Connect with us

Household Hacks

7 Ways to Cut Butter Without a Pastry Cutter

Published

on

An image showcasing the process of cutting in butter without a pastry cutter: A pair of hands gently pressing cold butter cubes into a flour mixture using a fork, resulting in a crumbly texture

Are you tired of facing difficulties when trying to cut butter without a pastry cutter? Don’t worry any longer! This article will show you how to cut in butter without the need for any special tools.

With just a few simple tools and the right technique, you’ll be able to achieve perfectly flaky pastries and biscuits every time. Say goodbye to those lumpy, uneven doughs and hello to buttery perfection!

So, let’s dive in and master this essential culinary skill together.

Key Takeaways

  • Softening butter before adding it to the mixture can make it easier to incorporate.
  • Using a knife technique allows for precise control and evenly distributed butter.
  • Grating the cold butter into small pieces can help with even distribution.
  • Working quickly and keeping the butter cold throughout the process is important for achieving the desired texture.

Tools and Equipment Needed

You’ll need a pastry cutter or a couple of forks for cutting in the butter. Choosing the right technique is crucial for achieving the desired results when it comes to incorporating butter into your recipes.

Advertisement

However, if you don’t have a pastry cutter on hand, there are alternative methods you can use. One option is to use two forks. Hold one fork in each hand and press them together in a crisscross motion to cut the butter into the dry ingredients.

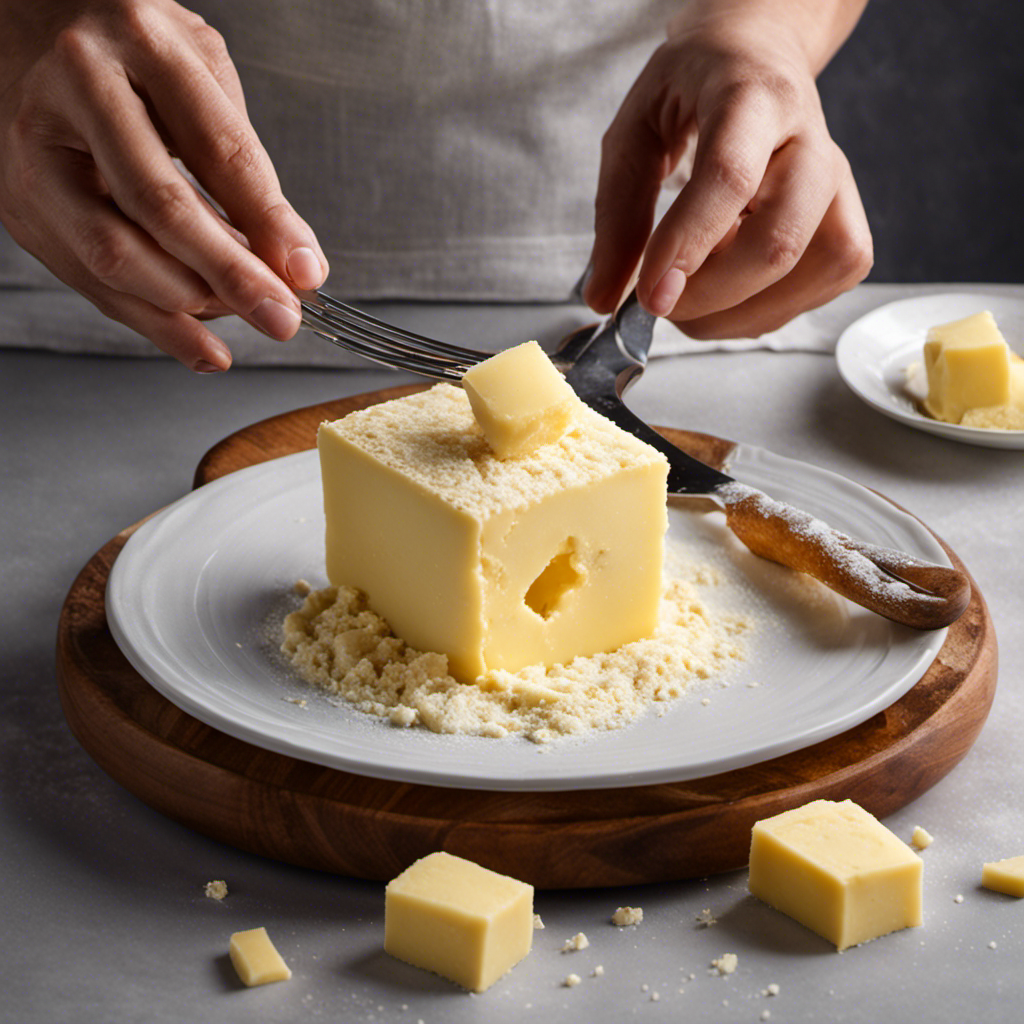
Another technique is to use a knife. Simply chop the butter into small pieces and then use the knife to further cut it into the dry mixture. Whichever method you choose, make sure to take your time and work the butter into the ingredients until it resembles coarse crumbs.

Preparing the Butter

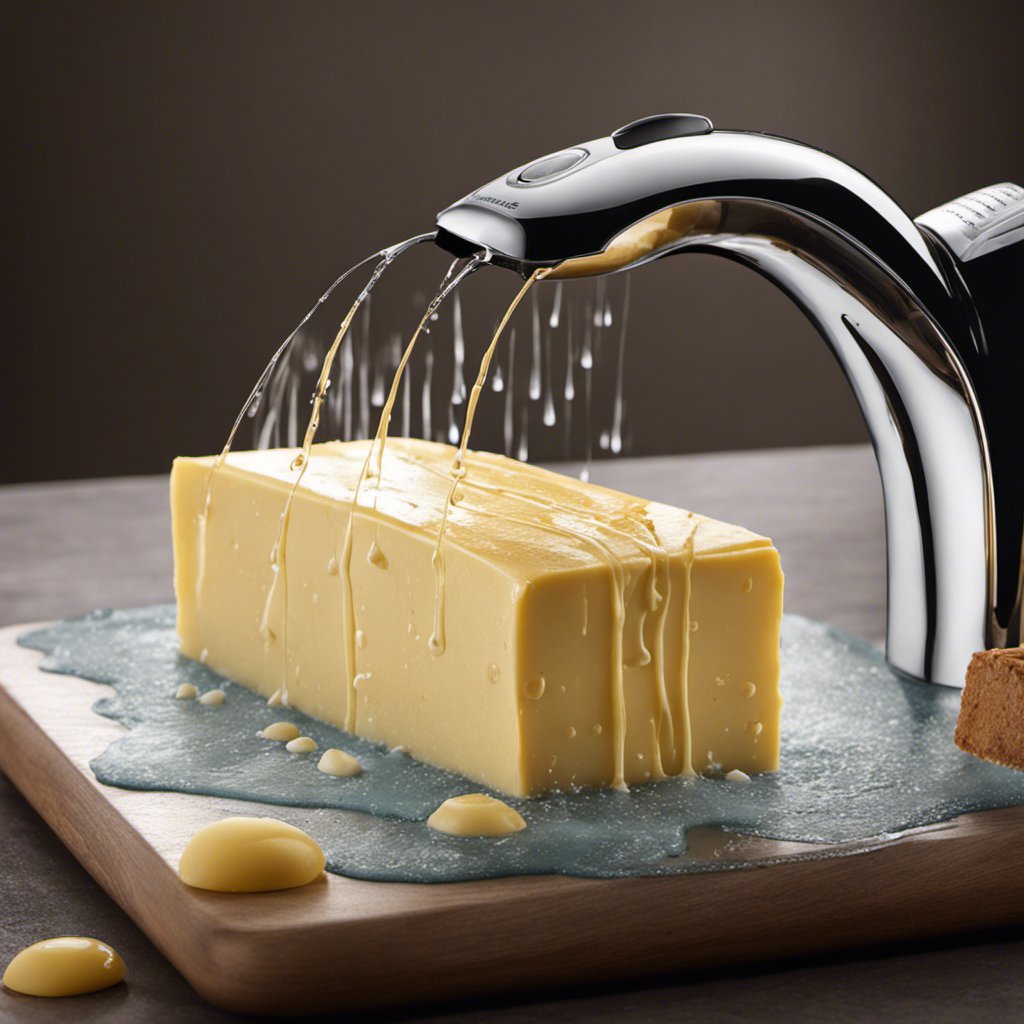
To prepare the butter for cutting in, simply soften it slightly before adding it to the mixture. Softening the butter helps achieve the desired texture and makes it easier to incorporate into the dry ingredients.

Here are some alternative methods for softening butter:

  • Microwave: Place the butter in a microwave-safe bowl and heat it in short bursts of 5-10 seconds until it becomes slightly soft.

  • Grating: Use a cheese grater to grate the cold butter into small pieces. This will help it soften quickly and evenly.

  • Rolling pin: Place the cold butter between two sheets of parchment paper and gently pound it with a rolling pin until it becomes pliable.

  • Room temperature: Leave the butter at room temperature for about 30 minutes, or until it is soft enough to be easily spreadable.

  • Hot water bath: Fill a bowl with hot water and place the butter in a smaller bowl on top. The heat from the water will gradually soften the butter.

Choosing the Right Technique

When it comes to choosing the right technique for preparing food, you have to consider the pros and cons of using a knife versus a fork. Using a knife gives you more control and precision. A fork can be useful for tasks like whisking or blending.

Advertisement

On the other hand, using your hand allows you to feel the texture and temperature of the ingredients. However, a machine can save you time and effort.

To ensure success in your culinary endeavors, it’s important to understand the advantages and disadvantages of each option. Choose the technique that best suits your needs and preferences.

Knife Vs. Fork

Grab a fork and start cutting the butter into small pieces.

When it comes to cutting in butter without a pastry cutter, you have two main options: the knife technique and the fork technique.

The knife technique involves using a sharp knife to cut the butter into small cubes or pieces. This technique allows for precise control and can result in evenly distributed butter throughout your dough.

Advertisement

On the other hand, the fork technique involves using a fork to break up the butter into smaller chunks. This technique is quicker and requires less skill, but may result in uneven distribution of butter.

Ultimately, the choice between the knife technique and the fork technique depends on your preference and the desired outcome of your recipe.

  • Knife technique: precise control, evenly distributed butter
  • Fork technique: quicker, less skill required, potential for uneven distribution

Hand Vs. Machine

If you’re looking for a quicker option, using a machine to break up the butter may be your best bet. While the traditional hand technique requires manual effort, a machine can make the process easier and more efficient. There are several benefits to using a machine for cutting in butter. Firstly, it saves time and energy, as the machine does the work for you. Secondly, it ensures a consistent result every time, as the blades of the machine create uniform butter pieces. Lastly, using a machine allows you to control the texture of the butter more easily, whether you prefer larger or smaller chunks. Overall, incorporating a machine into your baking routine can streamline the process and yield excellent results.

Hand Technique Benefits of Using a Machine
Requires manual effort Saves time and energy
Inconsistent results Ensures consistent butter pieces
More difficult to control texture Provides better control over texture

Tips for Success

Now that you understand the difference between hand and machine methods for cutting in butter, let’s dive into some tips for achieving a flaky crust without a pastry cutter.

To ensure the perfect flaky crust, keep these tips in mind:

  • Use cold butter: Cold butter is essential for achieving that flaky texture. Make sure to chill the butter before starting the process.
  • Grate the butter: Grating the cold butter using a box grater makes it easier to incorporate into the flour mixture.
  • Use your fingers: Use your fingertips to gently rub the grated butter into the flour until it resembles coarse crumbs.
  • Lift and toss: Lift the flour mixture from the bottom and toss it lightly, ensuring the butter is evenly distributed.
  • Avoid over mixing: Over mixing can lead to a tough crust. Mix the dough just until it comes together and stop.

Alternative Methods for Cutting in Butter

One option for cutting in butter without a pastry cutter is to use two knives.

However, if you’re looking for alternative methods, there are a few options you can consider.

Advertisement

One option is to use butter alternatives such as margarine or coconut oil, which can be easier to cut into your dry ingredients.

Another option is to use a food processor. Simply pulse the butter and dry ingredients together until the mixture resembles coarse crumbs. This method is quick and efficient, but be careful not to over-process, as it can lead to a greasy texture.

Whichever method you choose, it’s important to ensure that the butter is cold and firm, as this will help create flaky and tender results in your baked goods.

Tips and Tricks for Success

Using alternative butter options or a food processor can make the process of cutting in butter easier and more efficient. When choosing the right temperature for your butter, it should be cold but not rock hard. Softened butter will not create the desired flaky texture in your baked goods. To avoid overmixing, use a light touch when incorporating the butter into the dry ingredients. Overmixing can lead to a tough and dense final product.

Here are five helpful tips and tricks to ensure success when cutting in butter:

Advertisement
  • Use grated frozen butter for easier incorporation.
  • Use a knife or fork to cut the butter into small pieces before incorporating.
  • Chill your mixing bowl and utensils beforehand to keep the butter cold.
  • Use your fingertips to gently rub the butter into the dry ingredients until the mixture resembles coarse crumbs.
  • If using a food processor, pulse the butter and dry ingredients together until the desired texture is achieved.

With these techniques, you’ll achieve perfectly cut-in butter every time.

Now, let’s move on to troubleshooting common issues.

Troubleshooting Common Issues

If you find that your butter is not incorporating well into your dough, resulting in a lumpy texture, there may be a few potential causes.

One possibility is that the butter is too cold, making it difficult to evenly distribute throughout the dough.

Another issue could be uneven butter distribution, where some parts of the dough have more butter than others, leading to an inconsistent texture.

Lastly, achieving the desired texture can be challenging if the butter is not properly incorporated, as it is crucial for creating a light and flaky final product.

Advertisement

Butter Not Incorporating

When the butter is not incorporating properly, you can try using a fork to cut it into smaller pieces. This will help prevent clumping and ensure even distribution throughout your recipe.

Here are some tips to help you troubleshoot this issue:

  • Soften the butter slightly before cutting it into smaller pieces. This will make it easier to incorporate into the flour mixture.
  • Use cold butter if the recipe calls for it. Cold butter will create flaky layers in pastries and baked goods.
  • Avoid overworking the butter. If you mix it for too long, it may start to melt and lose its structure.
  • Make sure your hands are not warm when handling the butter. Warm hands can cause the butter to melt too quickly.
  • If the butter is still clumping, you can try freezing it for a few minutes before cutting it into smaller pieces.

Uneven Butter Distribution

To achieve even distribution of butter in your recipe, it’s important to make sure your hands are not warm when handling it. When butter melts too quickly, it can lead to uneven distribution and affect the texture of your final product.

To avoid this, start with cold butter and cut it into small chunks. Using a pastry cutter or two knives, work the butter into the dry ingredients until it resembles coarse crumbs. The key is to keep the butter cold throughout the process.

If your hands are warm, it can cause the butter to melt and create clumps instead of evenly distributed chunks. By maintaining a cool environment and handling the butter with care, you can achieve a consistent and delicious result in your recipes.

Difficulty Achieving Desired Texture

You may struggle to achieve the desired texture if you use warm hands while working with the butter. Achieving a flaky pastry requires the butter to be cold and evenly distributed throughout the dough.

Advertisement

Here are some tips to help you achieve the desired texture:

  • Start with cold butter: Ensure that the butter is chilled before incorporating it into the dough. Cold butter will create pockets of steam during baking, resulting in a flaky texture.

  • Use a grater: Grating the cold butter into the flour allows for easier incorporation and even distribution.

  • Cut the butter into small pieces: Instead of using your hands to mix the butter into the dough, cut it into small cubes. This will make it easier to evenly distribute and prevent melting.

  • Work quickly: Keep the butter as cold as possible by working quickly. The longer the butter is exposed to warm hands and room temperature, the more likely it will melt and lose its flakiness.

  • Chill the dough: After incorporating the butter, chill the dough for at least 30 minutes before rolling it out. This will help the butter solidify and maintain its flaky texture during baking.

Conclusion

Congratulations! You’ve now mastered the art of cutting in butter without a pastry cutter. With just a few simple tools and a little bit of practice, you can achieve perfectly flaky pastries and crumbly toppings. These will leave your taste buds dancing with delight.

So go ahead, grab that butter and get ready to impress your friends and family with your newfound skills. Get ready to take your baking game to the next level!

Continue Reading
Advertisement

Household Hacks

Steps to Melt Butter on Stove Like a Pro

Published

on

By

An image showcasing a stainless steel saucepan placed on a gas stove burner set to medium-low heat

I have always enjoyed the indulgent, smooth flavor of melted butter. It enhances the taste of countless dishes. Yet, I used to have trouble achieving the perfect consistency on the stovetop. The temperature would frequently be too high, leading to burnt or inconsistently melted butter. That is why I am here to reveal my reliable technique for melting butter over low heat.

By using low heat, you can slowly melt the butter without risking burning it. This gentle process helps to maintain the butter’s smooth texture and prevent any unwanted browning. To start, gather your ingredients and tools. All you’ll need is a stove, a pan, and of course, the butter.

Once you have everything ready, it’s time to begin. Place the pan on the stove over low heat. This will ensure that the butter melts slowly and evenly. Next, add the desired amount of butter to the pan. It’s important to use the correct amount for your recipe, so be sure to measure it out accurately.

As the butter starts to melt, you may notice some foam forming on the surface. This is normal and can be skimmed off if desired. Gently stir the butter occasionally to help it melt evenly. Be patient and resist the temptation to turn up the heat. Slow and steady wins the race when it comes to melting butter.

Once the butter is completely melted, remove it from the heat. It should be smooth and creamy, ready to be used in your favorite recipes. Whether you’re making a batch of cookies, sautéing vegetables, or drizzling it over popcorn, your melted butter will be perfect every time.

Advertisement

So, grab your stove and pan, and let’s get started on this delicious journey together. Follow these simple steps, and you’ll be able to achieve perfectly melted butter that will elevate your dishes to a whole new level. Enjoy!

Key Takeaways

  • Select a saucepan suitable for the amount of butter and ensure all ingredients and tools are ready before starting.
  • Use a non-stick pan with high sides and a lid to prevent splattering and ensure the pan is clean and dry.
  • Cut the butter into smaller chunks for even and faster melting, and use time-saving techniques like grating or rolling pin methods.
  • Stir constantly to achieve even melting and distribution of flavor, and incorporate air for a lighter and fluffier texture.

Gathering the Ingredients and Tools

First, you’ll need to gather the butter, a saucepan, and a stove. Time management is crucial when melting butter on the stove. To ensure a smooth and efficient process, it’s important to have all the necessary ingredients and tools ready before you begin.

Start by selecting a saucepan that is suitable for the amount of butter you wish to melt. A small saucepan works well for smaller quantities, while a larger one is better for larger amounts. Next, measure the desired amount of butter and place it in the saucepan. It’s important to cut the butter into smaller chunks to ensure even and faster melting.

Place the saucepan on a stove burner, set the heat to low, and allow the butter to melt slowly. By following these melting techniques and managing your time effectively, you’ll have perfectly melted butter for your culinary creations.

Advertisement

Preparing the Stove and Pan

Before you start, make sure the stove and pan are properly prepared.

To prevent butter from splattering, choose a pan with high sides and a lid. Non-stick pans are great because they make it easier to melt the butter without sticking.

Before heating the pan, ensure it is clean and dry. Moisture can cause the butter to splatter when it comes in contact with the hot surface.

Set the stove to low or medium heat to slowly melt the butter without overheating it. This will prevent unwanted splattering and ensure a smooth melting process.

Cutting the Butter Into Even Pieces

Advertisement

When it comes to cutting butter into even pieces, it’s not just about aesthetics, but also about achieving consistent results in your cooking. Evenness is crucial because it allows the butter to melt evenly and distribute its flavor and richness throughout your dish.

To save time and effort, I find it helpful to use time-saving techniques like the ‘grating’ method or the ‘rolling pin’ method, which help create uniform butter pieces quickly and efficiently.

Importance of Evenness

To ensure your melted butter is smooth and consistent, make sure you keep stirring it constantly on the stove. This is crucial for achieving an even melting process and a smooth texture. Here’s why it’s important:

  1. Uniform heat distribution: Stirring the butter prevents hot spots from forming, ensuring that it melts evenly throughout. This helps avoid any burnt or unevenly melted areas.

  2. Incorporation of air: Constant stirring helps incorporate air into the butter, resulting in a lighter and fluffier texture once melted. This is especially important for recipes that require a delicate and airy consistency.

  3. Homogeneous mixture: By stirring the butter continuously, you ensure that any solids or fat separation is evenly distributed, creating a smooth and cohesive texture in the final product.

Time-Saving Techniques

If you’re looking to save time in the kitchen, try using a microwave-safe bowl to melt your butter instead. This is one of the time-saving tips I always rely on when I’m in a hurry.

Advertisement

Simply place the desired amount of butter in the bowl and microwave it in short bursts, stirring in between, until it’s completely melted. This method is quick and efficient, allowing you to move on with your cooking or baking without wasting precious minutes.

However, if you prefer alternative melting methods, melting butter on low heat is another option worth considering. It requires a bit more patience, as you’ll need to constantly stir the butter over low heat until it melts slowly and evenly.

Melting Butter on Low Heat

When it comes to melting butter on the stove, achieving the optimal heat level is crucial. Too high of a heat can cause the butter to burn, resulting in a bitter taste and potentially ruining your dish.

Optimal Heat Level

The optimal heat level for melting butter on the stove is medium-low. This ensures that the butter melts slowly and evenly, preventing it from burning or losing its flavor. When melting butter on medium-low heat, here are three things to keep in mind:

  1. A small saucepan: Use a small saucepan to melt the butter. This allows for better control over the heat and prevents the butter from spreading too thin.

  2. Gentle bubbling: As the butter melts, it will start to bubble gently. This is normal and indicates that the butter is heating at the right temperature.

  3. Stirring occasionally: While the butter melts, stir it occasionally with a wooden spoon. This helps distribute the heat evenly and prevents any hot spots.

By following these guidelines, you can achieve the optimal melting time for butter and maintain its delicious flavor.

Advertisement

Now, let’s move on to the next section where we’ll discuss how to prevent butter from burning.

Prevent Butter Burning

Now that we know the optimal heat level to melt butter on the stove, let’s discuss how to prevent it from burning.

It’s crucial to avoid butter browning, as it can greatly affect the taste and quality of your dish. To prevent splattering and butter browning, start by using a heavy-bottomed pan. The thickness of the pan helps distribute heat evenly and reduces the risk of hot spots.

Next, melt the butter over low to medium heat, stirring constantly with a heat-resistant spatula. This ensures that the butter is melted gradually and prevents it from overheating.

Additionally, you can add a splash of water to the pan before melting the butter. The water creates a barrier between the butter and the hot pan, preventing direct contact and reducing the chances of browning.

Advertisement

Time and Consistency

To achieve the desired consistency, it’s important to monitor the time while melting butter on the stovetop. Here are three key factors to consider:

  1. Control the heat: Start by melting the butter over low heat to prevent it from burning. Gradually increase the heat if needed, but be cautious not to overdo it.

  2. Stir constantly: Continuously stir the butter while it melts to ensure even heat distribution and prevent any parts from burning. This will result in a smooth and creamy consistency.

  3. Be patient: Melting butter may take some time, but it’s worth it. Rushing the process can lead to uneven melting or burnt butter, which can ruin the flavor and texture.

Saving energy: To conserve energy, consider alternative melting methods such as using a microwave or a double boiler. These methods are quicker and require less heat, resulting in reduced energy consumption.

Stirring the Butter to Ensure Even Melting

Start by gently stirring the butter to ensure it melts evenly. This step is crucial because evenness is of utmost importance when melting butter on the stove. When the butter is heated, there can be pockets of unmelted butter, which can affect the outcome of your recipe.

By stirring the butter, you help distribute the heat evenly and promote uniform melting. This ensures that every part of the butter melts at the same rate, saving you time and preventing any inconsistencies in your dish.

Additionally, stirring the butter helps prevent it from burning or sticking to the pan, allowing it to melt smoothly and effortlessly. So, take a few moments to stir that butter, and you’ll be rewarded with perfectly melted goodness every time.

Advertisement

Monitoring the Butter’s Temperature

Make sure you’re keeping an eye on the temperature of that creamy goodness as it heats up on the stovetop. Monitoring the temperature is crucial in maintaining consistency and preventing the butter from burning or becoming too runny.

Here are three important things to consider while monitoring the temperature:

  1. Use a reliable kitchen thermometer: This will allow you to accurately measure the temperature of the butter as it melts. Ensure that the thermometer is inserted into the thickest part of the butter to get an accurate reading.

  2. Adjust the heat: As the butter begins to melt, you may need to adjust the heat to maintain a steady temperature. Lower the heat if the butter starts to bubble too vigorously or increase it slightly if the melting process is slow.

  3. Stir frequently: Stirring the butter will help distribute the heat evenly and prevent any hotspots. Make sure to scrape the bottom and sides of the pan to ensure thorough melting.

Removing the Melted Butter From the Stove

Once the butter has reached the desired temperature, it’s time for you to carefully remove it from the stove. To do this, make sure you have a heat-resistant pot holder or oven mitt on hand to protect yourself from any possible burns.

Gently grasp the handle of the pot or pan containing the melted butter and lift it off the heat source. Place it on a heat-resistant surface, such as a trivet or a cooling rack. Be cautious not to tilt the pot too much, as this can cause the hot butter to spill and potentially stain your clothes.

If any butter does spill, quickly attend to it by blotting the area with a clean cloth or paper towel. Avoid rubbing or spreading the butter, as this may drive it deeper into the fabric.

Advertisement

Now that the butter is safely off the stove, let’s move on to the next step: storing and using melted butter.

Storing and Using Melted Butter

Now that you’ve safely removed the melted butter from the stove, let’s discuss how to store and utilize it.

Storing melted butter properly is essential to maintain its freshness and quality. Here are three techniques to store and three alternative uses for melted butter:

  1. Storing Techniques:

    • Transfer the melted butter into an airtight container and refrigerate it. It can last for up to two weeks when stored correctly.
    • Pour the melted butter into ice cube trays and freeze. Once frozen, transfer the butter cubes into a freezer bag. This method allows you to conveniently portion out the butter as needed.
    • If you don’t plan to use the melted butter within a few days, you can also can it using a pressure canner. This method provides long-term storage.
  2. Alternative Uses:

    • Melted butter can be brushed onto bread or pastries before baking, giving them a golden and flavorful crust.
    • It can be used as a base for homemade sauces and gravies, adding richness and depth of flavor.
    • Melted butter can be drizzled over steamed vegetables, enhancing their taste and adding a touch of indulgence.

Frequently Asked Questions

How Do I Know When the Butter Is Fully Melted?

When melting butter on the stove, it’s important to know when it’s fully melted. Look for a smooth, liquid consistency with no solid bits remaining. This ensures it’s ready for baking or any other use.

Can I Use Margarine Instead of Butter?

I prefer using butter over margarine when baking because it adds a rich flavor and helps create a tender texture. While margarine can be a healthier alternative, it may not yield the same results in terms of taste and texture.

What Is the Best Type of Pan to Use for Melting Butter?

The best type of pan for melting butter is a non-stick pan. It allows for even heat distribution and prevents the butter from sticking. To melt butter, simply place it in the pan and heat over low to medium heat until fully melted.

Advertisement

Can I Melt Butter in the Microwave Instead of on the Stove?

Yes, you can melt butter in the microwave instead of on the stove. The microwave is quicker, but it can be harder to control the temperature. Stove melting gives you more control, but takes longer.

How Long Can Melted Butter Be Stored Before It Goes Bad?

Melted butter can be stored for about two weeks in the refrigerator. Look for signs of spoiled butter such as a rancid smell, mold, or an off taste. Proper storage can help maintain its freshness.

Conclusion

In conclusion, melting butter on the stove is a simple and efficient way to have smooth, melted butter ready for your culinary creations. By following the steps outlined in this article, you can ensure that your butter melts evenly and maintains its flavor.

While some may argue that using a microwave is quicker, melting butter on the stove allows for better control over the temperature and prevents the butter from overheating.

So why not give it a try and elevate your cooking game with perfectly melted butter?

Advertisement
Continue Reading

Household Hacks

Get Out Butter Stain: 3 Easy Steps to Clean Fabric

Published

on

By

An image showcasing a vibrant yellow butter stain on a crisp white shirt

Have you ever been in a sticky situation with a stain from butter? Don’t worry, we can help you!

In this article, we’ll guide you through the step-by-step process of removing those pesky butter stains from different fabrics. From understanding the nature of the stain to choosing the right removal method, we’ll provide you with expert tips and tricks to ensure a successful outcome.

So, roll up your sleeves and get ready to bid adieu to butter stains for good!

Key Takeaways

  • Rubbing the stain vigorously can make the butter stain worse, so it’s important to avoid this.
  • Using hot water can cause the butter to melt and penetrate deeper into the fabric fibers, so it’s best to avoid using hot water.
  • Gently blotting the stain with a clean cloth is recommended.
  • Using a mild detergent specifically designed for removing grease stains is an effective way to remove butter stains.

Understanding the Nature of a Butter Stain

Understanding the nature of a butter stain is crucial in knowing how to effectively remove it. Butter stains are commonly caused by accidental spills while cooking or eating, and they can be particularly stubborn to remove.

Advertisement

When treating a butter stain, it is important to avoid common mistakes that can further set the stain or damage the fabric. One common mistake is rubbing the stain vigorously, as this can spread the butter and make the stain worse. Another mistake is using hot water, as it can cause the butter to melt and penetrate deeper into the fabric fibers.

Instead, it is recommended to gently blot the stain with a clean cloth and use a mild detergent specifically designed for removing grease stains.

Pre-Treating the Stain: Removing Excess Butter

To start, you’ll wanna scrape off any remaining butter from the fabric. Use a spoon or a butter knife to gently lift off as much of the excess butter as possible. Be careful not to spread the stain further. Once you’ve removed the excess butter, it’s time to pre-treat the stain. There are several effective household remedies that can help remove oily stains like butter. Here are a few options you can try:

Remedies Instructions
Dishwashing soap Apply a small amount of dishwashing soap to the stain.
Cornstarch Sprinkle cornstarch onto the stain and let it sit for a while.
Vinegar Mix equal parts vinegar and water, then dab it onto the stain.
Baking soda and water Make a paste using baking soda and water, then apply it to the stain.

Choose one of these remedies and carefully follow the instructions. Remember to test any product on a small, inconspicuous area of the fabric first to ensure it doesn’t cause any damage.

Choosing the Right Stain Removal Method for Butter Stains

Advertisement

When tackling a butter stain, you’ll want to consider which stain removal method is most suitable for your specific situation. There are several butter stain removal techniques you can try, but it’s important to avoid common mistakes in removing butter stains. Here are some options to consider:

  • Dishwashing detergent: Mix a few drops of dishwashing detergent with warm water and apply it to the stain.
  • Vinegar: Dab a cloth soaked in vinegar onto the stain and let it sit for a few minutes before rinsing.
  • Baking soda: Make a paste with baking soda and water, apply it to the stain, and let it dry before brushing off.

Step-By-Step Guide: Removing Butter Stains From Different Fabrics

Now, let’s take a look at how we can effectively remove butter stains from various types of fabrics in a step-by-step guide. Butter stain removal techniques can vary depending on the fabric, so it’s important to know the right approach.

For cotton or polyester fabrics, start by gently scraping off any excess butter with a butter knife. Then, apply a small amount of dish soap directly to the stain and gently rub it in. Let it sit for a few minutes before rinsing with cold water.

For delicate fabrics like silk or wool, it’s best to use a specialized stain remover specifically designed for these fabrics. Apply the remover to the stain, gently blotting it with a clean cloth. Repeat if necessary.

Remember to always check the care instructions on your fabric before attempting any stain removal.

Advertisement

Tips and Tricks for Preventing and Treating Butter Stains

For preventing butter stains, it’s helpful to pre-treat fabrics with a stain repellent spray. This will create a barrier that prevents the butter from penetrating the fabric and causing a stain.

Here are some additional tips and tricks to help you keep your fabrics butter-free:

  • Be cautious when eating buttery foods: Avoid leaning on surfaces or touching fabrics while eating food that may contain butter.
  • Use napkins or paper towels: Place a napkin or paper towel on your lap or under your chin when eating buttery foods to catch any potential spills.
  • Act quickly: If you do get a butter stain, treat it as soon as possible to prevent it from setting and becoming more difficult to remove.

Conclusion

So now you know the secret to banishing butter stains from your favorite fabrics. With a little pre-treatment and the right stain removal method, those pesky stains don’t stand a chance.

Follow our step-by-step guide and you’ll have your clothes looking butter-free in no time.

Advertisement

And don’t forget our tips and tricks for preventing and treating butter stains in the future.

Stay butter-stain free, and enjoy your clean and pristine garments!

Continue Reading

Household Hacks

Quick Butter Melting in the Microwave

Published

on

By

An image showcasing a microwave-safe glass bowl filled with a chunk of butter

I’ve always been impressed by how easily and quickly butter can be melted in the microwave.

Did you know that melting butter in the microwave is not only a time-saving technique, but also helps to preserve its flavor and texture?

In this article, I will guide you through the steps to safely and efficiently melt butter in the microwave.

Grab your favorite microwave-safe bowl and let’s get started!

Key Takeaways

  • Consider the fat content and flavor when choosing a butter brand.
  • Opt for unsalted butter for more control over the flavor.
  • Use a microwave-safe container labeled as such, or use glass or ceramic bowls as alternatives.
  • Adjust the power level and time settings on your microwave, and pause and stir the butter at regular intervals to ensure even melting and prevent burning.

Selecting the Right Butter and Microwave Safe Container

Advertisement

To melt butter in the microwave, you’ll want to make sure you select the right butter and a microwave-safe container.

When it comes to choosing the best butter brand, it’s important to consider its fat content and flavor. Look for a brand that has a high fat content, as this will ensure a smooth and creamy melt. Additionally, opt for unsalted butter to have more control over the flavor of your dish.

As for the container, make sure it is labeled as microwave-safe to avoid any accidents or damage. If you don’t have a microwave-safe container, you can use a glass or ceramic bowl instead. Just be cautious and avoid using plastic or metal, as they can cause the butter to melt unevenly or even spark a fire.

Preparing the Butter for Melting

When it comes to melting butter in the microwave, there are two key points to keep in mind: optimal microwave settings and avoiding butter splatters.

To achieve the perfect consistency, it’s important to use the right power level and time settings on your microwave.

Advertisement

Additionally, to prevent messy splatters, covering the container with a microwave-safe lid or paper towel is essential.

Optimal Microwave Settings

The best way to melt butter in the microwave is by using a lower power setting. This allows for a slower and more even melting process, preventing the butter from overheating or splattering. The appropriate microwave wattage and melting point of butter are important factors to consider when determining the optimal power level.

Here’s a table to help you determine the ideal power setting based on your microwave wattage and the desired consistency of melted butter:

Microwave Wattage Melting Point of Butter Optimal Power Setting
600-800 watts 90-95°F (32-35°C) 30-40% power
800-1000 watts 95-100°F (35-38°C) 30-50% power
1000+ watts 100-105°F (38-41°C) 40-60% power

Avoiding Butter Splatters

By adjusting the power level on your microwave, you can prevent splatters while melting butter. Setting the power level to 50% or lower will ensure a slower and more controlled melting process, reducing the chances of butter splattering all over the microwave.

This simple adjustment can help you avoid potential microwave accidents and the hassle of cleaning up butter spills.

Advertisement

To begin, place the desired amount of butter in a microwave-safe bowl and cover it with a microwave-safe lid or microwave-safe plastic wrap, leaving a small vent for steam to escape. Then, set the power level to 50% or lower and microwave the butter in short intervals, checking and stirring every 15 seconds until it reaches the desired consistency.

This method will prevent hot butter from exploding and spreading all over the microwave, making your butter melting experience much safer and mess-free.

Setting the Microwave Power and Time

To set the microwave power and time, you’ll need to press the appropriate buttons on the control panel. Adjusting the power level and time is crucial to ensure the butter melts evenly without overheating or splattering. The wattage of your microwave and the initial temperature of the butter will determine the ideal settings. Refer to the table below for a general guideline:

Advertisement
Microwave Wattage Butter Temperature Power Level Time (seconds)
600-800 Cold 50% 30-40
600-800 Room Temperature 50% 20-30
800-1000 Cold 50% 20-30
800-1000 Room Temperature 50% 15-25
1000+ Cold 30% 15-20
1000+ Room Temperature 30% 10-15

Remember to check the butter every few seconds to prevent overheating. Adjust the time accordingly if needed. With the right microwave settings, you’ll achieve perfectly melted butter for your recipes.

Melting Butter in Intervals and Stirring

Make sure you pause and stir the butter at regular intervals while heating it in the microwave. This is crucial to ensure that the butter melts evenly and doesn’t overheat. When you microwave butter without pausing and stirring, you can end up with hot spots and partially melted butter, which can affect the texture and consistency of your recipes.

Here are three reasons why pausing and stirring is important:

  • Even Heat Distribution: By pausing and stirring, you allow the heat to distribute evenly throughout the butter, resulting in a smooth and consistent melt.

  • Avoid Burning: Pausing and stirring prevents the butter from reaching its smoke point and burning, which can give your dishes a burnt and unpleasant taste.

  • Faster Melting: Pausing and stirring helps speed up the melting process, as the heat is distributed more evenly, allowing the butter to melt more quickly.

Checking the Butter Consistency

When it comes to melting butter, two key points to consider are the consistency and the time it takes to melt.

The first thing to look out for is whether the butter is smooth or lumpy after melting. Smooth butter indicates that it has melted evenly and will be easier to incorporate into recipes.

Advertisement

The second aspect to assess is the time it takes for the butter to melt, as this can vary depending on the quantity and initial temperature of the butter.

Smooth or Lumpy

You can tell if your melted butter is smooth or lumpy by checking its consistency and appearance. When melting butter, it is important to use the proper techniques to ensure a smooth texture. If your melted butter appears lumpy, it may indicate that it was not melted evenly or at the correct temperature.

To troubleshoot butter melting, consider the following:

  • Use a microwave-safe container: Choosing the right container helps distribute heat evenly and prevents the butter from overheating.
  • Cut the butter into small pieces: Smaller pieces melt more evenly and quickly, reducing the chances of lumps forming.
  • Stir and check frequently: Stirring the butter during the melting process helps distribute the heat and prevents uneven melting.

Time for Melting?

If you’re unsure about the appropriate amount of time to heat your butter, it’s best to refer to a recipe or consult a cooking guide. The time it takes to melt butter in the microwave can vary depending on the wattage of your microwave and the starting temperature of the butter. To give you a general idea, I’ve created a table below with some estimated melting times based on different microwave wattages and butter temperatures:

Microwave Wattage Butter Temperature Melting Time
800W Room Temperature 20-30 seconds
1000W Cold from Fridge 15-25 seconds
1200W Frozen 10-20 seconds

Keep in mind that these times are just rough estimates and can vary. Always keep an eye on the butter and stop the microwave once it’s melted to avoid overheating. Speaking of safety, let’s now move on to some important safety tips and precautions to keep in mind when melting butter in the microwave.

Safety Tips and Precautions

Always remember to use a microwave-safe container when melting butter in the microwave. This is a crucial safety precaution to follow to avoid any accidents or damage to your microwave.

Advertisement

Here are some additional safety tips and precautions to keep in mind:

  • Never microwave butter in a container that is not labeled as microwave-safe. Non-safe containers can release harmful chemicals or melt, causing a mess or even a fire hazard.

  • Always cover the container with a microwave-safe lid or microwave-safe plastic wrap to prevent any splattering or explosions.

  • Be cautious when removing the container from the microwave as it can become hot. Use oven mitts or a towel to handle it safely.

Frequently Asked Questions

Can I Use Margarine Instead of Butter for Melting in the Microwave?

Yes, you can use margarine instead of butter to melt in the microwave. However, keep in mind that the taste may vary slightly. One benefit of using margarine is that it tends to melt faster.

Can I Use a Plastic Container to Melt Butter in the Microwave?

Using alternative containers to melt butter in the microwave is possible, but caution must be taken. It’s best to use microwave-safe dishes or glass containers. Set the microwave to a low power level to avoid overheating or melting the plastic.

How Long Should I Let the Butter Sit at Room Temperature Before Melting It in the Microwave?

How long does it take to melt butter in the microwave? Does melting butter in the microwave affect its taste? It usually takes about 30 seconds to melt butter in the microwave, and melting it this way doesn’t usually affect its taste.

What Should I Do if the Butter Starts to Splatter While Melting in the Microwave?

If the butter starts to splatter in the microwave, I immediately stop the microwave and carefully stir it to prevent any further splattering. This helps distribute the heat evenly and prevents the butter from overheating.

Advertisement

Can I Melt Butter in the Microwave Without Covering It?

Sure, you can melt butter in the microwave without covering it. But let me tell you, it’s like playing a game of buttery roulette. Splatters are bound to happen, so be prepared for a messy microwave. Microwave safety first!

Conclusion

In conclusion, melting butter in the microwave is a quick and easy process that can be done with the right tools and precautions.

By selecting the right butter and microwave-safe container, preparing the butter properly, and setting the microwave power and time correctly, you can achieve perfectly melted butter.

Remember to melt the butter in intervals and stir it to ensure even consistency.

Lastly, always prioritize safety by using microwave-safe containers and handling hot butter with care.

Advertisement

So, go ahead and melt that butter with confidence!

Continue Reading
Advertisement

Affiliate disclaimer

As an affiliate, we may earn a commission from qualifying purchases. We get commissions for purchases made through links on this website from Amazon and other third parties.

Advertisement

Trending