Connect with us

Butter Tips and Tricks

Ultimate Butter Popcorn Maker Guide: 7 Steps to Perfectly Buttered Popcorn

Published

on

An image showcasing a golden-brown batch of freshly popped popcorn, glistening with a generous drizzle of melted butter, cascading down the fluffy kernels from a popcorn maker

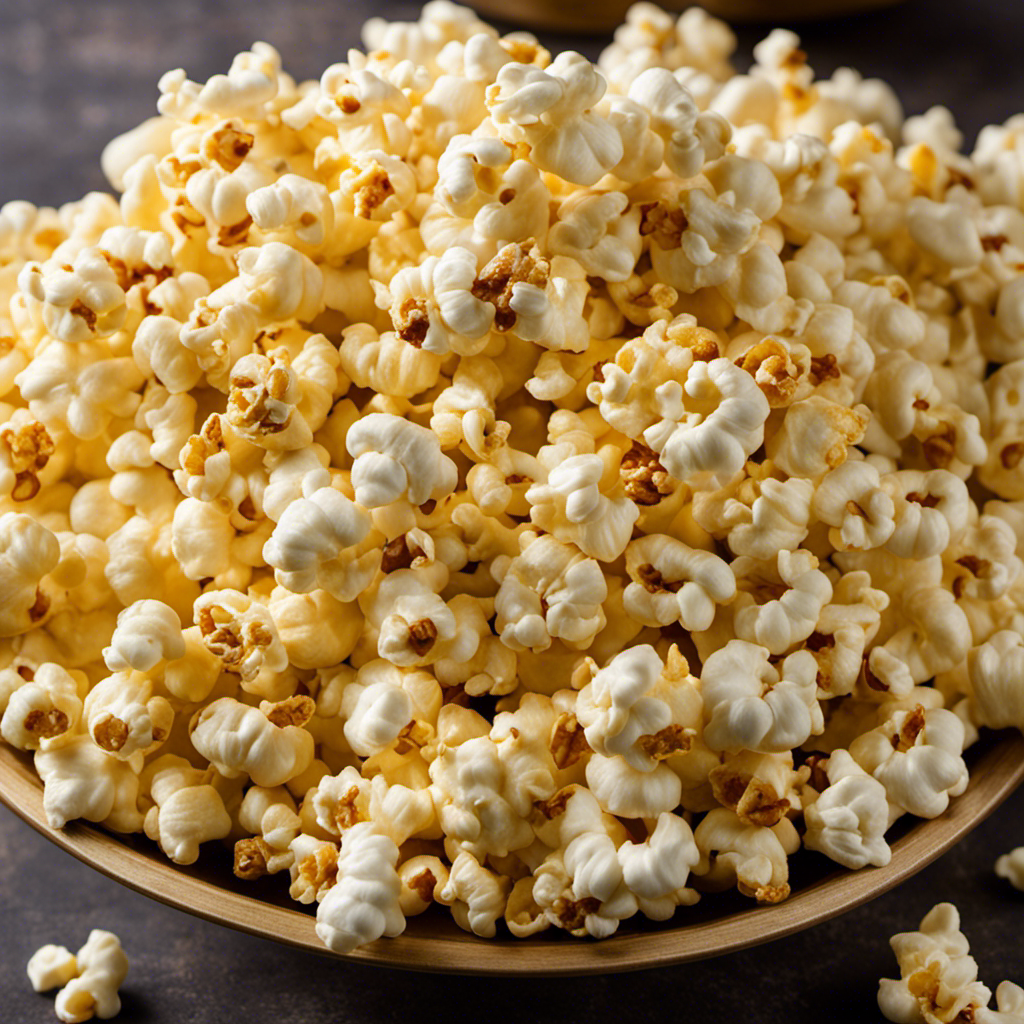
I adore spending evenings watching films at home, yet nothing compares to the enticing scent of newly popped popcorn wafting through the room. Moreover, when it’s about savoring popcorn, the unbeatable taste is the luxurious, buttery flavor that envelops every piece.

In this article, I’ll show you how to butter popcorn from a popcorn maker, step-by-step. From choosing the right popcorn maker to serving and enjoying the buttered popcorn, I’ll guide you through the process to ensure you have the perfect movie snack every time.

Let’s get started!

Key Takeaways

  • Master the art of melting butter for a perfect drizzle on popcorn.
  • Use caution when melting butter to avoid burning.
  • Pour melted butter over freshly popped popcorn in the popcorn maker.
  • Use a spatula or spoon to gently toss the popcorn for even distribution.

[bulkimporter_image id=’2′]

Choosing the Right Popcorn Maker

Advertisement

If you’re looking for a popcorn maker, you’ll want to consider factors like size, wattage, and ease of use. Choosing the right popcorn maker can greatly enhance your popcorn-making experience.

One important aspect to consider is the size of the popcorn maker. If you have limited countertop space, you’ll want to opt for a compact size that can easily fit in your kitchen.

Wattage is another crucial factor to consider. Higher wattage means faster popping times, so if you’re someone who likes to enjoy popcorn quickly, a higher wattage popcorn maker would be ideal.

Ease of use is also important. Look for a popcorn maker with simple controls and clear instructions for hassle-free popping.

Advertisement

When it comes to choosing popcorn kernels, there are a few options available. The most common type is yellow popcorn, which produces big and fluffy kernels. If you prefer a more tender and delicate texture, white popcorn is a great choice. There are also gourmet popcorn kernels available in various flavors like caramel, cheese, and butter. These can add a fun twist to your popcorn-making experience.

While popcorn makers are generally reliable, there are some common issues you may encounter. One common problem is unpopped kernels. This can be caused by using low-quality kernels or not allowing enough time for the popcorn to pop fully.

Another issue you may face is burnt popcorn. To avoid this, make sure to monitor the popcorn closely and remove it from the heat source as soon as it’s done popping. Additionally, if your popcorn maker has a stirring mechanism, ensure that it is functioning properly to evenly distribute the heat and prevent burning.

[bulkimporter_image id=’3′]

Advertisement

Gathering the Necessary Ingredients

When it comes to making delicious popcorn, there are a few key techniques to keep in mind.

First, mastering the art of melting butter is crucial for achieving that perfect drizzle. Additionally, for those looking for alternative options, there are a variety of ingredients that can be used in place of butter.

Butter Melting Techniques

To evenly distribute melted butter on popcorn from a popcorn maker, you can try gently shaking the machine or using a spoon to drizzle the butter over the popcorn. This ensures that every piece gets a delicious buttery coating.

When it comes to melting butter for popcorn, there are a few techniques you can use. One option is to melt the butter in a microwave-safe bowl in short intervals, stirring in between until it becomes a smooth liquid. Another technique is to melt the butter in a saucepan over low heat, constantly stirring until it melts completely.

Once you have your melted butter, it’s time to add some flavor to your popcorn. Some popular suggestions include sprinkling salt, grated Parmesan cheese, or even a dash of chili powder for some extra kick.

Advertisement

Now, let’s explore some ingredient alternatives for butter that can still give your popcorn a delicious taste.

Ingredient Alternatives for Butter

One option for a delicious alternative to butter on popcorn is using olive oil. Not only does olive oil add a rich and savory flavor to your popcorn, but it is also a healthier option compared to butter. Olive oil is packed with monounsaturated fats, which are beneficial for heart health. It is also a great source of antioxidants and can help reduce inflammation in the body. To use olive oil on your popcorn, simply drizzle it over the hot popcorn and toss to evenly coat. You can also experiment with different flavors by adding herbs, spices, or even nutritional yeast for a cheesy taste. Here is a table showcasing some other ingredient alternatives for butter on popcorn:

Alternative Description Health Benefits
Coconut Oil Adds a subtle tropical flavor to your popcorn and is high in healthy fats. Boosts metabolism
Ghee Clarified butter that adds a rich and nutty flavor to your popcorn. Lactose-free and high in vitamins
Avocado Oil Provides a creamy and buttery taste to your popcorn and is rich in monounsaturated fats. Supports skin and eye health
Nutritional Yeast Gives a cheesy and savory flavor to your popcorn and is a good source of B-vitamins and protein. Boosts immune system function

With these ingredient alternatives, you can enjoy a healthier and equally delicious popcorn experience.

Enhancing Flavor With Seasonings

Adding seasonings is a simple way to enhance the flavor of your popcorn without using butter. There are endless possibilities when it comes to experimenting with flavors and enhancing taste.

For a savory option, try sprinkling some grated Parmesan cheese and garlic powder on top of your popcorn. The combination of the nutty cheese and the aromatic garlic will give your popcorn a delicious and irresistible taste.

Advertisement

If you prefer a spicier kick, mix some cayenne pepper, paprika, and a pinch of salt together and toss it with your popcorn. The heat from the cayenne pepper combined with the smoky flavor of paprika will create a unique and bold taste experience.

Don’t be afraid to get creative and try different seasonings to find your favorite flavor combination. Your taste buds will thank you!

[bulkimporter_image id=’4′]

Preparing the Popcorn Maker

When it comes to using a popcorn maker, two important factors to consider are temperature control and cleaning.

Advertisement

Proper temperature control ensures that your popcorn is cooked to perfection, with just the right amount of crunch and flavor.

Cleaning the popcorn maker is essential for maintaining its performance and prolonging its lifespan.

In this discussion, I will guide you through the ins and outs of temperature control and provide tips for keeping your popcorn maker in tip-top shape.

Popcorn Maker Temperature Control

To control the temperature of your popcorn maker, you’ll want to adjust the settings to your desired level. This will ensure that your popcorn pops perfectly every time. Here are some tips for maintaining your popcorn maker and troubleshooting any issues that may arise:

Popcorn Maker Maintenance Troubleshooting Popcorn Maker Issues
Clean the popcorn maker regularly to prevent buildup and ensure proper functioning. If your popcorn maker is not heating evenly, check for any obstructions or loose wires.
Lubricate moving parts with food-grade oil to keep them running smoothly. If the popcorn maker is not popping the kernels, make sure the heating element is working properly.
Check the power cord for any damage and replace if necessary. If the popcorn comes out burnt, reduce the temperature setting and monitor closely.
Use the recommended amount of oil and popcorn kernels for optimal results. If the popcorn maker is making loud noises, there may be an issue with the fan or motor.
Store the popcorn maker in a cool, dry place when not in use. If you encounter any other issues, refer to the manufacturer’s manual or contact customer support.

Cleaning the Popcorn Maker

Cleaning your popcorn maker is an essential step in maintaining its performance and longevity. Proper cleaning techniques and maintenance tips can ensure that your popcorn maker continues to produce delicious popcorn for years to come.

Advertisement

To start, always unplug the machine and allow it to cool down completely before cleaning. Use a damp cloth or sponge to wipe away any oil or butter residue on the exterior. For the interior, remove any leftover popcorn kernels and wipe away any excess oil.

If your popcorn maker has a removable tray or bowl, wash it with warm soapy water and dry thoroughly before reassembling. Regular cleaning not only keeps your popcorn maker in top shape but also ensures that your popcorn tastes fresh every time.

Now that your popcorn maker is clean, let’s move on to measuring the popcorn kernels.

[bulkimporter_image id=’5′]

Advertisement

Measuring the Popcorn Kernels

Before starting, make sure you’ve measured the correct amount of popcorn kernels. It’s important to have the right amount of kernels to ensure a perfect batch of popcorn. The size of the popcorn kernels can vary, so it’s essential to measure them accurately. While a measuring cup is commonly used for this purpose, there are also some alternative methods you can try.

One alternative to a measuring cup is using a kitchen scale. This is a more precise method as it allows you to measure the exact weight of the kernels. Simply place a bowl on the scale, reset it to zero, and then add the desired amount of kernels until you reach the desired weight.

Another option is using a tablespoon. A tablespoon can hold approximately 16 kernels, so you can easily estimate the amount you need by counting the tablespoons. Keep in mind that this method might not be as accurate as using a measuring cup or a kitchen scale, but it can still give you a good estimate.

Regardless of the method you choose, it’s important to ensure that you have the correct amount of popcorn kernels before starting your popcorn maker. This will help you achieve the perfect batch of popcorn every time.

Advertisement
[bulkimporter_image id=’6′]

Adding Oil to the Popcorn Maker

When it comes to adding oil to the popcorn maker, there are a few key points to consider.

First, the type and amount of oil used can greatly impact the taste and texture of the popcorn.

Secondly, it is important to ensure an even distribution of oil throughout the popcorn kernels for a consistent and flavorful snack.

Lastly, the oil used can have a significant effect on the overall taste of the popcorn, so it’s worth experimenting with different oils to find your preferred flavor profile.

Advertisement

Oil Type and Amount

To achieve the perfect buttery flavor, it’s important to use the right type and amount of oil in your popcorn maker. The oil quality plays a significant role in enhancing the taste of your popcorn. Opt for high-quality oils like coconut oil, avocado oil, or grapeseed oil, as they have a neutral flavor and a high smoke point. These oils will prevent the popcorn from tasting greasy and will allow the butter flavor to shine through. If you prefer a healthier option, you can also try butter alternatives like ghee or olive oil. It’s essential to use the right amount of oil as well, as too much can make the popcorn soggy. A general rule of thumb is to use 1-2 tablespoons of oil per 1/4 cup of popcorn kernels. By using the right oil and amount, you’ll achieve popcorn perfection.

Oil Type Flavor Profile Smoke Point
Coconut oil Neutral 350°F
Avocado oil Neutral 520°F
Grapeseed oil Neutral 420°F

As mentioned earlier, the quality and type of oil used in your popcorn maker can greatly impact the taste. By choosing high-quality oils with neutral flavors and high smoke points, you can ensure that your popcorn doesn’t taste greasy and allows the butter flavor to shine through. However, if you’re looking for a healthier alternative, you can also try using ghee or olive oil. These butter alternatives can provide a unique taste to your popcorn while still maintaining a delicious flavor. Experimenting with different oils can be a fun way to customize your popcorn experience. Now that we know the importance of selecting the right oil, let’s move on to the next section and learn about the importance of even distribution.

Importance of Even Distribution

Achieving even distribution of oil throughout the popcorn kernels is crucial for ensuring consistent flavor and preventing any greasy or soggy patches. To achieve the perfect popcorn coating, here are three key steps:

  1. Use a popcorn maker with a built-in butter dispenser: This ensures that the melted butter is evenly distributed over the popcorn as it pops, resulting in a delicious and uniform coating.

  2. Toss the popcorn: After the popcorn is done popping, give it a gentle toss in the popcorn maker to ensure that the butter is evenly distributed. This step helps to coat every kernel with a thin layer of butter, enhancing the flavor.

  3. Add additional melted butter: If you prefer a heavier butter coating, drizzle some melted butter over the popcorn and toss it again. This step allows you to customize the amount of butter to your liking while still achieving even distribution.

Effect on Popcorn Taste

For a tastier popcorn experience, ensure that the flavor is evenly distributed throughout each kernel. This is crucial because it allows you to fully enjoy the deliciousness of every bite. When the flavor is evenly distributed, each kernel becomes a burst of taste in your mouth. To enhance your popcorn even further, try experimenting with alternative toppings. You can add a sprinkle of Parmesan cheese for a savory twist or drizzle some melted chocolate for a sweet indulgence. These alternative toppings not only add variety to your popcorn but also provide additional health benefits. For example, Parmesan cheese is a good source of protein and calcium, while dark chocolate contains antioxidants that can boost your mood. So go ahead and get creative with your popcorn toppings, and enjoy a tastier, healthier snack!

Toppings Health Benefits
Parmesan Cheese Protein and Calcium
Dark Chocolate Antioxidants and Mood Boost
Caramel Sauce Energy and Iron

Advertisement
[bulkimporter_image id=’7′]

Turning on the Popcorn Maker

Once you’ve turned on the popcorn maker, you can begin preparing the butter for your popcorn. But before we get into that, let’s talk about some important popcorn maker safety precautions to keep in mind. Safety should always be the top priority when using any kitchen appliance. Here are a few key safety tips to follow:

  1. Always read the instruction manual thoroughly before using the popcorn maker. Familiarize yourself with the machine’s features and functions to ensure proper and safe operation.

  2. Make sure the popcorn maker is placed on a stable and heat-resistant surface. This will prevent any accidents or damage caused by the machine tipping over.

  3. Never leave the popcorn maker unattended while it’s in use. It’s important to keep an eye on the popcorn as it pops to prevent any potential fire hazards.

Now, let’s move on to troubleshooting common popcorn maker issues. Here are three common problems you may encounter and their solutions:

  1. Popcorn not popping evenly: This could be due to a clogged vent or improper heat distribution. Clean the vent and ensure the popcorn maker is placed on a level surface to solve this issue.

  2. Burnt popcorn: Adjust the heat settings or try using a lower heat setting to prevent the popcorn from burning.

  3. Machine not turning on: Check if the power cord is securely plugged in and the outlet is functioning. If the problem persists, contact the manufacturer for further assistance.

[bulkimporter_image id=’8′]

Advertisement

Allowing the Popcorn to Pop

When it comes to making the perfect bowl of popcorn, there are a few key points to consider.

First, mastering the popcorn popping techniques is crucial. Whether it’s shaking the pot on the stovetop or using a popcorn maker, finding the right method can make all the difference.

Second, understanding the ideal popping temperature is essential. Too low and you’ll end up with a bag of unpopped kernels; too high and you risk burning the popcorn.

Lastly, timing is everything when it comes to popping corn. Knowing when to take the pot off the heat or when to stop the popcorn maker can ensure that you have a perfectly popped batch every time.

Popcorn Popping Techniques

To achieve the perfect popcorn popping results, it’s important to use the right amount of oil and heat. Here are some techniques that can help you achieve the best popcorn popping experience:

Advertisement
  1. Choose the right popcorn kernel types: There are different varieties of popcorn kernels available, such as butterfly and mushroom kernels. Butterfly kernels are more common and produce fluffy popcorn, while mushroom kernels are smaller and denser.

  2. Listen for popping sound indicators: As the popcorn kernels heat up, they start to pop. The popping sound is an important indicator of when the popcorn is ready. Initially, you will hear a few pops, but as the temperature increases, the pops will become more frequent.

  3. Pay attention to the popping rhythm: The popcorn should pop consistently and evenly. If you notice any gaps or a slow popping rhythm, it could be a sign that the heat is not distributed evenly or that you need to adjust the cooking time.

Ideal Popping Temperature

After learning about different popcorn popping techniques, let’s dive into the ideal popping time and the benefits of using a popcorn maker.

The ideal popping time for popcorn is around 2-3 minutes, depending on the type of popcorn and the heat level. Using a popcorn maker ensures that the kernels heat evenly and pop to perfection.

One of the benefits of using a popcorn maker is that it eliminates the guesswork. With precise temperature controls, you can achieve consistent results every time. Additionally, using a popcorn maker means less oil is needed compared to stovetop popping methods, making it a healthier option.

Now that we know the benefits of using a popcorn maker, let’s move on to the next section, where we will explore the timing for popping corn.

Timing for Popping Corn

Using a popcorn maker ensures consistent and precise timing for popping corn. Here are three key factors to consider when timing the popping of corn kernels:

Advertisement
  1. Preheat Time: Before adding the corn kernels, allow the popcorn maker to preheat for a few minutes. This ensures that the popping process begins as soon as the kernels are added, resulting in evenly popped popcorn.

  2. Kernel Quantity: Overloading the popcorn maker with too many kernels can lead to uneven popping and lower quality popcorn. It’s important to follow the manufacturer’s guidelines for the maximum quantity of kernels to use.

  3. Popping Time: The popping time can vary depending on the popcorn maker and the specific brand of corn kernels being used. It’s crucial to monitor the popping process closely and remove the popcorn from the maker once the popping slows down to prevent burning.
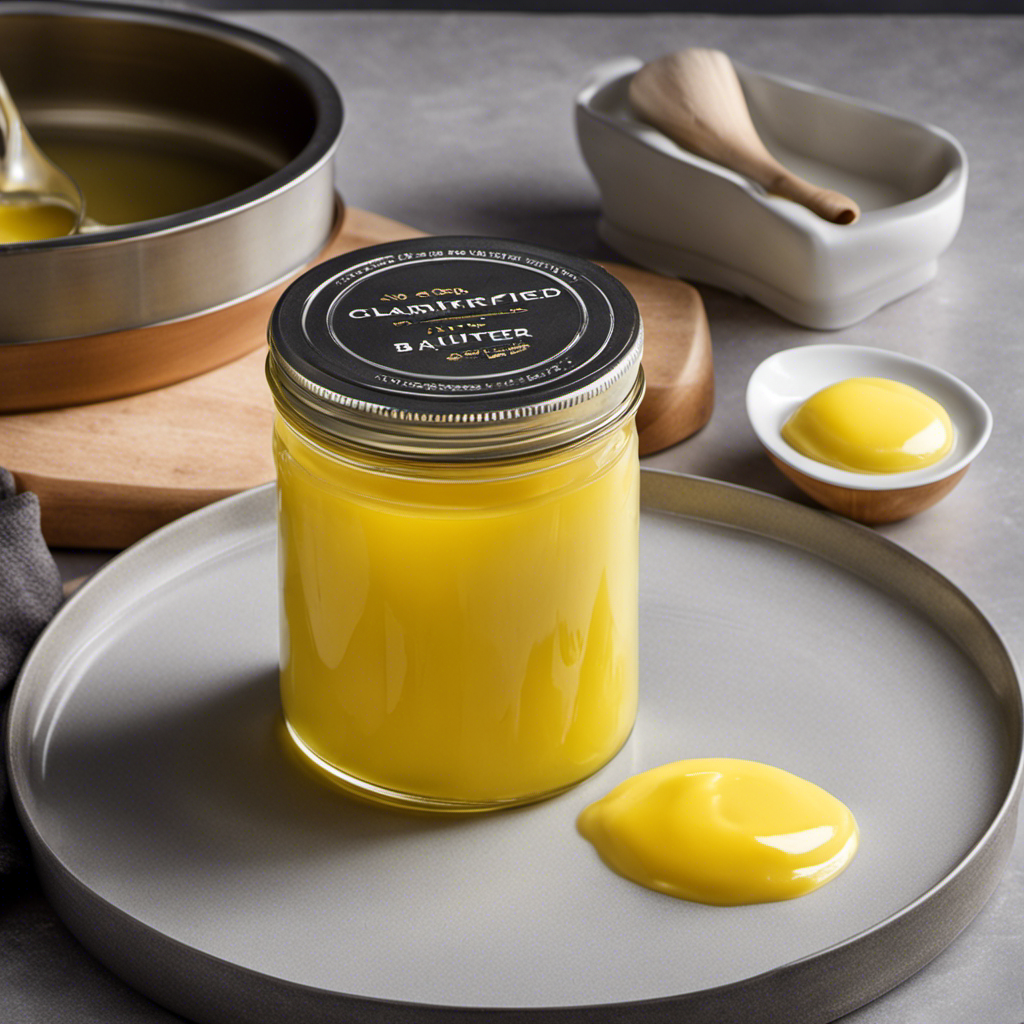
[bulkimporter_image id=’9′]

Melting the Butter

First, you’ll need to melt the butter for your popcorn in a small saucepan. However, if you’re looking for alternatives to melting butter, you can try using flavored oils to add a unique twist to your popcorn. Flavored oils are readily available in grocery stores and can be a healthier option compared to butter. They come in various flavors such as garlic, truffle, and chili, allowing you to experiment and find your favorite combination.

To melt the butter, simply follow these steps:

  1. Place the butter in the small saucepan.
  2. Heat the saucepan over low to medium heat.
  3. Stir the butter occasionally until it completely melts.
  4. Once melted, remove the saucepan from the heat and set it aside.

Now, if you decide to use flavored oils instead, the process is just as simple. Use the table below to choose your desired oil and follow the same steps as melting butter:

Flavor Oil
Garlic Olive oil
Truffle Truffle oil
Chili Chili oil
Butter Butter-flavored oil

Remember to drizzle the oil over your popcorn and toss it well to evenly distribute the flavor. Enjoy your buttery (or flavored) popcorn!

Advertisement

[bulkimporter_image id=’10’]

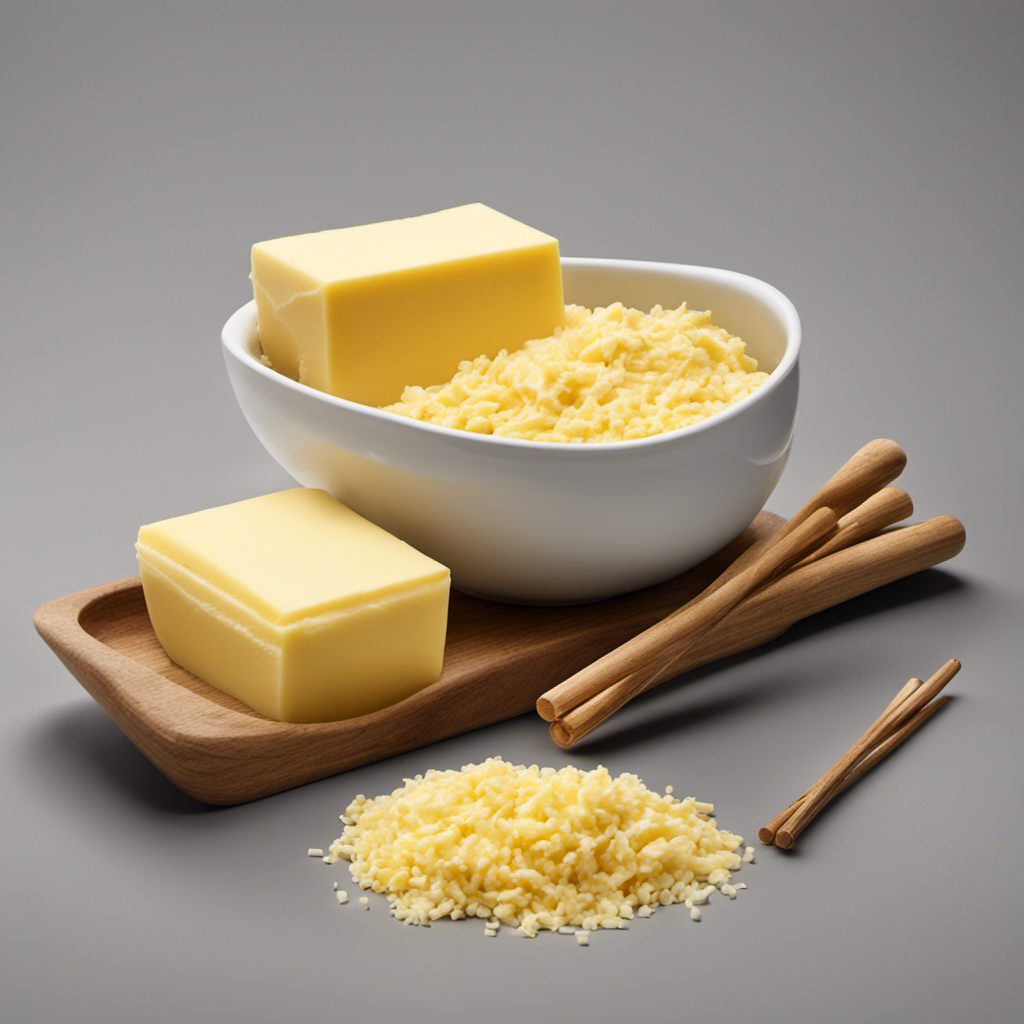
Adding Butter to the Popcorn Maker

When adding butter to the popcorn maker, make sure to use caution and not overload the machine. Adding butter to freshly popped popcorn can enhance its flavor and make it even more delicious. Here are some tips on adding butter to your popcorn maker:

  1. Butter Measurement: To achieve the perfect buttery taste, it’s important to measure the right amount of butter. I usually go for around 2 to 3 tablespoons of melted butter per 4 cups of popcorn. Adjust the amount according to your taste preferences.

  2. Butter Melting Techniques: There are a few ways to melt the butter before adding it to the popcorn maker. One easy method is to microwave the butter in a microwave-safe bowl for about 30 seconds. Another option is to melt the butter on the stovetop over low heat. Whichever method you choose, make sure the butter is completely melted and smooth.

  3. Adding the Butter: Once the butter is melted, carefully pour it over the freshly popped popcorn in the popcorn maker. Use a spatula or a spoon to gently toss the popcorn, ensuring that each kernel gets coated with the delicious buttery goodness. Take your time and make sure the butter is evenly distributed.

Adding butter to your popcorn maker can take your popcorn to the next level of yumminess. Just remember to use caution, measure the right amount of butter, and distribute it evenly.

Enjoy your buttery popcorn!

Advertisement

[bulkimporter_image id=’11’]

Mixing the Butter and Popcorn

To evenly distribute the melted butter, gently toss the popcorn in the popcorn maker with a spatula or spoon. This step is crucial in ensuring that each kernel gets coated with the delicious buttery goodness.

Now, let’s talk about the different butter melting methods and butter distribution techniques that you can use to enhance your popcorn experience.

When it comes to melting butter, there are a few popular methods you can try. One option is to melt the butter in a microwave-safe bowl. Simply place the desired amount of butter in the bowl and microwave it in short intervals, stirring in between, until it is completely melted.

Advertisement

Another method is to melt the butter on the stovetop. Just place the butter in a small saucepan over low heat and stir occasionally until it has melted.

Once your butter is melted, it’s time to distribute it onto the popcorn. You can do this by pouring the melted butter evenly over the popcorn in the popcorn maker and then tossing it with the spatula or spoon. Make sure to gently mix the popcorn to ensure that every kernel gets a taste of that rich, buttery flavor.

Alternatively, if your popcorn maker has a built-in butter dispenser, you can simply add the melted butter to the dispenser and let it distribute onto the popcorn as it pops.

[bulkimporter_image id=’12’]

Advertisement

Seasoning Options for Flavored Popcorn

One option for adding flavor to your popcorn is by using different seasonings. It’s a fun and creative way to elevate the taste of your popcorn and make it more exciting. Here are three delicious flavored popcorn seasonings that you can try:

  1. Classic Salt and Butter: This timeless combination is a crowd favorite. Simply melt some butter and drizzle it over your freshly popped popcorn. Then, sprinkle some salt evenly to enhance the flavor. The rich and savory taste of butter combined with the slight saltiness creates a mouthwatering treat.

  2. Sweet and Spicy: For those who enjoy a little heat with their snacks, this combination is perfect. Mix together some chili powder, brown sugar, and a pinch of cayenne pepper. Sprinkle this mixture over your popcorn and toss it well to coat evenly. The sweetness from the sugar balances out the spiciness, creating a unique and addictive flavor.

  3. Cheesy Ranch: If you’re a fan of cheesy and tangy flavors, this seasoning is a must-try. Mix together grated Parmesan cheese, dried dill, garlic powder, and onion powder. Sprinkle this mixture over your popcorn and toss it gently to coat. The combination of the creamy cheese and tangy ranch flavors will have you reaching for more.

These creative popcorn toppings are just the beginning. Feel free to experiment with different seasonings and create your own unique flavor combinations. Happy snacking!

[bulkimporter_image id=’13’]

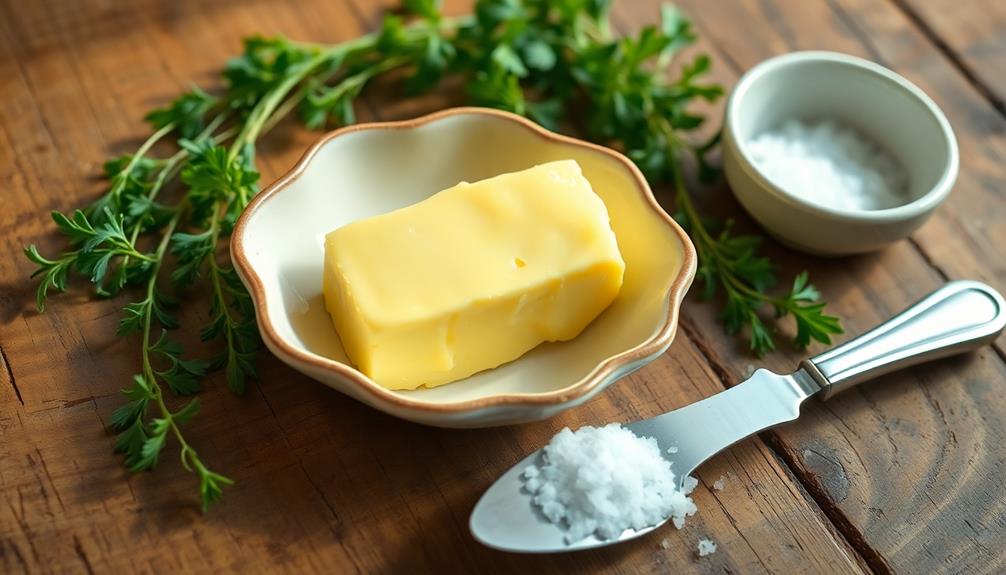
Adding Salt to the Popcorn

Using salt is a simple way to enhance the flavor of your popcorn. It adds a savory element that perfectly complements the buttery goodness. However, it’s important to find the right balance and measurement when adding salt to your popcorn. Too little and it may taste bland, but too much can make it overpowering.

Advertisement

To ensure the perfect amount of saltiness, it’s helpful to have a guide on how much salt to use. Here’s a handy table to give you an idea of the salt measurement based on the amount of popcorn you’re making:

Amount of Popcorn Salt Measurement
Small bowl (1-2 cups) 1/4 teaspoon
Medium bowl (3-4 cups) 1/2 teaspoon
Large bowl (5-6 cups) 3/4 teaspoon
Extra-large bowl (7+ cups) 1 teaspoon

Remember, these measurements are just a starting point. Feel free to adjust according to your taste preferences.

When it comes to choosing the type of salt for your popcorn, there are a few options. The most common type is fine table salt, which dissolves easily and evenly coats the popcorn. However, if you prefer a bit of texture, you can use kosher salt, which has larger grains. Sea salt can also add a subtle briny flavor to your popcorn.

[bulkimporter_image id=’14’]

Advertisement

Tossing the Popcorn to Distribute the Butter

As you shake the bowl, the butter-coated popcorn will distribute evenly. Tossing the popcorn is a crucial step in ensuring that every kernel gets a fair share of that delicious buttery goodness. Here’s how to do it:

  1. Get a large bowl: Choose a bowl that is big enough to hold all the popcorn without making a mess. The larger the bowl, the easier it will be to toss the popcorn.

  2. Lift and shake: Hold the bowl with both hands and lift it slightly off the table. Give the bowl a gentle shake back and forth, making sure to keep the popcorn moving. This motion will help distribute the butter evenly.

  3. Use a tossing motion: Instead of just shaking the bowl, try tossing the popcorn up into the air and catching it back in the bowl. This action helps mix the popcorn and ensures that every kernel gets coated with butter.

[bulkimporter_image id=’15’]

Serving and Enjoying the Buttered Popcorn

After tossing the popcorn to distribute the butter and ensuring each fluffy kernel is coated in its golden goodness, it’s time to serve and enjoy the mouthwatering creation.

Serving buttered popcorn is an art in itself, and there are a few techniques and toppings you can use to take your snacking experience to the next level.

Advertisement

One popular serving technique is to pour the buttered popcorn into a large bowl or individual serving bowls. This not only makes it easier to share with friends and family but also adds a touch of elegance to your movie night or gathering. Alternatively, you can serve the popcorn in fun and creative containers like popcorn cones or paper bags for a more casual vibe.

To enhance the flavor of your buttered popcorn, you can experiment with various toppings. Classic options include grated Parmesan cheese, a sprinkle of sea salt, or a dash of black pepper. For a sweet and savory twist, you can try drizzling your popcorn with melted chocolate or caramel sauce. Other popular choices include chili powder, garlic powder, or even nutritional yeast for a cheesy, dairy-free option.

No matter how you choose to serve and top your buttered popcorn, remember to enjoy it while it’s still warm and freshly made. The combination of the buttery goodness and the satisfying crunch of the popcorn is sure to make your taste buds dance with delight.

[bulkimporter_image id=’16’]

Advertisement

Cleaning and Maintaining the Popcorn Maker

To keep your popcorn maker in top shape, it’s important to regularly clean and maintain it. Here are some cleaning techniques and troubleshooting tips to help you keep your popcorn maker in perfect working order:

  1. Clean the exterior: Wipe down the outside of the popcorn maker with a damp cloth and mild soap. Avoid using abrasive cleaners that could damage the finish.

  2. Remove and clean the popping chamber: Before cleaning the popping chamber, make sure the machine is unplugged and has cooled down. Remove any leftover popcorn kernels and wipe the chamber with a damp cloth. For stubborn residue, use a mild dish soap and warm water.

  3. Clean the chute and butter tray: Remove the chute and butter tray, if applicable, and soak them in warm, soapy water. Scrub gently to remove any butter or oil buildup. Rinse thoroughly and dry before reattaching.

Troubleshooting common issues:

  • If your popcorn maker is not popping the kernels evenly, try adjusting the heat or stirring the kernels periodically while they pop.

  • If the machine is not turning on, check the power cord and ensure it is securely plugged in. If the problem persists, contact the manufacturer for further assistance.

  • If the popcorn is coming out burnt or too dry, reduce the cooking time or adjust the heat settings to avoid overcooking.

Regular cleaning and maintenance will not only ensure your popcorn maker lasts longer, but also help you enjoy delicious, buttery popcorn every time.

Frequently Asked Questions

How Do I Clean and Maintain My Popcorn Maker?

Cleaning and maintaining my popcorn maker is important for its longevity and performance. I follow a regular maintenance schedule, which includes wiping it down after each use and deep cleaning it every few months.

Can I Use a Different Type of Oil Besides the One Recommended in the Recipe?

I can use a different type of oil to butter popcorn from a popcorn maker. However, it’s important to consider the pros and cons of different oils for this purpose.

Advertisement

What Are Some Alternative Seasoning Options for Flavored Popcorn?

When it comes to flavored popcorn, there are endless options to get creative. From different types of cheese to sprinkle on top, to sweet and savory seasoning combinations, the possibilities are deliciously exciting.

How Long Should I Allow the Popcorn to Pop in the Popcorn Maker?

To achieve perfectly popped popcorn in a popcorn maker, it’s important to allow the kernels to pop for the right amount of time. Here are some tips for seasoning popcorn in creative ways.

Can I Use Margarine Instead of Butter to Butter the Popcorn?

Using margarine as an alternative to butter when buttering popcorn from a popcorn maker is possible. However, keep in mind that margarine has a different taste and texture compared to butter.

Conclusion

In conclusion, buttering popcorn from a popcorn maker is a simple and satisfying process. By choosing the right popcorn maker and gathering the necessary ingredients, you can create a delectable snack that will leave your taste buds tingling.

Measuring the popcorn kernels, adding oil and salt, and tossing the popcorn to distribute the butter ensures a perfectly buttered batch every time. So, sit back, relax, and indulge in the mouthwatering magic of buttered popcorn.

Advertisement

Let the buttery bliss transport you to a world of pure pleasure!

Continue Reading
Advertisement

Butter Tips and Tricks

Butter Hacks: 2/3 Cup Butter Is How Many Tablespoons?

Published

on

By

converting butter measurements easily

If you’ve ever wondered, 2/3 cup of butter equals around 10.67 tablespoons. This handy conversion guarantees your recipes turn out just right.

Key Takeaways

  • 2/3 cup of butter equals 10.67 tablespoons.
  • Useful for recipes specifying butter in tablespoons.
  • Ensures precise measurements in cooking.
  • Simplifies adjusting butter quantities.
  • Essential for accurate recipe results.

The Full Conversion Chart

Exploring the entire conversion chart for butter measurements can simplify your cooking endeavors. Understanding the different measurements for butter, such as blocks, sticks, cups, tablespoons, and weight in grams, allows you to easily adapt recipes to suit your needs.

For example, knowing that a block of butter weighs 5.33 ounces and that this is equivalent to 2.67 ounces in stick form can be incredibly helpful when following a recipe that specifies one form over the other.

Furthermore, realizing that 1/6 pound of butter is equal to one cup, or that one tablespoon of butter is approximately 80 milliliters, enables you to make precise adjustments based on what measuring tools you have available.

This detailed chart provides you with the flexibility to confidently experiment in the kitchen, ensuring that your dishes turn out just right every time. Whether you’re baking, sautéing, or simply spreading butter on your toast, having a solid grasp on these conversions will surely enhance your culinary skills.

How Much Is 1 Stick?

price of a single stick

To accurately measure butter, understanding the quantity in 1 stick is important for following recipes effectively. One stick of butter equals 8 tablespoons, approximately 4 ounces or 113 grams in weight, and fills half a cup. When working with recipes that call for butter, this information is vital for precise measurements.

Butter sticks are conveniently marked with tablespoon measurements, simplifying the process of cutting the right amount. By knowing how much butter is in 1 stick, you can easily adapt recipes to suit your needs without any guesswork.

Advertisement

Whether you’re baking a batch of cookies or whipping up a savory sauce, having this knowledge at your fingertips guarantees your dishes turn out just right every time. So next time you reach for a stick of butter, remember these measurements to ensure cooking or baking success.

Measuring Butter From Sticks

butter measurement using sticks

When measuring butter from sticks, make certain you understand that each stick is equivalent to 8 tablespoons or 1/2 cup. This means that if a recipe calls for 2/3 cup of butter, you’d need 1 stick plus 2 and 2/3 tablespoons of butter. Understanding this conversion is essential for accurately measuring butter in various recipes.

Measuring butter from sticks is a convenient way to portion out the right amount for your cooking or baking needs. By knowing that one stick equals 8 tablespoons, you can easily adjust the quantity of butter required for a recipe.

Whether you’re using butter in cups, tablespoons, or sticks, being able to convert between these measurements guarantees that your dishes turn out just right.

Next time you reach for a stick of butter, remember that it contains 8 tablespoons or 1/2 cup. This knowledge will simplify your cooking process and help you achieve consistent results in the kitchen.

Butter in Tablespoons (Tbsp.)

butter measurement in tablespoons

When measuring butter in tablespoons (Tbsp.), it’s essential to know that 2/3 cup of butter is equivalent to 10 and 2/3 tablespoons. Understanding this butter conversion can simplify your cooking and baking experience.

Here are a few key points to keep in mind:

Advertisement
  • Converting cups to tablespoons: To convert 2/3 cup of butter to tablespoons, multiply 2/3 by 16 (since 1 cup equals 16 tablespoons).
  • Precise measurement: The calculation results in 10.67 tablespoons, which can be rounded to 10 and 2/3 tablespoons. This accuracy is vital for achieving consistent results in your recipes.
  • Convenience in recipes: Knowing the butter measurements in tablespoons can be handy when a recipe specifies butter in this unit rather than cups, making it easier to follow instructions accurately.

Mastering butter measurements in tablespoons allows you to confidently navigate various recipes and secures your dishes turn out just right.

Butter Vs. Margarine Conversion

dairy debate butter or margarine

For a straightforward butter versus margarine conversion comparison, consider the differences in teaspoons and tablespoons.

ButterMargarine
1 Teaspoon1 Teaspoon
1 Tablespoon1 Tablespoon
1/4 Cup1/4 Cup

When substituting butter for margarine in recipes, bear in mind the conversion rate between the two. While both butter and margarine serve as fats in baking and cooking, they have slightly different compositions due to their ingredients. If a recipe calls for margarine but you prefer to use butter, a simple swap can be made using the table above. Remember that the water content in butter is higher than in margarine, which can affect the final texture of your dish. Experimenting with different ratios based on the conversion table can help you achieve the desired result.

Olive Oil Conversion

cooking with olive oil

To convert olive oil measurements effectively in your recipes, remember the following equivalences:

  • 1/4 Cup of olive oil is equivalent to 1/4 Cup of butter/margarine.
  • 1/4 Cup + 2 Tablespoons of olive oil is equal to 1/2 Cup of butter/margarine.
  • 1/2 Cup of olive oil is the same as 1/2 Cup + 1 Tablespoon of butter/margarine.

When substituting olive oil for butter or margarine in your recipes, keep these conversions in mind to guarantee your dish turns out just right. Whether you’re aiming for a healthier option or simply prefer the taste of olive oil, knowing how to make these conversions can make a significant difference in your cooking.

Next time you reach for olive oil instead of butter, confidently adjust your measurements using these simple equivalences.

Healthy Alternative: Olive Oil

heart healthy cooking with olives

Looking to make healthier choices in your cooking? Olive oil can be a great alternative to butter, providing a higher content of monounsaturated fats.

Benefits of Olive Oil

Consider incorporating olive oil into your cooking routine as a healthier alternative to butter, thanks to its rich content of monounsaturated fats. Substituting butter with olive oil not only reduces saturated fat intake but also maintains a similar texture and flavor profile in your dishes.

Here are some benefits of using olive oil:

  • Healthier Fat Option: Olive oil is packed with monounsaturated fats, which are considered heart-healthy fats that can help lower bad cholesterol levels.
  • Versatility in Cooking: From baking to sautéing and creating flavorful dressings, olive oil proves to be a versatile ingredient suitable for various cooking methods.
  • Unique Flavor Profile: Unlike butter, olive oil adds a distinct taste to your dishes, enhancing the overall flavor experience while offering a healthier alternative.

Incorporating olive oil into your daily cooking not only brings health benefits but also contributes to a more balanced and flavorful diet.

Cooking With Olive Oil

Enhance your cooking routine by incorporating olive oil as a healthier alternative to butter in various dishes. Olive oil offers a distinct flavor profile that can elevate the taste of your meals while providing several health benefits. Rich in monounsaturated fats, olive oil is considered heart-healthy and can help lower bad cholesterol levels.

Advertisement

When cooking with olive oil, you have the flexibility to use it in different methods such as sautéing, roasting, and making salad dressings. This versatility makes it a great choice for a wide range of recipes. By substituting butter with olive oil, you can reduce your saturated fat intake without compromising on flavor.

Next time you’re in the kitchen, consider reaching for olive oil instead of butter. Not only will you be making a healthier choice, but you’ll also be adding a delicious twist to your favorite dishes. Experiment with olive oil in your cooking and discover the wonderful benefits it can bring to your meals.

Contact & Copyright Information

contact and copyright details

For more details on butter and olive oil conversions, contact Monadnock Oil and Vinegar, LLC at their Dublin branch by dialing 603-563-7066 or at their Amherst branch at 603-589-9954.

If you prefer email correspondence, you can reach them at [emailprotected].

Remember that all content related to butter and olive oil conversions is protected by copyright owned by Monadnock Oil and Vinegar, LLC. Reproduction rights are reserved from 2015 to 2024, and any unauthorized use is strictly prohibited.

If you intend to use or refer to their content, make sure you have the appropriate permissions to avoid any copyright violations.

Advertisement

Frequently Asked Questions

How Many Tablespoons Is 2/3 Cup in a Stick of Butter?

To know how many tablespoons are in 2/3 cup of butter in a stick, remember it’s around 10 2/3 tablespoons or about 1 stick plus 2 tablespoons. This helps you accurately measure butter for recipes.

Is 1 Stick of Butter the Same as 1 2 Cup?

Yes, 1 stick of butter is equal to 1/2 cup. That means a stick of butter contains 8 tablespoons. Understanding these measurements can make your cooking and baking experiences smoother and more precise.

How Many Tablespoons Is a Full Cup of Butter?

To measure a full cup of butter, you’d need 16 tablespoons. That’s the scoop for your baking adventures. Remember this handy conversion to make your kitchen creations a piece of cake!

How Much Is 1 Cup of Butter in Stick Butter?

To convert 1 cup of butter to sticks, you need 2 sticks. For tablespoons, that’s 16 tablespoons. Knowing these conversions helps in precise measuring for recipes. It’s essential for successful baking and cooking.

Conclusion

Remember, when it comes to butter hacks, knowing how to convert measurements can make all the difference in your cooking.

Advertisement

As the saying goes, ‘A little butter can make everything better.’

So next time you’re in the kitchen and wondering how many tablespoons are in 2/3 cup of butter, you’ll be prepared to whip up something delicious with ease.

Happy cooking!

Continue Reading

Butter Tips and Tricks

How Many Sticks of Butter in 1 Cup: A Step-by-Step Guide

Published

on

By

An image showing a neatly arranged stack of 10 tablespoons of butter, each tablespoon represented by a smooth, rectangular slab with rounded edges, resembling traditional stick-shaped butter

Ever wondered how many sticks of butter are in one cup? Well, I have the answer for you!

Picture this: you’re in the middle of baking your favorite recipe and suddenly realize you’re out of butter. Panic sets in as you scramble to figure out the conversion from cups to sticks. But fear not!

In this article, I’ll break it down for you, providing all the information you need to know about the butter-to-cup ratio and how to make your baking adventures a breeze.

Key Takeaways

  • 1 cup of butter is equal to 2 sticks or 16 tablespoons.
  • Converting butter measurements from cups to sticks or vice versa is crucial for accurate recipe adjustments.
  • Different brands may have varying measurements for butter, so it’s important to be aware of equivalents.
  • Using the measurement markings on the butter wrapper allows for precise cutting of fractional amounts.
[bulkimporter_image id=’2′]

Understanding the Butter-to-Cup Ratio

1 cup of butter is equal to 2 sticks. When it comes to converting butter measurements, it’s important to understand the ratios.

If a recipe calls for tablespoons of butter, 1 stick is equivalent to 8 tablespoons. So, if you need 1 cup of butter, you’ll need 16 tablespoons or 2 sticks.

It’s also important to note the difference between salted and unsalted butter. Salted butter contains added salt, while unsalted butter does not. This can affect the taste and overall flavor of your dish.

When a recipe calls for unsalted butter, it’s best to stick to that recommendation to have better control over the amount of salt in the recipe. However, if you only have salted butter on hand, you can reduce the amount of added salt in the recipe.

[bulkimporter_image id=’3′]

Converting Butter Measurements: Cups to Sticks

When it comes to baking, understanding the butter cup to stick ratio is crucial. Knowing how many sticks of butter make up one cup can make or break a recipe.

In addition to the ratio, having an accurate conversion method from cups to sticks is essential for precise measurements.

Lastly, it’s important to familiarize oneself with common butter measurements to ensure successful baking endeavors.

Butter Cup to Stick Ratio

To determine the ratio of sticks of butter to cups, we can use this conversion chart. Understanding butter measurements is essential for baking and cooking. Converting butter ratios is a common task in the kitchen.

The standard stick of butter in the United States weighs 1/2 cup or 8 tablespoons. Therefore, if a recipe calls for 1 cup of butter, you will need 2 sticks. If the recipe calls for 1/2 cup of butter, you will need 1 stick.

It’s important to note that butter measurements can vary by country, so always consult a reliable conversion chart if you’re working with international recipes. By knowing the butter cup to stick ratio, you can confidently adapt recipes to suit your needs.

Accurate Conversion Method

The most accurate way to convert measurements is by consulting a reliable conversion chart. When it comes to measuring butter, it can be tricky since it often comes in sticks or cups. Here are some tips to help you accurately measure butter:

  1. Use a conversion chart: This will give you the exact measurement equivalents for butter, whether it’s in sticks or cups.
  2. Soften the butter: If a recipe calls for melted butter, measure it in its solid form and then melt it. This ensures accurate measurements.
  3. Use a kitchen scale: Weighing the butter can give you precise measurements, especially when dealing with small amounts.
  4. Know the standard measurements: One stick of butter is equal to 1/2 cup or 8 tablespoons. A cup of butter, on the other hand, is equal to 2 sticks or 16 tablespoons.

Common Butter Measurements?

Knowing the equivalents for different measurements of butter, such as tablespoons and sticks, can be helpful when following recipes. It ensures that you are adding the right amount of butter, which can greatly impact the outcome of your dish. Here are some common butter measurement equivalents to keep in mind:

Measurement Equivalent
1 stick 1/2 cup (8 tablespoons)
1/2 stick 1/4 cup (4 tablespoons)
1/4 stick 1/8 cup (2 tablespoons)
1 tablespoon 1/16 cup (1/2 stick)

When measuring butter, it’s important to be accurate. Use a kitchen scale for precise measurements, especially if the recipe calls for weight measurements. If you don’t have a scale, use a butter dish with marked measurements. Softened butter should be leveled off with a knife. When using tablespoons, make sure to fill them completely and level off the excess with a straight edge. These tips will help you measure butter accurately and achieve the best results in your recipes.

[bulkimporter_image id=’4′]

The Standard Size of a Stick of Butter

A stick of butter is typically equal to 1/2 cup. Understanding butter packaging and different butter measurements in other countries can be confusing.

Here are some key points to help you navigate the world of butter measurements:

  1. In the United States, butter is commonly sold in sticks, with each stick weighing 1/4 pound or 1/2 cup. This makes it easy to measure and use in recipes.
  2. In some European countries, butter is sold in blocks or tubs, with measurements listed in grams or kilograms. It’s important to convert these measurements to cups or ounces for American recipes.
  3. In Australia, butter is usually sold in 250g or 500g blocks, which can be converted to cups or ounces using conversion charts.
  4. When traveling or using international recipes, it’s helpful to familiarize yourself with the local butter measurements to ensure accurate results.
[bulkimporter_image id=’5′]

How Much Butter Is in 1 Cup

When it comes to baking, understanding the butter to cup ratio is crucial. Knowing how much butter is in 1 cup can help ensure that your recipes turn out perfectly.

Additionally, learning how to convert butter measurements can be helpful when using recipes from different countries or regions.

Lastly, if you’re looking for butter substitutes in baking, there are several options available that can still provide the moisture and richness that butter brings to baked goods.

Butter to Cup Ratio

To measure the butter to cup ratio, you can easily convert sticks of butter to cups. Understanding butter density is key to accurately converting butter measurements from tablespoons to cups. Here’s a step-by-step guide:

  1. Start by knowing that one stick of butter is equal to 1/2 cup. This is a common measurement used in many recipes.
  2. If your recipe calls for a different amount of butter in cups, you can use this conversion: 1 cup of butter is equivalent to 2 sticks or 16 tablespoons.
  3. To convert tablespoons to cups, divide the number of tablespoons by 16. For example, if you have 8 tablespoons of butter, it would be equal to 1/2 cup.
  4. Remember, when measuring butter, it’s important to consider its density. Softened or melted butter may take up less space compared to cold or solid butter.

Converting Butter Measurements

Understanding the conversion of butter measurements can help me confidently adjust my recipe. When it comes to baking or cooking, accuracy is key. Knowing the equivalents of butter can save me time and ensure the perfect outcome.

One cup of butter is equal to two sticks or 16 tablespoons. This information is crucial when a recipe calls for a specific amount of butter in cups, but I only have sticks. Conversely, if a recipe specifies butter in sticks, I can easily convert it to cups by dividing the number of sticks by two.

To measure butter accurately, I can use a kitchen scale or the markings on the butter wrapper. Softened butter should be packed into measuring cups, while solid butter should be cut according to the desired quantity.

With these tips, I can confidently use the correct amount of butter in my recipes.

Butter Substitutes in Baking

If you’re looking to substitute butter in your baking, there are various options available that can still yield delicious results. Here are four butter alternatives that not only provide a healthier option but also offer unique flavors and health benefits:

  1. Coconut oil: This versatile alternative adds a subtle tropical taste to your baked goods and is rich in healthy fats, promoting heart health.
  2. Avocado: Creamy and nutrient-dense, mashed avocado can replace butter in certain recipes, providing a boost of vitamins and minerals.
  3. Greek yogurt: With its tangy flavor and creamy texture, Greek yogurt adds moisture and protein to your baked treats while reducing the fat content.
  4. Applesauce: A natural sweetener and fat substitute, applesauce adds moisture and tenderness to your baked goods, making them lighter and healthier.
[bulkimporter_image id=’6′]

Butter Conversion: Cups to Sticks Simplified

You can easily convert 1 cup of butter to sticks by knowing that it equals 2 sticks.

When it comes to butter storage, it is important to consider the packaging. Butter is typically sold in wrapped blocks or sticks. The packaging not only protects the butter from external factors like air and light but also keeps it fresh for longer periods.

The most common packaging for butter is a waxed paper or foil wrapper. This type of packaging helps to maintain the butter’s quality and prevent it from spoiling. It is recommended to store butter in its original packaging or transfer it to an airtight container to maintain its freshness.

Proper butter storage ensures that it remains usable for a longer time and retains its flavor and texture.

[bulkimporter_image id=’7′]

Calculating Sticks of Butter for Your Recipe

To calculate the number of sticks needed for your recipe, it’s helpful to divide the total amount of butter by the conversion factor of 2. This will give you the accurate measurement in sticks.

Here are some tips for understanding butter measurements and achieving accurate conversions:

  1. Always use the conversion factor of 2 when converting cups to sticks of butter.
  2. Make sure to measure butter in its solid form for precise results.
  3. If your recipe calls for a fraction of a stick, you can easily cut it using the measurement markings on the wrapper.
  4. Remember that butter is sold in different sizes, so check the weight or volume on the packaging to ensure accuracy.

Now that you understand how to calculate the number of sticks needed for your recipe, let’s move on to some tips for measuring butter in cups.

[bulkimporter_image id=’8′]

Tips for Measuring Butter in Cups

When measuring butter in cups, it’s important to remember that different brands may have different measurements on their packaging. To ensure accuracy in your recipes, it’s helpful to be aware of butter measurement equivalents.

One cup of butter is equal to 2 sticks or 16 tablespoons. However, some brands of butter may label their packaging differently, so it’s always a good idea to double-check.

If you don’t have measuring cups or sticks of butter, there are alternative methods for measuring butter. One option is to use a kitchen scale to measure the desired amount in grams or ounces. Another option is to use the markings on the butter wrapper itself. Most butter sticks have measurements marked on the packaging, allowing you to easily cut off the desired amount.

[bulkimporter_image id=’9′]

Butter Conversions Made Easy: Cups to Sticks

When it comes to baking or cooking with butter, it’s important to have a clear understanding of the measurement equivalents. Knowing how many sticks of butter are in a cup can save time and ensure accurate results.

In this discussion, we will explore simple conversion techniques for butter measurements, providing you with the knowledge and confidence to easily adapt recipes to your preferred measurements.

Butter Measurement Equivalents

You can easily convert 1 cup of butter into sticks by dividing it into 2 sticks. This is a common measurement used in baking and cooking.

When it comes to understanding butter ratios and ensuring accurate measuring, here are some tips to keep in mind:

  1. Use a liquid measuring cup: Butter is a solid, but using a liquid measuring cup allows for more precise measurements.
  2. Soften the butter: To accurately measure butter, it should be softened to room temperature. This ensures that it is easily spreadable and can be measured accurately.
  3. Use a knife or bench scraper: When measuring butter, use a knife or bench scraper to level off the top. This will provide a consistent and accurate measurement.
  4. Pack it tightly: If a recipe calls for packed butter, make sure to tightly pack the butter into the measuring cup. This will give you the correct amount needed for the recipe.

Simple Conversion Techniques

To simplify conversions, try using a kitchen scale for more precise measurements. When it comes to baking, accurate measurements are crucial for the success of your recipe. Butter measurement equivalents in recipes can sometimes be confusing, especially when converting between different units.

Converting butter measurements for baking can be made easier by using a kitchen scale. By weighing the butter, you can accurately determine the amount needed for your recipe. For example, if a recipe calls for 1 cup of butter, you can weigh it on the scale to get the precise measurement in grams or ounces. This eliminates any guesswork and ensures that your baked goods turn out just right.

Now, let’s move on to how to substitute sticks of butter for cups.

[bulkimporter_image id=’10’]

How to Substitute Sticks of Butter for Cups

If you’re substituting sticks of butter for cups, it’s important to know that one stick of butter is equivalent to 1/2 cup. This knowledge is crucial for measuring accuracy in recipes.

Here are four key points to keep in mind when substituting sticks of butter for cups:

  1. Butter substitutes: In case you don’t have sticks of butter on hand, you can use other ingredients as substitutes. Options include margarine, shortening, coconut oil, or even applesauce for a healthier alternative.
  2. Measuring accuracy: When measuring butter in stick form, it’s essential to accurately cut the stick to the correct length. Each stick is typically 8 tablespoons or 1/2 cup, so make sure to measure it precisely.
  3. Conversions: If a recipe calls for a specific amount of cups, you may need to convert it to sticks of butter. Remember that two sticks of butter are equal to 1 cup, so adjust accordingly.
  4. Recipe adjustments: When substituting sticks of butter for cups, consider the impact on your recipe. Butter provides moisture and flavor, so using different substitutes may affect the final texture and taste.
[bulkimporter_image id=’11’]

Common Butter Measurements: Cups Vs Sticks

When baking, it’s helpful to know the difference between measuring butter in cups versus sticks. Understanding butter measurements and being able to convert between cups and sticks can make a big difference in the outcome of your baked goods. Here’s a simple table to help you understand the conversion:

Cups Sticks Grams
1 0.5 113
2 1 227
3 1.5 340

For example, if a recipe calls for 1 cup of butter, you can use 2 sticks or 227 grams. Similarly, if a recipe calls for 3 sticks of butter, you can use 1.5 cups or 340 grams. Having this understanding and being able to convert between cups and sticks will ensure that your baked goods turn out perfectly every time.

Frequently Asked Questions

Can I Use Margarine Instead of Butter When Measuring in Cups or Sticks?

Sure, you can use margarine instead of butter when measuring in cups or sticks. However, keep in mind that margarine has a different texture and flavor, so it may affect the outcome of your recipe. The butter vs margarine debate is a matter of personal preference.

How Much Does a Stick of Butter Weigh in Ounces?

A stick of butter weighs 4 ounces. Converting butter measurements can be tricky, but knowing that a stick of butter is 1/2 cup or 8 tablespoons helps in cooking and baking.

Can I Use Salted Butter Instead of Unsalted Butter in a Recipe That Calls for Measuring in Cups?

Yes, you can use salted butter instead of unsalted butter in a recipe that calls for measuring in cups. Just remember to adjust the amount of salt in the recipe accordingly.

Are There Any Special Considerations When Measuring Butter in High-Altitude Baking?

When baking at high altitudes, there are special considerations for measuring butter. The altitude affects the air pressure, which can impact the texture and rising of baked goods. Adjustments may be needed to ensure successful results.

Is There a Difference in Measurement if the Butter Is Cold or at Room Temperature When Using Cups or Sticks?

When measuring butter, it’s important to note that the accuracy may vary depending on whether the butter is cold or at room temperature. This applies to both measuring cups and sticks.

Conclusion

In conclusion, understanding the butter-to-cup ratio is crucial when it comes to baking. Converting measurements from cups to sticks can be simplified by knowing that one cup of butter is equal to two sticks.

It is important to note that a standard stick of butter typically measures 1/2 cup or 8 tablespoons. When measuring butter in cups, it is recommended to use precise measuring tools to ensure accurate results.

Remember, as the saying goes, “Measure twice, bake once!”

Continue Reading

Butter Tips and Tricks

How Many Cups of Butter Equal a Stick: A Simple Guide

Published

on

By

An image showing a neatly arranged cup filled with liquid butter, surrounded by a stack of butter sticks, one by one, gradually being poured into the cup until it reaches the brim

Ever thought about how many cups of butter are in one stick? Well, I have the answer for you! Deciphering butter measurements can be tricky, but don’t worry, I’m here to make it easier for you.

In this article, we’ll explore the standard stick of butter and how to convert it to cups. We’ll also delve into equivalents and measurements, as well as provide a handy butter conversion chart.

So, let’s dive in and demystify the world of butter measurements together!

Key Takeaways

  • One stick of butter is equal to 1/2 cup or 8 tablespoons.
  • Butter can be measured in grams or ounces for more precise measurements.
  • Conversion charts and kitchen scales are useful tools for accurate measurement conversion.
  • Knowing the equivalents (e.g., 1 stick = 1/2 cup, 2 sticks = 1 cup) helps measure butter accurately in recipes.

[bulkimporter_image id=’2′]

Understanding Butter Measurements

There’s no need to worry about how many cups of butter are in a stick because it’s a common measurement used in recipes. When it comes to accurately measuring butter, it’s important to understand the conversion from sticks to cups.

One stick of butter is equal to 1/2 cup or 8 tablespoons. This measurement is widely accepted and used in baking and cooking. However, it’s good to know that butter can also be measured in grams or ounces for more precise measurements.

To convert butter measurements for recipes, you can use a kitchen scale or refer to conversion charts that provide the equivalent measurements. Understanding these conversions ensures that you can accurately measure and use butter in your favorite recipes.

Advertisement

Now, let’s dive into the details of the standard stick of butter.

[bulkimporter_image id=’3′]

The Standard Stick of Butter

To determine the amount of butter in a standard stick, you’ll need to understand the conversion ratio. Understanding butter packaging and different butter measurements is crucial to accurately measuring ingredients in recipes. Here are some key points to keep in mind:

  • A standard stick of butter in the United States weighs 1/2 cup or 8 tablespoons.
  • The measurements on butter packaging are typically marked in tablespoons and cups.
  • European butter is often sold in 250-gram blocks, which is approximately 1 cup or 2 sticks of butter.
  • Some recipes may call for butter in ounces or grams, so it’s important to have a kitchen scale for precise measurements.
  • It’s also helpful to know that butter comes in different fat percentages, such as salted and unsalted.

[bulkimporter_image id=’4′]

Converting Sticks to Cups

When it comes to converting sticks to cups, it is important to understand the stick to cup ratio for accurate measurement conversion.

The stick to cup ratio is 1 stick of butter equals 1/2 cup. This means that if a recipe calls for 1 cup of butter, you will need 2 sticks.

Stick to Cup Ratio

The stick to cup ratio for butter is approximately 1/2 cup per stick. This ratio is important to know when it comes to baking and following recipes accurately.

Here are a few key points to keep in mind when it comes to butter measurements and baking conversions:

Advertisement

  • 1 stick of butter is equal to 1/2 cup or 8 tablespoons.
  • If a recipe calls for 1 cup of butter, you will need 2 sticks.
  • To convert tablespoons to cups, divide the number of tablespoons by 16.
  • It’s important to note that butter measurements can vary depending on the brand or type of butter you are using, so always check the packaging for accurate measurements.
  • When in doubt, it’s always a good idea to weigh your butter using a kitchen scale for precise measurements.

Knowing the stick to cup ratio and understanding butter measurements is essential for successful baking and achieving the desired results in your recipes.

Accurate Measurement Conversion

Remember, accurately converting measurements is crucial for achieving the desired results in your baking recipes.

When it comes to understanding butter measurements, it’s important to measure accurately to ensure your baked goods turn out just right.

Butter is often measured in sticks, and it’s helpful to know that one stick of butter is equal to 1/2 cup or 8 tablespoons.

This knowledge is especially handy when a recipe calls for a certain amount of cups and you only have sticks of butter on hand.

By measuring butter accurately, you can ensure that your recipes turn out perfectly every time.

Advertisement

Now that we understand how to measure butter correctly, let’s explore the equivalents and measurements for other common baking ingredients.

[bulkimporter_image id=’5′]

Equivalents and Measurements

You’ll need to know how many cups of butter are in a stick for accurate measurements. When it comes to butter measurement equivalents, it’s important to have the right conversions. Here are a few key measurements to keep in mind:

  • 1 stick of butter is equal to 1/2 cup
  • 1/2 stick of butter is equal to 1/4 cup
  • 2 sticks of butter is equal to 1 cup
  • 4 sticks of butter is equal to 2 cups
  • 8 sticks of butter is equal to 4 cups

Knowing these equivalents will help you measure butter accurately in your recipes.

Now that you have a good understanding of how many cups are in a stick of butter, let’s move on to the next section about how much butter is in a cup.

[bulkimporter_image id=’6′]

How Much Butter Is in a Cup

When it comes to baking or cooking, understanding the butter-to-cup ratio is crucial. Knowing how much butter is in a cup can make a huge difference in the outcome of your recipe.

In this discussion, we will explore the conversion of butter measurements and how to accurately measure the right amount of butter for your culinary endeavors.

Advertisement

Butter-To-Cup Ratio

To figure out the butter-to-cup ratio, divide the number of cups by the number of sticks. This ratio is essential when converting butter measurements or finding butter equivalents. Here are some important points to consider:

  • 1 stick of butter is equal to 1/2 cup.
  • 2 sticks of butter make 1 cup.
  • If a recipe calls for 1 cup of butter, you will need 2 sticks.
  • For 1/4 cup of butter, use half a stick.
  • To measure 1/3 cup of butter, you’ll need 5 and 1/3 tablespoons.

Understanding the butter-to-cup ratio allows for accurate measurements in recipes. Whether you’re baking cookies or making a savory dish, having the correct amount of butter is crucial for achieving the desired taste and texture.

Converting Butter Measurements?

Understanding how to convert butter measurements is essential for accurate recipe preparation. When it comes to converting butter measurements, there are a few common mistakes that people often make.

One of the most common mistakes is not knowing the correct conversion ratio. In the United States, butter is typically sold in sticks, with each stick weighing 1/2 cup or 8 tablespoons. However, in some recipes, butter may be measured in grams or ounces.

Another mistake people make is not properly measuring the butter. It is important to use a kitchen scale or measuring cups to ensure precise measurements.

Additionally, some recipes may call for melted butter, which can be measured differently than solid butter.

Advertisement

Understanding these conversions and avoiding these common mistakes will help ensure that your recipes turn out perfectly every time.

[bulkimporter_image id=’7′]

Measuring Butter for Baking

There’s no need to guess how many cups of butter are in a stick when measuring for baking. As someone who loves to bake, I have found that using the right tools for measuring butter is crucial for accurate results. Here are the best tools for measuring butter:

  • Measuring cups: These are the most common tools used for measuring butter. Make sure to use a dry measuring cup and pack the butter firmly for accurate measurements.

  • Kitchen scale: For precise measurements, a kitchen scale is the way to go. It allows you to measure the exact amount of butter required for your recipe.

  • Butter dish with markings: Some butter dishes come with markings that indicate the measurements. This makes it convenient to measure the required amount of butter directly from the dish.

  • Butter cutter: A butter cutter is a handy tool that helps you measure the butter by slicing it into tablespoons or teaspoons.

  • Butter wrappers: Butter wrappers often have measurements marked on them, making it easy to cut the butter into the desired amount.

By using these tools, you can ensure that your butter is measured accurately for your recipes.

Now, let’s move on to the next section where we will discuss a butter conversion chart.

[bulkimporter_image id=’8′]

Butter Conversion Chart

Now that we know how to measure butter for baking, let’s talk about butter conversion chart and how to convert butter for recipes.

Advertisement

It’s common to come across recipes that call for butter in different measurements, such as cups, tablespoons, or grams. To make things easier, there are some standard butter measurement equivalents that can be used for conversion.

For example, one stick of butter is equal to half a cup or 8 tablespoons. So if a recipe calls for 1 cup of butter, you would need 2 sticks or 16 tablespoons. It’s important to have these conversions handy to ensure you’re using the correct amount of butter in your recipes.

Now that we understand the butter conversion chart, let’s move on to some tips for measuring butter accurately.

[bulkimporter_image id=’9′]

Tips for Measuring Butter

To accurately measure butter, it’s helpful to soften it beforehand. Softening butter makes it easier to measure and ensures accurate results in your cooking. Here are some tips for measuring butter for cooking:

  • Take the butter out of the refrigerator and let it sit at room temperature for about 30 minutes before measuring.
  • Use a sharp knife to cut the butter into tablespoon-sized portions.
  • Fill a measuring cup with water and place the cut butter into the cup, submerging it completely.
  • Remove the butter from the water and drain any excess water.
  • Measure the butter in tablespoons or cups, depending on your recipe’s requirements.

[bulkimporter_image id=’10’]

Common Butter Measurement Mistakes

A common mistake when measuring butter is not using a sharp knife to cut it into proper portions. Accurately measuring butter is crucial in baking to achieve the desired results.

When butter is too soft or melted, it can throw off the texture and consistency of your baked goods. To measure butter accurately, start by using a sharp knife to cut the stick into tablespoon-sized portions. Then, use a measuring spoon to scoop out the desired amount.

Advertisement

It’s important to level off the butter with the back of a knife to ensure precise measurements. Another common mistake is eyeballing the amount of butter, which can lead to inconsistent results.

Frequently Asked Questions

Can I Use Margarine Instead of Butter in Baking Recipes?

I prefer using butter over margarine in baking recipes because it adds more flavor and richness. Margarine can affect the texture of baked goods, often making them softer and less tender. So, while margarine can be used as a substitute for butter in some recipes, it’s important to consider the impact on taste and texture.

How Can I Accurately Measure Butter Without Using a Scale?

When it comes to accurately measuring butter without a scale, it can be a bit tricky. But fear not! I’ve got you covered. Let me walk you through the process of converting butter measurements like a pro.

Can I Substitute Oil for Butter in a Recipe?

Substituting butter with oil in a recipe can have pros and cons. Oil can add moisture and make baked goods lighter, but it may also affect the taste and texture. The best oil substitutes for baking are vegetable oil, coconut oil, and olive oil.

How Much Butter Should I Use if the Recipe Calls for a Certain Number of Sticks?

When converting butter measurements, accurately measuring the amount of butter needed is crucial. If a recipe calls for a certain number of sticks, I can help you determine how much butter to use.

Advertisement

Can I Use Unsalted Butter Instead of Salted Butter in Baking Recipes?

Using unsalted butter for baking has its pros and cons. Pros include having more control over the saltiness of the recipe, while cons include potentially missing out on the flavor that salted butter provides.

Conclusion

In conclusion, understanding butter measurements is essential for successful baking. While a standard stick of butter is equivalent to 1/2 cup or 8 tablespoons, it’s important to note that this can vary depending on the brand or region.

To convert sticks to cups, simply divide the number of sticks by 2. Additionally, knowing that 1 cup of butter is equivalent to 2 sticks can help when following recipes.

By following a butter conversion chart and being mindful of common measurement mistakes, bakers can ensure accurate and delicious results.

Advertisement

Continue Reading

Trending