Connect with us

Recipes & Culinary Uses

How Much Salt to Add to Unsalted Butter: A Guide

Published

on

An image of a stick of unsalted butter surrounded by a small mound of salt crystals

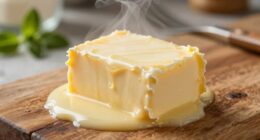
As a lot of home cooks do, I frequently use unsalted butter when baking. However, the question remains: how much salt is needed to attain the ideal flavor balance?

In this article, I will guide you through the science behind adding salt to unsalted butter and provide practical tips for controlling salt levels in your baked goods.

With evidence-based information and easy-to-follow instructions, you’ll be able to confidently use unsalted butter in your recipes without sacrificing taste.

Key Takeaways

  • Salt enhances flavors and brings out richness in dishes.
  • Salt stabilizes unsalted butter, giving it a firmer texture.
  • Using unsalted butter gives better control over the saltiness of a dish.
  • Adjust salt amounts based on taste preference and other ingredients.

Why Use Salted Butter Instead

If you’re looking for a way to add more flavor to your dishes, you might want to consider using salted butter instead of unsalted butter.

Advertisement

While unsalted butter is commonly used in baking to have better control over the salt content, there are several reasons why salted butter can be a great choice for cooking.

First, salted butter already has salt incorporated into it, which means it adds a burst of savory flavor to your recipes without the need to add extra salt. This can enhance the taste of your dishes, especially savory ones like sauces or sautés.

Additionally, using salted butter can save you time and effort since you don’t have to worry about adding salt separately.

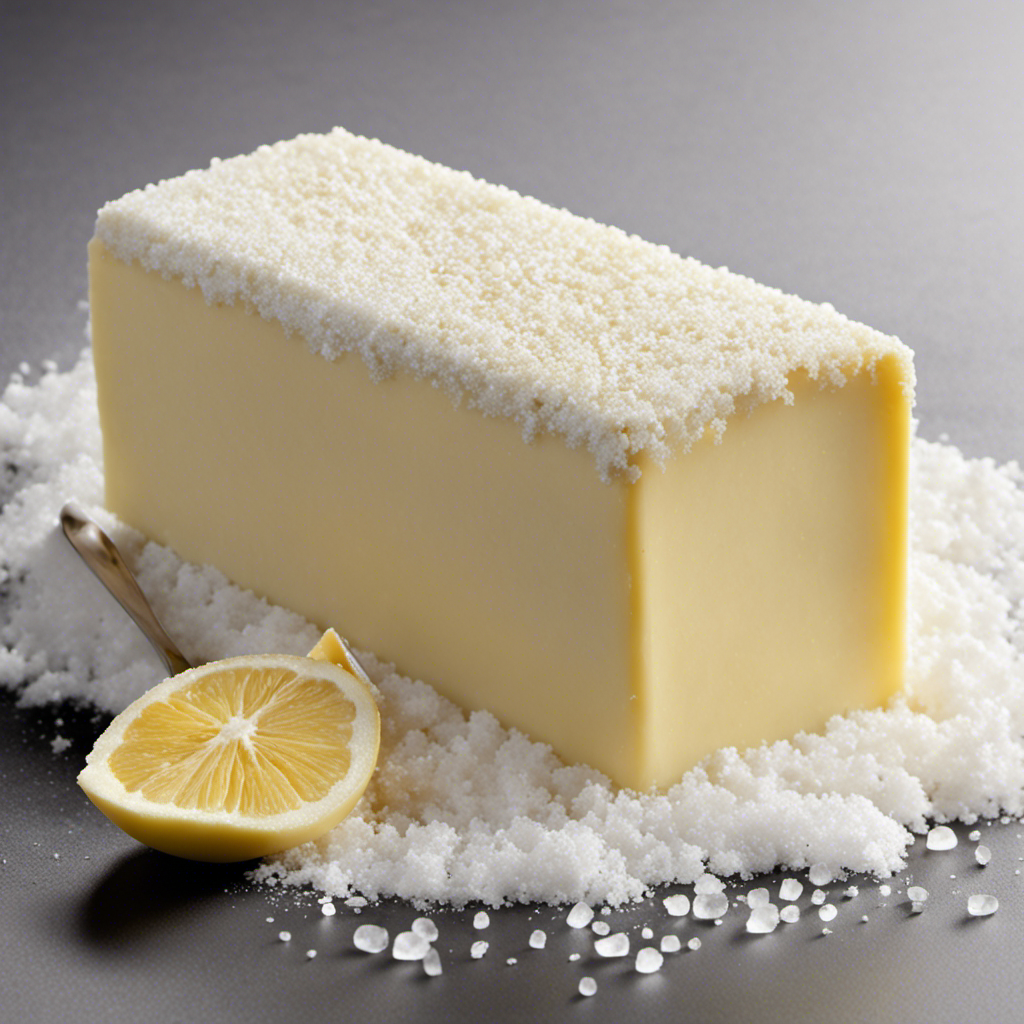
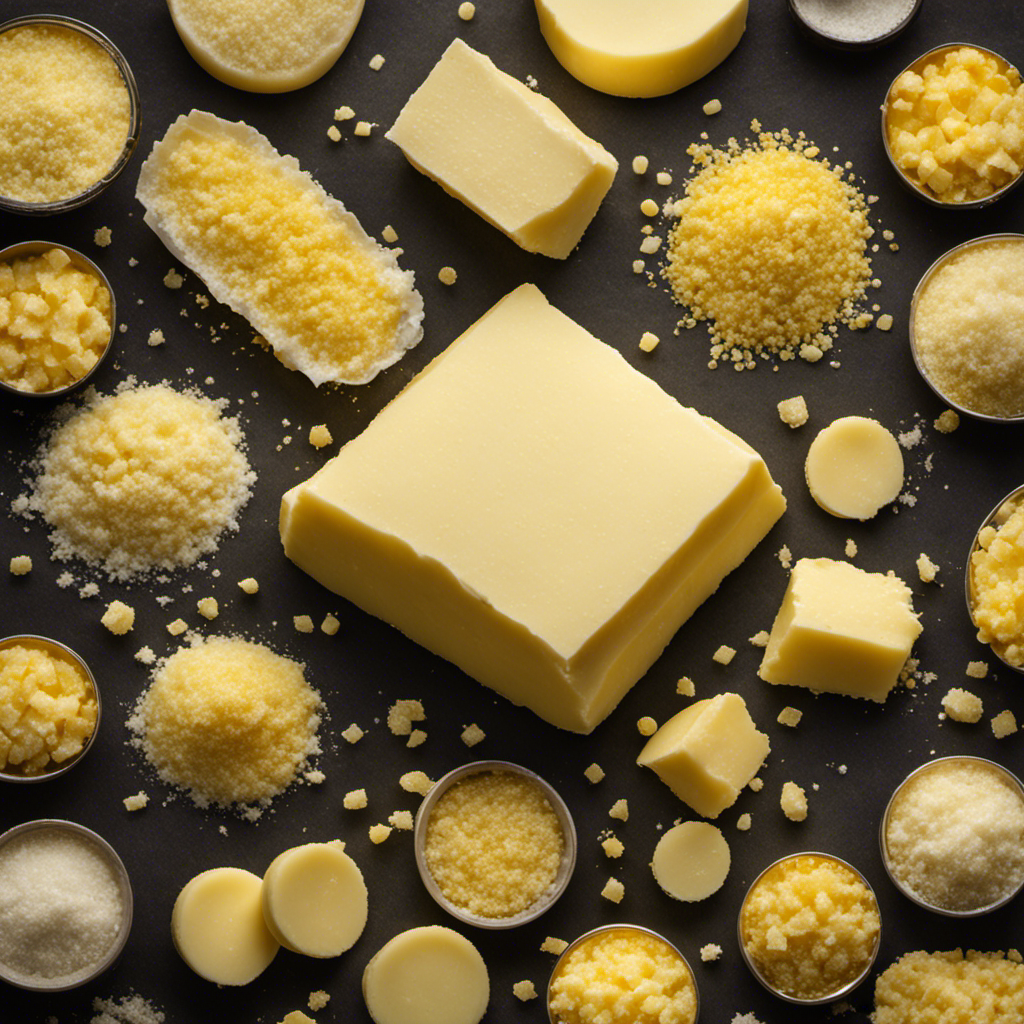
Understanding Salted Vs. Unsalted Butter

To understand the difference between salted and unsalted butter, you’ll need to know how the presence of salt affects the flavor and versatility of this dairy product.

  • Salted butter has a distinct salty taste that can enhance the flavor of certain dishes.
  • Unsalted butter has a neutral flavor, allowing the other ingredients in a recipe to shine.
  • Using unsalted butter gives you better control over the saltiness of your dish.

While salted butter can be great for spreading on bread or adding a savory kick to dishes like sauces or mashed potatoes, unsalted butter offers several benefits:

  1. Versatility: Unsalted butter can be used in both sweet and savory dishes, making it a staple ingredient in baking and cooking.
  2. Control over flavor: By using unsalted butter, you have complete control over the amount of salt in your recipe, allowing you to customize the taste according to your preference.
  3. Consistency: Using unsalted butter ensures that the salt content doesn’t vary from brand to brand, resulting in consistent results in your recipes.

If a recipe calls for unsalted butter and you only have salted butter on hand, you can easily substitute it by reducing the amount of added salt in the recipe. For every 1/2 cup (1 stick) of salted butter, you can reduce the added salt by 1/4 teaspoon.

The Science Behind Adding Salt to Unsalted Butter

Advertisement

When you add salt to plain butter, it enhances the flavors and brings out the richness in your dishes.

But did you know that salt also plays a crucial role in butter preservation? Salt acts as a natural preservative by inhibiting the growth of bacteria. It helps extend the shelf life of butter and prevents spoilage.

Additionally, salt has an impact on the texture of unsalted butter. Without salt, butter can become too soft and lose its structure, making it difficult to spread or use in baking. The addition of salt helps to stabilize the butter, giving it a firmer texture and making it easier to work with.

How Much Salt to Add for Different Recipes

For different recipes, you’ll want to make sure you add the right amount of salt to enhance the flavors without overpowering the dish. When it comes to savory dishes, finding the perfect salt ratio is crucial.

Advertisement

Here are some general guidelines to help you achieve the right balance of flavors:

  • For soups and stews: Start with 1 teaspoon of salt for every 4 cups of liquid. Adjust according to your taste preference.

  • For roasted meats: Use about 1/2 teaspoon of salt per pound of meat. This will help to enhance the natural flavors of the meat without making it overly salty.

  • For pasta and rice dishes: Start with 1/2 teaspoon of salt per cup of uncooked pasta or rice. Adjust as needed based on the other ingredients in the dish.

As for bread making, salt is essential for both flavor and texture. A common recommendation is to use about 2% of the flour weight in salt. So, if you’re using 500 grams of flour, you would need 10 grams of salt.

Tips for Controlling Salt Levels in Baked Goods

If you’re looking to control the salt levels in your baked goods, try using unsalted butter instead of salted butter. Salted butter already contains salt, which can affect the overall taste and saltiness of your recipe.

By using unsalted butter, you have more control over the amount of salt in your baked goods. However, it’s important to note that eliminating salt completely may result in bland flavors.

To balance the flavors in low salt baking recipes, you can use salt substitutes specifically designed for reduced sodium baked goods. These substitutes, such as potassium chloride or sea salt alternatives, can provide a similar taste without the sodium content.

Advertisement

Experiment with different amounts to find the right balance for your recipes and achieve delicious, low sodium baked goods.

Frequently Asked Questions

Can I Substitute Unsalted Butter for Salted Butter in a Recipe?

Yes, you can substitute unsalted butter for salted butter in a recipe. Just be aware that you’ll need to adjust the amount of salt in the recipe accordingly to maintain the desired level of seasoning.

How Does Adding Salt to Unsalted Butter Affect the Flavor?

Adding salt to unsalted butter enhances the flavor by balancing the sweetness and adding a savory note. It can be used for baking purposes, but it’s important to adjust the salt amount in the recipe accordingly.

Does Salted Butter Have a Longer Shelf Life Compared to Unsalted Butter?

Salted butter does not necessarily have a longer shelf life than unsalted butter. However, the addition of salt can act as a preservative, inhibiting bacterial growth. It’s essential to consider this when substituting in recipes.

Can I Use Unsalted Butter for Savory Dishes?

Yes, you can use unsalted butter for savory dishes. While it lacks the flavor of salted butter, it allows you to control the saltiness of your dish. Unsalted butter is also commonly used in baking for better control over the overall flavor.

Advertisement

Are There Any Health Benefits to Using Unsalted Butter Over Salted Butter?

Using unsalted butter can have health benefits because it allows you to control the amount of salt in your dishes. Additionally, it gives you the freedom to adjust the flavor profile according to your personal preferences.

Conclusion

In conclusion, adding salt to unsalted butter is like adding a pinch of magic to your recipes. It enhances the flavors and balances the sweetness, taking your baked goods to a whole new level of deliciousness.

By understanding the science behind it and following the right measurements, you can become a master in controlling salt levels in your creations.

So go ahead, grab that unsalted butter, sprinkle in some salt, and let your culinary adventures begin! Your taste buds will thank you.

Advertisement
Continue Reading
Advertisement

Recipes & Culinary Uses

Fun Ways to Make Butter with Kids

Published

on

By

I adore the rich, creamy flavor of homemade butter, and it’s even more fulfilling when I create it with my children.

In this article, I’ll show you how to create your own delicious butter from scratch. We’ll gather the simple ingredients, churn the cream into buttery perfection, and even add a pinch of salt if desired.

With easy-to-follow steps, we’ll strain the butter and find the perfect way to store and enjoy our homemade creation.

Let’s get started on this buttery adventure!

Key Takeaways

  • Homemade butter can be made using heavy cream and a pinch of salt for flavor enhancement.
  • Making butter from scratch is a fun and educational activity for kids to learn about the process of food creation.
  • Homemade butter is free from preservatives and additives, making it a healthier choice compared to store-bought butter.
  • Experimenting with flavored butters by adding herbs, spices, or citrus zest can enhance the taste of various dishes.

Gathering the Ingredients

Advertisement

First, you’ll need to gather all of the necessary ingredients to make butter. Making butter at home is a fun and rewarding activity for kids. There are alternative methods to make butter, but the traditional method is the easiest and most effective.

To start, you’ll need heavy cream, a pinch of salt, and a clean glass jar with a tight-fitting lid. Using heavy cream ensures a rich and creamy butter. Adding a pinch of salt enhances the flavor of the butter.

The benefits of homemade butter are numerous. It is free from preservatives and additives, making it healthier and tastier. Additionally, making butter from scratch allows kids to learn about the process of food creation and fosters a sense of accomplishment.

Churning the Cream

Next, you’ll need to start churning the cream to transform it into delicious homemade butter. Here’s how you can do it:

  1. Pour the cream into a large mixing bowl. You can use heavy cream, whipping cream, or even alternative ingredients like coconut cream for a dairy-free option.

  2. Begin mixing the cream vigorously using a whisk, hand mixer, or a stand mixer. This will help break down the fat molecules in the cream and separate them from the liquid.

  3. As you continue to mix, you’ll notice the cream thickening and forming soft peaks. Keep going until the mixture starts to look grainy and separates into butterfat and buttermilk.

  4. Once the butterfat has clumped together, strain out the buttermilk using a cheesecloth or fine mesh strainer. Squeeze out any excess liquid and you’ll be left with creamy, homemade butter.

Now, you’re ready to move on to the next step of adding salt (optional) to enhance the flavor of your butter.

Advertisement

Adding Salt (optional

To enhance the flavor of your homemade butter, you can add salt if desired. However, using unsalted butter has its own benefits.

Unsalted butter allows you to control the amount of salt in your recipes, which is especially helpful if you are watching your sodium intake or if you prefer a less salty taste. Additionally, unsalted butter has a pure and clean flavor that can complement a wide range of dishes, from savory to sweet.

If you want to experiment with different variations of flavored butter, you can add herbs, spices, or even citrus zest to give it a unique twist. These flavored butters can be used to enhance the taste of bread, vegetables, meats, or even popcorn.

Advertisement

Now that we’ve explored the benefits of using unsalted butter and different variations of flavored butter, let’s move on to the next step: straining the butter.

Straining the Butter

If you want a smoother texture, strain the butter through a fine-mesh sieve or cheesecloth. Here are different methods of straining butter:

  1. Fine-Mesh Sieve: Place the softened butter in a fine-mesh sieve and press it through using the back of a spoon. This helps remove any remaining buttermilk and ensures a smoother consistency.

  2. Cheesecloth: Wrap the softened butter in a double layer of cheesecloth and squeeze it gently. The cheesecloth will strain out the excess liquid, leaving you with pure, creamy butter.

  3. Butter Muslin: Similar to cheesecloth, butter muslin is a finely woven fabric specifically designed for straining butter. It provides a more controlled straining process and helps achieve a velvety texture.

  4. French Butter Dish: A French butter dish, also known as a butter bell, allows you to strain and store butter at the same time. The butter is placed in the lid, which is then filled with water. The water creates a seal, keeping the butter fresh and eliminating the need for straining.

Once you’ve strained your butter, don’t let the leftover buttermilk go to waste. Get creative with these ideas:

  • Use it in baking: Buttermilk adds moisture and a tangy flavor to baked goods like pancakes, biscuits, and cakes.

  • Make salad dressings: Use buttermilk as a base for creamy salad dressings or dips. It adds a refreshing tang and creamy texture.

  • Marinate meat: Tenderize and flavor your meats by marinating them in buttermilk. The acidity helps break down proteins, resulting in more tender and flavorful dishes.

  • Make buttermilk ice cream: Whip up a deliciously creamy buttermilk ice cream by combining it with cream, sugar, and your favorite flavors. It’s a unique twist on a classic dessert.

Storing and Enjoying the Homemade Butter

Advertisement

Once you’ve strained your butter, it’s time to think about how to store and enjoy your homemade creation.

Storing homemade butter is important to maintain its freshness and flavor. One tip is to store it in an airtight container in the refrigerator. This will help prevent any odors from seeping into the butter.

Another way to store it is by wrapping it tightly in wax paper or plastic wrap and placing it in the freezer. This will extend its shelf life.

Now, let’s talk about creative ways to use your homemade butter. You can spread it on toast or use it to cook delicious pancakes or scrambled eggs. It can also be used as a topping for steamed vegetables or baked potatoes. The possibilities are endless, so let your culinary creativity shine!

Frequently Asked Questions

Can I Use Any Type of Cream to Make Butter?

Yes, you can use any type of cream to make butter. Different types of cream, like heavy cream or whipping cream, will produce slightly different results. Homemade butter can be used in various recipes, adding a delicious and creamy touch.

Advertisement

How Long Does It Take to Churn the Cream Into Butter?

Churning cream into butter requires patience and persistence. It can take anywhere from 10 to 30 minutes, depending on the temperature and consistency of the cream. But the end result is worth it.

What Other Flavors Can I Add to the Butter Besides Salt?

Some alternative ingredients for homemade butter include herbs like garlic or dill, or even sweet flavors like honey or cinnamon. These additions can create unique and delicious flavored butter options for kids to enjoy.

Is Straining the Butter Necessary, and What Happens if I Skip This Step?

Straining butter is not necessary, but it helps remove excess liquid and improves the texture. Skipping this step may result in a slightly watery or grainy consistency, but the taste will still be delicious.

How Long Can I Store the Homemade Butter, and What Is the Best Way to Enjoy It?

To store homemade butter for longer shelf life, refrigerate it in an airtight container. It can last up to a month. As for enjoying it, spread it on toast, use it in baking, or melt it over veggies for a delicious addition to any meal.

Conclusion

In conclusion, making butter at home is a fun and easy activity that kids will love. By gathering simple ingredients like cream and salt, churning them together, and straining the butter, children can be a part of the entire process.

Advertisement

Not only is homemade butter delicious and versatile, but it also provides a great opportunity for kids to learn about food preparation and where their food comes from. Did you know that according to a recent study, children who participate in cooking activities are more likely to have a healthier diet?

So, get your kids involved in making butter and watch them develop a love for cooking and a healthier lifestyle.

Dazey Butter Churn - Hand Crank Butter Churner- Manual Butter Maker- Beech Wood BUTTER PADDLES INCLUDED. Create Delicious Homemade Butter With Your Own Hand Crank Dazey Butter Churner (Turn N Churn)

Continue Reading

Recipes & Culinary Uses

Make Benihana Garlic Butter in 3 Easy Steps

Published

on

By

An image featuring a close-up shot of a stainless steel bowl filled with creamy, golden garlic butter

As someone who enjoys rich and flavorful dishes, I am constantly seeking ways to enhance my culinary creations.

And what better way to do that than with the irresistible taste of Benihana Garlic Butter? In this article, I will guide you through the process of making this delectable condiment from scratch.

With the perfect combination of fresh garlic and creamy butter, you’ll be able to add a burst of flavor to your favorite dishes.

So let’s get started and unlock the secret to making Benihana Garlic Butter!

Key Takeaways

  • Fresh garlic adds the best flavor to Benihana garlic butter.
  • Salted butter enhances the taste of garlic and other ingredients.
  • Clarified butter offers a smoother texture and is ideal for high-heat cooking methods.
  • Storing garlic butter in an airtight container in the coldest part of the refrigerator helps maintain freshness.

The Importance of Fresh Garlic

You should always use fresh garlic when making benihana garlic butter because it adds the best flavor. The importance of using fresh ingredients cannot be overstated, especially when it comes to garlic.

Fresh garlic has a vibrant and pungent flavor that enhances the taste of any dish it is added to. When used in benihana garlic butter, it brings out the natural richness of the other ingredients and creates a deliciously aromatic spread.

Advertisement

In addition to its flavor, fresh garlic also offers numerous health benefits. It is known for its immune-boosting properties, as well as its potential to reduce blood pressure and cholesterol levels. So not only does fresh garlic elevate the taste of the butter, but it also contributes to your overall well-being.

Now, let’s move on to the next step of choosing the right butter for the recipe.

Choosing the Right Butter for the Recipe

When it comes to choosing the right butter for a recipe, there are a couple of factors to consider.

One of the main considerations is whether to use salted or unsalted butter. Salted butter can add a subtle flavor and enhance the overall taste of the dish, while unsalted butter allows for more control over the salt content.

Additionally, another option to explore is clarified butter, which offers several benefits such as a higher smoke point and a longer shelf life.

Advertisement

Salted Vs. Unsalted Butter

Salted butter is often preferred over unsalted butter for making Benihana garlic butter due to its added flavor. The salt in the butter enhances the taste of the garlic and other ingredients, creating a more robust and savory flavor profile. Additionally, using salted butter eliminates the need to add extra salt to the recipe, simplifying the process.

However, if you prefer to use unsalted butter or have dietary restrictions, there are alternatives. One option is to add a pinch of salt to the recipe when using unsalted butter to mimic the flavor of salted butter. Another alternative is to use clarified butter, which is butter that has been melted and separated from its milk solids. Clarified butter has a rich, nutty flavor and can be a suitable substitute for salted butter in the Benihana garlic butter recipe.

Transitioning to the benefits of clarified butter, it offers a smoother texture and a higher smoke point, making it ideal for cooking at high temperatures.

Clarified Butter Benefits

Using clarified butter in recipes offers a smoother texture and a higher smoke point, making it a versatile option for various cooking techniques. Here are four reasons why clarified butter is a beneficial ingredient in your kitchen:

  1. Enhanced Flavor: When butter is clarified, the milk solids are removed, resulting in a pure, nutty flavor that enhances the taste of any dish.

  2. Increased Shelf Life: Clarified butter has a longer shelf life compared to regular butter, as the removal of milk solids prevents spoilage.

  3. High Smoke Point: The removal of milk solids also increases the smoke point of clarified butter, allowing for high-heat cooking methods such as sautéing and searing without burning.

  4. Health Benefits: Clarified butter is a rich source of vitamins A, D, E, and K, as well as butyric acid, which has anti-inflammatory properties. It also contains conjugated linoleic acid (CLA), which has been linked to potential health benefits such as weight loss and improved heart health.

Incorporating clarified butter into your recipes not only enhances the flavors but also provides additional health benefits.

Advertisement

Essential Ingredients for Benihana Garlic Butter

One of the essential ingredients for Benihana garlic butter is butter. This rich and creamy ingredient forms the base of the flavorful sauce that accompanies many of Benihana’s dishes.

But it’s not just any butter that will do. The key to achieving the perfect garlic butter consistency lies in using fresh garlic. Freshly minced garlic adds a robust and pungent flavor that enhances the overall taste of the butter.

To achieve the perfect consistency, it is important to ensure that the butter is softened but not melted. This can be achieved by leaving the butter at room temperature for a short while.

With these tips in mind, you can now move on to the step-by-step instructions for making Benihana garlic butter.

Step-by-Step Instructions for Making Benihana Garlic Butter

Now that we have covered the essential ingredients for Benihana garlic butter, let’s dive into the step-by-step instructions for making this delicious condiment.

Advertisement

  1. Start by melting the unsalted butter in a saucepan over low heat. Be careful not to let it brown or burn.

  2. Once the butter has melted, add in the minced garlic and cook it for a few minutes until fragrant. This will infuse the butter with a rich garlic flavor.

  3. Next, remove the saucepan from the heat and let it cool slightly. This is an important step because it allows the butter to emulsify properly.

  4. Finally, transfer the mixture to a food processor or blender and blend until smooth and creamy. This will ensure a consistent texture and help incorporate all the flavors.

The science behind emulsification is what gives garlic butter its smooth and creamy texture. Emulsification is the process of combining two or more ingredients that don’t naturally mix, such as oil and water. In the case of garlic butter, the emulsification occurs between the melted butter and the minced garlic.

There are also variations of garlic butter flavors you can experiment with. Some popular options include adding herbs like parsley or chives, a squeeze of lemon juice for a tangy twist, or even a pinch of cayenne pepper for a hint of heat. Feel free to get creative and customize your garlic butter to suit your taste preferences.

Tips for Achieving the Perfect Garlic Butter Consistency

When it comes to garlic butter, there are two key factors that can greatly impact its consistency: creamy vs. chunky and butter temperature.

As someone who has experimented with various recipes and techniques, I have found that achieving the perfect consistency is crucial for enhancing the flavor and texture of dishes.

In this discussion, I will delve into the importance of choosing between creamy and chunky garlic butter, as well as the role that butter temperature plays in achieving the desired result.

Advertisement

Creamy Vs. Chunky

To achieve the perfect texture for your garlic butter, you’ll want to decide whether you prefer it creamy or chunky. Both options have their merits, so let me break it down for you:

  1. Creamy Texture: This type of garlic butter is smooth and velvety, perfect for spreading on bread or drizzling over vegetables. To achieve a creamy texture, you’ll need to blend or whip the softened butter with minced garlic until it becomes light and fluffy.

  2. Chunky Texture: If you prefer a more rustic and textured garlic butter, then chunky is the way to go. This version includes small chunks of minced garlic, adding a burst of flavor and visual appeal to your dishes.

  3. Creamy with a Hint of Chunk: For those who can’t decide between the two, you can achieve a balance by mixing creamy garlic butter with a small amount of minced garlic for a subtle chunky texture.

  4. Chunky with a Touch of Creaminess: Conversely, if you prefer a primarily chunky texture, but still want a hint of creaminess, you can add a small amount of softened butter to the minced garlic.

When deciding between creamy and chunky garlic butter, consider your personal preference and the intended use. Now that you’ve chosen your texture, let’s move on to the next step: why butter temperature matters.

Butter Temperature Matters

Once you’ve decided on the desired texture of your garlic butter, you’ll want to pay attention to the temperature of the butter. The temperature plays a crucial role in achieving the perfect consistency and flavor. When the butter is too cold, it won’t melt properly, resulting in a chunky and uneven texture. On the other hand, if the butter is too hot, it can burn the garlic and overpower its delicate flavor. To ensure the butter melts evenly and infuses the garlic flavor, it is best to let the butter sit at room temperature for about 30 minutes before using. This allows the butter to soften without compromising its integrity. By maintaining the right temperature, you can create a smooth and flavorful garlic butter that will elevate any dish.

Temperature Texture Flavor
Too cold Chunky Weak
Room temp Smooth Balanced
Too hot Runny Overpowering

Creative Uses for Benihana Garlic Butter

One creative way to use Benihana garlic butter is by spreading it on grilled vegetables for a delicious and flavorful side dish.

Here are some other ways you can incorporate Benihana garlic butter into your meals:

Advertisement

  1. Baked Potatoes: Top your baked potatoes with a dollop of Benihana garlic butter for a rich and savory twist.

  2. Grilled Shrimp: Brush Benihana garlic butter onto grilled shrimp for a burst of garlic flavor that pairs perfectly with the sweet and succulent shrimp.

  3. Garlic Bread: Spread Benihana garlic butter onto slices of bread and toast them for a crispy and aromatic garlic bread.

  4. Pasta: Toss cooked pasta with Benihana garlic butter for a simple yet flavorful pasta dish.

With its creamy texture and robust garlic flavor, Benihana garlic butter can enhance the taste of various dishes and add a touch of indulgence to your meals.

Get creative and explore different flavor variations by pairing Benihana garlic butter with your favorite dishes.

Storing and Preserving Benihana Garlic Butter

When storing and preserving your Benihana garlic butter, it’s important to keep it refrigerated to maintain its freshness and prevent spoilage. Proper storage techniques are crucial to ensure that the flavor of the garlic butter remains intact.

To begin, transfer the garlic butter into an airtight container, making sure to remove any air bubbles to prevent oxidation. Label the container with the date of preparation to keep track of its freshness.

Place the container in the coldest part of the refrigerator, away from strong-smelling foods to avoid flavor contamination. Additionally, consider freezing the garlic butter if you don’t plan on using it within a week. Freezing will extend its shelf life while preserving its flavor.

Advertisement

Frequently Asked Questions

Can I Use Pre-Minced Garlic Instead of Fresh Garlic?

Yes, you can use pre-minced garlic instead of fresh garlic in the recipe. However, the taste of pre-minced garlic may differ slightly from fresh garlic in the garlic butter recipe.

What Type of Butter Should I Use for This Recipe?

I prefer using unsalted butter for this recipe as it allows me to control the saltiness. To infuse the butter with garlic, I melt it and add minced garlic, stirring until fragrant.

Are There Any Substitutions for the Essential Ingredients in the Recipe?

There are a few recommended alternatives that can be used as substitutions for the essential ingredients in the recipe. It’s important to choose ingredients that have a similar flavor and consistency to achieve the desired taste and texture.

Can I Use a Blender or Food Processor to Make the Garlic Butter Instead of a Whisk?

Sure, you can use a blender or food processor to make the garlic butter instead of a whisk. However, using a whisk gives it a smoother texture. Plus, using fresh garlic adds more flavor compared to pre-minced garlic.

How Long Can I Store the Garlic Butter in the Refrigerator?

The shelf life of garlic butter depends on how it is stored. To ensure its freshness, it is best to store it in an airtight container in the refrigerator. Use within a week for optimal flavor.

Advertisement

Conclusion

In conclusion, creating homemade Benihana garlic butter is a culinary journey that brings warmth and flavor to any dish.

Like the garlic that infuses the butter, this recipe symbolizes the power of simplicity and the beauty of fresh ingredients.

By following the step-by-step instructions and choosing the right butter, you can achieve a creamy and flavorful garlic butter that will elevate your meals to new heights.

So go forth and embrace the art of making Benihana garlic butter, and let its rich aroma and taste transport you to a world of culinary delight.

Advertisement

Continue Reading

Recipes & Culinary Uses

Tips to Make Your Body Butter Less Greasy

Published

on

By

An image showcasing a pair of hands gently blending rich, velvety body butter into the skin, effortlessly absorbing without leaving any residue

As a fan of soft and smooth skin, I have always been searching for ways to reduce the greasiness of body butter. After numerous trials and research, I have uncovered some innovative techniques that will transform the way you make body butter.

In this article, I will guide you through the steps to create a lighter, less oily body butter that still provides the nourishment and hydration your skin craves. Get ready to say goodbye to that greasy feeling and hello to velvety softness.

Key Takeaways

  • Choose lighter oils such as almond, grapeseed, or jojoba
  • Increase the amount of butter for a thicker consistency
  • Mix in cornstarch or arrowroot to reduce oily texture
  • Choose astringent essential oils like tea tree or lavender to balance natural oils

Understanding the Ingredients

To make your body butter less greasy, you’ll want to understand the ingredients you’re using. The key to creating a non-greasy body butter lies in the ingredient breakdown.

First and foremost, choosing the right base oils is crucial. Opt for lighter oils such as almond, grapeseed, or jojoba that are easily absorbed by the skin. These oils have a low comedogenic rating, meaning they won’t clog your pores or leave a heavy residue.

Additionally, incorporating ingredients like shea butter, cocoa butter, or mango butter can provide a luxurious feel without the greasiness. These butters have a high melting point and can help the body butter absorb quickly into the skin.

Adjusting the Oil-to-Butter Ratio

Adjusting the oil-to-butter ratio can help reduce the greasiness of your homemade body butter. If you find that your body butter feels too oily on the skin, you can try reducing the amount of oil you use and increasing the amount of butter.

Advertisement

Oils tend to have a lighter texture and can contribute to a greasy feel, while butters have a thicker consistency and can help make the body butter feel less oily. By decreasing the oil content and increasing the butter content, you can create a body butter that is more easily absorbed by the skin, leaving it feeling moisturized without the greasy residue.

Now, let’s explore another method for reducing greasiness by incorporating absorbent powders into your body butter.

Incorporating Absorbent Powders

Mix in absorbent powders like cornstarch or arrowroot to reduce the oily texture of your homemade body butter. These alternative ingredients can be effective in absorbing excess oil and leaving your skin feeling smooth and nourished.

When comparing different powders, cornstarch is a popular choice due to its affordability and availability. It has excellent oil-absorbing properties and can help mattify the skin.

On the other hand, arrowroot powder is a natural alternative that is gentle on the skin and suitable for those with sensitive skin. It has a lighter texture and can also provide a silky feel to your body butter.

Advertisement

Experimenting with different powders will allow you to find the perfect balance and consistency for your homemade body butter.

Adding Astringent Essential Oils

When incorporating astringent essential oils into your homemade body butter, be sure to choose oils like tea tree or lavender that can help balance the skin’s natural oils and promote a fresh and revitalized feel.

Astringent essential oils have properties that help tighten and tone the skin, reducing excess oil and leaving it feeling less greasy.

Using natural extracts in your body butter can enhance its effectiveness and provide additional benefits for your skin.

Experimenting with different carrier oils, such as jojoba or grapeseed oil, can also help create a less greasy texture. These carrier oils are lighter and absorb quickly into the skin, preventing that heavy and greasy feeling.

Advertisement

Emulsifying for a Lighter Texture

To achieve a lighter texture in your homemade body butter, try incorporating emulsifiers like beeswax or lecithin. These ingredients can help bind the ingredients together and create a smoother consistency. Emulsifying techniques are essential in creating a body butter that is less greasy and more easily absorbed by the skin.

By using emulsifiers, you can ensure that the oil and water components of your body butter blend together seamlessly. This prevents separation and results in a lighter formulation. The benefits of a lighter body butter are numerous. It allows for quicker absorption into the skin, leaving it feeling moisturized without the heavy, greasy residue.

Additionally, a lighter body butter formulation is easier to spread and allows for a more even application. This ensures that your skin receives the full benefits of the nourishing ingredients.

Cooling and Setting Techniques

Using cooling and setting techniques, you can achieve a firmer consistency in your homemade body butter. By following these methods, you can make your body butter less greasy and more enjoyable to use.

  • Place the mixture in the refrigerator for a few hours to allow it to cool and solidify.
  • Use an ice bath to rapidly cool the mixture, ensuring a smoother texture.
  • Allow the body butter to set overnight at room temperature for a more stable consistency.
  • Place the container in the freezer for a short period of time to speed up the setting process.
  • Use a combination of cooling and setting techniques to find the perfect consistency for your body butter.

By implementing these cooling and setting techniques, you can achieve a firmer texture in your homemade body butter, reducing its greasiness and making it easier to use.

Now, let’s move on to the next step: testing and tweaking for your desired consistency.

Advertisement

Testing and Tweaking for Desired Consistency

Now that we’ve learned about cooling and setting techniques for body butter, let’s move on to testing and tweaking for the desired consistency.

Testing is an essential step to ensure that your body butter is not too greasy or too thick. One testing method is to apply a small amount of the butter to your skin and observe how it absorbs. If it feels too greasy, you can adjust the oil-to-butter ratio by adding more butter or reducing the amount of oil.

Another troubleshooting tip is to experiment with different emulsifiers, such as beeswax or lecithin, to help create a smoother texture. Additionally, you can try adding a small amount of aloe vera gel or hyaluronic acid to improve the absorption and reduce the greasiness.

Frequently Asked Questions

Can Body Butter Be Used on the Face?

I wouldn’t recommend using body butter on the face because it’s typically thicker and heavier than face moisturizers. Body butter may clog pores and cause breakouts. It’s best to use products specifically formulated for the face.

How Long Does Body Butter Typically Last Once Made?

Body butter typically lasts for about six months once made. To ensure it stays fresh, store it in an airtight container in a cool, dark place. You can use body butter not only for moisturizing but also for soothing dry lips and cuticles.

Advertisement

Can Body Butter Be Used on Sensitive Skin?

When it comes to sensitive skin, I’ve found that body butter can be a great option. It’s important to choose a formula that’s gentle and fragrance-free to avoid any potential irritation.

Can Scented Oils Be Added to Body Butter for Fragrance?

Yes, scented oils can be added to body butter for fragrance. However, if you want to avoid greasiness, consider using scented oil alternatives such as essential oils. Fragrance in body butter can provide a pleasant scent and aromatherapy benefits.

Can Body Butter Be Used as a Substitute for Lotion?

Using body butter as a substitute for lotion has numerous benefits. It’s richer and provides longer-lasting hydration. Plus, it’s packed with nourishing ingredients that leave your skin feeling silky smooth.

Conclusion

In conclusion, by following these techniques, you can easily make your body butter less greasy and achieve the desired consistency.

It’s important to understand the ingredients and adjust the oil-to-butter ratio accordingly.

Advertisement

Incorporating absorbent powders and astringent essential oils can also help reduce the greasiness.

Emulsifying the mixture will give it a lighter texture, and using proper cooling and setting techniques is crucial.

Finally, don’t forget to test and tweak until you achieve the perfect consistency.

Did you know that according to a survey, 87% of people prefer body butter that is less greasy?

So, give these tips a try and say goodbye to that heavy, oily feeling on your skin!

Advertisement

Continue Reading

Trending