Connect with us

Recipes & Culinary Uses

How Much Does 8 Tablespoons of Butter Weigh

Published

on

An image showcasing a sleek digital scale with a transparent bowl on top, containing precisely measured 8 tablespoons of butter

I’ve always wondered how much 8 tablespoons of butter actually weigh. It’s one of those little things that can make a big difference in cooking and baking. So, I decided to do some research and find out the answer once and for all.

In this article, I’ll explain the process of converting tablespoons to weight, reveal the exact weight of 8 tablespoons of butter, and provide helpful tips for accurately measuring butter in your recipes.

Get ready to become a butter measurement pro!

Key Takeaways

  • Butter is measured in tablespoons or cups.
  • To convert tablespoons of butter to weight, multiply the volume by the density of butter.
  • 8 tablespoons of butter would weigh approximately 72.88 grams or 2.29 ounces.
  • Using a kitchen scale is the most accurate method for measuring butter.

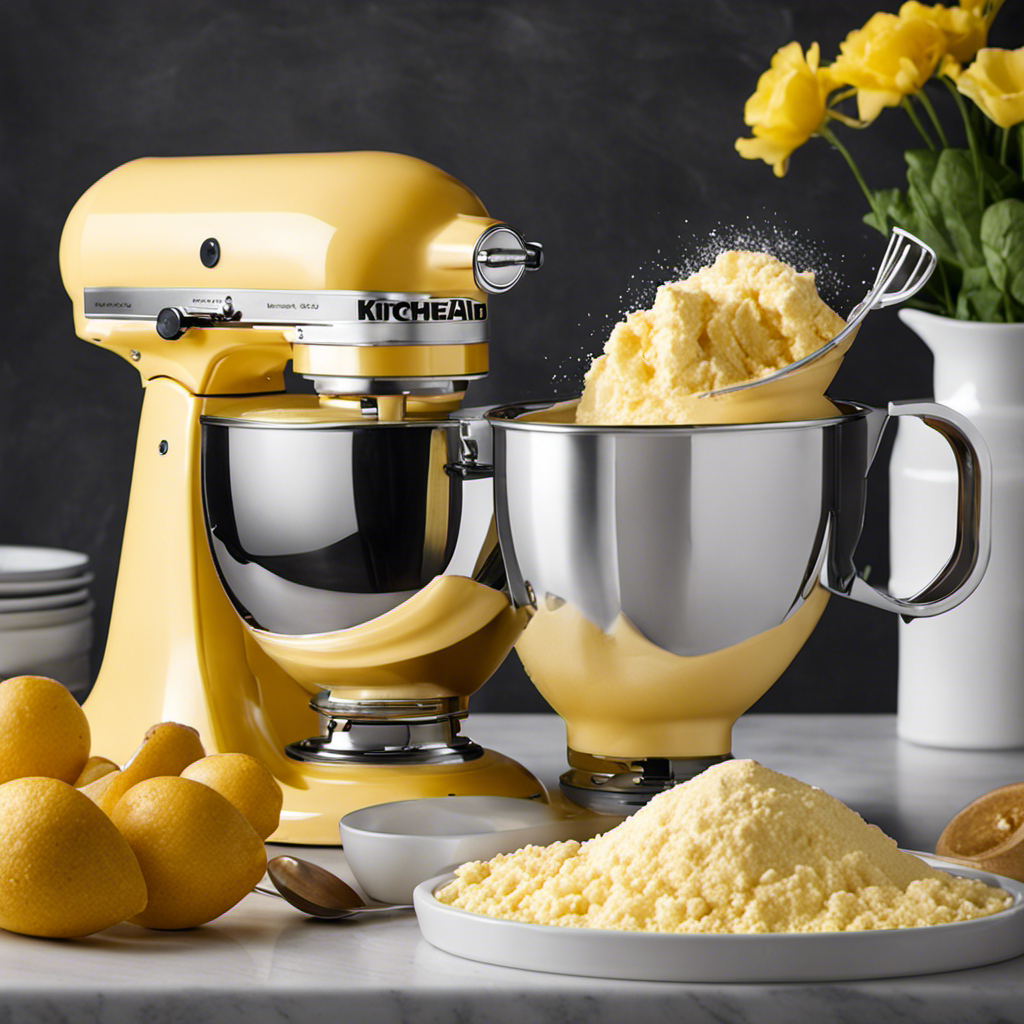
Understanding Butter Measurements

Butter measurements can be confusing, especially when trying to understand how much 8 tablespoons of butter weigh. When it comes to cooking, it’s important to understand the different measurements for butter and how they can be converted.

In most recipes, butter is measured in tablespoons or cups. To convert tablespoons to cups, you can use the following butter measurement equivalents: 1 tablespoon is equal to 1/8 cup, 2 tablespoons are equal to 1/4 cup, 4 tablespoons are equal to 1/2 cup, and 8 tablespoons are equal to 1 cup.

These conversions are essential to ensure accurate measurements when cooking with butter. By understanding butter measurement equivalents, you can confidently follow recipes and create delicious dishes.

Converting Tablespoons to Weight

To convert tablespoons to weight, you’ll need to know the density of the substance you’re measuring. When it comes to converting tablespoons to grams or ounces, the density of the specific ingredient is crucial.

For example, to convert tablespoons of butter to weight, you need to know its density. The density of butter is around 0.911 grams per milliliter or 0.032 ounces per milliliter.

So, for 8 tablespoons of butter, you can multiply the volume (8 tablespoons) by the density (0.911 grams/ml or 0.032 ounces/ml) to get the weight in grams or ounces. In this case, 8 tablespoons of butter would weigh approximately 72.88 grams or 2.29 ounces.

The Weight of 8 Tablespoons of Butter

If you want to know the weight of 8 tablespoons of butter, you’ll need to multiply the volume by the density. Converting butter measurements can be helpful when following recipes that call for specific amounts of butter in tablespoons.

To find the weight of 8 tablespoons of butter, you first need to know the density of butter, which is approximately 0.911 grams per milliliter. Since 1 tablespoon is equivalent to about 14.2 milliliters, multiplying 8 tablespoons by the density of butter gives us a weight of approximately 91.1 grams. This calculation allows you to accurately measure the weight of butter required for your recipe.

Now that we have determined the weight of 8 tablespoons of butter, let’s move on to measuring butter for recipes.

Measuring Butter for Recipes

When measuring butter for recipes, it’s important to accurately calculate the weight based on the density and volume. There are various butter measurement techniques that can help ensure precise measurements.

One popular method is using a kitchen scale to weigh the butter directly. This allows you to measure the exact weight required for your recipe, whether it’s in grams or ounces.

Another common technique is using the markings on the butter wrapper. These markings indicate tablespoon measurements, making it easy to measure the desired amount. However, it’s important to note that the density of butter can vary, so using a scale is the most accurate method.

Overall, the best kitchen tool for measuring butter is a reliable kitchen scale. It ensures precise measurements and helps you achieve the perfect results in your recipes.

Butter Weight Conversion Table

Using a conversion table can help you accurately measure the weight of butter for your recipes. It’s important to have the right amount of butter to achieve the perfect texture and flavor in your dishes. Here are five benefits of using a butter weight calculator and converting butter measurements for cooking:

  • Accuracy: A conversion table ensures you use the exact amount of butter needed for your recipe.

  • Consistency: By converting measurements, you can maintain consistency in your cooking, resulting in reliable and delicious results.

  • Precision: The butter weight calculator allows you to be precise in your measurements, preventing under or overuse of this ingredient.

  • Convenience: Converting butter measurements is quick and easy, making your cooking process more efficient.

  • Versatility: With a conversion table, you can adapt recipes that use different types of butter measurements, such as sticks, cups, or grams.

Tips for Accurate Butter Measurement

To ensure accurate measurements, it’s best to soften the butter before measuring it for your recipes. Softening the butter helps in achieving precise measurements and ensures that the butter is evenly distributed throughout the recipe.

Accurate measuring techniques are essential when it comes to baking, as slight variations in ingredient quantities can greatly affect the final outcome. When converting butter measurements, it’s important to keep in mind that 1 tablespoon of butter weighs approximately 14 grams or 0.5 ounces. So, if a recipe calls for 8 tablespoons of butter, you would need approximately 112 grams or 4 ounces.

Remember to use a scale or measuring spoons to get the exact amount needed. Following these tips will help you achieve consistency and accuracy in your recipes.

Converting Butter Measurements for Baking

When it comes to baking, accurate measurements are key. In this discussion, we will explore the importance of converting butter measurements from grams to ounces. We will also provide a handy butter conversion chart for reference.

Additionally, we will share some baking accuracy tips to ensure your recipes turn out perfectly every time.

Grams or Ounces

Grams or ounces: which unit of measurement is commonly used to weigh 8 tablespoons of butter? Well, when it comes to measuring butter accurately, grams are the preferred unit of measurement. Here’s why:

  • Grams provide a more precise measurement compared to ounces.
  • Conversion from grams to cups is easier and more accurate.
  • Many recipes use metric measurements, which means grams are more commonly used.
  • Professional bakers and pastry chefs often rely on grams for consistent results.
  • Using grams allows for easier scaling of recipes.

So, if you want to measure 8 tablespoons of butter accurately, it’s best to use grams.

Now, let’s move on to the next section and explore a butter conversion chart to help you with your baking needs.

Butter Conversion Chart

The butter conversion chart provides a helpful reference for accurately measuring different amounts of butter. It includes butter measurement equivalents for various quantities, making it easier to follow recipes and achieve consistent results.

For example, if a recipe calls for 1 cup of butter, you can consult the chart to find that it is equal to 16 tablespoons or 227 grams. This allows you to measure the correct amount of butter, even if you don’t have a measuring cup on hand.

Additionally, the chart provides butter substitution options in case you run out of butter or prefer a healthier alternative. It suggests using margarine, coconut oil, or vegetable shortening as substitutes, with corresponding measurements to ensure the right amount is used in the recipe.

Baking Accuracy Tips

To ensure your baked goods turn out perfectly, remember to preheat the oven to the recommended temperature. Achieving precision in baking is crucial for consistent and delicious results.

Here are some tips to help you bake with accuracy:

  • Use a kitchen scale: Weighing ingredients, including butter, ensures accuracy and consistency in your recipes.
  • Follow the recipe: Stick to the measurements provided in the recipe to maintain the intended texture and flavor of your baked goods.
  • Be mindful of alternative butter measurements: Some recipes may call for butter in different forms, such as melted or softened. Make sure to adjust your measurements accordingly.
  • Measure ingredients properly: Use proper measuring cups and spoons, leveling off ingredients like flour to avoid excess or insufficient amounts.
  • Maintain consistent oven temperature: Invest in an oven thermometer to ensure your oven is reaching and maintaining the correct temperature throughout the baking process.

Common Mistakes in Measuring Butter

When it comes to measuring butter, there are alternative ways to ensure accuracy. Precision is important in baking, as even a small difference in butter measurement can affect the final outcome of your recipe.

Understanding conversion ratios is crucial in order to successfully convert butter measurements and achieve the desired results in your baked goods.

Alternative Butter Measurement

If you want to measure butter differently, you can try using alternative measurements. Here are some options you can consider:

  • Grams: Instead of using tablespoons, you can weigh the butter in grams using a kitchen scale. 1 tablespoon of butter is approximately 14 grams.

  • Cups: If you prefer using cups, 8 tablespoons of butter is equal to 1/2 cup.

  • Ounces: Another option is to measure the butter in ounces. 8 tablespoons of butter is equivalent to 4 ounces.

  • Sticks: In many recipes, butter is measured in sticks. 8 tablespoons of butter is equal to 1 stick.

  • Alternative Butter Substitutes: If you’re looking for alternatives to butter, you can try using margarine, coconut oil, or olive oil as substitutes. Just make sure to adjust the measurements accordingly.

Using these alternative measurements and substitutes, you can easily adapt your recipes to suit your preferences or dietary needs.

Importance of Precision

Now that we’ve explored alternative ways to measure butter, let’s talk about the importance of measuring ingredients accurately in baking. Precision is key when it comes to baking because even the slightest variation in measurements can have a significant impact on the final results.

When we don’t measure ingredients accurately, it can throw off the balance of the recipe. For example, using too much butter can result in a greasy and heavy texture, while using too little can lead to dry and crumbly baked goods. The same goes for other ingredients like flour, sugar, and leavening agents.

Accurate measurements ensure that we achieve the right balance of flavors, textures, and rise in our baked goods. So, it’s crucial to use measuring tools like measuring cups and spoons, and follow the recipe instructions carefully. By doing so, we can avoid disappointment and enjoy perfectly baked treats every time.

Understanding Conversion Ratios

Understanding conversion ratios is essential in baking because it allows us to adjust recipes to yield different quantities of baked goods. When it comes to baking with butter, it’s important to know the conversion ratios to ensure accurate measurements and consistent results.

Here are some helpful tips to understand butter conversions:

  • 1 stick of butter is equal to 8 tablespoons or 1/2 cup.

  • If a recipe calls for melted butter, measure it after melting.

  • To substitute butter with oil, use 3/4 cup of oil for every 1 cup of butter.

  • To convert butter from grams to tablespoons, divide the grams by 14.18.

  • When using salted butter instead of unsalted, reduce or omit additional salt in the recipe.

Frequently Asked Questions

How Many Tablespoons Are There in a Stick of Butter?

There are 8 tablespoons in a stick of butter. It is important to measure butter accurately for baking recipes. Butter can be substituted with other fats like margarine or oil, but the results may vary.

Can I Use Margarine Instead of Butter in a Recipe?

Sure, margarine can be used as a substitute for butter in baking. It has a similar consistency and flavor. However, keep in mind that margarine may affect the texture and taste of the final product.

How Does the Weight of Melted Butter Compare to Solid Butter?

When comparing the weight of melted butter to solid butter, it’s important to consider the density. Melted butter is denser than solid butter, so if you’re measuring butter by weight, 8 tablespoons may weigh more when melted.

What Is the Difference Between Salted and Unsalted Butter?

When it comes to salted butter vs unsalted butter, the difference is all about taste and versatility. Salted butter adds a savory kick to dishes, while unsalted butter allows for more control in seasoning. It’s all about personal preference!

Are There Any Alternatives to Using Butter in Baking?

There are alternatives to using butter in baking. One option is to use oil, which can add moisture and richness to baked goods. It also has the benefit of being a dairy-free option for those with allergies or dietary restrictions.

Conclusion

In conclusion, understanding the weight of butter is crucial for accurate measurements in cooking and baking.

Converting tablespoons to weight can help ensure that your recipes turn out just right.

For example, let’s say you’re making a batch of chocolate chip cookies and the recipe calls for 8 tablespoons of butter.

By knowing that 1 tablespoon of butter weighs approximately 14 grams, you can accurately measure the right amount of butter needed for delicious, perfectly baked cookies.

So next time you’re in the kitchen, remember to measure your butter properly for the best results.

Continue Reading

Recipes & Culinary Uses

How to Make Butter Balls

Published

on

By

An image that showcases the step-by-step process of shaping smooth, round butter balls

Do you crave a dollop of flavor to enhance your dining experience? Look no further!

In this article, we will guide you through the magical process of creating delectable butter balls. With just a few simple ingredients and tools, you’ll be able to craft these little balls of creamy goodness in no time.

So, put on your apron, grab your whisk, and prepare to embark on a buttery adventure that will leave your taste buds dancing with delight.

Key Takeaways

  • Experiment with different combinations of herbs and spices to create unique flavors in the butter balls.
  • Chilling the butter mixture in the refrigerator helps firm it up and allows the flavors to meld together for a more harmonious taste.
  • Roll the chilled butter mixture into small, bite-sized spheres and optionally roll them in finely chopped herbs, spices, or edible flowers for added flavor and presentation.
  • Store the butter balls in an airtight container in the refrigerator and let them come to room temperature before serving to enhance their versatility in various dishes and spreads.

Gathering the Ingredients and Tools

First, you’ll need to gather the ingredients and tools necessary for making butter balls. To begin, gather 1 cup of softened butter, 1 ¼ cups of powdered sugar, 1 teaspoon of vanilla extract, and a pinch of salt. These ingredients will create a smooth and flavorful base for your butter balls.

Additionally, you’ll need a mixing bowl, an electric mixer, a spatula, and a baking sheet lined with parchment paper. If you’re feeling adventurous, you can also experiment with alternative ingredients such as almond or coconut extract to add a unique twist to your butter balls.

Once you have everything ready, it’s time to move on to preparing the butter mixture.

Preparing the Butter Mixture

Next, you’ll need to mix together the softened butter, your choice of herbs and spices, and a pinch of salt in a bowl. This step is crucial for adding flavor to your butter balls.

As you mix in the herbs and spices, imagine the burst of savory goodness they will bring to each bite. Experiment with different combinations like garlic and rosemary, or perhaps a hint of lemon zest and thyme.

Once everything is well incorporated, cover the bowl with plastic wrap and place it in the refrigerator to chill. This will help the butter mixture firm up, making it easier to shape into balls later on. The chilling process also allows the flavors to meld together, resulting in a more harmonious taste.

Get ready to elevate your butter balls to a whole new level of deliciousness.

Shaping the Butter Balls

Now it’s time to take the chilled butter mixture and roll it into small, bite-sized spheres. Shaping butter balls requires some techniques to achieve the perfect form.

Start by scooping a small amount of the butter mixture with a spoon or a melon baller. Then, gently roll it between your palms, applying light pressure to create a smooth and round shape.

For a more decorative touch, you can roll the butter balls in finely chopped herbs, spices, or even edible flowers. Arrange them on a serving plate, or place them in a decorative butter dish for a stunning presentation.

These butter balls can be a delightful addition to a cheese platter or served alongside warm bread.

Now, let’s move on to the next step – adding flavors and variations to your butter balls.

Adding Flavors and Variations

To enhance the taste and create unique variations, you can experiment with different ingredients and seasonings for your butter balls. By adding different flavors, you can elevate your butter balls to a whole new level. Here are some ideas to get you started:

Flavor Ingredients Creative Uses
Garlic and Herb Garlic, parsley, thyme Spread on bread or use in pasta dishes
Citrus Lemon or orange zest Use in baking or melt over grilled fish
Spicy Chili flakes, paprika Add a kick to roasted vegetables or steaks
Sweet Honey, cinnamon Delicious on pancakes or toast

There are endless possibilities when it comes to flavored butter balls. Get creative and experiment with different combinations to find your favorites. Once you have made your butter balls, it’s time to move on to storing and serving them.

TRANSITION: Now that you have created your delicious flavored butter balls, let’s talk about the best way to store and serve them.

Storing and Serving the Butter Balls

When it comes to storing and serving your flavorful creations, remember to keep your butter balls chilled in an airtight container to maintain their freshness. Storing butter balls properly is essential to preserve their taste and texture.

After shaping your butter into small balls, place them in the refrigerator for at least an hour to firm up. Once chilled, transfer the butter balls to an airtight container to prevent them from absorbing any odors or flavors from the fridge. This will ensure that your butter balls stay fresh and delicious.

When it’s time to serve, take out the desired amount and let them come to room temperature for a few minutes. Butter balls are versatile and can be used in various ways – spread them on toast, melt them on steamed vegetables, or use them to enhance the flavor of your favorite dishes. Get creative and enjoy the rich, creamy goodness of your homemade butter balls!

Conclusion

So there you have it, a step-by-step guide on how to make butter balls.

Now that you know the secrets to creating these delectable delights, you can impress your friends and family with your culinary skills.

Imagine the look on their faces as they bite into these creamy, flavorful bites of heaven.

The possibilities are endless when it comes to adding your own unique twist to the recipe.

So go ahead, gather your ingredients and tools, and embark on this buttery adventure.

Get ready to indulge in the buttery goodness that awaits!

Continue Reading

Recipes & Culinary Uses

How to Make Brownies With Weed Butter

Published

on

By

An image showcasing a close-up of fudgy, decadent brownies with a subtle hint of green peeking through the rich chocolate, enticing readers to learn the secret behind their magical ingredient

Hey there, fellow baking enthusiasts! Ever wondered how to take your brownie recipe to a whole new level? Well, I’ve got a little secret ingredient that’ll surely elevate your baking game: weed butter.

Now, before you start raising eyebrows, let me assure you that this article is all about responsible and informed baking. I’ll guide you through the process of making your very own batch of deliciously potent weed brownies.

So, get ready to embark on a mouthwatering journey that combines the best of baking and cannabis. Let’s dive in!

Key Takeaways

  • Different weed strains have different effects, so choose a balanced strain with a combination of THC and CBD for making weed butter.
  • Decarboxylate cannabis in the oven to activate THC before making weed butter.
  • Use proper dosing techniques and start with a lower dose to avoid overconsumption and unpleasant side effects.
  • Store weed brownies properly in a cool, dark place and consume within a week for optimal freshness and potency.

Selecting the Right Strain for Weed Butter

To make the best brownies with weed butter, you’ll need to choose the right strain of cannabis. When it comes to selecting the best cannabis strain for edibles, it’s important to understand the effects that different weed strains can have.

Some strains are known for their uplifting and energizing effects, while others are more relaxing and calming. For edibles, you’ll want to choose a strain that has a balanced combination of THC and CBD. THC is responsible for the psychoactive effects, while CBD provides a more calming and therapeutic experience. Finding the right balance will ensure that your brownies have the desired effects.

Now that you know the importance of choosing the right strain, let’s move on to making weed butter from scratch.

Making Weed Butter From Scratch

First, you’ll need to gather the necessary ingredients for making weed butter from scratch. To make weed butter, you’ll need unsalted butter, ground cannabis, and water. Start by decarboxylating your cannabis in the oven to activate the THC.

Next, melt the butter and add the ground cannabis. Simmer the mixture on low heat for a few hours, stirring occasionally. The alternative method of making weed-infused butter involves using a slow cooker, which can simplify the process.

The benefits of using weed butter in other recipes are numerous. Not only does it add a unique flavor to your dishes, but it also allows for a more controlled and precise dosage of cannabis.

Once the butter has cooled, strain out the plant matter, and you’re left with homemade weed butter ready to be used in all sorts of delicious recipes.

Infusing Weed Butter Into Your Brownie Mix

Once you’ve infused your homemade weed butter into your brownie mix, the rich and potent flavors will elevate your brownies to a whole new level of deliciousness. Infusing weed butter into your brownie mix is a simple and effective way to create alternative edibles that pack a punch.

Here are three infusing techniques to help you make the most of your weed butter brownies:

  1. Double Boiler Method: Place a heatproof bowl over a pot of simmering water, and melt your weed butter in the bowl. Once melted, add it to your brownie mix and stir well to ensure even distribution.

  2. Stovetop Method: Melt your weed butter in a saucepan on low heat, stirring continuously to prevent burning. Once melted, add it to your brownie mix and mix thoroughly.

  3. Microwave Method: Melt your weed butter in a microwave-safe bowl, heating in short bursts and stirring in between. Once melted, add it to your brownie mix and mix well.

With these infusing techniques, you can create delectable weed butter brownies that are sure to impress. Enjoy responsibly!

Baking Perfectly Potent Weed Brownies

For perfectly potent weed brownies, ensure you mix the infused butter thoroughly into the brownie batter. This step is crucial to evenly distribute the cannabis throughout the mixture, ensuring each bite is infused with the desired dose.

When it comes to dosing techniques, it’s important to note that the potency of your brownies will depend on the strength of your infused butter. To control the dosage, start by calculating the total amount of THC in your butter and divide it by the number of servings. This will give you an idea of how much THC is in each brownie.

If you’re looking for alternative cannabis-infused desserts, consider trying recipes like cannabis-infused cookies, cakes, or even ice cream. Just remember to adjust the dosage accordingly and always label your edibles clearly.

Happy baking!

Dos and Don’ts of Dosing Weed Brownies

When it comes to making weed brownies, proper dosage of weed butter is crucial. Overconsumption can lead to unpleasant experiences, so it’s important to know how much weed butter to use for the desired effect.

To ensure consistent potency, there are a few tips to keep in mind. First, use a reliable recipe that provides specific instructions on the amount of weed butter needed. This will help you avoid using too much or too little.

Second, properly measure the weed butter. Use a kitchen scale to weigh the butter accurately, as eyeballing it can result in inaccurate dosing. This step is crucial for achieving the desired effect and avoiding any potential negative experiences.

Proper Weed Butter Dosage

To determine the proper dosage of weed butter for your brownies, it’s essential to consider the potency and desired effects. Here are three important things to consider:

  1. Weed butter infusion methods: The potency of your weed butter depends on how you infuse it. Common methods include using a stovetop, slow cooker, or a specialized cannabis-infused butter machine. Each method may result in varying levels of THC extraction, so it’s important to choose a method that suits your desired potency.

  2. Calculating THC content: To accurately calculate the THC content in your weed butter, you need to know the percentage of THC in your starting cannabis material. This information can usually be found on the packaging of your cannabis product. From there, you can use a simple formula to determine the approximate THC content in your infused butter.

  3. Desired effects: Understanding your desired effects is crucial in determining the proper dosage of weed butter. If you’re a beginner or have a low tolerance, it’s recommended to start with a lower dose and gradually increase as needed. It’s important to remember that the effects of edibles can take longer to kick in and can be more potent, so patience is key.

Avoid Overconsumption Risks

Understanding the potential risks of overconsumption is crucial in ensuring a safe and enjoyable experience with cannabis-infused edibles. While edibles can provide a longer-lasting and more intense high compared to smoking or vaping, it’s important to consume them responsibly.

Overconsumption can lead to unpleasant side effects such as anxiety, paranoia, and even hallucinations. To avoid these risks, it is recommended to start with a low dose, especially if you are a beginner. Give your body enough time to process the edible before consuming more.

It’s also important to be aware of the potency of the edible you are consuming, as different products can have varying levels of THC. By practicing responsible consumption practices and being aware of the risks, you can have a safe and enjoyable experience with cannabis-infused edibles.

Tips for Consistent Potency

When it comes to making weed butter brownies, maintaining consistent effects can be a challenge. However, there are a few tips that can help you adjust the potency levels and ensure a consistent experience every time. Here’s what you need to know:

  1. Use precise measurements: To achieve consistent potency, it’s crucial to measure your ingredients accurately. This applies not only to the amount of weed butter you use but also to the other ingredients in your recipe.

  2. Test potency before baking: Before adding the weed butter to your brownie mix, try a small amount to gauge its potency. This will give you an idea of how strong the final product will be and allow you to adjust the amount of weed butter accordingly.

  3. Keep notes: Maintaining a record of your recipes and the effects they produce can help you fine-tune the potency levels over time. By noting the amount of weed butter used and the resulting effects, you can make adjustments to achieve your desired experience.

Following these tips will help you create consistently potent weed butter brownies that deliver the desired effects every time.

Storing and Enjoying Your Weed Brownies

Once they’ve cooled, you can store your weed brownies in an airtight container to keep them fresh. Proper storage techniques are essential to maintain the potency and flavor of your infused brownies. Here are some tips for storing and enjoying your weed brownies:

Technique Description
Store in a cool, dark place Heat and light can degrade the potency of the cannabinoids in your brownies. Keep them away from direct sunlight or high temperatures.
Separate from regular brownies To avoid confusion or accidental consumption, it’s best to store your weed brownies separately from regular ones. Label the container clearly.
Use within a week Although the brownies can last longer, it’s recommended to consume them within a week to ensure optimal freshness and potency.
Freeze for long-term storage If you have a large batch or want to save them for later, you can freeze your weed brownies in an airtight container. Thaw them before serving.
Best serving methods Enjoy your weed brownies by cutting them into small, manageable pieces. Start with a low dosage and wait at least an hour before consuming more. Remember to always store them securely and out of reach of children or pets.

Frequently Asked Questions

Can I Use Any Strain of Weed to Make Weed Butter, or Are There Specific Strains That Work Best?

Any strain of weed can be used to make weed butter, but there are specific strains that work best for making edibles. When infusing weed butter, consider the potency, flavor profile, and desired effects of the strain.

How Long Does It Take to Make Weed Butter From Scratch?

To make weed butter from scratch, it typically takes a few hours. After infusing the butter with cannabis, you can use it to enhance various recipes. Remember to store the weed butter properly to maintain its potency.

Can I Use Store-Bought Brownie Mix or Do I Have to Make the Mix From Scratch?

I can use store-bought brownie mix for weed brownies, but it’s important to properly dose them. The homemade mix gives more control over the ingredients, but store-bought is convenient.

How Do I Know if My Weed Brownies Are Potent Enough?

To properly dose weed brownies, start by using a reliable recipe and accurately measuring the amount of weed butter. Test the potency by starting with a small piece and waiting for the effects. Adjust the dosage accordingly for future batches.

How Long Can I Store My Weed Brownies Before They Go Bad?

The shelf life of weed brownies depends on how they are stored. To ensure the best quality, store them in an airtight container in a cool, dark place. They can last up to a week, but it’s best to consume them within a few days for optimal freshness.

Conclusion

In conclusion, making brownies with weed butter is a fun and delicious way to enjoy the benefits of marijuana. By selecting the right strain for your weed butter and infusing it into your brownie mix, you can create perfectly potent treats.

However, it is important to be mindful of dosing to avoid any unwanted effects. Did you know that a recent survey found that 42% of cannabis users prefer edibles as their preferred method of consumption?

So why not try making your own weed brownies and join the growing number of people who enjoy this tasty and alternative way of experiencing the effects of marijuana.

Continue Reading

Recipes & Culinary Uses

How to Make Brown Sugar Butter

Published

on

By

An image showcasing a rustic wooden bowl filled with smooth, creamy brown sugar butter, glistening with hints of golden caramel

Deliciously decadent and delightfully creamy, making homemade brown sugar butter is a culinary endeavor that is both easy and rewarding. With just a few simple ingredients and a touch of creativity, you can whip up a batch of this delectable spread that will elevate any dish it graces.

In this article, I will guide you through each step of the process, from selecting the perfect ingredients to achieving the ideal texture. Get ready to embark on a buttery journey like no other!

Key Takeaways

  • Consider coconut sugar, maple syrup, and honey as substitutes for brown sugar
  • Proper ingredient ratios are crucial for consistency and flavor
  • Spices like cinnamon and nutmeg can elevate the taste
  • Thoroughly cream together softened butter and brown sugar

Choosing the Right Ingredients

To make brown sugar butter, you’ll want to start by choosing the right ingredients.

When it comes to brown sugar substitutes and alternative sweeteners, there are a few options to consider. One popular substitute for brown sugar is coconut sugar. It has a similar flavor profile and can be used in equal amounts as a replacement.

Another alternative sweetener is maple syrup, which adds a rich and distinct taste to the butter. Honey is also a great option, with its natural sweetness and smooth texture.

Depending on your preference, you can experiment with different combinations of these substitutes to find the perfect balance of flavor. Remember to carefully measure the amount of substitute you use to ensure the right consistency and taste in your brown sugar butter.

Measuring and Mixing the Ingredients

When it comes to baking, getting the right ingredient ratios is crucial for achieving the perfect consistency and flavor in your finished product.

In this discussion, I will delve into the importance of proper ingredient ratios and how they can affect the outcome of your recipe.

Additionally, I will explore various mixing techniques that can help you achieve consistency in your batter or dough, ensuring that every bite is just as delicious as the last.

Proper Ingredient Ratios

The proper ingredient ratios for making brown sugar butter are essential for achieving the perfect balance of sweetness and richness. When it comes to ingredient substitutions, it’s important to note that while you can use white sugar instead of brown sugar, it will alter the flavor and color of the butter.

To troubleshoot common issues, such as the butter being too sweet or not sweet enough, you can adjust the amount of brown sugar used. If the butter is too sweet, try using less brown sugar or adding a pinch of salt to balance out the sweetness. On the other hand, if the butter is not sweet enough, you can increase the amount of brown sugar or add a teaspoon of vanilla extract for extra flavor.

Mixing Techniques for Consistency

For a consistent texture, try gently folding the mixture instead of vigorously stirring it.

When making brown sugar butter, the whisking method and temperature control are crucial for achieving the desired texture.

Begin by whisking the softened butter until it becomes smooth and creamy. This can be done using an electric mixer or by hand with a whisk.

Next, gradually add the brown sugar, ensuring that it is fully incorporated before moving on. Whisking slowly and evenly will prevent clumps from forming and create a smooth consistency.

Additionally, maintaining the temperature of the butter throughout the process is essential. If the butter becomes too warm, it can cause the mixture to separate or become greasy. To avoid this, work with softened butter at room temperature and avoid overheating.

Adding Flavor Enhancements

When it comes to adding flavor to a dish, spices are my go-to choice. They have the power to elevate the taste and take a recipe from ordinary to extraordinary.

In addition to spices, I also love infusing my dishes with aromatic herbs, like rosemary or thyme, to impart a subtle yet distinctive flavor.

Together, these flavor enhancements can transform a simple meal into a culinary masterpiece.

Spices for Added Taste

Spice up your brown sugar butter by adding a pinch of cinnamon or a dash of nutmeg for added taste. These warm and comforting spices will elevate the flavor profile of your butter, giving it a delightful twist.

But why stop there? You can also experiment with other aromatic spices like vanilla and cardamom to take your brown sugar butter to the next level. The combination of these flavors will create a harmonious blend that is both sweet and fragrant.

Whether you’re spreading it on toast, using it in baking, or simply enjoying it on its own, this spiced brown sugar butter will add a burst of flavor to any dish.

Now, let’s explore how infusing it with aromatic herbs can take it even further.

Infusing With Aromatic Herbs

After exploring the use of spices to enhance the taste of brown sugar butter, I decided to take it a step further and infuse it with aromatic herbs. Infusing the butter with citrus and experimenting with different herbs can elevate its flavor profile and add a refreshing twist. To help you understand the possibilities, I’ve created a table to showcase some exciting herb and citrus combinations:

Citrus Herbs Flavor Profile
Lemon Rosemary Fresh, tangy, and herbaceous
Orange Thyme Sweet, citrusy, and savory
Lime Basil Zesty, bright, and aromatic
Grapefruit Mint Tangy, refreshing, and cool

Achieving the Perfect Texture

To achieve the perfect texture for your brown sugar butter, make sure you thoroughly cream together the softened butter and brown sugar. This step is crucial in creating a smooth and spreadable consistency.

Here are three tips to improve spreadability and enhance shelf life:

  1. Gradually add the brown sugar to the softened butter while mixing. This ensures that the sugar is evenly distributed throughout the butter, resulting in a smooth texture.

  2. Beat the mixture on medium-high speed for a few minutes until it becomes light and fluffy. This incorporates air into the butter, making it easier to spread.

  3. Store the brown sugar butter in an airtight container in the refrigerator. This helps to preserve its freshness and extend its shelf life.

Storing and Preserving Brown Sugar Butter

Now that you’ve achieved the perfect texture for your brown sugar butter, it’s important to know how to store and preserve it to ensure its freshness and extend its shelf life.

There are several techniques that can help you in this process.

First, transfer the butter into an airtight container, ensuring that there is no excess air inside. This will prevent oxidation and maintain its flavor.

Secondly, store the butter in the refrigerator, as the cool temperature will slow down the growth of bacteria and maintain its quality.

Lastly, if you want to extend the shelf life even further, you can consider freezing the brown sugar butter. Simply wrap it tightly in plastic wrap or place it in a freezer-safe container.

Following these preserving techniques will help you enjoy your delicious brown sugar butter for a longer period of time.

Creative Ways to Use Brown Sugar Butter

If you’re feeling adventurous in the kitchen, try incorporating this delectable spread into your favorite baked goods or breakfast recipes for a unique and irresistible twist.

Here are three creative ways to use brown sugar butter:

  1. Baked Goods: Add a dollop of brown sugar butter to your cookie dough or cake batter for an extra burst of flavor. The rich and caramel-like taste of the butter will complement the sweetness of your treats, making them even more indulgent.

  2. Breakfast Delights: Spread brown sugar butter on your toast, pancakes, or waffles for a sweet and creamy topping. The warm and buttery notes of the spread will melt into your breakfast, adding a delightful richness to every bite.

  3. Savory Dishes: Don’t limit brown sugar butter to just sweet treats! Use it as a glaze for roasted vegetables or grilled meats. The hint of sweetness from the brown sugar will balance out the savory flavors, creating a harmonious and mouthwatering dish.

Frequently Asked Questions

Can I Use Salted Butter Instead of Unsalted Butter in This Recipe?

Yes, you can use salted butter instead of unsalted butter in this recipe. However, it will impact the taste as salted butter already has salt in it, which may make the brown sugar butter slightly saltier.

Can I Use Coconut Sugar Instead of Brown Sugar?

Yes, you can use coconut sugar instead of brown sugar. It will give the brown sugar butter a slightly different taste, with a hint of coconut flavor.

Can I Substitute Another Type of Sweetener, Like Honey or Maple Syrup, for the Brown Sugar?

Yes, you can substitute honey or maple syrup for the brown sugar in brown sugar butter. However, keep in mind that the flavor profile will change. Honey adds a floral sweetness, while maple syrup adds a rich, caramel-like taste.

How Long Can I Store Brown Sugar Butter in the Refrigerator?

The shelf life of brown sugar butter stored in the refrigerator varies, but it typically lasts for several weeks. To ensure proper storage, keep it in an airtight container or wrap it tightly in plastic wrap.

Can I Freeze Brown Sugar Butter for Long-Term Storage?

Yes, you can freeze brown sugar butter for long-term storage. To do so, put it in an airtight container or freezer bag. This freezing technique will preserve its flavor and texture.

Conclusion

In conclusion, making brown sugar butter is a simple and delicious way to add flavor to your dishes. By using the right ingredients, measuring and mixing them properly, and adding flavor enhancements, you can achieve the perfect texture and taste.

One interesting statistic to consider is that the average American consumes about 23 pounds of butter per year, showing just how popular this ingredient is in our diets.

So why not elevate your recipes with the rich and sweet taste of homemade brown sugar butter? Give it a try and enjoy the delightful results!

Continue Reading

Trending