Are you prepared to start your adventure in making homemade butter? Get ready to experience the satisfaction of transforming a basic ingredient into a smooth, delectable masterpiece.
In this article, we’ll guide you through the step-by-step process of how to make butter, ensuring you achieve the perfect texture and flavor every time. Prepare to become a butter-making maestro as we explore the science behind churning, the secrets of separating butter milk, and the art of shaping and storing your homemade creation.
Let’s get started!
Key Takeaways
- Choose the right cream: heavy cream, light cream, or whipping cream
- Churning separates the butterfat from the liquid portion (buttermilk)
- Strain the freshly churned cream to remove any remaining buttermilk
- Rinse the butter with cold water to remove any remaining buttermilk

Cosori Food Dehydrator, Bigger Than 7 Trays with Large 6.5 ft² Drying Space, Stainless Steel Trays, 600W Faster Drying, 165°F Dehydrated Dryer for Jerky, Dog Treats, Herbs, Meat, Fruit, Yogurt, Silver
𝗕𝗜𝗚𝗚𝗘𝗥 𝗧𝗛𝗔𝗡 𝟳 𝗧𝗥𝗔𝗬𝗦: With 6 stainless steel trays providing 6.5 ft² of drying space, this dehydrator is...
As an affiliate, we earn on qualifying purchases.
Gathering the Ingredients
You’ll need to gather the ingredients to make butter. When it comes to choosing the cream, there are different types you can use.
Heavy cream is the most common option, as it has a high fat content that results in a rich and creamy butter. However, you can also use light cream or whipping cream, which will yield a lighter and softer butter.
Make sure the cream is at the right temperature for churning. It should be chilled but not too cold, around 55°F (13°C), to ensure proper separation of the butterfat. If the cream is too warm, it will be difficult to churn, and if it’s too cold, the butter may not form properly.
Once you have gathered the right cream and ensured it’s at the correct temperature, you can move on to churning the cream…

Magic Mill Pro Food Dehydrator Machine | Powerful 600W Rear Fan Even-Drying System | 7 Full-Size Stainless Steel Trays | 95°-176° Temperature Control, 48H Timer, Keep Warm + Auto Shutoff | ETL Listed
FULL-STAINLESS BUILD, INSIDE & OUT | Built the way a premium dehydrator should be—stainless steel exterior + stainless...
As an affiliate, we earn on qualifying purchases.
Churning the Cream
Once the cream thickens, keep churning until it turns into butter. Churning is a crucial step in the butter-making process, as it helps separate the butterfat from the liquid portion of the cream, known as buttermilk. To achieve the best results, use a churn or a stand mixer fitted with a paddle attachment. Begin churning at a low speed to prevent splattering, gradually increasing the speed as the cream starts to thicken.
It usually takes about 15-20 minutes of continuous churning for the cream to transform into butter. If you encounter any issues during the churning process, such as the cream not thickening or the butter not forming, there are a few troubleshooting techniques you can try. Adding a pinch of salt can help stabilize the butter and improve its texture. Additionally, ensuring that the cream is at the right temperature, around 55-60°F (13-16°C), can also make a difference.
Once the cream has been properly churned and the butter has formed, it’s time to move on to the next step: separating the buttermilk.

Magic Mill Premium Food Dehydrator Machine (15 Extra-Large Stainless Steel Trays) 800W Dryer for Beef Jerky, Fruits, Vegetables, Dog Treats, 48 Hour Digital Timer - 95°-167° Temperature Control
Rear Mounted Fan for Even Drying - Designed with a rear-mounted fan and advanced Precision Airflow circulation, this...
As an affiliate, we earn on qualifying purchases.
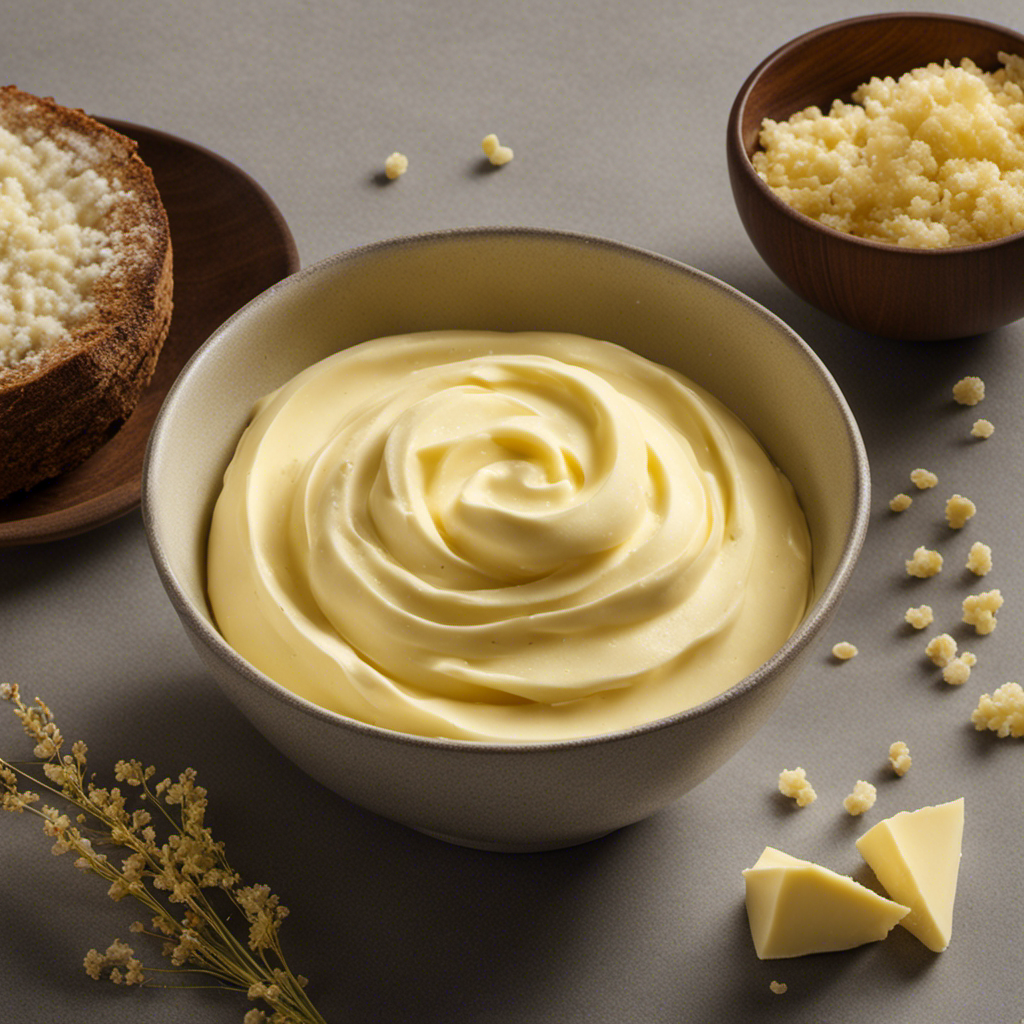
Separating the Butter Milk
To separate the buttermilk from the butter, strain the freshly churned cream through a fine-mesh sieve or cheesecloth. This step is crucial in achieving the perfect consistency of butter.
Make sure to place a bowl or container underneath the sieve to catch the buttermilk that will drain out. Once the cream is strained, gently press the butter solids with a spoon or spatula to remove any remaining buttermilk.
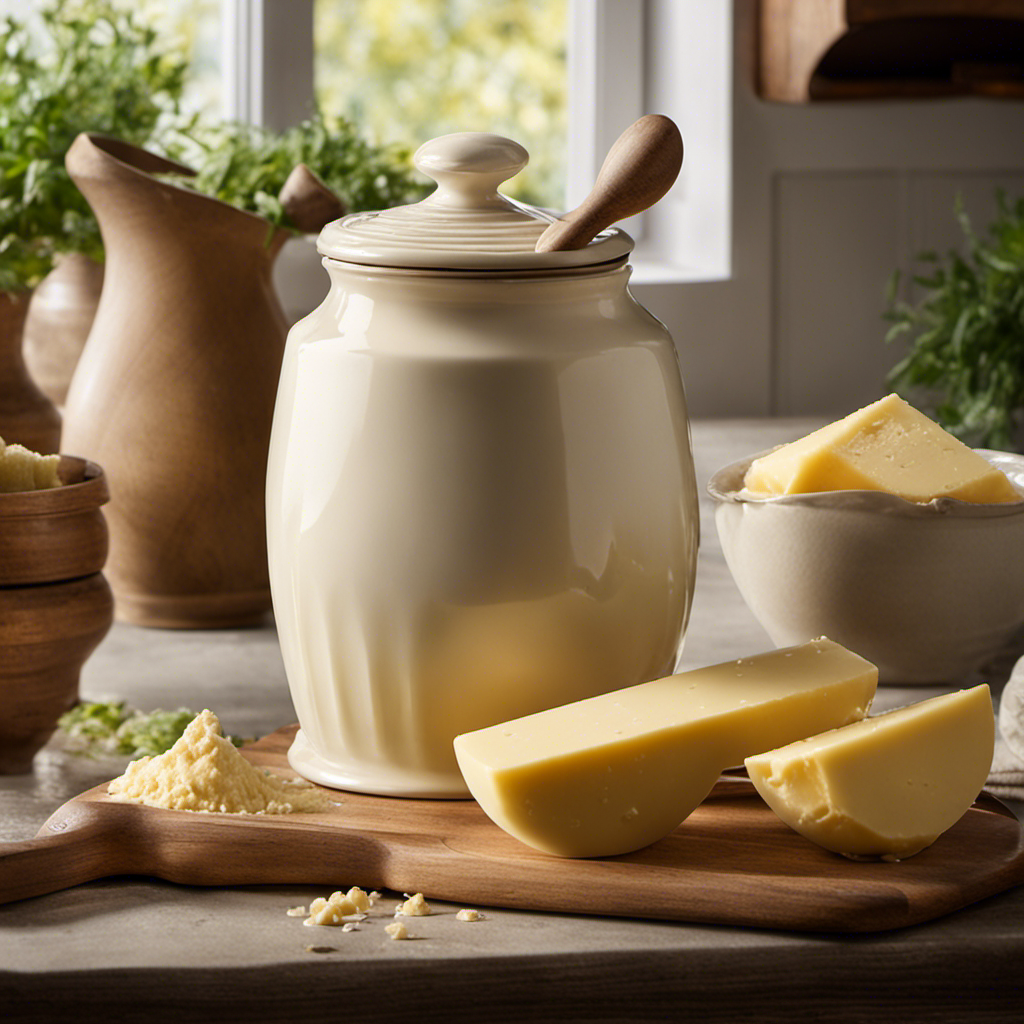
Alternatively, you can use a butter mold or shape the butter into a log and wrap it tightly in plastic wrap. Refrigerate the butter for at least an hour to firm up before using.
Breville Barista Express Espresso Machine BES870XL, Brushed Stainless Steel
The Breville Barista Express delivers third wave specialty coffee at home using the 4 keys formula and is...
As an affiliate, we earn on qualifying purchases.
Washing and Shaping the Butter
After straining the cream, gently press the butter solids with a spoon or spatula to remove any remaining buttermilk. This step is essential to ensure that your butter is creamy and free from excess liquid.
Once you have removed the buttermilk, it’s time to wash and shape the butter. Washing the butter involves rinsing it with cold water to remove any remaining buttermilk and to help preserve its freshness. To do this, place the butter in a bowl of cold water and knead it gently with your hands until the water runs clear.
Next, you can shape the butter using various techniques and different butter molds. Butter molds come in a variety of shapes and sizes, allowing you to create beautiful and decorative butter shapes for serving or gifting. Some popular shaping techniques include rolling the butter into logs, pressing it into molds, or using a butter paddle to shape it into a block.
Get creative and experiment with different shapes and molds to add a personal touch to your homemade butter.
Storing and Enjoying Your Homemade Butter
When storing your homemade butter, it’s important to keep it in an airtight container to maintain its freshness and prevent it from absorbing any unwanted odors from the refrigerator. To ensure the best storage techniques for your butter, follow these steps.
First, make sure the container you use is clean and dry. Any moisture can lead to spoilage or mold growth. Next, pack the butter tightly into the container, removing any excess air. This will help preserve its texture and prevent it from becoming rancid. Finally, store the butter in the refrigerator, as the cooler temperature will help keep it solid and fresh for longer.
Now, let’s talk about flavor variations. While traditional butter is delicious on its own, you can also experiment with different flavors to enhance your culinary creations.
One option is to add herbs and spices to the butter, such as garlic, rosemary, or chili flakes, to create a savory spread. Another option is to incorporate sweet ingredients like honey, cinnamon, or vanilla extract for a delightful treat. Additionally, you can try making compound butters by mixing in finely chopped ingredients like sun-dried tomatoes, olives, or nuts.
The possibilities are endless, so don’t be afraid to get creative and customize your butter to suit your taste preferences. Enjoy the process of making and experimenting with different flavors to elevate your dishes to the next level.
Conclusion
Congratulations, you’re a butter-making pro!
You’ve reached the end of this buttery adventure. Now it’s time to store and savor your homemade masterpiece.
Find a cozy spot in your fridge to keep your butter fresh and ready for all your culinary creations.
But be warned, once you take a bite of this heavenly creation, you may never want to go back to store-bought butter again.
So get ready to indulge in the creamiest, most delicious butter you’ve ever tasted.
Bon appétit!