Connect with us

Product Care & Storage

How Long Does Fresh Butter Last: A Guide to Shelf Life

Published

on

An image showcasing a rich, creamy stick of butter, perfectly sliced and glistening on a rustic wooden cutting board

Have you ever wondered about the shelf life of a fresh stick of butter? Don’t worry, we have all the information you need right here.

In this article, we’ll dive deep into the world of fresh butter and explore its shelf life, factors that affect its longevity, and signs that it might be time to bid farewell.

Plus, we’ll even share some tips on how to extend the lifespan of your butter and some alternative uses for when it’s past its prime.

So, get ready to butter up and let’s dive in!

Key Takeaways

  • Fresh butter typically lasts for about two to three weeks when stored properly in the refrigerator.
  • Store butter in an airtight container or wrap it tightly in foil or wax paper.
  • Keep butter away from foods with strong odors.
  • Avoid exposing butter to heat or direct sunlight.
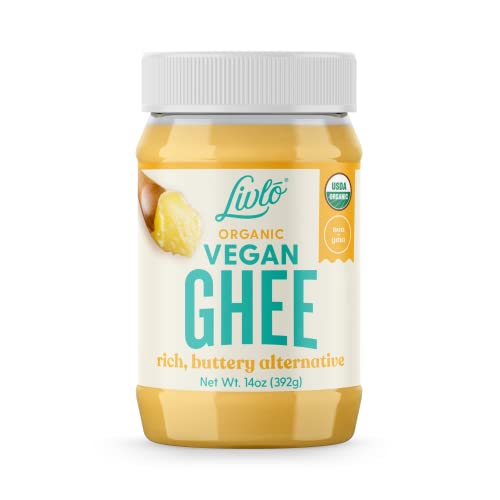
Storage Guidelines for Fresh Butter

Advertisement

Fresh butter typically lasts for about two to three weeks when stored properly in the refrigerator. To ensure the longevity and quality of your butter, follow these storage tips.

First, always keep your butter in an airtight container or wrap it tightly in foil or wax paper to prevent it from absorbing unwanted odors.

Additionally, make sure to store the butter away from foods with strong odors, such as onions or garlic. It is also important to keep your butter away from direct sunlight or heat sources, as they can cause it to spoil faster.

Lastly, choose high-quality butter brands that have a reputation for freshness and quality, as this can significantly impact the shelf life of your butter. Some popular and reliable butter brands include Kerrygold, Plugrá, and Land O’Lakes.

Factors Affecting the Shelf Life of Fresh Butter

One of the factors that affect the shelf life of butter is its exposure to air. When fresh butter is exposed to air, it undergoes oxidation, leading to rancidity and a shorter shelf life.

Advertisement

To ensure your fresh butter lasts as long as possible, here are three important factors to consider:

  1. Packaging: Opt for butter that is tightly wrapped in foil or parchment paper. This helps to minimize air contact and prolong the freshness.

  2. Storage Temperature: Keep your fresh butter in the refrigerator at a temperature of around 40°F (4°C). This helps to slow down the oxidation process and maintain its quality.

  3. Usage and Consumption: To fully enjoy the nutritional benefits of fresh butter, it is best to consume it within a reasonable timeframe. Pair it with artisanal breads, such as sourdough or whole-grain, to enhance the flavor and create a delicious combination.

Signs of Fresh Butter Going Bad

To determine if your butter has spoiled, simply check for any noticeable changes in smell or taste. Rancid butter has a distinct, unpleasant odor and a bitter or sour taste. It may also have a yellow or brownish color instead of the usual pale yellow. Here is a table that outlines the signs of fresh butter going bad:

Signs of Rancid Butter
Unpleasant odor
Bitter or sour taste
Yellow or brown color

Identifying these signs early can help prevent the consumption of spoiled butter. To ensure the freshness of your butter, store it properly in an airtight container in the refrigerator. Avoid exposing it to heat or direct sunlight, as these can accelerate spoilage. Additionally, always use clean utensils when handling butter to prevent contamination. By following these guidelines, you can enjoy fresh, flavorful butter for a longer period of time.

Advertisement

Moving on to the next section, let’s discuss the proper handling and usage of fresh butter.

Proper Handling and Usage of Fresh Butter

When handling fresh butter, make sure to use clean utensils to prevent any contamination.

Here are three important tips for proper handling and usage of fresh butter:

  1. Keep it refrigerated: Fresh butter should be stored in the refrigerator at a temperature between 32°F and 40°F (0°C to 4°C). This helps maintain its freshness and quality for a longer period of time.

  2. Freezing butter: If you have a surplus of fresh butter, you can freeze it for later use. Wrap it tightly in plastic wrap or place it in an airtight container to prevent freezer burn and maintain its flavor.

  3. Consider butter packaging options: Some butter brands offer individually wrapped sticks or portioned cups. These packaging options help keep the butter fresh and prevent it from absorbing any unwanted odors from the fridge.

Extending the Lifespan of Fresh Butter

Advertisement

Storing fresh butter in the refrigerator helps maintain its quality and freshness for an extended period of time. To maximize the freshness of your butter, there are a few preservation techniques you can employ.

Firstly, it is important to keep the butter wrapped tightly in its original packaging or in an airtight container to prevent exposure to air and odors from other foods. This will help preserve its natural flavor and prevent it from absorbing unwanted smells.

Additionally, keeping the butter away from direct light and heat sources will help maintain its consistency and prevent it from melting or becoming rancid.

Lastly, it is recommended to use clean utensils when handling the butter to avoid introducing bacteria into the product.

Alternative Uses for Expired Fresh Butter

If you’re wondering what to do with expired fresh butter, there are several creative ways to repurpose it.

Advertisement

One option is to use it in your culinary creations by incorporating it into recipes for baked goods or savory dishes.

Additionally, expired fresh butter can be used in homemade skincare remedies, such as DIY lip balms or body scrubs.

Lastly, if you’re feeling crafty, you can even use expired fresh butter to make butter-based DIY crafts, such as candles or soap.

Creative Culinary Repurposing

You can get creative in the kitchen and repurpose fresh butter in various culinary endeavors. Here are three culinary experiments that will surely surprise your taste buds with their buttery goodness:

  1. Butter-infused sauces: Melt fresh butter and mix it with your favorite herbs and spices to create a flavorful sauce. Pour it over grilled meats or roasted vegetables for a decadent twist.

  2. Buttery pastries: Take your baking skills to the next level by incorporating fresh butter into your pastry dough. The result? Flaky, buttery croissants, pies, and tarts that will leave you craving for more.

  3. Butter-based spreads: Whip softened butter with your choice of ingredients like garlic, herbs, or even honey for a delightful spread. Slather it on warm bread or crackers and enjoy the rich, creamy flavors.

By exploring these culinary surprises, you’ll not only make the most out of your fresh butter but also elevate your dishes to a whole new level.

Advertisement

And speaking of elevating, why not discover how fresh butter can also be used in homemade skincare remedies?

Homemade Skincare Remedies

To enhance your skincare routine, try incorporating homemade remedies using fresh butter as a nourishing ingredient. Natural ingredients like butter have been used for centuries in skincare due to their nourishing properties. Butter is rich in vitamins A, E, and K, as well as fatty acids that help moisturize and soften the skin.

You can create a simple butter-based moisturizer by whipping together softened butter with a few drops of essential oil. This mixture can be applied to your face and body for deep hydration. Another option is to make a butter-based exfoliating scrub by mixing softened butter with sugar or salt. This gentle scrub will remove dead skin cells and leave your skin feeling smooth and radiant.

By incorporating fresh butter into your skincare routine, you can enjoy the benefits of natural ingredients and nourish your skin from the outside in.

Now that you’ve learned how to incorporate fresh butter into your skincare routine, let’s explore some butter-based DIY crafts that you can try.

Advertisement

Butter-Based DIY Crafts

If you’re looking for a fun and creative way to use butter, why not try some butter-based DIY crafts? Not only will you have a blast making these projects, but they can also be a great way to add a unique touch to your home decor or gifts for loved ones.

Here are three ideas to get you started:

  1. Butter Sculpture: Use a block of chilled butter and sculpt it into different shapes and figures. From animals to objects, the possibilities are endless. Just make sure to keep your hands cool to prevent the butter from melting too quickly.

  2. Butter Painting: Melt some butter and mix it with food coloring to create a vibrant palette. Use a brush or your fingers to paint on a canvas or even on toast for a whimsical breakfast treat.

  3. Butter Candle: Combine melted butter with wax and pour it into a candle mold. Once the butter solidifies, you’ll have a unique and fragrant candle that will add a cozy ambiance to your home.

Conclusion

In conclusion, fresh butter can last up to two weeks if stored properly. It is important to keep it refrigerated and away from strong odors to maintain its freshness.

When fresh butter starts to develop a sour smell or mold, it’s time to discard it. Remember to handle and use fresh butter with clean utensils to prevent contamination.

If you want to extend its lifespan, consider freezing it in airtight containers.

Advertisement

Lastly, even expired fresh butter can find new life as a moisturizer or ingredient in homemade soap.

Continue Reading
Advertisement

Product Care & Storage

How Long to Blanch Butter Beans for Perfect Texture

Published

on

By

An image showcasing a pot of plump butter beans gently boiling in salted water, their creamy white skins glistening, as a timer sits nearby, capturing the anticipation of the precise blanching time

Hey there! Have you ever thought about how much time it takes to blanch butter beans?

Well, I’ve got you covered. In this article, I’ll walk you through the basics of blanching these delicious beans, including all the equipment you’ll need and a step-by-step guide for perfect results.

I’ll also share some tips and tricks to ensure your butter beans come out just right, and point out common mistakes to avoid.

So, let’s get started and master the art of blanching butter beans together!

Key Takeaways

  • Blanching butter beans for 2-3 minutes ensures they are tender yet firm.
  • Immediately transferring blanched beans to ice water helps retain their color and crispness.
  • Adding salt, herbs, or spices to the cooking water enhances the flavor of butter beans.
  • Blanching butter beans is crucial for preserving their color, texture, and flavor.

The Basics of Blanching Butter Beans

Advertisement

I’ll start by explaining the basics of blanching butter beans. Blanching is a cooking technique where the beans are briefly boiled and then immediately plunged into ice water to stop the cooking process. It helps to preserve the bright green color and crisp texture of the beans. Blanching is also beneficial for removing the outer skins of butter beans, making them more tender and easier to digest.

In addition to being delicious, butter beans offer several health benefits. They’re a good source of dietary fiber, which aids in digestion and helps to maintain a healthy weight. They’re also packed with essential vitamins and minerals like folate, iron, and potassium.

There are various ways to cook butter beans. You can steam them, sauté them with butter and garlic for added flavor, or even roast them in the oven for a crispy texture. Another popular method is to boil them until tender and then toss them with olive oil, lemon juice, and herbs for a refreshing salad.

Overall, blanching butter beans is a simple and effective way to enhance their taste, texture, and nutritional value.

Required Equipment for Blanching Butter Beans

To prepare butter beans, I’ll need a pot, a colander, and a timer. These essential pieces of equipment are crucial for blanching butter beans to perfection.

Advertisement

Here’s a breakdown of the equipment needed:

  1. Pot: Choose a pot that’s large enough to hold the butter beans and allow them to move freely in boiling water. A pot with a lid is ideal for maintaining the heat and reducing cooking time.

  2. Colander: A colander is essential for draining the blanched butter beans. Make sure to choose a colander with small holes to prevent the beans from falling through.

  3. Timer: Accurate timing is crucial when blanching butter beans. Use a timer to ensure that the beans are blanched for the recommended time, which is typically around 2 to 3 minutes.

Step-by-Step Guide to Blanching Butter Beans

First, gather the necessary equipment for blanching the butter beans. You’ll need a large pot, a colander, a bowl of ice water, and a slotted spoon.

To blanch the butter beans, there are a few different methods you can choose from. One method is to bring a pot of water to a boil and add the beans, cooking them for about 2 minutes. Then, quickly transfer them to the bowl of ice water to stop the cooking process.

Advertisement

Another method is to steam the beans for about 4-5 minutes until they’re tender but still crisp.

Once the butter beans are blanched, they can be used in a variety of ways. They can be added to salads, soups, or stews. They can also be seasoned and eaten as a side dish.

The blanched beans can even be pureed and used as a base for dips or spreads. The possibilities are endless!

Tips and Tricks for Perfectly Blanching Butter Beans

After gathering the necessary equipment, I can achieve perfectly blanched butter beans by carefully monitoring the cooking time and immediately transferring them to ice water. Here are three tips and tricks for achieving the best results:

  1. Timing is key: It’s crucial to blanch the butter beans for just the right amount of time. Overcooking can lead to mushy beans, while undercooking may result in a raw taste. Aim for a cooking time of about 2-3 minutes, until the beans are tender but still firm.

  2. Ice water bath: Once the beans are cooked to perfection, immediately transfer them to a bowl of ice water. This stops the cooking process and helps retain their vibrant green color and crispness.

  3. Seasoning options: While blanching butter beans, you can add a touch of flavor by seasoning the cooking water with salt, herbs, or spices. This will infuse the beans with a subtle taste, enhancing their overall flavor.

By following these blanching techniques and exploring different seasoning options, you can elevate the taste and texture of your butter beans.

Advertisement

Now, let’s delve into the common mistakes to avoid when blanching butter beans.

Common Mistakes to Avoid When Blanching Butter Beans

One mistake I often make when blanching butter beans isn’t properly blanching them for the right amount of time. Blanching is an essential step in cooking butter beans as it helps to preserve their color, texture, and flavor.

There are a few common blanching techniques that can be used, such as boiling the beans for a short period of time and then quickly cooling them in ice water. This helps to stop the cooking process and maintain the beans’ vibrant green color.

Advertisement

Another technique is to steam the beans until they’re just tender and then shock them in ice water. This method helps to retain their nutrients and natural sweetness.

It’s important to blanch the beans for the recommended time specified in the recipe to ensure they’re cooked evenly and have the desired texture.

One alternative use for butter beans is to include them in salads, soups, or stews for added protein and fiber. They can also be pureed and used as a base for dips or spreads.

Frequently Asked Questions

Can I Use Frozen Butter Beans for Blanching?

Yes, you can use frozen butter beans for blanching. Blanching is a common method used to cook vegetables before freezing them. It helps to preserve their flavor, color, and texture.

To blanch frozen butter beans, bring a pot of water to a boil, add the beans, and cook for 2-3 minutes. Then, drain and immediately transfer them to an ice bath to stop the cooking process.

Advertisement

This will ensure that your frozen butter beans retain their quality.

How Long Does It Take to Blanch Butter Beans in a Pressure Cooker?

Blanching butter beans in a pressure cooker is a quick and efficient method. It eliminates the need for a stovetop, making it faster.

The pressure cooker traps steam, allowing the beans to cook in a shorter amount of time.

The texture and flavor of butter beans can be affected by blanching versus steaming.

Blanching gives them a softer texture and a slightly milder flavor, while steaming retains more of their natural crunch and taste.

Advertisement

Can I Skip the Blanching Step and Cook Butter Beans Directly?

I haven’t tried skipping the blanching step when cooking butter beans directly, but it isn’t recommended. Blanching helps to soften the beans and remove any impurities.

However, there are alternative methods of cooking butter beans that you can try, such as simmering or pressure cooking. These methods may take longer than blanching, but they’ll ensure that the beans are cooked thoroughly and have a nice texture.

Can I Reuse the Blanching Water for Cooking the Butter Beans?

Reusing the blanching water for cooking the butter beans isn’t recommended. While it may seem like a convenient idea, blanching water contains impurities and can affect the flavor and texture of the beans.

Blanching is an important step in cooking butter beans as it helps remove dirt, impurities, and enzymes. It also helps preserve their color and nutrients.

Is It Necessary to Peel the Outer Skin of Butter Beans After Blanching?

It isn’t necessary to peel the outer skin of butter beans after blanching. Blanching butter beans has several benefits, such as preserving their vibrant color and enhancing their texture.

Advertisement

However, if you prefer to remove the outer skin, there are a few tips to make it easier. First, blanch the beans for about 2-3 minutes, then transfer them to an ice bath to cool quickly. Gently squeeze each bean between your fingers to pop them out of their skins.

Conclusion

Blanching butter beans is a simple and rewarding process that ensures they maintain their vibrant color and crisp texture. With the right equipment and following a step-by-step guide, you can achieve perfectly blanched butter beans every time.

Remember to avoid common mistakes like overcooking or undercooking, as they can result in a less enjoyable eating experience.

So, grab your beans, get blanching, and enjoy these delicious and visually appealing treats!

Advertisement
Continue Reading

Product Care & Storage

Preserving the Goodness: How to Store Browned Butter

Published

on

By

An image capturing a glass jar filled with warm, golden-brown liquid butter

Hello, fans of butter! Have you ever thought about how to properly store the tasty browned butter you put so much effort into making? Well, look no further because I have all the information you need right here.

In this article, I’m going to show you the ins and outs of properly storing browned butter. We’ll dive into the shelf life, the best containers to use, and even discuss the dos and don’ts of refrigerating and freezing this golden goodness.

So grab your spatula and let’s get started!

Key Takeaways

  • Properly storing browned butter is important to prevent spoilage and maintain its flavor.
  • Browned butter can last up to two weeks in the refrigerator when stored in an airtight container.
  • Freezing browned butter can extend its shelf life up to three months.
  • Glass containers are recommended for storing browned butter as they are non-reactive, airtight, and retain the original taste and aroma.

Why Browned Butter Should Be Stored Properly

You should know why browned butter needs to be stored properly.

Advertisement

When it comes to shelf life concerns, browned butter is quite delicate. It has a tendency to go rancid quickly if not stored correctly. Proper storage is essential to maintain its flavor and prevent any spoilage.

Browned butter has a rich and nutty taste that can enhance the flavor of various dishes. However, if it is not stored properly, its flavor can deteriorate, becoming bitter or unpleasant.

By storing browned butter in an airtight container and keeping it in the refrigerator, you can extend its shelf life and preserve its delicious flavor.

Understanding the shelf life of browned butter is crucial for anyone who wants to enjoy its unique taste in their culinary creations.

Understanding the Shelf Life of Browned Butter

Understanding the shelf life of browned butter can help determine how long it will stay fresh.

Advertisement

Browned butter, with its rich and nutty flavor, is a versatile ingredient that adds depth to various dishes.

However, it is important to store it properly to preserve its aroma and extend its shelf life.

When stored in an airtight container, browned butter can last for up to two weeks in the refrigerator. To ensure its freshness, it is recommended to label the container with the date it was made.

If you want to extend its shelf life further, browned butter can also be frozen for up to three months. Just make sure to thaw it in the refrigerator before using.

Following these shelf life tips will help you enjoy the delicious taste of browned butter for longer.

Advertisement

The Best Containers for Storing Browned Butter

When it comes to storing browned butter, there are a few key considerations to keep in mind.

First, the choice between glass and plastic containers can impact the longevity and flavor of the butter.

Secondly, it’s important to determine whether an airtight container is necessary to maintain the freshness of the butter.

Lastly, if you plan on freezing your browned butter, it’s crucial to choose a container that is freezer safe to prevent freezer burn and maintain the quality of the butter.

Glass Vs. Plastic

If storing browned butter, opt for glass containers instead of plastic. Glass containers provide several advantages over plastic when it comes to storing browned butter. Firstly, glass is non-reactive, meaning it won’t absorb or transfer any odors or flavors to the butter. This ensures that the butter retains its original taste and aroma. Secondly, glass containers are more airtight compared to plastic, preventing any air from entering and oxidizing the butter. This helps to maintain the butter’s freshness and quality for a longer period. However, one drawback of glass containers is that they are more prone to breakage compared to plastic. Therefore, it’s important to handle them with care. Overall, the pros of using glass containers for storing browned butter outweigh the cons.

Advertisement
Pros of Glass Containers Cons of Glass Containers
Non-reactive Prone to breakage
Airtight
Retains freshness

Airtight or Not

To keep your browned butter fresh and prevent oxidation, opt for a glass container that is airtight. Airtight storage provides numerous benefits for proper storage of browned butter.

Firstly, it prevents air from entering the container and coming into contact with the butter, thereby reducing the risk of oxidation. This is important because when butter oxidizes, it can develop an off-putting flavor and aroma.

Secondly, an airtight container helps to maintain the moisture content in the butter, preventing it from drying out and becoming rancid.

Lastly, by keeping the butter in an airtight container, you can protect it from absorbing any unwanted odors or flavors from the environment.

Freezer Safe Options?

Glass containers that are freezer safe are a great option for preserving the freshness of your browned butter. Freezing browned butter is a common practice to extend its shelf life and maintain its flavor.

Advertisement

Here are some freezing techniques and alternative storage methods to consider:

  • Use glass containers with tight-fitting lids to prevent freezer burn.
  • Allow the browned butter to cool completely before transferring it to the container.
  • Leave some headspace in the container to allow for expansion during freezing.
  • Label the container with the date of freezing for easy reference.
  • Consider portioning the browned butter into smaller containers to thaw only what you need.

Refrigerating Browned Butter: Dos and Don’ts

When it comes to refrigerating browned butter, it’s important to consider the proper storage temperature to maintain its quality.

Additionally, shelf life concerns should be taken into account to ensure that the butter does not spoil.

Lastly, preserving the flavor and texture of the browned butter is crucial for its intended use in recipes.

Proper Storage Temperature

Make sure you store your browned butter at the right temperature to maintain its quality. Proper storage temperature is crucial for preserving the rich flavor and aroma of browned butter.

Here are some guidelines for storing browned butter:

Advertisement
  • Storing in the fridge: Browned butter can be stored in the refrigerator for up to 2 weeks. Make sure to transfer it to an airtight container to prevent absorption of odors. The lower temperature of the fridge helps to slow down the oxidation process, keeping the butter fresh.

  • Storing in the pantry: If you plan to use the browned butter within a week, storing it in a cool, dark pantry is an option. However, be cautious as warmer temperatures can cause the butter to spoil quickly. Keep the container tightly sealed to prevent any air exposure.

Shelf Life Concerns

Now that we’ve discussed the proper storage temperature for browned butter, let’s address the shelf life concerns.

Extending the shelf life of browned butter is essential to prevent spoilage and maintain its quality over time. Browned butter has a shorter shelf life compared to regular butter due to the caramelization process, which introduces new flavors and compounds that can degrade over time.

To extend the shelf life, it is crucial to store browned butter in an airtight container and refrigerate it. The cool temperature of the refrigerator slows down the oxidation process, preventing the butter from going rancid. Additionally, keeping it away from strong odors and light exposure can further help in preserving its freshness.

By following these storage practices, you can ensure that your browned butter stays safe to use for a longer period.

Now, let’s move on to the next section and explore how to maintain its flavor and texture.

Advertisement

Maintaining Flavor and Texture

To keep the flavor and texture of your browned butter intact, it’s important to regularly check for any signs of spoilage. Maintaining freshness is crucial in preventing rancidity and ensuring that your browned butter stays delicious and usable for a longer period of time.

Here are some tips to help you maintain the freshness of your browned butter:

  • Store it in an airtight container to prevent oxidation.
  • Keep it in the refrigerator to slow down the process of rancidity.
  • Use a clean utensil every time you scoop out butter to avoid introducing contaminants.
  • Avoid exposing the butter to direct sunlight or heat, as it can accelerate spoilage.
  • Regularly check for any off smells or discoloration, which are signs of spoilage.

Freezing Browned Butter: Step-by-Step Guide

You can easily freeze browned butter to extend its shelf life and keep it on hand for future recipes. Freezing browned butter is a great way to preserve its rich, nutty flavor and creamy texture.

To freeze browned butter, first let it cool completely. Then transfer it to an airtight container, leaving some space at the top for expansion. Label the container with the date and store it in the freezer for up to 6 months.

When you’re ready to use the frozen browned butter, there are a couple of thawing techniques you can use. You can either let it thaw in the refrigerator overnight or gently heat it in a saucepan over low heat until melted.

Alternatively, you can freeze browned butter in ice cube trays for individual portions or even use silicone molds for fun shapes. These alternative storage methods make it easy to portion out the browned butter as needed for your recipes.

Advertisement

How to Thaw and Reuse Frozen Browned Butter

When thawing and reusing frozen browned butter, it’s important to gently heat it in a saucepan over low heat until melted. This ensures that the butter retains its flavor and texture.

Here are some tips for a successful thawing process and reusing frozen butter:

  • Place the frozen browned butter in a saucepan.
  • Heat the saucepan over low heat, stirring occasionally.
  • Avoid using high heat to prevent the butter from burning.
  • Once the butter is completely melted, remove it from the heat.
  • Allow the melted butter to cool slightly before using it in your recipes.

Frequently Asked Questions

Can I Reuse Browned Butter Multiple Times?

Yes, you can reuse browned butter multiple times, but it’s important to follow best practices for storing it. Properly store it in an airtight container in the refrigerator to maintain its flavor and quality.

Can I Store Browned Butter at Room Temperature?

No, you shouldn’t store browned butter at room temperature. It is best to store it in the fridge to extend its shelf life. This helps to prevent spoilage and maintain its quality for longer.

Can I Store Browned Butter in a Plastic Container?

I can store browned butter in a plastic container. It’s important to use airtight containers to keep the butter fresh. Proper storage techniques include refrigerating or freezing the butter to extend its shelf life.

Can I Freeze Browned Butter in an Ice Cube Tray?

Sure, I can freeze browned butter in an ice cube tray. It’s a convenient way to portion and store. However, if you don’t have an ice cube tray, other options include using a silicone mold or freezer-safe bags.

Advertisement

Can I Use Frozen Browned Butter Directly in Recipes Without Thawing It First?

Yes, you can use frozen browned butter directly in recipes without thawing it first. It adds a rich, nutty flavor to baked goods. If you don’t have frozen browned butter, you can use regular butter as an alternative.

Conclusion

In conclusion, properly storing browned butter is essential to maintain its quality and extend its shelf life. By understanding the best containers and techniques for refrigerating and freezing, you can ensure that your browned butter remains delicious and ready to use whenever needed.

Treat it like a precious treasure, carefully protecting its rich and nutty flavor, just like a delicate butterfly preserved in a glass case.

So go ahead, store your browned butter with confidence, knowing that a world of culinary possibilities awaits you.

Advertisement
Continue Reading

Product Care & Storage

How to Find Apple Butter in Your Local Grocery Store

Published

on

By

An image featuring a spacious grocery store aisle, neatly stacked with rows of colorful jars

As someone who frequently shops for groceries, I often have to search through the large aisles of the store to find specific items. One product that I have had difficulty locating in the past is apple butter. If you are also struggling to find this delicious spread, you have come to the right place.

In this article, I will provide you with the inside scoop on the different sections of the grocery store where you can find apple butter, popular brands to look out for, and some helpful tips to make your search a breeze.

So let’s dive in and uncover the secrets of finding apple butter in the grocery store!

Key Takeaways

  • Apple butter is usually located near jams and spreads in the condiment or breakfast food aisle of a grocery store.
  • Availability of apple butter may vary depending on the season, but it can often be found in glass jars or plastic containers.
  • Some grocery stores may have a dedicated section for specialty spreads, where apple butter can also be found.
  • To find apple butter, it is recommended to read product reviews and compare prices online, store it properly for freshness, and check the condiment aisle or consider checking the baking section as an alternative.

Different Sections in a Grocery Store

You can find apple butter in the condiments section of the grocery store.

Advertisement

Shopping in different sections of a grocery store offers several benefits. Firstly, it allows for better organization and a more efficient shopping experience. By separating items into specific sections, it becomes easier to locate and purchase the items you need.

Secondly, shopping in different sections helps you discover new products and ingredients. It exposes you to a wider variety of options and encourages you to try new things.

Lastly, it can save you time and money. By navigating the different sections, you can compare prices and find the best deals on the items you’re looking for.

To make navigating grocery store sections easier, it’s helpful to create a shopping list beforehand, familiarize yourself with the store layout, and take advantage of any signage or aisle markers provided.

Aisle Locations for Apple Butter

The aisle with apple butter is usually located near the jams and spreads. This aisle organization makes it convenient for shoppers to find all their favorite spreads in one place. When it comes to apple butter, its availability may vary depending on the season.

Advertisement

Here are some key points to consider:

  • Apple butter is typically available year-round in most grocery stores.
  • However, it may be more abundant during the fall season when apples are in peak harvest.
  • Look for apple butter in glass jars or plastic containers.
  • It can be found in the condiments or breakfast food aisle.
  • Some stores may also have a dedicated section for specialty spreads.

Remember to check the store’s layout or ask a store associate for assistance if you are having trouble finding apple butter.

Popular Brands of Apple Butter

If you’re looking for popular brands of apple butter, there are several options to choose from.

When it comes to flavors of apple butter, you’ll find a variety of choices that cater to different tastes. Some popular brands offer classic apple butter with a smooth and sweet flavor, while others may have added spices like cinnamon or nutmeg for a more aromatic experience.

Advertisement

Homemade apple butter recipes often use a combination of apples, sugar, and spices to create a personalized flavor profile. These recipes allow for customization, so you can experiment with different types of apples or adjust the sweetness level to suit your preferences.

Whether you prefer the convenience of store-bought or the homemade touch, there’s an apple butter option out there for everyone.

Tips for Finding Apple Butter

When searching for apple butter, it’s helpful to read product reviews and compare prices online. This way, you can find the best quality apple butter at the most affordable price.

Here are some tips for storing apple butter:

  • Keep it in a cool, dry place: Apple butter should be stored in a pantry or cupboard away from heat and sunlight.
  • Use airtight containers: Transfer the apple butter into airtight jars or containers to keep it fresh for longer.
  • Refrigerate after opening: Once opened, apple butter should be stored in the refrigerator to maintain its flavor and consistency.
  • Check for mold or spoilage: Before using apple butter, always check for any signs of mold or spoilage. If it looks or smells off, it’s best to discard it.
  • Consider homemade apple butter recipes: Making your own apple butter allows you to control the ingredients and customize the flavor to your liking.

Store Layout and Apple Butter Placement

Advertisement

To find the apple butter quickly in the store, look for the condiment aisle near the jams and jellies.

Grocery stores often have a specific layout that is designed to make shopping more efficient for customers. The placement of items is carefully thought out to ensure that customers can easily find what they are looking for.

When it comes to apple butter, it is typically placed in the condiment aisle because it is considered a spread or topping. This aisle is usually located near the jams and jellies, as these items are often used in a similar way.

Alternative Places to Find Apple Butter in Grocery Stores

You might also want to check out the baking section for possible alternative places to find it.

Here are some other places where you might find apple butter in a grocery store:

Advertisement
  • Jams and spreads aisle: Apple butter is often located near other fruit spreads and jams, as it is a popular spread for toast and biscuits.

  • Natural and organic section: If you’re looking for homemade apple butter recipes or organic options, this section is worth exploring.

  • Ethnic food aisle: Some grocery stores categorize apple butter as a specialty item and place it in the ethnic food section, particularly if it is imported.

  • Local or regional products section: If your grocery store supports local or regional products, you may find apple butter from nearby farms or producers.

  • Seasonal displays: During autumn and winter, grocery stores often create seasonal displays that feature apple butter along with other seasonal items.

In addition to being a delicious spread, apple butter also offers health benefits. It is a good source of dietary fiber and contains vitamins and minerals like vitamin C, potassium, and iron.

Frequently Asked Questions

How Many Different Sections Are There in a Typical Grocery Store?

There are usually different sections in a typical grocery store, such as produce, dairy, meat, and pantry. When it comes to apple butter, you can find it in the condiments or spreads aisle. Look for different types and choose the best one for your recipes.

Are There Any Other Popular Fruit Butters Available in Grocery Stores?

There are many popular fruit butters available in grocery stores. They are a delicious way to enjoy the flavors of different fruits. Fruit butter recipes can be found online, and they offer various health benefits.

Can You Provide Tips on How to Make Homemade Apple Butter?

To make homemade apple butter, here are some tips: choose the best apples like Granny Smith or McIntosh, peel and core them, cook with sugar, cinnamon, and lemon juice, and let it simmer until thick and spreadable.

What Are Some Common Store Layouts for Grocery Stores?

Common grocery store layouts vary, but most follow a similar organization. Sections are typically arranged by type of product, such as produce, dairy, and meat. This helps customers easily navigate the store and find what they need.

Advertisement

Are There Any Online Retailers That Sell Apple Butter?

There are several online retailers where you can find apple butter. When choosing the best brand, consider factors like ingredients, reviews, and price. Personally, I love shopping for apple butter online for convenience and variety.

Conclusion

In conclusion, finding apple butter in a grocery store can be a bit of a challenge if you’re not sure where to look. However, with some knowledge of the store layout and the popular brands, it becomes much easier.

For example, I recently had a customer who was desperately searching for apple butter to make a special apple pie for her daughter’s birthday. After giving her some tips and guiding her to the correct aisle, she was overjoyed and grateful for the assistance.

So don’t give up, apple butter is out there waiting for you!

Advertisement
Continue Reading

Trending