Connect with us

Recipes & Culinary Uses

10 Steps to Shea Butter Made Simple

Published

on

An image showcasing the intricate process of shea butter production

I have always been intrigued by the process of making shea butter. It is the creamy and luxurious ingredient that can be found in numerous skincare products. After doing some research, I uncovered the fascinating process of how shea butter is created.

From the origins of shea nuts to the modern techniques used for production, every step plays a crucial role in producing the highest quality shea butter.

So, let’s dive in and explore the world of shea butter production together.

Key Takeaways

  • Shea butter is derived from the nuts of the shea tree native to West Africa and is harvested through sustainable practices that provide employment opportunities for women in rural communities.
  • Traditional methods of shea butter extraction involve heating and crushing the nuts to separate the butter from solids, which is time-consuming but essential for high-quality shea butter.
  • Modern techniques include collection and cleaning of shea nuts, roasting to enhance flavor and fragrance, grinding into a fine paste, and filtering to remove impurities, ensuring only high-quality nuts are used.
  • The process of shea butter pressing involves hydraulic pressing to extract oil from ground powder, followed by melting, cooling, straining, and specialized filtering methods to remove impurities and create a stable and firm texture. Packaging and storing shea butter in airtight containers in a cool, dry place is important to preserve its freshness and quality. Fair trade certification ensures that shea butter meets quality and fairness standards.

The Origins of Shea Butter

You might be wondering where shea butter comes from. Well, let me enlighten you.

Advertisement

Shea butter is derived from the nuts of the shea tree, which is native to West Africa. The process of making shea butter starts with the collection of the nuts, which are then dried and crushed to extract the oil. This oil is then heated and filtered to remove impurities, resulting in the creamy and rich shea butter that we all know and love.

One of the remarkable things about shea butter is its sustainable production. The shea tree grows naturally in the wild, without the need for extensive cultivation. This means that the production of shea butter has a minimal impact on the environment.

Additionally, the harvesting and processing of shea nuts provide employment opportunities for many women in rural communities. This has a significant economic impact, as it helps to empower these women and improve their livelihoods.

Harvesting Shea Nuts

When it comes to harvesting shea nuts, there are several key points to consider.

First, the process of shea nut collection involves gathering the nuts from the shea tree, which typically grows in the dry savannah regions of Africa.

Advertisement

Second, traditional harvesting methods involve climbing the tree and using long sticks to knock the nuts down, or shaking the branches to make them fall.

Lastly, sustainable sourcing practices aim to ensure that shea nuts are harvested in a way that does not harm the trees or the environment, promoting the long-term viability of the shea butter industry.

Shea Nut Collection

The first step in making shea butter is collecting the shea nuts. Shea nuts are the seeds found inside the fruit of the shea tree, which grows in the savannahs of Africa. Shea nut processing begins with the collection of ripe fruits that have fallen to the ground. The nuts are then carefully separated from the fruit pulp. This is usually done by hand, using traditional methods.

Once the nuts are collected, they are typically dried in the sun for several days to reduce their moisture content. After drying, the nuts are cracked open to reveal the kernel inside. The kernels are then roasted and ground into a paste, which is then processed to extract the shea butter.

Shea butter has numerous benefits, including its moisturizing and healing properties, making it a valuable ingredient in skincare products.

Advertisement

Transitioning to the next section, let’s explore the traditional harvesting methods of shea nuts.

Traditional Harvesting Methods

Using traditional methods, the ripe fruits that have fallen to the ground are carefully collected in the traditional harvesting of shea nuts. This process ensures that only the best quality nuts are gathered for the production of shea butter. The traditional harvesting methods have been passed down through generations, preserving the authenticity and sustainability of the process.

Here are the three key steps involved in the traditional harvesting of shea nuts:

  • Gathering: Local women, who are experts in this field, venture into the shea tree groves and collect the fallen fruits. They meticulously inspect each fruit to ensure it is fully ripe and ready for processing.

  • Sorting: Once the fruits are gathered, they are sorted to separate the shea nuts from the pulp. The nuts are then carefully washed to remove any impurities.

  • Drying: After being sorted, the shea nuts are spread out on mats or woven baskets to dry under the sun. This natural drying process allows the nuts to retain their nutritional value and ensures optimal quality for the extraction of shea butter.

Sustainable Sourcing Practices

To ensure sustainability, I can support local communities by sourcing shea nuts through environmentally friendly practices.

Ethical sourcing and fair trade are crucial components of sustainable shea butter production. By partnering with local communities and cooperatives, we can ensure that the shea nuts are harvested in a way that does not harm the environment or exploit the workers.

Advertisement

This means using methods that promote the regeneration of shea trees and protect the biodiversity of the surrounding ecosystems. Additionally, fair trade practices guarantee that the workers receive a fair wage for their labor and that their rights are respected.

Traditional Methods of Extraction

When it comes to extracting shea butter, there are traditional methods that have been used for generations. These methods involve the use of heat and crush techniques to break down the shea nuts and release the oils.

The process is done manually, with the nuts being crushed and heated to extract the butter. This natural and traditional process ensures that the shea butter retains its purity and all its beneficial properties.

Heat and Crush

The shea nuts are heated and then crushed to extract the butter. Heat treatment is an essential step in the process as it helps soften the nuts and make the extraction easier.

Here is a detailed description of the crushing process:

Advertisement
  • The heated shea nuts are placed in a mortar and pestle or a mechanical crusher.
  • The nuts are then crushed using a pounding motion or mechanical pressure.
  • The crushing process breaks down the nuts into smaller pieces, allowing the oils to be released.
  • The crushed nuts are then further processed to separate the butter from the remaining solids.

This heat and crush method is an effective way to extract shea butter, as it maximizes the yield and ensures the highest quality.

The next step in the extraction process involves manual techniques to separate the butter from the solids.

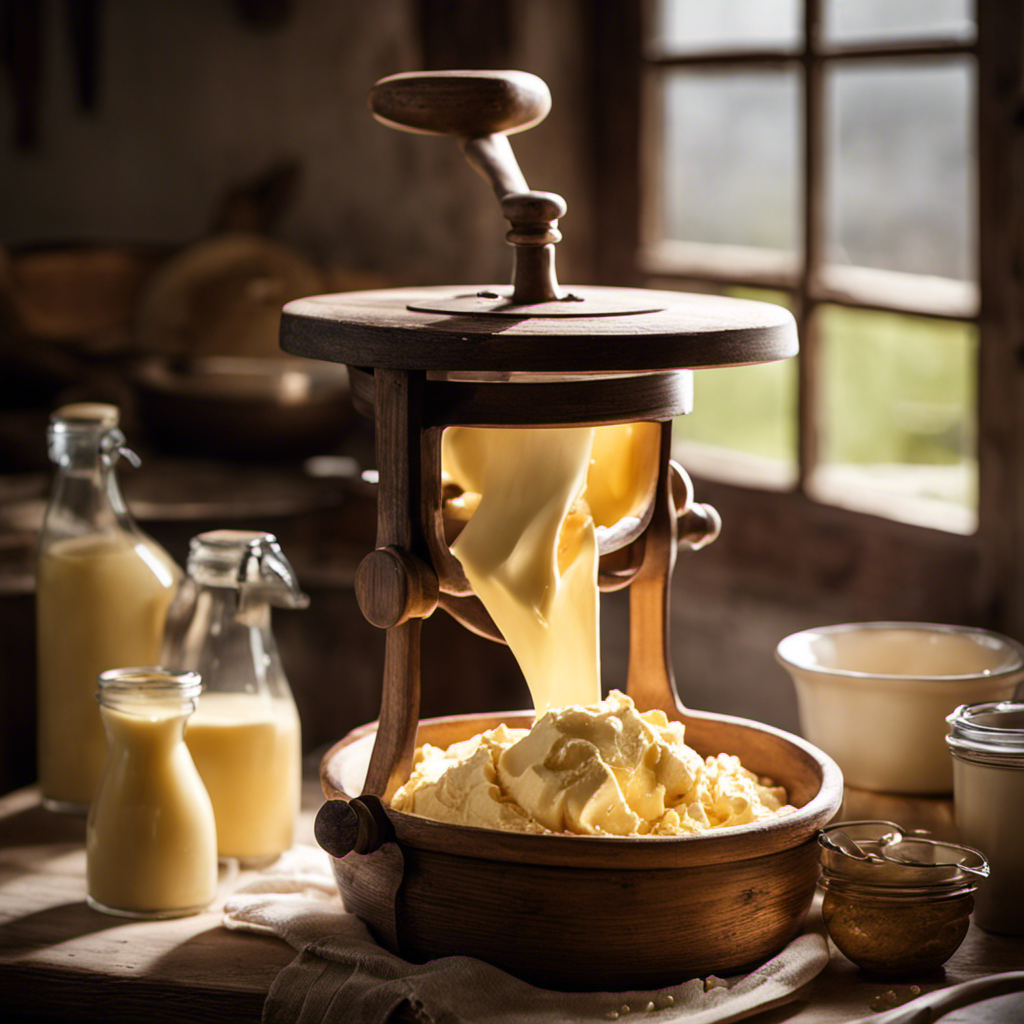
Manual Extraction Process

Using manual techniques, I separate the butter from the remaining solids after the heat and crush process. This step is crucial in the traditional techniques of making shea butter. It is a handmade process that requires skill and precision.

After the nuts are heated and crushed, the resulting paste is placed in a large container. I then manually separate the butter from the solids by kneading and pressing the paste. The butter gradually separates and rises to the surface, while the remaining solids sink to the bottom. This manual extraction process ensures that only the pure butter is collected, free from any impurities. It is a time-consuming process but essential for producing high-quality shea butter.

Transitioning into the subsequent section, the natural and traditional methods used in shea butter production guarantee its authenticity and effectiveness.

Natural and Traditional

In the natural and traditional methods, skill and precision are required to manually separate the butter from the solids. This meticulous process ensures the highest quality shea butter. Here are some key points to understand about traditional extraction methods and the benefits of shea butter:

Advertisement
  • Traditional extraction methods:

  • The shea nuts are collected and dried in the sun for several days.

  • The dried nuts are then crushed and roasted to release the oils.

  • The roasted nuts are ground into a paste and mixed with water.

  • Benefits of shea butter:

  • Moisturizing properties: Shea butter is rich in fatty acids and vitamins, making it an excellent moisturizer for the skin.

  • Anti-inflammatory effects: The natural compounds in shea butter can help soothe and calm irritated skin.

  • Anti-aging properties: Shea butter contains antioxidants that can help reduce the appearance of wrinkles and fine lines.

Modern Techniques for Shea Butter Production

Modern techniques have revolutionized the production of shea butter. Through the use of modern machinery and sustainable practices, the process of extracting shea butter has become more efficient and environmentally friendly.

First, the nuts are collected from the shea tree and then cleaned to remove any impurities.

Next, they are roasted to enhance the flavor and fragrance of the butter.

After roasting, the nuts are ground into a fine paste using modern grinding machines.

This paste is then mixed with water and kneaded to separate the oil from the solids.

Advertisement

The oil is then heated and filtered to remove any remaining impurities.

Finally, the pure shea butter is cooled, solidified, and packaged for sale.

These modern techniques not only increase production efficiency but also ensure that shea butter is produced in a sustainable and eco-friendly manner.

Sorting and Cleaning the Shea Nuts

After the shea nuts have been harvested and dried, the next step in the shea butter production process is sorting and cleaning. This crucial step ensures that only the highest quality nuts are used for processing.

Here are the key steps involved in sorting and cleaning the shea nuts:

Advertisement
  • Removal of debris: The nuts are carefully inspected and any foreign matter such as leaves, twigs, or stones is removed.

  • Separation of damaged nuts: Nuts that are discolored, moldy, or rotten are separated from the good ones to maintain quality control.

  • Sizing and grading: The nuts are sorted based on their size and quality. This helps to ensure uniformity during processing.

By carefully sorting and cleaning the shea nuts, we can guarantee that only the best quality nuts are used, resulting in high-quality shea butter.

With the shea nuts sorted and cleaned, the next step is to roast and grind them to extract the precious shea butter.

Roasting and Grinding the Shea Nuts

Now that you have sorted and cleaned the shea nuts, it’s time to roast and grind them to extract the precious oil. Roasting the nuts is a crucial step in the shea butter making process as it enhances the aroma and flavor of the final product. There are various roasting techniques used, but the most common one involves placing the nuts in a hot pan or oven and gently stirring them until they turn a deep brown color. This process helps to break down the nuts and release the oils trapped within. After roasting, the nuts are cooled and then ground into a fine powder using grinding methods such as stone grinding or mechanical grinding. This grinding process further releases the oils, creating a smooth and creamy texture.

Roasting Techniques Grinding Methods
Pan Roasting Stone Grinding
Oven Roasting Mechanical Grinding
Open Fire Roasting
Indirect Heat Roasting

The Process of Shea Butter Pressing

During the pressing process, the ground shea nut powder is placed in a hydraulic press to extract the oil. This process is crucial in producing shea butter, as it separates the oil from the nut powder.

Here’s a closer look at how the pressing process works:

Advertisement
  • The hydraulic press applies pressure to the shea nut powder, causing the oil to be squeezed out.
  • The extracted oil is collected and set aside for further processing.
  • The remaining solid residue, known as shea cake, is often used as animal feed or as a natural fertilizer.

Shea butter benefits include moisturizing the skin, reducing inflammation, and providing nourishment to the hair. Shea butter uses range from skincare products like lotions and creams to hair masks and lip balms.

With the oil extracted through pressing, the next step in the shea butter production process is to purify and filter the oil to obtain the final product.

Purifying and Filtering the Shea Butter

To purify and filter the shea butter, you’ll need to melt it down and remove any impurities. This process is essential to ensure that the final product is of high quality and free from any unwanted substances. There are various purifying techniques and filtering methods that can be used to achieve this.

One common method is to melt the shea butter at a low temperature to separate the impurities from the pure butter. Once melted, the butter is then allowed to cool down and solidify, which helps to further separate any remaining impurities. Another technique is to use a fine mesh or cheesecloth to strain the melted shea butter, effectively removing any larger particles or debris.

In addition to these techniques, there are also specialized filtering methods that can be employed. This can include the use of activated charcoal, which helps to absorb and remove impurities from the shea butter. Another option is to use a filtration system that utilizes multiple layers of different filter media, such as activated carbon and micron filters, to ensure thorough purification.

Overall, purifying and filtering shea butter is an important step in the production process, as it helps to ensure the final product is clean, pure, and suitable for use in various cosmetic and skincare applications.

Advertisement
Purifying Techniques Filtering Methods
Melting and Solidifying Straining with a Mesh
Activated Charcoal Filtration Systems
Cooling and Separating Multiple Layer Filters

Cooling and Solidifying Shea Butter

Once the shea butter has been melted down, you can allow it to cool and solidify, which will aid in separating any remaining impurities.

The cooling process is an important step in the shea butter-making process as it helps to remove any excess moisture and allows the butter to solidify into a smooth and creamy consistency.

During the cooling process, the shea butter undergoes a solidification process where it transforms from a liquid state to a solid state. This solidification process involves the alignment of the fat molecules within the butter, creating a stable and firm texture.

As the shea butter cools and solidifies, any impurities or sediments present in the butter will settle at the bottom, making it easier to separate them from the pure butter.

Packaging and Storing Shea Butter

When packaging and storing your shea butter, make sure to use airtight containers to preserve its freshness and extend its shelf life. Proper packaging techniques are crucial to maintain the quality and effectiveness of this valuable product.

Advertisement

Choose containers made of glass or dark-colored plastic to protect the shea butter from exposure to light, which can degrade its properties. Additionally, consider using a tin or aluminum container with a tight-fitting lid to prevent air from entering and causing oxidation.

It is also important to store the shea butter in a cool, dry place away from direct sunlight and heat sources. This will help to prevent the butter from melting or becoming rancid.

Shea Butter Quality and Certification Standards

After learning about the packaging and storing of shea butter, let’s dive into the quality and certification standards in the shea butter industry.

It’s important to ensure that the shea butter we use meets certain standards for both quality and fairness. One way to ensure this is through fair trade certification. Here are some key points to consider:

  • Quality Standards:

  • Shea butter should have a smooth texture and a mild, nutty aroma.

  • It should be free from any impurities or foreign particles.

  • The color of shea butter can range from ivory to yellow, depending on the extraction process and region.

  • Fair Trade Certification:

  • Fair trade certification ensures that shea butter is produced and traded ethically.

  • It promotes fair prices for shea butter producers, empowering women in rural communities.

  • Fair trade certification also encourages sustainable farming practices and supports environmental conservation.

Frequently Asked Questions

Can Shea Butter Be Used by People With Nut Allergies?

Yes, shea butter can be used by people with nut allergies. However, it is important to consult with a healthcare professional first. There are also shea butter alternatives available that offer similar benefits for the skin.

Advertisement

How Long Does It Take for Shea Nuts to Mature and Be Ready for Harvesting?

How long does it take for shea nuts to mature and be ready for harvesting? Well, shea nut growth is a gradual process. It typically takes around 15 years for the shea tree to produce mature nuts that are ready for harvesting.

What Are the Different Types of Shea Butter Available in the Market?

There are various types of shea butter available in the market, each with its own unique benefits. It is important to choose the right type based on your skincare needs and preferences.

Is Shea Butter Production Sustainable and Environmentally Friendly?

Shea butter production is sustainable and environmentally friendly. The process involves handcrafting, which promotes fair trade and supports local communities. It also has a low environmental impact, as it doesn’t require any harmful chemicals or synthetic additives.

How Can Consumers Determine the Quality and Authenticity of Shea Butter Products?

Determining the quality and authenticity of shea butter products can be done by checking for certifications, reading product labels for ingredients and processing methods, and researching the reputation of the brand or manufacturer.

Conclusion

In conclusion, learning about the process of making shea butter has been an eye-opening experience.

Advertisement

From the traditional methods passed down through generations to the modern techniques used today, it is clear that producing shea butter is a labor-intensive and meticulous process.

Like the transformation of shea nuts into the smooth and creamy butter, this journey has taught me that sometimes, in order to achieve something truly valuable, we must go through a rigorous process of refinement and purification.

Continue Reading
Advertisement

Recipes & Culinary Uses

Southern Comfort: Best Butter Bean Recipe for Hearty Meals!

Craving a taste of Southern comfort?

Published

on

By

delicious southern butter beans

Indulge in the rich, buttery flavors of Southern comfort with the best butter bean recipe that promises hearty satisfaction in every bite. Enhance the creamy texture with bacon, onions, and garlic for a mouthwatering dish. Incorporate ingredients like ham hock for a smoky twist. Don't forget to season with salt, cracked pepper, and brown sugar for a perfect balance. Pair with cornbread or cheddar cheese quick bread to elevate the experience. Experiment with flavors to create the ultimate Southern comfort cuisine. Get ready to elevate your culinary skills and taste buds to the next level with this delicious butter bean recipe!

Key Takeaways

  • Butter beans offer a creamy, buttery flavor ideal for Southern comfort cuisine.
  • Enhance dishes with ingredients like bacon, onions, and garlic for rich flavors.
  • Experiment with flavor combinations like smoky bacon and sweet brown sugar.
  • Pair butter beans with cornbread, rice, or cheddar cheese quick bread for a satisfying meal.
  • Store leftovers in the fridge for up to five days or freeze for later use.

Butter Bean Vs. Lima Bean

legume showdown butter versus lima

When comparing butter beans to lima beans, you'll notice that butter beans are the larger variety, while lima beans are smaller. Both types are creamy beans with a mild, buttery flavor that make them popular in various dishes.

Originating from Lima, Peru over 9000 years ago, these legumes have become a staple in cuisines worldwide. Large lima beans are commonly found at local grocery stores, perfect for incorporating into your favorite recipes.

In terms of size, butter beans offer a heartier bite compared to the smaller lima beans. The creamy texture of both beans is ideal for dishes that require a smooth consistency, such as soups, stews, and casseroles.

Whether you choose butter beans or lima beans for your next meal, you can expect a deliciously rich and buttery undertone that complements a wide range of ingredients. So, next time you're at the store, consider picking up some large lima beans to elevate your culinary creations.

Flavor Profile and Taste

exploring food sensory experience

You'll find that butter beans offer a mild, buttery flavor that adapts well to a variety of dishes. Their creamy texture and delicate taste make them a versatile addition to Southern comfort cuisine.

When exploring the flavor profile of butter beans, consider their culinary appeal in classic dishes and how they complement savory ingredients like bacon and onions.

Advertisement

Taste and Texture

Enhancing the flavor profile of butter beans is essential for creating delicious and satisfying dishes. When you make butter beans, whether using large dried beans or canned ones, you'll notice their creamy texture and mild, buttery taste. These characteristics make butter beans versatile for different recipes.

The rich protein and fiber content in butter beans not only provide long-lasting satisfaction but also offer essential nutrients.

Incorporating ingredients like bacon, ham hock, onions, and garlic can elevate the flavor of butter beans, adding depth and complexity to your dishes. These additions complement the beans' mild taste, creating a harmonious blend of flavors.

Whether you're preparing a hearty soup, a comforting stew, a flavorful casserole, a creamy dip, or a revitalizing salad, butter beans can be the star ingredient that brings everything together.

The smooth texture of butter beans contributes to the overall enjoyment of the dish, making each bite a delightful experience. Their versatility and ability to absorb flavors make them a staple in Southern comfort food recipes.

Advertisement

Flavor Combinations

Creating delicious dishes with butter beans involves combining their mild, buttery flavor with savory ingredients like bacon, ham, and onions for a rich and satisfying taste experience.

When preparing butter beans, consider these flavor combinations to elevate your dish:

  • Smoky Flavors: Incorporating cooked bacon or ham hock adds a delightful smokiness that enhances the overall taste profile of the butter beans.
  • Sweet Elements: Adding a touch of brown sugar complements the natural buttery taste of the beans, creating a harmonious balance of flavors.
  • Seasoning: Enhance the taste of butter beans by seasoning them with salt and cracked pepper, which adds depth and a hint of spice to the dish.
  • Versatility: The creamy texture of butter beans allows them to pair well with various ingredients, making them versatile for both hearty and light dishes.

Experimenting with these flavor combinations will help you create mouthwatering butter bean dishes that are sure to impress your taste buds.

Culinary Appeal

Butter beans' culinary appeal lies in their mild, buttery flavor that effortlessly complements a variety of seasonings and ingredients. These beans, also known as baby lima beans, offer a creamy texture and are a staple in Southern comfort dishes. Originating over 9000 years ago in Lima, Peru, butter beans have a rich history in cuisines worldwide. Young lima beans are tender and mild, ideal for quick cooking methods that preserve their delicate flavor. The versatile nature of butter beans allows them to be used in soups, stews, casseroles, dips, and salads, adding depth and heartiness to meals.

Flavor Texture Versatility
Mild, buttery Creamy Soups, stews, casseroles
Complements seasonings Tender Dips, salads
Rich history Versatile Southern comfort dishes

Home-Style Recipe Ingredients

home cooking ingredient list

You're about to discover the key ingredients that make up a classic home-style butter bean recipe.

Bacon, onion, brown sugar, butter, salt, and cracked pepper all play crucial roles in creating a flavorful and hearty dish.

These essential ingredients work together to enhance the taste profile of the butter beans, ensuring a delicious and satisfying meal.

Advertisement

Recipe Ingredients Breakdown

To make the home-style butter beans recipe, gather bacon, onion, brown sugar, frozen butterbeans, butter, salt, and cracked pepper. When preparing this hearty dish, each ingredient plays an essential role in enhancing the flavors and textures of the butter beans.

Here's a breakdown of the key components:

  • Bacon: Adds a savory smokiness to the dish, infusing it with rich flavors.
  • Brown Sugar: Provides a touch of sweetness that balances out the savory notes in the butter beans.
  • Frozen Butterbeans: Convenient and quick to cook, these big lima beans are perfect for this comforting recipe.
  • Butter, Salt, and Cracked Pepper: Together, these ingredients work harmoniously to elevate the overall taste of the dish, creating a deliciously rich and well-rounded flavor profile.

Key Flavor Enhancements

Enhancing the flavors of the home-style butter beans recipe is essential for creating a delicious and satisfying dish that balances savory and sweet notes. The key to achieving this balance lies in the combination of cooked beans, salt, and pepper.

When seasoning the dish, a pinch of salt and a generous crack of pepper are vital to enhance the natural flavors of the beans and create a well-rounded taste profile.

Cooked beans serve as the hearty base of the dish, providing a robust texture and earthy flavor that pairs perfectly with the other ingredients. Seasoning with salt not only brings out the inherent tastes of the beans but also helps to marry the flavors of the dish together.

Additionally, cracked pepper adds a subtle heat and depth to the butter beans, elevating the overall taste experience. By incorporating these key flavor enhancements into your home-style butter beans recipe, you can enjoy a satisfying and flavorful meal that will leave you craving more.

Advertisement

Cooking Method Details

detailed cooking method explanation

For achieving peak tenderness and flavor infusion, simmering butter beans in a seasoned broth is a fundamental cooking method detail. This process allows the beans to absorb the flavors of the broth while softening to the perfect texture.

To enhance the cooking method further, consider the following tips:

  • Stir well: Regularly stirring the butter beans while simmering helps distribute the flavors evenly and prevents them from sticking to the bottom of the pot.
  • Bring to a boil: Start the cooking process by bringing the seasoned broth and butter beans to a boil, then reduce the heat to a simmer to gently cook the beans.
  • Add complementary ingredients: Incorporating vegetables, meats like ham hocks, or herbs and spices can elevate the flavors of the butter beans during the cooking process.
  • Utilize different cooking techniques: Experiment with stovetop cooking or using a slow cooker to find the method that best suits your preferences and time constraints.

Storage and Reheating Tips

food storage and reheating

Properly storing and reheating your cooked butter beans is essential for maintaining their quality and flavor. After cooking a delicious batch of butter beans, make sure to refrigerate any leftovers promptly in an airtight container. This will help keep them fresh for up to five days. For longer storage, you can freeze the butter beans for up to three months. When you're ready to enjoy them again, simply thaw the frozen beans in the refrigerator before reheating.

To reheat your butter beans, you have the option of using the stovetop or microwave. Reheating on the stovetop is a great way to ensure even heating and prevent the beans from becoming mushy. Heat them until they are hot and ready to serve. Once reheated, you can enjoy your butter beans as a hearty side dish or incorporate them into various recipes for added flavor and texture.

Storage Tips Reheating Tips Freezing Tips
Refrigerate in airtight Reheat on stovetop or Freeze leftovers for up
container for up to five microwave until hot to three months
days
Thaw frozen beans in
the refrigerator before
reheating

Side Dish Pairings

dinner party menu ideas

To create a satisfying and well-rounded meal with butter beans, consider pairing them with traditional Southern sides like cornbread, white rice, and cheddar cheese quick bread. These side dishes perfectly complement the creamy texture and mild, buttery flavor of butter beans, enhancing the overall dining experience.

In addition to these classics, you can also enjoy butter beans with bread and butter or Texas Toast to elevate the Southern comfort food experience.

  • Butter beans are a classic side dish that pairs well with a variety of Southern staples.
  • Traditional accompaniments like cornbread and white rice enhance the rich flavors of butter beans.
  • Cheddar cheese quick bread offers a savory twist to the meal, adding depth to the dish.
  • Experimenting with different side dishes allows for a personalized touch to your butter bean meal, catering to diverse tastes and preferences.

Southern Comfort Classics

comforting southern cuisine favorites

You're about to discover timeless Southern recipes that bring hearty comfort to your table.

These classic dishes embody the warmth and tradition of Southern cooking, offering a taste of nostalgia with every bite.

Get ready to savor the rich flavors and comforting goodness of Southern comfort classics.

Advertisement

Timeless Southern Recipes

When exploring Southern comfort classics, you'll find that butter bean recipes are a beloved staple dish known for their hearty and satisfying nature. These timeless Southern recipes make the most of ingredients like butter beans, which offer a creamy texture and mild, buttery flavor that perfectly complements traditional Southern cooking.

To create an authentic Southern butter bean dish, consider the following:

  • Use High-Quality Ingredients: Opt for fresh or dried butter beans, and don't skimp on flavorful additions like bacon or ham hocks.
  • Slow Cooking Techniques: Embrace slow cooking methods to allow the flavors to meld together and create a rich, comforting dish.
  • Season Thoughtfully: Onions, garlic, and a touch of seasoning can elevate the humble butter bean to new heights of deliciousness.
  • Serve with Cornbread: A classic accompaniment to Southern dishes, cornbread pairs perfectly with butter beans for a complete and satisfying meal.

These Southern comfort dishes are sure to become a favorite at family gatherings, offering a taste of tradition and warmth in every bite.

Hearty Comfort Dishes

For those seeking ultimate comfort in their meals, Southern classics offer a range of hearty dishes that bring warmth and satisfaction with every bite. When it comes to preparing these comforting meals, a Dutch oven can be your best friend. Set it over medium heat, and you're ready to create delicious Southern comfort dishes that will surely become family favorites.

The versatility of butter beans shines in traditional Southern recipes like stews, casseroles, and soups, adding a creamy texture and mild, buttery flavor to every dish. With a rich history deeply rooted in Southern cuisine, butter beans have stood the test of time, proving to be a beloved ingredient for generations.

Incorporating butter beans into your cooking repertoire not only pays homage to Southern culinary traditions but also brings a taste of comfort to your table. So, why not whip up a hearty butter bean stew or casserole in your Dutch oven today? Your taste buds will thank you for the cozy Southern goodness that awaits.

Advertisement

Meat Additions and Enhancements

enhancing meat with additions

Enhance the flavor and richness of your butter bean recipe by incorporating bacon or ham into the dish. These meat additions not only add depth but also infuse the beans with a savory and smoky essence that elevates the overall taste of the dish.

To make the most of these meat additions, consider the following:

  • Bacon: Fry the bacon until crispy, then crumble it into the beans for a burst of salty goodness.
  • Ham: Boil the ham hocks alongside the beans to infuse the broth with a rich, meaty flavor.
  • Leftover Ham: Utilize any leftover ham by adding it towards the end of cooking to retain its tenderness and taste.
  • Butter: If you want to enhance the richness further, reduce the amount of butter needed to add a velvety finish to the beans.

Butter and Oil Options

mixing butter with oil

Consider incorporating butter or oil into your butter bean recipe to enhance its flavor and creaminess.

While adding butter isn't a strict requirement, it can greatly improve the overall taste and texture of your dish. If you prefer a dairy-free option or just want to experiment, using oil as a substitute can also achieve that desired creaminess in your beans.

To make this recipe even more indulgent, you may need to add a tablespoon or two of fat per pound of beans during the cooking process. This addition can infuse a rich flavor into the beans, especially when incorporated midway through cooking.

Don't be afraid to try different types of fats to see which one complements your butter beans the best. By choosing the right butter or oil for your recipe, you can elevate the flavors and create a truly satisfying dish.

Leftover Handling and Reheating

efficiently manage leftovers at home

Store your cooked butter beans in an airtight container in the refrigerator for 3-4 days. When dealing with leftovers, proper handling and reheating techniques can help maintain the delicious taste and texture of your butter beans.

Here are some essential tips to make the most of your leftovers:

Advertisement
  • Freezing Options: You can freeze cooked butter beans for up to 3 months for future use.
  • Thawing Process: Thaw frozen butter beans in the refrigerator before reheating to preserve texture.
  • Reheating Methods: Reheat butter beans in the microwave or on the stovetop until thoroughly heated.
  • Assessing Consistency: Avoid adding water immediately when reheating butter beans; assess consistency as they heat up.

Frequently Asked Questions

Should I Soak Butter Beans Before Cooking?

You don't have to soak butter beans before cooking, but a quick 30-minute soak can help. It's optional, depending on your preference. Soaking may reduce cooking time and improve texture in some recipes, ensuring even tenderness.

Are Butter Beans Good for Your Heart?

Butter beans are like tiny heart superheroes in a pod. They're packed with fiber, potassium, folate, and magnesium—all working together to support your heart health and keep it ticking strong.

Is There a Difference Between Butter Beans and Lima Beans?

Yes, there isn't a difference between butter beans and lima beans. They're the same type of bean, just with varying names based on size. Enjoy their creamy texture and buttery taste in a variety of dishes!

What Is the American Version of Butter Beans?

In the US, butter beans are the American version of lima beans. These creamy legumes, often used in Southern cooking, offer a mild, buttery taste. So, when looking for butter beans, know you're getting a true Southern favorite!

Conclusion

To sum up, whether you choose butter beans or lima beans, the hearty and comforting flavors in this recipe will satisfy your cravings.

From the rich and creamy texture to the savory seasonings, each bite will transport you to a Southern kitchen.

Advertisement

So go ahead, whip up a batch of this classic dish and enjoy the warmth and nostalgia it brings to your table. It's a simple yet delicious way to experience true Southern comfort.

Continue Reading

Recipes & Culinary Uses

Playtime Fun: Best Butter Slime Recipe for Kids!

Are you ready to create the best butter slime for your kids?

Published

on

By

butter slime kids love

Ready to create the best butter slime for your kids? Mix white glue and shaving cream, then add Crayola Model Magic clay for texture. Knead the ingredients until smooth and adjust with more clay if needed. This slime is perfect for sensory play, boosting fine motor skills, and offering stress relief. Get creative by hiding treasures in the slime or making a slime volcano. Enhance tactile exploration and cognitive development with this fun activity. Discover the endless playtime possibilities and benefits of butter slime that will keep your kids entertained and engaged for hours!

Key Takeaways

  • Use white glue, shaving cream, and Model Magic clay for fluffy and buttery texture.
  • Follow 1/2 cup glue, 1/2 cup shaving cream, then slowly add clay.
  • Knead until smooth consistency, adjust with more clay if needed.
  • Store in an airtight container to maintain texture and prevent drying out.
  • Enjoy sensory play, creativity, and stress relief with safe and entertaining butter slime.

Butter Slime Ingredients

slippery recipe for slime

You'll need specific ingredients to create the perfect batch of butter slime for your kids. Start by gathering a cup of white school glue, a cup of Elmer's glue, baking soda, shaving cream, Crayola Model Magic clay, food coloring, lotion, and an airtight container for storage.

The white school glue, also known as PVA glue, forms the base of the slime. Shaving cream adds fluffiness and volume, while the Model Magic clay is essential for achieving that signature buttery texture. Food coloring allows for customization, and lotion can be added for extra stretchiness and softness.

Properly storing your butter slime in an airtight container will help maintain its texture and prevent it from drying out. These specific ingredients, when combined in the right proportions, will result in a delightful batch of butter slime that your kids will love playing with for hours.

How to Make Butter Slime

creating butter slime tutorial

To create butter slime, begin by mixing together the glue and shaving cream in a bowl. Then, add the desired amount of clay to enhance the texture and stretchiness of the slime. Here's a simple guide to help you make your own butter slime:

Ingredients Amount
White Glue 1/2 Cup
Shaving Cream 1/2 Cup
Model Magic Clay As needed

First, pour the white glue and shaving cream into a mixing bowl. Mix them thoroughly until well combined. Next, slowly incorporate the Model Magic clay into the mixture. Knead the slime with your hands until you achieve a smooth and spreadable consistency. If the slime is too sticky, you can add a bit more clay. Once you've reached the desired texture, your butter slime is ready for playtime fun with the kids! Enjoy the process of making and playing with this delightful sensory material.

Benefits of Butter Slime

Butter slime offers children a sensory-rich and therapeutic play experience, promoting creativity and fine motor skill development. Engaging in sensory play with butter slime can help children explore different textures, colors, and scents, stimulating their senses and fostering creativity.

Advertisement

The squishy and stretchy nature of butter slime provides stress relief for children, offering a therapeutic outlet for them to relax and unwind. Manipulating butter slime also helps enhance fine motor skills as kids pinch, squeeze, and mold the slime, improving their hand-eye coordination and dexterity.

Moreover, butter slime is a safe activity suitable for kids of all ages, providing hours of entertainment and learning. By storing butter slime properly in an airtight container, you can guarantee its longevity for continued play over several days.

Playtime Ideas With Butter Slime

fun with butter slime

For an engaging and creative playtime experience with butter slime, consider trying out these fun and educational activities with your child. Using butter slime in play can be a great way to have fun and learn simultaneously. Check out the table below for some exciting ideas to explore with your child:

Playtime Ideas Benefits Keywords
Hide treasures in slime Encourages sensory play and imaginative exploration play,fun,sensory play,imagination
Spell out names with slime Enhances fine motor skills and promotes letter recognition using,butter slime recipe,fine motor skills
Create a slime volcano Hands-on science experiment teaching about chemical reactions creative,science experiment
Slime garden activity Fosters creativity and imagination with the addition of plants and figurines fun,kids activities,imagination
Self-portrait with slime Develops perceptual awareness in children through a sensory play activity sensory play,creative

These activities not only provide entertainment but also offer a chance for your child to learn and grow through play.

Sensory Activities With Butter Slime

butter slime tactile play

Engage your child in sensory activities with butter slime to enhance their tactile exploration and foster creativity. Kids love the smooth and spreadable texture of butter slime, making it perfect for sensory play. This type of slime offers a unique sensory experience, encouraging children to touch and manipulate it, stimulating their fine motor skills development.

By incorporating butter slime into playtime, you can create a calming and engaging sensory play session that promotes hands-on learning and cognitive development. These sensory activities not only provide a fun and interactive way for kids to play but also help in boosting their cognitive skills through sensory exploration.

Let your child immerse themselves in the world of sensory play with butter slime, where they can explore, create, and learn in a tactile and exciting manner. Make playtime fun and educational with sensory activities that spark imagination and creativity.

Advertisement

Frequently Asked Questions

How to Make Butter Slime for Kids?

To make butter slime for kids, you'll need white school glue, shaving cream, cornstarch, lotion, and Model Magic clay for stretchiness. Customize with colors, glitter, or sequins. Encourage fine motor skills and creativity through fun sensory play.

How to Make Butter Slime With 3 Ingredients?

To make butter slime with 3 ingredients, grab white glue, shaving cream, and cornstarch. Mix them together for a smooth, cloud-like texture. Remember, simplicity is key – less is more when it comes to creating this fun sensory play material!

What Is the Best Activator for Butter Slime?

To make the best butter slime, experiment with Borax, saline solution, or liquid starch as activators. Find what works for you, whether it's Borax for effectiveness, saline for gentleness, or liquid starch for good results.

How to Make Butter Slime With 2 Ingredients?

Mix hair conditioner and cornstarch in a bowl. Knead the soft dough until smooth. Add sparkles for extra flair. Immerse yourself in this easy, no-cook activity with your kids for a sensory delight that's bound to be a hit!

Conclusion

Now that you've got your butter slime ready, get ready for hours of squishy, stretchy fun!

Advertisement

Let your imagination run wild as you mold and shape this creamy concoction.

Remember, the possibilities are as endless as the buttery swirls in your slime.

So go ahead, immerse yourself and let your creativity flow like a river of melted butter!

Continue Reading

Recipes & Culinary Uses

Cookie Mastery: Best Recipe for Peanut Butter Cookies!

Fulfill your cookie cravings with the ultimate peanut butter cookies recipe that promises a decadent symphony of flavors – you won't want to miss out!

Published

on

By

peanut butter cookie perfection

Get ready for the ultimate peanut butter cookies! Combine peanut butter, brown sugar, egg, and baking soda. Mix in chocolate chips and bake at 350°F. Enjoy a soft, chewy treat with a golden brown color. The robust peanut butter taste, sweet brown sugar, and rich chocolate chips create a decadent symphony of flavors. Each cookie provides 245 calories, with a balance of carbohydrates, protein, and fat. Pair with milk or coffee for an enhanced experience. Stay tuned for more serving suggestions and detailed reviews to keep your cookie cravings satisfied.

Key Takeaways

  • Soft and chewy texture with golden brown color for irresistible appeal.
  • Robust peanut butter taste complemented by sweet brown sugar.
  • Decadent chocolate chips offer bursts of rich flavor.
  • Thick cookies with crisp edges and soft centers for a delightful mouthfeel.
  • Easy to make, perfect for parties, and pairs well with milk or coffee.

Recipe Ingredients and Preparation

cooking instructions and ingredients

To make these delicious peanut butter cookies, gather creamy peanut butter, brown sugar, a large egg, baking soda, and chocolate chips.

Start by mixing the peanut butter, brown sugar, egg, and baking soda until well combined.

Then, gently fold in the chocolate chips to ensure uniform distribution of the sweet morsels throughout the dough.

Roll the dough into balls and place them on a baking sheet lined with parchment paper.

Bake the cookies at 350°F for 10-12 minutes until they're soft, thick, and golden brown.

Advertisement

As they bake, the aroma of peanut butter and chocolate will fill your kitchen, making it hard to resist peeking into the oven.

Once done, allow the cookies to cool slightly before indulging in their rich peanut butter taste, sweetness from the brown sugar, and bursts of flavor from the chocolate chips.

These peanut butter cookies are the perfect treat for any occasion, offering a satisfying blend of flavors in every bite.

Texture and Appearance Details

textural and visual characteristics

The soft and chewy texture of these peanut butter cookies, coupled with their golden brown color and delightful chocolate chip accents, make them a visually appealing and irresistible treat. As you bite into these cookies, you'll experience a satisfying thickness that offers a substantial chewiness, creating a delightful mouthfeel. The golden brown hue of the cookies, with crisp edges and a soft center, invites you to indulge in their homemade goodness. Chocolate chips scattered throughout each cookie not only enhance the flavor but also provide a pop of visual interest, adding to the overall allure of these treats. Additionally, the aroma that fills your kitchen as these cookies bake is simply irresistible, with the rich scent of peanut butter enveloping your senses. Below is a table summarizing the key texture and appearance details of these peanut butter cookies:

Texture Appearance Additions
Soft Golden brown Chocolate chips
Chewy Crisp edges
Substantial Soft center

Flavor Profile Description

tasting notes and analysis

Peanut butter takes center stage in every decadent bite of these cookies, enchanting your taste buds with its rich and nutty essence. The flavor profile of these peanut butter cookies is a delightful symphony of tastes that will leave you craving more.

Here's why:

  1. Peanut Butter Taste: The unmistakable flavor of creamy peanut butter is the star of these cookies, providing a robust and nutty undertone that lingers with each bite.
  2. Brown Sugar Sweetness: The addition of brown sugar adds a perfect touch of sweetness that complements the peanut butter taste, creating a well-balanced and indulgent flavor profile.
  3. Chocolate Chips: The chocolate chips scattered throughout the cookie dough offer bursts of rich and decadent flavor, contrasting beautifully with the nuttiness of the peanut butter and adding an extra layer of deliciousness to each cookie.

Together, these elements harmonize to create a flavor profile that's both comforting and irresistible, making these peanut butter cookies a favorite treat for any occasion.

Nutrition Information Breakdown

nutrition facts analysis breakdown

Shifting from the flavor profile description, let's now take a closer look at the nutrition information breakdown of these delectable peanut butter cookies. Each serving of these cookies contains 245 calories, making them a reasonable treat for your sweet cravings.

The 27g of carbohydrates offer a delightful sweetness, while the 4g of protein in a single cookie contributes to a balanced snack option. With 13g of fat per cookie, these treats provide a rich and flavorful experience that has garnered rave reviews.

Advertisement

To bake these scrumptious cookies, make sure you use a cookie sheet lined with parchment paper to prevent sticking. The recipe calls for unsalted butter to control the sodium content, which amounts to 152mg per serving.

It's important to enjoy these cookies in moderation due to their calorie and fat content. However, their protein and carbohydrate balance makes them a satisfying indulgence for any cookie lover.

Serving Suggestions and Reviews

creative culinary ideas shared

Enhance your cookie-eating experience by pairing these delightful peanut butter cookies with a glass of milk or a cup of coffee. Reviewers have expressed positive feedback on the cookies' taste and texture, with many delighted by the recipe's success. Taking the time to bake these cookies will be well worth it based on the glowing reviews and high ratings they've received.

Here are some things reviewers liked about this recipe:

  1. The cookies' soft and thick texture that makes them perfect for parties or gatherings.
  2. The cookies' ability to pair exceptionally well with a glass of milk or a cup of coffee, enhancing the overall flavor experience.
  3. The ease of storing the cookies for a few days without compromising on freshness, allowing for continued enjoyment over time.

Frequently Asked Questions

Is It Better to Use Butter or Shortening in Peanut Butter Cookies?

For peanut butter cookies, use butter for flavor and richness, or shortening to maintain shape. Butter yields softer texture, while shortening gives a firmer bite. The choice depends on your preference for taste and texture.

Why Are My Peanut Butter Cookies Always Hard?

Overbaking leads to hard cookies. Guarantee precise baking time. Too much flour or insufficient fat causes dry dough and hardness. Cream butter and sugar moderately to prevent crumbliness. Excessive mix-ins make cookies dense. Improper storage dries out cookies, making them hard.

Why Are My Peanut Butter Cookies Crumbling and Falling Apart?

Your peanut butter cookies may be crumbling due to overbaking, excess flour, insufficient fat, too much leavening agent, or inadequate mixing. Adjust baking time, ingredients, and mixing technique to achieve cookies that hold together perfectly.

Advertisement

What Are the Basic Ingredients for Peanut Butter Cookies?

You need creamy peanut butter, brown sugar, egg, and baking soda for peanut butter cookies. They taste nutty and sweet, with a soft, chewy texture. Add chocolate chips for extra flavor. Just mix, bake, and enjoy these delicious treats!

Conclusion

You've mastered the art of baking with this peanut butter cookie recipe!

Did you know that Americans consume over 7 billion cookies a year?

So next time you whip up a batch of these delicious treats, know that you're contributing to that sweet statistic.

Keep baking and enjoy every bite of these irresistible peanut butter cookies!

Advertisement
Continue Reading
Advertisement

Affiliate disclaimer

As an affiliate, we may earn a commission from qualifying purchases. We get commissions for purchases made through links on this website from Amazon and other third parties.

Vetted

Vetted2 months ago

Infusion Buds Butter Infuser & Decarboxylator – 2024 Review

I recently got to try out the Infusion Buds Butter Infuser & Decarboxylator Machine Combo, and I am excited to...

Vetted2 months ago

LEVO Lux – Premium Herbal Oil Infusion Machine – Review [2024]

I recently got to try out the LEVO Lux – Premium Herbal Oil Infusion Machine – Botanical Extractor – Herb...

Vetted2 months ago

STX Infuzium & Decarboxylator Bundle Review [2024]

Today, I am thrilled to share my thoughts on the PREMIUM PACK • STX Infuzium Butter-Oil-Tincture Infuser & STX Activation...

Vetted2 months ago

Review: ONGROK Small Butter Infuser [2024]

Introduction: I am thrilled to share my experience with the ONGROK Small Butter Infuser in this post. This device has...

Vetted2 months ago

Herbal Infuser Hi – Innovative Botanical Butter Maker [2024]

Today, I am thrilled to share with you my experiences with the Herbal Infuser Hi Countertop Botanical Butter Maker, Tincture...

Vetted2 months ago

Ardent FX Decarboxylator Review: Quick & Effortless! [2024]

I recently had the opportunity to try out the Ardent FX Decarboxylator 110V With Bluetooth Connectivity, and I must say,...

Vetted2 months ago

Infusion Buds Butter Infuser – Review & Accessories [2024]

Thank you for joining me as we explore a review of the Infusion Buds Butter Infuser & Decarboxylator Machine Combo....

Vetted2 months ago

Decarboxylator Machine Review: Easy & Odorless Herb Activation [2024]

I recently had the opportunity to try out the Decarboxylator Machine for Herbs, and I have to admit, it really...

Vetted2 months ago

Decarb Mini System Review: All-in-One Herbal Processing Solution [2024]

Today, I will be giving my thoughts on the Decarb Mini System. As someone who enjoys herbal infusions and tinctures,...

elevate steak with butter elevate steak with butter
Vetted2 months ago

12 Best Compound Butter Recipes for Elevating Your Steak Game

Kick your steak game up a notch with these 12 mouthwatering compound butter recipes that will take your taste buds...

mouthwatering butter cookie taste mouthwatering butter cookie taste
Vetted2 months ago

15 Best Butter Cookies That Will Melt In Your Mouth – Taste Test Results

Tantalize your taste buds with the top 15 butter cookies that promise a melt-in-your-mouth experience - a delightful journey awaits!

peanut butter ice cream peanut butter ice cream
Vetted2 months ago

15 Best Peanut Butter Ice Cream Flavors You Need to Try This Summer

Craving a creamy and decadent summer treat?

Advertisement

Trending