Connect with us

Recipes & Culinary Uses

Crafting Cocoa Butter: How It’s Made

Published

on

An image showcasing the intricate process of cocoa butter production

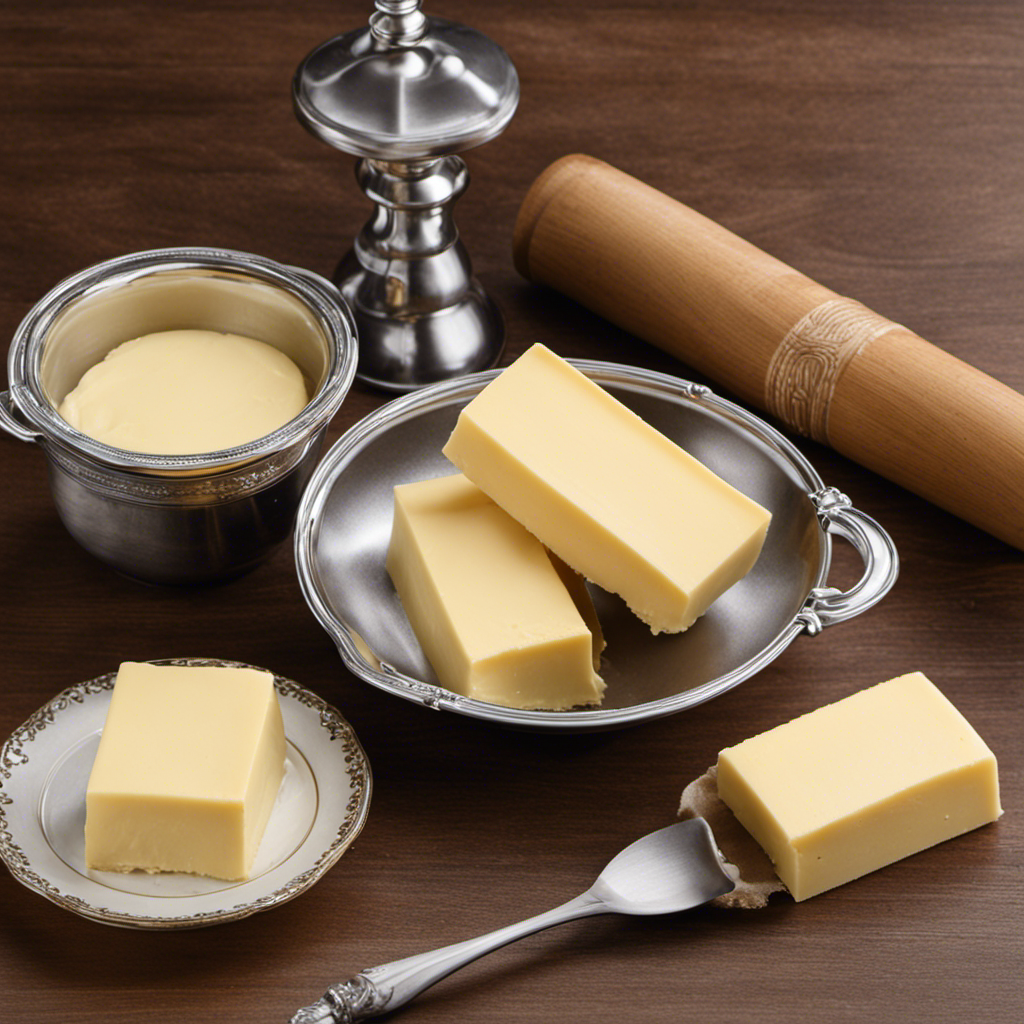
I’ve always been intrigued by the process of creating cocoa butter. It’s remarkable how a basic bean can be turned into this luxurious, velvety ingredient that enhances the flavor and texture of our beloved treats.

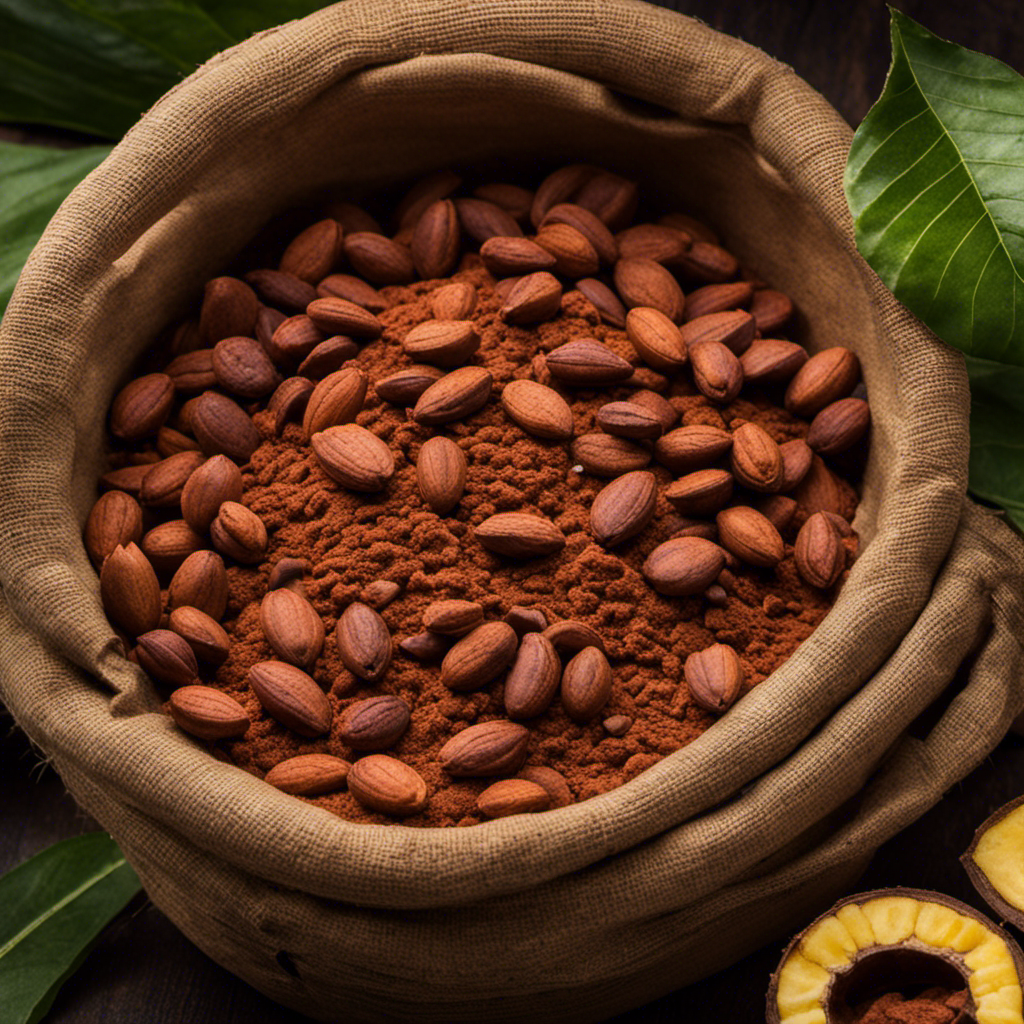
The journey starts with the careful harvesting of cocoa beans, followed by a series of precise steps including fermentation, drying, roasting, grinding, and purification. Each step plays a crucial role in extracting the pure, velvety goodness that is cocoa butter.

Join me as we delve into the scientific complexities and technical intricacies behind the creation of this culinary marvel.

Key Takeaways

  • Cocoa bean cultivation involves sustainable practices such as selecting an ideal planting site and implementing sustainability practices.
  • Proper handling and hygiene are crucial in maintaining purity, preventing contamination, and preserving the quality of cocoa butter.
  • Roasting and grinding techniques, such as precise temperature control and stone grinding, play a significant role in flavor formation and preserving natural flavors and properties.
  • Pressing, separating, and purifying cocoa butter involve various techniques such as hydraulic pressing, solvent extraction, filtration, degumming, deodorization, and purifying techniques to refine and purify cocoa butter.

Cocoa Bean Harvesting

To make cocoa butter, you’ll first need to understand how cocoa beans are harvested.

Advertisement

Cocoa bean cultivation involves sustainable practices to ensure the longevity of the crop. The process begins with the careful selection of the planting site, which should provide the ideal conditions for cocoa trees to thrive.

Once the trees are mature, the cocoa pods are hand-harvested to ensure that only ripe pods are collected. This requires skilled laborers who can identify the optimal ripeness of the pods.

After harvesting, the pods are opened, and the cocoa beans are removed. These beans are then fermented and dried to develop the desired flavor profile.

The sustainability practices implemented in cocoa bean cultivation include agroforestry techniques, water conservation, and responsible use of fertilizers and pesticides. These practices aim to maintain the ecological balance and protect the biodiversity of cocoa-growing regions.

Fermentation Process

During fermentation, cocoa beans undergo a natural process that enhances their flavor and aroma. As a food scientist, I can explain the precise steps involved in making cocoa butter.

Advertisement

After harvesting, the cocoa beans are placed in fermentation boxes, where microbial activity occurs. This microbial activity is crucial for the fermentation process. The beans are left to ferment for several days, with periodic turning to ensure even fermentation. The temperature and humidity are carefully monitored to create optimal conditions for microbial growth.

The fermentation process not only helps to develop the unique flavor compounds in cocoa beans but also affects the chemical composition, breaking down proteins and carbohydrates. This breakdown is essential for later steps in cocoa butter production, such as extraction and refining.

Quality control measures are implemented to ensure that the fermentation process is consistent and meets the desired standards for cocoa butter production.

Drying and Sorting

Advertisement

Cocoa bean processing is a crucial step in the production of cocoa butter. It involves several precise techniques and quality control measures.

As a food scientist, I understand the importance of proper handling during this process to ensure the highest quality end product.

Cocoa Bean Processing

After the cocoa beans are harvested, they are fermented and dried before being roasted. This is a crucial step in cocoa butter production as it helps develop the characteristic flavors and aromas of the final product.

Here is a breakdown of the cocoa bean processing:

  1. Fermentation: The beans are placed in large heaps or fermentation boxes where they undergo microbial fermentation. This process helps break down the pulp surrounding the beans and initiates biochemical reactions that contribute to the development of cocoa flavors.

  2. Drying: Once fermented, the beans are spread out to dry in the sun or using specialized drying equipment. Drying removes excess moisture and reduces the risk of mold growth.

  3. Roasting: The dried beans are then roasted to further develop their flavors and aromas. Roasting also helps remove any remaining moisture and activates enzymes responsible for cocoa butter formation.

Cocoa butter production is a complex process that involves various scientific principles and techniques. The extraction methods, refining processes, and the role of enzymes and chemicals play a crucial role in the production of high-quality cocoa butter.

Advertisement

Now that we have covered the cocoa bean processing, let’s move on to the next section where we will discuss the important quality control measures in cocoa butter production.

Quality Control Measures

To ensure the production of high-quality cocoa butter, you need to implement rigorous quality control measures throughout the entire process. As a food scientist, I understand the importance of documentation and precise procedures in cocoa butter production.

Quality control procedures play a crucial role in maintaining consistency and ensuring that the final product meets the desired standards. Throughout the production process, various quality control measures must be in place.

This includes monitoring and controlling the temperature during the extraction and refining processes to prevent any degradation of the cocoa butter. Regular testing for moisture content, acidity, and fat content is also essential. Additionally, proper storage conditions and cleanliness of equipment are crucial to avoid any contamination.

Importance of Proper Handling

Proper handling is crucial in ensuring the quality and integrity of the final product, which requires strict adherence to hygiene and safety protocols.

Advertisement

As a food scientist, I understand the importance of proper storage and preventing contamination in the production of cocoa butter. Here are three key reasons why it is essential:

  1. Maintaining purity: Cocoa beans must be stored in a clean and dry environment to prevent the growth of mold or bacteria. Any contamination can affect the flavor and aroma of the cocoa butter.

  2. Avoiding oxidation: Cocoa beans are susceptible to oxidation, which can lead to rancidity. Proper handling techniques, such as storing the beans in airtight containers and minimizing exposure to air, help preserve the quality of the cocoa butter.

  3. Preventing cross-contamination: During the extraction and refining processes, it is crucial to prevent cross-contamination with other ingredients or allergens. Strict separation and cleaning procedures ensure the purity and safety of the final cocoa butter product.

Roasting the Cocoa Beans

When it comes to roasting cocoa beans, the temperature and duration play a crucial role in shaping the flavor profile of the resulting cocoa butter.

As a food scientist, I will delve into the scientific aspects of this process, exploring the chemical reactions, temperature requirements, and quality control measures involved.

Temperature and Roasting Duration

The temperature and roasting duration greatly affect the production of cocoa butter. As a food scientist, I understand the importance of precise temperature control and timing in achieving the desired flavor and quality of cocoa butter. Here are three key points to consider:

  1. Roasting techniques: Different roasting techniques, such as low and slow or high and fast, can have varying effects on the flavor development of cocoa beans. The temperature and duration of roasting play a crucial role in determining the intensity and complexity of the cocoa flavor.

  2. Maillard reaction: During roasting, the Maillard reaction occurs, resulting in the browning and flavor formation of cocoa beans. This reaction is temperature-dependent, and careful control of the roasting parameters is necessary to achieve the desired flavor profile.

  3. Quality control: Monitoring the temperature and roasting duration is essential to ensure consistency and uniformity in the production of cocoa butter. Regular testing and analysis help maintain the desired flavor and quality standards.

Understanding the impact of temperature and roasting duration on cocoa butter production is crucial for achieving the desired flavor profile.

Advertisement

Impact on Flavor Profile?

Achieving the desired flavor profile of cocoa butter depends on carefully controlling the temperature and roasting duration. As a food scientist, I understand the importance of these factors in creating a high-quality cocoa butter.

The temperature and roasting duration impact the flavor by influencing the chemical reactions that occur during the process. The Maillard reaction, for example, takes place when the temperature reaches a certain level, resulting in the development of desirable flavors and aromas. However, it is crucial to monitor the temperature closely to prevent the cocoa butter from becoming over-roasted, which can lead to a burnt or bitter taste.

Additionally, the texture of cocoa butter can also be affected by temperature and roasting duration. Proper control of these variables ensures that the cocoa butter has a smooth and creamy texture.

From a nutritional standpoint, cocoa butter contains healthy monounsaturated fats, which can have positive effects on heart health.

Grinding the Cocoa Nibs

To grind the cocoa nibs, you’ll need a grinder or food processor. Grinding the nibs is an essential step in cocoa butter production as it helps release the fat from the nibs.

Advertisement

Here are three grinding techniques commonly used:

  1. Stone Grinding: Traditional method involving grinding cocoa nibs between two stone plates. This process ensures gentle grinding, preserving the natural flavors and properties of the cocoa butter.

  2. Ball Milling: Involves using steel balls in a rotating drum to grind the nibs into a fine paste. This method is more efficient and can produce smoother cocoa butter.

  3. Roller Refining: A modern technique where the nibs are passed through multiple roller mills to achieve the desired particle size. This method provides precise control and consistency in grinding.

Grinding the cocoa nibs is crucial to expose the cocoa butter and create a smooth texture. It allows for better extraction of fats and contributes to the unique properties of cocoa butter, such as its melting point and crystallization behavior.

Pressing the Cocoa Liquor

After grinding the cocoa nibs, the next step in the production of cocoa butter is pressing the cocoa liquor. This process involves the application of pressing techniques to extract the cocoa butter from the cocoa mass.

The cocoa liquor is placed in a hydraulic press, where pressure is applied to separate the fat from the solids. The cocoa butter, being a fat, is forced out while the cocoa solids remain behind.

The pressing techniques used can vary, including hydraulic pressing or screw pressing, depending on the desired yield and quality of the cocoa butter. The properties of cocoa butter, such as its melting point and texture, are largely influenced by the pressing process.

Advertisement

It is important to carefully control the pressure, temperature, and time during pressing to obtain cocoa butter with the desired characteristics. Quality control measures, such as monitoring the moisture content and acidity, are also implemented during this stage to ensure the production of high-quality cocoa butter.

Separating Cocoa Butter From Cocoa Powder

When it comes to extracting cocoa butter, there are various methods that can be employed. One common method is hydraulic pressing, where the cocoa liquor is subjected to high pressure to separate the cocoa butter from the cocoa solids.

Another method is solvent extraction, where a solvent such as hexane is used to extract the cocoa butter from the cocoa liquor.

As for the uses of cocoa powder, it is widely used in baking and confectionery products as a flavoring agent and coloring agent. It is also used in the production of chocolate and chocolate-based beverages.

Extraction Methods for Cocoa Butter

You can extract cocoa butter using various methods such as hydraulic pressing or solvent extraction.

Advertisement

In hydraulic pressing, the cocoa nibs are ground into a paste and then pressed to separate the cocoa butter from the cocoa solids.

Solvent extraction involves using food-grade solvents to dissolve the cocoa butter from the cocoa powder. The cocoa butter is then separated from the solvent through a refining process.

During this process, the cocoa butter undergoes several stages of filtration and purification to remove impurities and improve its quality. Quality control measures are implemented to ensure that the cocoa butter meets the required standards.

The extraction techniques and refining process are crucial in obtaining high-quality cocoa butter for various applications.

Now, let’s move on to explore the uses of cocoa powder.

Advertisement

Uses of Cocoa Powder

One of the most popular uses of cocoa powder is in baking delicious chocolate desserts. Cocoa powder is the result of processing cocoa beans, which are roasted and ground into a fine powder.

As a food scientist, I can tell you that cocoa powder is not only a key ingredient in desserts, but it also offers numerous health benefits. It is rich in antioxidants, which can help reduce the risk of heart disease and improve brain function. Additionally, cocoa powder contains minerals such as magnesium and iron, which are essential for maintaining good health.

Its uses extend beyond desserts as well, as it can be used in smoothies, hot cocoa drinks, and even savory dishes like mole sauce.

Now, let’s delve into the process of purifying the cocoa butter.

Purifying the Cocoa Butter

To purify cocoa butter, the impurities are removed through a process called filtration. This is done to ensure the final product is of high quality and free from any unwanted substances.

Advertisement

Here are three purifying techniques used in the refining process of cocoa butter:

  1. Filtration: The cocoa butter is passed through a series of filters, which physically remove any solid impurities or unwanted particles.

  2. Degumming: This step involves treating the cocoa butter with water or citric acid to remove any phospholipids present, which can affect the flavor and stability of the butter.

  3. Deodorization: To eliminate any undesirable odors or flavors, the cocoa butter is subjected to high temperatures under vacuum conditions. This process helps remove volatile compounds and enhances the overall quality of the butter.

Through these purifying techniques, the cocoa butter is refined and purified, resulting in a smooth and high-quality product that is widely used in the chocolate and confectionery industry.

Cooling and Solidifying the Cocoa Butter

After the purification process, the cocoa butter is cooled and solidified to achieve the desired texture and consistency. Cooling techniques play a crucial role in the production of cocoa butter as they help to control the crystallization process.

The melted cocoa butter is slowly cooled down, usually using a cooling tunnel or refrigeration system, to promote the formation of stable crystals. This solidification process is carefully monitored to ensure that the cocoa butter solidifies evenly and without any defects. Maintaining the right temperature during cooling is essential to achieve the desired properties of cocoa butter.

Proper solidification is crucial as it affects the texture, melting point, and overall quality of the final product. Once the cocoa butter has solidified, it is ready for packaging and storing, ensuring its freshness and preserving its unique characteristics.

Advertisement

Transitioning into the next section, let’s now explore the important aspects of packaging and storing cocoa butter.

Packaging and Storing Cocoa Butter

When packaging and storing cocoa butter, be sure to choose airtight containers to preserve its freshness and prevent any potential spoilage. Proper packaging techniques play a crucial role in maintaining the quality and extending the shelf life of cocoa butter.

Here are three essential tips for packaging and storing cocoa butter:

  1. Use opaque containers: Cocoa butter is sensitive to light and heat, which can cause it to degrade. Opt for opaque containers that can shield the butter from light exposure, preserving its color and flavor.

  2. Seal tightly: Airtight containers prevent any moisture or air from entering, which can lead to rancidity. Ensure the lid or closure is tightly sealed to maintain the freshness and prevent oxidation.

  3. Store in a cool place: Cocoa butter should be stored in a cool and dry environment, away from direct sunlight and heat sources. This helps maintain its stability and prevent any melting or softening.

Utilizing Cocoa Butter in Various Industries

Using cocoa butter in various industries has become increasingly popular due to its versatility and numerous benefits. As a food scientist, I have witnessed the growing demand for cocoa butter in the beauty and food sectors. In the table below, I have outlined some of the key applications of cocoa butter in these industries:

Beauty Products Food Recipes
Moisturizers Chocolate
Lip balms Desserts
Body lotions Baked goods

In beauty products, cocoa butter is utilized for its moisturizing properties and ability to improve skin elasticity. It is commonly found in lip balms, body lotions, and moisturizers. In the food industry, cocoa butter is incorporated into various recipes to enhance the flavor and texture. It is commonly used in chocolate production, as well as in desserts, baked goods, and confections. The unique chemical composition of cocoa butter, with its high content of saturated fats, gives it the ability to provide a smooth and creamy texture to these products.

Advertisement

Frequently Asked Questions

How Long Does the Cocoa Bean Harvesting Process Typically Take?

The cocoa bean harvesting process typically takes several days. It involves carefully picking ripe cocoa pods from trees, removing the beans, fermenting them, and then drying them in the sun.

What Are the Different Methods Used for Drying and Sorting Cocoa Beans?

When it comes to drying methods and sorting techniques for cocoa beans, there are several options available. These processes play a crucial role in ensuring the quality and flavor of the final cocoa butter product.

How Does the Roasting Process Affect the Flavor and Aroma of Cocoa Beans?

The roasting process brings out unique flavors and aromas in cocoa beans, enhancing the overall taste of cocoa butter. It’s fascinating how heat transforms the chemistry of the beans, resulting in a delightful sensory experience.

What Are the Different Ways Cocoa Nibs Can Be Ground to Produce Cocoa Mass?

To produce cocoa mass, cocoa nibs can be ground using various methods. This grinding process creates cocoa paste, which is then further processed to extract cocoa butter.

Can Cocoa Butter Be Used in Industries Other Than the Food and Cosmetic Industries?

Yes, cocoa butter can be used in various industries beyond food and cosmetics. It has applications in pharmaceuticals, personal care products, and even in the manufacturing of certain industrial lubricants. There are also cocoa butter substitutes available.

Advertisement

Conclusion

To conclude, the process of making cocoa butter involves several precise steps and specific details.

From harvesting and fermenting the cocoa beans to grinding and purifying the cocoa nibs, each stage requires careful attention to ensure quality.

The cooling and solidifying of the cocoa butter is crucial, as is the packaging and storing process.

Cocoa butter finds its use in various industries due to its unique properties.

As a food scientist or food technologist, it is essential to understand the scientific aspects and technical language involved in cocoa butter production.

Advertisement
Continue Reading
Advertisement

Recipes & Culinary Uses

Southern Comfort: Best Butter Bean Recipe for Hearty Meals!

Craving a taste of Southern comfort?

Published

on

By

delicious southern butter beans

Indulge in the rich, buttery flavors of Southern comfort with the best butter bean recipe that promises hearty satisfaction in every bite. Enhance the creamy texture with bacon, onions, and garlic for a mouthwatering dish. Incorporate ingredients like ham hock for a smoky twist. Don't forget to season with salt, cracked pepper, and brown sugar for a perfect balance. Pair with cornbread or cheddar cheese quick bread to elevate the experience. Experiment with flavors to create the ultimate Southern comfort cuisine. Get ready to elevate your culinary skills and taste buds to the next level with this delicious butter bean recipe!

Key Takeaways

  • Butter beans offer a creamy, buttery flavor ideal for Southern comfort cuisine.
  • Enhance dishes with ingredients like bacon, onions, and garlic for rich flavors.
  • Experiment with flavor combinations like smoky bacon and sweet brown sugar.
  • Pair butter beans with cornbread, rice, or cheddar cheese quick bread for a satisfying meal.
  • Store leftovers in the fridge for up to five days or freeze for later use.

Butter Bean Vs. Lima Bean

legume showdown butter versus lima

When comparing butter beans to lima beans, you'll notice that butter beans are the larger variety, while lima beans are smaller. Both types are creamy beans with a mild, buttery flavor that make them popular in various dishes.

Originating from Lima, Peru over 9000 years ago, these legumes have become a staple in cuisines worldwide. Large lima beans are commonly found at local grocery stores, perfect for incorporating into your favorite recipes.

In terms of size, butter beans offer a heartier bite compared to the smaller lima beans. The creamy texture of both beans is ideal for dishes that require a smooth consistency, such as soups, stews, and casseroles.

Whether you choose butter beans or lima beans for your next meal, you can expect a deliciously rich and buttery undertone that complements a wide range of ingredients. So, next time you're at the store, consider picking up some large lima beans to elevate your culinary creations.

Flavor Profile and Taste

exploring food sensory experience

You'll find that butter beans offer a mild, buttery flavor that adapts well to a variety of dishes. Their creamy texture and delicate taste make them a versatile addition to Southern comfort cuisine.

When exploring the flavor profile of butter beans, consider their culinary appeal in classic dishes and how they complement savory ingredients like bacon and onions.

Advertisement

Taste and Texture

Enhancing the flavor profile of butter beans is essential for creating delicious and satisfying dishes. When you make butter beans, whether using large dried beans or canned ones, you'll notice their creamy texture and mild, buttery taste. These characteristics make butter beans versatile for different recipes.

The rich protein and fiber content in butter beans not only provide long-lasting satisfaction but also offer essential nutrients.

Incorporating ingredients like bacon, ham hock, onions, and garlic can elevate the flavor of butter beans, adding depth and complexity to your dishes. These additions complement the beans' mild taste, creating a harmonious blend of flavors.

Whether you're preparing a hearty soup, a comforting stew, a flavorful casserole, a creamy dip, or a revitalizing salad, butter beans can be the star ingredient that brings everything together.

The smooth texture of butter beans contributes to the overall enjoyment of the dish, making each bite a delightful experience. Their versatility and ability to absorb flavors make them a staple in Southern comfort food recipes.

Advertisement

Flavor Combinations

Creating delicious dishes with butter beans involves combining their mild, buttery flavor with savory ingredients like bacon, ham, and onions for a rich and satisfying taste experience.

When preparing butter beans, consider these flavor combinations to elevate your dish:

  • Smoky Flavors: Incorporating cooked bacon or ham hock adds a delightful smokiness that enhances the overall taste profile of the butter beans.
  • Sweet Elements: Adding a touch of brown sugar complements the natural buttery taste of the beans, creating a harmonious balance of flavors.
  • Seasoning: Enhance the taste of butter beans by seasoning them with salt and cracked pepper, which adds depth and a hint of spice to the dish.
  • Versatility: The creamy texture of butter beans allows them to pair well with various ingredients, making them versatile for both hearty and light dishes.

Experimenting with these flavor combinations will help you create mouthwatering butter bean dishes that are sure to impress your taste buds.

Culinary Appeal

Butter beans' culinary appeal lies in their mild, buttery flavor that effortlessly complements a variety of seasonings and ingredients. These beans, also known as baby lima beans, offer a creamy texture and are a staple in Southern comfort dishes. Originating over 9000 years ago in Lima, Peru, butter beans have a rich history in cuisines worldwide. Young lima beans are tender and mild, ideal for quick cooking methods that preserve their delicate flavor. The versatile nature of butter beans allows them to be used in soups, stews, casseroles, dips, and salads, adding depth and heartiness to meals.

Flavor Texture Versatility
Mild, buttery Creamy Soups, stews, casseroles
Complements seasonings Tender Dips, salads
Rich history Versatile Southern comfort dishes

Home-Style Recipe Ingredients

home cooking ingredient list

You're about to discover the key ingredients that make up a classic home-style butter bean recipe.

Bacon, onion, brown sugar, butter, salt, and cracked pepper all play crucial roles in creating a flavorful and hearty dish.

These essential ingredients work together to enhance the taste profile of the butter beans, ensuring a delicious and satisfying meal.

Advertisement

Recipe Ingredients Breakdown

To make the home-style butter beans recipe, gather bacon, onion, brown sugar, frozen butterbeans, butter, salt, and cracked pepper. When preparing this hearty dish, each ingredient plays an essential role in enhancing the flavors and textures of the butter beans.

Here's a breakdown of the key components:

  • Bacon: Adds a savory smokiness to the dish, infusing it with rich flavors.
  • Brown Sugar: Provides a touch of sweetness that balances out the savory notes in the butter beans.
  • Frozen Butterbeans: Convenient and quick to cook, these big lima beans are perfect for this comforting recipe.
  • Butter, Salt, and Cracked Pepper: Together, these ingredients work harmoniously to elevate the overall taste of the dish, creating a deliciously rich and well-rounded flavor profile.

Key Flavor Enhancements

Enhancing the flavors of the home-style butter beans recipe is essential for creating a delicious and satisfying dish that balances savory and sweet notes. The key to achieving this balance lies in the combination of cooked beans, salt, and pepper.

When seasoning the dish, a pinch of salt and a generous crack of pepper are vital to enhance the natural flavors of the beans and create a well-rounded taste profile.

Cooked beans serve as the hearty base of the dish, providing a robust texture and earthy flavor that pairs perfectly with the other ingredients. Seasoning with salt not only brings out the inherent tastes of the beans but also helps to marry the flavors of the dish together.

Additionally, cracked pepper adds a subtle heat and depth to the butter beans, elevating the overall taste experience. By incorporating these key flavor enhancements into your home-style butter beans recipe, you can enjoy a satisfying and flavorful meal that will leave you craving more.

Advertisement

Cooking Method Details

detailed cooking method explanation

For achieving peak tenderness and flavor infusion, simmering butter beans in a seasoned broth is a fundamental cooking method detail. This process allows the beans to absorb the flavors of the broth while softening to the perfect texture.

To enhance the cooking method further, consider the following tips:

  • Stir well: Regularly stirring the butter beans while simmering helps distribute the flavors evenly and prevents them from sticking to the bottom of the pot.
  • Bring to a boil: Start the cooking process by bringing the seasoned broth and butter beans to a boil, then reduce the heat to a simmer to gently cook the beans.
  • Add complementary ingredients: Incorporating vegetables, meats like ham hocks, or herbs and spices can elevate the flavors of the butter beans during the cooking process.
  • Utilize different cooking techniques: Experiment with stovetop cooking or using a slow cooker to find the method that best suits your preferences and time constraints.

Storage and Reheating Tips

food storage and reheating

Properly storing and reheating your cooked butter beans is essential for maintaining their quality and flavor. After cooking a delicious batch of butter beans, make sure to refrigerate any leftovers promptly in an airtight container. This will help keep them fresh for up to five days. For longer storage, you can freeze the butter beans for up to three months. When you're ready to enjoy them again, simply thaw the frozen beans in the refrigerator before reheating.

To reheat your butter beans, you have the option of using the stovetop or microwave. Reheating on the stovetop is a great way to ensure even heating and prevent the beans from becoming mushy. Heat them until they are hot and ready to serve. Once reheated, you can enjoy your butter beans as a hearty side dish or incorporate them into various recipes for added flavor and texture.

Storage Tips Reheating Tips Freezing Tips
Refrigerate in airtight Reheat on stovetop or Freeze leftovers for up
container for up to five microwave until hot to three months
days
Thaw frozen beans in
the refrigerator before
reheating

Side Dish Pairings

dinner party menu ideas

To create a satisfying and well-rounded meal with butter beans, consider pairing them with traditional Southern sides like cornbread, white rice, and cheddar cheese quick bread. These side dishes perfectly complement the creamy texture and mild, buttery flavor of butter beans, enhancing the overall dining experience.

In addition to these classics, you can also enjoy butter beans with bread and butter or Texas Toast to elevate the Southern comfort food experience.

  • Butter beans are a classic side dish that pairs well with a variety of Southern staples.
  • Traditional accompaniments like cornbread and white rice enhance the rich flavors of butter beans.
  • Cheddar cheese quick bread offers a savory twist to the meal, adding depth to the dish.
  • Experimenting with different side dishes allows for a personalized touch to your butter bean meal, catering to diverse tastes and preferences.

Southern Comfort Classics

comforting southern cuisine favorites

You're about to discover timeless Southern recipes that bring hearty comfort to your table.

These classic dishes embody the warmth and tradition of Southern cooking, offering a taste of nostalgia with every bite.

Get ready to savor the rich flavors and comforting goodness of Southern comfort classics.

Advertisement

Timeless Southern Recipes

When exploring Southern comfort classics, you'll find that butter bean recipes are a beloved staple dish known for their hearty and satisfying nature. These timeless Southern recipes make the most of ingredients like butter beans, which offer a creamy texture and mild, buttery flavor that perfectly complements traditional Southern cooking.

To create an authentic Southern butter bean dish, consider the following:

  • Use High-Quality Ingredients: Opt for fresh or dried butter beans, and don't skimp on flavorful additions like bacon or ham hocks.
  • Slow Cooking Techniques: Embrace slow cooking methods to allow the flavors to meld together and create a rich, comforting dish.
  • Season Thoughtfully: Onions, garlic, and a touch of seasoning can elevate the humble butter bean to new heights of deliciousness.
  • Serve with Cornbread: A classic accompaniment to Southern dishes, cornbread pairs perfectly with butter beans for a complete and satisfying meal.

These Southern comfort dishes are sure to become a favorite at family gatherings, offering a taste of tradition and warmth in every bite.

Hearty Comfort Dishes

For those seeking ultimate comfort in their meals, Southern classics offer a range of hearty dishes that bring warmth and satisfaction with every bite. When it comes to preparing these comforting meals, a Dutch oven can be your best friend. Set it over medium heat, and you're ready to create delicious Southern comfort dishes that will surely become family favorites.

The versatility of butter beans shines in traditional Southern recipes like stews, casseroles, and soups, adding a creamy texture and mild, buttery flavor to every dish. With a rich history deeply rooted in Southern cuisine, butter beans have stood the test of time, proving to be a beloved ingredient for generations.

Incorporating butter beans into your cooking repertoire not only pays homage to Southern culinary traditions but also brings a taste of comfort to your table. So, why not whip up a hearty butter bean stew or casserole in your Dutch oven today? Your taste buds will thank you for the cozy Southern goodness that awaits.

Advertisement

Meat Additions and Enhancements

enhancing meat with additions

Enhance the flavor and richness of your butter bean recipe by incorporating bacon or ham into the dish. These meat additions not only add depth but also infuse the beans with a savory and smoky essence that elevates the overall taste of the dish.

To make the most of these meat additions, consider the following:

  • Bacon: Fry the bacon until crispy, then crumble it into the beans for a burst of salty goodness.
  • Ham: Boil the ham hocks alongside the beans to infuse the broth with a rich, meaty flavor.
  • Leftover Ham: Utilize any leftover ham by adding it towards the end of cooking to retain its tenderness and taste.
  • Butter: If you want to enhance the richness further, reduce the amount of butter needed to add a velvety finish to the beans.

Butter and Oil Options

mixing butter with oil

Consider incorporating butter or oil into your butter bean recipe to enhance its flavor and creaminess.

While adding butter isn't a strict requirement, it can greatly improve the overall taste and texture of your dish. If you prefer a dairy-free option or just want to experiment, using oil as a substitute can also achieve that desired creaminess in your beans.

To make this recipe even more indulgent, you may need to add a tablespoon or two of fat per pound of beans during the cooking process. This addition can infuse a rich flavor into the beans, especially when incorporated midway through cooking.

Don't be afraid to try different types of fats to see which one complements your butter beans the best. By choosing the right butter or oil for your recipe, you can elevate the flavors and create a truly satisfying dish.

Leftover Handling and Reheating

efficiently manage leftovers at home

Store your cooked butter beans in an airtight container in the refrigerator for 3-4 days. When dealing with leftovers, proper handling and reheating techniques can help maintain the delicious taste and texture of your butter beans.

Here are some essential tips to make the most of your leftovers:

Advertisement
  • Freezing Options: You can freeze cooked butter beans for up to 3 months for future use.
  • Thawing Process: Thaw frozen butter beans in the refrigerator before reheating to preserve texture.
  • Reheating Methods: Reheat butter beans in the microwave or on the stovetop until thoroughly heated.
  • Assessing Consistency: Avoid adding water immediately when reheating butter beans; assess consistency as they heat up.

Frequently Asked Questions

Should I Soak Butter Beans Before Cooking?

You don't have to soak butter beans before cooking, but a quick 30-minute soak can help. It's optional, depending on your preference. Soaking may reduce cooking time and improve texture in some recipes, ensuring even tenderness.

Are Butter Beans Good for Your Heart?

Butter beans are like tiny heart superheroes in a pod. They're packed with fiber, potassium, folate, and magnesium—all working together to support your heart health and keep it ticking strong.

Is There a Difference Between Butter Beans and Lima Beans?

Yes, there isn't a difference between butter beans and lima beans. They're the same type of bean, just with varying names based on size. Enjoy their creamy texture and buttery taste in a variety of dishes!

What Is the American Version of Butter Beans?

In the US, butter beans are the American version of lima beans. These creamy legumes, often used in Southern cooking, offer a mild, buttery taste. So, when looking for butter beans, know you're getting a true Southern favorite!

Conclusion

To sum up, whether you choose butter beans or lima beans, the hearty and comforting flavors in this recipe will satisfy your cravings.

From the rich and creamy texture to the savory seasonings, each bite will transport you to a Southern kitchen.

Advertisement

So go ahead, whip up a batch of this classic dish and enjoy the warmth and nostalgia it brings to your table. It's a simple yet delicious way to experience true Southern comfort.

Continue Reading

Recipes & Culinary Uses

Playtime Fun: Best Butter Slime Recipe for Kids!

Are you ready to create the best butter slime for your kids?

Published

on

By

butter slime kids love

Ready to create the best butter slime for your kids? Mix white glue and shaving cream, then add Crayola Model Magic clay for texture. Knead the ingredients until smooth and adjust with more clay if needed. This slime is perfect for sensory play, boosting fine motor skills, and offering stress relief. Get creative by hiding treasures in the slime or making a slime volcano. Enhance tactile exploration and cognitive development with this fun activity. Discover the endless playtime possibilities and benefits of butter slime that will keep your kids entertained and engaged for hours!

Key Takeaways

  • Use white glue, shaving cream, and Model Magic clay for fluffy and buttery texture.
  • Follow 1/2 cup glue, 1/2 cup shaving cream, then slowly add clay.
  • Knead until smooth consistency, adjust with more clay if needed.
  • Store in an airtight container to maintain texture and prevent drying out.
  • Enjoy sensory play, creativity, and stress relief with safe and entertaining butter slime.

Butter Slime Ingredients

slippery recipe for slime

You'll need specific ingredients to create the perfect batch of butter slime for your kids. Start by gathering a cup of white school glue, a cup of Elmer's glue, baking soda, shaving cream, Crayola Model Magic clay, food coloring, lotion, and an airtight container for storage.

The white school glue, also known as PVA glue, forms the base of the slime. Shaving cream adds fluffiness and volume, while the Model Magic clay is essential for achieving that signature buttery texture. Food coloring allows for customization, and lotion can be added for extra stretchiness and softness.

Properly storing your butter slime in an airtight container will help maintain its texture and prevent it from drying out. These specific ingredients, when combined in the right proportions, will result in a delightful batch of butter slime that your kids will love playing with for hours.

How to Make Butter Slime

creating butter slime tutorial

To create butter slime, begin by mixing together the glue and shaving cream in a bowl. Then, add the desired amount of clay to enhance the texture and stretchiness of the slime. Here's a simple guide to help you make your own butter slime:

Ingredients Amount
White Glue 1/2 Cup
Shaving Cream 1/2 Cup
Model Magic Clay As needed

First, pour the white glue and shaving cream into a mixing bowl. Mix them thoroughly until well combined. Next, slowly incorporate the Model Magic clay into the mixture. Knead the slime with your hands until you achieve a smooth and spreadable consistency. If the slime is too sticky, you can add a bit more clay. Once you've reached the desired texture, your butter slime is ready for playtime fun with the kids! Enjoy the process of making and playing with this delightful sensory material.

Benefits of Butter Slime

Butter slime offers children a sensory-rich and therapeutic play experience, promoting creativity and fine motor skill development. Engaging in sensory play with butter slime can help children explore different textures, colors, and scents, stimulating their senses and fostering creativity.

Advertisement

The squishy and stretchy nature of butter slime provides stress relief for children, offering a therapeutic outlet for them to relax and unwind. Manipulating butter slime also helps enhance fine motor skills as kids pinch, squeeze, and mold the slime, improving their hand-eye coordination and dexterity.

Moreover, butter slime is a safe activity suitable for kids of all ages, providing hours of entertainment and learning. By storing butter slime properly in an airtight container, you can guarantee its longevity for continued play over several days.

Playtime Ideas With Butter Slime

fun with butter slime

For an engaging and creative playtime experience with butter slime, consider trying out these fun and educational activities with your child. Using butter slime in play can be a great way to have fun and learn simultaneously. Check out the table below for some exciting ideas to explore with your child:

Playtime Ideas Benefits Keywords
Hide treasures in slime Encourages sensory play and imaginative exploration play,fun,sensory play,imagination
Spell out names with slime Enhances fine motor skills and promotes letter recognition using,butter slime recipe,fine motor skills
Create a slime volcano Hands-on science experiment teaching about chemical reactions creative,science experiment
Slime garden activity Fosters creativity and imagination with the addition of plants and figurines fun,kids activities,imagination
Self-portrait with slime Develops perceptual awareness in children through a sensory play activity sensory play,creative

These activities not only provide entertainment but also offer a chance for your child to learn and grow through play.

Sensory Activities With Butter Slime

butter slime tactile play

Engage your child in sensory activities with butter slime to enhance their tactile exploration and foster creativity. Kids love the smooth and spreadable texture of butter slime, making it perfect for sensory play. This type of slime offers a unique sensory experience, encouraging children to touch and manipulate it, stimulating their fine motor skills development.

By incorporating butter slime into playtime, you can create a calming and engaging sensory play session that promotes hands-on learning and cognitive development. These sensory activities not only provide a fun and interactive way for kids to play but also help in boosting their cognitive skills through sensory exploration.

Let your child immerse themselves in the world of sensory play with butter slime, where they can explore, create, and learn in a tactile and exciting manner. Make playtime fun and educational with sensory activities that spark imagination and creativity.

Advertisement

Frequently Asked Questions

How to Make Butter Slime for Kids?

To make butter slime for kids, you'll need white school glue, shaving cream, cornstarch, lotion, and Model Magic clay for stretchiness. Customize with colors, glitter, or sequins. Encourage fine motor skills and creativity through fun sensory play.

How to Make Butter Slime With 3 Ingredients?

To make butter slime with 3 ingredients, grab white glue, shaving cream, and cornstarch. Mix them together for a smooth, cloud-like texture. Remember, simplicity is key – less is more when it comes to creating this fun sensory play material!

What Is the Best Activator for Butter Slime?

To make the best butter slime, experiment with Borax, saline solution, or liquid starch as activators. Find what works for you, whether it's Borax for effectiveness, saline for gentleness, or liquid starch for good results.

How to Make Butter Slime With 2 Ingredients?

Mix hair conditioner and cornstarch in a bowl. Knead the soft dough until smooth. Add sparkles for extra flair. Immerse yourself in this easy, no-cook activity with your kids for a sensory delight that's bound to be a hit!

Conclusion

Now that you've got your butter slime ready, get ready for hours of squishy, stretchy fun!

Advertisement

Let your imagination run wild as you mold and shape this creamy concoction.

Remember, the possibilities are as endless as the buttery swirls in your slime.

So go ahead, immerse yourself and let your creativity flow like a river of melted butter!

Continue Reading

Recipes & Culinary Uses

Cookie Mastery: Best Recipe for Peanut Butter Cookies!

Fulfill your cookie cravings with the ultimate peanut butter cookies recipe that promises a decadent symphony of flavors – you won't want to miss out!

Published

on

By

peanut butter cookie perfection

Get ready for the ultimate peanut butter cookies! Combine peanut butter, brown sugar, egg, and baking soda. Mix in chocolate chips and bake at 350°F. Enjoy a soft, chewy treat with a golden brown color. The robust peanut butter taste, sweet brown sugar, and rich chocolate chips create a decadent symphony of flavors. Each cookie provides 245 calories, with a balance of carbohydrates, protein, and fat. Pair with milk or coffee for an enhanced experience. Stay tuned for more serving suggestions and detailed reviews to keep your cookie cravings satisfied.

Key Takeaways

  • Soft and chewy texture with golden brown color for irresistible appeal.
  • Robust peanut butter taste complemented by sweet brown sugar.
  • Decadent chocolate chips offer bursts of rich flavor.
  • Thick cookies with crisp edges and soft centers for a delightful mouthfeel.
  • Easy to make, perfect for parties, and pairs well with milk or coffee.

Recipe Ingredients and Preparation

cooking instructions and ingredients

To make these delicious peanut butter cookies, gather creamy peanut butter, brown sugar, a large egg, baking soda, and chocolate chips.

Start by mixing the peanut butter, brown sugar, egg, and baking soda until well combined.

Then, gently fold in the chocolate chips to ensure uniform distribution of the sweet morsels throughout the dough.

Roll the dough into balls and place them on a baking sheet lined with parchment paper.

Bake the cookies at 350°F for 10-12 minutes until they're soft, thick, and golden brown.

Advertisement

As they bake, the aroma of peanut butter and chocolate will fill your kitchen, making it hard to resist peeking into the oven.

Once done, allow the cookies to cool slightly before indulging in their rich peanut butter taste, sweetness from the brown sugar, and bursts of flavor from the chocolate chips.

These peanut butter cookies are the perfect treat for any occasion, offering a satisfying blend of flavors in every bite.

Texture and Appearance Details

textural and visual characteristics

The soft and chewy texture of these peanut butter cookies, coupled with their golden brown color and delightful chocolate chip accents, make them a visually appealing and irresistible treat. As you bite into these cookies, you'll experience a satisfying thickness that offers a substantial chewiness, creating a delightful mouthfeel. The golden brown hue of the cookies, with crisp edges and a soft center, invites you to indulge in their homemade goodness. Chocolate chips scattered throughout each cookie not only enhance the flavor but also provide a pop of visual interest, adding to the overall allure of these treats. Additionally, the aroma that fills your kitchen as these cookies bake is simply irresistible, with the rich scent of peanut butter enveloping your senses. Below is a table summarizing the key texture and appearance details of these peanut butter cookies:

Texture Appearance Additions
Soft Golden brown Chocolate chips
Chewy Crisp edges
Substantial Soft center

Flavor Profile Description

tasting notes and analysis

Peanut butter takes center stage in every decadent bite of these cookies, enchanting your taste buds with its rich and nutty essence. The flavor profile of these peanut butter cookies is a delightful symphony of tastes that will leave you craving more.

Here's why:

  1. Peanut Butter Taste: The unmistakable flavor of creamy peanut butter is the star of these cookies, providing a robust and nutty undertone that lingers with each bite.
  2. Brown Sugar Sweetness: The addition of brown sugar adds a perfect touch of sweetness that complements the peanut butter taste, creating a well-balanced and indulgent flavor profile.
  3. Chocolate Chips: The chocolate chips scattered throughout the cookie dough offer bursts of rich and decadent flavor, contrasting beautifully with the nuttiness of the peanut butter and adding an extra layer of deliciousness to each cookie.

Together, these elements harmonize to create a flavor profile that's both comforting and irresistible, making these peanut butter cookies a favorite treat for any occasion.

Nutrition Information Breakdown

nutrition facts analysis breakdown

Shifting from the flavor profile description, let's now take a closer look at the nutrition information breakdown of these delectable peanut butter cookies. Each serving of these cookies contains 245 calories, making them a reasonable treat for your sweet cravings.

The 27g of carbohydrates offer a delightful sweetness, while the 4g of protein in a single cookie contributes to a balanced snack option. With 13g of fat per cookie, these treats provide a rich and flavorful experience that has garnered rave reviews.

Advertisement

To bake these scrumptious cookies, make sure you use a cookie sheet lined with parchment paper to prevent sticking. The recipe calls for unsalted butter to control the sodium content, which amounts to 152mg per serving.

It's important to enjoy these cookies in moderation due to their calorie and fat content. However, their protein and carbohydrate balance makes them a satisfying indulgence for any cookie lover.

Serving Suggestions and Reviews

creative culinary ideas shared

Enhance your cookie-eating experience by pairing these delightful peanut butter cookies with a glass of milk or a cup of coffee. Reviewers have expressed positive feedback on the cookies' taste and texture, with many delighted by the recipe's success. Taking the time to bake these cookies will be well worth it based on the glowing reviews and high ratings they've received.

Here are some things reviewers liked about this recipe:

  1. The cookies' soft and thick texture that makes them perfect for parties or gatherings.
  2. The cookies' ability to pair exceptionally well with a glass of milk or a cup of coffee, enhancing the overall flavor experience.
  3. The ease of storing the cookies for a few days without compromising on freshness, allowing for continued enjoyment over time.

Frequently Asked Questions

Is It Better to Use Butter or Shortening in Peanut Butter Cookies?

For peanut butter cookies, use butter for flavor and richness, or shortening to maintain shape. Butter yields softer texture, while shortening gives a firmer bite. The choice depends on your preference for taste and texture.

Why Are My Peanut Butter Cookies Always Hard?

Overbaking leads to hard cookies. Guarantee precise baking time. Too much flour or insufficient fat causes dry dough and hardness. Cream butter and sugar moderately to prevent crumbliness. Excessive mix-ins make cookies dense. Improper storage dries out cookies, making them hard.

Why Are My Peanut Butter Cookies Crumbling and Falling Apart?

Your peanut butter cookies may be crumbling due to overbaking, excess flour, insufficient fat, too much leavening agent, or inadequate mixing. Adjust baking time, ingredients, and mixing technique to achieve cookies that hold together perfectly.

Advertisement

What Are the Basic Ingredients for Peanut Butter Cookies?

You need creamy peanut butter, brown sugar, egg, and baking soda for peanut butter cookies. They taste nutty and sweet, with a soft, chewy texture. Add chocolate chips for extra flavor. Just mix, bake, and enjoy these delicious treats!

Conclusion

You've mastered the art of baking with this peanut butter cookie recipe!

Did you know that Americans consume over 7 billion cookies a year?

So next time you whip up a batch of these delicious treats, know that you're contributing to that sweet statistic.

Keep baking and enjoy every bite of these irresistible peanut butter cookies!

Advertisement
Continue Reading
Advertisement

Affiliate disclaimer

As an affiliate, we may earn a commission from qualifying purchases. We get commissions for purchases made through links on this website from Amazon and other third parties.

Vetted

Vetted2 months ago

Infusion Buds Butter Infuser & Decarboxylator – 2024 Review

I recently got to try out the Infusion Buds Butter Infuser & Decarboxylator Machine Combo, and I am excited to...

Vetted2 months ago

LEVO Lux – Premium Herbal Oil Infusion Machine – Review [2024]

I recently got to try out the LEVO Lux – Premium Herbal Oil Infusion Machine – Botanical Extractor – Herb...

Vetted2 months ago

STX Infuzium & Decarboxylator Bundle Review [2024]

Today, I am thrilled to share my thoughts on the PREMIUM PACK • STX Infuzium Butter-Oil-Tincture Infuser & STX Activation...

Vetted2 months ago

Review: ONGROK Small Butter Infuser [2024]

Introduction: I am thrilled to share my experience with the ONGROK Small Butter Infuser in this post. This device has...

Vetted2 months ago

Herbal Infuser Hi – Innovative Botanical Butter Maker [2024]

Today, I am thrilled to share with you my experiences with the Herbal Infuser Hi Countertop Botanical Butter Maker, Tincture...

Vetted2 months ago

Ardent FX Decarboxylator Review: Quick & Effortless! [2024]

I recently had the opportunity to try out the Ardent FX Decarboxylator 110V With Bluetooth Connectivity, and I must say,...

Vetted2 months ago

Infusion Buds Butter Infuser – Review & Accessories [2024]

Thank you for joining me as we explore a review of the Infusion Buds Butter Infuser & Decarboxylator Machine Combo....

Vetted2 months ago

Decarboxylator Machine Review: Easy & Odorless Herb Activation [2024]

I recently had the opportunity to try out the Decarboxylator Machine for Herbs, and I have to admit, it really...

Vetted2 months ago

Decarb Mini System Review: All-in-One Herbal Processing Solution [2024]

Today, I will be giving my thoughts on the Decarb Mini System. As someone who enjoys herbal infusions and tinctures,...

elevate steak with butter elevate steak with butter
Vetted2 months ago

12 Best Compound Butter Recipes for Elevating Your Steak Game

Kick your steak game up a notch with these 12 mouthwatering compound butter recipes that will take your taste buds...

mouthwatering butter cookie taste mouthwatering butter cookie taste
Vetted2 months ago

15 Best Butter Cookies That Will Melt In Your Mouth – Taste Test Results

Tantalize your taste buds with the top 15 butter cookies that promise a melt-in-your-mouth experience - a delightful journey awaits!

peanut butter ice cream peanut butter ice cream
Vetted2 months ago

15 Best Peanut Butter Ice Cream Flavors You Need to Try This Summer

Craving a creamy and decadent summer treat?

Advertisement

Trending