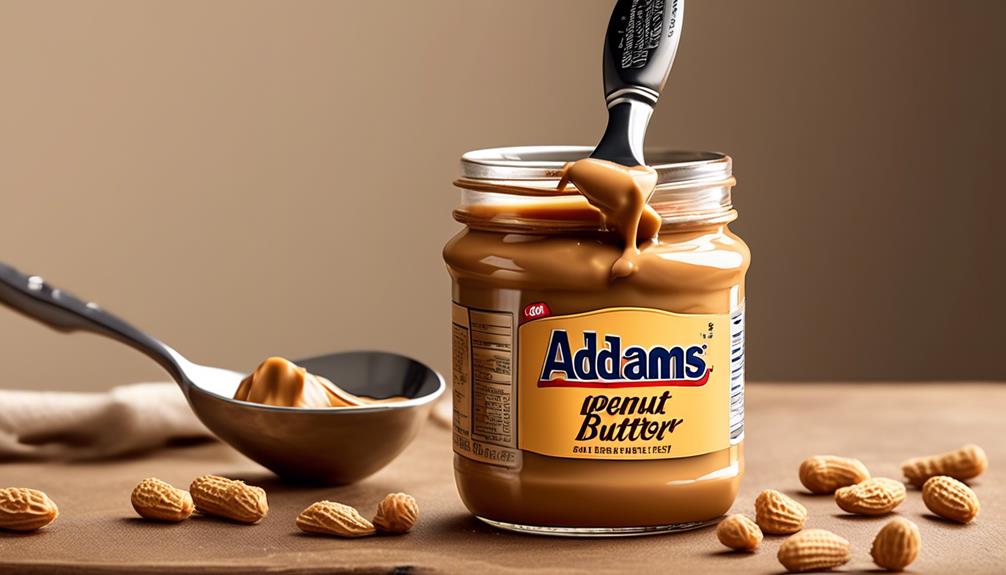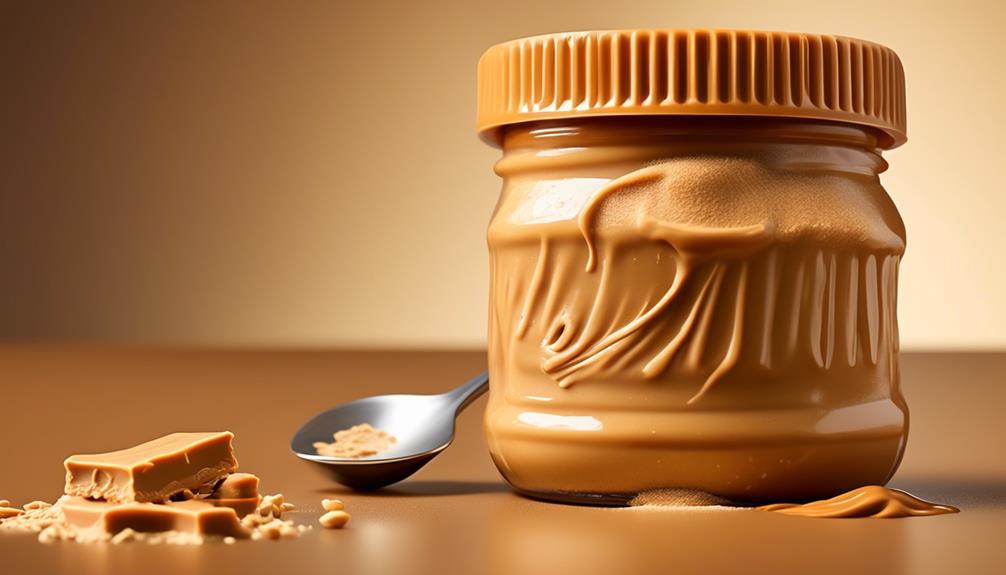
Have you ever grabbed a jar of peanut butter, only to discover it floating in a pool of oil? It’s a common annoyance for a lot of people.
But fear not, there are some simple tricks to help keep your peanut butter from getting overly oily. From storing the jar upside down to using mixing techniques, there are several methods to explore.
So, if you're tired of dealing with separated, oily peanut butter, keep on reading to discover some practical solutions that can help you achieve a smoother, more spreadable consistency.
Key Takeaways
- Storing natural peanut butter upside down can help mix the oil and prevent separation.
- Proper stirring techniques, including pouring off excess oil and thoroughly stirring the remaining oil, can maintain the consistency of the peanut butter.
- Refrigeration can control oil separation by solidifying the oil on top and allowing for easier stirring to achieve the desired consistency.
- Following proper storage methods, such as storing in a cool, dry place away from heat and light sources, can maximize the shelf life of natural peanut butter.
Breville Barista Express Espresso Machine BES870XL, Brushed Stainless Steel
The Breville Barista Express delivers third wave specialty coffee at home using the 4 keys formula and is...
As an affiliate, we earn on qualifying purchases.
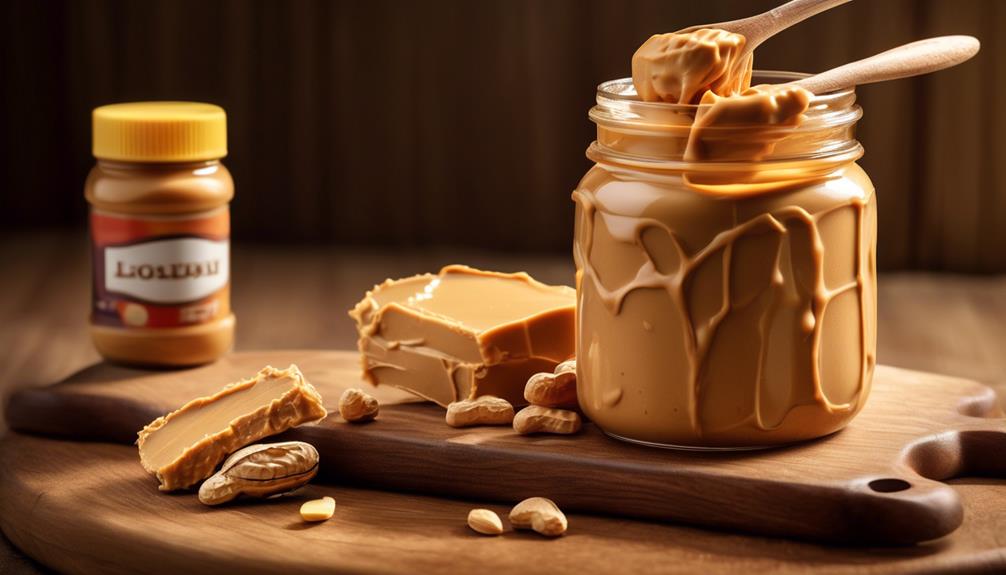
Storing Peanut Butter Upside Down
Storing peanut butter upside down facilitates even oil distribution, ensuring a creamy and smooth consistency while minimizing the need for stirring and extending its shelf life.
When the jar is inverted, the oil, which naturally separates and rises to the top, is forced to travel through the butter, preventing it from settling at the top. This method effectively maintains a homogeneous texture throughout the peanut butter.
As a result, the peanut butter is readily spreadable without the hassle of having to mix in the separated oil. This simple yet effective technique also prevents the oil from becoming rancid, thus extending the shelf life of the peanut butter.
To maximize the benefits of storing peanut butter upside down, it's essential to ensure that the lid is tightly secured to prevent any potential spills. Additionally, gently turning the jar every few days helps to redistribute the oil, maintaining the desired consistency.
For those seeking a longer shelf life and a firmer texture, refrigeration can also be considered to solidify the peanut butter and further prevent oil separation.

Aromaster Burr Coffee Grinder with 48 Gind Settings, Conical Coffee Bean Grinder for Home Use,Stainless Steel,40 Seconds Adjustable Timer,Anti-static,Easy to Clean with Brush
48 Grind Settings and Large Capacity : The Aromaster electric coffee grinder offers 48 different settings, from fine...
As an affiliate, we earn on qualifying purchases.
Using a Peanut Butter Lid Mixer

As we consider the benefits of using a Peanut Butter Lid Mixer, it's essential to understand its impact on achieving a smooth and creamy consistency in natural nut butter.
Proper lid placement and mastering the mixing technique are crucial factors in effectively using this tool to combat oily separation.
Lid Mixer Benefits
Utilizing a peanut butter lid mixer provides a convenient and efficient method for achieving a smooth and creamy consistency in natural nut butter, enhancing its texture and appeal without the need for manual stirring.
The benefits of using a lid mixer include:
- Convenient Mixing: A peanut butter lid mixer provides a convenient way to mix natural nut butter without the hassle of stirring with a knife or spoon.
- Smooth Consistency: Using a lid mixer ensures a smoother and creamier consistency, eliminating the unappealing texture and messy splatters associated with natural nut butter.
- Kid-Friendly Solution: The lid mixer makes natural nut butter more appealing to kids, encouraging them to enjoy this nutritious spread.
- Time-Saving: With a lid mixer, the process of achieving a well-combined and spreadable nut butter is quick and effortless, making it a time-saving solution for busy individuals.
Proper Lid Placement
When using a peanut butter lid mixer, ensure the lid is placed securely on the jar to prevent spills and facilitate smooth, consistent blending of the natural oils back into the peanut butter for a creamy, well-mixed consistency.
This proper lid placement is crucial for effectively integrating the separated oil in natural peanut butter. By securely attaching the lid mixer, the integrated mixer can evenly distribute the oil throughout the peanut butter, eliminating the need for vigorous stirring and promoting a uniform texture.
This method not only prevents messy oil separation but also extends the shelf life of the peanut butter. The lid mixer provides an efficient and convenient solution for maintaining a smooth, spreadable consistency, making it an essential tool for anyone who enjoys the natural goodness of peanut butter.
Mixing Technique
To ensure thorough blending of natural oils in peanut butter and achieve a consistent texture, the peanut butter lid mixer provides an effective and convenient mixing technique. When using the lid mixer, follow these steps for optimal results:
- Secure Placement: Ensure the lid is tightly sealed onto the jar to prevent any leakage during the mixing process.
- Gentle Pressure: Apply gentle pressure while moving the lid mixer in a circular motion, allowing the natural oils to incorporate evenly.
- Scrape Sides: Periodically stop and use the lid mixer to scrape the sides of the jar, bringing any settled oils back into the mix.
- Repeat as Needed: Continue mixing until the desired consistency is achieved, adding the lid mixer intermittently to bring the oils back into the blend.
This method ensures that the oils are thoroughly mixed back into the peanut butter, resulting in a smooth and homogenous texture.

SHARDOR Professional 64mm Burr Coffee Grinder with 100 Grind Settings and All-Metal Chamber, Coffee Bean Grinder with Adjustable Electronic Timer and LED Display, Anti-Static,Black, 120V Only
64mm Flat Burr: Achieves uniform grinding with minimal heat generation, enhancing the flavor profile for a superior taste...
As an affiliate, we earn on qualifying purchases.
Using a Hand Mixer for Peanut Butter

When using a hand mixer for peanut butter, controlling the speed is crucial to achieving the desired texture. By adjusting the speed, we can effectively distribute the oil and prevent separation.
Additionally, it's important to limit the mixing time to avoid overheating the peanut butter, which could lead to a runny consistency.
Mixer Speed Control
With a hand mixer, it's essential to start at a low speed when making peanut butter to prevent the natural oils from separating too quickly. This gradual approach allows for better incorporation of the oils, resulting in a smoother and more consistent texture. Here are some key points to consider for mixer speed control:
- Low Speed: Begin at the lowest speed setting to initially combine the peanuts and prevent splattering.
- Gradual Increase: Slowly increase the speed as the peanuts break down, ensuring the oils are thoroughly mixed without separating.
- Monitoring Texture: Pay attention to the texture and adjust the speed accordingly to maintain the desired consistency.
- Cooling Breaks: If the mixture starts to warm up, pause to let it cool, preventing the oils from separating due to excessive heat.
Mixing Time Limits
Mixing peanut butter with a hand mixer requires precise timing to achieve the ideal consistency without risking the separation of oils. When using natural peanut butters, the oil tends to rise to the top, creating a layer that needs to be thoroughly mixed to achieve a smooth texture. However, overmixing can lead to an oily separation, affecting the spreadability of the peanut butter. It's essential to monitor the mixing time carefully to prevent this. Here's a breakdown of the recommended mixing time limits for achieving the perfect peanut butter consistency:
| Mixing Time | Texture |
|---|---|
| 1-2 minutes | Creamy and spreadable |
| 3-4 minutes | Risk of oily separation |
| 5+ minutes | Significant oil on top |
OXO Brew Conical Burr Coffee Grinder - Silver, Stainless Steel Burrs, One-Touch Automatic Smart Grind
Stainless steel conical burrs: Precision grinding system produces uniform coffee grounds for rich, balanced flavor in every cup.
As an affiliate, we earn on qualifying purchases.
Using a Hand Immersion Blender

To achieve a smooth and well-combined texture in natural nut butter, the hand immersion blender can be gently placed inside the jar and used in an up and down motion. Using the hand immersion blender offers a quick and mess-free process, preventing splattering and ensuring a smooth texture.
This method effectively combats the oily separation at the top of natural nut butter, resulting in a creamy and well-combined consistency. The hand immersion blender allows for effortless and quick blending, making it a favorite hack for improving natural nut butter texture.
Additionally, pouring off some excess oil from the top of the natural nut butter can be considered to adjust the consistency as needed, further enhancing the effectiveness of using a hand immersion blender. The immersion blender's ability to thoroughly mix the natural nut butter ensures that the oil is evenly distributed, resulting in a homogeneous and spreadable product.
This technique is ideal for individuals seeking a convenient and efficient way to maintain the desired consistency of their natural nut butter.
Pouring off Excess Oil From Peanut Butter

When it comes to managing excess oil in peanut butter, there are several key points to consider.
First, we need to focus on oil separation prevention techniques, such as properly storing the peanut butter and choosing natural varieties.
Second, we'll explore the most effective stirring technique to redistribute the oil and maintain a consistent texture.
Lastly, we'll discuss the option of using refrigeration as a method to help keep the peanut butter from becoming too oily.
Oil Separation Prevention
How can excess oil be effectively managed in natural nut butter to prevent it from becoming too runny and maintain the desired consistency?
Here are some proven methods to prevent oil separation and maintain the creamy texture of natural nut butter:
- Store the jar upside down to encourage the oil to mix back into the peanut butter on its own.
- Use a hand mixer or hand immersion blender to whip up the natural nut butter for an instant, spreadable consistency, preventing oil separation.
- Consider pouring off some of the excess oil from the top of the natural nut butter to adjust the consistency as needed and prevent it from becoming too runny.
- Tighten the lid of the natural nut butter jar to prevent spills and turn the jar every few days to distribute the oil, helping to keep the butter creamy and smooth.
These techniques can help maintain the desired consistency and prevent oil separation in natural nut butter.
Stirring Technique
Regularly pouring off excess oil from natural nut butter can help improve its consistency and maintain a smooth texture. When utilizing the stirring technique, it's essential to ensure the oil is gently poured off from the top of the natural nut butter. This process should be followed by thorough stirring to integrate the remaining oil and achieve a creamy texture.
It's beneficial to use a separate jar to collect the excess oil for later use in cooking or baking. Additionally, refrigerating the natural nut butter after stirring can aid in maintaining its consistency and reducing oil separation.
Refrigeration Method
Utilizing the refrigeration method for natural peanut butter, we can further control oil separation by allowing the excess oil to solidify, making it easier to pour off and maintain the desired consistency.
- Chill: Place the natural peanut butter in the refrigerator and let it chill for at least 6-8 hours.
- Solidify: The cold temperature causes the oil to solidify on the top of the jar, making it easier to distinguish from the peanut butter.
- Pour Off: Carefully pour off the excess oil into a separate container, leaving behind the peanut butter.
- Stir: Once the excess oil is removed, stir the peanut butter to achieve the desired consistency.
This method helps to maintain the integrity of natural peanut butter, ensuring a creamy texture and preventing excessive oil separation.
Proper Storage Methods for Natural Peanut Butter

To prevent natural peanut butter from becoming oily, store it in a cool, dry place and stir it thoroughly upon opening to evenly distribute the oil. Proper storage methods are crucial for maintaining the texture and quality of natural nut butter. We recommend storing natural peanut butter in a pantry or cupboard away from direct sunlight and heat sources. Here is a table summarizing the proper storage methods for natural peanut butter:
| Storage Method | Description |
|---|---|
| Cool Place | Store in a cool area away from sunlight |
| Dry Place | Keep in a dry environment to prevent moisture |
| Stirring | Stir thoroughly upon opening to evenly distribute oil |
Preventing Oil Separation in Peanut Butter

Proper storage methods are essential for maintaining the texture and quality of natural peanut butter. Preventing oil separation can be achieved through simple techniques.
- Store the nut butter jar upside down: Allowing the oil to naturally mix back into the peanut butter can prevent separation without any extra effort.
- Use a hand mixer: Transferring the peanut butter into a separate mixing bowl and whipping it up with an electric hand mixer can create a soft, spreadable consistency.
- Use a hand immersion blender: Placing the immersion blender inside the jar and using a gentle up and down motion can quickly and mess-free create smooth peanut butter.
- Pour off some of the top oil: Pouring excess oil into a separate jar for later use can help adjust the consistency of the peanut butter as needed.
Best Practices for Maintaining Peanut Butter Consistency

Maintaining peanut butter consistency requires strategic techniques such as storing the jar upside down and using a hand immersion blender to ensure even distribution and a smooth texture. By implementing these best practices, you can enjoy a creamy and well-combined nut butter. Here are some key strategies for maintaining peanut butter consistency:
| Technique | Purpose | Tips |
|---|---|---|
| Store the jar upside down | Prevent oil separation and ensure even distribution | Use a tight-sealing lid to avoid leaks and spills |
| Use a hand immersion blender | Gently mix the oil back into the peanut butter for a smooth consistency | Start at a low speed and gradually increase to prevent splattering |
| Consider refrigeration | Solidify the butter and extend its shelf life | Allow refrigerated peanut butter to come to room temperature before use |
| Pour off some of the top oil if runny | Adjust the consistency as needed | Use a spoon to carefully remove excess oil without removing too much peanut butter |
| Experiment with different flavors and pairings | Enjoy the creamy and well-combined consistency of nut butter | Try adding honey, cinnamon, or cocoa powder for unique flavor combinations |
These practices will help you maintain the desired texture and consistency of your peanut butter, ensuring a delightful experience with every spoonful.
Mixing Techniques for Creamy Peanut Butter

Implementing effective mixing techniques is essential for achieving a creamy and well-combined consistency in natural peanut butter. Here are some techniques to help you achieve the perfect texture:
- Store upside down: By storing the nut butter jar upside down, the oil will naturally mix back in, reducing the need for manual mixing.
- Use a hand mixer: Transfer the nut butter into a separate mixing bowl and whip it up using an electric hand mixer. This method provides an instant soft, spreadable consistency.
- Hand immersion blender: Place an immersion blender inside the jar and use a gentle up and down motion to create smooth peanut butter quickly and mess-free.
- Pour off excess oil: If the natural nut butter is runny even after stirring, pour off the excess oil into a separate jar for later use to adjust the consistency as needed.
These techniques, along with proper storage methods, such as turning the jar every few days and considering refrigeration, will help you achieve a creamy and well-combined consistency for your natural peanut butter.
Avoiding Oily Mess in Natural Peanut Butter

To prevent an oily mess in natural peanut butter, we can employ various techniques that aid in achieving a well-combined and spreadable consistency.
Storing the nut butter jar upside down allows the oil to mix back into the peanut butter on its own.
Additionally, using a hand mixer to whip up the natural nut butter can result in a soft, spreadable texture. For a smooth peanut butter texture, consider using a hand immersion blender by gently moving it up and down in the jar.
If the peanut butter still appears too oily, pouring off some of the top oil can adjust the consistency as needed.
Furthermore, refrigeration can solidify the butter and extend its shelf life, reducing the likelihood of an oily mess.
Tips for Smooth and Spreadable Peanut Butter

After addressing the oil separation issue, we can now focus on optimizing the smoothness and spreadability of natural peanut butter. Achieving the perfect texture for peanut butter can be a game-changer in enhancing your overall experience. Here are some tips to ensure your peanut butter is smooth and spreadable:
- Stirring Technique: Properly stirring your natural peanut butter is crucial. Start by stirring the oil back into the butter thoroughly. Then, continue stirring in a slow, circular motion, ensuring that the entire jar is well mixed.
- Temperature Control: Temperature greatly affects the consistency of natural peanut butter. To make it more spreadable, you can gently warm the peanut butter by placing the closed jar in warm water for a few minutes.
- Addition of Oil: If the peanut butter is still not achieving the desired smoothness, consider adding a small amount of oil, such as coconut or peanut oil, and mix it thoroughly to reach your preferred consistency.
- Storage Upside Down: Storing the jar upside down can help distribute the oils more evenly throughout the peanut butter, making it easier to stir and achieve a smoother texture.
Implementing these tips can help you achieve the perfect smooth and spreadable natural peanut butter, enhancing your snacking experience.
Maximizing Shelf Life of Peanut Butter

How can we maximize the shelf life of natural peanut butter to ensure its freshness and quality over an extended period?
To maintain the optimal condition of natural peanut butter, it's essential to store it in a cool, dark place to shield it from heat and light, which can accelerate spoilage.
Additionally, ensuring a tight seal on the lid after each use is crucial in preventing air from entering the jar and causing oxidation and rancidity.
If a firmer consistency is preferred or an extended shelf life is desired, refrigeration is an option, but allowing the peanut butter to reach room temperature before use facilitates easier spreading.
When handling natural peanut butter, using a clean, dry utensil is imperative to prevent the introduction of moisture, which can lead to mold growth.
Lastly, it's recommended to consume natural peanut butter within a few months of opening to enjoy its peak freshness and flavor.
Frequently Asked Questions
How Do You Make Peanut Butter Not Oily?
We make peanut butter not oily by utilizing various methods.
Storing the jar upside down allows the oil to mix back into the peanut butter.
Using a hand mixer instantly achieves a soft, spreadable consistency.
A hand immersion blender creates smooth peanut butter quickly and mess-free.
Pouring off some of the top oil can adjust the consistency as needed.
Refrigerating the natural nut butter can solidify it and extend its shelf life.
How Do You Keep Oil off Top of Peanut Butter?
To keep oil off the top of peanut butter, we recommend storing it upside down. This simple solution allows the natural oils to redistribute and prevent separation, keeping the texture consistent.
Additionally, refrigerating the peanut butter can help slow down the oil separation process.
Regularly stirring the peanut butter can also help evenly distribute the oil.
These techniques can help maintain a smooth and creamy peanut butter consistency.
Why Is My Peanut Butter so Oily?
Our peanut butter might become oily due to natural oil separation. When peanuts are ground, their natural oils can separate and rise to the top.
To prevent this, stirring the peanut butter thoroughly before storing it can help redistribute the oil. Additionally, storing it upside down can help prevent the oil from rising to the top.
These methods can help maintain a creamy consistency and minimize the oiliness of the peanut butter.
Why Is My Peanut Butter Oily When I Open It?
When we open peanut butter, the oil separation can be due to its natural oil content. It's a common occurrence in natural peanut butter, where the oil rises to the top. This happens because the peanuts' natural oils separate over time.
Stirring the peanut butter thoroughly before using it can help redistribute the oils and prevent it from being overly oily.
Conclusion
In conclusion, storing peanut butter upside down and using mixing techniques like a hand mixer or immersion blender can help prevent it from getting oily.
By incorporating the oil more evenly and adjusting the consistency as needed, we can enjoy smooth and spreadable peanut butter.
So, why not give these techniques a try and say goodbye to oily peanut butter for good?