Connect with us

Vegetarian Dishes

Butter Bean Curry: A Rich, Creamy, and Satisfying Twist on Classic Curry

Indulge in the rich, creamy, and satisfying twist on classic curry that’s bursting with earthy, fragrant, and indulgent flavors.

Published

on

creamy butter bean curry

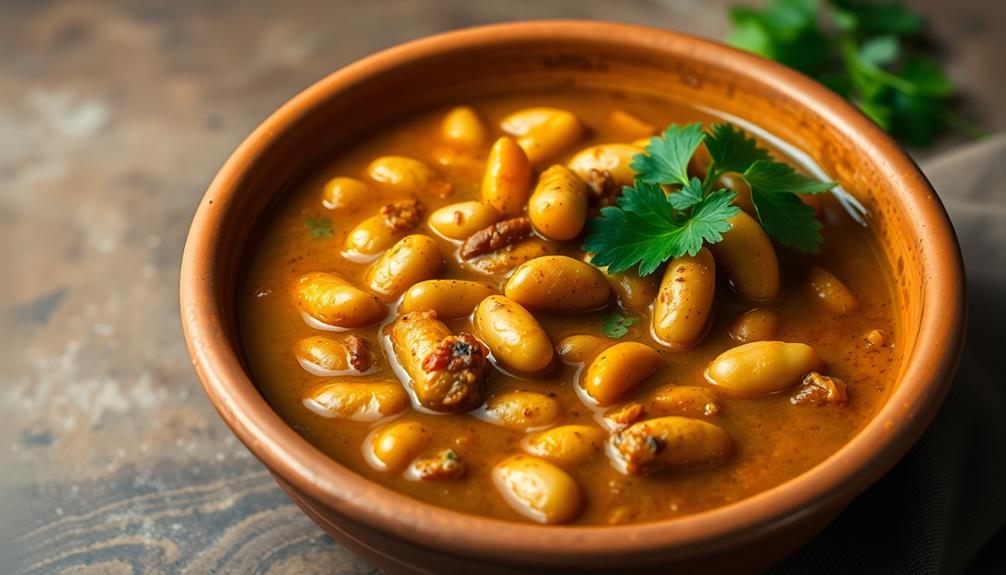
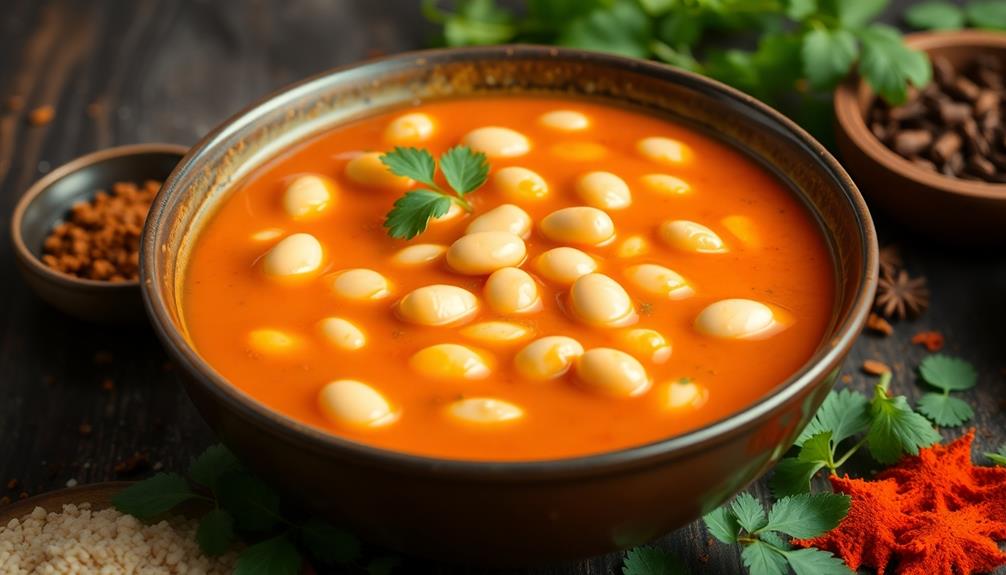
Butter bean curry is a rich, creamy, and satisfying twist on classic curry that'll have your tastebuds dancing with joy. Originating in the South, these buttery beans add a velvety texture and comforting flavor that pairs beautifully with aromatic spices. The adaptable recipe allows you to tailor it to your dietary needs, whether you're craving a plant-based delight or a protein-packed meal. Simmered to perfection, the curry's harmony of earthy, fragrant, and indulgent notes will leave you coming back for more. You'll find serving suggestions and cooking tips that'll help you take your curry game to the next level.

Key Takeaways

  • Butter bean curry offers a comforting, creamy twist on traditional curry, featuring the buttery flavor and velvety texture of the versatile legume.
  • The dish combines aromatic spices, coconut milk, and tangy tomatoes to create a harmonious balance of flavors and textures.
  • Adaptable to various dietary preferences, the curry can be customized to suit individual tastes, making it an appealing option for diverse palates.
  • Pairing the curry with fluffy basmati rice or warm naan bread provides a satisfying and complete dining experience.
  • Butter beans, the key ingredient, offer a protein-packed and fiber-rich component, making this curry a nutritious and wholesome meal choice.

History
historical events and narratives

Originating from the southern regions of the United States, butter beans have long been a staple ingredient in traditional Southern cuisine. These plump, creamy legumes were initially cultivated by Native American tribes, who recognized their versatility and nutritional value.

Over time, butter beans became a beloved component in the diverse culinary tapestry of the South, finding their way into beloved dishes like succulent pork and bean stews, hearty vegetable medleys, and, of course, the delightful butter bean curry.

As the popularity of Southern fare spread across the nation, butter beans have gained increased recognition for their rich, buttery flavor and velvety texture.

Today, these versatile beans are enjoyed in kitchens worldwide, adding a delightful twist to a variety of international dishes. Whether simmered in savory broths, blended into creamy dips, or incorporated into vibrant curries, butter beans continue to captivate the palates of food enthusiasts, leaving a lasting impression with their comforting, homespun appeal.

Recipe

cooking instructions and ingredients

Butter bean curry is a delightful and comforting dish that combines the creamy texture of butter beans with a blend of aromatic spices. This dish is a perfect choice for a cozy meal, offering a satisfying and flavorful experience. With its roots in Indian cuisine, butter bean curry can be easily adapted to various dietary preferences, similar to how unique cake pop packaging enhances gift presentation and customer appeal.

Originating from the Indian subcontinent, butter bean curry is a versatile dish that can be enjoyed on its own or served alongside fluffy basmati rice or warm naan bread. The combination of the earthy butter beans, fragrant spices, and rich, velvety sauce makes this dish a true delight for the senses.

Advertisement

Ingredients:

  • 2 cups cooked butter beans (or 1 (15 oz) can, drained and rinsed)
  • 1 large onion, diced
  • 3 cloves garlic, minced
  • 1 tablespoon grated ginger
  • 1 teaspoon cumin
  • 1 teaspoon coriander
  • 1 teaspoon garam masala
  • 1 teaspoon turmeric
  • 1 teaspoon paprika
  • 1 (14 oz) can diced tomatoes
  • 1 cup coconut milk
  • Salt and pepper to taste
  • Chopped cilantro for garnish (optional)

Instructions:

In a large skillet or saucepan, sauté the onion over medium heat until translucent. Add the garlic and ginger, and cook for an additional minute, stirring constantly.

Stir in the cumin, coriander, garam masala, turmeric, and paprika, and cook for 2-3 minutes, or until the spices are fragrant. Pour in the diced tomatoes and coconut milk, and bring the mixture to a simmer.

Add the cooked butter beans, and season with salt and pepper to taste. Simmer for 15-20 minutes, allowing the flavors to meld together. Serve the butter bean curry hot, garnished with chopped cilantro if desired.

For best results, adjust the spice level to your personal preference. If you enjoy a creamier texture, you can blend a portion of the curry mixture before returning it to the pan.

Advertisement

Additionally, consider serving the butter bean curry with a side of basmati rice or naan bread to soak up the delicious sauce.

Cooking Steps

step by step cooking instructions

First, soak your butter beans overnight, then drain and rinse them.

Next, sauté some onions and fragrant spices in a pan.

Step 1. Soak Butter Beans Overnight

soak butter beans overnight

Before you can start cooking the butter bean curry, you'll need to soak the beans overnight. This important step helps to soften the beans and makes them easier to cook.

Simply place the dried butter beans in a large bowl and cover them with plenty of water. Let them soak for at least 8 hours, or overnight. You'll notice the beans expand and become plump as they absorb the water.

Once they're ready, drain and rinse the soaked beans. This quick prep work sets you up for success in the kitchen, ensuring your butter bean curry turns out rich, creamy, and absolutely delicious.

With the hard part out of the way, you can now move on to the next steps of the recipe. Get ready to be amazed by the deep, savory flavors of this satisfying curry dish!

Advertisement

Step 2. Drain and Rinse Butter Beans

drain and rinse beans

After the overnight soak, you'll need to drain and rinse the butter beans. This step is crucial to remove any excess starch and prepare the beans for the curry.

Grab a colander and place it in the sink. Carefully pour the soaked beans into the colander, letting the water drain out. Once drained, give the beans a thorough rinse under cool running water.

You'll notice the water becomes cloudy as you rinse – this is just the starch being washed away. Keep rinsing until the water runs clear. Gently shake the colander to help remove any remaining water.

Now your butter beans are ready to be added to the curry! This simple step ensures your finished dish will have the perfect texture and flavor. Don't skip it – rinsing the beans is a must for achieving that rich, creamy curry you're after.

Step 3. Sauté Onions and Spices

saut onions and spices

Now that the butter beans are drained and rinsed, it's time to start building the flavors for your curry. In a large skillet over medium heat, add a drizzle of olive oil.

Once the oil is shimmering, toss in the diced onions. Sauté the onions, stirring occasionally, until they're softened and starting to caramelize, about 5-7 minutes.

Next, add the minced garlic and grated ginger to the skillet. The aroma will instantly fill your kitchen, making your mouth water in anticipation.

Advertisement

Stir the garlic and ginger constantly for 1-2 minutes, being careful not to let them burn.

Now, it's time to introduce the warm, aromatic spices. Sprinkle in the cumin, coriander, and garam masala.

Give everything a good stir, coating the onions, garlic, and ginger in the fragrant spice blend. Allow the spices to toast for 1-2 minutes, releasing their essential oils and deepening the flavor.

Step 4. Add Coconut Milk and Simmer

coconut milk simmering step

The next step is to pour in the creamy coconut milk. This luscious, tropical ingredient will transform the dish, creating a rich, velvety texture that's simply divine. Coconut milk is also a great source of healthy fats, which can help with nutrient absorption and provide energy during cooking.

Go ahead and slowly pour it in, watching as it melds with the aromatic spices and tender onions. Stir gently to combine everything, then let the mixture simmer. As it bubbles away, the flavors will deepen and meld, creating a harmonious balance of spice, creaminess, and sweetness.

Be patient and allow the curry to simmer for about 15-20 minutes, stirring occasionally. This gives the coconut milk time to work its magic, infusing the dish with its signature flavor and creaminess.

Advertisement

Breathe in the heavenly aroma – can you almost taste it already? The butter beans will soak up all those wonderful flavors, becoming tender and infused with the essence of the curry.

Celery juice benefits get ready, because the next step is about to take this dish to the next level of deliciousness!

Step 5. Add Chopped Tomatoes and Simmer

chopped tomatoes simmering added

Next, grab some juicy, ripe tomatoes and chop them up. The vibrant, red color of the tomatoes will add a lovely pop to your curry. Toss the chopped tomatoes into the simmering coconut milk.

As the curry continues to cook, the tomatoes will break down, releasing their tangy sweetness into the creamy sauce. This combination enhances the dish not only visually but also nutritionally, as tomatoes are known for their health benefits, including allergen reduction. Stir the mixture occasionally, allowing the flavors to meld together beautifully.

The addition of the tomatoes not only enhances the visual appeal of the dish but also adds a delightful depth of flavor. The acidity from the tomatoes perfectly balances the richness of the coconut milk, creating a harmonious blend that'll have your taste buds dancing.

Allow the curry to simmer for about 10-15 minutes, until the tomatoes have softened and the flavors have fully integrated. Get ready for a curry that's bursting with bright, tomatoey goodness in every bite!

Advertisement

Final Thoughts

concluding reflections and insights

Though the butter bean curry may seem like a simple dish, it's a flavorful and versatile meal that can be enjoyed in various ways. The rich, creamy texture and complex blend of spices make this curry a real treat for your taste buds.

Don't be afraid to get creative and experiment with different toppings or sides – the possibilities are endless! You could serve it over a bed of fluffy rice, alongside some freshly baked naan bread, or even topped with a sprinkle of toasted coconut for an extra burst of flavor.

And the best part? This dish isn't only delicious but also incredibly nourishing, thanks to the protein-packed butter beans.

Frequently Asked Questions

Can I Substitute Other Beans for Butter Beans?

Absolutely! You can substitute other beans for butter beans in this recipe. Try kidney, chickpeas, or even lentils – they'll all work well and provide a similar creamy, satisfying texture to the dish.

How Long Does the Curry Keep in the Fridge?

The curry will keep in the fridge for 3-4 days. Store it in an airtight container, and make sure to reheat it thoroughly before serving. This will help maintain the flavor and texture of the dish.

Is This Dish Suitable for Vegetarians or Vegans?

This dish is suitable for vegetarians and vegans. The recipe doesn't contain any animal-derived ingredients, making it a plant-based, meatless option that caters to those following a vegetarian or vegan diet. Enjoy this flavorful and satisfying curry!

Advertisement

Can I Freeze the Leftover Curry for Later Use?

Yes, you can easily freeze the leftover curry for later use. The creamy texture and rich flavors will hold up well in the freezer, allowing you to enjoy this satisfying dish again at a later time.

What Side Dishes Pair Well With Butter Bean Curry?

You can pair butter bean curry with a variety of side dishes. Consider serving it with naan bread, rice, roasted vegetables, or a fresh salad to create a well-rounded and flavorful meal.
Advertisement

Vegetarian Dishes

Butter-Roasted Vegetable Tart: a Golden, Savory Tart That’S Packed With Flavor

Satisfy your craving for a golden, savory tart with the Butter-Roasted Vegetable Tart, a culinary masterpiece that celebrates the season’s bounty.

Published

on

By

flavorful butter roasted vegetable tart

Sink your teeth into the golden, savory splendor of the butter-roasted vegetable tart! This culinary masterpiece showcases seasonal produce at its finest, with tender, caramelized veggies nestled within a flaky, buttery crust. The trick lies in carefully selecting and expertly roasting the ingredients – from butternut squash to zucchini and bell peppers – to coax out their natural sweetness. As the aromas fill the air, you'll be transported to a cozy, homemade haven. Take a bite and savor the symphony of flavors – it's a celebration of the season's bounty that's sure to leave you craving more.

Key Takeaways

  • The Butter-Roasted Vegetable Tart is a savory dish that originated in the late 19th century, evolving from European chefs' experiments with seasonal produce.
  • The tart combines a buttery crust with roasted vegetables, including butternut squash, zucchini, bell pepper, and onion, to create a visually stunning and flavorful main course or side dish.
  • The success of the tart lies in the careful selection and roasting of the vegetables, which are tossed with butter and spices to enhance their caramelized flavors.
  • The baking process involves layering the roasted vegetables and an egg-cream mixture in the crust, resulting in a golden-brown and crisp pastry.
  • Garnishing the tart with fresh herbs like thyme, rosemary, and oregano adds a final touch of aroma and flavor, creating a harmonious culinary experience.

History

knowledge of past events

The origins of the butter-roasted vegetable tart can be traced back to the late 19th century, when European chefs began experimenting with new ways to showcase the season's bountiful produce.

As the industrial revolution transformed food production, these culinary innovators sought to elevate humble vegetables into decadent masterpieces. Inspired by the rich, caramelized flavors of roasted roots and tubers, they developed a technique of tossing the vegetables in butter before roasting.

This process unlocked a depth of flavor that perfectly complemented the delicate pastry crust. Soon, these savory tarts became a staple in the households of the aristocracy, who delighted in the interplay of buttery, tender vegetables and flaky, golden dough.

Over the decades, the butter-roasted vegetable tart evolved, with chefs incorporating a wider variety of seasonal produce and experimenting with different pastry techniques.

Today, it remains a beloved classic, a testament to the enduring power of simple, high-quality ingredients elevated by skilled preparation.

Advertisement

Recipe

cooking instructions and ingredients

Butter-Roasted Vegetable Tart

This savory tart is a delightful way to enjoy a variety of roasted vegetables. The buttery crust provides a rich base for the caramelized vegetables, making for a satisfying and visually stunning dish. Whether served as a main course or a side, this tart is sure to impress your guests.

The key to this recipe is the careful selection and roasting of the vegetables. By allowing the natural sweetness and flavors to develop, you'll create a depth of taste that pairs beautifully with the flaky crust.

Ingredients:

  • 1 pie crust, homemade or store-bought
  • 2 cups diced butternut squash
  • 1 cup diced zucchini
  • 1 cup diced red bell pepper
  • 1 cup diced onion
  • 3 tablespoons unsalted butter, melted
  • 2 tablespoons olive oil
  • 1 teaspoon dried thyme
  • 1 teaspoon garlic powder
  • Salt and black pepper to taste
  • 2 eggs, beaten
  • 1 cup heavy cream

To prepare, preheat your oven to 400°F (200°C). Toss the diced vegetables with the melted butter, olive oil, thyme, garlic powder, salt, and pepper in a large bowl.

Spread the seasoned vegetables onto a baking sheet and roast for 25-30 minutes, or until the vegetables are tender and lightly caramelized.

Once the vegetables have cooled slightly, arrange them in the prepared pie crust. In a separate bowl, whisk together the beaten eggs and heavy cream.

Advertisement

Pour this mixture over the roasted vegetables, ensuring an even distribution. Bake the tart for 30-35 minutes, or until the filling is set and the crust is golden brown.

Allow the tart to cool for 10-15 minutes before slicing and serving. Enjoy the rich, flavorful combination of the roasted vegetables and the buttery crust.

Cooking Steps

sequential culinary instructions

Preheat your oven to 400°F.

Butter adds flavor and moisture to baked goods, making it an excellent choice for enhancing your tart.

Next, toss the vegetables with a bit of oil and your favorite spices. Incorporating butter in global cuisine can elevate the taste profile even further.

Then, bake the tart until it's golden brown.

Advertisement

Don't forget to brush the top with an egg wash and garnish with fresh herbs for a beautiful finishing touch.

Step 1. Preheat Oven to 400°F

preheat oven to 400 f

Preheating the oven to 400°F is the first crucial step in this Butter-Roasted Vegetable Tart recipe. This high heat will ensure your vegetables caramelize and develop a delicious, golden-brown crust.

Start by locating your oven and double-checking that it's empty, with no baking sheets or racks inside. Carefully slide the oven rack to the middle position to make room for your tart pan later.

Once you've confirmed the oven is clear, go ahead and turn the temperature dial or use the digital controls to set the oven to 400°F. Listen for the satisfying click as the oven ignites, then wait patiently as it preheats. This should take around 10-15 minutes.

While you wait, you can gather the rest of your ingredients and tools. When the oven is fully heated, you'll be ready to pop in your prepared tart and let the roasting begin!

Preheating is an essential step that sets the stage for the incredible flavors to come.

Advertisement

Step 2. Toss Vegetables With Oil and Spices

toss vegetables with oil

Next, grab a large mixing bowl and add the chopped vegetables. Drizzle them with a few tablespoons of olive oil and sprinkle with a pinch of salt and freshly ground black pepper.

Gently toss the veggies until they're evenly coated. You want the seasonings to cling to every nook and cranny for maximum flavor. To enhance the richness of your dish, consider using a high-quality Grass-Fed Butter to complement the vegetables.

Now, let's kick things up a notch! Add a dash of smoked paprika, a teaspoon of dried thyme, and a sprinkle of garlic powder.

Toss again until the spices are distributed throughout. The smoky paprika will lend a subtle depth, while the thyme and garlic add an aromatic warmth. Feel free to adjust the amounts of seasonings to suit your personal tastes. Just make sure the vegetables are well-seasoned and ready to roast to perfection.

Step 3. Bake Tart Until Golden Brown

bake tart until golden

Once the vegetables are evenly coated in the aromatic spices, transfer them to a large baking sheet.

Arrange the vegetables in a single, even layer, ensuring they've plenty of room to roast and caramelize. Preheat your oven to 400°F (200°C) and slide the baking sheet onto the middle rack. Consider pairing this savory tart with a warm cup of herbal tea to enhance your meal experience.

As the tart bakes, your kitchen will fill with the most tantalizing aroma.

Advertisement

Keep a close eye on the vegetables, rotating the pan halfway through the cooking time to promote even browning. After 25-30 minutes, the tart should be golden-brown and the vegetables tender. To check for doneness, pierce a piece of vegetable with a fork – it should be easily pierced, with no resistance.

Remove the tart from the oven and let it cool for a few minutes before slicing.

The flaky, buttery crust and caramelized vegetables create a delightful harmony of flavors and textures in every bite. Serve this tart warm, garnished with a sprinkle of fresh herbs, for a truly memorable meal.

Step 4. Brush Tart With Egg Wash

egg wash tart brushing

To prepare the tart for baking, brush the surface of the pastry crust with a light coating of egg wash. This simple step will give the tart a beautiful, golden-brown sheen when it emerges from the oven.

Dip a clean pastry brush into the beaten egg, then gently sweep it across the entire top of the tart. Make sure to cover every inch, from the edges to the center, for an even appearance.

The egg wash acts as a sealant, helping the crust bake up crisp and flaky. As the tart bakes, the egg wash will cook, creating a delicate, shiny glaze that enhances the tart's visual appeal.

Advertisement

This finishing touch is the perfect way to make your butter-roasted vegetable tart look as mouthwatering as it tastes. Once the egg wash is applied, the tart is ready to slide into the oven and bake until it's golden brown and irresistible.

Step 5. Garnish Tart With Fresh Herbs

garnish tart with herbs

A flourish of fresh herbs is the perfect finishing touch to elevate your butter-roasted vegetable tart. Reach for a handful of aromatic herbs like thyme, rosemary, and oregano.

Gently pluck the delicate leaves from their stems and scatter them over the tart, allowing their vibrant colors and fragrant scents to dance across the golden crust. The herbaceous notes will perfectly complement the rich, caramelized vegetables beneath.

For an extra burst of flavor, try tearing the herbs with your fingers just before garnishing – this will help release their essential oils and maximize their aroma.

Garnish the tart right before serving, so the herbs maintain their freshness and vibrancy. With a final sprinkle of the fragrant greens, your tart is now ready to delight your senses and impress your guests.

Enjoy the harmonious blend of roasted vegetables and aromatic herbs in every satisfying bite.

Advertisement

Final Thoughts

concluding reflections and insights

As the butter-kissed aroma of the roasted vegetables lingers, it's time to reflect on this tart's delightful journey.

You've crafted a golden, savory masterpiece that's packed with flavor and texture. The blend of perfectly roasted vegetables, nestled in a buttery crust, creates a truly satisfying experience.

When you slice into the tart, you'll be rewarded with vibrant colors and a symphony of tastes. The tender, caramelized vegetables melt in your mouth, while the flaky crust provides a delightful contrast.

With a sprinkle of fresh herbs, this tart becomes a work of art, both visually and gastronomically.

As you savor each bite, you'll find yourself transported to a cozy kitchen, surrounded by the comforting aromas of a homemade meal.

This tart isn't just a dish, but a celebration of the season's bounty, a testament to the power of simple, quality ingredients.

Advertisement

Enjoy this tart with family and friends, and let the flavors inspire your next culinary adventure.

Frequently Asked Questions

Can I Use Different Vegetables in the Tart?

Absolutely! You can use a variety of vegetables in the tart. Feel free to experiment with different combinations, such as roasted bell peppers, zucchini, eggplant, or even a medley of root vegetables. The possibilities are endless, so get creative!

How Long Does the Tart Stay Fresh?

The tart will stay fresh for up to 3 days when stored properly in an airtight container in the refrigerator. It's best to consume it within that time frame for optimal flavor and texture.

Is the Tart Suitable for Vegetarians or Vegans?

The tart may not be suitable for vegetarians or vegans, as it likely contains butter or other dairy products. You'll want to check the recipe's ingredients to ensure it aligns with your dietary preferences.

Can I Prepare the Tart in Advance?

Yes, you can prepare the tart in advance. The tart's components can be made a day or two ahead, then assembled and baked just before serving. This makes it a convenient dish to prepare for a crowd.

Advertisement

What Type of Cheese Works Best in the Tart?

For the best cheese in your tart, you can't go wrong with a firm, flavorful cheese like Gruyère or Parmesan. Their nutty, slightly salty notes will complement the roasted vegetables perfectly. Avoid softer cheeses that may become watery when baked.

Continue Reading

Vegetarian Dishes

Brown Butter Sage Pasta: a Simple yet Exquisite Dish Bursting With Flavor

Key into the captivating flavors of brown butter and sage in this delectable pasta dish that’s perfect for cozy dinners and impressive gatherings.

Published

on

By

flavorful brown butter pasta

Get ready to elevate your pasta game with this captivating brown butter sage pasta dish! Originating from the rolling hills of Italy, this timeless recipe combines the luxurious, nutty essence of browned butter with the earthy aroma of fresh sage, creating a harmonious, comforting flavor that'll transport you to a cozy trattoria. The silky, al dente pasta serves as the perfect canvas for this indulgent sauce, while a sprinkle of salty Parmesan cheese adds the finishing touch. It's a simple yet exquisite meal that's perfect for cozy dinners and impressive gatherings alike. Intrigued? Let's dive deeper into the secrets behind this delectable dish.

Key Takeaways

  • The recipe combines the rich, nutty flavor of brown butter with the earthy aroma of fresh sage, creating an indulgent and comforting pasta dish.
  • The simple cooking process of boiling pasta and sautéing the butter and sage results in an elegant meal suitable for both casual and formal occasions.
  • The addition of Parmesan cheese enhances the umami-forward taste, providing a delightful contrast of textures and flavors.
  • This dish can be easily enhanced by incorporating coffee, which may offer cognitive and mood benefits for the diner.
  • The recipe has been passed down through generations, adapting to regional tastes while maintaining its classic Italian roots and appeal.

History

historical events and narratives

Centuries ago, in the rolling hills of Italy, pasta was a staple dish enjoyed by peasants and nobility alike. This versatile food, made from simple ingredients like flour, water, and eggs, quickly became a beloved part of the country's culinary heritage.

Over time, creative cooks began experimenting with different shapes, sauces, and flavor combinations, giving rise to the diverse array of pasta dishes we know and love today.

The addition of nutty, aromatic brown butter and fragrant sage to pasta is a classic Italian pairing that has stood the test of time. The rich, velvety sauce coats each noodle, while the earthy sage lends a warm, comforting touch.

This timeless recipe has been passed down through generations, evolving to suit the tastes and ingredients of different regions and families. Whether enjoyed as a simple weeknight meal or an elegant dinner party dish, brown butter sage pasta remains a cherished part of Italy's culinary legacy.

Recipe

cooking instructions and ingredients

Brown Butter Sage Pasta

Recipe

Advertisement

This simple yet elegant dish combines the rich, nutty flavor of brown butter with the earthy aroma of fresh sage. The pasta is tossed in a luxurious sauce that coats each strand, creating a truly indulgent and comforting meal.

This recipe is perfect for a cozy weeknight dinner or an impressive dinner party. Additionally, this dish can be enhanced by enjoying a cup of coffee alongside it, as coffee is linked to improved cognitive function and mood enhancement, making for a delightful dining experience fresh insights about coffee.

Prepare to be captivated by the delightful interplay of textures and flavors in this Brown Butter Sage Pasta. The silky, al dente pasta provides the perfect canvas for the luscious brown butter and fragrant sage.

Ingredients:

  • 12 oz. package of your favorite pasta
  • 6 tbsp. unsalted butter
  • 10-12 fresh sage leaves, chopped
  • 1/2 cup grated Parmesan cheese
  • Salt and freshly ground black pepper to taste

In a large skillet, melt the butter over medium heat, swirling the pan occasionally, until the butter is golden brown and has a nutty aroma, about 5-7 minutes.

Add the chopped sage leaves and cook for an additional 2-3 minutes, until the sage is crisp and the butter is fragrant.

Advertisement

Remove the skillet from heat and set aside. Cook the pasta according to the package instructions until al dente.

Drain the pasta, reserving 1/2 cup of the cooking water. Add the cooked pasta to the skillet with the brown butter and sage. Toss to coat, adding the reserved pasta water as needed to create a smooth, creamy sauce.

Stir in the Parmesan cheese and season with salt and black pepper to taste.

Serve the Brown Butter Sage Pasta immediately, garnished with additional Parmesan cheese and fresh sage leaves, if desired. Enjoy the rich, comforting flavors of this simple yet decadent dish.

Cooking Steps

step by step cooking instructions

First, bring a large pot of salted water to a boil.

While that's heating up, melt the butter in a skillet and cook the sage until it's crisp and fragrant.

Advertisement

Once the pasta's cooked al dente, toss it right in the brown butter sauce, then garnish with freshly grated Parmesan cheese for the perfect finishing touch.

Step 1. Bring Salted Water to Boil

boil salted water first

Bring a large pot of salted water to a rolling boil. You'll want to use a generous amount of salt – about a tablespoon per quart of water. This will season the pasta as it cooks, infusing it with flavor.

As the water heats up, you'll start to see bubbles forming and rising to the surface. Once it reaches a full, rapid boil, it's ready for the pasta. Carefully add the dry pasta to the pot, stirring gently to prevent it from sticking together.

Set a timer according to the package instructions, usually around 8-10 minutes for al dente texture. Keep an eye on the pot, adjusting the heat as needed to maintain a steady boil. You want the water to stay at a high temperature so the pasta cooks evenly and doesn't become soggy.

When the timer goes off, quickly drain the pasta in a colander, reserving a cup of the starchy cooking water. The pasta is now ready to be combined with the aromatic brown butter and sage sauce.

Step 2. Melt Butter and Cook Sage

melt butter cook sage

While the pasta boils, melt the butter in a large skillet or saucepan over medium heat. As the butter sizzles, it'll begin to brown and develop a nutty, aromatic aroma.

Toss in the fresh sage leaves and let them sizzle in the butter, releasing their earthy, fragrant oils. The addition of aromatic herbs, like sage, can enhance the overall flavor profile of your dishes, similar to how essential oils like lavender oil can provide calming effects in other applications.

Advertisement

The butter will continue to darken, turning a beautiful golden-brown hue. Gently swirl the pan to coat the sage leaves and ensure even cooking.

Let the sage sizzle for 2-3 minutes, until it becomes crisp and the butter has a rich, toasted flavor. Be careful not to let the butter burn – you want it to reach that perfect nutty brown state.

This quick step adds so much depth and complexity to the dish, so don't rush it. The sage and browned butter will create a mouthwatering sauce that coats the pasta beautifully.

Step 3. Cook Pasta Until Al Dente

cook pasta al dente

Simultaneously, cook the pasta according to the package instructions until it reaches an al dente texture – tender yet firm to the bite.

Carefully drop the pasta into a pot of boiling salted water, stirring gently to prevent it from sticking together. Set a timer and monitor the pasta closely, tasting a piece every minute or so to ensure it reaches the perfect consistency.

You'll know it's ready when it offers a slight resistance when bitten but is still pleasantly chewy.

Advertisement

Drain the pasta in a colander, reserving a bit of the starchy cooking water to add back to the dish later.

The pasta should now be perfectly cooked, ready to be tossed with the fragrant brown butter and crispy sage leaves.

This simple yet flavorful technique will transform ordinary pasta into an extraordinary culinary experience that's sure to delight your senses and satisfy your taste buds.

Step 4. Toss Pasta With Brown Butter Sauce

pasta tossed with brown butter

With the perfectly cooked pasta ready, it's time to toss it with the fragrant brown butter sauce. In a large skillet, melt the butter over medium heat, stirring occasionally, until it turns a rich, golden-brown color. You'll notice the butter begin to foam and sizzle, releasing a nutty, toasted aroma that will have your mouth watering.

Carefully add the cooked pasta to the skillet, tossing it gently to coat each strand with the luxurious brown butter. The sauce will cling to the pasta, creating a silky, decadent texture. Sprinkle in the fresh sage leaves, letting them sizzle and infuse the dish with their earthy, aromatic flavor.

Continue tossing the pasta until everything is evenly combined and heated through. The sage leaves will crisp up slightly, adding a lovely crunch to contrast the smooth, creamy sauce.

Advertisement

Finish with a generous grinding of black pepper and a light dusting of Parmesan cheese, if desired. Get ready to indulge in a pasta dish that's bursting with the comforting, umami-rich taste of brown butter and sage.

Step 5. Garnish With Fresh Parmesan Cheese

garnish with parmesan cheese

To finish the dish, sprinkle a generous amount of freshly grated Parmesan cheese over the pasta. The sharp, salty flavor of the Parmesan will perfectly complement the rich, nutty brown butter and earthy sage.

Grab a handful of the finely shredded cheese and let it cascade over the steaming hot noodles, creating a delightful contrast of textures. As the cheese melts into the sauce, it will bind everything together, creating a harmonious blend of flavors in every bite.

Be sure to use a high-quality Parmesan for the best results – the kind that's been aged to perfection, with a complex, umami-forward taste.

Take a moment to admire the beautiful presentation as the vibrant green sage leaves and glistening cheese transform the simple pasta dish into something truly special.

Now, dig in and savor the incredible depth of flavor that the Parmesan adds to this irresistible brown butter sage pasta.

Advertisement

Final Thoughts

concluding reflections and insights

The brown butter and sage in this pasta dish create a comforting and elegant flavor profile that you'll come to crave. The warmth and richness of the brown butter, combined with the aromatic earthiness of the sage, elevate this simple recipe into something truly special.

The final touch of freshly grated Parmesan cheese adds a delightful salty-savory element that ties the whole dish together. Once you've tasted this brown butter sage pasta, you'll find yourself craving it again and again.

The effortless preparation and depth of flavor make it an ideal weeknight meal or elegant dinner party dish. Serve it alongside a crisp green salad and a glass of white wine for a truly satisfying and indulgent experience.

This recipe is sure to become a new staple in your culinary repertoire, transporting you to a cozy Italian trattoria with every bite. Enjoy the comforting embrace of this brown butter sage pasta and savor each delectable moment.

Frequently Asked Questions

Can I Substitute Other Herbs for the Sage?

Absolutely! You can substitute other herbs for the sage in this dish. Thyme, rosemary, or even parsley would work well, adding their unique flavors to the brown butter sauce. Feel free to experiment and find your perfect herb pairing.

How Long Will the Dish Stay Fresh in the Fridge?

The dish will stay fresh in the fridge for 3-4 days. Be sure to store it in an airtight container to preserve the flavors and prevent the pasta from drying out. Enjoy your meal!

Advertisement

Can I Use a Different Type of Pasta?

Yes, you can use a different type of pasta with this recipe. The brown butter and sage sauce will pair well with various pasta shapes, such as spaghetti, linguine, or even penne. Feel free to experiment and find your favorite combination.

Is It Possible to Make This Dish Vegan?

Yes, you can absolutely make this dish vegan! Simply swap out the butter for a high-quality vegan butter, and use a plant-based cheese or nutritional yeast to achieve the same rich, creamy flavor.

Can I Make the Brown Butter Ahead of Time?

You can absolutely make the brown butter ahead of time. Just store it in an airtight container in the fridge, and you can use it whenever you're ready to put the dish together.

Continue Reading

Vegetarian Dishes

Butter-Poached New Potatoes: The Creamy, Decadent Side You’ll Make Again and Again

Knock yourself out with this creamy, decadent side dish that will have you craving butter-poached new potatoes again and again. Keep reading to uncover more.

Published

on

By

creamy butter poached potatoes delight

Butter-poached new potatoes are the creamy, decadent side you'll crave again and again. Tracing back to the ancient Andes, these tender, waxy potatoes burst with natural sweetness when gently poached in aromatic butter. The simple cooking method preserves their delicate flavor, transforming humble ingredients into an indulgent culinary experience. Serve these silky, melt-in-your-mouth potatoes alongside roasted meats or grilled fish for a balanced meal that's sure to impress. With minimal effort and maximum flavor, you'll soon discover why this luxurious dish is worthy of any special occasion – whether it's a fancy holiday spread or a cozy family dinner. Keep reading to uncover more about the history and preparation of this remarkable side.

Key Takeaways

  • Butter-poaching transforms new potatoes into a luxurious, creamy, and indulgent side dish that enhances various main courses and can be prepared with minimal effort.
  • The cooking process involves gently simmering new potatoes in rich, aromatic butter, preserving their natural sweetness and delicate flavor.
  • Butter-poached new potatoes can be paired with a variety of dishes, including roasted meats, grilled fish, and fresh salads, making them a versatile option for different occasions.
  • The silky exterior and tender, creamy interior of butter-poached new potatoes provide a memorable culinary experience that encourages experimentation with flavors.
  • Butter-poaching simplifies the cooking process while yielding impressive results, allowing even novice cooks to create an indulgent and delicious potato dish.

History

historical events and narratives

The humble new potato's history can be traced back to the ancient Andes, where indigenous communities first cultivated this versatile tuber.

For centuries, these small, tender potatoes were a dietary staple, prized for their delicate flavor and nourishing properties.

As European explorers ventured into the New World, they discovered the wonders of the new potato and helped spread its popularity around the globe.

Recipe

culinary instructions and ingredients

Butter-poached new potatoes are a simple yet indulgent dish that showcases the natural sweetness and creamy texture of fresh, young potatoes. This cooking method gently cooks the potatoes in a bath of rich, aromatic butter, resulting in a tender, melt-in-your-mouth texture.

The key to this recipe is the use of new potatoes, which are harvested early and have a thin, delicate skin and a creamy, waxy interior. The gentle poaching in butter preserves the potatoes' delicate flavor and ensures they remain intact during the cooking process.

Ingredients:

Advertisement
  • 1 lb new potatoes, scrubbed clean
  • 4 oz unsalted butter
  • 2 sprigs fresh thyme
  • 1 bay leaf
  • Kosher salt and freshly ground black pepper

Instructions:

In a medium saucepan, combine the butter, thyme, and bay leaf. Cook over medium heat, stirring occasionally, until the butter is melted and fragrant.

Add the new potatoes and season with a pinch of salt and pepper. Reduce the heat to low, cover the pan, and simmer, stirring occasionally, until the potatoes are tender when pierced with a fork, about 20-25 minutes.

To serve, use a slotted spoon to transfer the butter-poached potatoes to a serving dish. Spoon some of the flavorful butter over the top.

This simple dish pairs well with roasted meats, grilled fish, or as a side for any meal.

Cooking Steps

recipe preparation instructions

Scrub those new potatoes thoroughly under running water to remove any dirt or impurities.

Then, combine the butter and potatoes in a saucepan and let them simmer until the potatoes are tender.

Advertisement

Drain the potatoes and set them aside, seasoning with a sprinkle of salt and pepper to enhance their buttery flavor.

Step 1. Scrub Potatoes Under Running Water

wash potatoes thoroughly first

Cleanliness is paramount when preparing these delicate new potatoes. Start by scrubbing them under cool, running water. Gently rub the potatoes with your fingers or a soft brush to remove any dirt or debris.

Be careful not to scrub too hard, as you don't want to damage the thin, tender skins. Once they're clean, place the potatoes in a colander to drain off any excess water.

It's important to thoroughly clean the potatoes to ensure they cook evenly and absorb the rich, buttery flavors. Visualize the potatoes emerging from the water, their skin glistening and smooth, ready for the next step in the cooking process.

Take your time with this simple yet crucial task, as it sets the stage for the delicious, butter-poached potatoes to come. With a clean, well-prepped foundation, you're one step closer to enjoying the creamy, decadent side dish you'll make again and again.

Step 2. Combine Butter and Potatoes

combine butter with potatoes

Next, you'll combine the clean potatoes with a generous amount of butter.

Imagine the smooth, creamy richness as the cool, firm potatoes meet the luscious, golden butter. Gently lower the potatoes into the pan, taking care not to splash or disturb the delicate surface.

Advertisement

As the butter slowly melts around the potatoes, the sweet, earthy aromas will begin to fill your kitchen. The culinary uses of butter truly elevate this dish, enhancing the flavor profile of the potatoes.

Resist the temptation to poke or stir too soon – let the potatoes gently poach, allowing the butter to work its magic. The potatoes will slowly transform, their exteriors softening while the insides remain tender and fluffy.

After a few minutes, you can carefully turn the potatoes, ensuring each one is evenly coated in the velvety butter. Continue this process, basting the potatoes occasionally, until they're fork-tender and infused with the rich, buttery flavor.

Get ready for a side dish that's truly decadent and delightful.

Step 3. Simmer Potatoes in Butter Mixture

simmer potatoes in butter

With the potatoes prepped, it's time to let them simmer in that luscious butter mixture. Gently lower the parboiled potatoes into the aromatic pan, making sure they're submerged in the golden, melted butter.

As the potatoes soak up the rich flavors, adjust the heat to maintain a gentle simmer. The butter will caress each tender spud, creating a velvety, indulgent sauce that coats them perfectly.

Advertisement

Resist the urge to stir too vigorously, as you want the potatoes to retain their shape. Instead, use a spoon to baste the butter over the potatoes, ensuring even cooking.

After 15-20 minutes, the potatoes should be fork-tender and infused with the irresistible taste of butter. The kitchen will be filled with the heavenly aroma, making your mouth water in anticipation.

Once the potatoes are cooked through, you're ready to move on to the next step – plating and serving this decadent, butter-poached delight.

Step 4. Drain Potatoes and Set Aside

drain potatoes set aside

After the potatoes have simmered in the butter mixture, use a slotted spoon to gently transfer them to a serving dish. The creamy, golden-hued potatoes will have absorbed all the delectable flavors from the butter, garlic, and herbs.

This method of cooking not only infuses flavor but can also enhance the nutritional value of the dish, similar to how fermentation enhances nutritional value in vegetables. Carefully drain off any excess liquid, ensuring the potatoes remain perfectly coated in that rich, decadent sauce.

With the potatoes now set aside, take a moment to admire their soft, buttery texture and enticing aroma. These aren't your average boiled potatoes – the long, gentle simmer has transformed them into something truly special.

Advertisement

Go ahead and take a few to taste, if you can resist the temptation to dive in immediately. The flavors will only continue to meld and deepen as the potatoes sit, so be patient and let them rest for a minute or two before serving.

Once you're ready, transfer the potatoes to your favorite dish and prepare to wow your guests with this indulgent, butter-poached masterpiece.

Step 5. Season Potatoes With Salt and Pepper

season potatoes with spices

Season the drained potatoes with a generous sprinkle of salt and a few grinds of black pepper. The salt will enhance the natural sweetness of the potatoes, while the pepper adds a subtle kick of warmth and depth of flavor.

Gently toss the potatoes to ensure the seasoning is evenly distributed, coating each one. You can use your hands or a large spoon to carefully mix the potatoes, taking care not to break them apart. The goal is to have a light, even coating that will complement the rich, buttery sauce you'll be creating.

Don't be shy with the seasoning – these potatoes deserve to shine! The combination of creamy, salty, and peppery notes will tantalize your taste buds, making this side dish utterly irresistible.

Get ready to experience the pure bliss of perfectly seasoned, butter-poached new potatoes.

Advertisement

Final Thoughts

conclusion and reflections shared

Ultimately, butter-poaching is a simple yet transformative technique that can elevate the humble new potato into a delectable, luxurious treat. This method can be complemented by a variety of flavors, such as the addition of fresh herbs or spices, making it a versatile side dish for any occasion.

With just a few ingredients and a bit of time, you can create a side dish that's sure to impress. The silky, buttery exterior gives way to a tender, creamy interior, making each bite a true delight. Pair these butter-poached new potatoes with roasted meats, grilled fish, or a fresh salad, and you've got a meal that's both comforting and elegant.

Don't be intimidated by the process – it's easier than you might think. Give it a try, and you'll wonder why you didn't start butter-poaching your potatoes sooner. The rich, indulgent flavor is well worth the minimal effort, and you'll be hard-pressed to find a more satisfying side dish.

So go ahead, treat yourself and your loved ones to the deliciousness of butter-poached new potatoes. It's a culinary experience you won't soon forget.

Don't forget, these potatoes can also be a delightful accompaniment to a classic and savory appetizer like crab cakes.

Frequently Asked Questions

Can I Use Other Types of Potatoes Instead?

Absolutely, you can use other types of potatoes instead. While new potatoes offer a creamy texture, you can experiment with Yukon Gold, russet, or even sweet potatoes to create your desired flavor and texture.

Advertisement

How Do I Adjust the Cooking Time for Different Potato Sizes?

Adjust the cooking time for different potato sizes by checking them frequently. Smaller potatoes will cook faster, so keep an eye on them to prevent overcooking. Larger potatoes may require a few extra minutes to become tender.

Can I Make This Dish Ahead of Time?

Yes, you can make this dish ahead of time. The potatoes can be boiled, buttered, and refrigerated a day in advance. Just reheat them gently in a skillet or the oven before serving for maximum creaminess and flavor.

Is the Butter-Poaching Method Healthier Than Roasting?

The butter-poaching method may not be healthier than roasting, as it involves cooking the potatoes in a significant amount of butter. Roasting potatoes can be a more health-conscious approach, as it doesn't require as much added fat. However, the creaminess of butter-poached potatoes may be worth the trade-off for some.

What Are Some Variations or Additions to This Recipe?

You can add various herbs like thyme, rosemary, or chives to the butter-poached potatoes for extra flavor. You can also toss in some garlic, lemon zest, or a sprinkle of Parmesan cheese for a tasty twist.

Advertisement
Continue Reading
Advertisement

Affiliate disclaimer

As an affiliate, we may earn a commission from qualifying purchases. We get commissions for purchases made through links on this website from Amazon and other third parties.

Vetted

truck bed cover review truck bed cover review
Vetted10 hours ago

RealTruck RetraxPRO XR Tonneau Cover Review

Hop on board the RealTruck RetraxPRO XR Tonneau Cover review for a premium cover with impressive features and functionality.

truck bed cover overview truck bed cover overview
Vetted10 hours ago

RealTruck RetraxPRO XR Review: Pros, Cons, Installation

Hunting for a top-notch tonneau cover? Discover the RealTruck RetraxPRO XR's features, installation, and user reviews for the ultimate truck...

durable truck bed cover durable truck bed cover
Vetted10 hours ago

Retrax RetraxPRO XR Tonneau Cover Review

Discover the sturdy and secure Retrax RetraxPRO XR Tonneau Cover for Chevy/GMC Silverado/Sierra owners, offering durable protection and sleek design.

air dryer performance evaluation air dryer performance evaluation
Vetted10 hours ago

Ingersoll-Rand D72IN Air Dryer Review

Yearning for efficient air drying solutions? Discover why the Ingersoll-Rand D72IN Air Dryer stands out in performance and reliability.

peloton bike immersive workout peloton bike immersive workout
Vetted10 hours ago

Peloton Bike+ Review: Total-Body Workout Immersion

Discover how the Peloton Bike+ delivers a total-body workout immersion like no other, enticing you to dive into its innovative...

outdoor tv for sunlight outdoor tv for sunlight
Vetted10 hours ago

SYLVOX 55 Full Sun Outdoor TV Review

Boldly step into the world of outdoor entertainment with the SYLVOX 55 Full Sun Outdoor TV - it's a game-changer...

electric pressure washer details electric pressure washer details
Vetted10 hours ago

Karcher Electric Pressure Washer Review

Need a powerful cleaning tool for tough tasks? Dive into the review of the Karcher Electric Pressure Washer for a...

automated lawn care excellence automated lawn care excellence
Vetted10 hours ago

Husqvarna Automower 450XH Review: Ultimate Lawn Care Solution

Navigate the world of ultimate lawn care with the Husqvarna Automower 450XH review - a game-changer for efficient, smart yard...

entertainment at its best entertainment at its best
Vetted10 hours ago

Sony BRAVIA Theater Quad Review

Hesitating to dive into the Sony BRAVIA Theater Quad review? Uncover how this system revolutionizes your home entertainment experience.

canon eos r6 mark ii canon eos r6 mark ii
Vetted10 hours ago

Canon EOS R6 Mark II Review: Professional Insights

Discover the powerful capabilities of the Canon EOS R6 Mark II, offering advanced subject detection and high-speed shooting for professionals...

high speed networking with d link high speed networking with d link
Vetted10 hours ago

D-Link 30-Port Switch Review: High-Performance Networking

At the forefront of high-performance networking, the D-Link 30-Port Switch offers unparalleled speed and advanced features that redefine connectivity.

samsung 120 premiere projector samsung 120 premiere projector
Vetted11 hours ago

Samsung 120 The Premiere Projector Review

Need a home entertainment upgrade? Discover how the Samsung 120 The Premiere Projector transforms your viewing experience with stunning visuals...

Advertisement

Trending