Connect with us

Butter Tips and Tricks

Brown Butter Popcorn Balls: The Sweet and Savory Snack That’s Perfect for Parties

Featuring a rich, nutty aroma and a satisfying crunch, these Brown Butter Popcorn Balls are a nostalgic treat that’ll transport your guests back in time and leave them craving more.

Published

on

savory sweet party snack

Brown butter popcorn balls are a nostalgic treat that'll transport you back in time. Originating with Native American tribes centuries ago, these sweet and savory snacks combine the rich, nutty aroma of caramelized brown butter with the satisfying crunch of freshly popped corn coated in a simple syrup glaze. Perfect for festive parties, their layered flavors and chewy-yet-crunchy texture create a unique taste experience that'll have your guests reaching for more. With easy-to-follow steps and customizable toppings, you can whip up a batch that'll elevate any gathering – and inspire you to dig deeper into the history and evolution of this beloved treat.

Key Takeaways

  • Brown Butter Popcorn Balls are a nostalgic treat with a rich, nutty flavor, combining sweet, salty, and buttery elements for a delightful taste experience.
  • The key ingredient, brown butter, enhances the flavor through a caramelized aroma, creating a unique and gourmet taste that elevates ordinary popcorn.
  • Popcorn Balls are a versatile party snack, as they can be personalized with various toppings or mix-ins and are suitable for all ages.
  • The chewy, buttery center contrasts with a satisfying crunch, providing a layered flavor profile that surprises and delights the palate.
  • Popcorn Balls are a crowd-pleasing treat that adds autumn whimsy to party spreads and enhances the festive atmosphere, making them perfect for holiday gatherings and celebrations.

History

past events and narratives

Popcorn balls have a rich history, with origins tracing back to Native American tribes who crafted the snack as early as the 1600s.

These indigenous communities would pop corn kernels and shape them into round balls, often adding nuts, dried fruits, or other ingredients to create a delightful treat.

As the tradition spread, early settlers in the American Midwest embraced popcorn balls, evolving the recipe over time.

Recipe
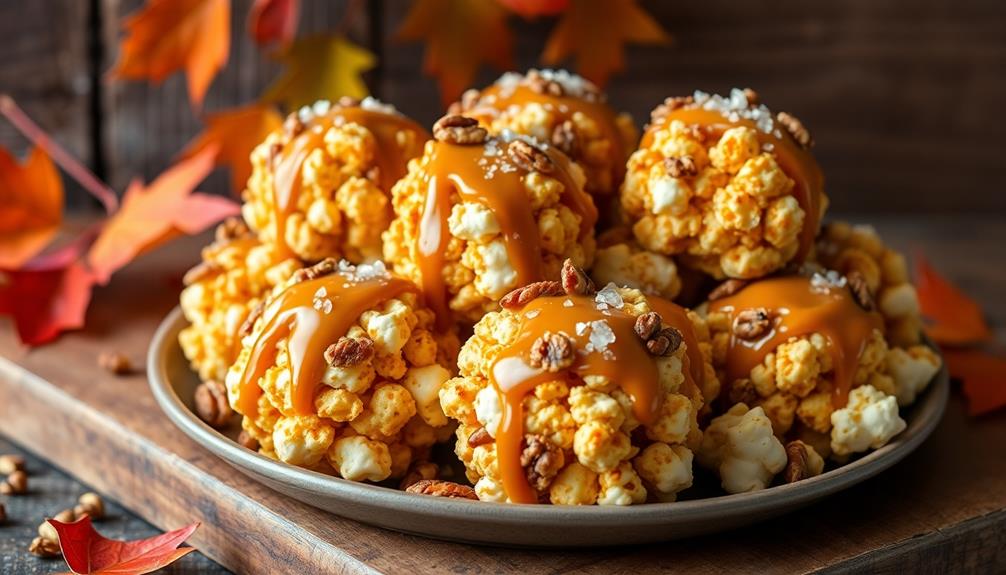
cooking instructions and ingredients

Brown Butter Popcorn Balls

Recipe

Popcorn balls are a classic treat that bring back nostalgic memories of childhood. This version takes the humble popcorn and elevates it with the rich, nutty flavor of brown butter. The result is a delightful balance of sweet, salty, and buttery goodness that's sure to delight your taste buds.

Advertisement

Preparing the brown butter is the key to this recipe. The browning process deepens the flavor and creates a lovely caramelized aroma that will permeate your kitchen. Once the butter is ready, it's combined with a simple syrup to coat the fresh popcorn, ensuring every kernel is coated in the irresistible mixture.

Ingredients:

  • 8 cups popped popcorn
  • 1/2 cup unsalted butter
  • 1 cup granulated sugar
  • 1/4 cup light corn syrup
  • 1/4 teaspoon salt

Instructions:

In a saucepan, melt the butter over medium heat, stirring frequently, until it turns a deep golden brown and develops a nutty aroma, about 5-7 minutes. Carefully pour the browned butter into a heatproof bowl, being sure to scrape up any browned bits. Set aside.

In the same saucepan, combine the sugar, corn syrup, and salt. Cook over medium heat, stirring constantly, until the mixture comes to a boil. Continue to cook, without stirring, until it reaches 235°F on a candy thermometer, about 5-7 minutes.

Remove the pan from the heat and carefully pour the hot syrup into the browned butter, stirring to combine. Quickly pour the mixture over the popcorn and stir to evenly coat.

Advertisement

Working quickly, use greased hands to form the coated popcorn into small balls, about 2 inches in diameter. Place the popcorn balls on a parchment-lined baking sheet and allow them to cool and firm up, about 15-20 minutes.

Tips:

  • For best results, use freshly popped popcorn. The warm kernels will help the brown butter and caramel mixture adhere better.
  • Be cautious when handling the hot sugar syrup, as it can cause serious burns. Wear oven mitts and work carefully.
  • Store the popcorn balls in an airtight container at room temperature for up to 3 days.

Cooking Steps
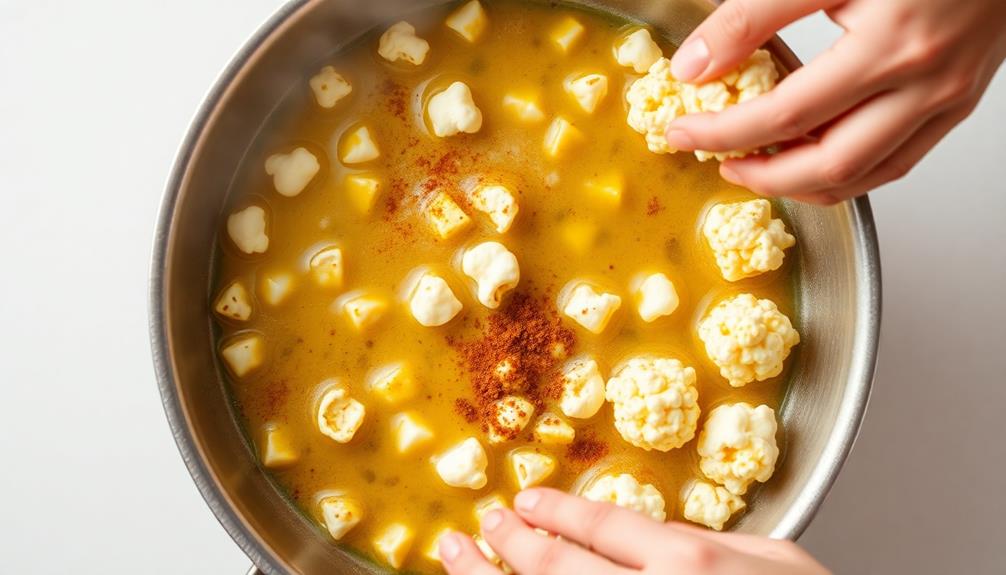
meal preparation instructions summary

First, melt the butter in a saucepan over medium heat until it's nice and browned.

Then, add the popcorn and give it a good stir to coat it evenly in that delicious nutty butter.

Now, it's time to get your hands dirty – form the buttery popcorn mixture into fun, bite-sized balls.

Let those popcorn balls cool down just a bit before you coat them in a sweet caramel glaze.

Advertisement

Step 1. Melt Butter in Saucepan

melt butter in saucepan

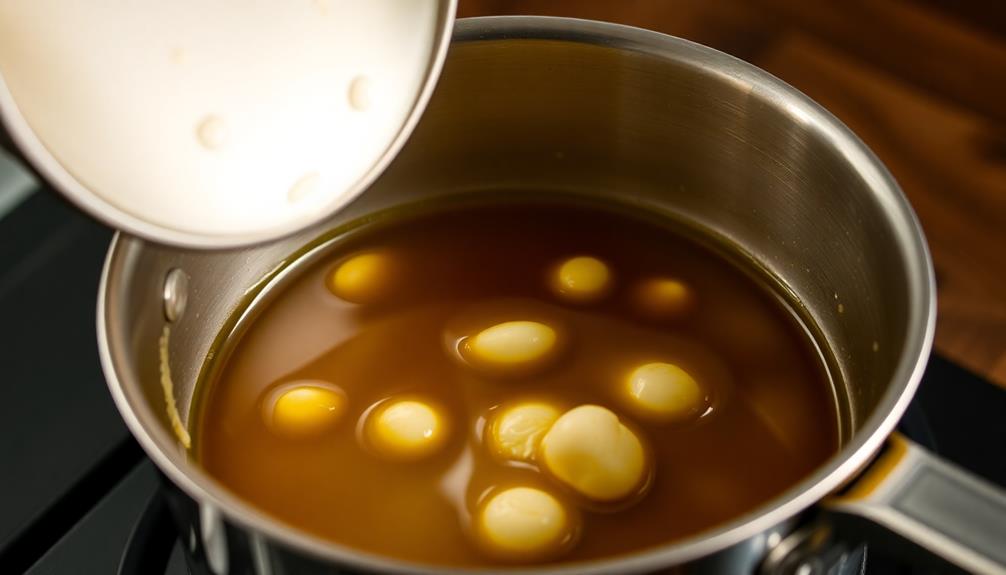
Melt the butter in a saucepan over medium heat, ensuring it's thoroughly liquefied and golden-brown in color. As the butter sizzles and transforms, keep a close eye on it, stirring occasionally to promote even heating.

You'll know it's ready when the butter takes on a nutty, toasted aroma and the milk solids have caramelized, creating a rich, decadent flavor.

Don't be tempted to rush this process – the key is to let the butter gently brown, allowing the flavors to develop fully.

Once you've achieved that perfect shade of amber, remove the saucepan from the heat and set it aside, ready to incorporate into your popcorn ball mixture.

This brown butter will add a luxurious depth of flavor that will have your guests coming back for more.

With a little patience and attention, you're well on your way to creating a truly memorable batch of brown butter popcorn balls.

Advertisement

Step 2. Add Popcorn to Melted Butter

add popcorn to butter

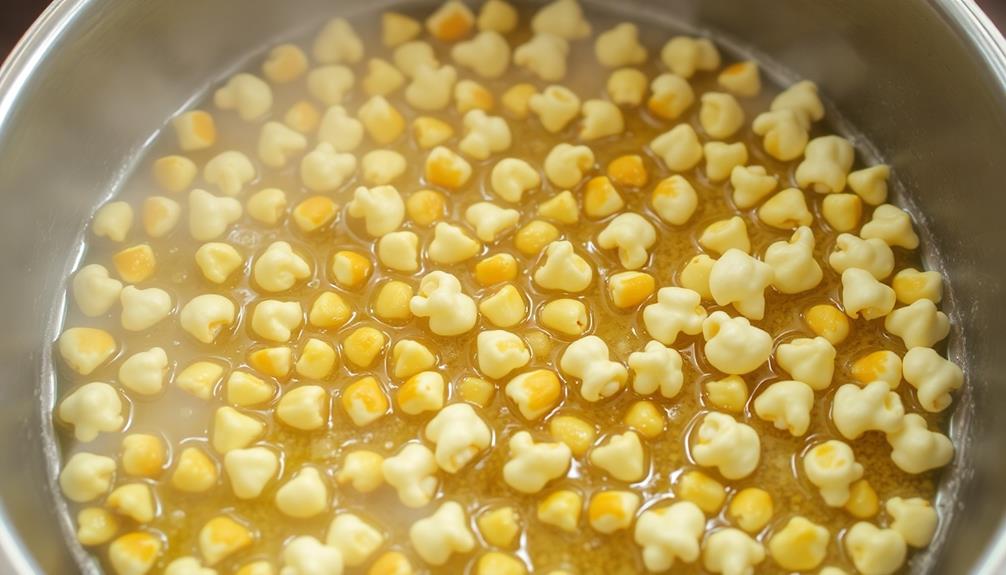
With the nutty brown butter ready, gently fold the freshly popped popcorn into the melted mixture. The popcorn should sizzle and crackle as it's coated in the rich, aromatic butter.

This sensory experience not only delights the taste buds but also engages cognitive functions, as cooking can enhance creativity and problem-solving skills in children (importance of understanding child development).

Use a large spoon or spatula to carefully incorporate all the fluffy popcorn kernels, making sure they're evenly distributed and thoroughly coated. The popcorn will start to form little clusters as the butter clings to the surfaces.

Be gentle during this process – you don't want to crush the delicate popcorn. Take your time and work slowly, savoring the satisfying sound and scent.

Once the popcorn is fully coated, it's ready for the next step of shaping into irresistible balls. This simple addition of popcorn transforms the brown butter into a delightful, texture-packed base for the sweet and savory popcorn balls.

The contrast of the crisp, airy popcorn and the decadent brown butter is absolutely divine.

Advertisement

Step 3. Form Popcorn Mixture Into Balls

shape popcorn into balls

To form the popcorn mixture into irresistible balls, scoop up generous handfuls of the buttery kernels and gently pack them together.

Roll the mixture between your palms, applying light pressure to shape them into perfectly round spheres. Picture the golden, toasted popcorn coated in the rich, nutty brown butter – it's a sensory delight!

As you work, the warmth of your hands will help the mixture hold its form.

Carefully place each popcorn ball onto a parchment-lined baking sheet, arranging them with care. This allows the balls to cool and set without sticking together.

Once you've formed all the popcorn into tempting little orbs, pop them in the fridge for 30 minutes. This quick chilling will firm up the butter, ensuring your popcorn balls maintain their irresistible shape.

Now they're ready to dazzle your guests! Serve these brown butter popcorn balls as a unique and flavorful party snack. Their sweet and savory goodness is sure to delight.

Advertisement

Step 4. Let Popcorn Balls Cool Slightly
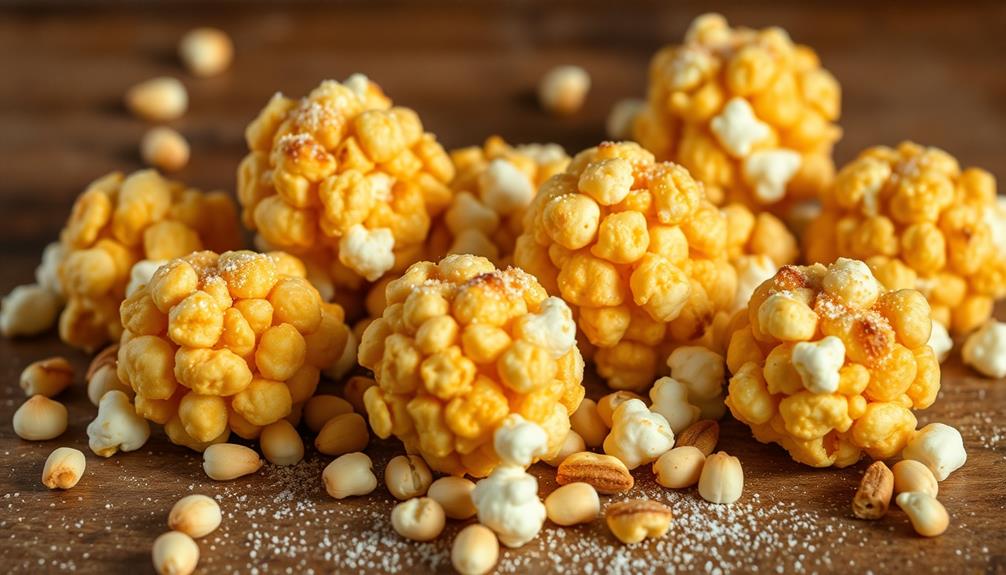
cool popcorn balls slightly

After forming the popcorn balls, you'll want to let them cool slightly before serving. This brief pause allows the brown butter and sugar coating to set, ensuring the popcorn balls hold their shape and don't fall apart when you pick them up.

You can place the freshly-formed balls on a parchment-lined baking sheet or plate, giving them a few minutes to firm up. The sweet, nutty aroma of the brown butter will waft through the air, tempting you to dive right in.

But resist the urge – let them cool for 2-3 minutes first. This short wait is worth it, as the popcorn balls will have a delightful, crisp exterior that gives way to a soft, pillowy interior.

Once cooled, the popcorn balls are ready to be enjoyed as a tasty snack or incorporated into your party spread. Their perfectly round shape and golden-brown hue make them an eye-catching addition to any gathering.

Step 5. Coat Popcorn Balls With Caramel
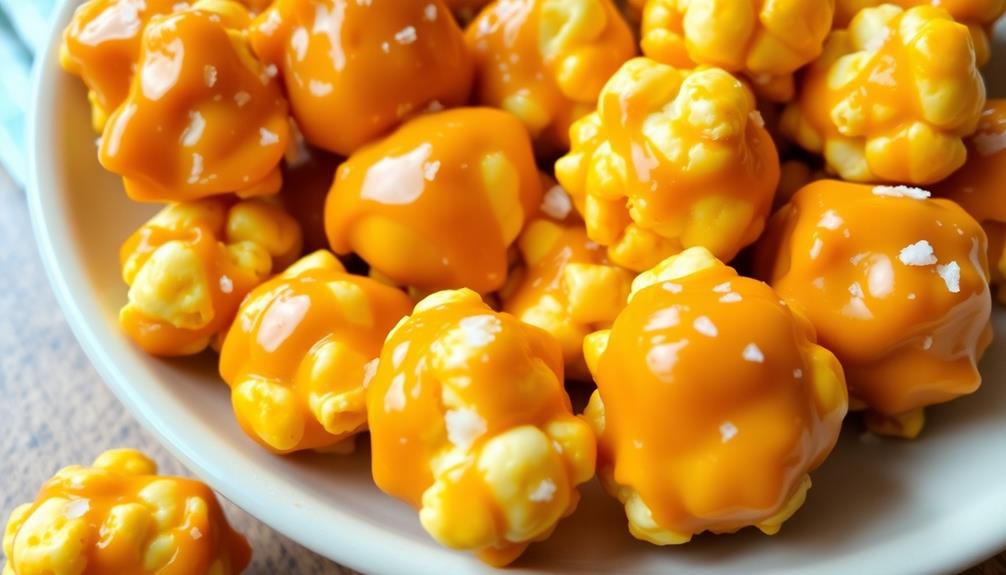
coat popcorn balls caramel

Once the popcorn balls have cooled slightly, it's time to coat them in a delectable caramel glaze.

Grab a medium-sized saucepan and melt some butter over medium heat. Once the butter starts to sizzle and turn golden brown, carefully pour in some light corn syrup and granulated sugar. Stir the mixture continuously until it reaches a rich, amber color and a temperature of 235-240°F on a candy thermometer.

Carefully dip each popcorn ball into the hot caramel, using a fork or spoon to gently roll it around until it's completely coated. Allow any excess caramel to drip off before transferring the coated balls to a baking sheet lined with parchment paper.

Advertisement

Work quickly, as the caramel will start to firm up as it cools. Once all the popcorn balls are coated, let them sit until the caramel has set, about 15-20 minutes.

The result is a delightfully sweet and crunchy treat that's perfect for sharing at parties or enjoying as a special snack.

Final Thoughts

concluding reflections and insights

Ultimately, how do these brown butter popcorn balls measure up? They're a true crowd-pleaser – the perfect balance of sweet and savory that'll have your guests coming back for more.

The caramelized brown butter coating adds a delightful depth of flavor, elevating the humble popcorn to new heights. Bite into one, and you'll be met with a satisfying crunch that gives way to a chewy, buttery center. It's a textural delight that keeps you coming back for another handful.

What sets these popcorn balls apart is the attention to detail. The careful layering of flavors, from the nutty brown butter to the hint of salt, creates a flavor profile that's both familiar and unique.

Additionally, just like the cherished bread pudding, which transforms stale bread into a comforting dessert, these popcorn balls utilize simple ingredients to create something truly special.

Advertisement

And let's not forget the festive factor – these balls are the perfect addition to any party spread, adding a touch of autumn whimsy that's sure to delight.

Frequently Asked Questions

How Long Do the Popcorn Balls Last?

The popcorn balls should last for up to a week when stored in an airtight container at room temperature. They'll stay fresh and maintain their delicious flavor and texture if you take proper care of them.

Can the Popcorn Balls Be Frozen?

Yes, you can freeze the popcorn balls. They'll keep for up to 3 months in the freezer. Just be sure to wrap them tightly in plastic wrap or place them in an airtight container before freezing.

Can I Use Microwave Popcorn for This Recipe?

You can certainly use microwave popcorn for this recipe. It'll save you the time and effort of popping the kernels yourself. Just be sure to adjust the seasoning and cooking time as needed to accommodate the pre-popped nature of the microwave popcorn.

Are the Popcorn Balls Gluten-Free?

The popcorn balls are not inherently gluten-free. While the main ingredient, popcorn, is naturally gluten-free, the recipe may contain other ingredients that contain gluten. To make them gluten-free, you'd need to use gluten-free substitutes for any gluten-containing ingredients.

Advertisement

What Are Some Variations to the Recipe?

To vary the recipe, you could try using different nuts, dried fruits, or even a touch of spice. Swap out the brown butter for other flavors like caramel or cinnamon. Get creative and make it your own!
Advertisement

Butter Tips and Tricks

Guide to European-Style Vegan Butter

Bite into the world of European-style vegan butter and discover how this creamy delight can transform your cooking—are you ready to explore its secrets?

Published

on

By

european vegan butter guide

European-style vegan butter is a rich, creamy alternative to traditional dairy butter that enhances the flavors of your dishes. It's made from high-quality plant oils and often includes emulsifiers for a smooth consistency. You'll find it perfect for cooking, baking, and spreading, offering a luxurious mouthfeel in pastries and sauces. Plus, it's typically lower in saturated fat and cholesterol-free, promoting better heart health. Popular brands like Miyoko's Creamery and Earth Balance deliver various flavors and textures. If you're curious about ingredient tips, cooking methods, and even homemade recipes, there's plenty more to explore!

Key Takeaways

  • European-style vegan butter mimics traditional butter with a rich, creamy texture and enhanced flavor, ideal for various culinary uses.
  • Key ingredients include high-quality oils, emulsifiers, nutritional yeast, and often fortification with Vitamin B12 for added health benefits.
  • It is cholesterol-free and typically lower in saturated fat, promoting heart health and overall well-being.
  • Popular brands like Earth Balance and Miyoko's Creamery offer versatile options for cooking, baking, and spreading.
  • Use a 1:1 substitution ratio for baking, and adjust recipes to accommodate the unique flavors of vegan butter.

What Is European-Style Vegan Butter?

european style vegan butter defined

European-style vegan butter is a plant-based alternative that closely mimics the rich, creamy texture and flavor of traditional European butter. You're likely aware that many people are shifting to plant-based diets, and this butter option fits perfectly into that lifestyle.

Unlike regular vegan butter, which may have a more straightforward flavor, European-style varieties often incorporate specific ingredients and techniques that enhance their depth and creaminess.

When you spread European-style vegan butter on your toast or use it in baking, you'll notice how well it performs in both cooking and flavor. It melts beautifully, allowing you to achieve that luxurious mouthfeel you'd get from dairy butter. It's perfect for making flaky pastries or rich sauces without sacrificing taste.

This type of vegan butter is versatile, making it a great substitute for various culinary applications. Whether you're sautéing vegetables, whipping up a batch of cookies, or simply spreading it on bread, you can enjoy the same delightful experience you'd expect from traditional butter.

If you're looking to explore plant-based options without compromising on flavor, European-style vegan butter is definitely worth trying.

Advertisement

Key Ingredients to Look For

essential elements to consider

When exploring European-style vegan butter, it's important to pay attention to the ingredients that contribute to its rich flavor and texture. Look for high-quality oils, such as coconut, olive, or avocado oil, which provide a creamy mouthfeel. These oils often blend well with natural flavors, enhancing the product's overall taste.

Another key component is emulsifiers, like sunflower lecithin or soy lecithin. These help maintain a smooth consistency and prevent separation. Additionally, many brands fortify their vegan butter with vitamins, particularly B12, to mimic the nutritional benefits found in traditional butter.

To help you identify the best options, here's a quick comparison of key ingredients:

Ingredient Purpose Benefits
Coconut Oil Creamy texture Rich in medium-chain fatty acids
Olive Oil Flavor Heart-healthy fats
Sunflower Lecithin Emulsifier Enhances texture
Nutritional Yeast Flavor enhancer Adds umami taste
Fortified B12 Nutritional boost Supports energy metabolism

Differences From Traditional Butter

non traditional butter alternatives

Vegan butter stands apart from traditional butter in several key ways, primarily due to its plant-based ingredients and absence of dairy. While traditional butter is made from cream, vegan butter is typically crafted from oils, nuts, or seeds, providing a different flavor and texture profile. You'll notice that many vegan butters include ingredients like coconut oil, olive oil, or cashews, which contribute to their unique taste.

Another significant difference lies in their functionality. Traditional butter has a higher fat content, which can affect baking and cooking. When you use vegan butter, you might need to experiment a bit to achieve similar results in recipes, especially in pastries or sauces, where fat plays an essential role.

Moreover, vegan butter often contains added emulsifiers and stabilizers to maintain consistency and spreadability, something you won't find in pure traditional butter. This can lead to a creamier texture or even a slightly different melting point.

Ultimately, while both types serve similar purposes in the kitchen, understanding these differences can help you make informed choices based on your cooking needs and dietary preferences.

Advertisement

Health Benefits of Vegan Butter

vegan butter health advantages

Choosing vegan butter can provide several health benefits that make it an appealing alternative to traditional butter. First off, vegan butter typically contains no cholesterol, which can help you maintain better heart health. By switching to vegan options, you're likely to lower your saturated fat intake, as many brands use healthier oils like olive or avocado oil. This can promote healthier cholesterol levels and reduce the risk of heart disease.

Additionally, many vegan butters are enriched with vitamins and nutrients that can benefit your overall well-being. For instance, you might find options fortified with Vitamin D and E, essential for maintaining healthy bones and skin.

Benefit Detail Impact
Cholesterol-Free No cholesterol, supporting heart health Reduces risk of heart disease
Lower Saturated Fat Made with healthy oils Improves cholesterol levels
Nutrient-Enriched Often fortified with vitamins Supports overall health

Popular Brands to Consider

top brands to explore

In recent years, numerous brands have emerged that offer delicious and versatile vegan butter options. These brands provide a range of flavors and textures, making it easier for you to find the perfect fit for your cooking and baking needs.

One popular option is Earth Balance, known for its creamy texture and rich taste. Their plant-based butter spreads easily and works well in a variety of recipes.

Another excellent choice is Miyoko's Creamery, which offers a cultured vegan butter that mimics traditional European butters with its rich flavor profile.

If you're looking for something more traditional, consider Flora's plant-based butter. It's crafted with oils and plant ingredients that give it a buttery taste without dairy.

For those who prefer a nut-based option, you can't go wrong with Nutiva's organic coconut oil-based vegan butter, which adds a unique flavor to your dishes.

Advertisement

How to Use Vegan Butter

vegan butter usage tips

Using vegan butter opens up a world of culinary possibilities.

You can spread it on toast for a quick snack or incorporate it into your favorite baking recipes for a rich, creamy texture.

Plus, if you're looking for alternatives, there are plenty of options that can still deliver great flavor and consistency.

Cooking and Baking Tips

Often, you'll find that vegan butter can be seamlessly integrated into your cooking and baking routines. When you're sautéing vegetables, use vegan butter to add richness and flavor without the dairy. It melts beautifully, allowing you to achieve that golden-brown finish you're after.

For baking, substitute vegan butter in a 1:1 ratio for regular butter in most recipes. This works well in cookies, pastries, and cakes. Just remember to let it soften to room temperature before creaming it with sugars. This helps create that perfect light and fluffy texture you want in baked goods.

If you're making a sauce or dressing, melt the vegan butter gently over low heat. You can whisk in herbs, garlic, or lemon juice for a delicious drizzle over steamed veggies or pasta.

Advertisement

When you're working with dough, like for pie crusts or biscuits, keep the vegan butter cold. Cut it into small pieces and mix it quickly into the flour to create a flaky texture.

Experimenting with different brands can lead to delightful discoveries, so don't hesitate to try various options to find your favorite!

Spreading on Toast

A warm slice of toast topped with vegan butter creates a simple yet satisfying breakfast or snack. To achieve the perfect spread, start with fresh, crusty bread or your favorite gluten-free option. Once you've toasted it to a golden crisp, grab your European-style vegan butter, which has a rich, creamy texture that melts beautifully.

For those who enjoy experimenting with flavors, consider utilizing specialized butter tools that can enhance your butter experience.

Using a butter knife, scoop a generous amount of vegan butter and spread it evenly across the toast. Be gentle; you want to guarantee the toast stays intact while letting the butter melt into every nook and cranny. If you prefer, you can let the butter sit at room temperature for a few minutes to soften it up, making spreading even easier.

Advertisement

For added flavor, consider sprinkling a pinch of sea salt or a dash of your favorite herbs on top. You can also layer on additional toppings like avocado, tomato slices, or a dollop of fruit preserves for a more indulgent treat.

Enjoy your toast warm, and savor the delightful combination of flavors and textures. With vegan butter, you're not just spreading; you're creating a delicious experience!

Vegan Butter Alternatives

Vegan butter alternatives offer a versatile option for enhancing your cooking and baking.

These plant-based spreads can elevate the flavor and texture of your dishes while keeping them cruelty-free.

Here are three easy ways to use vegan butter alternatives:

Advertisement
  1. Sautéing and Stir-Frying: Use vegan butter to sauté vegetables or stir-fry your favorite dishes. It adds a rich flavor while helping to achieve that golden-brown color you love.
  2. Baking: Replace regular butter with vegan alternatives in your baking recipes. Whether you're making cookies, cakes, or muffins, using vegan butter will yield delicious results without sacrificing taste.
  3. Sauces and Dressings: Melt vegan butter and incorporate it into sauces or dressings for a creamy texture. It works great in pasta dishes or as a drizzle over steamed vegetables.

Cooking and Baking Tips

culinary techniques and advice

When you're cooking or baking with European-style vegan butter, it's crucial to know how to substitute it for traditional butter effectively.

You can also explore melting and spreading techniques to get the best texture and flavor.

Plus, don't forget about flavor enhancements and pairings that can elevate your dishes to a whole new level.

Substituting Traditional Butter

While many recipes call for traditional butter, substituting it with European-style vegan butter is easier than you might think.

This creamy alternative can work wonders in your cooking and baking, allowing you to enjoy your favorite dishes without compromising on flavor or texture.

Here are three tips to make the switch seamless:

Advertisement
  1. Use a 1:1 Ratio: Generally, you can replace traditional butter with vegan butter in equal amounts. If a recipe calls for 1 cup of butter, simply use 1 cup of European-style vegan butter instead.
  2. Choose the Right Type: Some vegan butters are softer, while others are firmer. For baking, you might prefer a firmer variety as it holds its shape better. For spreading or cooking, a softer option will work perfectly.
  3. Mind the Flavor: European-style vegan butter often has a rich, slightly tangy flavor that can enhance your dishes. Be mindful of this when you're preparing sweet treats, as it might slightly alter the taste.

With these simple tips, you can confidently substitute traditional butter and still create delicious meals and baked goods!

Melting and Spreading Techniques

To achieve the best results when melting or spreading European-style vegan butter, it's essential to understand its unique properties. This type of vegan butter typically has a higher fat content, mimicking traditional European butter, which means it melts beautifully and spreads easily.

When melting, use low heat to prevent separation. You can place it in a saucepan over a gentle flame or microwave it in short bursts, stirring in between to guarantee even melting. Avoid overheating, as this can alter the texture and flavor.

For spreading, it's best to let your vegan butter soften at room temperature for about 15-20 minutes before using it. If you're in a hurry, you can cut it into small pieces to speed up the softening process.

When spreading on bread or baked goods, use a butter knife or a spatula to create an even layer. If you're working with frozen or very cold butter, slightly warming your knife under hot water can help glide it more smoothly.

These techniques will enhance your experience and assure your dishes shine with that perfect buttery touch.

Advertisement

Flavor Enhancements and Pairings

There's no shortage of ways to elevate the flavor of European-style vegan butter in your cooking and baking. By incorporating a few key enhancements, you can take your dishes from good to gourmet. Here are some ideas to get you started:

  1. Herbs and Spices: Infuse your vegan butter with fresh herbs like rosemary or thyme, or spices like smoked paprika and garlic powder. This adds depth and complexity to your dishes.
  2. Citrus Zest: A touch of lemon or orange zest can brighten the flavor profile of your butter. It works wonders in baked goods and savory recipes alike, adding a revitalizing twist.
  3. Nutritional Yeast: If you're after that cheesy flavor, sprinkle in some nutritional yeast. It's perfect for a buttery spread or to enhance sauces, giving them a savory richness.

Experimenting with these enhancements can make your European-style vegan butter a star ingredient in your kitchen.

Don't hesitate to mix and match according to your taste preferences and the dishes you're preparing!

Flavor Profiles and Pairings

taste combinations and suggestions

When exploring flavor profiles and pairings for European-style vegan butter, you'll discover a delightful range of tastes that elevate any dish. This vegan butter often features rich, creamy notes reminiscent of traditional dairy butter, making it an excellent base for various culinary creations.

You can enjoy herbed versions infused with garlic, chive, or dill, which pair beautifully with roasted vegetables, baked potatoes, or as a spread on crusty bread.

If you prefer something more indulgent, look for versions that include a hint of truffle or smoked flavors, perfect for enhancing pasta dishes or drizzling over popcorn.

For those who love sweetness, a vegan butter blended with maple or vanilla can be delightful on pancakes or in baked goods.

Advertisement

Don't forget about the tangy options, like lemon or nutritional yeast-infused butters, which work wonders in savory dishes or as a zesty topping for grilled corn.

Experiment with different combinations to find your favorite pairings.

Whether you're spreading it on toast, using it in a sauce, or incorporating it into a pastry, the versatility of European-style vegan butter allows you to explore and enjoy a world of flavors.

Homemade Vegan Butter Recipes

plant based butter alternatives guide

Creating your own European-style vegan butter at home opens up a world of flavor possibilities tailored to your taste. You can experiment with various ingredients to achieve the perfect spread.

Here's a simple recipe to get you started, along with some ideas to customize it.

Basic Vegan Butter Recipe

  1. Ingredients:
    • 1 cup coconut oil (softened)
    • 1/4 cup neutral oil (like grapeseed)
    • 1/4 cup non-dairy milk
    • 1 tsp salt
    • 1 tsp nutritional yeast (optional)
  2. Instructions:
    • Blend all ingredients in a food processor until smooth.
    • Taste and adjust salt or add herbs for a unique flavor.
    • Transfer to a container and refrigerate until firm.

Customization Ideas

  • Herbed Delight: Add fresh or dried herbs like chives or rosemary for a savory kick.
  • Garlic Infusion: Blend in roasted garlic for a rich, aromatic spread.
  • Sweet Twist: Mix in a touch of maple syrup or cinnamon for a sweet version.

With these basics, you can create your ideal vegan butter that enhances any meal!

Sustainability and Ethical Considerations

responsible environmental practices emphasized

When you choose European-style vegan butter, you're not just opting for a tasty alternative; you're also making a choice that can impact the environment.

Consider how the plant-based ingredients contribute to sustainability and how eco-friendly packaging options can further reduce your carbon footprint.

Advertisement

It's time to think about the broader implications of your food choices and their role in a more ethical lifestyle.

Plant-Based Ingredients Impact

The impact of plant-based ingredients on sustainability and ethics is profound and deserves attention. As you explore the world of European-style vegan butter, consider how these ingredients contribute to a more sustainable future.

Here are three key areas where plant-based choices make a difference:

1. Lower Carbon Footprint: Plant-based ingredients typically require fewer resources to produce compared to animal products. This means less deforestation, water usage, and greenhouse gas emissions, which helps combat climate change.

Additionally, the shift towards solar energy solutions can further reduce the carbon footprint associated with food production and processing.

Advertisement

2. Animal Welfare: Choosing vegan butter means you're opting for a product that doesn't involve animal exploitation. By supporting plant-based alternatives, you align your values with ethical considerations regarding animal rights.

3. Biodiversity Preservation: Plant-based diets promote the cultivation of a variety of crops, which can help preserve biodiversity.

This encourages sustainable farming practices and protects ecosystems from the harmful impacts of industrial agriculture.

Eco-Friendly Packaging Options

As you embrace European-style vegan butter, consider the impact of its packaging on sustainability. Choosing brands that prioritize eco-friendly packaging can greatly reduce your environmental footprint.

Look for products packaged in materials like glass, aluminum, or recyclable plastics, which are less harmful to the planet compared to traditional plastic. Some companies are even using biodegradable or compostable materials, making it easier for you to dispose of packaging responsibly.

Advertisement

When you opt for vegan butter in bulk or refillable containers, you not only cut down on waste but also save money in the long run. Additionally, support brands that focus on minimal packaging or use innovative designs that reduce excess materials. This conscious choice helps you align your values with your purchasing decisions.

Check for certifications like FSC (Forest Stewardship Council) or labels indicating recycled content, which can guide you toward more sustainable options. By being mindful of packaging, you contribute to a larger movement towards sustainability.

Every small choice counts, and your preference for eco-friendly packaging can encourage more companies to adopt responsible practices. Together, we can make a positive impact on the environment while enjoying delicious vegan butter.

Frequently Asked Questions

Can European-Style Vegan Butter Be Frozen for Long-Term Storage?

Yes, you can freeze European-style vegan butter for long-term storage. Just make sure to wrap it tightly to prevent freezer burn. When you're ready to use it, let it thaw in the fridge.

Is European-Style Vegan Butter Suitable for People With Nut Allergies?

If you're concerned about nut allergies, you'll want to check labels carefully. Many European-style vegan butters are nut-free, but some brands might include nuts. Always verify ingredients to confirm it's safe for you.

Advertisement

How Does European-Style Vegan Butter Compare in Price to Regular Vegan Butter?

European-style vegan butter often costs a bit more than regular vegan butter due to its specialized ingredients and production methods. You might find the price difference worth it for the richer flavor and texture it offers.

Can I Find European-Style Vegan Butter in Regular Grocery Stores?

You can often find European-style vegan butter in regular grocery stores, especially larger chains. If it's not on the shelf, check specialty or organic sections, or ask your store to contemplate stocking it.

What Is the Shelf Life of European-Style Vegan Butter Once Opened?

Once opened, European-style vegan butter typically lasts about two to three weeks in the fridge. Keep it tightly sealed, like a treasure chest, to preserve its delightful flavors and creamy texture for your culinary adventures!

Conclusion

In the grand tapestry of culinary delights, European-style vegan butter stands out, weaving together flavor and compassion in every spread. By choosing this plant-based alternative, you're not just indulging in rich taste but also embracing a lifestyle that echoes the harmony of nature, much like the idyllic scenes of a Monet painting. So, as you explore this buttery domain, remember you're savoring a choice that celebrates both your palate and the planet.

Advertisement
Continue Reading

Butter Tips and Tricks

Comparing Plant-Based Butter Alternatives

Keen to discover the best plant-based butter alternatives? Uncover the unique flavors and health benefits that could elevate your culinary creations!

Published

on

By

evaluating plant based butter options

When you're comparing plant-based butter alternatives, you'll find a variety of flavors and textures tailored to your needs. Nut-based butters offer rich, creamy options like almond or peanut, while coconut oil spreads provide a tropical kick. Soy-based butters are high in protein and mimic traditional butter's taste. Additionally, avocado and olive oil blends contribute healthy fats and enhance absorption of vitamins. Each alternative has distinct culinary uses, whether for baking, spreading, or cooking. Explore their nutritional benefits and cooking performance to find the perfect fit for your dishes. There's plenty more to uncover about these versatile options!

Key Takeaways

  • Plant-based butters vary in flavor profiles, with nut-based options offering rich tastes and coconut spreads providing a tropical essence.
  • Nutritional benefits differ; nut-based butters are high in healthy fats and protein, while soy-based options are lower in saturated fats.
  • Ingredient quality matters; opt for whole, natural ingredients and avoid hydrogenated oils and artificial additives for healthier choices.
  • Performance in cooking and baking can be similar to dairy butter, with most alternatives offering comparable moisture and texture in recipes.
  • Popular brands like Miyoko's Creamery and Earth Balance each have distinct flavors and best uses, catering to different culinary needs.

Overview of Plant-Based Butters

exploring plant based butter options

In recent years, plant-based butters have emerged as a popular alternative to traditional dairy butter, catering to the growing demand for vegan and lactose-free options. You might find these spreads made from a variety of sources, including oils, grains, and legumes. They offer a wide range of flavors and textures, making them versatile for cooking, baking, or simply spreading on toast.

When you look for plant-based butter, you'll often come across options like coconut oil, olive oil, and avocado oil. These ingredients provide healthy fats and can enhance the flavor of your dishes. Many brands also fortify their products with vitamins and minerals, ensuring you get a nutritious alternative without sacrificing taste.

What's great is that plant-based butters can mimic the creamy texture of dairy butter, allowing you to enjoy your favorite recipes without concern for dietary restrictions.

Plus, they're often lower in saturated fats, making them a heart-healthy choice. As you explore the world of plant-based butters, you'll discover that they can elevate your meals while aligning with your dietary preferences and values.

Nut-Based Butter Alternatives

nut butter substitutes available

When you think about nut-based butter alternatives, you're tapping into a world rich in flavor and nutrition.

These spreads not only offer unique taste profiles but also pack a punch regarding health benefits.

Advertisement

Let's explore how they compare in both nutrition and flavor to find the perfect fit for your meals.

Nutritional Benefits Overview

Nut-based butter alternatives offer a wealth of nutritional benefits that can enhance your diet. These alternatives, made from almonds, cashews, walnuts, and other nuts, are packed with healthy fats, protein, and essential vitamins and minerals. You'll find them rich in monounsaturated fats, which can support heart health by helping to lower bad cholesterol levels.

Additionally, many of these nut-based options are available as dairy-free butter alternatives, making them suitable for those with dietary restrictions.

In addition to healthy fats, nut-based butters provide a good source of protein. A serving can offer a substantial protein boost, making them an excellent choice for vegetarians or anyone looking to increase their protein intake. They also contain important nutrients like vitamin E, magnesium, and potassium, all of which play crucial roles in your body's overall function.

Moreover, nut-based butters are a great option if you're looking to maintain or lose weight. Their healthy fats and protein can help keep you feeling full longer, reducing the likelihood of snacking on less nutritious options.

Advertisement

Just be mindful of portion sizes, as they can be calorie-dense. By incorporating nut-based butter alternatives into your meals or snacks, you can enjoy delicious flavors while reaping the numerous health benefits they offer.

Flavor Profiles Comparison

Exploring the flavor profiles of nut-based butter alternatives reveals a delightful variety that can enhance your culinary creations.

Almond butter, with its subtly sweet, nutty flavor, lends itself well to both sweet and savory dishes. It's perfect for smoothies, spreads, and even baking.

Cashew butter, on the other hand, offers a creamy texture and a mild, slightly sweet taste, making it an ideal base for sauces and dips.

Peanut butter, a classic favorite, boasts a robust, earthy flavor that works wonders in desserts and sandwiches alike.

Advertisement

If you're looking for something a bit more exotic, try macadamia nut butter, which has a rich, buttery taste that can elevate your recipes to new heights.

Hazelnut butter brings a distinctive, sweet, and slightly earthy profile, excellent in both desserts and savory dishes.

When you experiment with these nut-based alternatives, you'll discover how they can transform your meals. Each option has its unique appeal, allowing you to tailor flavors to your preferences.

Coconut Oil Spreads

versatile coconut oil spreads

Coconut oil spreads have taken the culinary world by storm, offering a creamy and flavorful alternative to traditional butters. You'll find these spreads made from coconut oil blended with other ingredients, making them versatile for a range of uses. They're perfect for slathering on toast, enhancing baked goods, or even cooking.

One of the standout features of coconut oil spreads is their rich, tropical flavor. This can bring an exciting twist to your favorite recipes. Plus, they're typically dairy-free, making them suitable for vegans and those with lactose intolerance. You'll also appreciate that many brands offer organic options, ensuring you're getting a clean product.

When it comes to health benefits, coconut oil is known for its medium-chain triglycerides (MCTs), which can provide quick energy and may support metabolism. However, keep in mind that while coconut oil spreads are a great option, moderation is key due to their calorie content.

Advertisement

As you explore these spreads, consider the various brands available. Some might include added flavors, while others focus on pure coconut richness. Overall, coconut oil spreads can be a delightful addition to your plant-based pantry.

Soy-Based Butter Options

plant based butter alternatives

If you're looking for another plant-based alternative, soy-based butter options might pique your interest. These spreads often blend soy protein with oils, giving you a creamy texture that works well in various recipes.

One of the great things about soy-based butter is its versatility; you can use it for baking, cooking, or simply spreading on toast.

Soy butter typically contains fewer saturated fats compared to traditional dairy butter, making it a healthier choice for many. Plus, it's packed with protein, which is a bonus if you're trying to increase your intake.

However, if you have a soy allergy, you'll want to steer clear of these options, as they can trigger adverse reactions.

When you're shopping, check for enriched varieties that include vitamins A and D, as these nutrients help mimic the nutritional profile of dairy butter.

Advertisement

You'll also want to look for organic brands when possible, as they typically offer higher-quality ingredients without harmful pesticides.

Avocado and Olive Oil Blends

healthy cooking oil blends

Avocado and olive oil blends offer impressive nutritional benefits that can enhance your diet.

You'll find their flavor profiles bring a unique richness, making them versatile for various culinary uses.

Whether you're spreading it on toast or using it in cooking, these blends can elevate your meals effortlessly.

Nutritional Benefits Overview

While many people are exploring plant-based diets, blending avocado and olive oil offers impressive nutritional benefits. This combination not only enhances your meals but also supports your health in several ways.

Here's why you should consider incorporating this blend into your diet:

Advertisement

1. Heart Health: Both avocado and olive oil are rich in monounsaturated fats, which can help lower bad cholesterol levels, reducing your risk of heart disease.

Additionally, incorporating health benefits of various honeys into your diet can further support cardiovascular health.

2. Nutrient Absorption: Healthy fats aid in the absorption of fat-soluble vitamins (A, D, E, and K), ensuring your body utilizes the nutrients from your food effectively.

3. Antioxidant Boost: Olive oil is packed with antioxidants, which help combat oxidative stress, potentially lowering your risk of chronic diseases.

4. Anti-Inflammatory Properties: Avocado and olive oil contain compounds that may help reduce inflammation in your body, promoting overall wellness.

Advertisement

Flavor Profile Comparison

There's something uniquely delightful about the flavor profile of a blend combining avocado and olive oil. This combination offers a rich, creamy texture paired with a fruity, nutty essence that elevates any dish. When you spread it on bread or mix it into your favorite recipes, you'll notice how the avocado's buttery notes harmonize beautifully with the distinct, peppery undertones of olive oil.

To help you appreciate these flavors even more, here's a quick comparison:

Flavor Component Description
Avocado Creamy, buttery, and slightly sweet
Olive Oil Fruity, nutty, and peppery
Combined Experience Rich, smooth, and well-rounded
Ideal Pairings Bread, vegetables, and pasta

This blend not only enhances the taste of your meals but also provides a unique option for those seeking plant-based alternatives. It's perfect for experimenting in the kitchen, allowing you to explore different flavor combinations while still enjoying healthy fats. Give it a try, and you'll see how versatile and delicious this pairing can be!

Culinary Uses and Versatility

In the kitchen, avocado and olive oil blends shine as versatile ingredients that can elevate a wide range of dishes. Their creamy texture and rich flavor make them perfect for various culinary applications, allowing you to experiment and enjoy healthier alternatives.

Here are four ways you can incorporate these blends into your cooking:

Advertisement
  1. Spreads and Dips: Use the blend as a delicious spread on toast or as a base for creamy dips that will wow your guests at any gathering.
  2. Cooking and Sautéing: Replace traditional butter or oil with this blend for sautéed vegetables or proteins, adding a layer of flavor that's hard to resist.
  3. Baking: Incorporate it into your baking recipes for cookies or muffins, giving them a moist and delightful texture.
  4. Dressings and Marinades: Whip up a zesty salad dressing or marinade, enhancing the freshness of your dishes while keeping them healthy.

With avocado and olive oil blends, you're not just cooking—you're creating flavorful experiences that nourish both body and soul.

Embrace the versatility and let your culinary creativity flourish!

Ingredients to Look For

essential cooking components checklist

When choosing plant-based butter alternatives, it's essential to pay attention to the ingredients list. Look for options that use high-quality oils like olive, avocado, or coconut, as these provide healthy fats and essential nutrients.

Avoid products that contain hydrogenated oils, which can introduce trans fats into your diet and may be harmful to your heart health.

You'll also want to check for natural flavorings and avoid artificial additives or preservatives. Ingredients such as nutritional yeast can add a rich flavor while providing additional vitamins, particularly B12.

If you're sensitive to allergens, read labels carefully for common allergens like soy or nuts.

Moreover, consider the presence of emulsifiers, which help maintain a creamy texture. Glycerin or lecithin derived from plants are generally safe choices.

Advertisement

Flavor Profiles and Uses

culinary taste characteristics applications

When choosing a plant-based butter alternative, you'll notice that different brands offer unique taste profiles that can enhance your cooking.

Some are rich and creamy, while others might've a more nutty or herbaceous flavor.

Understanding these differences will help you find the best uses for each alternative in your favorite recipes.

Taste Comparisons of Brands

As you explore the world of plant-based butter alternatives, you'll quickly notice that different brands offer distinct flavor profiles and culinary uses.

Each brand has its unique taste, which can elevate your dishes or leave you craving more. Here's a quick look at four popular options:

  1. Miyoko's Creamery: If you're after a rich, creamy taste reminiscent of traditional butter, this brand shines. Perfect for spreading on warm bread or using in pastries.
  2. Earth Balance: Known for its slightly nutty flavor, it's a versatile choice that works well in both baking and cooking. You'll love how it enhances your favorite recipes.
  3. Flora Plant Butter: This option offers a light, buttery flavor, making it ideal for delicate dishes. It's a delightful choice for sautéing veggies or drizzling over popcorn.
  4. Nutiva: With a hint of coconut, Nutiva adds a tropical twist to your meals. It's great for greasing pans or adding to smoothies for a creamy texture.

Finding your favorite plant-based butter can transform your cooking experience, allowing you to enjoy delicious, buttery flavors while sticking to your dietary preferences.

Best Uses in Cooking

You'll discover that plant-based butter alternatives can elevate your culinary creations in various ways, depending on their flavor profiles.

Advertisement

For instance, a nut-based butter, like cashew or almond, infuses a creamy richness that works beautifully in sauces and baked goods. It enhances the nuttiness of cookies and adds depth to savory dishes.

If you opt for a coconut-based alternative, its subtle sweetness and slight tropical flavor shine in desserts and curries. Try it in your favorite chocolate cake or as a base for a luscious frosting. You'll appreciate how it complements flavors without overpowering them.

For a more traditional flavor, look for a soy or canola-based butter. These tend to mimic dairy butter closely, making them great for spreading on toast or using in classic recipes like mashed potatoes.

You can also use them for sautéing vegetables, as they offer a balanced taste that suits various cuisines.

Nutritional Comparisons

dietary analysis and evaluation

Nutritional comparisons between plant-based butter alternatives and traditional dairy butter reveal significant differences that can influence your dietary choices.

While dairy butter is high in saturated fats and cholesterol, plant-based options often offer healthier profiles.

Advertisement

Here are four key points to reflect on:

  1. Heart Health: Plant-based butters typically contain unsaturated fats, which can help lower bad cholesterol levels, promoting better heart health.
  2. Vitamins and Antioxidants: Many plant-based alternatives are fortified with vitamins like B12 and D, essential for those on a vegan diet, while dairy butter lacks these nutrients.
  3. Caloric Content: Some plant-based options have fewer calories than dairy butter, making them a lighter choice for those watching their weight.
  4. Dietary Restrictions: If you're lactose intolerant or have a dairy allergy, plant-based butters provide a safe and delicious alternative without compromising flavor.

Cooking and Baking Performance

culinary skills evaluation metrics

When it comes to cooking and baking, plant-based butter alternatives can perform surprisingly well, often matching or even exceeding the capabilities of traditional dairy butter. You'll find that many of these alternatives have a similar fat content, making them suitable for a variety of recipes.

Whether you're sautéing veggies, making a sauce, or whipping up a batch of cookies, you can confidently substitute plant-based butter without compromising flavor or texture.

In baking, plant-based butter usually provides a comparable rise and moisture, so your cakes and muffins should turn out just as fluffy and delicious. Many brands melt and cream just like dairy butter, allowing for smooth mixing and easy incorporation into your batter.

When it comes to cookies, you might notice a slightly different spread, but this can often be adjusted with simple tweaks to your recipe.

For cooking, plant-based options often handle high heat well, making them perfect for frying or roasting. Just keep an eye on the smoke point, as some alternatives may vary.

Advertisement

Choosing the Right Option

selecting the best choice

Finding the right plant-based butter alternative can enhance your cooking and baking experience even further. With so many options available, it's crucial to take into account your specific needs and preferences. Here are four factors to help you choose the best option:

1. Flavor: Think about the taste profile you want. Some alternatives have a strong coconut flavor, while others are more neutral. Pick one that complements your dishes.

Remember that butter adds flavor and moisture to baked goods, so finding a plant-based option that mimics this quality can elevate your recipes.

2. Texture: Different brands offer various consistencies. If you're baking, you might want something that mimics the creaminess of traditional butter.

3. Ingredient Quality: Check the label for high-quality, whole ingredients. Avoid those filled with preservatives or artificial additives to guarantee you're eating healthily.

4. Purpose: Reflect on what you'll be using it for. Some alternatives work better for cooking, while others shine in baking or spreading.

Advertisement

Frequently Asked Questions

Are Plant-Based Butters Suitable for People With Nut Allergies?

If you have nut allergies, you should carefully check the ingredients of plant-based butters. Some may contain nuts or be processed in facilities that handle nuts, which could pose a risk for you. Always read labels!

How Long Do Plant-Based Butters Typically Last Once Opened?

Once you open plant-based butter, it usually lasts about 1 to 3 months in the refrigerator. Always check for any off smells or discoloration to verify it's still good to use. Enjoy your cooking!

Can I Make My Own Plant-Based Butter at Home?

Yes, you can definitely make your own plant-based butter at home! Simply blend nuts or seeds with oils, add flavorings like garlic or herbs, and freeze for a delicious, customizable alternative to store-bought options.

Do Plant-Based Butters Contain Any Artificial Additives or Preservatives?

Many store-bought plant-based butters contain artificial additives or preservatives. For instance, a popular brand uses emulsifiers to improve texture. Always check labels to guarantee you're choosing a product that aligns with your health goals.

Are There Any Environmental Benefits to Using Plant-Based Butters?

Using plant-based butters can reduce your carbon footprint, conserve water, and lessen deforestation compared to dairy products. By choosing these alternatives, you're supporting sustainable practices and contributing to a healthier planet for future generations.

Advertisement

Conclusion

When it comes to plant-based butter alternatives, you might wonder if they truly match up to traditional butter. The truth is, while they offer unique flavors and health benefits, not all options perform the same in cooking or baking. By understanding the differences among nut, coconut, soy, and oil-based spreads, you can choose the perfect one for your needs. So, experiment with these alternatives and discover how they can elevate your meals without compromising on taste!

Continue Reading

Butter Tips and Tricks

Butter-Poached Vegetable Juice: a New Way to Enjoy Your Veggies With a Buttery Kick

Overflowing with the natural sweetness of fresh produce, Butter-Poached Vegetable Juice offers a unique and indulgent way to enjoy your daily dose of veggies.

Published

on

By

buttery vegetable juice innovation

If you're ready to jazz up your veggies, get ready to sip on the buttery goodness of Butter-Poached Vegetable Juice! This unique dish brings out the natural sweetness and vibrant colors of fresh produce through gentle poaching in rich, melted butter. The infusion of herbs and spices creates a balanced, comforting flavor profile that's perfect for sipping as a broth, drizzling over roasted meats, or enjoying as a light, nourishing soup. With just a few simple ingredients, you can transform your everyday veggies into an indulgent, yet wholesome, culinary experience. Intrigued? Let's dive deeper into this creative way to enjoy your greens.

Key Takeaways

  • Butter-poached vegetable juice is a unique culinary technique that highlights the natural sweetness and vibrant colors of fresh produce.
  • The gentle poaching in butter infuses the vegetables with a rich, velvety texture and subtle nutty sweetness.
  • This dish offers a versatile flavor profile suitable for various culinary uses, from sipping broth to topping roasted meats.
  • The simple cooking process requires minimal ingredients and has a quick preparation time, making it convenient for both novice and experienced cooks.
  • Butter-poached vegetable juice encourages creativity in the kitchen with customizable options, designed to become a staple in one's cooking repertoire.

History

historical events and narratives

Although the exact origins of butter-poached vegetable juice are unclear, it likely emerged as a creative way to utilize the byproducts of butter production.

Back in the day, when dairy farms and creameries were the heart of many communities, the leftover whey and vegetable scraps from butter-making would have been abundant. Resourceful cooks probably experimented with simmering these in butter, discovering the delightful flavor and velvety texture that results.

Over time, this technique evolved, with skilled chefs finding new ways to highlight the natural sweetness and vibrant colors of various vegetables through the magic of butter-poaching.

Today, butter-poached vegetable juice has become a beloved delicacy, offering a unique and indulgent spin on healthy eating.

Whether drizzled over roasted veggies, stirred into soups, or enjoyed as a sipping broth, this rich and creamy elixir pays homage to its humble origins while delighting modern palates with its simple yet sophisticated taste.

Advertisement

Recipe

cooking instructions and ingredients

Butter-poached vegetable juice is a delicate and flavorful dish that showcases the natural sweetness and depth of vegetables. The gentle poaching in butter allows the vegetables to retain their vibrant colors and tender textures, while the infusion of aromatic herbs and spices creates a harmonious balance of flavors.

The key to this recipe is the selection of fresh, high-quality vegetables. By carefully choosing a variety of in-season produce, you can create a vibrant and visually appealing dish that's both nourishing and delightful to the palate.

Ingredients:

  • 2 cups assorted vegetables (such as carrots, celery, bell peppers, and zucchini), chopped into 1-inch pieces
  • 4 tablespoons unsalted butter
  • 1 clove garlic, minced
  • 2 sprigs fresh thyme
  • 1 bay leaf
  • Salt and freshly ground black pepper to taste

Instructions:

In a medium saucepan, melt the butter over medium heat. Add the chopped vegetables, garlic, thyme, and bay leaf. Gently poach the vegetables, stirring occasionally, for 15-20 minutes or until they're tender and the flavors have melded. Season with salt and pepper to taste.

Tips:

For the best results, use a variety of seasonal and colorful vegetables to create a visually stunning and flavorful dish. Be mindful of the cooking time, as you want the vegetables to remain tender but not overcooked.

Advertisement

The gentle poaching in butter allows the natural sweetness of the vegetables to shine, so resist the temptation to add any additional sweeteners. Serve the butter-poached vegetable juice warm, as a side dish or as a light and nourishing main course.

Cooking Steps

step by step cooking instructions

Alright, let's get started!

First, wash and chop your assortment of fresh vegetables.

Next, melt some butter in a saucepan over medium heat.

Then, gently add the vegetable pieces to the melted butter and let them simmer until tender.

Step 1. Wash and Chop Vegetables

prepare vegetables for cooking

Begin by thoroughly washing the vegetables under cool running water. Take your time and give each piece a good scrub to remove any dirt or debris.

Once they're nice and clean, place the veggies on a clean cutting board. Grab a sharp knife and start chopping them up into bite-sized pieces. Aim for uniform chunks so they cook evenly.

Advertisement

Slice the carrots, dice the onions, and chop the celery into small, uniform pieces. As you work, try to create a rhythm – the more comfortable you get with your knife skills, the faster you'll be able to prep everything.

Don't forget to compost or dispose of any scraps properly when you're done.

Now that your veggies are all washed and chopped, you're ready to move on to the next step in creating your delicious butter-poached vegetable juice. Get excited, because the best part is yet to come!

Step 2. Melt Butter in a Saucepan

melt butter in saucepan

With your vegetables prepped, it's time to turn your attention to the stovetop. In a medium-sized saucepan, gently melt some unsalted butter over medium heat.

You'll want to keep a close eye on it, stirring occasionally, until the butter is fully melted and just starting to bubble. Butter has a long and fascinating history, historical context of butter making that adds a layer of appreciation to this simple yet essential ingredient.

Now, this is the fun part – you get to infuse the butter with flavor! Toss in any aromatic ingredients you'd like, such as minced garlic, shallots, or fresh herbs.

Advertisement

Let them sizzle and release their aroma, filling your kitchen with an enticing, buttery scent. The goal is to create a rich, flavorful butter base that will later poach your vegetables to perfection.

Once the butter is melted and your aromatics have had a chance to infuse it, it's time to move on to the next step.

Get ready to add those beautiful chopped veggies and transform them into a decadent, butter-poached delight!

Step 3. Add Vegetable Pieces to Melted Butter

add vegetables to butter

Into the buttery, aromatic pool, gently lower your prepared vegetable pieces. Butter, a source of essential vitamins like A, D, E, and K, enhances not only the flavor but also the nutritional profile of your dish.

Watch as they become enveloped in the rich, golden liquid, sizzling softly. Swirl and turn the vegetables with a spoon, ensuring each morsel is coated evenly. The delicate aromas of the butter mingle with the fresh, vibrant flavors of the produce, creating a symphony of scents that tantalizes the senses.

As the vegetables poach, the butter will slowly infuse them with its luxurious mouthfeel and subtly sweet notes. Depending on the type and size of your vegetables, this process may take anywhere from 5 to 15 minutes.

Advertisement

Keep a close eye, gently stirring occasionally, until they reach your desired level of tenderness. The vegetables should still retain a slight bite, maintaining their integrity and natural flavors. For optimal results, ensure your butter is stored properly to maintain its freshness and flavor butter storage tips.

Step 4. Simmer Vegetables in Butter

saut vegetables with butter

Gently lower the butter-poached vegetables into a saucepan and adjust the heat to maintain a gentle simmer. As the butter melts around the tender veggies, you'll notice the liquid slowly transforming into a rich, golden broth. Breathe in the captivating aroma – the sweet, earthy notes of the vegetables mingling with the decadent butter.

Stir the mixture occasionally, allowing the flavors to meld and the vegetables to become infused with the butter. You'll see the colors of the vegetables deepen and the liquid thicken slightly as it simmers. This gradual process is key, gently coaxing out the full flavor potential of your ingredients.

After about 10-15 minutes, the vegetables should be fork-tender and the butter-vegetable broth will have developed a silky, velvety texture. Resist the urge to rush; let the vegetables simmer at their own pace, allowing the magic to happen.

Soon, you'll have a luxurious, butter-poached vegetable juice ready to be enjoyed.

Step 5. Strain and Serve Immediately

strain and serve promptly

Once the vegetables are fork-tender and the butter-vegetable broth has developed a silky, velvety texture, it's time to strain and serve immediately.

Regular cleaning is essential for optimal performance of air purifiers in your cooking environment, as dust and debris accumulation can hinder effectiveness.

Advertisement

Carefully transfer the contents of the pot to a fine-mesh strainer, letting the aromatic liquid drain into a clean bowl below.

Don't skip this step – the rich, buttery juice is the star of the show!

Gently press on the vegetables with the back of a spoon to extract every last drop of that golden, flavor-packed broth.

Now, it's time to enjoy your creation.

Ladle the vibrant, butter-poached vegetable juice into serving bowls.

Advertisement

You can serve it as a sipping broth, or pour it over roasted vegetables, grains, or your favorite protein for a luxurious boost of flavor.

The possibilities are endless!

Sprinkle with a pinch of flaky sea salt and freshly cracked black pepper for the perfect finishing touch.

Savor each sip or bite, marveling at how a few simple ingredients have transformed into something so utterly delicious.

Final Thoughts

concluding reflections and insights

The butter-poached vegetable juice is an intriguing and thoughtful way to showcase the natural flavors of fresh produce. You'll be amazed at how the simple process of poaching veggies in butter can transform them into a rich, velvety delight.

The vibrant colors and textures of the vegetables are preserved, while the butter lends a luxurious mouthfeel and subtle nutty sweetness. This technique is perfect for highlighting the season's best offerings, whether it's crisp carrots, earthy beets, or verdant kale.

Advertisement

The final product is versatile too – serve it as a unique appetizer, drizzle it over roasted meats or grains, or simply enjoy it on its own. Experiment with different vegetable combinations to discover your personal favorites.

With its ease of preparation and truly remarkable flavor, the butter-poached vegetable juice is sure to become a new go-to in your cooking repertoire. Get ready to savor the true essence of your veggies in every sip.

Frequently Asked Questions

Can I Use Different Vegetables for This Recipe?

Absolutely! You can use a variety of vegetables for this recipe. Feel free to experiment with different combinations to suit your taste preferences. The butter-poaching technique works well with a wide range of veggies, so get creative and enjoy.

How Long Does the Butter-Poached Vegetable Juice Last?

The butter-poached vegetable juice will last 3-5 days when stored in an airtight container in the refrigerator. Be sure to consume it within this timeframe for optimal freshness and flavor. Enjoy your homemade juice while it's at its best!

Is This Recipe Suitable for Vegetarians or Vegans?

No, this recipe would not be suitable for vegetarians or vegans as it contains butter, a dairy product. Vegetarians and vegans typically avoid all animal-derived ingredients, including butter, in their diets.

Advertisement

Can I Adjust the Butter Amount to My Preference?

Absolutely! You can adjust the butter amount to suit your personal preferences. Start with less butter if you want a lighter, less rich flavor, or add more if you crave that indulgent, buttery kick.

What Are Some Serving Suggestions for the Juice?

When it comes to serving the juice, you can get creative. Try drizzling it over roasted vegetables, using it as a base for soups or stews, or even mixing it into your favorite smoothie for a creamy, buttery twist.

Continue Reading
Advertisement

Affiliate disclaimer

As an affiliate, we may earn a commission from qualifying purchases. We get commissions for purchases made through links on this website from Amazon and other third parties.

Vetted

Vetted4 months ago

Infusion Buds Butter Infuser & Decarboxylator – 2024 Review

I recently got to try out the Infusion Buds Butter Infuser & Decarboxylator Machine Combo, and I am excited to...

Vetted4 months ago

LEVO Lux – Premium Herbal Oil Infusion Machine – Review [2024]

I recently got to try out the LEVO Lux – Premium Herbal Oil Infusion Machine – Botanical Extractor – Herb...

Vetted4 months ago

STX Infuzium & Decarboxylator Bundle Review [2024]

Today, I am thrilled to share my thoughts on the PREMIUM PACK • STX Infuzium Butter-Oil-Tincture Infuser & STX Activation...

Vetted4 months ago

Review: ONGROK Small Butter Infuser [2024]

Introduction: I am thrilled to share my experience with the ONGROK Small Butter Infuser in this post. This device has...

Vetted4 months ago

Herbal Infuser Hi – Innovative Botanical Butter Maker [2024]

Today, I am thrilled to share with you my experiences with the Herbal Infuser Hi Countertop Botanical Butter Maker, Tincture...

Vetted4 months ago

Ardent FX Decarboxylator Review: Quick & Effortless! [2024]

I recently had the opportunity to try out the Ardent FX Decarboxylator 110V With Bluetooth Connectivity, and I must say,...

Vetted4 months ago

Infusion Buds Butter Infuser – Review & Accessories [2024]

Thank you for joining me as we explore a review of the Infusion Buds Butter Infuser & Decarboxylator Machine Combo....

Vetted4 months ago

Decarboxylator Machine Review: Easy & Odorless Herb Activation [2024]

I recently had the opportunity to try out the Decarboxylator Machine for Herbs, and I have to admit, it really...

Vetted4 months ago

Decarb Mini System Review: All-in-One Herbal Processing Solution [2024]

Today, I will be giving my thoughts on the Decarb Mini System. As someone who enjoys herbal infusions and tinctures,...

elevate steak with butter elevate steak with butter
Vetted4 months ago

12 Best Compound Butter Recipes for Elevating Your Steak Game

Kick your steak game up a notch with these 12 mouthwatering compound butter recipes that will take your taste buds...

mouthwatering butter cookie taste mouthwatering butter cookie taste
Vetted4 months ago

15 Best Butter Cookies That Will Melt In Your Mouth – Taste Test Results

Tantalize your taste buds with the top 15 butter cookies that promise a melt-in-your-mouth experience - a delightful journey awaits!

peanut butter ice cream peanut butter ice cream
Vetted4 months ago

15 Best Peanut Butter Ice Cream Flavors You Need to Try This Summer

Craving a creamy and decadent summer treat?

Advertisement

Trending