
To achieve the perfect nutty flavor in brown butter, you need to control the heat and watch for visual and aroma cues. Use a light-colored pan to see the color change to golden brown, and listen for bubbling moments. When the aroma shifts to toasted and caramel-like notes, remove it from heat. Patience is key — if you keep going, you’ll uncover rich, nutty flavors that elevate your dishes. Keep exploring to master this skill.
Key Takeaways
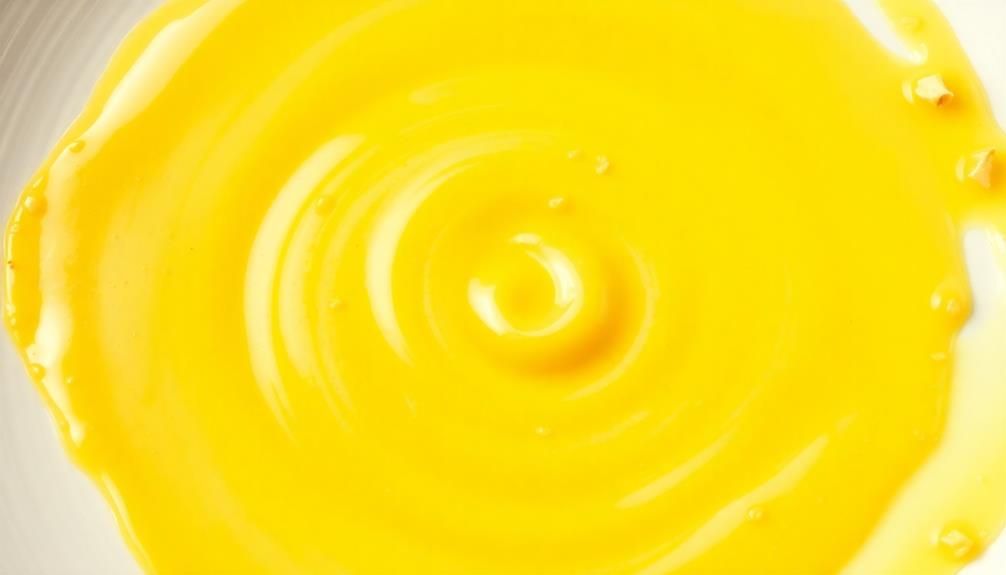
- Use a light-colored pan to clearly monitor color change to a golden-brown hue.
- Heat butter over medium heat, stirring occasionally, until foam subsides and aroma develops toasted, nutty notes.
- Watch for visual cues: bubbling, foaming, and a deepening golden-brown color; avoid burning.
- Recognize the nutty aroma, which signals optimal flavor development just before burning occurs.
- Remove from heat promptly once the butter reaches the desired color and aroma to prevent bitterness.
DBXMJWCMDT Electric Nut Grinder Peanut Butter Maker Machine, 500ml Large-Capacity Almond/Cashew/Sesame Grinding Mill with Non-Slip Base, Efficient Home & Commercial Nut Butter Processor
【Homemade Peanut Butter Maker】 This 500ml electric grinder allows you to create fresh, natural peanut butter and nut...
As an affiliate, we earn on qualifying purchases.
Understanding the Science Behind Browning Butter
Browning butter is a fascinating process rooted in simple chemical reactions. When you heat butter, the milk solids caramelize and undergo the Maillard reaction, creating complex flavors. The caramelization process occurs as the sugars in the milk solids break down into new compounds, developing rich, nutty notes. Simultaneously, the Maillard reaction happens between amino acids and sugars, enhancing browning and aroma. Temperature control is essential; too high, and you risk burning the butter, too low, and you won’t achieve the desired nutty flavor. As you heat, you’ll notice the butter changing color and releasing a toasted aroma. Understanding these chemical reactions helps you master browning butter, ensuring you develop a deep, flavorful foundation for your dishes. Proper temperature management is crucial to avoid overcooking or underdeveloping the flavors.

ZERNEIL Peanut Butter Maker Machine Nut Butter Machine 110V 1100W Electric Grain Grinder Peanut Butter Maker - 33lb/h Sesame Sauce Grinder Home/Commercial for Groundnut, Almond, Cashew Nut and Sesame
🧉【Grinding Assistant】: The 1100W pure copper motor, 2850r/min, and the white jade just grinding wheel used can grind...
As an affiliate, we earn on qualifying purchases.
Choosing the Right Type of Butter for Browning

The type of butter you choose can markedly influence the flavor and success of your browning process. Different butter types offer distinct flavor profiles that impact the final nutty note. For example, unsalted butter allows you to control salt levels, while cultured butter provides a richer, tangier taste. Clarified butter has a higher smoke point and a cleaner flavor, making it ideal for browning. Additionally, color accuracy plays a crucial role in visualizing the perfect golden-brown hue during the browning process. Below is a quick comparison:
| Butter Type | Flavor Profile |
|---|---|
| Unsalted Butter | Mild, creamy, versatile |
| Cultured Butter | Tangy, richer |
| Clarified Butter | Clean, nutty, high smoke point |
| Grass-Fed Butter | Earthy, strong flavor |
| Salted Butter | Salty, more pronounced flavor |
Electric Peanut Butter Maker Machine, Nut Butter Grinder for Almond Cashew Sesame, Large-Capacity Grain Grinder, Home & Commercial Nut Processor with Non-Slip Base
【Fresh Homemade Nut Butter】Ideal for peanuts, almonds, cashews, hazelnuts, seeds, grains—create smooth or chunky spreads for home kitchens...
As an affiliate, we earn on qualifying purchases.
Step-by-Step Guide to Making Brown Butter
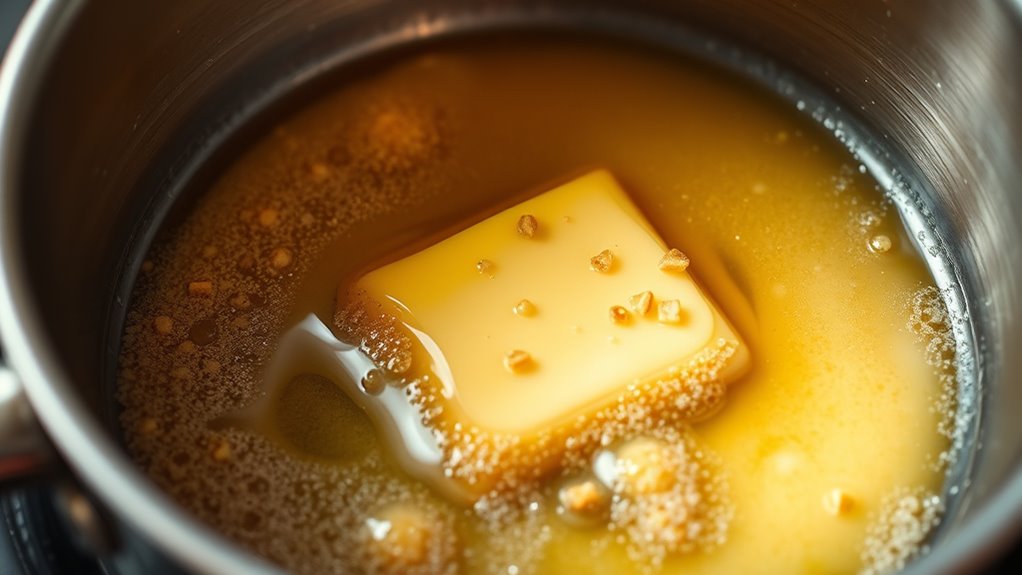
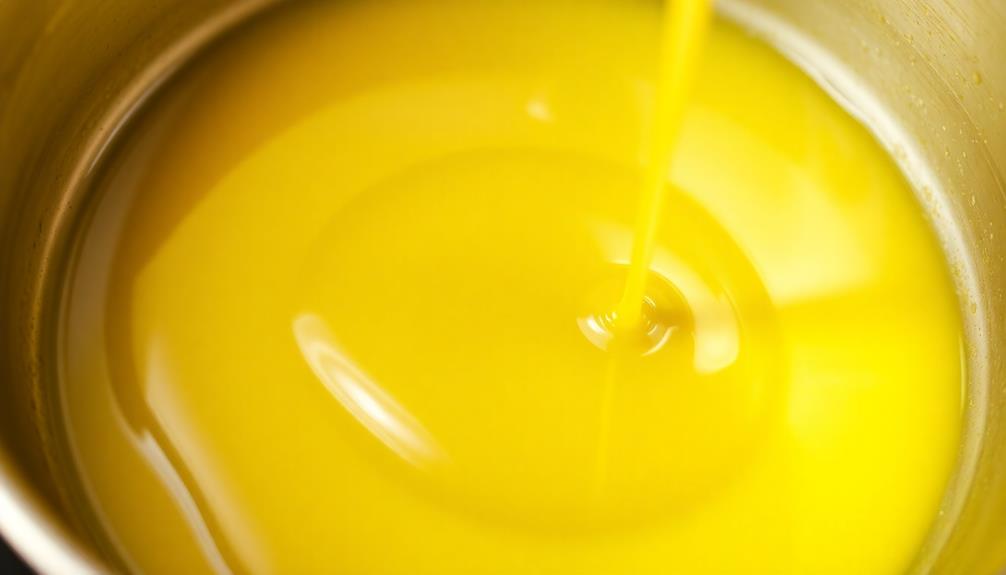
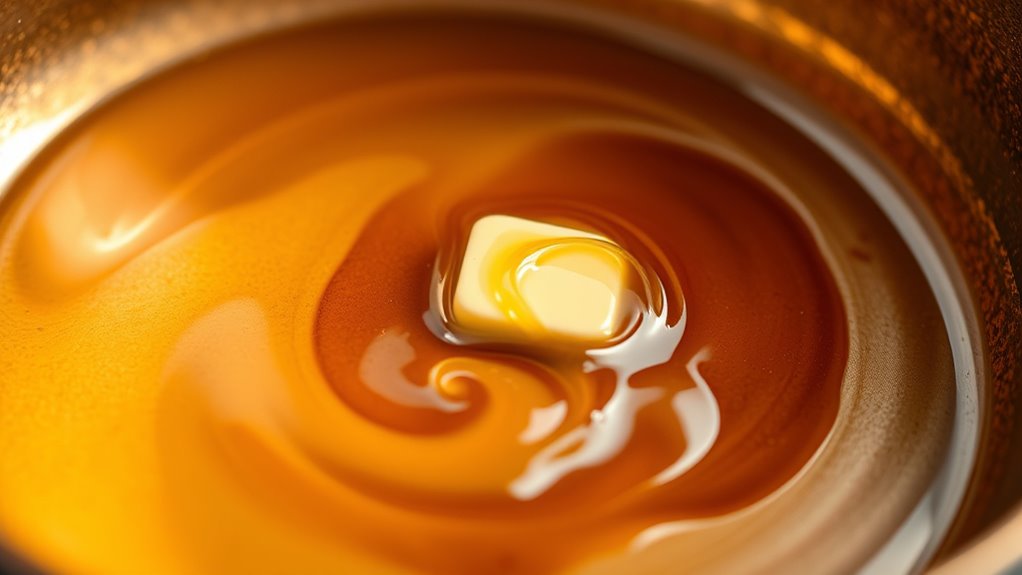
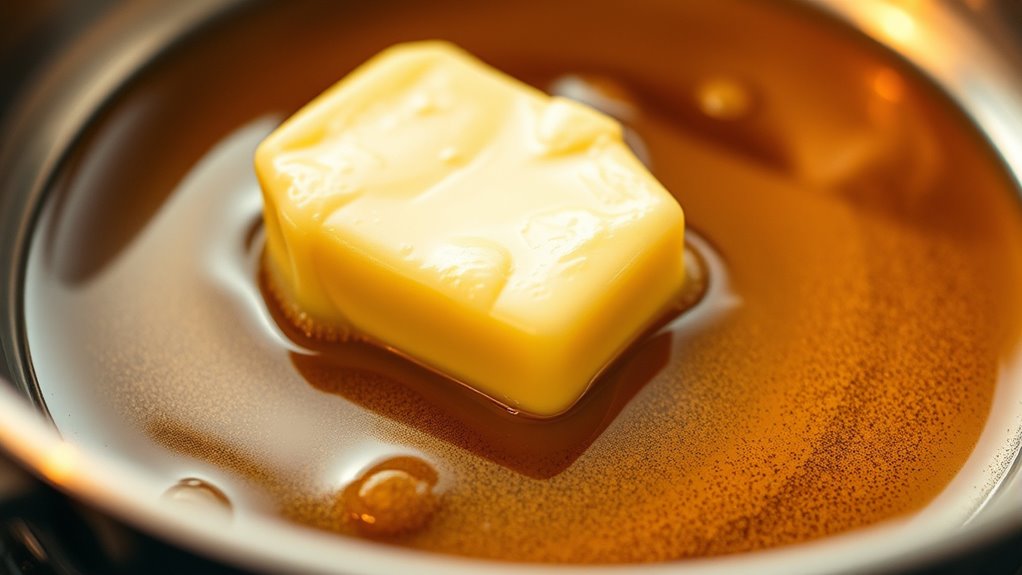
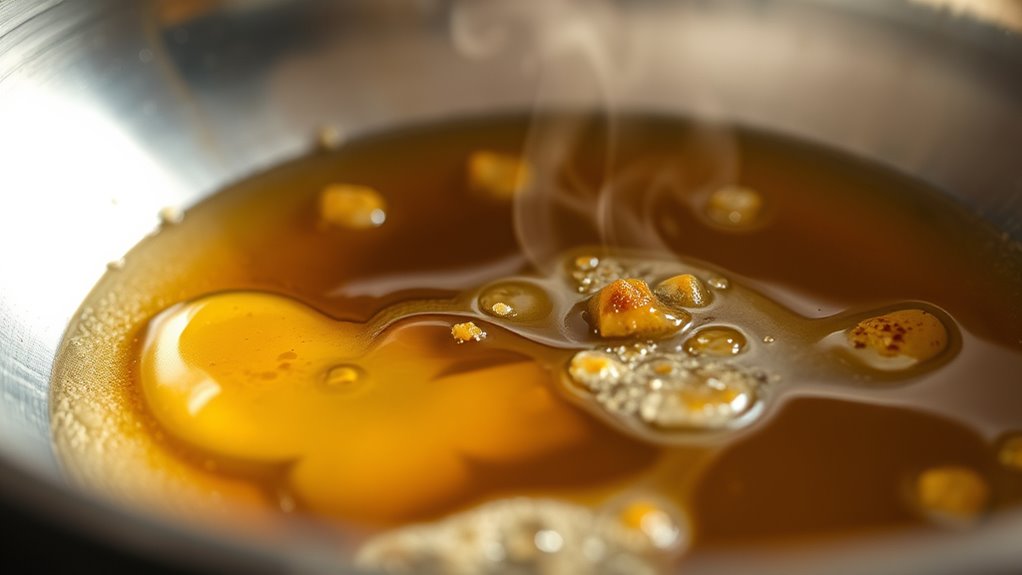
To make brown butter, start by melting butter in a light-colored saucepan over medium heat. As the butter melts, you’ll notice it begins to bubble and foam, signaling the start of flavor development. Keep a close eye and stir occasionally to guarantee even heating. Once the foam subsides and the butter turns a golden-brown color, it’s ready.
Using a light-colored pan helps you easily see the color change and monitor the browning process. This step-by-step approach helps you control butter melting and achieve that perfect nutty note in your brown butter, enhancing your dishes with rich, complex flavor.

Peanut Butter Maker, Nut Butter Machine, 2025 New Electric Nut Butter Maker Machine, Electric Sesame Sauce Nut Grinder with Non-Slip Base Entry, Easy Install Easy to Use,Grinder
Our peanut nut grinder lets you easily grind a variety of nuts and seeds to make smooth.
As an affiliate, we earn on qualifying purchases.
Recognizing When Your Butter Has Achieved the Perfect Nutty Aroma

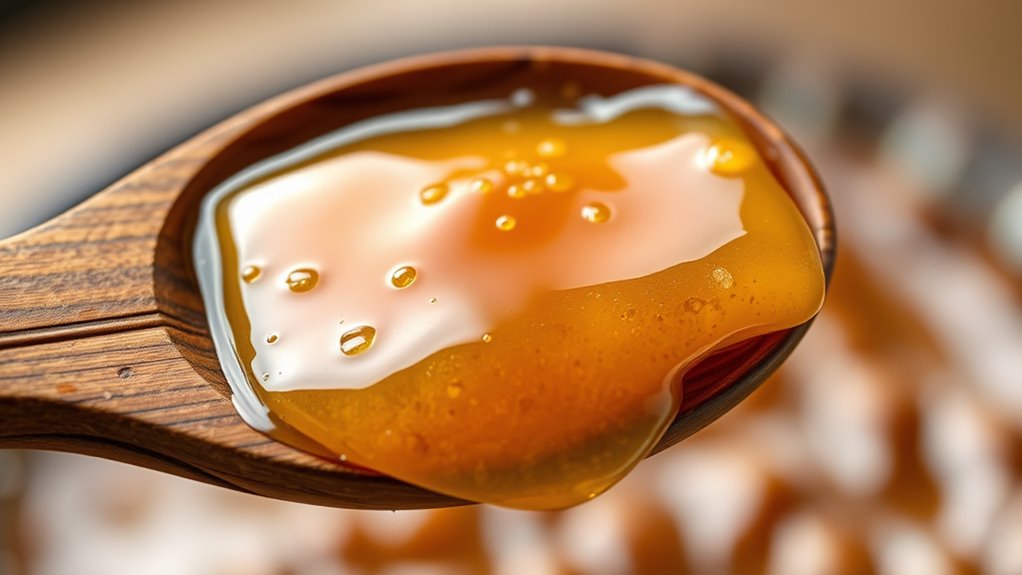
As your butter cooks, you’ll notice a gradual shift in its aroma, signaling that it’s approaching the perfect nutty stage. The butter aroma becomes richer and more toasted, with hints of caramel and toasted nuts. Sensory cues are your best guide—smell is the most reliable indicator. When the aroma deepens and develops a warm, slightly sweet scent, you’re nearing readiness. Keep a close eye on the color as well; it should turn a light golden brown without burning. The smell will intensify just before the butter reaches its peak nutty aroma. Once you detect this rich, toasted scent and see the golden hue, it’s time to remove the butter from heat. Trust your senses—this is the key to perfect beurre noisette. Being aware of industry trends can also help you refine your technique and timing.
Common Mistakes to Avoid When Browning Butter
To get perfect brown butter, you need to watch out for some common mistakes. Overheating the butter can cause it to burn quickly, ruining the flavor. Rushing the process or ignoring color changes can also lead to underdeveloped or burnt butter, so patience is key. Paying attention to credit card terms can help you better understand the process and avoid unexpected issues.
Overheating the Butter
Overheating the butter is a common mistake that can easily ruin your browned butter. When butter melts too quickly or is exposed to high heat, it can burn or develop bitter flavors. To avoid this, focus on heat control and watch the melting process carefully. Using a gentle heat helps prevent overheating and ensures a smooth browning process. – Use a low to medium heat setting to prevent rapid butter melting. – Stir constantly to distribute heat evenly and avoid hot spots. – Remove the pan from heat as soon as you see the butter start to foam and turn golden.
Ignoring Color Changes
Ignoring color changes is a common mistake that can undermine your browned butter. As the butter heats, look for subtle visual cues indicating a proper color change. Too often, you might rely solely on smell or timing, but these aren’t reliable without observing the butter’s appearance. Pay close attention to the visual cues—initial bubbling turns to a golden hue, then deepens to a light amber. If you ignore these signs, you risk overbrowning or burning the butter, which can impart a bitter flavor. Staying vigilant about color change helps you stop at the perfect stage, achieving that rich, nutty aroma and flavor. Remember, the visual cues are your best guide to perfect beurre noisette. Don’t overlook them, or you might miss the ideal moment to remove the butter from heat. Additionally, understanding how AI tools assist in identifying trends in visual cues can help refine your technique over time.
Rushing the Process
Rushing the browning process often leads to uneven results or burnt butter. If you try to accelerate, you risk missing the delicate color change and developing a bitter taste. For a quick flavor boost, patience is key, even when you want rapid preparation. Here’s what to avoid:
- Increasing heat too high, which burns the butter quickly.
- Stirring too aggressively, causing uneven browning.
- Ignoring aroma and color cues, leading to overcooking.
Instead, keep the heat medium and stay attentive, allowing the butter to develop a rich, nutty aroma gradually. This careful approach ensures a perfect beurre noisette, maximizing flavor without risking burnt notes. Remember, rushing sacrifices quality for speed and can ruin your dish’s final taste.
Creative Ways to Incorporate Brown Butter Into Your Dishes
You can elevate your baking by swapping regular butter for brown butter in cookies, cakes, or muffins to add depth and richness. It also pairs beautifully with savory dishes like roasted vegetables, pasta, or seafood, enhancing their flavor profiles. Experimenting with these ideas will inspire you to incorporate brown butter creatively into your everyday cooking.
Baking Enhancements
Brown butter adds a rich, nutty depth that can elevate your baked goods in unexpected ways. It enhances the butter flavor and fills your kitchen with a warm, inviting aroma. You can incorporate it into various baked treats for a sophisticated twist. For example, swap regular butter with browned butter in cookie dough to add complexity. Drizzle it over muffins or scones just before baking for added richness. Or, blend it into cake batters to deepen flavor and improve moistness. This simple upgrade makes your baked items more flavorful and aromatic, impressing everyone with minimal effort. Experimenting with browned butter transforms standard recipes into memorable, gourmet delights that showcase your baking skills and love for nuanced flavors. Additionally, understanding the proper browning process ensures the best flavor development in your butter.
Savory Pairings
Since brown butter’s rich, nutty flavor can enhance many savory dishes, it’s a versatile ingredient to experiment with in your cooking. Its depth of flavor boosts everything from roasted vegetables to grilled meats, adding a layer of complexity that’s hard to achieve with other fats. Use brown butter to sauté greens like spinach or kale, providing both flavor enhancement and a silky texture. Drizzle it over grilled chicken or fish for a luxurious finish that elevates simple proteins. You can also incorporate it into pasta sauces or mashed potatoes, creating a savory richness that delights the palate. The culinary versatility of brown butter makes it an excellent secret weapon in your kitchen, transforming everyday dishes into memorable, flavor-packed meals. Embracing minimalist cooking techniques allows you to highlight the natural flavors of ingredients like brown butter without unnecessary complexity.
Tips for Storing and Preserving Brown Butter

Proper storage is essential to maintain the rich flavor and aroma of brown butter. To preserve its nutty notes, use airtight storage containers that prevent oxidation and absorb aroma transfer. For short-term use, keep brown butter in the refrigerator for up to a week. For longer storage, freezing is your best option. Use freezing techniques like dividing the butter into small portions or ice cube trays, making it easy to thaw only what you need. Label containers clearly with the date to track freshness. When ready to use, gently defrost in the fridge or at room temperature. Proper storage and freezing techniques help retain the butter’s distinct flavor, ensuring you can enjoy its delicious, nutty aroma whenever the craving strikes. Additionally, understanding the importance of fathers’ guidance can enrich your culinary journey by reminding you of the value of patience and care in preserving flavors.
Frequently Asked Questions
Can I Brown Plant-Based or Dairy-Free Butter?
Yes, you can brown plant-based or dairy-free butter. Just like dairy butter, these alternatives can develop a rich, nutty flavor when browned. Use plant-based options like coconut, avocado, or vegan margarine, and melt them over medium heat. Keep an eye on them to prevent burning, and stir constantly. Browning dairy-free options enhances their flavor, making them perfect for recipes that call for beurre noisette or a toasted, nutty note.
How Long Does Homemade Brown Butter Last in the Fridge?
Think of homemade brown butter like a treasure chest—delightful, but needs proper care. In your fridge, it typically lasts about 1 to 2 weeks if stored in an airtight container. Keep an eye out for spoilage signs like a sour smell or mold. Proper storage duration helps preserve its nutty flavor and prevents spoilage, so enjoy it within this window for the best taste and safety.
Is It Safe to Reuse Browned Butter for Cooking?
Yes, it’s safe to reuse browned butter for cooking if you follow proper storage safety. Keep it in an airtight container in the fridge and use it within a week to preserve flavor. Reusing browned butter adds a rich, nutty depth to your dishes, but always check for any off smells or mold before using. Proper storage guarantees you enjoy its flavor without compromising safety.
Can Brown Butter Be Made in a Microwave?
Imagine transforming butter into a rich, nutty beurre noisette—can you do this in a microwave? It’s possible, but tricky. The microwave technique heats unevenly, risking burnt spots or undercooked butter. The stovetop method offers more control, allowing you to watch the butter turn golden and develop that irresistible aroma. For perfect browning, stick to the stovetop—it’s safer and gives you better results.
What Are Some Gluten-Free Recipes Using Brown Butter?
You can create delicious gluten-free recipes using brown butter to add rich, nutty flavor combinations. Think about drizzling it over roasted vegetables, incorporating it into gluten-free cookie dough, or using it in sauces for added depth. For success, follow gluten-free baking tips like using certified gluten-free flours and paying attention to texture. Brown butter elevates your baked goods with its irresistible, nutty aroma and flavor, making your gluten-free dishes truly special.
Conclusion
Now that you’ve mastered browning butter, imagine the warm, nutty aroma filling your kitchen like a comforting hug. Each golden flicker of butter is a reminder of patience and care, transforming simple ingredients into something extraordinary. With this skill, you hold the power to add depth and richness to your dishes, turning everyday moments into culinary delights. Embrace the process, and let the nutty aroma inspire your next delicious creation.