Recipes & Culinary Uses
Ultimate Guide: Best Peanut Butter Cookie Recipe Ever!
Never settle for mediocre peanut butter cookies again – discover the ultimate recipe that will elevate your baking game to new heights!
Elevate your peanut butter cookie game with this ultimate recipe! Cream butter, sugars, and add in peanut butter chips for richness. Shape into balls, roll in sugar, then bake for golden goodness. Let them cool on a wire rack for added crunch. The best part? There's more tips and feedback to enhance your cookie experience.
Key Takeaways
- Cream butter and sugar for light, fluffy cookies.
- Incorporate real peanut butter and baking soda for flavor and texture.
- Roll dough in sugar before baking for a crunchy exterior.
- Cool on wire racks to maintain soft, chewy centers.
- Use parchment paper-lined sheets for easy cleanup and even baking.
Recipe Ingredients and Making Process
To create the Best Peanut Butter Cookie Recipe, gather your ingredients and follow a simple, step-by-step process. Start by whisking together the dry ingredients, including flour, baking soda, salt, and a hint of cinnamon.
In a separate bowl, cream together the butter, sugars, and then mix in chunky peanut butter, peanut butter chips, egg, and vanilla until the mixture is smooth. Gradually add the dry ingredients to the wet ingredients, combining until a soft and chewy dough forms.
Once the dough is ready, roll it into balls and place them on a baking sheet. Bake the cookies until they're golden brown around the edges.
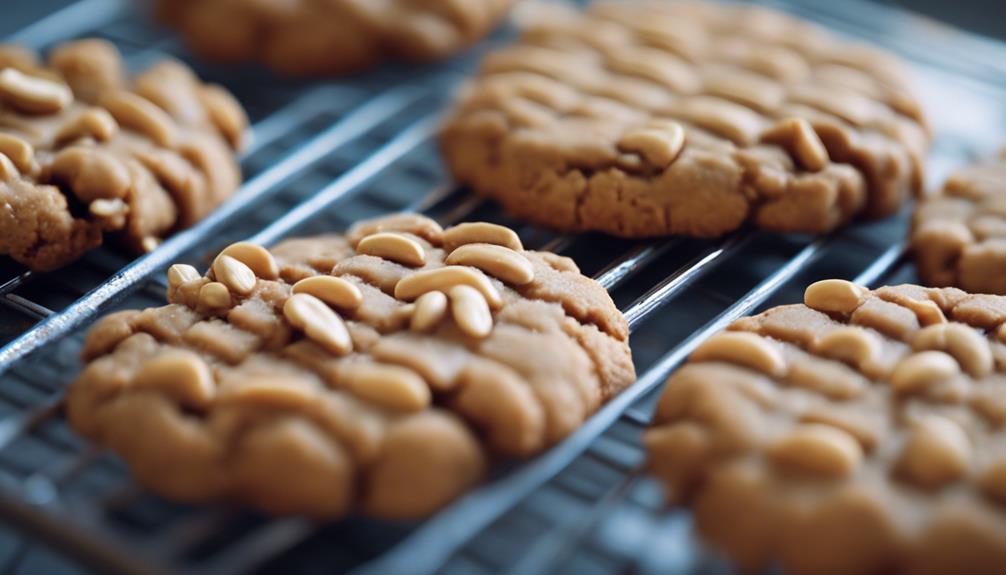
After baking, allow the cookies to cool completely on a wire rack. The combination of chunky peanut butter and peanut butter chips in this recipe adds a delightful crunch and bursts of flavor to these classic treats.
These soft and chewy cookies are sure to become your go-to recipe for the perfect peanut butter indulgence.
No Criss-Cross Pattern and Recipe Notes
The traditional criss-cross pattern typically used in peanut butter cookie recipes isn't a requirement for this particular peanut butter cookie recipe, but it can aid in flattening the dense dough for more consistent baking.
If you prefer a softer cookie, gently press down on the cookie dough with a fork before baking.
These cookies are packed with rich peanut butter flavor, enhanced by the addition of peanut butter chips and a hint of cinnamon. The brown sugar in the recipe adds a delightful caramel note to complement the peanut butter taste.
When preparing the dough, make sure to thoroughly mix the flour mixture to guarantee an even distribution of ingredients.
After baking, allow the cookies to cool on a cooling rack to preserve their texture.
Ultimate Peanut Butter Cookies Recipe
For an ultimate peanut butter cookie experience that tantalizes your taste buds, try this unique recipe featuring peanut butter chips and a hint of cinnamon.
When baking the Ultimate Peanut Butter Cookies, make sure to follow these steps for the perfect batch:
- Cream together butter and sugar until light and fluffy.
- Add creamy peanut butter along with other wet ingredients for a smooth dough.
- Incorporate flour, baking soda, and cinnamon for that delicious peanut buttery flavor.
- Shape the dough into balls, roll them in sugar, and bake until golden brown.
- Once baked, let the cookies cool and then store them in an airtight container for freshness.
To achieve the best results, consider chilling the dough in the refrigerator before baking.
Feedback and Comments
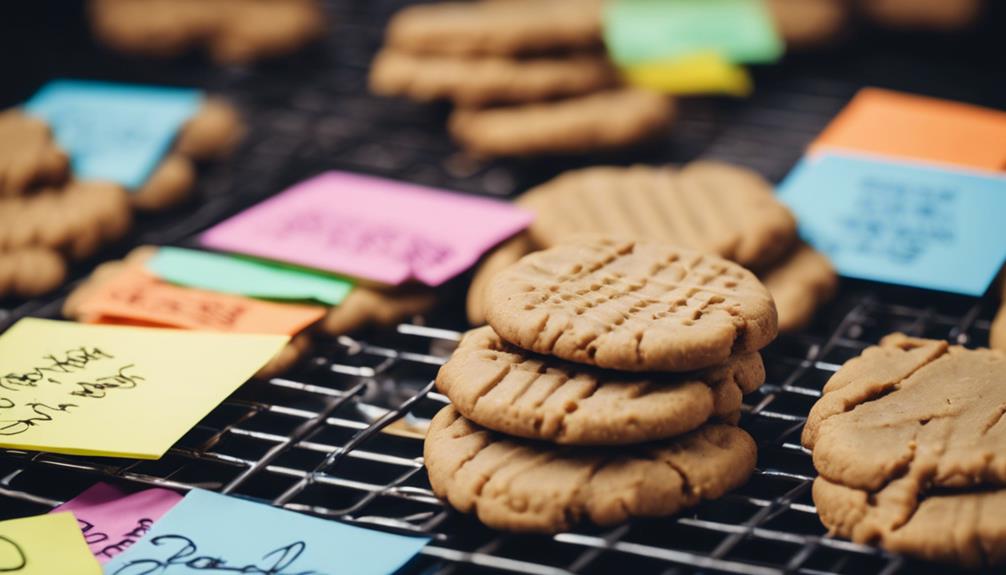
Feedback and comments on Lynn's Ultimate Peanut Butter Cookies recipe have been overwhelmingly positive. Amy praised the cookies, calling them the best she ever had.
Monica, a true peanut butter cookie lover, loved the rich flavor and soft texture of the cookies.
Lauran appreciated the added crunch from the peanut butter chips, while Brooke found the balance of peanut butter flavor just right.
Stephanie mentioned that Lynn's recipe was easy to follow and was a big hit with her family.
Using real peanut butter and baking soda, Lynn's recipe yields cookies that are light and fluffy with a great texture. If you want to make your cookies stand out and impress your friends and family, this recipe is a surefire way to do so.
The good peanut butter cookie has the potential to become your go-to recipe for any occasion. Thanks SO MUCH to Lynn for sharing this fantastic recipe with us!
Recipe Tips
Consider using real butter and Jiff Peanut Butter for best results when making Lynn's Ultimate Peanut Butter Cookies. To ensure your cookies turn out perfectly, follow these tips:
- Avoid overcooking: Keep an eye on the cookies to maintain a soft and chewy texture.
- Use Air cookie sheets: Opt for these sheets for more even baking and browning.
- Follow baking temperature: Stick to 350 degrees Fahrenheit for the ideal cookies.
- Cool on a wire rack: After baking, carefully transfer the cookies to a wire rack to prevent sogginess.
- Use parchment paper: Place the cookies on baking sheets lined with parchment paper for easy cleanup.
Frequently Asked Questions
Why Do You Put Fork Marks in Peanut Butter Cookies?
You put fork marks in peanut butter cookies to create a classic criss-cross pattern, flatten the dough for even baking, and help the cookies spread out evenly. It's traditional but not essential; you can press down post-baking for a similar effect.
What Is the Secret to a Good Cookie?
To make a good cookie, you must use high-quality ingredients like real butter and fresh eggs. Precisely measure and follow the recipe for success. Balance sweetness, texture, and flavor. Watch baking time and temperature for perfect cookies.
Why Don't My Peanut Butter Cookies Taste Like Peanut Butter?
If your peanut butter cookies lack that nutty punch, try using chunky peanut butter for texture, adding peanut butter chips for extra flavor bursts, and balancing sugar and vanilla right. Cinnamon can also give a tasty twist!
What Is the Best Peanut Butter to Use for Cookies?
For the ideal peanut butter cookies, use creamy commercial brands like Jif or Skippy. They provide a smooth consistency, rich flavor, and added stabilizers for top-notch texture. Avoid natural peanut butter with oil separation for top results.
Conclusion
So next time you're craving a delicious peanut butter cookie, remember this ultimate recipe.
With just a few simple ingredients and easy steps, you can whip up a batch of these irresistible treats in no time.
Say goodbye to store-bought cookies and hello to homemade goodness.
Your taste buds will thank you for choosing this recipe over all others.
Enjoy!
Sunny’s articles radiate enthusiasm, much like her sunny disposition. As our resident “Butter Geek”, she delves deep into the latest butter trends, ensuring our readers are always in the know. Beyond her writing, Sunny’s passion lies in exploring vegan butter alternatives and hosting butter-tasting soirées.
Side Dishes
Butter-Poached Asparagus: Tender, Flavorful Asparagus That’s Perfect Every Time
Kick off spring with the exquisite simplicity of butter-poached asparagus, a mouthwatering dish that’ll have your taste buds dancing with joy. Learn the secrets behind this springtime delight.
Elevate your spring menu with the exquisite simplicity of butter-poached asparagus, a dish that'll have your taste buds dancing with joy. The gentle poaching technique enhances the vegetable's tender, succulent texture and nuanced flavors, creating a mouthwatering experience. Just simmer fresh asparagus in melted butter until perfectly tender, then season with a squeeze of lemon and a sprinkle of salt and pepper. Serve this elegant side dish immediately for maximum flavor impact – you won't believe how quick and easy it is to prepare restaurant-quality asparagus that's sure to impress. Want to learn more about the history and cooking secrets behind this springtime delight?
Key Takeaways
- Butter-poaching asparagus enhances its delicate flavor and texture, resulting in a tender and flavorful dish perfect for special occasions or everyday meals.
- The gentle poaching method prevents overcooking, ensuring the asparagus retains a crisp texture while being infused with the richness of butter.
- Seasoning the asparagus with lemon juice, salt, and pepper balances the flavors and adds brightness to the dish.
- Butter-poached asparagus is a versatile side dish that can be paired with a variety of main courses to create a complete and satisfying meal.
- The visual appeal of carefully arranged, vibrant green asparagus spears further enhances the overall dining experience.
History
Asparagus, a vegetable with roots tracing back to ancient times, has long been a cherished ingredient in culinary traditions across the globe. You can find references to this nutrient-rich plant in Egyptian, Greek, and Roman texts, where it was revered for its unique flavor and purported health benefits.
Over the centuries, asparagus has become a springtime staple, its tender spears eagerly anticipated as a sign of the changing seasons.
Today, this versatile vegetable continues to captivate chefs and home cooks alike, with endless ways to prepare and enjoy its distinctive taste. From classic roasted asparagus to vibrant salads and rich, creamy soups, the possibilities are endless.
And one of the most indulgent ways to savor asparagus is through the simple yet decadent technique of butter-poaching, which coaxes out the vegetable's natural sweetness and imparts a luxurious mouthfeel.
Whether you're a seasoned asparagus enthusiast or just discovering this spring treasure, the history and versatility of this beloved ingredient are sure to inspire your culinary adventures.
Recipe
Butter-poached asparagus is a simple yet elegant dish that showcases the delicate flavors of fresh asparagus. The gentle poaching in a rich butter sauce creates a luxurious texture and intensifies the natural sweetness of the vegetable.
To prepare this dish, you'll need a few high-quality ingredients and a bit of patience, but the result is well worth the effort. The key is to poach the asparagus gently, allowing the butter to infuse the stalks with its creamy and savory notes.
Ingredients:
- 1 lb fresh asparagus, trimmed
- 4 tbsp unsalted butter
- 1 tsp lemon juice
- Salt and freshly ground black pepper to taste
Instructions:
In a large skillet, melt the butter over medium-low heat. Gently add the trimmed asparagus spears and poach them, turning occasionally, for 8 to 10 minutes, or until they're tender but still have a slight bite. Be careful not to overcook.
Remove the asparagus from the butter and transfer to a serving dish. Drizzle the lemon juice over the asparagus and season with salt and pepper to taste.
For best results, use the freshest and thinnest asparagus you can find. The gentle poaching in the butter allows the vegetable to retain its vibrant color and delicate flavor.
Serve the butter-poached asparagus immediately, as it's best enjoyed warm.
Cooking Steps
Bring the butter to a gentle simmer in a pan.
Carefully add the asparagus to the simmering butter and let it cook until it's tender.
Once the asparagus is done, remove it from the butter and season it with a sprinkle of salt and pepper.
Step 1. Bring Butter to Gentle Simmer
To begin, you'll want to bring the butter to a gentle simmer. Place the butter in a skillet or saucepan over medium heat. Keep a close eye on it, stirring occasionally, until the butter melts and starts to bubble gently.
You're looking for a soft, steady simmer – not a rapid boil. This gentle heat will help the butter infuse the asparagus with its rich, creamy flavor.
As the butter simmers, you might notice it start to foam up a bit. That's normal! Just continue to stir it occasionally to prevent any burning or scorching.
The goal is to maintain that gentle simmer until you're ready to add the asparagus. Once the butter is perfectly melted and heated through, you can move on to the next step.
Just be patient and resist the urge to crank up the heat – slow and steady is the way to go for this butter-poached asparagus technique. Your taste buds will thank you!
Step 2. Add Asparagus to Butter
With the butter at the perfect temperature, it's time to add the asparagus. Gently lower the spears into the silky, golden liquid, making sure each one is fully submerged. The asparagus will immediately begin to sizzle and soak up the rich, nutty flavor of the butter.
Swirl the pan gently to ensure even cooking, and watch as the vibrant green stalks slowly transform, becoming tender and infused with the buttery goodness.
As the asparagus cooks, the butter will take on a slightly greenish hue, absorbing the essence of the vegetable. Baste the spears occasionally, coating them completely in the aromatic butter.
This gentle poaching method ensures the asparagus remains delicate and succulent, retaining its crisp-tender texture and vibrant color. The longer you cook the asparagus, the more it will soften, so keep a close eye and remove it from the heat when it reaches your desired doneness.
Step 3. Cook Until Tender
The asparagus will begin to transform as it cooks, gradually softening to your desired doneness. Keep a watchful eye as the spears gently simmer in the fragrant butter, their vibrant green hues steadily deepening.
You'll notice the stems becoming increasingly tender, while the tips remain slightly crisp, creating a wonderful contrast in texture. Periodically, use tongs to flip and rotate the asparagus, ensuring even cooking. This will also allow you to gauge their progress – when they yield to the gentle pressure of the tongs, you'll know they're perfectly cooked.
Resist the urge to overcrowd the pan, as this can result in uneven heating. Work in batches if necessary, maintaining the butter at a gentle simmer. The aroma will become increasingly mouthwatering as the asparagus reaches your preferred level of doneness, perhaps 5-8 minutes.
Once they reach that point, use the tongs to transfer the asparagus to a serving dish, allowing any excess butter to drip off. Your tender, flavorful asparagus is now ready to enjoy.
Step 4. Remove Asparagus From Butter
Once the asparagus has reached your desired level of doneness, it's time to remove them from the butter. Using a slotted spoon, gently lift the tender asparagus spears out of the warm, fragrant butter, letting the excess liquid drip back into the pan.
Be careful not to overcrowd the spears – work in batches if needed to ensure each piece is thoroughly coated and delicately handled. This method not only enhances the flavors but also ensures the asparagus retains a vibrant color and appealing texture, characteristic of butter's role in global cuisine.
As you transfer the asparagus to a serving platter or plate, take a moment to admire their vibrant green hues and silky-smooth texture. The butter-poaching process has transformed these vegetables, leaving them soft, supple, and infused with a rich, buttery flavor.
Arrange the asparagus in a visually appealing manner, perhaps fanning them out or standing them upright, so your guests can fully appreciate their appetizing appearance.
Now that the asparagus is ready, it's time to move on to the final step of this delectable recipe. Get ready to drizzle on the finishing touches and serve up a truly remarkable dish!
Step 5. Season With Salt and Pepper
Generously season the butter-poached asparagus with a pinch of salt and a few grinds of freshly cracked black pepper. The salt will enhance the natural sweetness of the asparagus, while the pepper adds a subtle kick of heat and complexity.
As you sprinkle the seasonings over the tender, glistening spears, you'll see them come alive, the flavors dancing on your palate. It's important to choose the right ingredients for your dishes, much like selecting cold medications for effective relief during a cold.
Be generous but not overpowering – a light touch is all you need. Gently toss the asparagus to evenly distribute the salt and pepper, ensuring every bite is perfectly seasoned.
The aroma of the fragrant butter will mingle with the earthy, grassy notes of the asparagus, creating a mouthwatering symphony. Take a moment to admire the way the spears glisten, reflecting the light and begging to be savored.
Now, dig in and experience the true depth of flavor that butter-poaching can bring out in asparagus. Each bite will be a delightful balance of richness, brightness, and subtle heat.
Final Thoughts
Ultimately, butter-poached asparagus makes a delightful and simple side dish.
You'll be amazed at how the rich, creamy butter transforms tender asparagus into a true delight for your senses. The method is straightforward, yet the result is truly impressive. The asparagus glistens with a velvety sheen, the perfect complement to its bright green hue.
Each bite melts in your mouth, the butter's luxurious texture perfectly paired with the asparagus's fresh, slightly sweet flavor. This dish is a true crowd-pleaser, sure to impress your dinner guests.
Additionally, understanding the importance of consumer awareness in food sourcing can enhance your culinary experience.
And the best part? It's incredibly easy to prepare, allowing you to enjoy the taste of restaurant-quality asparagus in the comfort of your own home.
Frequently Asked Questions
Is Butter-Poaching the Only Way to Cook Asparagus?
No, butter-poaching is not the only way to cook asparagus. You can also roast, grill, sauté, or steam asparagus, each method offering unique flavors and textures. The best cooking method depends on your personal preferences and the dish you're preparing.
How Long Does It Take to Butter-Poach Asparagus?
To butter-poach asparagus, it typically takes 5-7 minutes. The asparagus should be tender yet still retain a crisp texture when done. The exact time can vary depending on the thickness of the asparagus spears.
Can I Use Frozen Asparagus for This Recipe?
Yes, you can use frozen asparagus for this recipe. The cooking time may be slightly shorter, so keep an eye on it. Give the asparagus a quick rinse before adding it to the butter-poaching liquid.
What Kind of Butter Works Best for This Dish?
For this dish, you'll want to use a high-quality, unsalted butter. The butter's rich flavor and creamy texture will complement the asparagus perfectly, creating a delightful poached experience. Avoid using salted butter, as it can overpower the asparagus.
How Do I Know When the Asparagus Is Cooked Through?
To know when the asparagus is cooked through, keep an eye on it and test it with a fork. It should be tender yet still have a slight bite. You'll know it's done when it's easily pierced but not mushy.
Sunny’s articles radiate enthusiasm, much like her sunny disposition. As our resident “Butter Geek”, she delves deep into the latest butter trends, ensuring our readers are always in the know. Beyond her writing, Sunny’s passion lies in exploring vegan butter alternatives and hosting butter-tasting soirées.
Side Dishes
Butter-Sautéed Mushrooms: The Rich, Earthy Side Dish That Completes Any Meal
Tantalizing and umami-packed, these butter-sautéed mushrooms are a versatile side dish that elevates any meal with their rich, earthy flavors – discover why.
Butter-sautéed mushrooms are the rich, earthy side dish that effortlessly elevates any meal, delivering a burst of umami-packed flavor and a satisfying, meaty texture that delights the senses. Tracing back to ancient Greek and Roman culinary traditions, this beloved dish has graced tables throughout history, from monastic kitchens to modern-day restaurants. Packed with essential nutrients and antioxidants, mushrooms make for a healthy alternative to meat, suitable for various dietary preferences. With simple yet impactful ingredients like butter, olive oil, garlic, and fresh herbs, you can recreate this restaurant-worthy side at home – and learn more about why it's a true crowd-pleaser.
Key Takeaways
- Butter-sautéed mushrooms are a beloved side dish with a rich, earthy flavor that complements various main courses, from steak to pasta.
- Mushrooms are a nutritious ingredient, low in calories yet high in antioxidants, making them a versatile choice for balanced, health-conscious meals.
- The traditional cooking method involves sautéing mushrooms in a combination of butter and olive oil, along with garlic and seasonings, for optimal flavor.
- Proper cooking techniques, such as avoiding overcrowding the pan and monitoring heat, ensure perfectly tender and caramelized mushrooms.
- Butter-sautéed mushrooms are a popular and versatile dish, suitable for both casual and special occasions, appealing to a wide range of audiences.
History
The history of sautéed mushrooms can be traced back to ancient culinary traditions. Throughout the centuries, various cultures have cherished the earthy, savory flavors of these versatile fungi. In ancient Greece, sautéed mushrooms were enjoyed as a delicacy, often seasoned with herbs and olive oil.
The Romans later expanded on this dish, experimenting with different cooking techniques and ingredients. Early butter-making techniques, such as those used by ancient civilizations, also played a role in enhancing the rich flavors of sautéed mushrooms.
During the Middle Ages, mushrooms became a staple in European cuisine, with monasteries and noble households incorporating them into their meals.
The Renaissance era saw a surge in culinary innovation, as chefs began to experiment with butter-sautéing mushrooms, unlocking their rich, decadent qualities.
Today, butter-sautéed mushrooms remain a beloved side dish, beloved for their ability to complement a wide variety of main courses. Whether served alongside steak, chicken, or vegetarian options, this classic preparation continues to delight and satisfy diners around the world.
Recipe
Mushrooms are a versatile ingredient that can be prepared in a variety of ways. One classic preparation is butter-sautéed mushrooms, which showcases the rich, earthy flavor of the mushrooms. This simple yet elegant dish is perfect as a side or as a topping for steak, chicken, or pasta.
Additionally, incorporating mushrooms into your meals can offer health benefits, as they're low in calories and provide essential nutrients, including antioxidants that help combat oxidative stress in the body natural supplement for chronic inflammation.
The key to perfectly sautéed mushrooms is to use a combination of butter and oil. The butter adds a delicious, velvety richness, while the oil helps to prevent the butter from burning. Additionally, it's important to not overcrowd the pan, as this can cause the mushrooms to steam rather than sauté.
- 1 pound mixed mushrooms (such as button, cremini, and shiitake), sliced
- 2 tablespoons unsalted butter
- 1 tablespoon olive oil
- 1 garlic clove, minced
- 1 tablespoon chopped fresh parsley
- Salt and freshly ground black pepper to taste
In a large skillet, melt the butter and olive oil over medium-high heat. Add the sliced mushrooms and sauté, stirring occasionally, until the mushrooms are tender and golden brown, about 8-10 minutes.
Add the minced garlic and sauté for an additional 1-2 minutes, or until fragrant. Stir in the chopped parsley and season with salt and pepper to taste.
To ensure the perfect texture, it's important not to crowd the pan when sautéing the mushrooms. Work in batches if necessary, and resist the temptation to stir the mushrooms too frequently, as this can prevent them from browning properly.
Serve the butter-sautéed mushrooms immediately, while they're hot and fragrant.
Cooking Steps
Melt the butter in a skillet over medium heat, allowing its creamy texture and rich flavor to enhance the dish.
Butter enhances flavor when combined with the earthy notes of mushrooms.
Toss in the sliced mushrooms and sauté until they're nicely browned.
Don't forget to season with a sprinkle of salt and pepper, then serve these savory mushrooms immediately for the best flavor.
Step 1. Melt Butter in Skillet Over Medium
Once you have your skillet ready over medium heat, go ahead and add the butter.
You'll want to use a generous amount – around 2-3 tablespoons should do the trick. As the butter starts to melt, you'll notice it begin to bubble and foam up. This is exactly what you want! Give the pan a gentle swirl to help the butter coat the entire surface.
Now, keep an eye on the butter. You'll want it to get nice and golden brown, but be careful not to let it burn. That nutty, toasted aroma is what you're going for.
Once the butter has reached that perfect color, it's time to add your mushrooms. Toss them in the skillet, making sure they're in an even layer. Let them sizzle and brown for a minute or two, then give them a stir.
Repeat this process, stirring occasionally, until the mushrooms are tender and cooked through. The rich, buttery flavor will be absolutely irresistible!
Step 2. Add Sliced Mushrooms
With the butter nicely browned, it's time to add your mushrooms to the skillet. Grab a bunch of fresh, sliced mushrooms and carefully slide them into the hot, fragrant butter.
Listen as they sizzle and pop, releasing their earthy aroma into the air. Gently stir the mushrooms, ensuring they cook evenly on all sides. As they soften and brown, you'll notice the butter taking on a nutty, caramelized hue.
The mushrooms will start to release their juices, creating a rich, savory sauce that coats each tender slice. Be sure to keep an eye on them, stirring occasionally, until they reach your desired level of doneness.
Whether you like them lightly browned and still firm or deeply caramelized and melt-in-your-mouth tender, the choice is yours. Just let your senses guide you, and enjoy the wonderful transformation happening right before your eyes.
Step 3. Sauté Mushrooms Until Browned
Sauté the mushrooms in the hot, browned butter over medium-high heat. The sizzle as the mushrooms hit the pan is music to your ears!
Stir the mushrooms constantly to ensure they cook evenly, caramelizing the edges to a deep, golden brown. The aroma of the nutty, toasted butter and earthy mushrooms will fill your kitchen, making your mouth water in anticipation.
Continue sautéing until the mushrooms release their juices and the liquid evaporates, about 5-7 minutes. Keep a close eye, adjusting the heat as needed to prevent burning. You want the mushrooms to be tender yet still have a slight bite, not soggy.
Once perfectly browned, remove the pan from the heat. The mushrooms are now ready to be seasoned and served as a delightful side dish or incorporated into your favorite recipes.
Get ready to enjoy the rich, umami-packed flavor of these butter-sautéed mushrooms!
Step 4. Season With Salt and Pepper
Grab a pinch of sea salt and a few grinds of freshly cracked black pepper. These simple seasonings will transform your sautéed mushrooms into a flavor sensation.
Sprinkle the salt and pepper over the browned mushrooms, taking care to evenly distribute the seasonings. As the salt and pepper mingle with the savory mushroom juices, a mouthwatering aroma will fill the air.
The coarse texture of the sea salt provides a delightful crunch, while the peppery kick awakens your taste buds. With just a few shakes, you've elevated this humble side dish to new heights.
The earthy mushrooms, now seasoned to perfection, are ready to take center stage. Taste a mushroom and marvel at the way the salt and pepper complement the natural flavors, creating a harmonious balance that will have your family and guests coming back for seconds.
Get ready to wow them with your culinary expertise.
Step 5. Finish by Serving Immediately
Once the mushrooms are perfectly seasoned, it's time to serve them up hot and fresh. Grab your serving spoon and scoop up those glistening, golden-brown beauties, transferring them to a serving dish.
The aroma is simply divine – the rich, buttery notes mingling with the earthy, umami-packed mushrooms. Don't wait a moment longer; these mushrooms are best enjoyed straight away, while they're piping hot and the flavors are at their peak.
Gather your loved ones around the table and watch their faces light up as they take that first delightful bite. The tender mushrooms practically melt in your mouth, complemented by the savory seasoning.
Every forkful is a burst of comfort and satisfaction. Serve these butter-sautéed mushrooms alongside your main dish, allowing their flavors to elevate the entire meal.
Indulge in this luxurious side that's sure to become a new family favorite. Enjoy!
Final Thoughts
With the butter-sautéed mushrooms now ready, consider how these savory bites can elevate a simple dish. Their rich, earthy flavors and tender, meaty texture make them a perfect accompaniment to steak, chicken, or even pasta.
Imagine the contrast of the mushrooms' umami notes against the mild protein, creating a harmonious symphony of tastes and textures on your plate.
These mushrooms also work wonderfully as a side dish in their own right. Scoop them over a bed of fluffy mashed potatoes or fragrant rice for a satisfying, vegetable-forward meal.
Their versatility means you can enjoy them anytime, whether as a special occasion dish or a quick weeknight addition.
With just a few simple ingredients and minimal prep, you can have this restaurant-worthy side ready in minutes.
Frequently Asked Questions
Can I Use Canned Mushrooms Instead of Fresh?
You can use canned mushrooms instead of fresh, but the texture and flavor won't be as robust. Canned mushrooms tend to be softer and have a more muted taste compared to their fresh counterparts. Consider your dish's needs when making the swap.
How Long Do the Mushrooms Keep in the Fridge?
Freshly sautéed mushrooms will keep in the fridge for 3-5 days. Store them in an airtight container to maintain their texture and flavor. Be sure to reheat them thoroughly before serving for the best results.
Can I Substitute Olive Oil for the Butter?
Yes, you can substitute olive oil for the butter in this recipe. The flavor profile will be slightly different, but olive oil can work well as an alternative. Just be mindful that the cooking time may need to be adjusted.
Is This Dish Suitable for Vegetarians or Vegans?
Yes, this dish can be suitable for vegetarians and vegans if you substitute the butter with olive oil. The mushrooms and other plant-based ingredients make it a great option for those following a meat-free diet.
Can I Add Other Herbs or Spices to the Recipe?
Absolutely! You can easily customize the dish by adding your favorite herbs and spices. Try garlic, thyme, rosemary, or even a dash of paprika to enhance the earthy flavors. Get creative and make it your own!
Sunny’s articles radiate enthusiasm, much like her sunny disposition. As our resident “Butter Geek”, she delves deep into the latest butter trends, ensuring our readers are always in the know. Beyond her writing, Sunny’s passion lies in exploring vegan butter alternatives and hosting butter-tasting soirées.
Recipes & Culinary Uses
Festive Favorite: Best Peanut Butter Blossom Recipe for the Holidays!
Yummy Peanut Butter Blossom recipe awaits with a perfect blend of peanut butter and chocolate for a delightful holiday treat – continue reading for the ultimate festive flavor experience!
Get ready for a tasty holiday tradition with the perfect Peanut Butter Blossom recipe that pairs the goodness of peanut butter and chocolate in a festive treat. Roll the dough in sugar for a sweet crunch and adorn with colorful sprinkles. Don't forget to chill the dough before baking for the ideal texture! Enjoy these cookies with a warm beverage like hot cocoa or coffee for a flavor-packed experience. They are great for gatherings and make lovely gifts. Find out more about how to bake these delectable treats and interesting tips for serving and decorating them.
Key Takeaways
- Irresistible Peanut Butter Blossoms with a classic peanut butter and chocolate flavor combination.
- Roll dough in sugar for a sweet crunch and chill before baking to prevent spreading.
- Decorate with festive sugar sprinkles or Hershey's kisses for a colorful touch.
- Serve with hot cocoa or coffee, perfect for holiday gatherings or cozy evenings.
- Package in decorative tins for gifting and consider privacy settings for tailored ads.
Recipe Overview
For a quick and delightful holiday treat, whip up a batch of these irresistible Peanut Butter Blossoms. This classic cookie recipe is a must-have during the Christmas season, loved by many for its delicious combination of peanut butter and chocolate.
To make these delectable Christmas cookies, you'll need pantry staples like peanut butter, sugar, butter, egg, and vanilla extract. The signature touch of a Hershey's kiss placed in the center adds a festive flair to these treats.
Creating Peanut Butter Blossoms is a straightforward process that yields delightful results. Simply mix the ingredients, roll the dough into balls, coat them in sugar, and bake until golden brown.
Once out of the oven, press a Hershey's kiss into the center of each cookie, allowing it to slightly melt and adhere to the cookie. The end result is a batch of irresistible Peanut Butter Blossoms that are sure to be a hit at any holiday gathering.
Baking and Decorating Tips
To enhance the visual appeal and flavor of your Peanut Butter Blossoms, consider incorporating these baking and decorating tips. Rolling the cookie dough balls in sugar before baking adds a sweet crunch to the exterior, while pressing the Hershey's kiss into the center immediately after baking ensures it sticks to the warm cookie. Chilling the dough for 30 minutes before baking helps prevent the cookies from spreading too much. For a festive touch, use red, green, and white sugar sprinkles when decorating your Peanut Butter Blossoms. Decorating with chocolate kisses not only adds a delicious chocolate element but also creates a classic look for the holiday season.
Tip | Description |
---|---|
Roll in sugar before baking | Adds a sweet crunch to the exterior of the cookies |
Chill dough before baking | Prevents the cookies from spreading too much |
Use festive sugar sprinkles | Adds a colorful touch to the cookies for a festive holiday look |
Serving and Pairing Suggestions
Consider pairing these delightful Peanut Butter Blossoms with a cup of hot cocoa, coffee, or a glass of milk for a delicious treat. These classic holiday cookies go perfectly with a warm beverage, enhancing their rich peanut butter flavor.
Whether you're hosting a festive gathering or simply enjoying a cozy evening at home, serving Peanut Butter Blossoms alongside a hot drink will surely delight your taste buds.
To serve Peanut Butter Blossoms, place them on a festive platter or cookie tray for a charming presentation. Their signature chocolate center makes them a visually appealing addition to any dessert spread.
If you're planning to gift these cookies, consider packaging them in decorative tins or boxes for a thoughtful touch.
For storage, keep your Peanut Butter Blossoms in an airtight container to maintain their freshness. If you want to enjoy them later, these cookies can also be frozen, allowing you to have a convenient make-ahead dessert ready whenever you need it.
Nutritional Information
Explore the nutritional profile of these tempting Peanut Butter Blossom cookies to make informed choices about your holiday treats. Each peanut butter blossom cookie contains approximately 121 calories, making it a reasonable indulgence during the festive season.
These cookies offer 2g of protein per serving, which can help keep you feeling satisfied. With 7g of fat per cookie, Peanut Butter Blossoms provide a flavorful and fulfilling treat. Additionally, they include 14g of carbohydrates for energy, making them a sweet pick-me-up during holiday gatherings.
The 1g of fiber in these cookies supports digestion, contributing to a well-rounded snacking experience. When enjoying these delightful peanut butter cookies, you can appreciate their balance of calories, protein, and other essential nutrients.
Privacy and Data Management
Learn how to manage your data processing preferences effectively by clicking below for control over information storage and access on your devices.
When baking the best peanut butter cookie dough balls, it's crucial to also consider your privacy and data management. By making informed choices, such as objecting to legitimate interest use and adjusting privacy settings for personalized ads, you can tailor your online experience while maintaining control over your data.
Transparency is key, and privacy policy details are readily available to help you understand how your information is processed. Rest assured that these options won't impact your browsing data but will enable tailored advertising and content based on your user profile.
Take charge of your data privacy today and make sure that you're empowered to decide how your information is stored and utilized for online interactions. Enjoy baking your delicious treats while also safeguarding your privacy preferences.
Frequently Asked Questions
Why Are My Peanut Butter Blossoms Dry?
You might find your peanut butter blossoms dry due to adding too much flour or using organic peanut butter. Maintain the right balance of wet to dry ingredients and avoid overbaking. Try adding a bit of vegetable oil or milk to moisten them up.
Why Did My Peanut Butter Blossoms Go Flat?
To prevent flat peanut butter blossoms, avoid overmixing the dough, using melted butter, not chilling it enough, incorrect oven settings or baking time, and opting for natural peanut butter. Follow these tips for perfect cookies every time!
What Is Baskin Robbins Peanut Butter Blossom?
Baskin Robbins Peanut Butter Blossom is a delightful ice cream flavor featuring creamy peanut butter ice cream swirled with chocolate fudge ribbon and peanut butter cookie dough pieces. It's a must-try for peanut butter and chocolate enthusiasts!
How Many Calories Are in a Peanut Butter Blossom?
An average peanut butter blossom cookie contains about 120 calories. To cut down on calories, opt for lower calorie ingredients or smaller servings. Remember to savor these treats in moderation as part of a balanced diet.
Conclusion
Now that you have all the tips and tricks for making the best peanut butter blossoms for the holidays, it's time to start baking! Get your ingredients ready, preheat the oven, and get ready to create some delicious treats that everyone will love.
Just imagine the warm, gooey peanut butter and sweet chocolate melting in your mouth – the perfect festive treat to enjoy with loved ones this holiday season.
Happy baking!
Sunny’s articles radiate enthusiasm, much like her sunny disposition. As our resident “Butter Geek”, she delves deep into the latest butter trends, ensuring our readers are always in the know. Beyond her writing, Sunny’s passion lies in exploring vegan butter alternatives and hosting butter-tasting soirées.
-
Recipes & Culinary Uses4 months ago
Make Homemade Butter from Milk at Home
-
Shopping Guides4 months ago
Where to Buy Raw Butter
-
Butter Tips and Tricks6 months ago
Churn Butter the Old Fashioned Way: 3 Traditional Steps
-
Recipes & Culinary Uses6 months ago
How Many Sticks of Butter Equals a Pound: A Handy Guide
-
Recipes & Culinary Uses4 months ago
Make Creamy Butter From Buttermilk
-
Butter Tips and Tricks6 months ago
How Much Heavy Cream to Make Butter: A Step-by-Step Guide
-
Butter Tips and Tricks7 months ago
How Many Sticks of Butter in 2/3 Cup: A Simple Guide
-
Recipes & Culinary Uses5 months ago
Make Your Own Homemade Spray Butter