Connect with us

Recipes & Culinary Uses

Stirring Almond Butter Like a Pro: 3 Easy Steps

Published

on

-up image of a hand holding a wooden spoon, gently swirling smooth almond butter in a glass jar

I’ve always been fascinated by the process of stirring almond butter, as a fan of all things nutty and delicious. It’s truly satisfying to see plain almonds turn into a creamy spread that is both versatile and nutritious.

In this article, I will guide you through the process, sharing tips and techniques to help you achieve the perfect almond butter consistency.

So grab your favorite almonds and get ready to embark on a culinary adventure that will elevate your nut butter game to new heights.

Key Takeaways

  • Stir almond butter only when it is completely cooled after roasting
  • Roasting almonds enhances the texture and spreadability of almond butter
  • Blending the roasted almonds produces a smoother and creamier consistency
  • Proper storage of almond butter is important to maintain its freshness and prevent issues.

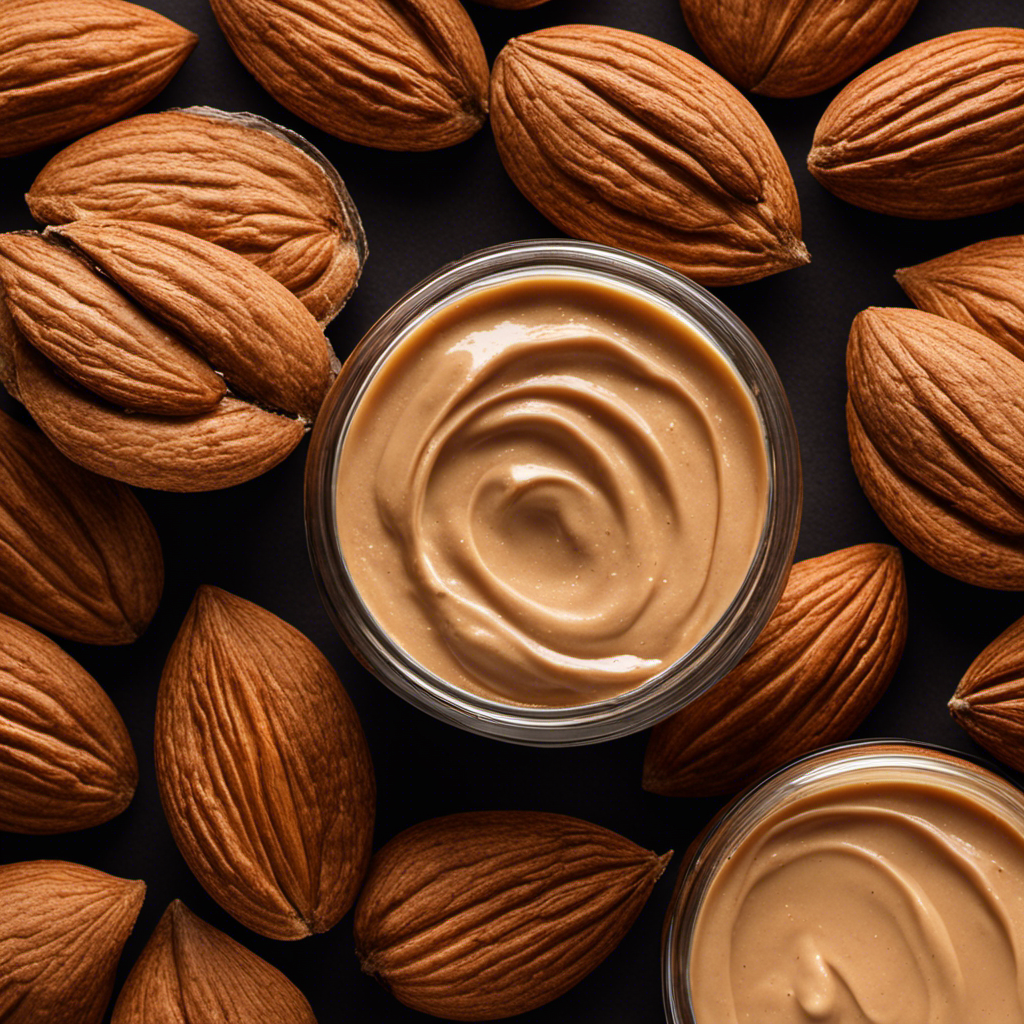
Choosing the Right Almonds

To make the best almond butter, you’ll want to choose the right almonds. When it comes to choosing almond varieties, there are a few factors to consider. Firstly, look for almonds that are labeled as ‘raw’ or ‘natural,’ as these will yield the best results. Avoid roasted or flavored almonds, as they may alter the taste of your almond butter. Additionally, consider the size of the almonds. Smaller almonds tend to blend more easily and create a smoother texture.

Advertisement

After selecting the almonds, proper storage is crucial to maintain their freshness and flavor. It is recommended to store almonds in an airtight container in a cool, dark place, such as the pantry or refrigerator. This helps to prevent the nuts from becoming rancid or losing their natural oils. Avoid storing them in humid environments, as moisture can cause them to spoil quickly.

Now that you have chosen the right almonds and stored them properly, it’s time to prepare them for stirring.

Preparing the Almonds for Stirring

Before you begin, make sure you have properly roasted and cooled the almonds.

Choosing the right almonds and using proper roasting techniques are essential for preparing the almonds for stirring almond butter.

When selecting almonds for making almond butter, it’s best to choose raw, unsalted almonds. This ensures that you have control over the flavor and sodium content of your almond butter.

Advertisement

Roasting the almonds adds depth and enhances their natural nutty flavor. To roast the almonds, preheat your oven to 350°F (175°C) and spread the almonds evenly on a baking sheet. Roast for about 10-15 minutes, or until they turn golden brown and emit a nutty aroma.

Allow the almonds to cool completely before proceeding with the almond butter stirring process. Properly roasted and cooled almonds will result in a rich and creamy almond butter.

The Importance of Roasting Almonds

Roasting almonds is a crucial step in enhancing the flavor of almond butter. When almonds are roasted, they release their natural oils, intensifying their nutty taste and creating a richer, more complex flavor profile.

Advertisement

Additionally, roasting almonds helps improve the texture and spreadability of the resulting almond butter, making it easier to spread on toast or incorporate into recipes.

Enhancing Flavor Through Roasting

When you roast almonds, their natural oils are released, intensifying the flavor of the almond butter. Roasting not only enhances the aroma of the almonds but also brings out their natural sweetness. Here are three reasons why roasting almonds is beneficial when making almond butter:

  • Enhanced flavor: Roasting almonds deepens their flavor profile, resulting in a rich and nutty taste that adds depth to your almond butter.

  • Nutritional benefits: Roasting almonds can increase the bioavailability of nutrients, making them easier for your body to absorb. It also helps break down phytic acid, which can hinder mineral absorption.

  • Improved texture: Roasting almonds can give your almond butter a smoother and creamier texture, making it easier to spread and enjoy on toast or as a dip for fruits and vegetables.

Improving Texture and Spreadability

To achieve a smoother and easier-to-spread texture, simply roast the almonds. Roasting not only enhances the flavor of the almond butter but also improves its consistency.

When almonds are roasted, the oils within them are released, making them easier to blend into a creamy butter. The heat from the roasting process helps break down the almonds’ cellular structure, resulting in a smoother texture.

This reduction in oil separation is particularly beneficial for those who prefer a more homogenous almond butter, as it prevents the oil from settling on top. By roasting the almonds before making almond butter, you can achieve a delicious spread with improved consistency and reduced oil separation.

Advertisement

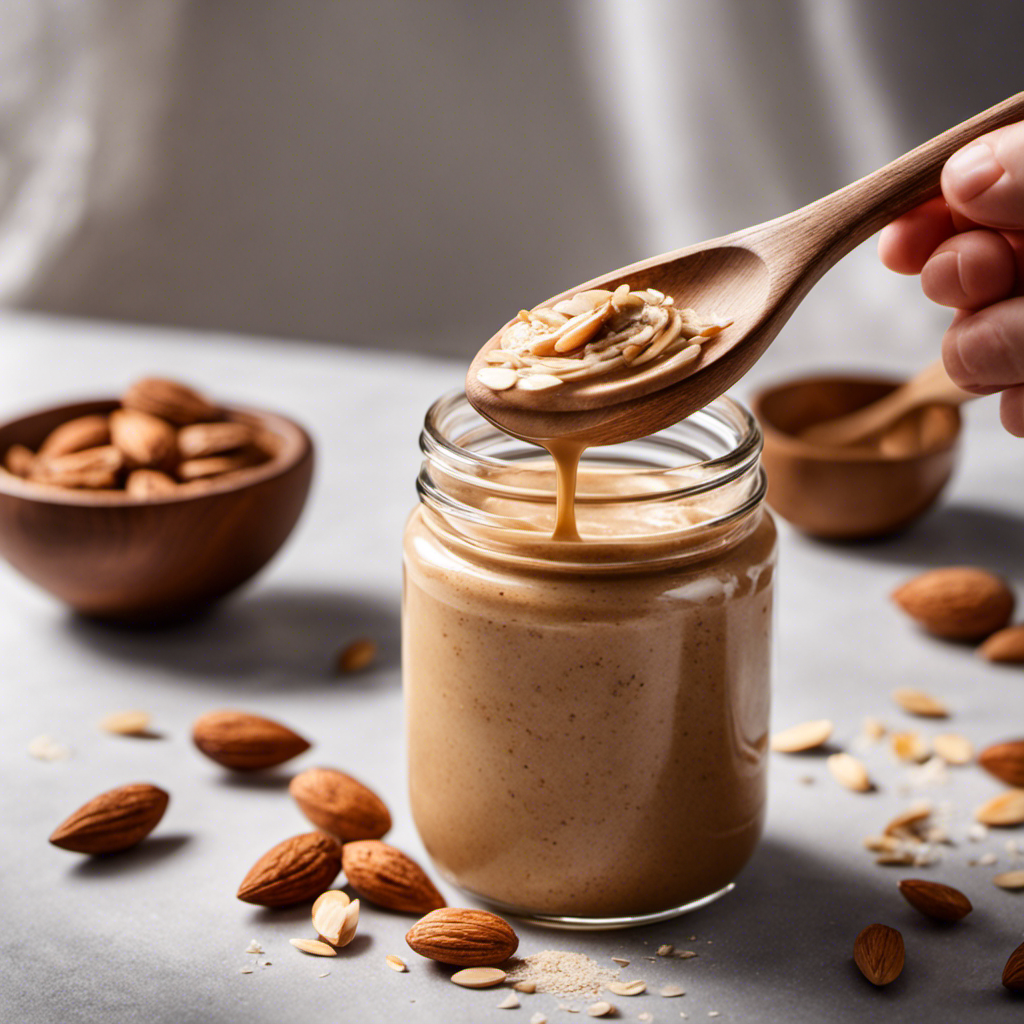
Techniques for Achieving Creamy Almond Butter

When it comes to making almond butter, two key factors to consider are blending versus grinding and using roasted versus raw almonds.

Blending and grinding both involve breaking down the almonds to create a smooth, creamy texture, but blending tends to be more efficient and results in a finer consistency.

As for roasted versus raw almonds, roasting enhances the flavor and brings out the natural oils, resulting in a richer and more flavorful almond butter. However, raw almonds can also be used for a more mild and natural taste.

Ultimately, the choice between blending versus grinding and roasted versus raw depends on personal preference and desired outcome.

Blending Vs. Grinding

If you want creamy almond butter, blending is the way to go. Blending techniques are superior to grinding methods when it comes to achieving a smooth and creamy texture. Here are some reasons why blending is the better option:

Advertisement
  • Blending allows for better control over the consistency of the almond butter. You can start with a coarse grind and gradually blend it to a smooth texture, according to your preference.

  • Blending helps to release the natural oils present in the almonds, resulting in a creamier and more flavorful butter.

  • Blending is more efficient and faster than grinding. With a powerful blender, you can achieve the desired consistency in a shorter amount of time.

Roasted Vs. Raw

In my quest to create the perfect almond butter, I couldn’t help but wonder about the benefits of using roasted almonds versus raw ones.

After some research, I discovered that roasted almonds offer a distinct advantage when it comes to flavor. The roasting process enhances the nutty and toasty flavors, resulting in a richer and more satisfying taste. Additionally, roasting almonds can make them easier to blend, as the heat loosens their natural oils.

However, it’s important to note that roasting almonds may slightly reduce their nutritional content compared to raw almonds. Raw almonds are packed with enzymes and nutrients that can be affected by the roasting process. Nevertheless, the difference is minimal, and the taste benefits of roasted almonds often outweigh these slight nutritional differences.

Now that we understand the roasted versus raw debate, let’s move on to the next section and explore ways to add flavor and variety to almond butter.

Adding Flavor and Variety to Almond Butter

To enhance the taste of your almond butter, try mixing in some honey or cinnamon. These delicious additions can take your plain almond butter to a whole new level of flavor.

Advertisement

Here are some other nut butter combinations that you can try to add even more variety to your almond butter:

  • Add a tablespoon of cocoa powder for a rich and chocolatey taste.
  • Mix in some chopped nuts, like walnuts or pecans, for added crunch.
  • For a tropical twist, blend in some shredded coconut or a squeeze of lime juice.

How to Store Almond Butter Properly

After experimenting with different flavors and ingredients to enhance the taste of almond butter, it’s important to know how to properly store it. Proper storage not only helps maintain its freshness but also prevents separation. Almond butter is prone to separation because it lacks the stabilizers found in commercial peanut butter. To prevent separation, store your almond butter in a cool, dry place, away from direct sunlight. It’s best to store it in a tightly sealed jar or container to minimize exposure to air and moisture. If you want to extend its shelf life, you can also refrigerate it, although this may result in a slightly firmer texture. By following these storage tips, you can enjoy your almond butter without worrying about separation.

To summarize, here are some key points for proper storage of almond butter:

Store in a cool, dry place Away from direct sunlight Tightly sealed jar or container Refrigerate for extended shelf life
Prevents separation Maintains freshness Minimizes exposure to air May result in firmer texture

Troubleshooting Common Almond Butter Issues

If you’re experiencing issues with separation or a gritty texture, try adding a small amount of oil and blending it well. Almond butter can sometimes present common problems, but with a few troubleshooting tips, you can easily solve them.

Here are some helpful suggestions:

  • If your almond butter is too dry or thick, try adding a teaspoon of oil, such as almond or coconut oil, to the mixture. This will help to improve the spreadability and creaminess of the butter.

  • If your almond butter is too runny or oily, try refrigerating it for a few hours. This will help it to firm up and become easier to use.

  • If your almond butter has a bitter taste, it may be due to the almonds being roasted for too long. Try using raw almonds instead or roasting them for a shorter period of time.

Using Almond Butter in Recipes

Now that we have covered troubleshooting common almond butter issues, let’s explore the exciting ways you can use almond butter in recipes. Almond butter is not just a spread for toast; it can be a versatile ingredient that adds richness and flavor to various dishes.

Advertisement

One popular way to enjoy almond butter is by using it as a dip. Its creamy texture and nutty taste make it an excellent choice for pairing with fruits, vegetables, or even pretzels. You can also incorporate almond butter into desserts, such as cookies, brownies, or even smoothies. Its natural sweetness and nutty undertones can enhance the overall flavor profile of your favorite treats.

To give you some inspiration, here’s a table showcasing three delicious recipes that incorporate almond butter:

Recipe Ingredients Instructions
Almond Butter Dip Almond butter, honey, vanilla extract 1. In a bowl, mix almond butter, honey, and vanilla extract until well combined. Serve as a dip.
Almond Butter Cookies Almond butter, eggs, sugar, flour 1. Preheat oven to 350°F. 2. In a bowl, mix almond butter, eggs, sugar, and flour. 3. Shape into cookies and bake for 10-12 minutes.
Almond Butter Smoothie Almond butter, banana, almond milk 1. Blend almond butter, banana, and almond milk until smooth. Enjoy as a refreshing smoothie.

Exploring Alternative Nut Butters

You can explore alternative nut butters, like cashew or peanut butter, for different flavors and textures in your recipes. Here are some creative uses and health benefits of these delicious alternatives:

  • Cashew Butter

  • Use it as a creamy base for sauces or dressings.

  • Spread it on toast with sliced bananas for a tasty and nutritious snack.

  • Cashew butter is rich in monounsaturated fats, which can help lower bad cholesterol levels.

  • Peanut Butter

  • Blend it with coconut milk and curry paste for a flavorful peanut sauce.

  • Add a dollop to smoothies for a protein boost.

  • Peanut butter is packed with protein, fiber, and healthy fats, making it a satisfying and nutritious choice.

  • Almond Butter

  • Mix it with honey and oats to create energy balls for a quick and healthy snack on the go.

  • Spread it on apple slices or celery for a crunchy and nutritious treat.

  • Almond butter is a great source of vitamin E and magnesium, which are important for overall health.

Exploring these alternative nut butters not only adds variety to your recipes but also provides unique health benefits. So, go ahead and get creative in the kitchen!

Frequently Asked Questions

Can I Use Any Type of Almonds to Make Almond Butter?

Yes, you can use different types of almonds to make almond butter. However, roasting the almonds before blending them can enhance the flavor and make the butter smoother.

Advertisement

How Long Should I Roast the Almonds for Before Stirring?

Roasting time for almonds before stirring? About 10-15 minutes at 350°F, or until they turn golden brown. But hey, if you’re not into roasting, try using toasted almonds as an alternative for that nutty flavor!

Can I Make Almond Butter Without Roasting the Almonds?

Yes, it is possible to make almond butter without roasting the almonds. However, the taste and texture may be different. Exploring alternative methods like soaking, blanching, or sprouting almonds can help achieve desired results.

Can I Add Other Ingredients to My Almond Butter to Enhance the Flavor?

Adding spices and sweeteners to almond butter can enhance its flavor. Incorporating different nuts can also create a unique taste. It’s an exciting journey of experimentation and discovery in the world of almond butter.

How Long Can Almond Butter Be Stored and How Should It Be Stored to Maintain Freshness?

To maintain freshness, store almond butter in an airtight container in a cool, dark place like the pantry. It can last for several months, but check for signs of spoilage like off smells or mold.

Conclusion

In conclusion, stirring almond butter is a simple and rewarding process. By choosing the right almonds and properly preparing them, you can achieve a creamy and delicious result.

Advertisement

Roasting the almonds is crucial for enhancing the flavor and achieving the desired texture. Adding different flavors and experimenting with alternative nut butters can bring excitement and variety to your almond butter creations.

Remember to store your almond butter properly to maintain its freshness. So why wait? Grab your almonds and get stirring for a nuttylicious treat!

Continue Reading
Advertisement

Recipes & Culinary Uses

How to Make Creamy Butter Garlic Pasta

Published

on

By

An image of a steaming plate of al dente pasta twirled with a rich, golden butter garlic sauce

I am going to reveal to you the secret to making the most delicious butter garlic pasta you have ever tried.

Get ready to indulge in a symphony of flavors as tender pasta gets enveloped in a rich, velvety butter garlic sauce.

This recipe is simple yet sophisticated, perfect for impressing guests or treating yourself to a truly decadent meal.

So grab your apron and let’s dive into the magic of homemade butter garlic pasta.

Trust me, you won’t be able to resist.

Advertisement

Key Takeaways

  • Choose long and thin pasta like spaghetti or linguine for the best texture.
  • Cook the pasta al dente to prevent mushiness and allow the sauce to cling to the strands.
  • Prepare a well-seasoned and fragrant garlic butter sauce with sautéed minced garlic and optional herbs and spices.
  • Combine the cooked pasta with the simmered sauce, ensuring every strand is coated, and garnish with Parmesan cheese and parsley.

Choosing the Right Pasta

I’ll pick out the perfect type of pasta for my butter garlic pasta. When it comes to choosing the right pasta, there are so many options to consider. Different types of pasta shapes can greatly impact the overall texture and taste of the dish.

For a butter garlic pasta, I’d opt for a long and thin pasta shape like spaghetti or linguine. These types of pasta allow the butter garlic sauce to cling onto the strands, ensuring each bite is full of flavor.

Additionally, the importance of cooking the pasta until it’s al dente can’t be understated. Al dente pasta has a slight bite to it, providing a satisfying texture and preventing it from becoming mushy when combined with the butter garlic sauce.

Preparing the Garlic Butter Sauce

To start, I’ll heat up the olive oil in a skillet and sauté the minced garlic until it becomes fragrant. This step is crucial as it will infuse the sauce with a rich, savory flavor.

Advertisement

Once the garlic is golden and aromatic, I’ll enhance the garlic butter sauce by adding a handful of fresh herbs, such as chopped parsley or basil. These herbs not only add a burst of freshness but also contribute to the overall visual appeal of the dish.

Next, I’ll pour in a splash of white wine to the garlic butter sauce. The wine adds a subtle tanginess and complexity that elevates the flavors. This step is optional, but it truly takes the sauce to another level.

With the garlic butter sauce now perfectly seasoned and fragrant, it’s time to move on to boiling the pasta.

Boiling the Pasta

Advertisement

Once the water reaches a rolling boil, I add a generous amount of salt before adding the pasta. Achieving the perfect al dente texture is essential for a delicious butter garlic pasta. I carefully follow the instructions on the pasta package, cooking it for the recommended time minus a minute or two. This ensures that the pasta is cooked, but still firm to the bite.

To add a twist to the traditional garlic butter pasta, I sometimes incorporate a variety of herbs and spices into the boiling water. A pinch of red pepper flakes adds a subtle kick, while a handful of fresh basil leaves brings a refreshing aroma. These additions elevate the flavors and take the dish to a whole new level.

Cooking the Garlic Butter Sauce

While simmering the sauce, I stir in a knob of butter until it melts and blends seamlessly with the other ingredients. This step is crucial for creating a rich and flavorful garlic butter sauce that will elevate your pasta dish to new heights.

Here are three cooking techniques and flavor variations that you can experiment with to enhance the taste of your butter garlic pasta:

  • Sautéing the garlic: Instead of simply adding minced garlic to the sauce, try sautéing it in the butter until fragrant and golden brown. This will bring out the natural sweetness and depth of flavor in the garlic.

  • Adding herbs and spices: To take your sauce to the next level, consider incorporating herbs like parsley or basil, and spices like red pepper flakes or black pepper. These additions will add complexity and a touch of heat to your butter garlic pasta.

  • Using flavored butter: If you want to get creative with your flavor profile, try using flavored butter. You can find a wide variety of options at the grocery store or make your own by mixing in herbs, spices, or even cheese. This will infuse your sauce with a unique and delicious taste.

Combining the Pasta and Sauce

Advertisement

After the sauce has simmered to perfection, I pour it over the cooked pasta and toss until every strand is coated in the creamy goodness.

The combination of the rich butter and aromatic garlic creates a delectable flavor that’s hard to resist.

To enhance the dish even further, I like to garnish it with a sprinkle of freshly grated Parmesan cheese and a handful of chopped parsley. This adds a touch of freshness and brings out the flavors of the sauce.

As for serving suggestions, this butter garlic pasta pairs well with a simple green salad or some crusty garlic bread on the side.

Advertisement

For variations and substitutions, you can experiment with different types of pasta, such as spaghetti or fettuccine, and add in ingredients like sautéed mushrooms or grilled chicken for added protein.

The possibilities are endless, but one thing is for sure: this butter garlic pasta is a crowd-pleaser that will leave everyone wanting more.

Frequently Asked Questions

How Can I Make This Recipe Vegan-Friendly?

To make this recipe vegan-friendly, you can use vegan substitutes for butter, such as plant-based margarine or coconut oil. Additionally, opt for dairy-free options like almond milk or cashew cream instead of regular milk or cream.

Can I Use Gluten-Free Pasta for This Recipe?

Sure, you can use gluten-free pasta for this recipe. Just remember to follow the cooking instructions for gluten-free pasta and consider alternatives like rice or quinoa pasta for a delicious, gluten-free version.

Can I Substitute Olive Oil for Butter in the Garlic Butter Sauce?

Substituting olive oil or vegan butter in the garlic butter sauce can alter the taste and texture of the dish. Olive oil adds a rich, fruity flavor, while vegan butter provides a creamy and buttery texture.

Advertisement

How Can I Make This Dish Spicier?

To make this dish spicier, there are several ways to add heat. You can incorporate hot chili flakes, spicy red pepper sauce, or even diced jalapeños. Another alternative to garlic could be using ginger for a flavorful twist.

Can I Add Vegetables or Protein to This Pasta Dish?

Adding vegetables and protein to this pasta dish is a great idea. It not only enhances the nutritional value but also adds texture and flavor. I recommend sautéing some bell peppers and adding cooked chicken for a delicious and balanced meal.

Conclusion

In conclusion, making butter garlic pasta is a simple yet delicious dish that can be enjoyed by everyone.

The rich and creamy garlic butter sauce perfectly coats the al dente pasta, creating a mouthwatering combination of flavors.

This recipe allows you to indulge in a culinary experience that’s both satisfying and comforting, like a warm embrace on a chilly evening.

Advertisement

So why not give it a try and treat yourself to a delightful meal?

Continue Reading

Recipes & Culinary Uses

Easy Steps to Make Butter from Raw Milk Using a Mixer

Published

on

By

An image showcasing the step-by-step process of transforming creamy raw milk into luscious butter using a mixer

As I immerse myself in the realm of culinary exploration, I came across a hidden treasure: crafting butter from raw milk using a mixer. With just a few basic ingredients and my reliable mixer, I unveiled the key to producing smooth, homemade butter that would impress any chef.

In this article, I will guide you through the precise steps, from gathering the ingredients to storing the final product. Get ready to churn and savor the rich rewards of your own creation.

Let’s butter up!

Key Takeaways

  • Choose a mixer with a powerful motor and sturdy construction
  • Strain and pasteurize the raw milk before churning
  • Use a high-speed setting on the mixer for faster butter formation
  • Store homemade butter in airtight containers to maintain flavor and freshness

Gathering the Ingredients and Equipment

I’m gathering the ingredients and equipment needed to make butter from raw milk in my mixer.

Advertisement

To ensure a successful butter-making process, it’s crucial to choose the right mixer. Look for a mixer with a powerful motor and a sturdy construction that can handle the thick consistency of the cream. A high-speed setting is also desirable to expedite the churning process.

When it comes to sourcing raw milk, it’s important to prioritize safety and quality. Look for local farms or dairies that follow strict hygiene practices and ensure the cows are healthy and well-cared for. Freshness is key, so opt for milk that has been recently produced and stored properly.

Preparing the Raw Milk for Churning

To start preparing the raw milk for churning, I’ll first need to strain out any impurities. This ensures that the milk is clean and safe for consumption.

Before churning, it’s important to pasteurize the raw milk to eliminate any harmful bacteria that may be present. Pasteurization involves heating the milk to a specific temperature and holding it there for a set period of time. This process helps to destroy any potential pathogens without significantly altering the taste or nutritional composition of the milk.

Once the raw milk is pasteurized, there are different methods of churning it into butter. One method involves using a mixer, which agitates the milk until the fat globules separate from the liquid, forming butter.

Advertisement

Churning the Raw Milk in the Mixer

Using a high-speed setting, I’ll let the mixer agitate the milk until the fat globules separate and butter forms. The speed of the mixer plays a crucial role in the churning process. A higher speed will help the fat globules to separate more quickly, resulting in butter formation. The churning time will vary depending on the mixer speed and the amount of milk being churned. It is important to monitor the process closely to avoid over-churning, which can lead to a grainy texture. To give you an idea of the correlation between mixer speed and churning time, here is a table that summarizes the approximate time required for butter formation at different speeds:

Mixer Speed Churning Time (minutes)
Low 20-30
Medium 15-20
High 10-15
Very High 5-10
Turbo 2-5

Separating the Butter From the Buttermilk

After the churning process, I strain the mixture through a fine-mesh sieve to separate the butter from the buttermilk. The creamy liquid slowly drips down, leaving behind the beautiful golden butter. It’s a delicate process, requiring patience and precision.

As I watch the buttermilk flow through the sieve, I can’t help but appreciate the benefits of using raw milk for making butter. The rich and complex flavors of raw milk add depth and character to the final product. It’s like tasting a piece of the farm, with its grassy undertones and hints of sweetness.

Advertisement

To further enhance the butter’s taste, there are various methods for flavoring homemade butter. From the simplicity of sprinkling salt to the creativity of adding herbs and spices, the possibilities are endless.

Storing and Using Your Homemade Butter

When storing my homemade butter, I prefer to use airtight containers to keep it fresh and prevent any unwanted odors from seeping in. It’s important to protect the butter’s flavor and texture, as well as extend its shelf life. Additionally, I like to experiment with different flavors to add a unique twist to my butter. Some creative ways to flavor homemade butter include incorporating herbs like rosemary or thyme, adding spices like cinnamon or garlic powder, or mixing in sweet ingredients like honey or maple syrup. This allows me to customize my butter based on my preferences and the dishes I plan to use it in. Speaking of which, homemade butter has a multitude of uses in cooking and baking. It can be spread on toast, melted over vegetables, used as a base for sauces, or incorporated into pastry dough for flakier results. The possibilities are endless!

Flavor Ingredients Recommended Uses
Herb-infused Rosemary, thyme Mashed potatoes, roasted vegetables
Spiced Cinnamon, garlic powder Toast, pancakes
Sweet Honey, maple syrup Baked goods, waffles

Frequently Asked Questions

How Long Does It Take for the Raw Milk to Turn Into Butter in the Mixer?

To speed up the process of turning raw milk into butter in a mixer, you can increase the speed and duration of mixing. It is not possible to make butter in a mixer without using raw milk.

Advertisement

Can I Use Pasteurized Milk Instead of Raw Milk for Making Butter in a Mixer?

Using raw milk instead of pasteurized milk for making butter in a mixer has several benefits. It enhances the flavor and nutritional value of the butter. To achieve the best consistency, ensure the milk is fresh and at room temperature before churning.

What Is the Ideal Temperature for the Raw Milk Before Churning It in the Mixer?

The ideal temperature for raw milk before churning it in the mixer is around 50-55°F. This ensures proper fat separation and reduces churning time. It’s crucial to maintain the correct temperature for the best results.

Can I Add Flavorings or Herbs to the Butter While Churning It in the Mixer?

Yes, you can add flavorings or herbs to the butter while churning it in the mixer. This is a great way to incorporate flavor into homemade butter and experiment with different tastes.

Can I Use a Hand Mixer Instead of a Stand Mixer to Churn the Raw Milk Into Butter?

Using a hand mixer for churning raw milk into butter has its pros and cons. It can be more convenient and easier to handle, but may take longer and require more effort compared to a stand mixer. Other methods without a mixer include shaking in a jar or using a food processor.

Conclusion

In conclusion, making butter from raw milk in a mixer is a simple and rewarding process. By following the steps outlined above and using the right ingredients and equipment, you can transform fresh raw milk into delicious homemade butter.

Advertisement

Remember, practice makes perfect, so don’t be discouraged if your first attempt isn’t perfect. With a little patience and perseverance, you’ll be churning out creamy butter in no time, and soon you’ll be able to spread it on toast and enjoy the fruits of your labor.

Continue Reading

Recipes & Culinary Uses

Make Rich Butter from Raw Milk

Published

on

By

An image capturing the process of making butter from raw milk

Hey! Have you ever thought about how to turn raw milk into homemade butter? Look no further, I’ve got the solution for you.

In this article, I’ll take you through the step-by-step process of turning that creamy goodness into delicious homemade butter.

We’ll explore the benefits of using raw milk, learn how to separate the cream, and even discover different flavors you can infuse into your butter.

So, grab your apron and let’s get churning!

Key Takeaways

  • Raw milk contains essential vitamins, minerals, and enzymes that are destroyed during pasteurization.
  • Separating the cream from raw milk can be done through gravity separation, centrifugal separation, or cold separation.
  • Churning the cream into butter can be done through hand churning, using a stand mixer with a whisk attachment, or using a food processor with a blade attachment.
  • Washing and storing the freshly made butter involves cleaning the butter container and preserving its freshness by wrapping it tightly in wax paper or using an airtight container.

Understanding the Benefits of Raw Milk

Advertisement

Raw milk has numerous health benefits that are not found in pasteurized milk. Understanding the nutritional value of raw milk is important for those seeking a natural and wholesome source of nutrients.

Contrary to popular belief, raw milk is not a dangerous product when handled and consumed properly. In fact, it contains essential vitamins, minerals, and enzymes that are destroyed during the pasteurization process.

Raw milk is rich in beneficial bacteria and probiotics, which can support a healthy gut microbiome and enhance digestion. Additionally, raw milk is a good source of bioavailable nutrients such as calcium, protein, and healthy fats.

Debunking myths about raw milk is crucial to prevent misinformation and promote informed choices regarding our food.

Preparing the Raw Milk for Butter Making

To prepare the milk for butter making, it’s important to first skim off the cream. This step is crucial as it allows us to separate the high-fat cream from the milk, which is necessary for obtaining a good quality butter.

Advertisement

Here are three separating techniques to help you achieve the best results:

  1. Gravity separation: After allowing the milk to stand undisturbed for a few hours, the cream naturally rises to the top, making it easy to skim off with a spoon or ladle.

  2. Centrifugal separation: Using a cream separator machine, the milk is spun at high speeds, causing the heavier cream to separate from the lighter milk. This method is efficient and yields a higher cream quality.

  3. Cold separation: By refrigerating the milk overnight, the cream becomes denser and easier to separate. Skimming off the cold cream results in a richer and creamier butter.

Separating the Cream From the Raw Milk

If you want to achieve the best results when separating the cream from the milk, try using gravity separation, centrifugal separation, or cold separation techniques.

Gravity separation involves allowing the milk to sit undisturbed in a container for a period of time, allowing the cream to rise to the top.

Advertisement

Centrifugal separation utilizes a machine that spins the milk at high speeds, forcing the cream to separate from the milk.

Cold separation involves chilling the milk to a low temperature, causing the cream to solidify and separate from the milk.

These techniques are beneficial because consuming raw dairy has numerous health benefits, such as improved digestion, increased nutrient absorption, and enhanced immune function.

Additionally, if you don’t have access to a churn, these separation methods provide alternatives for obtaining cream for making butter.

Churning the Cream Into Butter

Once the cream has separated from the milk, you can start churning it into delicious butter. Churning is the process of agitating the cream until it transforms into butter.

Advertisement

Here are three techniques to help you achieve the perfect consistency:

  1. Hand Churning: This traditional method involves using a small churn or jar and physically shaking or rocking it back and forth until the cream turns into butter.

  2. Stand Mixer: If you have a stand mixer with a whisk attachment, you can use it to churn the cream. Start at a low speed and gradually increase until the butter forms.

  3. Food Processor: Another option is to use a food processor with a blade attachment. Pulse the cream until it separates into butter and buttermilk.

Troubleshooting common butter making problems:

  • If the cream isn’t thickening, ensure it is at the right temperature (around 50-55°F) and give it more time to churn.
  • If the butter is too soft, refrigerate it for a while before churning again.
  • If the butter is too hard, let it soften at room temperature or add a small amount of buttermilk to adjust the consistency.

After churning the cream into butter, it’s time to move on to the next step of washing and storing the freshly made butter.

Washing and Storing the Freshly Made Butter

When it comes to washing and storing freshly made butter, there are a few key points to consider.

Advertisement

First, cleaning the butter container is essential to maintain the quality of the butter. I recommend using warm soapy water and a soft sponge to remove any residue before drying it thoroughly.

Second, preserving the butter’s freshness is crucial to prolong its shelf life. To do this, I suggest wrapping the butter tightly in wax paper or placing it in an airtight container to protect it from air and odors.

Lastly, it’s important to store butter at the proper temperature. The recommended storage temperature for butter is between 32-40°F (0-4°C), as this helps to maintain its texture and prevent spoilage.

Cleaning the Butter Container

Before cleaning the butter container, make sure to remove any leftover butter residue. Cleaning the butter container is essential to maintain its freshness and prevent any cross-contamination. Here are three effective cleaning techniques to ensure a clean and sanitized container:

  1. Soak in hot, soapy water: Fill the container with hot water and add a few drops of dish soap. Let it sit for a few minutes to loosen any residue, then scrub with a sponge or brush.

  2. Use vinegar solution: Mix equal parts white vinegar and water in the container. Let it sit for about 15 minutes to dissolve any stubborn residue. Scrub with a sponge or brush, then rinse thoroughly.

  3. Bleach solution: Mix 1 tablespoon of bleach with 1 gallon of water. Let the container soak in the solution for 10 minutes, then scrub and rinse well.

Preserving Butter’s Freshness

After cleaning the butter container, the next step is to ensure that the butter stays fresh and maintains its texture for as long as possible. This is important because nobody wants to end up with rancid butter. To preserve the butter’s freshness, there are a few key things you can do. Firstly, storing the butter in an airtight container or wrapping it tightly in wax paper will help prevent it from being exposed to air and developing off flavors. Secondly, keeping the butter refrigerated at a consistent temperature, ideally around 40°F (4°C), will slow down the process of it going rancid. Lastly, if you want to store butter for an extended period of time, freezing it is a great option as it can extend its shelf life for several months. By following these steps, you can enjoy fresh and flavorful butter for all your culinary needs.

Advertisement
Preserving Butter’s Freshness
Store butter in an airtight container or wrap tightly in wax paper.
Refrigerate butter at a consistent temperature of around 40°F (4°C).
Freeze butter for extended storage, which can extend its shelf life for several months.
Follow these steps to enjoy fresh and flavorful butter for all your culinary needs.

Recommended Storage Temperature

Storing butter in the refrigerator at a consistent temperature of around 40°F (4°C) helps to maintain its freshness and prevent it from going rancid. Here are three recommended storage methods and the ideal temperature range for butter:

  1. Wrap it properly: Use parchment paper or airtight containers to wrap the butter. This will protect it from absorbing odors and prevent it from drying out.

  2. Keep it away from light: Exposure to light can cause butter to spoil faster. Store it in a cool, dark place, like the refrigerator’s butter compartment or a covered butter dish.

  3. Avoid temperature fluctuations: Butter can easily absorb flavors and odors from other foods in the fridge. To maintain its quality, store it away from strong-smelling foods and make sure the temperature remains constant.

Following these recommended storage methods and keeping the butter at the ideal temperature range will help to preserve its freshness and taste for longer periods.

Using Leftover Buttermilk in Recipes

You can easily use leftover buttermilk in recipes to add a tangy flavor. Buttermilk is a versatile ingredient that can enhance the taste and texture of various baked goods. It’s a great substitute for regular milk in recipes because it adds a unique tanginess and richness. Here are some creative uses for leftover buttermilk in baking:

Row Buttermilk Recipe Result
1 Pancakes Fluffy and Light and
tender texture fluffy pancakes
2 Biscuits Tender and Flaky and
flaky texture buttery biscuits
3 Cakes Moist and Moist and
tender texture tender cakes
4 Fried chicken Crispy and Juicy and
flavorful coating flavorful chicken

Exploring Variations and Flavors in Homemade Butter

When it comes to homemade butter, there are endless possibilities for adding unique flavors and enhancing its taste.

One way to do this is through unique butter infusions, where you can mix in various ingredients like garlic, herbs, or even fruit zest to create a personalized flavor profile.

Advertisement

Another option is to enhance the taste of your homemade butter by incorporating herbs such as rosemary, thyme, or basil, which can add a delightful aroma and taste.

Lastly, experimenting with flavored salts like smoked sea salt or truffle salt can take your butter to a whole new level, adding a burst of flavor that will elevate any dish.

Unique Butter Infusions

To add unique flavors to your butter, try infusing it with herbs or spices. Butter infusion techniques offer a creative way to elevate the taste of your homemade butter. Here are three ideas to get you started:

  1. Garlic and Herb Butter: Melt your butter, then add minced garlic and chopped fresh herbs like rosemary, thyme, or parsley. Let the flavors infuse for a few hours before refrigerating.

  2. Citrus Zest Butter: Grate the zest of an orange, lemon, or lime into your softened butter. Mix well and let it sit in the fridge for a while to let the citrus flavors infuse.

  3. Spiced Butter: Add a pinch of your favorite spices, such as cinnamon, nutmeg, or cardamom, to your softened butter. Mix thoroughly and let it sit in the fridge to develop the flavors.

Enhancing Taste With Herbs

Adding herbs to your butter is a simple and effective way to enhance the taste of your culinary creations. Not only does it add a burst of flavor, but it also adds a touch of freshness and complexity to your dishes. Experimenting with different herbal blends can elevate your butter to a whole new level. Whether you prefer a savory blend of rosemary and thyme or a more exotic combination of cilantro and lime, the possibilities are endless. To help you get started, here is a table showcasing some popular herb and spice combinations that you can try in your butter:

Herb/Spice Flavor Profile Best Pairings
Rosemary Earthy, piney Potatoes, lamb
Basil Sweet, peppery Tomatoes, mozzarella
Dill Fresh, tangy Fish, cucumbers
Cinnamon Warm, sweet Apples, baked goods

Experimenting With Flavored Salts

After experimenting with herbs to enhance the taste of my homemade butter, I decided to take my flavor exploration to the next level by experimenting with flavored salts. Flavored salts can add a unique and exciting twist to butter, elevating its taste and making it even more delicious.

Advertisement

Here are three ways I incorporated different salts into my flavored butter recipes:

  1. Smoked Salt Butter: I mixed smoked salt into softened butter, creating a smoky and savory spread that pairs perfectly with grilled meats and vegetables.

  2. Truffle Salt Butter: By combining truffle salt with butter, I created a luxurious and indulgent spread that adds a hint of earthy and aromatic flavor to any dish.

  3. Citrus Salt Butter: I zested some fresh citrus fruits and mixed the zest with sea salt before incorporating it into butter. The result was a bright and tangy butter that adds a burst of freshness to baked goods and seafood.

Frequently Asked Questions

Can I Make Butter From Pasteurized Milk?

Yes, you can make butter from pasteurized milk. It’s a simple process of churning the cream until it separates into butter and buttermilk. Homemade butter can be healthier than store-bought due to its freshness and lack of additives.

How Long Does It Take to Separate the Cream From the Raw Milk?

Separating cream from raw milk depends on various factors, such as temperature and milk fat content. Once separated, the cream can be churned into butter. The churning process can take anywhere from 10 to 30 minutes.

Can I Use an Electric Mixer Instead of a Churn to Make Butter?

Yes, you can use an electric mixer to make butter. However, it’s important to note that the process may differ slightly between churning raw milk and pasteurized milk.

How Long Can I Store Freshly Made Butter?

Freshly made butter can be stored in the refrigerator for up to two weeks. However, its shelf life can be extended by freezing it. Proper storage is essential to maintain its freshness and quality.

Advertisement

What Other Uses Are There for Leftover Buttermilk Besides Using It in Recipes?

Leftover buttermilk can be used in pancakes, biscuits, or even as a marinade for fried chicken. As for alternative methods for making butter, you can also use heavy cream and a mixer.

Conclusion

In conclusion, making butter from raw milk is a delightful and rewarding process. The benefits of raw milk are numerous, as it contains valuable enzymes and nutrients that are lost during pasteurization.

By separating the cream from the raw milk and churning it vigorously, you can easily transform it into creamy and delicious homemade butter.

Don’t forget to wash and store the butter properly to ensure its freshness. And don’t discard the leftover buttermilk! It can be used in various recipes to add flavor and moisture.

So, grab some raw milk and start your butter-making adventure today!

Advertisement
Continue Reading

Trending