Connect with us

Recipes & Culinary Uses

Creating Exquisite Truffle Butter: 10 Easy Steps to Make It at Home

Published

on

An image showcasing the step-by-step process of making truffle butter: a close-up of a chef's hands gently shaving aromatic truffles onto a mound of softened butter, followed by a shot of the butter being mixed until smooth and creamy

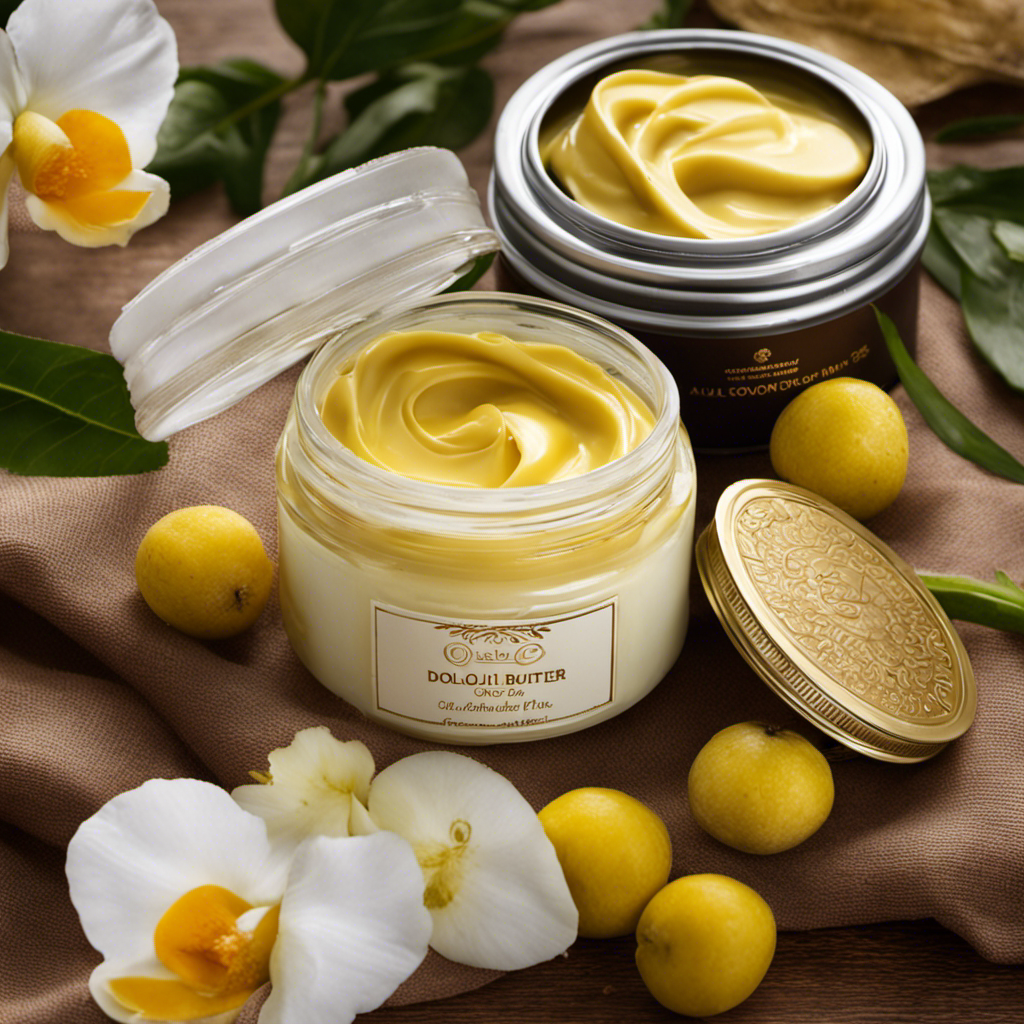
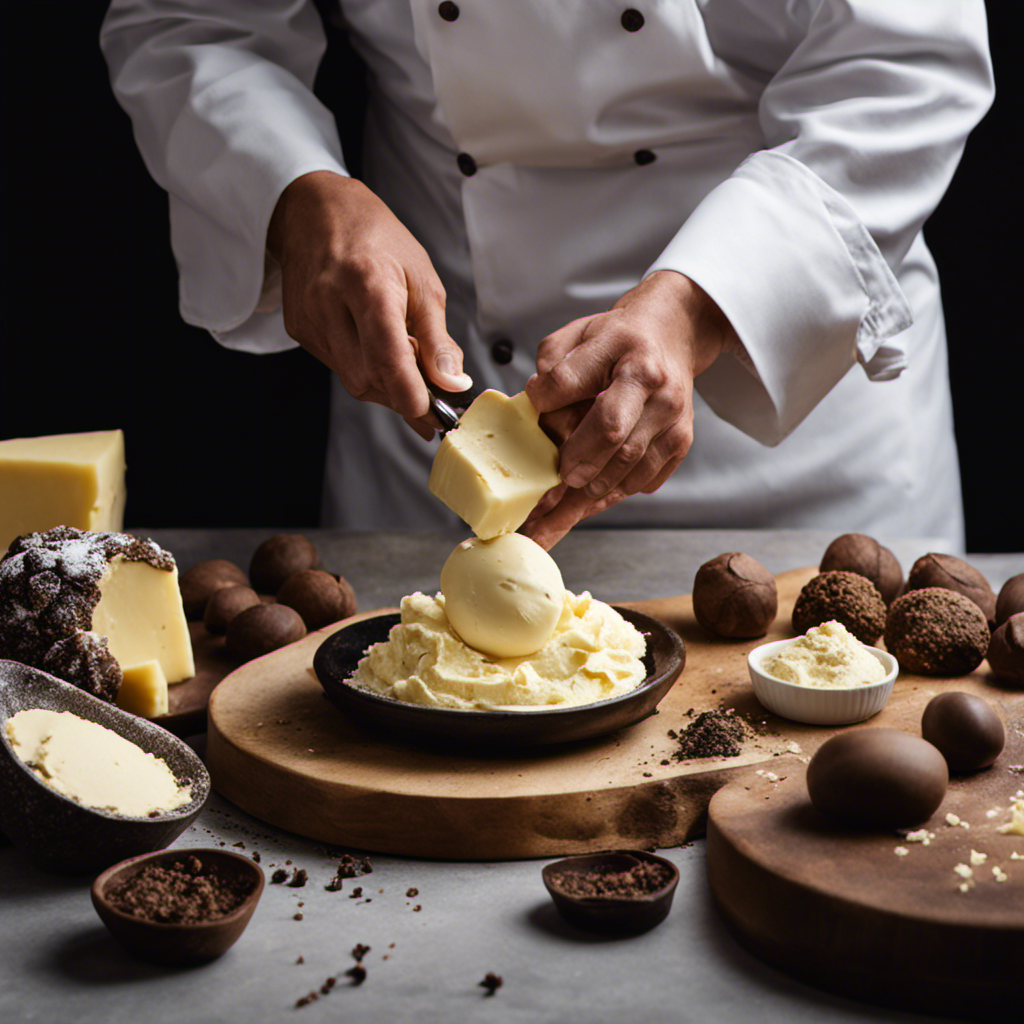
Picture the luxurious, earthly scent of truffles blended into smooth, rich butter. That’s the enchantment of homemade truffle butter.

As a passionate food enthusiast, I can’t help but be captivated by the luxurious flavors and versatility of this culinary delight. In this article, I’ll guide you through the process of making your own truffle butter, from selecting the perfect truffles to expertly combining them with essential ingredients.

Get ready to elevate your cooking and indulge in a touch of gourmet decadence.

Key Takeaways

  • Truffle butter is a luxurious spread made by combining butter with finely chopped truffles.
  • Truffle butter adds a touch of decadence and richness to dishes.
  • Truffle butter can be made using different types of truffles, each with its own unique flavor profile.
  • Truffle butter should be stored in an airtight container in the refrigerator to preserve freshness and aroma.

What Is Truffle Butter

If you’re wondering what truffle butter is, it’s a luxurious spread made by combining butter with finely chopped truffles. The result is a creamy and flavorful concoction that elevates any dish it touches. Truffle butter adds a touch of decadence and richness to everything from pasta and risotto to grilled meats and vegetables. It’s like a little black diamond that transforms ordinary meals into gourmet experiences.

Advertisement

While truffle butter is undeniably delicious, there are alternatives for those who can’t get their hands on real truffles. Some recipes use truffle oil or truffle salt to achieve a similar flavor profile. These alternatives may not have the same depth and complexity as truffle butter, but they can still add a hint of truffle essence to your dishes.

In terms of health benefits, truffle butter should be enjoyed in moderation due to its high fat content. However, truffles themselves are known to have antioxidant properties and are rich in vitamins and minerals. They may also have potential anti-inflammatory effects. So, while truffle butter may not be the healthiest option, the truffles it contains can provide some nutritional benefits.

Choosing the Right Truffles

To choose the right truffles, you’ll want to look for ones that have a strong aroma and a firm texture. When it comes to truffle butter, using high-quality truffles is essential to get the best flavor and benefits.

There are different types of truffles, each with its own unique characteristics. The most sought-after truffle is the black truffle, known for its earthy and intense flavor. It pairs well with savory dishes like pasta and risotto.

Another popular variety is the white truffle, which has a more delicate and aromatic taste. It is often shaved over dishes like eggs or mashed potatoes to enhance their flavor.

Advertisement

Whichever truffle you choose, incorporating it into butter will elevate your dishes with its rich and decadent essence. Truffle butter adds a luxurious touch to everything from steaks to popcorn, making it a versatile and indulgent ingredient.

Essential Ingredients for Truffle Butter

When choosing ingredients for truffle butter, it’s important to select high-quality butter and aromatic seasonings. Truffle butter is all about elevating your dishes with the rich and earthy flavor of truffles.

The first step is choosing the right truffles. There are various types available, such as black truffles, white truffles, and even summer truffles. Each has its own unique flavor profile, so it’s important to pick one that suits your taste. Personally, I prefer the intense and pungent aroma of black truffles.

Advertisement

However, if you can’t get your hands on fresh truffles, don’t worry. There are truffle butter alternatives available, such as truffle oil or truffle salt, that can still give your dishes that luxurious truffle taste.

Tools and Equipment Needed

When it comes to cooking, having the right tools and equipment can make all the difference. In my opinion, there are a few essential kitchen utensils that every home cook should have.

From a sharp chef’s knife to a versatile spatula, these tools will help you tackle any recipe with confidence.

And if you’re planning on making truffle butter, there are a few must-have cooking tools and equipment that will ensure you achieve the perfect balance of flavors and textures.

Essential Kitchen Utensils

You’ll need a few essential kitchen utensils for making truffle butter. Trust me, these tools will make your truffle butter-making experience so much easier and enjoyable.

Advertisement

Here are my top picks for must-have kitchen gadgets when it comes to making this decadent spread:

  • A high-quality truffle slicer: This tool allows you to slice the truffles into thin, delicate pieces, ensuring that their flavor is evenly distributed throughout the butter.

  • A sturdy wooden spoon: When mixing the truffle slices into the softened butter, a wooden spoon provides the perfect balance of control and durability.

  • A silicone spatula: Once the truffle butter is ready, a silicone spatula is ideal for scraping every last bit out of the bowl, ensuring that none of that precious truffle goodness goes to waste.

Now that you have the essential kitchen utensils covered, let’s move on to the must-have cooking tools for making truffle butter even more effortlessly.

Must-Have Cooking Tools

Now that we know which kitchen utensils are essential, let’s talk about how to maintain them and choose the right ones for your cooking needs.

When it comes to keeping your cooking tools in good condition, there are a few tips to remember. Firstly, always clean them thoroughly after each use, using warm soapy water and a soft sponge. Avoid using abrasive cleaners that can damage the surface.

Secondly, store them properly, whether it’s hanging them up on a rack or placing them in a drawer with dividers to prevent them from scratching against each other.

Advertisement

Now, when it comes to choosing the right kitchen utensils, consider the material, functionality, and durability. Stainless steel utensils are a great option as they are resistant to rust and stains. Look for utensils with ergonomic handles for a comfortable grip.

Ultimately, investing in high-quality cooking tools will make your kitchen experience much more enjoyable and efficient.

Equipment for Truffle Butter

To get the best flavor and texture, it’s important to use high-quality ingredients in your truffle butter recipe. Truffle butter is a luxurious and versatile condiment that can elevate any dish.

Here are some key equipment you’ll need to make the perfect truffle butter:

  • Double boiler: This is essential for melting the butter and infusing it with the rich truffle flavor without burning it.

  • Truffle slicer: A truffle slicer allows you to thinly slice the truffles, ensuring that their unique flavor is evenly distributed throughout the butter.

  • Airtight container: To preserve the freshness and aroma of the truffle butter, it’s important to store it in an airtight container in the refrigerator.

  • Whisk or spatula: These tools will help you mix the melted butter and truffle slices together, ensuring that the truffle flavor is fully infused.

Step-by-Step Instructions for Making Truffle Butter

First, gather all of your ingredients for making truffle butter. Choosing the right truffle varieties is crucial for achieving the best flavor. I personally love using black truffles for their robust and earthy taste, but white truffles can also add a delicate and aromatic touch. To enhance the flavor even further, I like to infuse my truffle butter with herbs like thyme and rosemary. The combination of the truffles and herbs creates a delightful harmony that elevates any dish. Here is a table showcasing the different truffle varieties and the herbs that pair well with them:

Advertisement
Truffle Variety Recommended Herbs
Black Truffle Thyme, Rosemary
White Truffle Sage, Parsley
Summer Truffle Basil, Chives
Burgundy Truffle Tarragon, Dill
Perigord Truffle Bay Leaf, Mint

Tips for Infusing Maximum Flavor

Infusing your truffle butter with fresh herbs and spices will enhance its flavor to the maximum. When it comes to maximizing aroma and enhancing taste, here are three tips that will take your truffle butter to the next level:

  • Experiment with different combinations of herbs and spices. From fragrant rosemary to earthy thyme, the possibilities are endless. Find the perfect blend that complements the rich, earthy flavor of truffles.

  • Don’t be afraid to get creative with your ingredients. Try adding a hint of citrus zest for a refreshing twist or a touch of heat with some crushed red pepper flakes. Let your taste buds guide you.

  • Allow enough time for the flavors to meld together. After infusing your truffle butter, give it some time to rest in the refrigerator. This will allow the herbs and spices to fully infuse the butter, resulting in a harmonious and flavorful blend.

Storing and Preserving Truffle Butter

When it comes to truffle butter, it’s important to know how to store and preserve it properly to maintain its incredible flavor. In my opinion, following these shelf life tips is essential to ensure that your truffle butter stays fresh and delicious for as long as possible.

And don’t forget, refrigeration is necessary to keep the truffle butter from spoiling, but if you want to extend its shelf life even further, freezing is always an option.

Shelf Life Tips

To extend the shelf life of truffle butter, it’s important to store it in an airtight container in the refrigerator. This helps maintain its freshness and prevent any cross-contamination with other foods in the fridge.

Here are some tips to make your truffle butter last longer:

Advertisement
  • Keep it sealed tight: Use a container with a secure lid or wrap it tightly in plastic wrap to prevent air from getting in and causing oxidation.

  • Store it in the coldest part of the fridge: The colder the temperature, the longer the truffle butter will stay fresh. Keep it in the back of the fridge where it’s usually the coolest.

  • Avoid exposing it to light: Light can degrade the quality of the truffle butter, so store it in a dark corner or opaque container.

Refrigeration Necessary

Storing it in the refrigerator is essential to maintain the freshness and quality of your truffle-infused spread. The cold temperature helps to preserve the delicate flavors and prevents the growth of harmful bacteria.

However, I understand that not everyone has access to a refrigerator or may be looking for refrigeration alternatives. In such cases, there are a few options to consider.

One alternative is to store your truffle butter in a cool, dark pantry or cellar. Make sure the area is well-ventilated and away from direct sunlight.

Another option is to freeze your truffle butter. Simply portion it into smaller containers or wrap it tightly in plastic wrap before placing it in the freezer. When you’re ready to use it, thaw it in the refrigerator overnight.

While these alternatives may not provide the same level of freshness as refrigeration, they can help prolong the shelf life of your truffle butter.

Advertisement

Freezing Truffle Butter

Another option for preserving the quality of your truffle-infused spread is freezing it. Freezing truffle butter is a great technique to extend its shelf life and ensure you always have a supply on hand.

Here are three reasons why freezing truffle butter is a smart choice:

  • Longevity: By freezing your truffle butter, you can make it last much longer than if you were to refrigerate it. This is especially useful if you have a large batch or want to stock up for future use.

  • Flavor preservation: Freezing truffle butter helps to lock in the rich, earthy flavors of the truffles. When thawed, the butter retains its aromatic qualities, making it perfect for adding that decadent touch to your dishes.

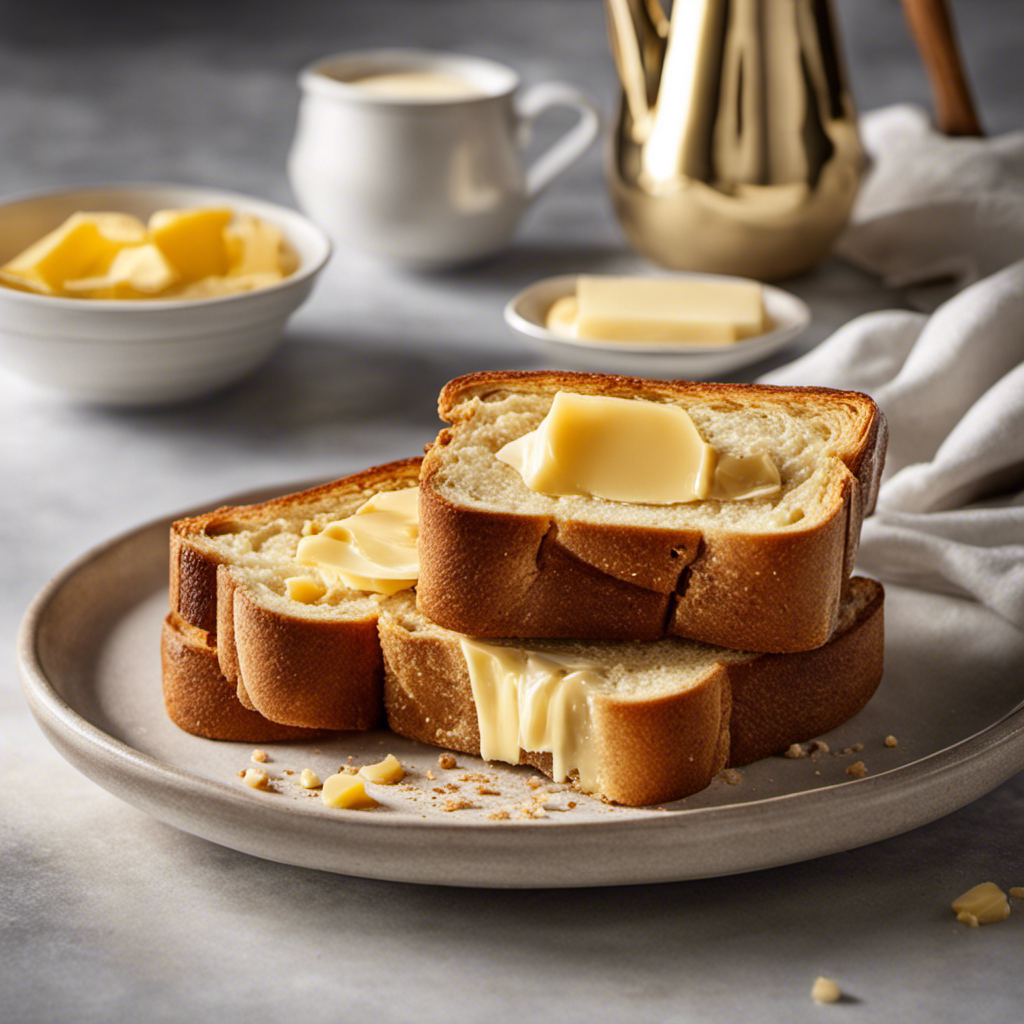
  • Versatility: Once frozen, truffle butter can be easily portioned and used in various recipes. From spreading on toast to melting over steak, the options are endless.

Creative Ways to Use Truffle Butter

You can get creative with truffle butter by using it as a spread on crostini or as a flavor enhancer for mashed potatoes. Truffle butter is one of the most flavorful spreads that can elevate any dish to gourmet levels. Its rich and earthy taste adds a touch of luxury to even the simplest of ingredients.

Another way to enjoy truffle butter is by drizzling it over popcorn. The combination of the buttery popcorn and the decadent truffle flavor creates a truly indulgent treat. The aromatic truffle essence permeates the popcorn, creating a unique and irresistible snack.

Whether you’re hosting a dinner party or simply looking to elevate your movie night, truffle butter is the perfect ingredient to take your culinary creations to the next level.

Advertisement

Variations and Flavor Combinations

If you’re feeling adventurous, try experimenting with different herbs and spices to create unique flavor combinations for your truffle-infused dishes. Truffle butter is already bursting with decadent flavors, but adding a touch of creativity can take your dishes to a whole new level.

Here are some flavor pairings that I absolutely love:

  • Truffle butter and garlic: The earthiness of truffle pairs perfectly with the pungent and aromatic flavors of garlic. It adds a bold and savory kick to any dish.

  • Truffle butter and thyme: The delicate and floral notes of thyme beautifully complement the richness of truffle butter. It adds a refreshing and herby twist to your dishes.

  • Truffle butter and Parmesan cheese: The nutty and salty flavors of Parmesan cheese enhance the earthy flavors of truffle butter. It creates a luxurious and indulgent taste.

Not only do these flavor pairings make your dishes more exciting, but truffle butter also offers numerous benefits. It adds depth and complexity to your recipes, elevating them from ordinary to extraordinary. The rich and intense flavors of truffle butter are sure to impress your taste buds and leave you craving for more.

Frequently Asked Questions About Making Truffle Butter

When it comes to truffle butter, it’s not just about the taste, but also about how long it can last in your pantry.

In this discussion, we’ll dive into the intriguing world of truffle butter shelf life and explore alternative recipes for those looking to switch things up.

Advertisement

Trust me, you don’t want to miss out on these valuable insights and mouthwatering ideas!

Truffle Butter Shelf Life

The shelf life of truffle butter is typically around three to six months. Truffle butter is a luxurious and flavorful ingredient that can elevate any dish. However, it’s important to store it properly to ensure its freshness and quality.

Here are some tips to extend the shelf life of your truffle butter:

  • Store it in the refrigerator: Truffle butter should always be kept in the refrigerator to maintain its freshness. The cold temperature helps to slow down the growth of bacteria and preserve its flavor.

  • Use an airtight container: Transfer your truffle butter into an airtight container to prevent air and moisture from entering. This will help to maintain its texture and prevent it from going rancid.

  • Keep it away from strong odors: Truffle butter easily absorbs odors from other foods, so it’s important to store it away from strong-smelling ingredients to preserve its unique aroma.

Alternative Truffle Butter Recipes?

After learning about the shelf life of truffle butter, let’s explore some alternative truffle butter recipes that will take your taste buds on a delightful adventure.

While traditional truffle butter is rich and luxurious, there are various flavors you can experiment with to create a unique twist. How about adding a hint of garlic to give it an extra kick? Or perhaps some fresh herbs like rosemary or thyme to elevate the flavors even more?

Advertisement

And for those who follow a vegan lifestyle, fear not! There are plenty of vegan truffle butter options available that use plant-based ingredients to achieve that same indulgent taste. From cashews to mushrooms, these alternatives offer a fantastic alternative for those who want to enjoy the truffle experience without compromising their dietary preferences.

Now, let’s move on to the next section and discuss troubleshooting and common mistakes to avoid when making truffle butter.

Troubleshooting and Common Mistakes to Avoid

To avoid common mistakes when making truffle butter, you should double-check the freshness of the truffles before using them. Trust me, I’ve made this mistake before and it can ruin the entire batch. But once you have fresh truffles in hand, there are a few other things you need to keep in mind to ensure a perfect consistency and flavor for your truffle butter. Here are some troubleshooting tips that have helped me along the way:

  • Truffle Butter Substitutes:

  • If you can’t find truffles, don’t worry! You can use truffle oil or truffle salt as a substitute. While it won’t be the same as using fresh truffles, it will still give your butter a hint of that earthy, luxurious flavor.

  • Another option is to use mushrooms. Porcini mushrooms have a similar flavor profile and can be a great alternative in a pinch.

  • If you’re looking for a vegan substitute, try using roasted garlic or shallots for a rich and savory flavor.

  • Troubleshooting Truffle Butter Consistency:

  • If your truffle butter turns out too soft, try adding a bit more butter and refrigerating it for a longer period of time.

  • On the other hand, if your truffle butter is too firm, let it sit at room temperature for a while to soften before using.

  • If you find that your truffle butter has a grainy texture, it could be due to uneven distribution of the truffle pieces. Make sure to finely chop the truffles and mix them well into the butter.

  • Storage Tips:

  • Store your truffle butter in an airtight container in the refrigerator. It should last for a few weeks, but make sure to check for any signs of spoilage before using.

  • You can also freeze your truffle butter for longer storage. Just wrap it tightly in plastic wrap or place it in an airtight container before freezing.

Frequently Asked Questions

Can I Use Any Type of Truffles to Make Truffle Butter?

Yes, you can use different types of truffles to make truffle butter. Each type has its own unique flavor profile, so experiment and find your favorite. Truffle butter adds a rich and decadent touch to any recipe.

How Long Does Truffle Butter Last in the Fridge?

Truffle butter, with its rich and decadent flavor, is a culinary delight. But how long does this heavenly creation last in the fridge? Well, when stored properly, truffle butter can last for up to two weeks.

Advertisement

Can I Freeze Truffle Butter?

Yes, you can freeze truffle butter to extend its shelf life. It’s a versatile ingredient that adds a luxurious and earthy flavor to dishes. Try it in pasta, risotto, or simply spread it on warm bread.

Can I Use Truffle Oil Instead of Fresh Truffles?

Yes, you can use truffle oil instead of fresh truffles to make truffle butter. While it won’t have the same intensity of flavor, it can still add a delicious truffle essence. There are plenty of recipes available for truffle butter alternatives using truffle oil.

Can I Substitute Regular Butter With Vegan Butter in the Recipe?

Yes, you can substitute regular butter with vegan butter in the recipe. Vegan butter alternatives work well and can give a similar creamy texture. It’s a great option for those who prefer plant-based alternatives.

Conclusion

In conclusion, making truffle butter is a culinary adventure that will elevate your dishes to new heights. The rich and earthy flavors of truffles combined with the creamy butter create a decadent and luxurious spread that is sure to impress.

By following the step-by-step instructions and experimenting with different variations and flavor combinations, you can unleash your creativity and discover unique ways to use truffle butter in your cooking.

Advertisement

So why settle for plain butter when you can indulge in the indulgent and tantalizing world of truffle butter? Don’t miss out on this gastronomic delight!

Continue Reading
Advertisement

Recipes & Culinary Uses

How to Make Creamy Butter Garlic Pasta

Published

on

By

An image of a steaming plate of al dente pasta twirled with a rich, golden butter garlic sauce

I am going to reveal to you the secret to making the most delicious butter garlic pasta you have ever tried.

Get ready to indulge in a symphony of flavors as tender pasta gets enveloped in a rich, velvety butter garlic sauce.

This recipe is simple yet sophisticated, perfect for impressing guests or treating yourself to a truly decadent meal.

So grab your apron and let’s dive into the magic of homemade butter garlic pasta.

Trust me, you won’t be able to resist.

Advertisement

Key Takeaways

  • Choose long and thin pasta like spaghetti or linguine for the best texture.
  • Cook the pasta al dente to prevent mushiness and allow the sauce to cling to the strands.
  • Prepare a well-seasoned and fragrant garlic butter sauce with sautéed minced garlic and optional herbs and spices.
  • Combine the cooked pasta with the simmered sauce, ensuring every strand is coated, and garnish with Parmesan cheese and parsley.

Choosing the Right Pasta

I’ll pick out the perfect type of pasta for my butter garlic pasta. When it comes to choosing the right pasta, there are so many options to consider. Different types of pasta shapes can greatly impact the overall texture and taste of the dish.

For a butter garlic pasta, I’d opt for a long and thin pasta shape like spaghetti or linguine. These types of pasta allow the butter garlic sauce to cling onto the strands, ensuring each bite is full of flavor.

Additionally, the importance of cooking the pasta until it’s al dente can’t be understated. Al dente pasta has a slight bite to it, providing a satisfying texture and preventing it from becoming mushy when combined with the butter garlic sauce.

Preparing the Garlic Butter Sauce

To start, I’ll heat up the olive oil in a skillet and sauté the minced garlic until it becomes fragrant. This step is crucial as it will infuse the sauce with a rich, savory flavor.

Advertisement

Once the garlic is golden and aromatic, I’ll enhance the garlic butter sauce by adding a handful of fresh herbs, such as chopped parsley or basil. These herbs not only add a burst of freshness but also contribute to the overall visual appeal of the dish.

Next, I’ll pour in a splash of white wine to the garlic butter sauce. The wine adds a subtle tanginess and complexity that elevates the flavors. This step is optional, but it truly takes the sauce to another level.

With the garlic butter sauce now perfectly seasoned and fragrant, it’s time to move on to boiling the pasta.

Boiling the Pasta

Advertisement

Once the water reaches a rolling boil, I add a generous amount of salt before adding the pasta. Achieving the perfect al dente texture is essential for a delicious butter garlic pasta. I carefully follow the instructions on the pasta package, cooking it for the recommended time minus a minute or two. This ensures that the pasta is cooked, but still firm to the bite.

To add a twist to the traditional garlic butter pasta, I sometimes incorporate a variety of herbs and spices into the boiling water. A pinch of red pepper flakes adds a subtle kick, while a handful of fresh basil leaves brings a refreshing aroma. These additions elevate the flavors and take the dish to a whole new level.

Cooking the Garlic Butter Sauce

While simmering the sauce, I stir in a knob of butter until it melts and blends seamlessly with the other ingredients. This step is crucial for creating a rich and flavorful garlic butter sauce that will elevate your pasta dish to new heights.

Here are three cooking techniques and flavor variations that you can experiment with to enhance the taste of your butter garlic pasta:

  • Sautéing the garlic: Instead of simply adding minced garlic to the sauce, try sautéing it in the butter until fragrant and golden brown. This will bring out the natural sweetness and depth of flavor in the garlic.

  • Adding herbs and spices: To take your sauce to the next level, consider incorporating herbs like parsley or basil, and spices like red pepper flakes or black pepper. These additions will add complexity and a touch of heat to your butter garlic pasta.

  • Using flavored butter: If you want to get creative with your flavor profile, try using flavored butter. You can find a wide variety of options at the grocery store or make your own by mixing in herbs, spices, or even cheese. This will infuse your sauce with a unique and delicious taste.

Combining the Pasta and Sauce

Advertisement

After the sauce has simmered to perfection, I pour it over the cooked pasta and toss until every strand is coated in the creamy goodness.

The combination of the rich butter and aromatic garlic creates a delectable flavor that’s hard to resist.

To enhance the dish even further, I like to garnish it with a sprinkle of freshly grated Parmesan cheese and a handful of chopped parsley. This adds a touch of freshness and brings out the flavors of the sauce.

As for serving suggestions, this butter garlic pasta pairs well with a simple green salad or some crusty garlic bread on the side.

Advertisement

For variations and substitutions, you can experiment with different types of pasta, such as spaghetti or fettuccine, and add in ingredients like sautéed mushrooms or grilled chicken for added protein.

The possibilities are endless, but one thing is for sure: this butter garlic pasta is a crowd-pleaser that will leave everyone wanting more.

Frequently Asked Questions

How Can I Make This Recipe Vegan-Friendly?

To make this recipe vegan-friendly, you can use vegan substitutes for butter, such as plant-based margarine or coconut oil. Additionally, opt for dairy-free options like almond milk or cashew cream instead of regular milk or cream.

Can I Use Gluten-Free Pasta for This Recipe?

Sure, you can use gluten-free pasta for this recipe. Just remember to follow the cooking instructions for gluten-free pasta and consider alternatives like rice or quinoa pasta for a delicious, gluten-free version.

Can I Substitute Olive Oil for Butter in the Garlic Butter Sauce?

Substituting olive oil or vegan butter in the garlic butter sauce can alter the taste and texture of the dish. Olive oil adds a rich, fruity flavor, while vegan butter provides a creamy and buttery texture.

Advertisement

How Can I Make This Dish Spicier?

To make this dish spicier, there are several ways to add heat. You can incorporate hot chili flakes, spicy red pepper sauce, or even diced jalapeños. Another alternative to garlic could be using ginger for a flavorful twist.

Can I Add Vegetables or Protein to This Pasta Dish?

Adding vegetables and protein to this pasta dish is a great idea. It not only enhances the nutritional value but also adds texture and flavor. I recommend sautéing some bell peppers and adding cooked chicken for a delicious and balanced meal.

Conclusion

In conclusion, making butter garlic pasta is a simple yet delicious dish that can be enjoyed by everyone.

The rich and creamy garlic butter sauce perfectly coats the al dente pasta, creating a mouthwatering combination of flavors.

This recipe allows you to indulge in a culinary experience that’s both satisfying and comforting, like a warm embrace on a chilly evening.

Advertisement

So why not give it a try and treat yourself to a delightful meal?

Continue Reading

Recipes & Culinary Uses

Easy Steps to Make Butter from Raw Milk Using a Mixer

Published

on

By

An image showcasing the step-by-step process of transforming creamy raw milk into luscious butter using a mixer

As I immerse myself in the realm of culinary exploration, I came across a hidden treasure: crafting butter from raw milk using a mixer. With just a few basic ingredients and my reliable mixer, I unveiled the key to producing smooth, homemade butter that would impress any chef.

In this article, I will guide you through the precise steps, from gathering the ingredients to storing the final product. Get ready to churn and savor the rich rewards of your own creation.

Let’s butter up!

Key Takeaways

  • Choose a mixer with a powerful motor and sturdy construction
  • Strain and pasteurize the raw milk before churning
  • Use a high-speed setting on the mixer for faster butter formation
  • Store homemade butter in airtight containers to maintain flavor and freshness

Gathering the Ingredients and Equipment

I’m gathering the ingredients and equipment needed to make butter from raw milk in my mixer.

Advertisement

To ensure a successful butter-making process, it’s crucial to choose the right mixer. Look for a mixer with a powerful motor and a sturdy construction that can handle the thick consistency of the cream. A high-speed setting is also desirable to expedite the churning process.

When it comes to sourcing raw milk, it’s important to prioritize safety and quality. Look for local farms or dairies that follow strict hygiene practices and ensure the cows are healthy and well-cared for. Freshness is key, so opt for milk that has been recently produced and stored properly.

Preparing the Raw Milk for Churning

To start preparing the raw milk for churning, I’ll first need to strain out any impurities. This ensures that the milk is clean and safe for consumption.

Before churning, it’s important to pasteurize the raw milk to eliminate any harmful bacteria that may be present. Pasteurization involves heating the milk to a specific temperature and holding it there for a set period of time. This process helps to destroy any potential pathogens without significantly altering the taste or nutritional composition of the milk.

Once the raw milk is pasteurized, there are different methods of churning it into butter. One method involves using a mixer, which agitates the milk until the fat globules separate from the liquid, forming butter.

Advertisement

Churning the Raw Milk in the Mixer

Using a high-speed setting, I’ll let the mixer agitate the milk until the fat globules separate and butter forms. The speed of the mixer plays a crucial role in the churning process. A higher speed will help the fat globules to separate more quickly, resulting in butter formation. The churning time will vary depending on the mixer speed and the amount of milk being churned. It is important to monitor the process closely to avoid over-churning, which can lead to a grainy texture. To give you an idea of the correlation between mixer speed and churning time, here is a table that summarizes the approximate time required for butter formation at different speeds:

Mixer Speed Churning Time (minutes)
Low 20-30
Medium 15-20
High 10-15
Very High 5-10
Turbo 2-5

Separating the Butter From the Buttermilk

After the churning process, I strain the mixture through a fine-mesh sieve to separate the butter from the buttermilk. The creamy liquid slowly drips down, leaving behind the beautiful golden butter. It’s a delicate process, requiring patience and precision.

As I watch the buttermilk flow through the sieve, I can’t help but appreciate the benefits of using raw milk for making butter. The rich and complex flavors of raw milk add depth and character to the final product. It’s like tasting a piece of the farm, with its grassy undertones and hints of sweetness.

Advertisement

To further enhance the butter’s taste, there are various methods for flavoring homemade butter. From the simplicity of sprinkling salt to the creativity of adding herbs and spices, the possibilities are endless.

Storing and Using Your Homemade Butter

When storing my homemade butter, I prefer to use airtight containers to keep it fresh and prevent any unwanted odors from seeping in. It’s important to protect the butter’s flavor and texture, as well as extend its shelf life. Additionally, I like to experiment with different flavors to add a unique twist to my butter. Some creative ways to flavor homemade butter include incorporating herbs like rosemary or thyme, adding spices like cinnamon or garlic powder, or mixing in sweet ingredients like honey or maple syrup. This allows me to customize my butter based on my preferences and the dishes I plan to use it in. Speaking of which, homemade butter has a multitude of uses in cooking and baking. It can be spread on toast, melted over vegetables, used as a base for sauces, or incorporated into pastry dough for flakier results. The possibilities are endless!

Flavor Ingredients Recommended Uses
Herb-infused Rosemary, thyme Mashed potatoes, roasted vegetables
Spiced Cinnamon, garlic powder Toast, pancakes
Sweet Honey, maple syrup Baked goods, waffles

Frequently Asked Questions

How Long Does It Take for the Raw Milk to Turn Into Butter in the Mixer?

To speed up the process of turning raw milk into butter in a mixer, you can increase the speed and duration of mixing. It is not possible to make butter in a mixer without using raw milk.

Advertisement

Can I Use Pasteurized Milk Instead of Raw Milk for Making Butter in a Mixer?

Using raw milk instead of pasteurized milk for making butter in a mixer has several benefits. It enhances the flavor and nutritional value of the butter. To achieve the best consistency, ensure the milk is fresh and at room temperature before churning.

What Is the Ideal Temperature for the Raw Milk Before Churning It in the Mixer?

The ideal temperature for raw milk before churning it in the mixer is around 50-55°F. This ensures proper fat separation and reduces churning time. It’s crucial to maintain the correct temperature for the best results.

Can I Add Flavorings or Herbs to the Butter While Churning It in the Mixer?

Yes, you can add flavorings or herbs to the butter while churning it in the mixer. This is a great way to incorporate flavor into homemade butter and experiment with different tastes.

Can I Use a Hand Mixer Instead of a Stand Mixer to Churn the Raw Milk Into Butter?

Using a hand mixer for churning raw milk into butter has its pros and cons. It can be more convenient and easier to handle, but may take longer and require more effort compared to a stand mixer. Other methods without a mixer include shaking in a jar or using a food processor.

Conclusion

In conclusion, making butter from raw milk in a mixer is a simple and rewarding process. By following the steps outlined above and using the right ingredients and equipment, you can transform fresh raw milk into delicious homemade butter.

Advertisement

Remember, practice makes perfect, so don’t be discouraged if your first attempt isn’t perfect. With a little patience and perseverance, you’ll be churning out creamy butter in no time, and soon you’ll be able to spread it on toast and enjoy the fruits of your labor.

Continue Reading

Recipes & Culinary Uses

Make Rich Butter from Raw Milk

Published

on

By

An image capturing the process of making butter from raw milk

Hey! Have you ever thought about how to turn raw milk into homemade butter? Look no further, I’ve got the solution for you.

In this article, I’ll take you through the step-by-step process of turning that creamy goodness into delicious homemade butter.

We’ll explore the benefits of using raw milk, learn how to separate the cream, and even discover different flavors you can infuse into your butter.

So, grab your apron and let’s get churning!

Key Takeaways

  • Raw milk contains essential vitamins, minerals, and enzymes that are destroyed during pasteurization.
  • Separating the cream from raw milk can be done through gravity separation, centrifugal separation, or cold separation.
  • Churning the cream into butter can be done through hand churning, using a stand mixer with a whisk attachment, or using a food processor with a blade attachment.
  • Washing and storing the freshly made butter involves cleaning the butter container and preserving its freshness by wrapping it tightly in wax paper or using an airtight container.

Understanding the Benefits of Raw Milk

Advertisement

Raw milk has numerous health benefits that are not found in pasteurized milk. Understanding the nutritional value of raw milk is important for those seeking a natural and wholesome source of nutrients.

Contrary to popular belief, raw milk is not a dangerous product when handled and consumed properly. In fact, it contains essential vitamins, minerals, and enzymes that are destroyed during the pasteurization process.

Raw milk is rich in beneficial bacteria and probiotics, which can support a healthy gut microbiome and enhance digestion. Additionally, raw milk is a good source of bioavailable nutrients such as calcium, protein, and healthy fats.

Debunking myths about raw milk is crucial to prevent misinformation and promote informed choices regarding our food.

Preparing the Raw Milk for Butter Making

To prepare the milk for butter making, it’s important to first skim off the cream. This step is crucial as it allows us to separate the high-fat cream from the milk, which is necessary for obtaining a good quality butter.

Advertisement

Here are three separating techniques to help you achieve the best results:

  1. Gravity separation: After allowing the milk to stand undisturbed for a few hours, the cream naturally rises to the top, making it easy to skim off with a spoon or ladle.

  2. Centrifugal separation: Using a cream separator machine, the milk is spun at high speeds, causing the heavier cream to separate from the lighter milk. This method is efficient and yields a higher cream quality.

  3. Cold separation: By refrigerating the milk overnight, the cream becomes denser and easier to separate. Skimming off the cold cream results in a richer and creamier butter.

Separating the Cream From the Raw Milk

If you want to achieve the best results when separating the cream from the milk, try using gravity separation, centrifugal separation, or cold separation techniques.

Gravity separation involves allowing the milk to sit undisturbed in a container for a period of time, allowing the cream to rise to the top.

Advertisement

Centrifugal separation utilizes a machine that spins the milk at high speeds, forcing the cream to separate from the milk.

Cold separation involves chilling the milk to a low temperature, causing the cream to solidify and separate from the milk.

These techniques are beneficial because consuming raw dairy has numerous health benefits, such as improved digestion, increased nutrient absorption, and enhanced immune function.

Additionally, if you don’t have access to a churn, these separation methods provide alternatives for obtaining cream for making butter.

Churning the Cream Into Butter

Once the cream has separated from the milk, you can start churning it into delicious butter. Churning is the process of agitating the cream until it transforms into butter.

Advertisement

Here are three techniques to help you achieve the perfect consistency:

  1. Hand Churning: This traditional method involves using a small churn or jar and physically shaking or rocking it back and forth until the cream turns into butter.

  2. Stand Mixer: If you have a stand mixer with a whisk attachment, you can use it to churn the cream. Start at a low speed and gradually increase until the butter forms.

  3. Food Processor: Another option is to use a food processor with a blade attachment. Pulse the cream until it separates into butter and buttermilk.

Troubleshooting common butter making problems:

  • If the cream isn’t thickening, ensure it is at the right temperature (around 50-55°F) and give it more time to churn.
  • If the butter is too soft, refrigerate it for a while before churning again.
  • If the butter is too hard, let it soften at room temperature or add a small amount of buttermilk to adjust the consistency.

After churning the cream into butter, it’s time to move on to the next step of washing and storing the freshly made butter.

Washing and Storing the Freshly Made Butter

When it comes to washing and storing freshly made butter, there are a few key points to consider.

Advertisement

First, cleaning the butter container is essential to maintain the quality of the butter. I recommend using warm soapy water and a soft sponge to remove any residue before drying it thoroughly.

Second, preserving the butter’s freshness is crucial to prolong its shelf life. To do this, I suggest wrapping the butter tightly in wax paper or placing it in an airtight container to protect it from air and odors.

Lastly, it’s important to store butter at the proper temperature. The recommended storage temperature for butter is between 32-40°F (0-4°C), as this helps to maintain its texture and prevent spoilage.

Cleaning the Butter Container

Before cleaning the butter container, make sure to remove any leftover butter residue. Cleaning the butter container is essential to maintain its freshness and prevent any cross-contamination. Here are three effective cleaning techniques to ensure a clean and sanitized container:

  1. Soak in hot, soapy water: Fill the container with hot water and add a few drops of dish soap. Let it sit for a few minutes to loosen any residue, then scrub with a sponge or brush.

  2. Use vinegar solution: Mix equal parts white vinegar and water in the container. Let it sit for about 15 minutes to dissolve any stubborn residue. Scrub with a sponge or brush, then rinse thoroughly.

  3. Bleach solution: Mix 1 tablespoon of bleach with 1 gallon of water. Let the container soak in the solution for 10 minutes, then scrub and rinse well.

Preserving Butter’s Freshness

After cleaning the butter container, the next step is to ensure that the butter stays fresh and maintains its texture for as long as possible. This is important because nobody wants to end up with rancid butter. To preserve the butter’s freshness, there are a few key things you can do. Firstly, storing the butter in an airtight container or wrapping it tightly in wax paper will help prevent it from being exposed to air and developing off flavors. Secondly, keeping the butter refrigerated at a consistent temperature, ideally around 40°F (4°C), will slow down the process of it going rancid. Lastly, if you want to store butter for an extended period of time, freezing it is a great option as it can extend its shelf life for several months. By following these steps, you can enjoy fresh and flavorful butter for all your culinary needs.

Advertisement
Preserving Butter’s Freshness
Store butter in an airtight container or wrap tightly in wax paper.
Refrigerate butter at a consistent temperature of around 40°F (4°C).
Freeze butter for extended storage, which can extend its shelf life for several months.
Follow these steps to enjoy fresh and flavorful butter for all your culinary needs.

Recommended Storage Temperature

Storing butter in the refrigerator at a consistent temperature of around 40°F (4°C) helps to maintain its freshness and prevent it from going rancid. Here are three recommended storage methods and the ideal temperature range for butter:

  1. Wrap it properly: Use parchment paper or airtight containers to wrap the butter. This will protect it from absorbing odors and prevent it from drying out.

  2. Keep it away from light: Exposure to light can cause butter to spoil faster. Store it in a cool, dark place, like the refrigerator’s butter compartment or a covered butter dish.

  3. Avoid temperature fluctuations: Butter can easily absorb flavors and odors from other foods in the fridge. To maintain its quality, store it away from strong-smelling foods and make sure the temperature remains constant.

Following these recommended storage methods and keeping the butter at the ideal temperature range will help to preserve its freshness and taste for longer periods.

Using Leftover Buttermilk in Recipes

You can easily use leftover buttermilk in recipes to add a tangy flavor. Buttermilk is a versatile ingredient that can enhance the taste and texture of various baked goods. It’s a great substitute for regular milk in recipes because it adds a unique tanginess and richness. Here are some creative uses for leftover buttermilk in baking:

Row Buttermilk Recipe Result
1 Pancakes Fluffy and Light and
tender texture fluffy pancakes
2 Biscuits Tender and Flaky and
flaky texture buttery biscuits
3 Cakes Moist and Moist and
tender texture tender cakes
4 Fried chicken Crispy and Juicy and
flavorful coating flavorful chicken

Exploring Variations and Flavors in Homemade Butter

When it comes to homemade butter, there are endless possibilities for adding unique flavors and enhancing its taste.

One way to do this is through unique butter infusions, where you can mix in various ingredients like garlic, herbs, or even fruit zest to create a personalized flavor profile.

Advertisement

Another option is to enhance the taste of your homemade butter by incorporating herbs such as rosemary, thyme, or basil, which can add a delightful aroma and taste.

Lastly, experimenting with flavored salts like smoked sea salt or truffle salt can take your butter to a whole new level, adding a burst of flavor that will elevate any dish.

Unique Butter Infusions

To add unique flavors to your butter, try infusing it with herbs or spices. Butter infusion techniques offer a creative way to elevate the taste of your homemade butter. Here are three ideas to get you started:

  1. Garlic and Herb Butter: Melt your butter, then add minced garlic and chopped fresh herbs like rosemary, thyme, or parsley. Let the flavors infuse for a few hours before refrigerating.

  2. Citrus Zest Butter: Grate the zest of an orange, lemon, or lime into your softened butter. Mix well and let it sit in the fridge for a while to let the citrus flavors infuse.

  3. Spiced Butter: Add a pinch of your favorite spices, such as cinnamon, nutmeg, or cardamom, to your softened butter. Mix thoroughly and let it sit in the fridge to develop the flavors.

Enhancing Taste With Herbs

Adding herbs to your butter is a simple and effective way to enhance the taste of your culinary creations. Not only does it add a burst of flavor, but it also adds a touch of freshness and complexity to your dishes. Experimenting with different herbal blends can elevate your butter to a whole new level. Whether you prefer a savory blend of rosemary and thyme or a more exotic combination of cilantro and lime, the possibilities are endless. To help you get started, here is a table showcasing some popular herb and spice combinations that you can try in your butter:

Herb/Spice Flavor Profile Best Pairings
Rosemary Earthy, piney Potatoes, lamb
Basil Sweet, peppery Tomatoes, mozzarella
Dill Fresh, tangy Fish, cucumbers
Cinnamon Warm, sweet Apples, baked goods

Experimenting With Flavored Salts

After experimenting with herbs to enhance the taste of my homemade butter, I decided to take my flavor exploration to the next level by experimenting with flavored salts. Flavored salts can add a unique and exciting twist to butter, elevating its taste and making it even more delicious.

Advertisement

Here are three ways I incorporated different salts into my flavored butter recipes:

  1. Smoked Salt Butter: I mixed smoked salt into softened butter, creating a smoky and savory spread that pairs perfectly with grilled meats and vegetables.

  2. Truffle Salt Butter: By combining truffle salt with butter, I created a luxurious and indulgent spread that adds a hint of earthy and aromatic flavor to any dish.

  3. Citrus Salt Butter: I zested some fresh citrus fruits and mixed the zest with sea salt before incorporating it into butter. The result was a bright and tangy butter that adds a burst of freshness to baked goods and seafood.

Frequently Asked Questions

Can I Make Butter From Pasteurized Milk?

Yes, you can make butter from pasteurized milk. It’s a simple process of churning the cream until it separates into butter and buttermilk. Homemade butter can be healthier than store-bought due to its freshness and lack of additives.

How Long Does It Take to Separate the Cream From the Raw Milk?

Separating cream from raw milk depends on various factors, such as temperature and milk fat content. Once separated, the cream can be churned into butter. The churning process can take anywhere from 10 to 30 minutes.

Can I Use an Electric Mixer Instead of a Churn to Make Butter?

Yes, you can use an electric mixer to make butter. However, it’s important to note that the process may differ slightly between churning raw milk and pasteurized milk.

How Long Can I Store Freshly Made Butter?

Freshly made butter can be stored in the refrigerator for up to two weeks. However, its shelf life can be extended by freezing it. Proper storage is essential to maintain its freshness and quality.

Advertisement

What Other Uses Are There for Leftover Buttermilk Besides Using It in Recipes?

Leftover buttermilk can be used in pancakes, biscuits, or even as a marinade for fried chicken. As for alternative methods for making butter, you can also use heavy cream and a mixer.

Conclusion

In conclusion, making butter from raw milk is a delightful and rewarding process. The benefits of raw milk are numerous, as it contains valuable enzymes and nutrients that are lost during pasteurization.

By separating the cream from the raw milk and churning it vigorously, you can easily transform it into creamy and delicious homemade butter.

Don’t forget to wash and store the butter properly to ensure its freshness. And don’t discard the leftover buttermilk! It can be used in various recipes to add flavor and moisture.

So, grab some raw milk and start your butter-making adventure today!

Advertisement
Continue Reading

Trending