Connect with us

Recipes & Culinary Uses

Make Butter with Pampered Chef Whipped Cream Maker

Published

on

An image showcasing the step-by-step process of making butter with the Pampered Chef Whipped Cream Maker: pouring fresh cream into the container, pumping the handle rhythmically, and transforming the cream into beautifully churned butter

I am amazed at how simple it is to prepare smooth, homemade butter using the Pampered Chef Whipped Cream Maker!

In just a few simple steps, you’ll have delicious, fresh butter that will elevate your cooking and baking to a whole new level.

With the right ingredients and this handy kitchen tool, you’ll be able to whip up butter in no time.

Get ready to impress your friends and family with this homemade delight!

Key Takeaways

  • Use cream with high fat content for rich and creamy butter.
  • Properly assemble and maintain the whipped cream maker for optimal performance.
  • Accurately measure the cream and use the optimal mixing technique for light and fluffy whipped cream.
  • Drain, wash, and store the butter properly to achieve a smooth texture and maintain freshness.

Choosing the Right Ingredients

Advertisement

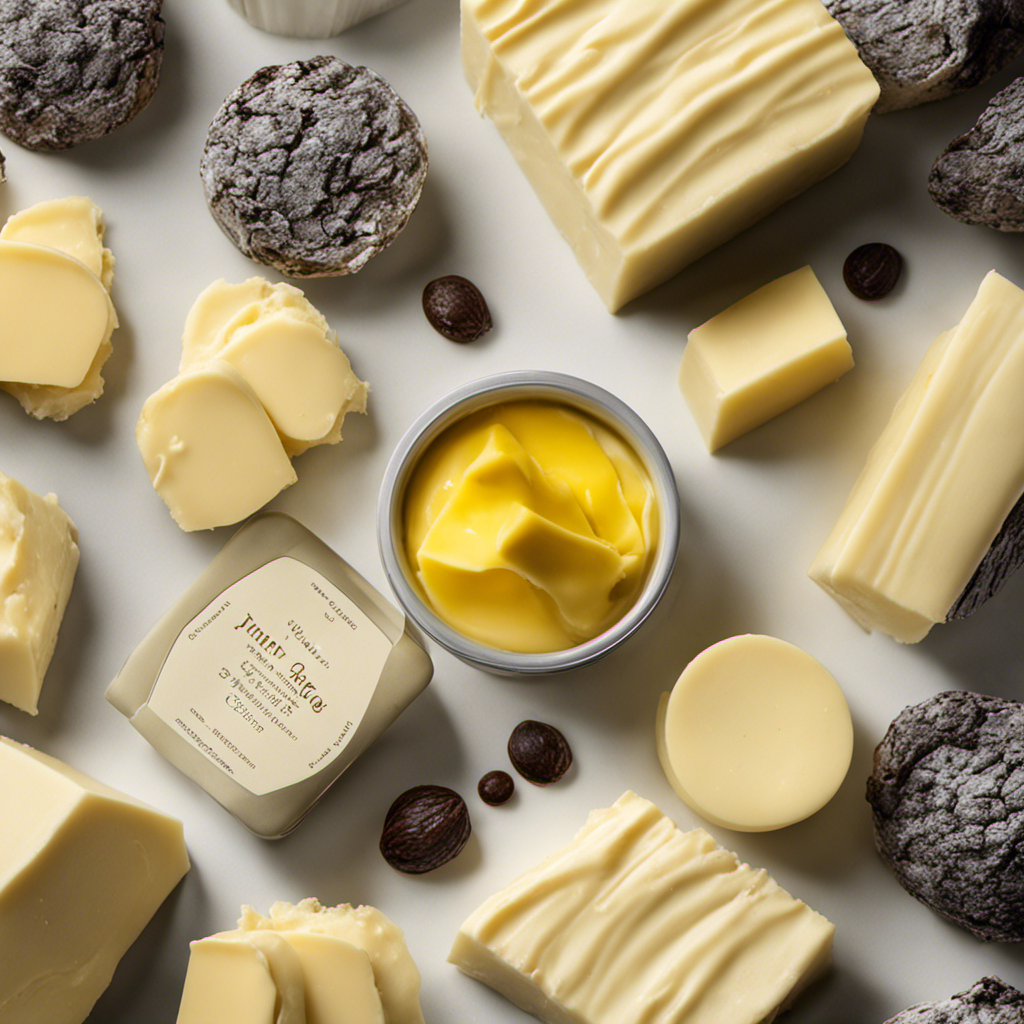
To make butter with the Pampered Chef whipped cream maker, you’ll need to choose the right ingredients. The first and most important ingredient is cream. Look for heavy cream or whipping cream with a high fat content, around 35% or more. This will ensure that your butter turns out rich and creamy. If you prefer a lighter butter, you can also use half and half or a combination of milk and cream. Another alternative ingredient is cultured cream, which will give your butter a tangy flavor. Make sure to choose organic or high-quality cream for the best results.

Now that you know about the different cream options, let’s move on to assembling the Pampered Chef whipped cream maker.

Assembling the Pampered Chef Whipped Cream Maker

When it comes to assembling the Pampered Chef Whipped Cream Maker, effective assembly steps are crucial for success.

In this discussion, I will walk you through the key points of assembling this handy kitchen tool, ensuring that you have a smooth and hassle-free experience.

Additionally, I will also address common issues that may arise during assembly and provide troubleshooting tips to help you overcome any obstacles.

Advertisement

Effective Assembly Steps

To effectively assemble the Pampered Chef whipped cream maker, follow these steps:

  1. Attach the dispenser head to the canister, making sure it is securely screwed on to prevent leaks.

  2. Insert the charger into the charger holder located on the underside of the canister. This provides the necessary pressure to whip the cream.

  3. Place the silicone gasket on top of the canister and twist the cap on tightly to seal everything in place.

If you encounter any assembly issues, such as the dispenser head not fitting properly, follow these troubleshooting steps:

  1. Check to make sure all parts are clean and free of debris.

  2. Ensure that the charger is properly inserted into the holder.

Troubleshooting Common Issues

If the dispenser head doesn’t fit properly, check for any debris or dirt on the parts and make sure the charger is inserted correctly.

Troubleshooting issues with the Pampered Chef whipped cream maker is important to ensure smooth operation and delicious results.

One common problem that may arise is the dispenser head not fitting snugly onto the canister. This could be due to debris or dirt on the parts, preventing a proper seal. In such cases, it’s important to thoroughly clean both the dispenser head and canister before reassembling.

Advertisement

Another common issue is the charger not being inserted correctly. Make sure to follow the instructions carefully and ensure that the charger is properly punctured.

Adding the Cream to the Whipped Cream Maker

When it comes to making whipped cream, there are three key points to consider: proper cream measurement, whipped cream maker assembly, and optimal mixing technique.

First, it is important to measure the cream accurately to ensure the perfect consistency.

Advertisement

Second, assembling the whipped cream maker correctly is crucial for it to function properly.

Finally, using the optimal mixing technique will help achieve light and fluffy whipped cream that is sure to impress.

Let’s dive into each of these points to master the art of homemade whipped cream.

Proper Cream Measurement

Make sure you accurately measure the cream for the best results with your Pampered Chef whipped cream maker. Proper cream measurement is crucial to achieving the perfect consistency and texture. Here are three tips to help you get it right:

  1. Use measuring tools: To ensure accurate measurements, use measuring cups or a kitchen scale. This will help you get the right amount of cream every time.

  2. Follow the recipe: Pay close attention to the recipe instructions and measure the cream according to the specified amount. This will help you achieve the desired results and prevent any issues with the whipped cream maker.

  3. Troubleshooting techniques: If the cream doesn’t whip properly or the consistency is off, try adjusting the amount of cream you’re using. Too much cream can result in a runny texture, while too little cream may not whip at all. Experiment with different measurements until you find the perfect balance.

Whipped Cream Maker Assembly

The assembly of the whipped cream maker is straightforward and can be done quickly. To give you a clear picture, here’s a table that outlines the different parts of the whipped cream maker and their functions:

Advertisement
Part Function Maintenance Tips
Canister Holds the cream Clean after each use, avoid submerging in water
Dispensing Valve Controls cream flow Regularly check for clogs, clean if necessary
Charger Holder Holds nitrous oxide charger Replace when damaged or worn out
Nozzle Dispenses whipped cream Clean thoroughly, remove any clogs
Rubber Gasket Seals the canister Check for wear and tear, replace if needed

Maintenance is important to ensure optimal performance and longevity of your whipped cream maker. Common issues you may encounter include clogs in the dispensing valve or nozzle, leaks from a worn-out rubber gasket, or difficulty in dispensing cream. Troubleshooting these issues usually involves cleaning the affected parts or replacing worn-out components.

Now that we have the whipped cream maker assembled and understand how to maintain it, let’s move on to the next section: optimal mixing technique.

Optimal Mixing Technique

To achieve the best results, it’s important to follow the recommended mixing technique for optimal whipped cream. Here are three key steps to ensure your whipped cream turns out light, fluffy, and perfect every time:

  1. Start with chilled cream: For the best results, make sure your whipping cream is cold. This will help it whip up faster and hold its shape better.

  2. Use the right mixing speed: When using a Pampered Chef Whipped Cream Maker, start on the lowest speed setting and gradually increase it as the cream begins to thicken. This will prevent overmixing and ensure a creamy texture.

  3. Watch for butter consistency: Keep a close eye on the cream as you mix it. It should form soft peaks that hold their shape but are not stiff. If you continue to mix beyond this point, you risk turning the cream into butter.

Turning on the Whipped Cream Maker

First, you’ll need to attach the nozzle to the Whipped Cream Maker. Make sure it is securely fastened so that no air escapes during the butter-making process.

Once the nozzle is attached, it’s time to turn on the Whipped Cream Maker. Simply locate the power switch and flip it on. You should hear a soft hum as the machine powers up.

Advertisement

If you encounter any technical difficulties, such as the machine not turning on or making strange noises, try troubleshooting by checking the power source and making sure all connections are secure. If the problem persists, consult the user manual or contact the manufacturer for further assistance.

Once the machine is on, you can adjust the speed settings to your desired level. Start with a low setting and gradually increase the speed as needed.

Beating the Cream to Make Whipped Cream

Once you’ve attached the nozzle and turned on the machine, you can start beating the cream to make delicious whipped cream. It’s important to use heavy cream, as it has a higher fat content that will result in a richer and more stable whipped cream.

Here are three tips to help you achieve the perfect whipped cream:

  1. Chill your bowl and whisk attachment in the freezer for about 10 minutes before starting. This will help the cream whip faster and hold its shape better.

  2. Start on low speed and gradually increase to medium-high speed. This will prevent splattering and ensure even whipping.

  3. Stop beating when soft peaks form. Over-whipping can result in clumpy, grainy whipped cream. It should be light, fluffy, and hold its shape when dolloped onto desserts.

If you’re looking for whipped cream alternatives or want to experiment with different flavors, you can add flavored extracts like vanilla or almond, or even incorporate cocoa powder or fruit purees for a unique twist.

Advertisement

Continuing to Beat the Cream for Butter

As I continue beating the cream for a longer period of time, it will start to separate into butter and buttermilk. This is the next step in the process of making butter with the Pampered Chef Whipped Cream Maker.

The beating techniques are crucial here, as the cream needs to be whipped until it reaches a thick consistency. I like to use a hand mixer for this, as it allows me to control the speed and intensity of the beating.

As the cream is beaten, it will gradually transform into butter and buttermilk. The butter will start to clump together, while the liquid buttermilk will separate. This is when you know you’ve achieved the desired result.

Now, you can experiment with different flavor variations by adding herbs, spices, or even sweeteners to your homemade butter. Get creative and enjoy the process of making your very own flavorful butter.

Draining the Buttermilk From the Butter

To separate the buttermilk from the butter, you’ll need to strain the mixture through a fine-mesh sieve or cheesecloth. This step is essential to achieve the smoothest consistency for your homemade butter.

Advertisement

Here’s how to do it:

  1. Prepare your straining equipment: Place a fine-mesh sieve or a double layer of cheesecloth over a bowl or container large enough to hold the strained liquid.

  2. Pour the mixture into the strainer: Slowly pour the churned butter and buttermilk mixture into the sieve or cheesecloth. The liquid will pass through, leaving behind the solid butter.

  3. Collect the drained buttermilk: Allow the liquid to fully drain into the bowl or container. This buttermilk can be used in various recipes, such as pancakes, biscuits, or even as a marinade for chicken.

Washing and Kneading the Butter

After draining the buttermilk from the butter, the next step is to wash and knead it. This helps remove any remaining buttermilk and enhances the butter’s texture and flavor. To do this, I fill a bowl with ice-cold water and place the butter in it. Using a spatula, I gently press and knead the butter against the sides of the bowl. This washing technique helps remove any residual buttermilk, which can cause the butter to spoil quickly. I repeat this process a few times, changing the water each time, until the water remains clear. Once the butter is thoroughly washed, I transfer it to a clean surface and continue kneading it by hand. This kneading process helps remove any remaining moisture and ensures a smooth and creamy texture.

To give you a visual representation of the process, here’s a table showing the steps involved in washing and kneading the butter:

Step Description
1 Fill a bowl with ice-cold water
2 Place the butter in the water
3 Press and knead the butter against the sides of the bowl
4 Repeat the process, changing the water each time, until it remains clear
5 Transfer the butter to a clean surface
6 Continue kneading the butter by hand to remove remaining moisture
7 Enjoy the smooth and creamy homemade butter!

Storing and Using Your Homemade Butter

Once the butter is thoroughly washed and kneaded, you can store it in an airtight container in the refrigerator for up to two weeks. Storing homemade butter properly is important to maintain its freshness and flavor. Here are three tips for storing and using your homemade butter:

  1. Keep it in an airtight container: To prevent the butter from absorbing odors and flavors from other foods in the fridge, store it in a tightly sealed container. This will also help to maintain its creamy texture.

  2. Label and date your container: It’s easy to forget when you made your homemade butter, so make sure to label the container with the date. This way, you’ll know when it’s time to use it or make a fresh batch.

  3. Get creative with your butter: Homemade butter is incredibly versatile and can be used in a variety of ways. Spread it on toast, melt it over vegetables, or use it as a base for baking and cooking. The possibilities are endless!

Conclusion

In conclusion, making butter with the Pampered Chef Whipped Cream Maker was a delightful journey.

Advertisement

With just a few simple steps, I transformed ordinary cream into a heavenly spread.

As I watched the cream transform, it was like witnessing a magical dance of flavors.

The smooth texture and rich taste of the homemade butter were like a symphony of indulgence on my taste buds.

Now, I can’t wait to spread this creamy goodness on warm, freshly baked bread and savor the satisfaction of creating something truly butterylicious.

Advertisement
Continue Reading
Advertisement

Recipes & Culinary Uses

Creamy Delight: Best Butter Pecan Ice Cream Recipe for Summer!

Yearning for a creamy summer treat that will leave you craving more?

Published

on

By

butter pecan ice cream

Savor a delicious summer treat with our Butter Pecan Ice Cream recipe. Mix butter, brown sugar, cream, and pecans for a creamy delight. Melt butter, cook pecans, whisk eggs, and blend for a rich flavor. Add pecans, cream, and vanilla, then freeze to perfection. Master this easy-to-follow recipe for a tasty dessert to beat the heat.

Key Takeaways

  • Rich and creamy blend of butter, brown sugar, and heavy cream
  • Toasted pecans for a nutty crunch and flavor
  • Easy-to-follow steps for homemade ice cream perfection
  • Customization options with variations like bourbon or chocolate
  • Perfect summer treat with a decadent, refreshing taste

Recipe Ingredients for Butter Pecan Ice Cream

To create a delectable batch of butter pecan ice cream, gather the essential ingredients listed in the recipe.

You'll need:

  • Butter
  • Brown sugar
  • Heavy cream
  • Pecans

These ingredients combine to bring out the rich and nutty flavors of this classic dessert.

The brown sugar adds a caramel-like sweetness, while the heavy cream contributes to a creamy texture that's essential for a decadent treat.

Pecans, when toasted in butter, provide a delightful crunch and enhance the overall flavor profile of the ice cream.

Cooking Instructions for Homemade Ice Cream

making ice cream at home

Start by melting butter in a skillet to infuse the pecans with a rich, nutty flavor for your homemade butter pecan ice cream.

Here's a quick guide to help you make this creamy delight:

Advertisement
  • Melt butter and cook pecans for flavor.
  • Whisk eggs and combine with half-and-half and brown sugar for a creamy base.
  • Cook until thickened, then mix with eggs in a bowl.
  • Add cream, pecans, and vanilla extract.
  • Freeze the mixture in an ice cream maker.

Following these steps will guarantee your homemade butter pecan ice cream turns out rich and delicious.

Remember to carefully adhere to the manufacturer's instructions for your ice cream maker to achieve the perfect consistency.

Enjoy the process of creating this delightful treat that will surely be a hit during the summer months.

Ice Cream Preparation Steps

ice cream recipe instructions

Mix half and half with brown sugar over medium heat in a large bowl to prepare the ice cream base.

Next, whisk beaten eggs and temper them with the warm milk mixture to create a smooth custard.

Once done, thicken the mixture on low heat, then cool it over an ice bath to achieve ideal texture.

After that, stir in heavy cream, vanilla extract, maple extract, and a pinch of salt for rich flavor.

Advertisement

Remember to refrigerate the mixture for 1 1/2 – 2 hours before churning it into creamy butter pecan ice cream.

This process ensures that the flavors meld together beautifully and the ice cream attains the perfect consistency for scooping and savoring.

Nutritional Information and Tips

healthy eating guidance provided

Considering the rich and creamy nature of homemade butter pecan ice cream, it's important to be mindful of its nutritional content and serving size. When indulging in this delectable dessert, remember these essential tips:

  • Portion Control: Enjoy in moderation to savor the flavors without overindulging.
  • Brown Sugar Sweetness: Opt for a moderate amount of brown sugar to balance sweetness without overwhelming the palate.
  • Room Temperature Ingredients: Confirm ingredients like butter and heavy cream are at room temperature for a smoother texture.
  • Nutritional Awareness: Be mindful that homemade butter pecan ice cream can vary in nutritional content, so adjust ingredients accordingly.
  • Consultation: Seek advice from a nutritionist or healthcare provider for personalized guidance on incorporating this treat into a balanced diet.

Homemade Butter Pecan Ice Cream Variations

delicious homemade ice cream

Explore creative twists on traditional butter pecan ice cream by incorporating different nuts, spirits, sauces, chocolates, and dairy-free alternatives.

For a unique flavor, try substituting pecans with walnuts or almonds in the full recipe. Toast the nuts in a separate bowl until browned and fragrant, then chop them finely enough to coat in the ice cream mixture.

To add a boozy kick, mix in a splash of bourbon or rum to the base as you churn the ice cream. For an extra indulgent touch, swirl in caramel sauce or fudge ripple throughout the mixture.

Incorporate chunks of chocolate or chocolate-covered nuts for a delightful contrast in texture, giving each bite a sweet surprise.

Advertisement

If you prefer a lighter, dairy-free option, consider using coconut milk or almond milk as a substitute for traditional dairy products. These alternatives provide a creamy base while catering to plant-based diets.

Experiment with these variations to create a personalized butter pecan ice cream that suits your taste preferences.

Frequently Asked Questions

What Is the Secret to Making Ice Cream Very Creamy?

To make ice cream very creamy, you use a rich base of ingredients like heavy cream, eggs, and sugar. Chilling the base before churning is crucial for a smoother texture. Adding vanilla extract enhances creaminess, and slow churning prevents a dense outcome.

What Flavor Is the Ice Cream in Butter Pecan?

The ice cream in butter pecan is a delightful blend of buttery richness, vanilla sweetness, and maple undertones, perfectly paired with toasted pecans for a nutty crunch. This flavor combination creates a harmonious and indulgent treat.

What's the Difference Between Butter Pecan Ice Cream and Praline Pecan Ice Cream?

In butter pecan ice cream, you'll savor the buttery richness of pecans blended with a creamy base. On the other hand, praline pecan ice cream highlights caramelized sweetness with a swirl of praline sauce for a delightful flavor contrast.

Advertisement

What Age Group Eats Butter Pecan Ice Cream?

You'll find that adults and older individuals, typically in the 30-60 age group, enjoy butter pecan ice cream. It's a favorite among those with a more refined palate, drawn to its rich and nutty flavor.

Conclusion

So there you have it, folks! Whip up this buttery, nutty delight for a taste of summer in every scoop.

Don't cry over spilled milk – grab a cone and enjoy this creamy treat that's sure to satisfy your sweet tooth.

Get churning and indulge in the best butter pecan ice cream you've ever tasted!

Advertisement
Continue Reading

Recipes & Culinary Uses

Festive Favorites: Best Peanut Butter Blossoms Recipe for Holidays!

Unleash the ultimate holiday baking magic with the best Peanut Butter Blossoms recipe – an irresistible treat that will elevate your festive celebrations!

Published

on

By

holiday baking with flair

Elevate your holiday baking with the ultimate Peanut Butter Blossoms recipe. Cream together peanut butter, butter, sugars, and salt, then add egg and vanilla. Roll dough into balls, coat in brown sugar, bake until golden, then press a Hershey's kiss on top. Adjust baking time as needed. Explore ingredient swaps for a personalized touch. Enjoy with hot cocoa or pair with savory dishes. For more tips, ideas, and customization options, the recipe holds more festive surprises.

Key Takeaways

  • Cream together peanut butter, butter, sugars for rich flavor.
  • Bake at 375°F for 8-10 minutes for soft, chewy cookies.
  • Customize with ingredient swaps like almond butter or maple syrup.
  • Pair with savory dishes or hot cocoa for holiday enjoyment.
  • Press Hershey kisses onto warm cookies for a classic finish.

Ingredients for Peanut Butter Blossoms

For the classic Peanut Butter Blossoms recipe, gather peanut butter, butter, sugar, an egg, and Hershey's kisses as your essential ingredients.

Peanut butter is the star, offering a rich flavor that blends perfectly with the sweetness of the cookies.

Butter plays a pivotal role by adding moisture and richness to the dough, ensuring a soft and chewy texture.

The sugar not only sweetens the cookies but also contributes to their festive appeal, making them a perfect treat for any occasion.

Finally, the Hershey's kisses on top provide a delightful chocolatey finish that elevates these cookies to a whole new level of deliciousness.

Advertisement

Together, these ingredients create a harmonious blend of flavors and textures that make Peanut Butter Blossoms a beloved classic for holiday baking or any time you crave a sweet and satisfying treat.

Recipe Steps for Peanut Butter Blossoms

bake peanut butter cookies

To make Peanut Butter Blossoms, start by creaming together peanut butter, butter, sugars, and salt until light and fluffy.

Next, add in the egg and vanilla extract, making sure to mix well to combine all the ingredients thoroughly.

Then, gradually incorporate the dry ingredients into the wet mixture until a smooth dough forms.

Once the dough is ready, roll it into balls and coat each ball generously in brown sugar.

Place the sugar-coated dough balls on a baking sheet, making sure to leave enough space between them for spreading during baking.

Advertisement

Bake the cookies in a preheated oven until they turn a beautiful golden brown.

As soon as the cookies are out of the oven, press a Hershey's kiss into the center of each cookie gently.

The heat from the freshly baked cookies will melt the chocolate just enough to adhere it to the cookie.

These Peanut Butter Blossoms are a delightful treat perfect for Christmas celebrations!

Pro Tips for Making Peanut Butter Blossoms

baking perfect peanut blossoms

To enhance your peanut butter blossom baking experience, consider adjusting the baking time based on your oven's performance for best results.

Additionally, explore ingredient substitutions to cater to dietary preferences or allergies without compromising the flavor or texture of the cookies.

Advertisement

These pro tips can help you customize your peanut butter blossoms while ensuring delicious outcomes.

Baking Time Recommendations

Achieving the ideal texture for your peanut butter blossoms involves baking them at 375°F for 8-10 minutes. This baking duration guarantees that the cookies have a soft and chewy consistency while allowing the Hershey kisses on top to be softened but not completely melted.

Once out of the oven, remember to press the Hershey kisses onto the cookies immediately to secure them in place for that classic appearance.

For the best outcomes, chill the cookie dough for about 30 minutes before baking. This step helps the cookies maintain their shape and prevents excessive spreading during baking, ensuring your peanut butter blossom cookies are perfectly formed and ready to impress during your holiday baking.

Shortening or extending the baking time can alter the texture of the cookies. A quick bake of 6-8 minutes produces softer and chewier cookies, while longer baking times yield a slightly crispier consistency. Stick to the recommended 8-10 minutes for the best soft and chewy peanut butter blossoms.

Advertisement

Ingredient Substitutions

Consider incorporating different ingredients to elevate the flavor and nutritional profile of your peanut butter blossoms. For a healthier option, swap out shortening with unsalted butter to achieve a unique texture and taste in your cookies.

Try using natural peanut butter instead of creamy to add a wholesome twist to the classic recipe. If you're looking to reduce the glycemic impact, substitute brown sugar with coconut sugar in your baking. For a natural sweetener alternative, replace regular granulated sugar with maple syrup in the cookie dough mixture.

Additionally, for a distinct flavor experience, experiment with almond butter as a substitute for peanut butter in your blossoms. These ingredient substitutions can bring a new dimension to your peanut butter blossoms, making them not only delicious but also tailored to your dietary preferences.

Upgrade your baking game this holiday season with these creative twists on a beloved recipe!

Serving Suggestions for Peanut Butter Blossoms

peanut butter cookie recipe

Enhance the enjoyment of your peanut butter blossoms by pairing them with savory dishes like lasagna tortellini soup for a satisfying meal. These classic cookies also complement family-friendly dinners such as easy ground beef shepherd's pie and creamy broccoli cheddar soup, making for a delightful combination. The holiday season calls for cozy treats, and the sweet nuttiness of peanut butter blossoms pairs perfectly with a warm cup of hot cocoa. Whether you're participating in a cookie exchange or looking for a festive touch to your holiday dessert spread, consider rolling the cookies in red, green, and white sugar sprinkles to add a pop of color and fun.

Serving Suggestions Pairing Ideas
Lasagna Tortellini Soup Comforting and hearty meal alongside the cookies
Easy Ground Beef Shepherd's Pie Delicious combination for a family dinner
Creamy Broccoli Cheddar Soup Perfect accompaniment to the nutty cookie flavors

12 Days of Christmas Cookies Recipes

baking traditions for the holidays

Indulge in a variety of delightful Christmas cookie recipes each day during the holiday season. One standout choice is the classic Peanut Butter Blossoms. These holiday cookies feature a peanut butter base topped with a Hershey's kiss, making them a beloved treat for cookie exchanges and festive gatherings.

The process of making these cookies is simple yet rewarding. Start by rolling the dough balls in sugar before baking to add a sweet crunch to each bite. The combination of rich peanut butter flavor and the chocolatey goodness of the Hershey's kiss creates a perfect balance of sweetness.

Advertisement

When enjoying these Christmas cookies, consider pairing them with a glass of milk for a classic and satisfying treat.

Whether you're baking them for your family, a cookie exchange, or a holiday party, Peanut Butter Blossoms are sure to be a hit. Make each day of the holiday season a little sweeter with these delicious cookies.

User Engagement Features

user interaction enhancements

Let's talk about how user interaction features and personalization options enhance your experience with the Peanut Butter Blossoms recipe.

You can engage with others by leaving comments and sharing your results, creating a sense of community around this holiday treat.

Personalization options like name and email entry fields help tailor the experience to your preferences, making it more engaging and enjoyable.

User Interaction Features

Utilizing user engagement features on the website allows for increased participation and feedback from visitors. The comment section enables users to interact with each other and provide valuable feedback on the Peanut Butter Blossoms recipe or share their experiences with Hershey's kisses. By incorporating a reply option, users can engage in conversations, fostering a sense of community around baking these delightful peanut butter cookies.

Advertisement

Moreover, the inclusion of name and email fields not only allows for personalization but also facilitates communication between the website and its visitors. This data storage feature guarantees that users can conveniently access their information for future visits, enhancing their overall user experience.

These user engagement features play an essential role in creating an interactive platform where users can engage, provide feedback, and communicate effectively. Such interaction not only enriches the user experience but also encourages visitors to actively participate in the community surrounding the Peanut Butter Blossoms recipe.

Personalization Options

Enhance your website's user engagement by incorporating personalized options such as commenting, replying, and sharing feedback on the Peanut Butter Blossoms recipe. This level of user interaction not only fosters a sense of community building but also encourages customization and feedback. By allowing users to share their thoughts, results, and experiences with the festive favorites, you create a more engaging and interactive user experience. Additionally, providing users with the option to save their data for future visits and encouraging them to tag @preppykitchen and use #preppykitchen when trying the recipe further enhances their engagement.

Personalization Options Description Benefits
Commenting Users can leave comments on the Peanut Butter Blossoms recipe, sharing their thoughts and experiences. Fosters community building and user engagement.
Replying Users can reply to comments and engage in discussions with other users about the recipe. Encourages active participation and interaction.
Feedback Sharing Users can share feedback on the recipe, providing valuable insights for improvement. Enhances user experience and customization.

Additional Information

clarifying specific details provided

You may find it interesting to know more about the history of the Peanut Butter Blossoms recipe and its cultural significance during the holidays.

  • The Peanut Butter Blossoms recipe's popularity is backed by IRI MULO data, making it a sought-after choice for holiday baking.
  • Copyright for this beloved recipe belongs to The J.M. Smucker Company, a reputable name in the food industry known for quality products.
  • These delightful cookies aren't only perfect for serving at holiday parties but also make excellent gifts due to their festive appeal.

Frequently Asked Questions

Why Are My Peanut Butter Blossoms Dry?

If your peanut butter blossoms are dry, it could be due to using too much flour, overbaking, using natural peanut butter that requires stirring, or not enough butter/shortening. Guarantee precise measurements and follow the recipe closely to maintain moisture.

Why Did My Peanut Butter Blossoms Go Flat?

When making peanut butter blossoms, going flat happens due to overmixing, too much flour, insufficient chilling, or low oven temperature. Remember to avoid these pitfalls. Preheat the oven properly and follow the recipe for perfect blossoms!

What Is America's Favorite Christmas Cookie?

America's favorite Christmas cookie is Peanut Butter Blossoms. Loved for their peanut butter-chocolate combo and nostalgic Hershey's Kiss center, these easy-to-make treats are a holiday staple at parties and gatherings. They're a must-have during the festive season.

Advertisement

What Is Baskin Robbins Peanut Butter Blossom?

You asked about Baskin Robbins Peanut Butter Blossom. It's a delectable seasonal ice cream flavor featuring creamy peanut butter ice cream with a ribbon of more peanut butter and chocolate cookie pieces. Indulge in this festive treat!

Conclusion

Indulge in the warm, gooey goodness of these peanut butter blossoms this holiday season. With the perfect blend of creamy peanut butter and rich chocolate, these cookies are sure to bring joy to your festivities.

Picture yourself surrounded by loved ones, sharing laughter and memories as you enjoy these delicious treats. Let the aroma of freshly baked cookies fill your home and create a cozy, festive atmosphere.

Happy baking and happy holidays!

Advertisement
Continue Reading

Recipes & Culinary Uses

Bite-Sized Treats: Best Peanut Butter Ball Recipe You'll Love!

Adore these heavenly peanut butter balls with a delectable mix of smooth peanut butter, powdered sugar, and vanilla—perfect for indulging in bite-sized bliss!

Published

on

By

delicious peanut butter balls

You'll adore these easy and heavenly peanut butter balls. Mix smooth peanut butter, powdered sugar, and vanilla extract for a delectable dough. Roll into small balls and chill. Dip in melted chocolate, then refrigerate to set. Enhance the flavor with rum extract, nuts, or crushed pretzels. Get creative with colorful sprinkles and different chocolate coatings. Use quality chocolate coating and adjust mix consistency. Store them in the fridge or freezer. Enjoy these mouthwatering treats alone or at gatherings. More tips and delightful variations await!

Key Takeaways

  • Creamy peanut butter, powdered sugar, and vanilla create a smooth dough.
  • Incorporate nuts, rum extract, or pretzels for flavor and texture variety.
  • Use quality chocolate coating like candy melts for best results.
  • Chill peanut butter balls before dipping for easier handling.
  • Store in the fridge or freezer for convenient snacking and serving.

Ingredients and Preparation

To create irresistible peanut butter balls, gather creamy peanut butter, powdered sugar, and vanilla extract as your key ingredients.

Begin by mixing the peanut butter, butter, sugar, and vanilla until you have a smooth dough. Roll this mixture into small balls and chill them before dipping them in melted chocolate.

The type of chocolate you use, such as dark or milk chocolate, will enhance the flavor of your peanut butter balls. After dipping, make sure to refrigerate the balls until the chocolate sets for a perfect finish.

This process guarantees that each bite-sized treat isn't only visually appealing but also bursting with delicious peanut butter and chocolate flavors.

Variations and Enhancements

creative modifications and improvements

You can elevate the flavor of your peanut butter balls by incorporating unique ingredients like chopped nuts or rum extract.

Experiment with different chocolate coatings such as white almond bark or dark chocolate candy melts for a varied taste experience.

Advertisement

Get creative by adding finishing touches like colorful sprinkles to make your peanut butter balls visually appealing.

Flavorful Ingredient Additions

Enhance the flavor of your peanut butter balls by incorporating unique ingredient variations and enhancements. While the classic combination of peanut butter, powdered sugar, and butter creates a delicious dough for your treats, you can take it up a notch by adding flavorful ingredient additions.

Consider mixing in crushed pretzels for a salty crunch that complements the sweetness of the peanut butter. Chopped nuts like almonds or pecans can also add a delightful texture and nutty taste to your chocolate-covered peanut butter balls.

For a burst of fruity flavor, try incorporating dried cranberries or raisins into the dough. These additions not only provide a contrast in texture but also introduce a hint of sweetness that pairs well with the creamy peanut butter.

Another option is to include a sprinkle of cinnamon or a dash of vanilla extract to elevate the overall taste profile of your peanut butter balls. Experiment with these flavorful ingredient additions to create a unique and delectable twist on the classic treat.

Advertisement

Chocolate Coating Options

Experiment with different types of chocolate coatings – dark, white, or milk chocolate – to suit your preferences and elevate the flavor of your peanut butter balls.

When considering the chocolate coating for your crunchy peanut butter treats, here are some options to enhance your culinary creation:

  1. Choose Candy Melts or Almond Bark: Opt for candy melts or almond bark for a smooth and firm chocolate coating that sets well on your peanut butter balls.
  2. Avoid Chocolate Chips: Steer clear of using chocolate chips for coating, as they may contain stabilizers that hinder smooth melting, affecting the overall texture.
  3. Add Colored Sprinkles: For a festive touch, sprinkle colored sprinkles on top of the chocolate coating before it sets to add a pop of color and extra crunch to your peanut butter balls.

Experimenting with different chocolate coatings and techniques can take your peanut butter balls to the next level, ensuring a delightful and indulgent treat for any occasion.

Creative Finishing Touches

To elevate the flavor profile of your peanut butter balls, consider incorporating creative finishing touches through various enhancements and unique variations.

You can enhance the texture by adding chopped nuts or crispy rice cereal to the peanut butter mixture, providing a delightful crunch with every bite.

Experiment with different flavors by using almond extract or rum extract instead of vanilla for a twist on the traditional taste.

Advertisement

For a festive touch, roll the balls in crushed graham crackers, sprinkles, or a sprinkle of sea salt to add a pop of flavor.

Drizzle white chocolate over the dark, semi-sweet, or milk chocolate coating for a visually appealing contrast that will impress your guests.

If you enjoy a crunchy element, try coating the balls in crushed pretzels or toasted coconut before the chocolate sets.

These creative enhancements will take your peanut butter balls to the next level, making them a standout treat at any gathering.

Tools and Tips

crafting with precision

Consider using a 1 tablespoon cookie scoop for consistent sizing when preparing your peanut butter balls. This tool will help guarantee all your treats are uniform in size, making for a neat presentation and even cooking.

Here are some additional tools and tips to enhance your peanut butter ball-making experience:

Advertisement
  1. Invest in Quality Chocolate Coating: Opt for candy melts or almond bark for a smooth and firm chocolate coating on your peanut butter balls. These coatings melt easily and provide a professional finish to your treats.
  2. Adjust Peanut Butter Mixture Consistency: If your peanut butter mixture is too sticky or too dry, adjust the consistency by adding more peanut butter or powdered sugar. This will help you achieve the perfect texture for shaping your balls.
  3. Refrigerate Before Dipping: Prior to dipping your peanut butter balls in chocolate, chill them in the refrigerator. This step will make the balls firmer, making them easier to handle and coat without falling apart.

Storage and Serving Suggestions

great suggestion for storage

For best freshness and presentation of your peanut butter balls, follow these storage and serving suggestions.

To keep your peanut butter balls tasting delicious, store them properly. You can store them in an airtight container in the fridge for up to 1 week or in the freezer for up to 2 months. When freezing, remember to thaw the frozen peanut butter balls before serving by bringing them to room temperature. To prevent them from sticking together, separate the layers of peanut butter balls with wax paper.

Here is a helpful table summarizing the storage and serving suggestions:

Storage Serving Frozen
Airtight container Display on festive tray Thaw before serving
Fridge – 1 week Pair with hot cocoa Bring to room temp
Freezer – 2 months Enjoy at holiday gatherings
Separate with wax paper

Additional Peanut Butter Desserts

peanut butter dessert recipes

Explore a variety of delectable peanut butter desserts to satisfy your sweet cravings.

  1. Peanut Butter Blossom Cookies: Indulge in the classic combination of peanut butter cookies topped with a chocolate kiss for a delightful treat.
  2. Peanut Butter Chocolate Mug Cake: Whip up this easy-to-make single-serving dessert that combines the rich flavors of peanut butter and chocolate in a mug for a quick fix.
  3. Peanut Butter Overload Cookies: For those who can't get enough peanut butter, these cookies are loaded with peanut butter chips, chocolate chips, and chopped peanuts for an explosion of flavor in every bite.

These additional peanut butter desserts offer a diverse selection to cater to your cravings.

Whether you're in the mood for a classic treat like Peanut Butter Blossom Cookies, a quick fix with Peanut Butter Chocolate Mug Cake, or a flavor-packed experience with Peanut Butter Overload Cookies, there's something for every peanut butter lover.

Enjoy these easy-to-make delights whenever you need a sweet pick-me-up!

Recipe Instructions and Nutritional Information

cooking guidance and facts

To create these delectable Peanut Butter Balls, start by blending peanut butter, butter, sugar, and vanilla to form a dough. Roll the mixture into small balls and place them on a baking sheet lined with parchment paper. Chill the peanut butter balls in the refrigerator for about 30 minutes until firm.

Once chilled, melt chocolate in a heatproof bowl over simmering water or in the microwave. Dip each chilled peanut butter ball into the melted chocolate, ensuring they're evenly coated. Place the coated balls back on the parchment paper and let the chocolate set.

Advertisement

Each serving of these delightful treats contains approximately 114 calories.

Store the finished peanut butter balls in the fridge for up to 2 weeks or freeze them for up to 3 months.

Enjoy these decadent bite-sized snacks whenever you crave a sweet and nutty indulgence.

Frequently Asked Questions

Can I Use Chunky Peanut Butter Instead of Creamy for This Recipe?

Yes, you can use chunky peanut butter instead of creamy for this recipe. It will add a delightful texture and extra crunch to your peanut butter balls. Enjoy experimenting with different variations!

How Long Do Chocolate Covered Peanut Butter Balls Stay Fresh?

Like a sweet memory, chocolate-covered peanut butter balls stay fresh for up to two weeks when stored in an airtight container in the fridge. Indulge in these delectable treats within that time frame for best taste.

Advertisement

Can I Freeze the Peanut Butter Balls for Later Enjoyment?

Yes, you can freeze the peanut butter balls for later enjoyment. Simply place them in an airtight container or freezer bag. When ready to indulge, let them thaw in the fridge for a few hours.

What Type of Chocolate Is Best for Coating the Peanut Butter Balls?

For coating the peanut butter balls, semi-sweet or milk chocolate works best. They provide a delicious contrast to the creamy peanut butter filling. Simply melt the chocolate, dip the balls, and enjoy the sweet treat!

Can I Add Chopped Nuts or Sprinkles to the Peanut Butter Balls for Extra Flavor?

You can definitely add chopped nuts or sprinkles to the peanut butter balls for extra flavor. It's a great way to customize your treats and add a delightful crunch or colorful touch to each bite.

Conclusion

Indulge in these irresistible peanut butter balls that are sure to satisfy your sweet tooth cravings.

With just a few simple ingredients and easy-to-follow instructions, you can enjoy these bite-sized treats in no time.

Advertisement

So go ahead, treat yourself to a little taste of heaven and experience the perfect combination of creamy peanut butter and rich chocolate.

You won't be able to resist coming back for more!

Continue Reading

Trending