Connect with us

Recipes & Culinary Uses

How to Make Creamy Cashew Butter at Home

Published

on

An image showcasing the step-by-step process of making cashew butter: whole cashews being roasted to golden perfection, blended into a creamy consistency, and finally spooned into a jar with a luscious spread

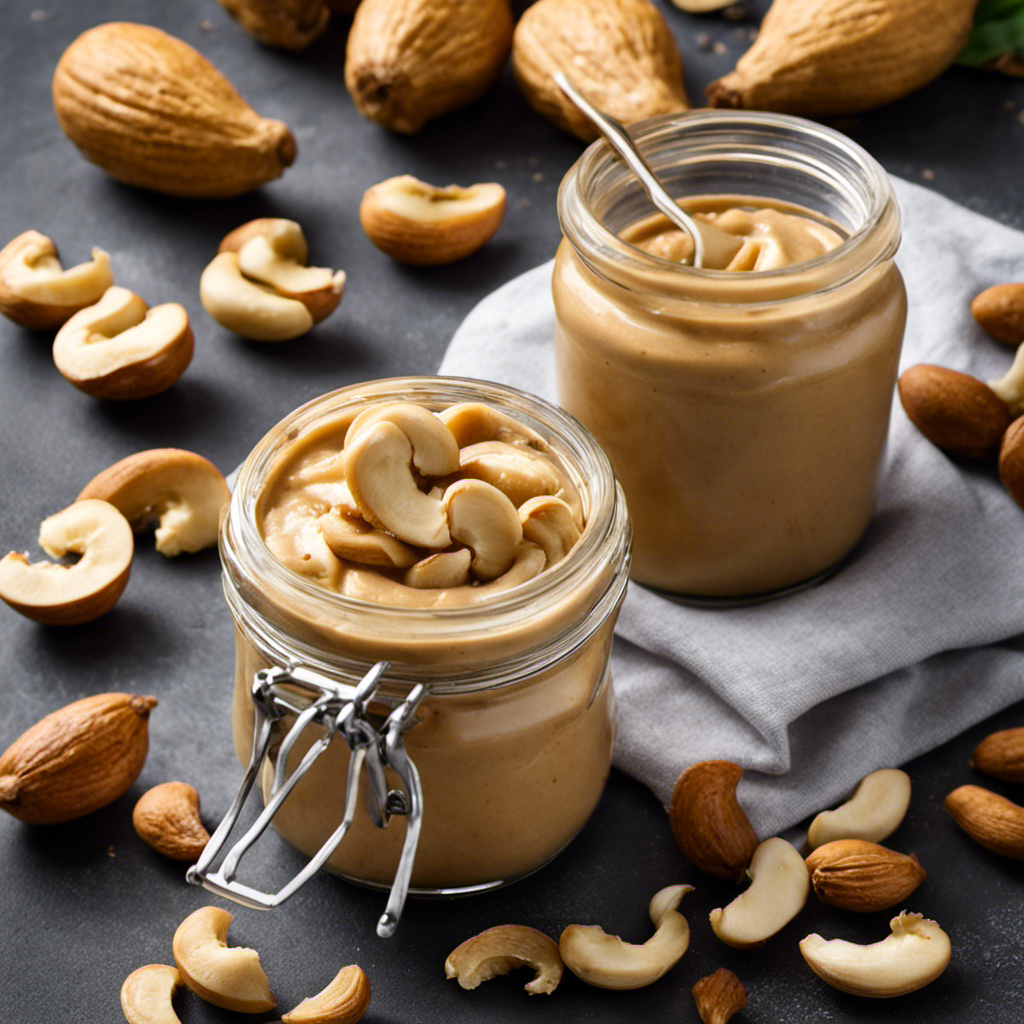
I have always been fond of nut butters, but cashew butter has become my top choice. The creamy texture and delicate nutty taste make it ideal for spreading on toast, fruit, or incorporating it into recipes.

In this article, I’ll guide you through the process of making your own homemade cashew butter, from selecting the right cashews to adjusting the consistency to your liking.

Get ready to embark on a delicious journey that will leave you with a jar of irresistible cashew goodness.

Key Takeaways

  • Look for fresh and unsalted cashews that are plump, firm, and light beige in color.
  • Soak cashews for at least 2 hours or overnight to make them easier to blend and remove phytic acid.
  • Consider alternatives to cashew butter such as almond butter, peanut butter, and sunflower seed butter.
  • Experiment with enhancing the flavor and consistency of cashew butter by roasting cashews, adjusting blender settings, adding oils and sweeteners, and trying different spices and flavorings.

[bulkimporter_image id=’2′]

Selecting the Right Cashews

Advertisement

When selecting the right cashews for making cashew butter, it’s important to look for ones that are fresh and unsalted. Choosing the best cashews is crucial because it affects the taste and texture of the final product.

Cashews are a popular choice for making nut butter due to their mild, creamy flavor. Compared to other nut butters, cashew butter has a smoother consistency and a naturally sweet taste. Look for cashews that are plump, firm, and have a light beige color. Avoid cashews that are discolored, shriveled, or have a rancid smell.

It’s also best to choose unsalted cashews to have better control over the salt content in your cashew butter.

Now that you know how to select the right cashews, let’s move on to soaking them for optimal results.

Advertisement

[bulkimporter_image id=’3′]

Soaking the Cashews

When it comes to making cashew butter, one important step is soaking the cashews. Soaking time for cashews can vary, but I typically soak them for at least 2 hours or overnight.

Soaking cashews has several benefits. It makes them easier to blend, improves their digestibility, and enhances their nutritional value by activating enzymes and reducing phytic acid.

Soaking Time for Cashews

The ideal soaking time for cashews is usually around 4-6 hours. During this time, the cashews absorb water, which softens them and removes the natural enzyme inhibitors they contain. Soaking cashews is an important step in making cashew butter as it improves the texture and taste of the final product.

Advertisement

Here are some popular soaking methods:

  • Traditional method: Soak cashews in water for 4-6 hours.
  • Quick soak method: Pour boiling water over cashews and let them sit for 1-2 hours.
  • Saltwater soak: Soak cashews in saltwater to enhance flavor.
  • Fermentation soak: Soak cashews with probiotic culture for added health benefits.
  • Lemon soak: Soak cashews in lemon juice to neutralize phytic acid.

Soaking cashews offers several benefits, including improved digestion, increased nutrient absorption, and easier blending. It also helps to remove any bitterness and makes the cashews easier to process into a smooth and creamy butter.

With the cashews properly soaked, let’s move on to the next step in making delicious cashew butter.

Benefits of Soaking Cashews

To fully enjoy the benefits of soaking cashews, you’ll want to ensure you give them enough time to absorb water and soften. Soaking cashews is important because it helps to improve their digestibility and enhances their nutritional value.

When you soak cashews, it activates enzymes that break down anti-nutrients, making them easier for your body to digest. Additionally, soaking also helps to remove phytic acid, a compound that can interfere with nutrient absorption.

There are a few different techniques you can use to soak cashews. One method is to simply cover the cashews with water and let them soak for at least four hours or overnight. Another technique is to boil water and pour it over the cashews, letting them soak for about 15 minutes.

Advertisement

Whichever method you choose, make sure to drain and rinse the cashews before using them in your recipes.

[bulkimporter_image id=’4′]

Draining and Rinsing the Cashews

Advertisement

When it comes to making cashew butter, one important step is soaking the cashews before blending. Soaking the cashews helps to soften them, making them easier to blend into a smooth and creamy butter.

Additionally, soaking cashews can also help to remove any bitterness and improve the overall taste of the butter. It is also important to rinse the cashews after soaking to remove any residual dirt or debris, ensuring a clean and pure final product.

Soaking Cashews Before Blending

Before blending, you’ll want to soak the cashews to achieve a creamy consistency in your cashew butter. Soaking cashews has numerous benefits and is an essential step in the process. Here are the best soaking methods to ensure the perfect cashew butter:

  • Overnight Soaking: Place the cashews in a bowl and cover them with water. Let them soak overnight for at least 8 hours. This method allows the cashews to fully soften and become easier to blend.

  • Quick Soaking: If you’re short on time, you can also do a quick soak. Place the cashews in a bowl, cover them with boiling water, and let them soak for 1-2 hours. This method speeds up the softening process.

  • Salted Soaking: For added flavor, you can soak the cashews in salted water. Simply add a teaspoon of salt to the water before soaking. This method enhances the taste of the cashews in the final butter.

  • Acidic Soaking: Another option is to soak the cashews in acidic water, such as lemon juice or apple cider vinegar diluted in water. This method helps break down the phytic acid in the cashews, making them easier to digest.

  • Refrigerated Soaking: If you’re concerned about the cashews going bad, you can soak them in the refrigerator. Place the cashews and water in an airtight container and let them soak for 8-12 hours in the fridge. This method helps prevent bacterial growth.

Importance of Rinsing Cashews?

Rinsing the soaked cashews thoroughly under cold water is essential for removing any residue and ensuring a clean base for your creamy creation. When making cashew butter, it is important to start with clean and fresh ingredients to achieve the best flavor and texture. By rinsing the cashews, you eliminate any dirt, dust, or unwanted flavors that may be present on the nuts. This step also helps to remove any anti-nutrients or enzyme inhibitors that can hinder digestion and absorption of nutrients. Additionally, rinsing the cashews can reduce the risk of bacterial contamination.

Incorporating alternative nuts or seeds into your butter recipes can offer a variety of flavors and added health benefits. Some popular cashew butter alternatives include almond butter, peanut butter, and sunflower seed butter. Each of these alternatives has its own unique taste and nutritional profile. For example, almond butter is rich in vitamin E and healthy fats, while peanut butter is a good source of protein and fiber. Sunflower seed butter is high in vitamin E and selenium, which are important antioxidants.

Advertisement
Cashew Butter Alternatives Flavor Nutritional Benefits
Almond Butter Nutty Rich in vitamin E and healthy fats
Peanut Butter Creamy Good source of protein and fiber
Sunflower Seed Butter Earthy High in vitamin E and selenium, important antioxidants

Cashews themselves have numerous health benefits. They are packed with essential minerals like magnesium, phosphorus, and zinc, which are important for bone health and immune function. Cashews are also a good source of healthy fats, including monounsaturated fats, which can promote heart health. Furthermore, cashews contain antioxidants like vitamin E and plant compounds such as polyphenols, which have been linked to a reduced risk of chronic diseases. Incorporating cashews into your diet, whether in the form of butter or as a snack, can provide these health benefits and enhance your overall well-being.

[bulkimporter_image id=’5′]

Roasting the Cashews (Optional

You can choose to roast the cashews before making cashew butter. Roasting the cashews can enhance the flavor and texture of the final product. Here are some benefits of roasting cashews:

  • Enhanced flavor: Roasting brings out the natural nuttiness and sweetness of cashews, giving your cashew butter a rich and delicious taste.

  • Improved texture: Roasting the cashews helps to remove excess moisture, resulting in a smoother and creamier butter.

  • Increased shelf life: The roasting process helps to extend the shelf life of cashews, making your cashew butter last longer.

  • Nutritional benefits: Roasting cashews can enhance the bioavailability of certain nutrients, such as antioxidants and minerals.

  • Alternative soaking methods: If you prefer not to roast the cashews, you can soak them in water overnight or for a few hours. This softens the cashews and makes them easier to blend into butter.

Advertisement
[bulkimporter_image id=’6′]

Blending the Cashews

After roasting, blend the cashews until they reach a smooth and creamy consistency. Adjusting blender settings can help achieve the desired texture. Start by adding the roasted cashews to the blender and secure the lid tightly. Set the blender to its lowest setting to begin the blending process. Gradually increase the speed as the cashews break down and become smoother. If the mixture seems too thick or dry, you can add a small amount of oil, such as coconut or vegetable oil, to help loosen it up. On the other hand, if the mixture becomes too thin, you can add more cashews to thicken it. Troubleshooting blending issues may involve stopping the blender, scraping down the sides, and then continuing to blend until the desired consistency is reached.

Blending Tip Emotional Response
Adjusting blender settings Excitement
Adding oil for creaminess Satisfaction
Troubleshooting blending issues Relief
Achieving smooth and creamy consistency Accomplishment

[bulkimporter_image id=’7′]

Adding Oil (Optional

After blending the cashews to a smooth and creamy consistency, the next step is to add oil to enhance the texture and flavor of the cashew butter. While this step is optional, it can make a significant difference in the final product.

Advertisement

Here are a few pointers to consider when adding oil:

  • Choose a neutral-tasting oil like avocado or grapeseed oil to avoid overpowering the delicate cashew flavor.
  • Start by adding a tablespoon of oil at a time and blend it into the cashew mixture until you achieve the desired consistency.
  • Incorporating honey can add a touch of sweetness to the cashew butter. Start with a teaspoon and adjust according to your preference.
  • Adding a pinch of salt helps to balance the flavors and enhance the natural nuttiness of the cashews.
  • Remember to taste the cashew butter as you go and adjust the oil, honey, and salt to suit your personal preference.

Now that we have discussed adding oil, let’s move on to the next section, which is incorporating sweeteners (optional).

[bulkimporter_image id=’8′]

Incorporating Sweeteners (Optional

To enhance the taste of your cashew blend, consider incorporating optional sweeteners like honey or maple syrup for a touch of sweetness. These natural sweeteners not only add flavor but also offer some health benefits. Honey, for instance, is rich in antioxidants and has antibacterial properties. Maple syrup, on the other hand, contains minerals like manganese and zinc. When selecting sweeteners for your cashew butter, it’s important to choose high-quality options that are free from additives and artificial ingredients. Below is a table that compares different sweeteners alternatives you can use in your cashew butter:

Sweetener Taste Health Benefits
Honey Sweet Antioxidants, Antibacterial properties
Maple Syrup Sweet Minerals like manganese and zinc
Coconut Sugar Sweet Vitamins and minerals
Dates Sweet Fiber, Potassium

Advertisement
[bulkimporter_image id=’9′]

Mixing in Flavorings (Optional

When it comes to enhancing taste with spices, there are countless options to explore. From fragrant herbs like basil and thyme to bold spices like cumin and paprika, each ingredient can add a unique and delicious flavor to your dishes.

Additionally, experimenting with unique flavors can be a fun and exciting way to elevate your cooking. Whether it’s adding a touch of smokiness with chipotle powder or a hint of sweetness with cardamom, the possibilities are endless when it comes to creating unforgettable taste experiences.

Enhancing Taste With Spices

One way to enhance the taste of cashew butter is by adding a pinch of cinnamon for a warm and cozy flavor. Cinnamon not only adds a delightful aroma but also offers several health benefits.

Here are some spice pairing ideas to further elevate your cashew butter experience:

Advertisement
  • Nutmeg: A sprinkle of nutmeg adds a subtle earthiness and complements the creamy texture of cashew butter.

  • Cardamom: This aromatic spice brings a unique citrusy and floral flavor, adding a refreshing twist to your cashew butter.

  • Ginger: Adding a touch of ginger provides a warm and slightly spicy kick, enhancing the overall taste of your cashew butter.

  • Vanilla: A few drops of vanilla extract lend a sweet and comforting flavor, making your cashew butter taste even more indulgent.

  • Allspice: This versatile spice combines flavors of cinnamon, nutmeg, and cloves, creating a complex and rich taste profile in your cashew butter.

Experimenting With Unique Flavors

If you’re feeling adventurous, why not try adding unexpected flavors like chili powder or rosemary to your cashew spread? These unique flavor combinations can take your cashew butter to a whole new level. Experimenting with different spices and herbs not only adds an exciting twist to the taste but also enhances the overall experience.

For example, a pinch of chili powder can give your spread a subtle heat, while rosemary adds a savory and aromatic note. Additionally, you can also experiment with texture by incorporating ingredients like crushed nuts or dried fruits for a delightful crunch or chewiness. These creative additions allow you to customize your cashew butter to suit your preferences and create a truly unique flavor profile.

And speaking of customization, let’s now explore how you can adjust the consistency of your cashew spread.

[bulkimporter_image id=’10’]

Advertisement

Adjusting the Consistency

To make cashew butter creamier, you can add a little bit of oil. Adjusting the consistency of cashew butter is important to achieve the desired texture and spreadability.

Here are some troubleshooting tips and ideas for adding flavors and mix-ins to enhance your cashew butter experience:

  • Add a dash of coconut oil or avocado oil for a smoother consistency.
  • Gradually incorporate small amounts of water to thin out thick cashew butter.
  • For a sweeter taste, mix in honey, maple syrup, or a few drops of vanilla extract.
  • Experiment with different spices like cinnamon, nutmeg, or cardamom for added flavor.
  • Try incorporating mix-ins such as chopped nuts, dried fruits, or chocolate chips for a delightful crunch or extra burst of flavor.

[bulkimporter_image id=’11’]

Storing the Cashew Butter

When storing your cashew butter, remember to keep it in an airtight container to maintain its freshness and prevent it from drying out. Proper storage is essential for preserving cashew butter and extending its shelf life. Here are some tips to help you keep your cashew butter in optimal condition:

Tip Explanation
Use an airtight container This prevents air from entering the container, which can cause the cashew butter to oxidize and spoil.
Store in a cool, dark place Exposure to light and heat can degrade the quality of the cashew butter. Find a cool pantry or cupboard away from direct sunlight.
Avoid moisture and contaminants Moisture can cause the cashew butter to spoil, so make sure the container is completely dry before storing. Avoid introducing contaminants.

Advertisement
[bulkimporter_image id=’12’]

Using Cashew Butter in Recipes

Now that we know how to store cashew butter, let’s explore the different ways we can use it in recipes.

Cashew butter is incredibly versatile and can be used as a spread or as an ingredient in baking. Here are some exciting ways to incorporate cashew butter into your culinary creations:

  • Spread it on toast or rice cakes for a delicious and nutritious breakfast or snack.
  • Use it as a substitute for peanut butter in sandwiches or as a dip for fruits and vegetables.
  • Add it to smoothies for a creamy texture and a boost of protein.
  • Incorporate it into sauces and dressings for a rich and nutty flavor.
  • Use it in baking recipes, like cookies, cakes, and brownies, to add moisture and a subtle nuttiness.

With its smooth and creamy texture, cashew butter adds a unique and delightful twist to any dish. So go ahead and experiment with this delicious ingredient in your next culinary adventure!

[bulkimporter_image id=’13’]

Advertisement

Tips and Tricks for Making Cashew Butter

For a smoother consistency, you can soak the cashews in water before blending them. Soaking the cashews helps to soften them, making them easier to blend into a creamy butter. To do this, simply place the cashews in a bowl and cover them with water. Let them soak for at least 4 hours, or overnight for best results. After soaking, drain the water and rinse the cashews before blending.

While cashews are a popular choice for nut butter, there are also alternative nut options that you can try. Almonds, peanuts, and macadamia nuts can all be used to make delicious nut butters. Each nut has its own unique flavor profile, so feel free to experiment and find your favorite.

Just like with cashews, you can soak these nuts before blending for a smoother consistency. Remember to adjust the soaking time based on the size and hardness of the nut.

Frequently Asked Questions

Can I Use Roasted Cashews Instead of Raw Cashews?

Yes, you can use roasted cashews instead of raw cashews to make cashew butter. Roasting cashews adds a delicious nutty flavor and enhances their crunchiness. However, keep in mind that roasting may slightly reduce the health benefits of cashews.

How Long Should I Soak the Cashews For?

I soak the cashews for at least 4 hours to achieve a creamy cashew butter consistency. Soaking helps soften the cashews and makes them easier to blend, resulting in a smooth and delicious spread.

Advertisement

Do I Need to Add Oil to the Cashew Butter?

I don’t need to add oil to the cashew butter. Cashews have enough natural oils to create a creamy texture. However, you can experiment with different nuts or flavorings to make unique variations.

Can I Use a Blender Instead of a Food Processor?

Yes, you can use a blender instead of a food processor to make cashew butter. The pros of using a blender are its versatility and convenience, but the cons are that it may not achieve the same smooth consistency as a food processor.

Can I Use Alternative Sweeteners Like Honey or Maple Syrup in the Cashew Butter?

Yes, you can use alternative sweeteners like honey or maple syrup in cashew butter. It adds a touch of sweetness without overpowering the nutty flavor. Experiment with different soaking methods for the cashews for a creamy texture.

Conclusion

In conclusion, making cashew butter is a simple and rewarding process. By following the steps outlined in this article, you can create a delicious and creamy spread that can be used in various recipes.

Whether you choose to roast the cashews or not, the end result will be a rich and nutty flavor that is hard to resist. So why not give it a try? Who can resist the temptation of homemade cashew butter?

Advertisement

Start experimenting with this versatile ingredient and elevate your culinary creations to a whole new level.

Continue Reading
Advertisement

Recipes & Culinary Uses

Mixer Magic: How to Make Fresh Butter

Published

on

By

-up image capturing a clear glass mixing bowl filled with thick, creamy liquid, as the whisk attachment of a stand mixer vigorously whips it, causing tiny droplets of butter to form and separate from the buttermilk

I have always thought that cooking is easy as pie. And what better way to demonstrate that than by making your own butter in a mixer?
Could you please rephrase that for me?

With just a few simple steps, you can transform ordinary cream into a creamy and delicious homemade butter. In this article, I’ll guide you through the process, from choosing the right mixer to adding your favorite flavors.

So let’s roll up our sleeves and get ready to whip up some buttery goodness!

Key Takeaways

  • Consider the speed settings and attachments available when choosing a mixer for making butter.
  • Ensure the cream is at room temperature for successful churning.
  • Use a medium-high speed for mixing the cream to achieve the desired consistency.
  • Properly drain and wash the butter to ensure a creamy and spreadable texture.

Choosing the Right Mixer for Making Butter

When choosing the right mixer for making butter, it’s important to consider the speed settings and attachments available. There are several reputable mixer brands on the market that offer a range of options.

Advertisement

One of the pros of using a mixer for making butter is the convenience it provides. With various speed settings, you can easily control the consistency of your butter. Additionally, many mixers come with attachments specifically designed for whipping cream or blending ingredients, which can be useful when making flavored butters.

However, there are also some cons to consider. Mixers can be expensive, and not all models are suitable for butter-making. It’s crucial to do your research and choose a mixer that has enough power and durability to handle the task effectively.

Gathering the Necessary Ingredients and Equipment

To gather the necessary ingredients and equipment, you’ll need to ensure you have everything ready before starting. Here’s a table outlining the key items you’ll need for making butter in a mixer:

Ingredient/Equipment Quantity
Heavy cream 2 cups
Salt 1/4 tsp
Mixer with whisk attachment 1
Bowl 1
Butter mold or storage container 1

To achieve the desired texture, it’s important to choose the right mixer. Look for a mixer with a powerful motor and a whisk attachment. This will ensure that the cream is whipped efficiently and will result in a smoother and creamier butter. Additionally, make sure the bowl you use is deep enough to prevent splattering. By following these steps and using the right equipment, you’ll be able to achieve the perfect texture for your homemade butter.

Preparing the Cream for Churning

Advertisement

Before you start, make sure you have the cream prepared for churning. Choosing the right churning method is essential for successful butter making. There are two main options: using a stand mixer or a hand mixer. Both can produce excellent results, but the stand mixer offers more convenience and control.

To prepare the cream, start by ensuring it is at room temperature. Cold cream will take longer to churn and may result in less creamy butter. Pour the cream into the mixer bowl, making sure not to overfill it. Set the speed to medium-high and let the mixer do its work.

If you encounter any problems during the churning process, troubleshooting common butter making problems is crucial. If the cream isn’t thickening, it might be due to insufficient fat content. Adding a small amount of heavy cream can help. If the butter separates into solids and buttermilk too quickly, reduce the speed to avoid over-churning.

Mixing the Cream to Form Butter

When it comes to mixing cream to form butter, there are a few key points to keep in mind.

Advertisement

First, the speed of the mixer is crucial in achieving the desired consistency. I’ve found that using a medium-high speed works best, as it allows the cream to come together without becoming overmixed.

Secondly, the churning time and technique also play a role in the final outcome. I’ve found that churning for about 10-15 minutes, or until the cream starts to separate into butter and buttermilk, is sufficient.

Mixer Speed for Cream

The mixer’s speed should be adjusted based on the consistency of the cream. The ideal mixer speed for making butter from cream is medium to high. Here are some tips for controlling the mixer speed:

  • Start at a low speed: Begin mixing the cream at a low speed to prevent splattering and ensure even distribution of the ingredients.
  • Gradually increase the speed: As the cream starts to thicken and form soft peaks, gradually increase the mixer speed to medium. This will help break down the fat globules and encourage the separation of butter from the buttermilk.
  • Watch for changes in consistency: Keep a close eye on the cream’s consistency. If it starts to look grainy or curdled, reduce the mixer speed to avoid over-mixing and producing a greasy butter.

Churning Time and Technique

To achieve the desired consistency, it’s important to monitor the churning time and technique when making homemade butter. The churning time can vary depending on several factors, such as the type of cream used, the temperature, and the speed of the mixer. It’s recommended to start with a low speed and gradually increase it until the cream starts to separate into butter and buttermilk. This process usually takes around 10-15 minutes, but it can vary. If the butter is not forming properly, it may be due to insufficient churning time or using cream that is too cold. On the other hand, if the butter is too soft or grainy, it may be a result of over-churning. It’s important to troubleshoot these common issues to ensure the best results.

Here is a table highlighting the recommended churning time variations for different types of cream:

Cream Type Churning Time
Heavy Cream 10-15 minutes
Whipping Cream 8-12 minutes
Double Cream 12-18 minutes

Separating Butter and Buttermilk

It’s important to gradually increase the speed of the mixer until the cream starts to separate into butter and buttermilk. This process usually takes around 10-15 minutes of continuous mixing.

Advertisement

Here are some troubleshooting tips for separating butter and buttermilk:

  • Make sure the cream is at the right temperature. It should be around 50-55°F for optimal separation.
  • If the butter isn’t forming, you can try adding a small amount of ice water to encourage separation.
  • If the butter separates but the buttermilk looks chunky or watery, it may be due to overmixing. Stop the mixer as soon as the separation occurs to prevent further mixing.
  • If the butter and buttermilk aren’t fully separating, you can strain the mixture through a cheesecloth or fine-mesh sieve to remove any remaining liquid.

Draining and Washing the Butter

When it comes to draining and washing butter, there are three key points to consider.

The first is removing excess liquid, which is important for achieving a creamy and spreadable texture.

Next, washing out impurities is crucial to ensure the butter is clean and free from any unwanted flavors or particles.

Removing Excess Liquid

First, drain the excess liquid from the butter by using a cheesecloth. This step is crucial in achieving a creamy consistency for your homemade butter.

Here are some tips for removing excess water and getting that perfect texture:

Advertisement
  • Gently squeeze the butter in the cheesecloth to remove any remaining liquid. Be careful not to squeeze too hard, as this can cause the butter to become too dense.

  • Place the butter in a bowl of cold water and gently knead it with your hands. This helps to further remove any water that may be trapped in the butter.

  • If you still notice excess liquid, you can try pressing the butter between two plates to help drain out any remaining water.

Washing Out Impurities

To remove impurities from the butter, you can wash it under cold water while gently kneading it. It is important to use cold water for this process as it helps to solidify the butter and make it easier to separate from any impurities. There are different methods you can use to wash out impurities in homemade butter. One method is to place the butter in a bowl of cold water and let it sit for a few minutes. Then, gently knead the butter with your hands to release any impurities. Another method is to wrap the butter in cheesecloth and immerse it in a bowl of cold water. Gently squeeze and knead the cheesecloth to release any impurities. Whichever method you choose, be sure to rinse the butter thoroughly to ensure all impurities are removed.

Method Steps Benefits
Cold Water Method 1. Place butter in a bowl of cold water. 2. Let it sit for a few minutes. 3. Gently knead the butter to release impurities. – Helps solidify the butter. – Easy to perform.
Cheesecloth Method 1. Wrap butter in cheesecloth. 2. Immerse in a bowl of cold water. 3. Gently squeeze and knead the cheesecloth to release impurities. – Provides a barrier for impurities. – Allows for easier removal.

Achieving Desired Texture

You can achieve the desired texture of your homemade butter by adjusting the amount of kneading and chilling time. Here are some tips to help you achieve the perfect consistency:

  • Kneading Time: For a softer and spreadable butter, knead the cream for a shorter period of time. This will result in a smoother and creamier texture. If you prefer a firmer butter, knead the cream for a longer period of time. This will help develop a more solid and compact texture.

  • Chilling Time: After kneading the cream, refrigerate it for at least 30 minutes before shaping it. This will allow the butter to firm up and hold its shape. If your butter is too soft or greasy, try chilling it for a longer period of time. This will help solidify the fat and improve the texture.

  • Troubleshooting Common Texture Issues: If your butter turns out grainy, it may be due to insufficient kneading. Simply knead it for a few more minutes until the grains disappear. If your butter is too hard or crumbly, it may have been over-kneaded. Try kneading it less next time to achieve a smoother texture.

Adding Salt or Flavorings (Optional

If you want to enhance the taste of your butter, consider adding salt or other flavorings. There are numerous flavoring variations you can experiment with to create a unique and delicious butter.

One popular option is to add a pinch of sea salt, which brings out the natural flavors of the butter and gives it a satisfying savory taste.

For those looking for a sweeter option, you can try adding a drizzle of honey or a sprinkle of cinnamon. Not only do these flavorings add a delightful twist to your butter, but they also offer health benefits. Honey, for example, is known for its antibacterial properties and can provide a natural source of antioxidants.

Advertisement

Storing and Using Homemade Butter

When storing your homemade butter, it is important to keep it in an airtight container to maintain its freshness and prevent it from absorbing any odors from the refrigerator. Here are some helpful tips for storing and using your homemade butter:

  • Store it in an airtight container: This will prevent your butter from picking up any unwanted flavors or odors from other foods in the fridge.
  • Keep it in the coldest part of the refrigerator: Butter tends to soften quickly at room temperature, so keeping it in the coldest part of the fridge will help it stay firm and fresh.
  • Freeze it for long-term storage: If you have made a large batch of butter, you can freeze it in smaller portions for later use. Just make sure to wrap it tightly in freezer-safe packaging.

Creative uses for homemade butter:

  • Baking: Homemade butter adds a rich and creamy flavor to baked goods like cookies, cakes, and pastries.
  • Cooking: Use homemade butter to sauté vegetables, cook eggs, or melt over grilled meats for a flavorful finish.
  • Spreads and sauces: Whip up delicious spreads like garlic herb butter or homemade hollandaise sauce using your homemade butter.

With proper storage and creative uses, your homemade butter will be a versatile and tasty addition to your culinary repertoire.

Frequently Asked Questions

Can I Use a Hand Mixer Instead of a Stand Mixer to Make Butter?

Yes, you can use a hand mixer instead of a stand mixer to make butter. Here are some tips for making butter with a hand mixer: use a deep bowl, start on low speed, and be patient.

Can I Use Any Type of Cream to Make Butter?

Yes, you can use any type of cream to make butter. Heavy cream is commonly used, but you can also use whipping cream or double cream. Additionally, you can make butter without a mixer using alternative methods like shaking cream in a jar or using a food processor.

Do I Need to Chill the Cream Before Churning It Into Butter?

Yes, it is necessary to chill the cream before churning it into butter. Chilling helps in achieving a better consistency and texture. It also enhances the homemade butter taste by allowing the fat to separate more easily.

How Long Does It Typically Take to Churn Cream Into Butter Using a Mixer?

To speed up the butter churning process, is there a way to make butter in a blender? It typically takes around 10-15 minutes to churn cream into butter using a mixer.

Advertisement

Can I Use Store-Bought Salted Butter to Add Flavor to My Homemade Butter?

Yes, you can use store-bought salted butter to add flavor to your homemade butter. Another option is to incorporate flavored oils during the churning process. Both methods will enhance the taste of your homemade butter.

Conclusion

In conclusion, making butter in a mixer is a delightful and rewarding experience. By choosing the right mixer and gathering the necessary ingredients and equipment, you are well on your way to creating a creamy and delicious homemade butter.

From preparing the cream and mixing it to perfection, to draining and washing the butter, every step is crucial in achieving that perfect consistency. And don’t forget to add a pinch of salt or your favorite flavorings for that extra touch of deliciousness.

So go ahead, store and savor your homemade butter, and let your taste buds dance with joy!

Advertisement
Continue Reading

Recipes & Culinary Uses

Make Rich Butter Using Whipping Cream

Published

on

By

An image showcasing the process of making butter from whipping cream: a glass jar filled with creamy liquid, a hand vigorously shaking it, and then separating the solid butter and liquid buttermilk

I understand your skepticism about the process of making butter from whipping cream, it may seem complicated and time-consuming. However, let me assure you that it is actually much simpler than you think!

In just a few simple steps, you can transform that carton of whipping cream in your fridge into a delicious, homemade butter. So grab your materials, chill that cream, and get ready to whip up some buttery goodness.

Trust me, once you taste the creamy, rich flavor of your homemade butter, you’ll never go back to store-bought again.

Key Takeaways

  • Select the right whipping cream with the desired fat content for the desired outcome in recipes.
  • Use a chilled bowl and whisk, and start at a low speed to gradually incorporate air while whipping.
  • Avoid overwhipping to prevent grainy butter and separation.
  • Separate and wash the butter properly to remove excess buttermilk and improve its shelf life.

Gathering the Materials

Before we begin, make sure you’ve gathered all the necessary materials. For making homemade butter, you will need some key items.

Advertisement

Firstly, you will need fresh whipping cream. Look for a high-quality cream with a high fat content for the best results.

Next, you will need a container to store your homemade butter. There are various options available, such as glass jars, plastic containers, or butter keepers. Choose one that suits your preference and ensures the butter stays fresh.

Moving on to flavors, there are plenty of ways to add a delicious twist to your homemade butter. You can experiment with herbs like garlic, thyme, or rosemary. Alternatively, you can try sweet flavors like honey or cinnamon. The possibilities are endless, so get creative and have fun exploring different flavors for your homemade butter.

Selecting the Right Whipping Cream

When choosing the right whipping cream, it’s important to consider the fat content. The fat content determines the richness and thickness of the cream, which can greatly affect the outcome of your recipes.

There are different types of cream available, each with varying fat content. Heavy cream, also known as heavy whipping cream, is the richest with a fat content of around 36%. It’s perfect for making whipped cream and adding richness to sauces and soups.

Advertisement

Light cream has a fat content of around 20% and is best for adding a touch of creaminess to coffee or tea.

Half-and-half is a mixture of milk and cream, with a fat content of around 10-12%. It’s commonly used in coffee and as a lighter alternative to heavy cream.

When it comes to salt alternatives, you can opt for unsalted butter or low-sodium cream if you’re watching your sodium intake.

Chilling the Whipping Cream

Advertisement

To achieve the best results, it’s crucial to chill the whipping cream before using it in your recipes. This helps the cream to whip up faster and hold its shape better. The chilling time and temperature of the cream are important factors to consider.

Discussion Point 1: Chilling Time
It is recommended to chill the whipping cream for at least 30 minutes before using it. This allows the fat in the cream to solidify slightly, which makes it easier to whip. If the cream is not chilled enough, it may take longer to reach the desired consistency and may not hold its shape as well.

Discussion Point 2: Temperature of the Cream
The whipping cream should be cold but not frozen. Ideally, it should be around 40°F (4°C). If the cream is too warm, it will not whip properly and may become runny. On the other hand, if it is too cold, it may be difficult to incorporate air into the cream and achieve the desired volume.

Table: Chilling Time Temperature of the Cream
At least 30 minutes Around 40°F (4°C)

Whipping the Cream

When it comes to whipping cream, there are a few key points to keep in mind.

First, mastering the whipping technique is crucial for achieving the perfect consistency. I’ll be sharing some helpful tips to ensure your cream whips up beautifully.

Advertisement

Second, having the right tools for the job makes a world of difference. I’ll be discussing the best tools to use for whipping cream, so you can achieve the best results.

Lastly, over-whipping can lead to some consequences that can ruin your whipped cream. I’ll be covering what those consequences are and how to avoid them.

Whipping Technique Tips

One important tip for whipping cream into butter is to ensure you’re using cold cream straight from the fridge. This is because cold cream has a higher fat content and will whip up more easily.

When it comes to whipping technique, there are a few key tips to keep in mind:

  • Use a chilled bowl and whisk: This helps to maintain the cold temperature of the cream and promotes better whipping.
  • Start at a low speed: Beginning at a low speed allows the cream to incorporate air gradually, preventing splattering.
  • Avoid overwhipping: Be careful not to overwhip the cream, as this can lead to grainy butter and separation of the milk solids.

Best Tools for Whipping

Using a chilled bowl and whisk will help you maintain the cold temperature of your ingredients and achieve better results.

However, if you don’t have access to these tools, there are alternatives for whipping cream. An electric mixer with a whisk attachment can be a great option, as it saves time and effort. Another alternative is a hand mixer, which is more portable and convenient for smaller batches.

Advertisement

Now, let’s address some common whipping issues. If your cream is not thickening, make sure it is cold and that you’re using the correct fat percentage. If the cream starts to curdle, stop whipping immediately, as this means you have over-whipped it.

Speaking of over-whipping, let’s discuss the consequences in the next section.

Over-Whipping Consequences

If you over-whip the cream, it will become grainy and lose its smooth texture. Over-whipping introduces too much air into the cream, causing it to thicken excessively and break down. As a result, the fat globules in the cream clump together, creating a grainy consistency. This is not ideal when using the cream for toppings or fillings.

Consequences of over-whipping:

  • Grainy texture
  • Loss of smoothness

While over-whipped cream may not be suitable for its original purpose, there are alternative uses for it:

Alternative uses for over-whipped cream:

Advertisement
  • Incorporate it into a cake batter for added moisture and richness.
  • Use it as a base for homemade butter, by continuing to whip until the fat separates from the liquid.

Adding Salt (Optional

I love adding salt to my dishes because it enhances the flavor and brings out the best in every ingredient.

But I know there’s an ongoing debate about whether to use salt or not, with some people advocating for a salt-free diet.

In this discussion, we’ll explore the benefits of adding salt and how it can transform a dish from ordinary to extraordinary.

Salt Enhances Flavor

Adding salt to the whipped cream enhances its flavor. Salt has the ability to bring out the natural sweetness and richness of the cream, creating a more balanced and enjoyable taste. But the benefits of adding salt to whipped cream go beyond flavor enhancement.

Firstly, consuming salt in moderation can have several health benefits. It helps to regulate fluid balance in the body, supports proper muscle function, and aids in nerve transmission.

Secondly, if you prefer to explore alternative flavor enhancements, there are various options to consider. You can add a splash of vanilla extract for a subtle sweetness, a drizzle of chocolate syrup for a decadent twist, or a sprinkle of cinnamon for a warm and spicy flavor. These alternatives offer unique tastes that can elevate your whipped cream to new heights.

Advertisement

Salt or No Salt

In my previous subtopic, I discussed how salt enhances the flavor of butter. Now, let’s tackle the age-old debate: salted or unsalted butter? It’s a discussion point that has divided many home cooks and chefs alike.

Some argue that salted butter adds an extra depth of flavor to dishes, while others prefer the versatility of unsalted butter. When it comes to health benefits, both options have their merits. Salted butter contains trace amounts of iodine, which is essential for thyroid function. On the other hand, unsalted butter allows you to control the sodium intake in your meals.

For those looking for alternative seasonings, there are plenty of options to explore. Herbs like rosemary, thyme, or garlic can add a burst of flavor to your butter. You can even experiment with spices like paprika or cayenne pepper for a little kick.

Ultimately, the choice between salted and unsalted butter and alternative seasonings comes down to personal preference and the specific dish you’re preparing.

Benefits of Adding Salt

When using salt, you’ll notice that it helps to enhance the flavors in your dishes. It’s a staple in most kitchens and adds that extra kick to your meals.

Advertisement

But did you know that there are alternatives to salt that can provide the same flavor enhancement? Some popular salt alternatives include herbs and spices like garlic powder, onion powder, and black pepper. These alternatives not only bring out the flavors in your food but also offer additional health benefits.

For example, garlic powder is known for its antioxidant properties and can boost your immune system. Onion powder is rich in vitamins and minerals, while black pepper aids digestion.

Continuing to Whip

Once the cream starts to thicken, you can keep whipping it to achieve the desired consistency for butter. Continuous whipping has its benefits.

Firstly, it helps to break down the fat globules in the cream, allowing them to stick together and form butter. This continuous agitation also helps to release excess moisture, resulting in a creamier and more spreadable butter.

Secondly, different whipping techniques can be employed to achieve different results. For a light and fluffy butter, whip the cream at a high speed until it forms soft peaks. If you prefer a denser and more solid butter, continue whipping until the cream becomes stiff and separates into butter and buttermilk.

Advertisement

Separating the Butterfat

To separate the butterfat, you’ll want to continue agitating the cream until it separates into butter and buttermilk. The butterfat content of different types of cream can vary, with heavy cream having a higher percentage compared to light cream. This difference in butterfat content affects the flavor and texture of the resulting butter.

When it comes to the history of butter making techniques, it dates back thousands of years. Ancient civilizations discovered that agitating cream could separate the butterfat from the liquid. They used various methods, such as shaking the cream in animal skin bags or churning it in wooden barrels. Over time, these techniques evolved, and today we have modern tools like stand mixers and butter churns to make the process easier.

Now, let’s move on to the next step: draining the buttermilk.

Draining the Buttermilk

Now, you can strain the mixture through a fine mesh sieve or cheesecloth to separate the buttermilk from the butter. Straining is an essential step in the butter-making process as it helps remove any remaining liquid from the solid butter.

As the mixture passes through the sieve or cheesecloth, the golden buttermilk will slowly drip down, leaving behind the creamy, velvety butter. Buttermilk, despite its name, is not actually made from butter. It is the liquid left over after churning butter from cream.

Advertisement

Besides being a delicious ingredient in pancakes and baked goods, buttermilk also offers several health benefits. It is rich in probiotics, calcium, and vitamins, making it good for digestion and bone health. In addition to its culinary uses, buttermilk has been historically used as a natural beauty remedy, helping to cleanse and exfoliate the skin.

Washing the Butter

When it comes to making homemade butter, there’s an important step that often gets overlooked – washing the butter.

In this discussion, we’ll explore the reasons why washing butter is necessary and the benefits it brings to the final product.

Additionally, we’ll delve into the proper techniques for washing butter to ensure the best results and achieve that smooth, creamy texture we all love.

Discussion Point 1: Why Wash Butter

Why wash butter? It helps remove excess buttermilk and improves the shelf life of your homemade butter. When making butter, it’s important to properly wash it to ensure the final product is of high quality.

Advertisement

Here are some key reasons why butter washing is essential:

  • Proper butter washing techniques:

  • Rinse the butter under cold water to remove any remaining buttermilk.

  • Knead the butter to remove excess moisture.

  • Benefits of adding salt:

  • Salt acts as a preservative, extending the shelf life of the butter.

  • Salt enhances the flavor and adds a subtle depth to the butter.

By following these proper butter washing techniques and adding a pinch of salt, you can achieve a creamy, flavorful, and longer-lasting homemade butter.

Now, let’s move on to discussing proper butter washing techniques in more detail.

Discussion Point 2: Proper Butter Washing Techniques

To achieve a creamy and longer-lasting homemade butter, it’s important to properly wash the butter and remove excess moisture. When it comes to butter washing techniques, there are a few variations you can try.

One method is using cold water. After churning the butter, you can place it in a bowl of cold water and gently knead it. The water will help remove any remaining buttermilk, which can cause the butter to spoil faster.

Advertisement

Another technique involves using ice water. This method is particularly effective in removing even more buttermilk and excess moisture, resulting in a smoother and firmer butter.

Whichever technique you choose, the benefits of proper butter washing are undeniable. Not only does it improve the taste and texture, but it also helps to extend the shelf life of your homemade butter.

Shaping the Butter

First, take the lump of butter and shape it into a round ball. Shaping the butter is an important step in creating a visually appealing final product. Here are some shaping techniques to consider:

  • Press and roll: Use the palm of your hand to press the butter into a flat shape, then gently roll it into a cylinder.
  • Knife sculpting: With a sharp knife, carefully carve the butter into intricate shapes or patterns.

Now, let’s talk about butter molds. Butter molds are a fun and creative way to shape your homemade butter. They come in various designs, such as flowers, animals, or even holiday-themed shapes. Simply press the softened butter into the mold, then gently tap it out to reveal the beautiful shape.

By shaping your butter with different techniques or using molds, you can add a personal touch to your homemade butter.

Now, let’s move on to the next step: storing and enjoying your creation.

Advertisement

Storing and Enjoying Your Homemade Butter

Now let’s talk about how to store and enjoy your homemade butter.

Homemade butter is better because it contains no preservatives or additives, giving you a pure and natural flavor.

To store your butter, wrap it tightly in wax paper or plastic wrap and keep it in the refrigerator. This will help it stay fresh for up to two weeks.

When it comes to enjoying your homemade butter, the possibilities are endless. Spread it on warm toast or freshly baked bread for a simple and satisfying treat. Use it to sauté vegetables or melt it over grilled steak for added richness and flavor. And don’t forget about baking! Homemade butter is perfect for making flaky pie crusts and delicious cookies.

Frequently Asked Questions

How Long Does It Take to Make Butter From Whipping Cream?

It doesn’t take long to make butter from whipping cream. Once the cream is whipped, it separates into butter and buttermilk. After that, you can store the homemade butter properly and even flavor it to your liking.

Advertisement

Can I Use Any Type of Salt When Adding It to the Butter?

Yes, you can use different types of salt when adding it to homemade butter. It’s a great way to add flavors and enhance the taste. I personally enjoy using sea salt or Himalayan pink salt for a unique twist.

Can I Use an Electric Mixer Instead of a Hand Whisk to Whip the Cream?

Yes, you can definitely use an electric mixer instead of a hand whisk to whip the cream. It’s quicker and more efficient. Plus, you’ll get that perfect fluffy texture for your homemade butter.

Can I Use Heavy Cream Instead of Whipping Cream to Make Butter?

Yes, heavy cream can be used as an alternative ingredient for making butter from cream. It contains a higher fat content than whipping cream, which helps in the butter-making process.

How Long Can I Store Homemade Butter in the Refrigerator Before It Goes Bad?

I’ll share some storage tips for homemade butter and signs of spoiled butter. It’s important to know how long we can keep it in the refrigerator before it goes bad.

Conclusion

In conclusion, making butter from whipping cream is a simple and rewarding process. By following the steps outlined in this article, you can create your own delicious homemade butter.

Advertisement

So why not give it a whirl? With a little patience and effort, you’ll be churning out creamy, flavorful butter that will have you saying, ‘It’s like butter wouldn’t melt in my mouth!’

So go ahead and embark on this butter-making adventure, and indulge in the rich and wholesome taste of your very own creation.

Continue Reading

Recipes & Culinary Uses

10 Easy Steps to Make Butter in a Jar

Published

on

By

An image featuring a glass jar filled with creamy, pale yellow liquid, surrounded by a flurry of motion as a hand vigorously shakes it

One often hears that the most wonderful things in life are those made at home, and this is especially evident when it comes to butter.

In this article, I’ll show you how to make butter in a jar using simple ingredients and tools.

With a little bit of churning and straining, you’ll have a creamy, delicious spread that will elevate any meal.

So, roll up your sleeves and get ready to embark on a butter-making adventure that will leave your taste buds begging for more.

Let’s dive in!

Advertisement

Key Takeaways

  • Choose high-fat heavy cream without additives or preservatives
  • Sterilize the jar to eliminate bacteria and contaminants
  • Gather necessary tools and equipment for the butter-making process
  • Experiment with flavor variations and proper storage techniques for homemade butter

Choosing the Right Ingredients

Before you begin, make sure you have the right ingredients for making butter in a jar. Choosing the right ingredients is crucial to achieving the perfect taste and texture.

For homemade butter, it’s best to use heavy cream that has a high fat content. Look for cream that is fresh and free from any additives or preservatives. Organic, grass-fed cream is also a great option if you prefer a more natural flavor.

Additionally, consider your taste preferences when selecting the ingredients. If you like salted butter, you can add a pinch of salt to the cream before shaking it.

Now that you have the right ingredients, let’s move on to preparing the jar and tools for making butter.

Advertisement

Preparing the Jar and Tools

When it comes to preparing the jar and tools for making butter, there are several key points to consider.

First, it is important to sterilize the jar to ensure that it is free from any bacteria or contaminants that could affect the quality and safety of the butter. This can be done by washing the jar in hot, soapy water and then boiling it in a pot of water for a few minutes.

Additionally, it is necessary to gather the necessary tools and equipment, such as a butter churn or a jar with a tight-fitting lid, a thermometer, and a clean cloth or cheesecloth for straining the butter.

Lastly, it is crucial to take safety precautions into account, such as wearing gloves to protect your hands from hot surfaces and using caution when working with boiling water.

Jar Sterilization Techniques

To ensure cleanliness, it’s important to sterilize the jar before making butter. Proper sterilization ensures that harmful bacteria and contaminants are eliminated, reducing the risk of spoilage and ensuring the butter remains safe to consume. There are several methods for sterilizing a jar, each with its own advantages and limitations:

Advertisement
  • Boiling: Placing the jar in boiling water for a few minutes effectively kills bacteria and other microorganisms.

  • Bleaching: Soaking the jar in a solution of bleach and water, then rinsing thoroughly, is another effective method.

  • Steam sterilization: Using a pressure cooker or steam sterilizer, the jar is exposed to high heat and pressure, effectively sterilizing it.

  • Oven sterilization: Placing the jar in an oven preheated to a specific temperature kills bacteria and sterilizes the jar.

  • Chemical sterilization: Using chemical sterilizing agents like hydrogen peroxide or food-grade sanitizers effectively sterilizes the jar.

Necessary Tools and Equipment

You’ll need a few necessary tools and equipment for the process.

First and foremost, choosing the right jar is crucial. Opt for a glass jar with a tight-fitting lid to ensure proper sealing and storage of your homemade butter. It should be of adequate size to accommodate the cream and allow room for shaking.

Additionally, cleanliness plays a vital role in butter-making. Make sure all your tools and equipment are thoroughly cleaned and sanitized to prevent any contamination. Sterilize the jar by boiling it in water for a few minutes or running it through the dishwasher on a hot setting.

Maintaining a clean environment throughout the process will help ensure the quality and safety of your homemade butter.

Safety Precautions to Consider

Ensure that all tools and equipment are cleaned and sanitized to maintain a safe environment throughout the butter-making process. When it comes to food handling, cleanliness precautions are of utmost importance. Here are some key precautions to consider:

Advertisement
  • Wash your hands thoroughly before and after handling any ingredients or equipment.
  • Clean all surfaces and utensils used in the butter-making process to prevent cross-contamination.
  • Use separate cutting boards and knives for raw ingredients such as herbs and spices.
  • Store ingredients properly to avoid spoilage and contamination.
  • Regularly inspect and clean your storage areas to prevent the growth of harmful bacteria.

By following these cleanliness precautions, you can ensure that your butter-making process remains safe and hygienic.

Churning the Cream

Start shaking the jar vigorously to churn the cream into butter. Churning cream is an essential step in the butter-making process. The type of cream used and the method of churning can greatly affect the outcome of the butter.

There are two main types of cream commonly used for making butter: heavy cream and whipping cream. Heavy cream contains a higher fat content, typically around 36-40%, which makes it ideal for butter-making. Whipping cream, on the other hand, has a lower fat content, usually around 30%, and may result in a softer, less dense butter.

When it comes to churning methods, there are various techniques you can employ. These include using a jar, a stand mixer, a food processor, or even a traditional churn. Each method has its advantages and disadvantages, so it’s important to choose the one that suits your preferences and equipment availability.

Experimenting with different cream types and churning methods can yield unique and delicious results in your homemade butter.

Straining the Buttermilk

To strain the buttermilk from the freshly churned butter, pour the mixture into a fine mesh sieve or cheesecloth-lined colander. This step is crucial in separating the liquid buttermilk from the solid butter.

Advertisement

Here are some key techniques and uses for straining buttermilk:

  • Cream separation: Straining helps separate the cream from the buttermilk, resulting in a creamy, rich butter.

  • Flavor enhancement: By removing the buttermilk, you can customize the flavor of your butter by adding herbs, spices, or even honey.

  • Baking ingredient: Buttermilk is a versatile ingredient in baking, adding moisture and tanginess to cakes, biscuits, and pancakes.

  • Culinary applications: Strained buttermilk can be used as a marinade for tenderizing meat or as a base for salad dressings and sauces.

  • Culturing: If you want to make your own cultured buttermilk, strain the liquid and let it sit at room temperature with a starter culture to develop tangy flavors.

Straining the buttermilk not only yields a smooth and creamy butter but also opens up a world of culinary possibilities.

Washing and Shaping the Butter

When it comes to making butter, two important factors to consider are the texture of the butter and the techniques used to shape it.

The texture of the butter can vary depending on how it is made and the quality of the cream used. Achieving the desired texture requires careful attention to the churning process and ensuring that all the buttermilk is properly removed.

Additionally, shaping the butter can be done in various ways, such as using molds or rolling it into logs, and each technique can result in a different appearance and presentation of the final product.

Advertisement

Texture of the Butter

You can tell the texture of the butter by shaking the jar and feeling how thick or creamy it is. The texture is an important factor in making flavored butter, as it determines how well the flavors will blend together.

Here are five key points to consider when assessing the texture of your butter:

  • Creaminess: A creamy texture indicates that the butter has a higher fat content and will be easier to spread.

  • Smoothness: A smooth texture suggests that the butter has been properly churned and will have a silky mouthfeel.

  • Firmness: The firmness of the butter can vary depending on the temperature at which it was stored. Softer butter is easier to work with when making flavored butter.

  • Consistency: The consistency of the butter should be uniform throughout, without any lumps or chunks.

  • Moisture content: Butter with a higher moisture content will have a softer texture, while butter with a lower moisture content will be firmer.

Understanding the texture of your butter is crucial when shaping it into various forms, as we will explore in the next section.

Butter Shaping Techniques

Now that we have discussed the texture of the butter, let’s move on to the exciting topic of butter shaping techniques.

Butter molding is a fascinating art form that allows you to create decorative butter shapes that will impress your guests at the dining table.

Advertisement

To start, ensure that your butter is at room temperature for easy shaping. Once softened, you can use various tools and techniques to mold the butter into intricate designs. From simple shapes like flowers and animals to more elaborate creations, the possibilities are endless.

One popular technique is using butter molds, which are specially designed containers that shape the butter into specific forms. These molds come in a variety of shapes, allowing you to create beautiful, detailed designs.

Another method is butter sculpting, where you use sculpting tools to carve delicate patterns and textures into the butter. This technique requires precision and patience but can result in stunning masterpieces.

With butter shaping techniques, you can elevate the presentation of your butter and add an artistic touch to your meals.

Storing and Enjoying Your Homemade Butter

To savor your homemade butter, try spreading it on warm toast or using it as a flavorful addition to your favorite recipes. Storing your homemade butter properly is essential to maintain its freshness and flavor.

Advertisement

Here are some storing techniques and flavor variations to enhance your butter experience:

  • Keep your butter in an airtight container to prevent it from absorbing other odors in the fridge.
  • For longer-term storage, you can freeze your butter. Wrap it tightly in wax paper or plastic wrap before placing it in a freezer bag.
  • To add a twist to your butter, experiment with different flavor variations like garlic and herb, cinnamon and honey, or even spicy chili.
  • If you prefer salted butter, incorporate sea salt or other coarse salts during the churning process.
  • Don’t forget to label your butter with the date of preparation to keep track of its freshness.

Frequently Asked Questions

Can I Use Any Type of Cream to Make Butter in a Jar?

Yes, you can use heavy cream instead of regular cream to make butter in a jar. It contains a higher fat content which aids in the separation process. However, flavored creams may not yield the desired results due to additional ingredients.

How Long Does It Take to Churn the Cream Into Butter?

It typically takes about 10-15 minutes to churn cream into butter, depending on various factors. The butter churn method can be faster than traditional methods, but it also requires more effort.

Can I Use a Blender or Mixer Instead of a Jar to Make Butter?

Yes, a blender or mixer can be used as alternatives to a jar to make butter. They provide a faster and more efficient way of churning the cream into butter, saving time and effort.

What Can I Do With the Leftover Buttermilk After Straining?

When it comes to the leftover buttermilk, there’s no need to waste it. Get creative with recipes using buttermilk, like pancakes or biscuits, to make the most of this tangy ingredient.

How Long Can I Store Homemade Butter in the Refrigerator?

Homemade butter can be stored in the refrigerator for up to two weeks, as long as it is kept in an airtight container. To maximize longevity, it is important to remove any excess buttermilk and rinse the butter thoroughly before storing.

Advertisement

Conclusion

In conclusion, making butter in a jar is a fun and rewarding process that anyone can do at home. By following the steps outlined in this article, you can create your own delicious homemade butter with just a few simple ingredients and tools.

It’s amazing how a simple act of churning cream can transform it into a creamy and flavorful spread. Just like how the process of churning butter requires patience and persistence, sometimes in life, we need to put in effort and work hard to achieve something truly amazing.

So why not give it a try and enjoy the fruits of your labor by spreading your homemade butter on warm toast or fresh biscuits?

Continue Reading

Trending