Connect with us

Recipes & Culinary Uses

How to Make Creamy Butter from Pasteurized Milk

Published

on

An image showcasing the step-by-step process of making butter from pasteurized milk: a glass jar filled with creamy milk, shaking motion blurred hands, milk separating into butter and buttermilk, and finally, a lump of freshly churned butter

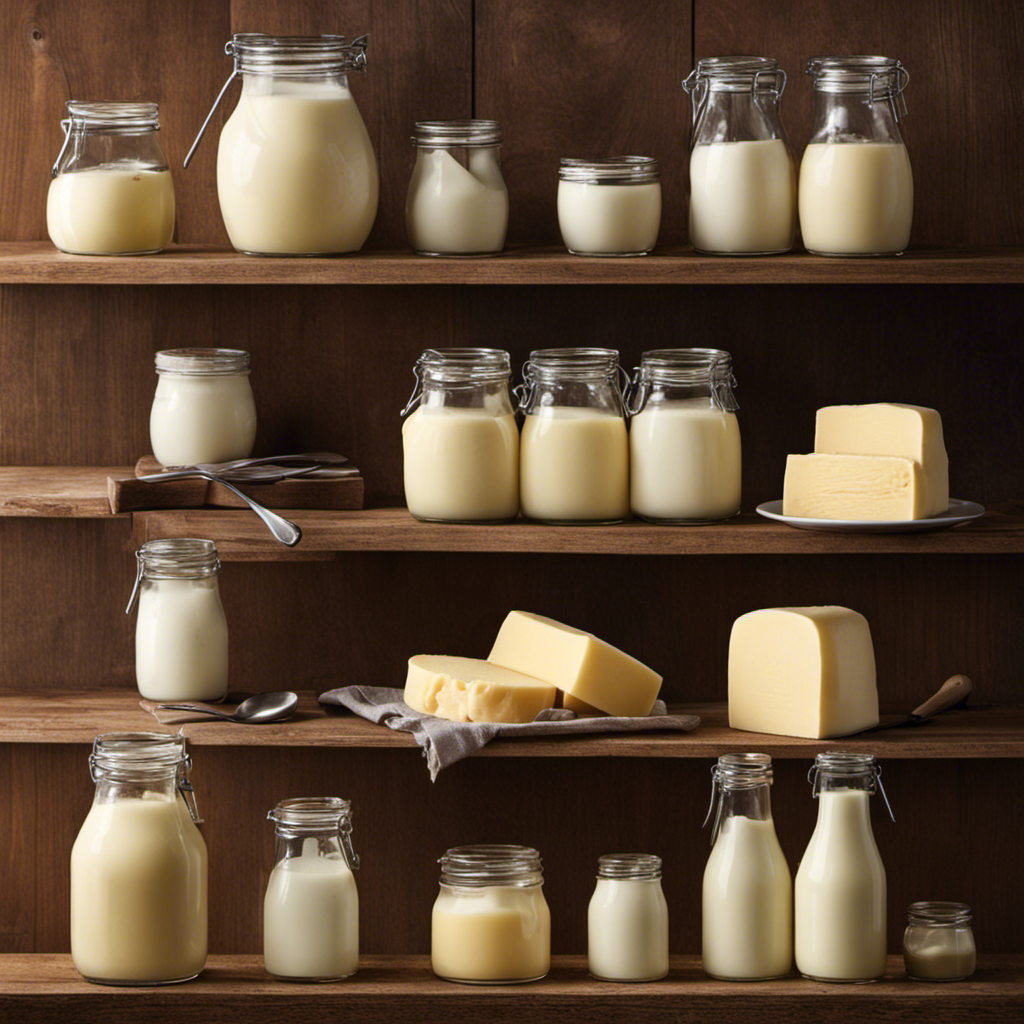
I have always been intrigued by the transformation of milk into butter. It is incredible how something as basic as pasteurized milk can be changed into a luxurious and creamy spread.

In this article, I’ll guide you through the step-by-step process of making butter from pasteurized milk. We’ll explore the science behind butter making, troubleshoot common issues, and discover the health benefits of homemade butter.

Get ready to embark on a delicious and informative butter-making journey!

Key Takeaways

  • Pasteurization kills harmful bacteria and pathogens in milk, making it safe for consumption.
  • Churning separates butterfat from liquid in pasteurized milk to create homemade butter.
  • The process of churning butter involves agitating cream to encourage fat globules to clump together.
  • Homemade butter offers the advantage of customization, flavor enhancement, and control over ingredients compared to processed butter.

The Importance of Using Pasteurized Milk

Using pasteurized milk is essential for making butter because it ensures the butter is safe to consume. Pasteurization is a process that involves heating the milk to kill harmful bacteria and pathogens that can cause foodborne illnesses. By using pasteurized milk, we can minimize the risk of contamination and ensure the health benefits of homemade butter.

Advertisement

Pasteurization does not significantly affect the nutritional value of the milk, as it retains most of its vitamins and minerals. Additionally, pasteurized milk is readily available in grocery stores, making it convenient for butter-making purposes.

Now that we understand the importance of using pasteurized milk, let’s move on to the next step of gathering the necessary equipment for making butter.

Gathering the Necessary Equipment

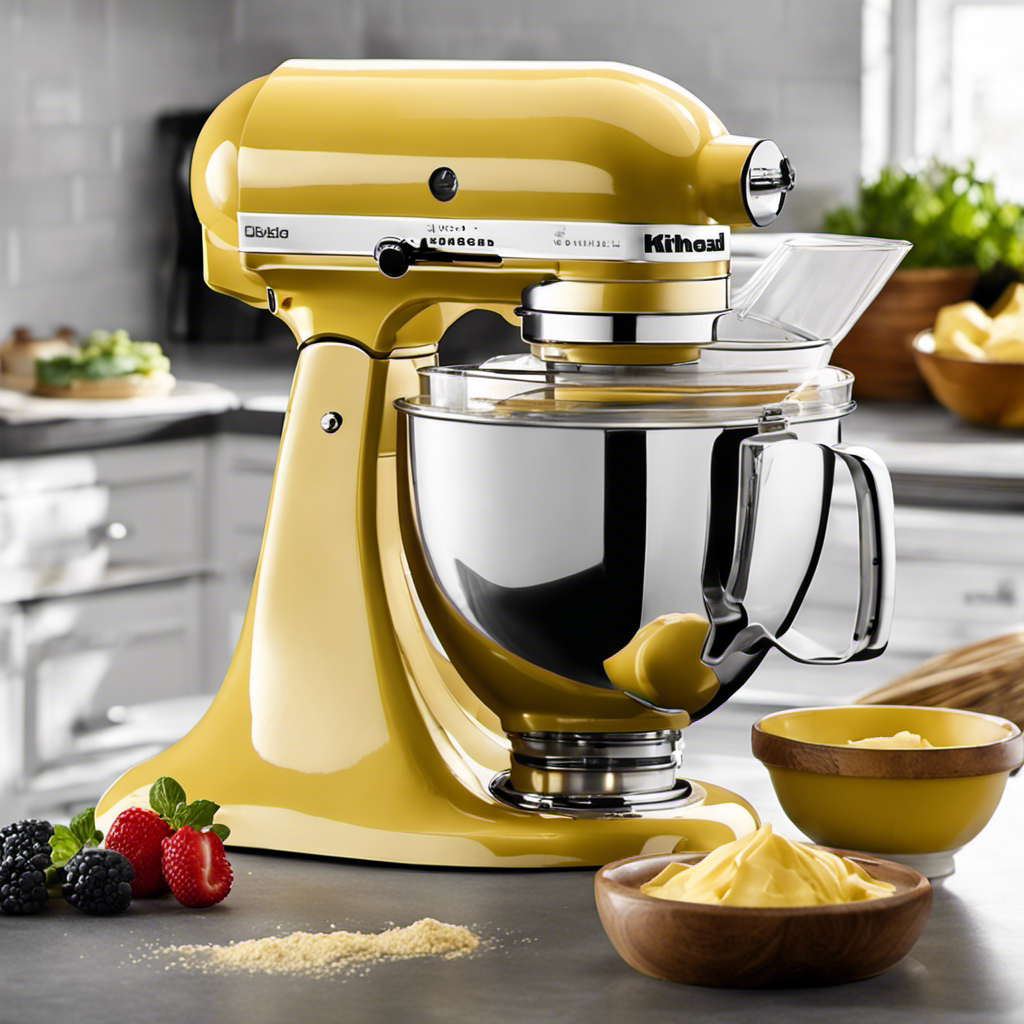
To gather the necessary equipment, you’ll need a blender, a large bowl, and a fine-mesh strainer. These tools are essential for successfully making butter from pasteurized milk. The blender will help you separate the butterfat from the liquid, while the large bowl will catch the liquid for further use. The fine-mesh strainer will ensure that no unwanted particles end up in your final product.

When choosing the right milk for making butter, it is important to opt for pasteurized milk. Pasteurization helps eliminate harmful bacteria and ensures the milk is safe for consumption. Additionally, pasteurized milk has a longer shelf life, making it easier to store and use for making butter.

Step-by-Step Guide to Churning Butter

Advertisement

First, you’ll need a clean and spacious workspace to start churning your homemade butter. The science behind churning involves the separation of fat from the liquid in milk. This process can be achieved by agitating the cream until the fat globules clump together and separate from the buttermilk. To achieve the perfect consistency, it is essential to control the temperature and timing during the churning process. Here is a step-by-step guide to churning butter:

Step Procedure Time (minutes)
1 Pour the cream into a churn or mixer. 10
2 Begin churning at a low speed to break up the fat globules. 20
3 Increase the speed gradually to encourage the fat to clump together. 30
4 Once the fat has separated from the buttermilk, stop churning and strain the butter. 40

Understanding the Science Behind Butter Making

Understanding the science behind butter making involves recognizing the separation of fat from the liquid in milk and the process of agitating the cream. When cream is churned, the fat globules in the cream collide with each other, causing them to stick together and eventually form butter. Here are some key points to consider when delving into the science behind churning:

  • Cream contains fat globules that are dispersed in water.
  • Agitating the cream causes the fat globules to come together and form clumps.
  • The clumps of fat globules trap air and water, resulting in the formation of butter.
  • The process of churning also helps release buttermilk, which can be used in various culinary applications.

Homemade butter offers several benefits in cooking. Firstly, it has a rich and creamy flavor that enhances the taste of dishes. Secondly, it allows for better control over the ingredients used, ensuring a healthier option. Lastly, it can be customized by adding herbs, spices, or even sweeteners, adding a unique and personalized touch to your culinary creations.

Understanding the science behind churning and the benefits of homemade butter can greatly elevate your cooking skills and enhance your dishes.

Tips for Achieving the Perfect Consistency

Advertisement

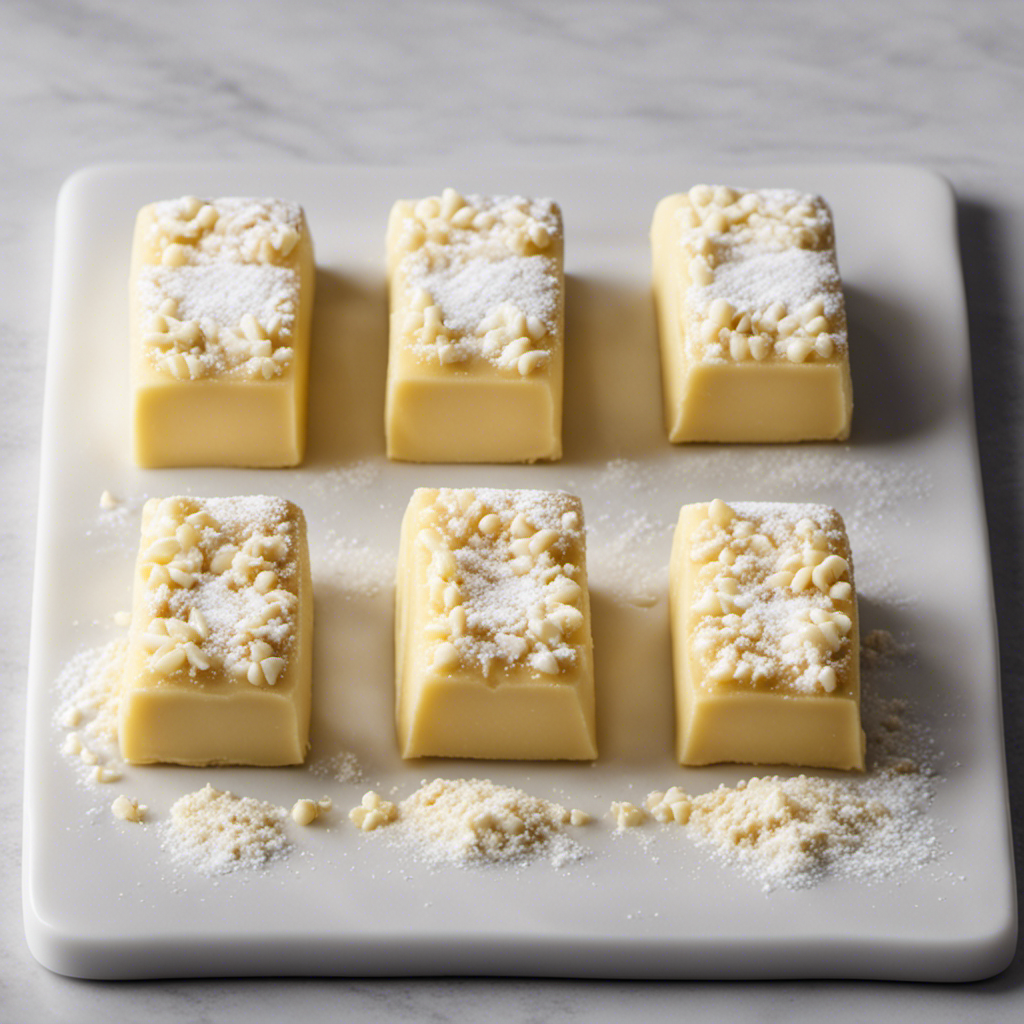
When churning your own butter, you can achieve the perfect consistency by ensuring that the cream is chilled before starting the process. This step is crucial in achieving a smooth texture in your homemade butter. Cold cream helps to separate the butterfat from the liquid, resulting in a better consistency.

Another important tip is to avoid over-churning the cream. Over-churning can lead to a grainy texture, so it’s important to stop churning as soon as the butter starts to form clumps.

Additionally, make sure to strain the butter after churning to remove any excess liquid, which can also affect the texture.

By following these tips, you can avoid common mistakes and achieve a smooth and creamy homemade butter.

Advertisement

Now, let’s explore the next section about adding flavors and enhancements to your butter.

Adding Flavors and Enhancements to Your Butter

When it comes to adding flavors and enhancements to butter, there are endless possibilities to explore. Creative butter combinations can elevate the taste of any dish, allowing for a unique and personalized culinary experience.

From savory options like garlic and herbs to sweet additions like honey and cinnamon, the versatility of butter makes it a perfect canvas for experimentation and flavor infusion.

Creative Butter Combinations

To get creative with your butter, try blending in different herbs and spices for unique flavor combinations. Flavored butter recipes are a fantastic way to elevate your dishes and add a burst of flavor.

Here are some unique butter pairings that you can experiment with:

Advertisement
  • Garlic and Parsley: This classic combination adds a delicious savory flavor to your butter, perfect for spreading on bread or melting over grilled meats.

  • Lemon and Dill: The bright citrusy notes of lemon combined with the fresh taste of dill create a refreshing and zesty butter that pairs well with seafood.

  • Cinnamon and Brown Sugar: Transform your butter into a sweet treat by blending in cinnamon and brown sugar. This combination is great for spreading on toast or pancakes.

  • Chili and Lime: Add a kick to your butter by mixing in chili and lime zest. This spicy and tangy combination is excellent for adding a bold flavor to grilled corn or roasted vegetables.

Flavorful Butter Additions

Now that we’ve explored some creative butter combinations, let’s dive into the world of flavorful butter additions.

By experimenting with different flavor pairings, you can create unique and delicious homemade spreads that will elevate any dish.

One popular option is adding herbs and spices to your butter. For example, mixing in chopped garlic and parsley can give your butter a savory kick, perfect for spreading on warm bread or melting over grilled meats.

Another option is incorporating sweet ingredients like honey or cinnamon for a delightful twist. The possibilities are endless, so don’t be afraid to get creative and try out different combinations.

In the next section, we will discuss the best practices for storing and preserving your homemade butter, ensuring its freshness and quality.

Advertisement

Storing and Preserving Homemade Butter

If you want to store and preserve your homemade butter, you can simply place it in an airtight container and keep it in the refrigerator. This will help maintain its freshness and extend its shelf life. However, there are a few techniques you can follow to ensure your butter stays in optimal condition for longer periods of time:

  • Keep the butter away from strong-smelling foods to prevent flavor absorption.
  • Store the butter in the coldest part of the refrigerator, preferably in the back.
  • Wrap the butter tightly in wax or parchment paper to prevent it from picking up any off flavors.
  • If you want to store butter for an extended period, consider freezing it in a freezer-safe container or wrapped tightly in plastic wrap.

Troubleshooting Common Butter Making Issues

One common issue when making homemade butter is that it may not solidify properly if the cream was not chilled enough before churning. To troubleshoot this problem, it is important to ensure that the cream is thoroughly chilled before starting the churning process. Additionally, using cream with a higher fat content can help achieve a better solidification of the butter.

Another common issue is the butter turning out too soft or greasy. This can be caused by over-churning the cream, which leads to the fat separating and resulting in a softer consistency. To avoid this, it is crucial to monitor the churning process closely and stop once the butter has formed solid clumps.

By addressing these common butter making issues, you can ensure a successful homemade butter-making experience.

Transition: Now that we have discussed troubleshooting tips for common butter making issues, let’s delve into the health benefits of homemade butter.

Health Benefits of Homemade Butter

When it comes to discussing the nutritional value of butter, it’s important to understand the differences between processed and homemade butter.

Advertisement

Processed butter often contains added ingredients, such as stabilizers and preservatives, which can affect its nutritional composition.

On the other hand, homemade butter is typically made from pure cream, which means it contains higher amounts of beneficial nutrients like vitamins A, D, and E.

In this discussion, we will explore the nutritional differences between processed and homemade butter and how they can impact our overall health.

Nutritional Value of Butter

The nutritional value of butter can vary depending on the quality of the milk used. When it comes to health benefits, homemade butter can provide several advantages. Here are some key points to consider regarding the nutritional content of butter:

  • Rich in healthy fats: Butter is a good source of healthy saturated fats, which are essential for brain function and hormone production.

  • Vitamins and minerals: Butter contains fat-soluble vitamins like A, D, E, and K, which are important for various bodily functions. It also provides small amounts of minerals like calcium, phosphorus, and selenium.

  • Conjugated linoleic acid (CLA): Homemade butter from grass-fed cows may contain higher levels of CLA, a fatty acid associated with potential health benefits, including reduced inflammation and improved heart health.

  • Antioxidants: Butter contains small amounts of antioxidants like beta-carotene and vitamin E, which help protect the body against free radicals.

Overall, homemade butter can be a nutritious addition to a balanced diet, providing essential fats, vitamins, and minerals.

Advertisement

Processed Vs Homemade Butter

If you’re looking for a healthier option, consider opting for homemade butter instead of processed butter. Processed butter often contains additives and preservatives that can be harmful to your health.

On the other hand, homemade butter is made from fresh ingredients and can be customized to your preferences. There are many homemade butter recipes available that are easy to follow and require minimal ingredients.

One popular recipe involves churning pasteurized milk until it separates into butter and buttermilk. This process ensures that you have control over the quality and purity of your butter.

Additionally, making your own butter allows you to experiment with different flavors by adding herbs, spices, or even fruits. So, why settle for processed butter when you can enjoy the taste and health benefits of homemade butter?

Exploring Different Varieties of Butter

To explore different varieties of butter, you can try mixing in various herbs and spices for added flavor. Here are four creative butter combinations that you can experiment with:

Advertisement
  • Garlic and Herb: Mix minced garlic, chopped fresh herbs like parsley, thyme, and rosemary, and a pinch of salt into softened butter. This aromatic blend is perfect for spreading on bread or melting over cooked vegetables.

  • Lemon and Dill: Combine grated lemon zest, freshly squeezed lemon juice, chopped fresh dill, and a sprinkle of salt into softened butter. This tangy and refreshing butter is great for seafood dishes or as a dip for grilled shrimp.

  • Chili and Lime: Add finely chopped red chili pepper, lime zest, lime juice, and a touch of salt to softened butter. The spicy kick and zesty lime flavor make this butter ideal for adding heat to grilled corn or slathering on grilled chicken.

  • Maple and Cinnamon: Mix pure maple syrup, ground cinnamon, and a pinch of salt into softened butter. This sweet and warm butter is a delightful addition to pancakes, waffles, or even a simple slice of toast.

Creative Ways to Use Homemade Butter in Recipes

When it comes to homemade butter, the flavor-enhancing benefits are truly remarkable. The rich and creamy taste of homemade butter can elevate any dish, from baked goods to savory dishes.

Additionally, homemade butter offers versatility in cooking, allowing for a wide range of culinary creations that can satisfy any palate.

Flavor-Enhancing Benefits

Enhancing the flavor of your homemade butter can be achieved by using high-quality, pasteurized milk. When it comes to flavor extraction and taste enhancement, the quality of the milk used plays a vital role. Here are four reasons why using high-quality, pasteurized milk can improve the taste of your homemade butter:

  • Freshness: High-quality milk ensures that your butter will have a fresher taste, as it is sourced from reputable farms that prioritize freshness and quality.

  • Creaminess: Pasteurized milk contains a higher fat content, resulting in a creamier texture and richer flavor in your butter.

  • Nutritional Value: High-quality milk is packed with essential nutrients and vitamins, which can contribute to a more flavorful and nutritious homemade butter.

  • Consistency: Using pasteurized milk ensures a consistent flavor profile in your butter, allowing you to achieve the desired taste every time.

Versatility in Cooking

Using high-quality milk in your recipes allows for greater versatility in your cooking. It enhances the flavor and texture of various dishes. The quality of the ingredients plays a crucial role in the final outcome when it comes to cooking techniques. High-quality milk, with its rich and creamy consistency, can be used in a wide range of recipes to elevate the taste and mouthfeel.

From creamy soups and sauces to fluffy pancakes and custards, the possibilities are endless. The richness of the milk adds depth and complexity to savory dishes, while enhancing the sweetness in desserts. High-quality milk can be a great source of inspiration for creating unique and delicious recipes.

Advertisement

Its versatility allows you to experiment with different flavors and textures, ensuring a delightful culinary experience.

Frequently Asked Questions

How Long Does It Take to Make Butter From Pasteurized Milk?

It takes approximately 20 minutes to make butter from pasteurized milk without using a churner. Alternative methods, such as shaking cream vigorously in a jar or using a food processor, can expedite the process.

Can I Use Unpasteurized Milk to Make Butter?

Yes, using unpasteurized milk for butter making is possible, but it poses safety risks. Unpasteurized milk may contain harmful bacteria that can cause foodborne illnesses. It’s recommended to use pasteurized milk for butter making to ensure safety.

What Type of Equipment Do I Need to Make Butter From Pasteurized Milk?

To make butter from pasteurized milk, you will need a few key pieces of equipment. One option is to use a stand mixer with a whisk attachment. Another alternative is to use a hand-held mixer or a food processor.

Can I Add Salt to My Homemade Butter?

Yes, you can add salt to homemade butter to enhance its flavor. When choosing salt, opt for fine-grained or kosher salt as they dissolve easily. Add a pinch or to taste during the churning process.

Advertisement

How Long Can Homemade Butter Be Stored?

Proper storage is crucial to maximize the shelf life of homemade butter. It can last up to three weeks when stored in an airtight container in the refrigerator.

Conclusion

In conclusion, making butter from pasteurized milk is a rewarding and scientific process that anyone can enjoy.

By following the step-by-step guide and understanding the science behind butter making, you can achieve the perfect consistency for your homemade butter.

The health benefits of homemade butter are numerous, and exploring different varieties can add a unique touch to your culinary creations.

So gather your equipment, churn away, and let the creamy richness of homemade butter transport you to a world of culinary delight.

Advertisement
Continue Reading
Advertisement

Recipes & Culinary Uses

Southern Comfort: Best Butter Bean Recipe for Hearty Meals!

Craving a taste of Southern comfort?

Published

on

By

delicious southern butter beans

Indulge in the rich, buttery flavors of Southern comfort with the best butter bean recipe that promises hearty satisfaction in every bite. Enhance the creamy texture with bacon, onions, and garlic for a mouthwatering dish. Incorporate ingredients like ham hock for a smoky twist. Don't forget to season with salt, cracked pepper, and brown sugar for a perfect balance. Pair with cornbread or cheddar cheese quick bread to elevate the experience. Experiment with flavors to create the ultimate Southern comfort cuisine. Get ready to elevate your culinary skills and taste buds to the next level with this delicious butter bean recipe!

Key Takeaways

  • Butter beans offer a creamy, buttery flavor ideal for Southern comfort cuisine.
  • Enhance dishes with ingredients like bacon, onions, and garlic for rich flavors.
  • Experiment with flavor combinations like smoky bacon and sweet brown sugar.
  • Pair butter beans with cornbread, rice, or cheddar cheese quick bread for a satisfying meal.
  • Store leftovers in the fridge for up to five days or freeze for later use.

Butter Bean Vs. Lima Bean

legume showdown butter versus lima

When comparing butter beans to lima beans, you'll notice that butter beans are the larger variety, while lima beans are smaller. Both types are creamy beans with a mild, buttery flavor that make them popular in various dishes.

Originating from Lima, Peru over 9000 years ago, these legumes have become a staple in cuisines worldwide. Large lima beans are commonly found at local grocery stores, perfect for incorporating into your favorite recipes.

In terms of size, butter beans offer a heartier bite compared to the smaller lima beans. The creamy texture of both beans is ideal for dishes that require a smooth consistency, such as soups, stews, and casseroles.

Whether you choose butter beans or lima beans for your next meal, you can expect a deliciously rich and buttery undertone that complements a wide range of ingredients. So, next time you're at the store, consider picking up some large lima beans to elevate your culinary creations.

Flavor Profile and Taste

exploring food sensory experience

You'll find that butter beans offer a mild, buttery flavor that adapts well to a variety of dishes. Their creamy texture and delicate taste make them a versatile addition to Southern comfort cuisine.

When exploring the flavor profile of butter beans, consider their culinary appeal in classic dishes and how they complement savory ingredients like bacon and onions.

Advertisement

Taste and Texture

Enhancing the flavor profile of butter beans is essential for creating delicious and satisfying dishes. When you make butter beans, whether using large dried beans or canned ones, you'll notice their creamy texture and mild, buttery taste. These characteristics make butter beans versatile for different recipes.

The rich protein and fiber content in butter beans not only provide long-lasting satisfaction but also offer essential nutrients.

Incorporating ingredients like bacon, ham hock, onions, and garlic can elevate the flavor of butter beans, adding depth and complexity to your dishes. These additions complement the beans' mild taste, creating a harmonious blend of flavors.

Whether you're preparing a hearty soup, a comforting stew, a flavorful casserole, a creamy dip, or a revitalizing salad, butter beans can be the star ingredient that brings everything together.

The smooth texture of butter beans contributes to the overall enjoyment of the dish, making each bite a delightful experience. Their versatility and ability to absorb flavors make them a staple in Southern comfort food recipes.

Advertisement

Flavor Combinations

Creating delicious dishes with butter beans involves combining their mild, buttery flavor with savory ingredients like bacon, ham, and onions for a rich and satisfying taste experience.

When preparing butter beans, consider these flavor combinations to elevate your dish:

  • Smoky Flavors: Incorporating cooked bacon or ham hock adds a delightful smokiness that enhances the overall taste profile of the butter beans.
  • Sweet Elements: Adding a touch of brown sugar complements the natural buttery taste of the beans, creating a harmonious balance of flavors.
  • Seasoning: Enhance the taste of butter beans by seasoning them with salt and cracked pepper, which adds depth and a hint of spice to the dish.
  • Versatility: The creamy texture of butter beans allows them to pair well with various ingredients, making them versatile for both hearty and light dishes.

Experimenting with these flavor combinations will help you create mouthwatering butter bean dishes that are sure to impress your taste buds.

Culinary Appeal

Butter beans' culinary appeal lies in their mild, buttery flavor that effortlessly complements a variety of seasonings and ingredients. These beans, also known as baby lima beans, offer a creamy texture and are a staple in Southern comfort dishes. Originating over 9000 years ago in Lima, Peru, butter beans have a rich history in cuisines worldwide. Young lima beans are tender and mild, ideal for quick cooking methods that preserve their delicate flavor. The versatile nature of butter beans allows them to be used in soups, stews, casseroles, dips, and salads, adding depth and heartiness to meals.

Flavor Texture Versatility
Mild, buttery Creamy Soups, stews, casseroles
Complements seasonings Tender Dips, salads
Rich history Versatile Southern comfort dishes

Home-Style Recipe Ingredients

home cooking ingredient list

You're about to discover the key ingredients that make up a classic home-style butter bean recipe.

Bacon, onion, brown sugar, butter, salt, and cracked pepper all play crucial roles in creating a flavorful and hearty dish.

These essential ingredients work together to enhance the taste profile of the butter beans, ensuring a delicious and satisfying meal.

Advertisement

Recipe Ingredients Breakdown

To make the home-style butter beans recipe, gather bacon, onion, brown sugar, frozen butterbeans, butter, salt, and cracked pepper. When preparing this hearty dish, each ingredient plays an essential role in enhancing the flavors and textures of the butter beans.

Here's a breakdown of the key components:

  • Bacon: Adds a savory smokiness to the dish, infusing it with rich flavors.
  • Brown Sugar: Provides a touch of sweetness that balances out the savory notes in the butter beans.
  • Frozen Butterbeans: Convenient and quick to cook, these big lima beans are perfect for this comforting recipe.
  • Butter, Salt, and Cracked Pepper: Together, these ingredients work harmoniously to elevate the overall taste of the dish, creating a deliciously rich and well-rounded flavor profile.

Key Flavor Enhancements

Enhancing the flavors of the home-style butter beans recipe is essential for creating a delicious and satisfying dish that balances savory and sweet notes. The key to achieving this balance lies in the combination of cooked beans, salt, and pepper.

When seasoning the dish, a pinch of salt and a generous crack of pepper are vital to enhance the natural flavors of the beans and create a well-rounded taste profile.

Cooked beans serve as the hearty base of the dish, providing a robust texture and earthy flavor that pairs perfectly with the other ingredients. Seasoning with salt not only brings out the inherent tastes of the beans but also helps to marry the flavors of the dish together.

Additionally, cracked pepper adds a subtle heat and depth to the butter beans, elevating the overall taste experience. By incorporating these key flavor enhancements into your home-style butter beans recipe, you can enjoy a satisfying and flavorful meal that will leave you craving more.

Advertisement

Cooking Method Details

detailed cooking method explanation

For achieving peak tenderness and flavor infusion, simmering butter beans in a seasoned broth is a fundamental cooking method detail. This process allows the beans to absorb the flavors of the broth while softening to the perfect texture.

To enhance the cooking method further, consider the following tips:

  • Stir well: Regularly stirring the butter beans while simmering helps distribute the flavors evenly and prevents them from sticking to the bottom of the pot.
  • Bring to a boil: Start the cooking process by bringing the seasoned broth and butter beans to a boil, then reduce the heat to a simmer to gently cook the beans.
  • Add complementary ingredients: Incorporating vegetables, meats like ham hocks, or herbs and spices can elevate the flavors of the butter beans during the cooking process.
  • Utilize different cooking techniques: Experiment with stovetop cooking or using a slow cooker to find the method that best suits your preferences and time constraints.

Storage and Reheating Tips

food storage and reheating

Properly storing and reheating your cooked butter beans is essential for maintaining their quality and flavor. After cooking a delicious batch of butter beans, make sure to refrigerate any leftovers promptly in an airtight container. This will help keep them fresh for up to five days. For longer storage, you can freeze the butter beans for up to three months. When you're ready to enjoy them again, simply thaw the frozen beans in the refrigerator before reheating.

To reheat your butter beans, you have the option of using the stovetop or microwave. Reheating on the stovetop is a great way to ensure even heating and prevent the beans from becoming mushy. Heat them until they are hot and ready to serve. Once reheated, you can enjoy your butter beans as a hearty side dish or incorporate them into various recipes for added flavor and texture.

Storage Tips Reheating Tips Freezing Tips
Refrigerate in airtight Reheat on stovetop or Freeze leftovers for up
container for up to five microwave until hot to three months
days
Thaw frozen beans in
the refrigerator before
reheating

Side Dish Pairings

dinner party menu ideas

To create a satisfying and well-rounded meal with butter beans, consider pairing them with traditional Southern sides like cornbread, white rice, and cheddar cheese quick bread. These side dishes perfectly complement the creamy texture and mild, buttery flavor of butter beans, enhancing the overall dining experience.

In addition to these classics, you can also enjoy butter beans with bread and butter or Texas Toast to elevate the Southern comfort food experience.

  • Butter beans are a classic side dish that pairs well with a variety of Southern staples.
  • Traditional accompaniments like cornbread and white rice enhance the rich flavors of butter beans.
  • Cheddar cheese quick bread offers a savory twist to the meal, adding depth to the dish.
  • Experimenting with different side dishes allows for a personalized touch to your butter bean meal, catering to diverse tastes and preferences.

Southern Comfort Classics

comforting southern cuisine favorites

You're about to discover timeless Southern recipes that bring hearty comfort to your table.

These classic dishes embody the warmth and tradition of Southern cooking, offering a taste of nostalgia with every bite.

Get ready to savor the rich flavors and comforting goodness of Southern comfort classics.

Advertisement

Timeless Southern Recipes

When exploring Southern comfort classics, you'll find that butter bean recipes are a beloved staple dish known for their hearty and satisfying nature. These timeless Southern recipes make the most of ingredients like butter beans, which offer a creamy texture and mild, buttery flavor that perfectly complements traditional Southern cooking.

To create an authentic Southern butter bean dish, consider the following:

  • Use High-Quality Ingredients: Opt for fresh or dried butter beans, and don't skimp on flavorful additions like bacon or ham hocks.
  • Slow Cooking Techniques: Embrace slow cooking methods to allow the flavors to meld together and create a rich, comforting dish.
  • Season Thoughtfully: Onions, garlic, and a touch of seasoning can elevate the humble butter bean to new heights of deliciousness.
  • Serve with Cornbread: A classic accompaniment to Southern dishes, cornbread pairs perfectly with butter beans for a complete and satisfying meal.

These Southern comfort dishes are sure to become a favorite at family gatherings, offering a taste of tradition and warmth in every bite.

Hearty Comfort Dishes

For those seeking ultimate comfort in their meals, Southern classics offer a range of hearty dishes that bring warmth and satisfaction with every bite. When it comes to preparing these comforting meals, a Dutch oven can be your best friend. Set it over medium heat, and you're ready to create delicious Southern comfort dishes that will surely become family favorites.

The versatility of butter beans shines in traditional Southern recipes like stews, casseroles, and soups, adding a creamy texture and mild, buttery flavor to every dish. With a rich history deeply rooted in Southern cuisine, butter beans have stood the test of time, proving to be a beloved ingredient for generations.

Incorporating butter beans into your cooking repertoire not only pays homage to Southern culinary traditions but also brings a taste of comfort to your table. So, why not whip up a hearty butter bean stew or casserole in your Dutch oven today? Your taste buds will thank you for the cozy Southern goodness that awaits.

Advertisement

Meat Additions and Enhancements

enhancing meat with additions

Enhance the flavor and richness of your butter bean recipe by incorporating bacon or ham into the dish. These meat additions not only add depth but also infuse the beans with a savory and smoky essence that elevates the overall taste of the dish.

To make the most of these meat additions, consider the following:

  • Bacon: Fry the bacon until crispy, then crumble it into the beans for a burst of salty goodness.
  • Ham: Boil the ham hocks alongside the beans to infuse the broth with a rich, meaty flavor.
  • Leftover Ham: Utilize any leftover ham by adding it towards the end of cooking to retain its tenderness and taste.
  • Butter: If you want to enhance the richness further, reduce the amount of butter needed to add a velvety finish to the beans.

Butter and Oil Options

mixing butter with oil

Consider incorporating butter or oil into your butter bean recipe to enhance its flavor and creaminess.

While adding butter isn't a strict requirement, it can greatly improve the overall taste and texture of your dish. If you prefer a dairy-free option or just want to experiment, using oil as a substitute can also achieve that desired creaminess in your beans.

To make this recipe even more indulgent, you may need to add a tablespoon or two of fat per pound of beans during the cooking process. This addition can infuse a rich flavor into the beans, especially when incorporated midway through cooking.

Don't be afraid to try different types of fats to see which one complements your butter beans the best. By choosing the right butter or oil for your recipe, you can elevate the flavors and create a truly satisfying dish.

Leftover Handling and Reheating

efficiently manage leftovers at home

Store your cooked butter beans in an airtight container in the refrigerator for 3-4 days. When dealing with leftovers, proper handling and reheating techniques can help maintain the delicious taste and texture of your butter beans.

Here are some essential tips to make the most of your leftovers:

Advertisement
  • Freezing Options: You can freeze cooked butter beans for up to 3 months for future use.
  • Thawing Process: Thaw frozen butter beans in the refrigerator before reheating to preserve texture.
  • Reheating Methods: Reheat butter beans in the microwave or on the stovetop until thoroughly heated.
  • Assessing Consistency: Avoid adding water immediately when reheating butter beans; assess consistency as they heat up.

Frequently Asked Questions

Should I Soak Butter Beans Before Cooking?

You don't have to soak butter beans before cooking, but a quick 30-minute soak can help. It's optional, depending on your preference. Soaking may reduce cooking time and improve texture in some recipes, ensuring even tenderness.

Are Butter Beans Good for Your Heart?

Butter beans are like tiny heart superheroes in a pod. They're packed with fiber, potassium, folate, and magnesium—all working together to support your heart health and keep it ticking strong.

Is There a Difference Between Butter Beans and Lima Beans?

Yes, there isn't a difference between butter beans and lima beans. They're the same type of bean, just with varying names based on size. Enjoy their creamy texture and buttery taste in a variety of dishes!

What Is the American Version of Butter Beans?

In the US, butter beans are the American version of lima beans. These creamy legumes, often used in Southern cooking, offer a mild, buttery taste. So, when looking for butter beans, know you're getting a true Southern favorite!

Conclusion

To sum up, whether you choose butter beans or lima beans, the hearty and comforting flavors in this recipe will satisfy your cravings.

From the rich and creamy texture to the savory seasonings, each bite will transport you to a Southern kitchen.

Advertisement

So go ahead, whip up a batch of this classic dish and enjoy the warmth and nostalgia it brings to your table. It's a simple yet delicious way to experience true Southern comfort.

Continue Reading

Recipes & Culinary Uses

Playtime Fun: Best Butter Slime Recipe for Kids!

Are you ready to create the best butter slime for your kids?

Published

on

By

butter slime kids love

Ready to create the best butter slime for your kids? Mix white glue and shaving cream, then add Crayola Model Magic clay for texture. Knead the ingredients until smooth and adjust with more clay if needed. This slime is perfect for sensory play, boosting fine motor skills, and offering stress relief. Get creative by hiding treasures in the slime or making a slime volcano. Enhance tactile exploration and cognitive development with this fun activity. Discover the endless playtime possibilities and benefits of butter slime that will keep your kids entertained and engaged for hours!

Key Takeaways

  • Use white glue, shaving cream, and Model Magic clay for fluffy and buttery texture.
  • Follow 1/2 cup glue, 1/2 cup shaving cream, then slowly add clay.
  • Knead until smooth consistency, adjust with more clay if needed.
  • Store in an airtight container to maintain texture and prevent drying out.
  • Enjoy sensory play, creativity, and stress relief with safe and entertaining butter slime.

Butter Slime Ingredients

slippery recipe for slime

You'll need specific ingredients to create the perfect batch of butter slime for your kids. Start by gathering a cup of white school glue, a cup of Elmer's glue, baking soda, shaving cream, Crayola Model Magic clay, food coloring, lotion, and an airtight container for storage.

The white school glue, also known as PVA glue, forms the base of the slime. Shaving cream adds fluffiness and volume, while the Model Magic clay is essential for achieving that signature buttery texture. Food coloring allows for customization, and lotion can be added for extra stretchiness and softness.

Properly storing your butter slime in an airtight container will help maintain its texture and prevent it from drying out. These specific ingredients, when combined in the right proportions, will result in a delightful batch of butter slime that your kids will love playing with for hours.

How to Make Butter Slime

creating butter slime tutorial

To create butter slime, begin by mixing together the glue and shaving cream in a bowl. Then, add the desired amount of clay to enhance the texture and stretchiness of the slime. Here's a simple guide to help you make your own butter slime:

Ingredients Amount
White Glue 1/2 Cup
Shaving Cream 1/2 Cup
Model Magic Clay As needed

First, pour the white glue and shaving cream into a mixing bowl. Mix them thoroughly until well combined. Next, slowly incorporate the Model Magic clay into the mixture. Knead the slime with your hands until you achieve a smooth and spreadable consistency. If the slime is too sticky, you can add a bit more clay. Once you've reached the desired texture, your butter slime is ready for playtime fun with the kids! Enjoy the process of making and playing with this delightful sensory material.

Benefits of Butter Slime

Butter slime offers children a sensory-rich and therapeutic play experience, promoting creativity and fine motor skill development. Engaging in sensory play with butter slime can help children explore different textures, colors, and scents, stimulating their senses and fostering creativity.

Advertisement

The squishy and stretchy nature of butter slime provides stress relief for children, offering a therapeutic outlet for them to relax and unwind. Manipulating butter slime also helps enhance fine motor skills as kids pinch, squeeze, and mold the slime, improving their hand-eye coordination and dexterity.

Moreover, butter slime is a safe activity suitable for kids of all ages, providing hours of entertainment and learning. By storing butter slime properly in an airtight container, you can guarantee its longevity for continued play over several days.

Playtime Ideas With Butter Slime

fun with butter slime

For an engaging and creative playtime experience with butter slime, consider trying out these fun and educational activities with your child. Using butter slime in play can be a great way to have fun and learn simultaneously. Check out the table below for some exciting ideas to explore with your child:

Playtime Ideas Benefits Keywords
Hide treasures in slime Encourages sensory play and imaginative exploration play,fun,sensory play,imagination
Spell out names with slime Enhances fine motor skills and promotes letter recognition using,butter slime recipe,fine motor skills
Create a slime volcano Hands-on science experiment teaching about chemical reactions creative,science experiment
Slime garden activity Fosters creativity and imagination with the addition of plants and figurines fun,kids activities,imagination
Self-portrait with slime Develops perceptual awareness in children through a sensory play activity sensory play,creative

These activities not only provide entertainment but also offer a chance for your child to learn and grow through play.

Sensory Activities With Butter Slime

butter slime tactile play

Engage your child in sensory activities with butter slime to enhance their tactile exploration and foster creativity. Kids love the smooth and spreadable texture of butter slime, making it perfect for sensory play. This type of slime offers a unique sensory experience, encouraging children to touch and manipulate it, stimulating their fine motor skills development.

By incorporating butter slime into playtime, you can create a calming and engaging sensory play session that promotes hands-on learning and cognitive development. These sensory activities not only provide a fun and interactive way for kids to play but also help in boosting their cognitive skills through sensory exploration.

Let your child immerse themselves in the world of sensory play with butter slime, where they can explore, create, and learn in a tactile and exciting manner. Make playtime fun and educational with sensory activities that spark imagination and creativity.

Advertisement

Frequently Asked Questions

How to Make Butter Slime for Kids?

To make butter slime for kids, you'll need white school glue, shaving cream, cornstarch, lotion, and Model Magic clay for stretchiness. Customize with colors, glitter, or sequins. Encourage fine motor skills and creativity through fun sensory play.

How to Make Butter Slime With 3 Ingredients?

To make butter slime with 3 ingredients, grab white glue, shaving cream, and cornstarch. Mix them together for a smooth, cloud-like texture. Remember, simplicity is key – less is more when it comes to creating this fun sensory play material!

What Is the Best Activator for Butter Slime?

To make the best butter slime, experiment with Borax, saline solution, or liquid starch as activators. Find what works for you, whether it's Borax for effectiveness, saline for gentleness, or liquid starch for good results.

How to Make Butter Slime With 2 Ingredients?

Mix hair conditioner and cornstarch in a bowl. Knead the soft dough until smooth. Add sparkles for extra flair. Immerse yourself in this easy, no-cook activity with your kids for a sensory delight that's bound to be a hit!

Conclusion

Now that you've got your butter slime ready, get ready for hours of squishy, stretchy fun!

Advertisement

Let your imagination run wild as you mold and shape this creamy concoction.

Remember, the possibilities are as endless as the buttery swirls in your slime.

So go ahead, immerse yourself and let your creativity flow like a river of melted butter!

Continue Reading

Recipes & Culinary Uses

Cookie Mastery: Best Recipe for Peanut Butter Cookies!

Fulfill your cookie cravings with the ultimate peanut butter cookies recipe that promises a decadent symphony of flavors – you won't want to miss out!

Published

on

By

peanut butter cookie perfection

Get ready for the ultimate peanut butter cookies! Combine peanut butter, brown sugar, egg, and baking soda. Mix in chocolate chips and bake at 350°F. Enjoy a soft, chewy treat with a golden brown color. The robust peanut butter taste, sweet brown sugar, and rich chocolate chips create a decadent symphony of flavors. Each cookie provides 245 calories, with a balance of carbohydrates, protein, and fat. Pair with milk or coffee for an enhanced experience. Stay tuned for more serving suggestions and detailed reviews to keep your cookie cravings satisfied.

Key Takeaways

  • Soft and chewy texture with golden brown color for irresistible appeal.
  • Robust peanut butter taste complemented by sweet brown sugar.
  • Decadent chocolate chips offer bursts of rich flavor.
  • Thick cookies with crisp edges and soft centers for a delightful mouthfeel.
  • Easy to make, perfect for parties, and pairs well with milk or coffee.

Recipe Ingredients and Preparation

cooking instructions and ingredients

To make these delicious peanut butter cookies, gather creamy peanut butter, brown sugar, a large egg, baking soda, and chocolate chips.

Start by mixing the peanut butter, brown sugar, egg, and baking soda until well combined.

Then, gently fold in the chocolate chips to ensure uniform distribution of the sweet morsels throughout the dough.

Roll the dough into balls and place them on a baking sheet lined with parchment paper.

Bake the cookies at 350°F for 10-12 minutes until they're soft, thick, and golden brown.

Advertisement

As they bake, the aroma of peanut butter and chocolate will fill your kitchen, making it hard to resist peeking into the oven.

Once done, allow the cookies to cool slightly before indulging in their rich peanut butter taste, sweetness from the brown sugar, and bursts of flavor from the chocolate chips.

These peanut butter cookies are the perfect treat for any occasion, offering a satisfying blend of flavors in every bite.

Texture and Appearance Details

textural and visual characteristics

The soft and chewy texture of these peanut butter cookies, coupled with their golden brown color and delightful chocolate chip accents, make them a visually appealing and irresistible treat. As you bite into these cookies, you'll experience a satisfying thickness that offers a substantial chewiness, creating a delightful mouthfeel. The golden brown hue of the cookies, with crisp edges and a soft center, invites you to indulge in their homemade goodness. Chocolate chips scattered throughout each cookie not only enhance the flavor but also provide a pop of visual interest, adding to the overall allure of these treats. Additionally, the aroma that fills your kitchen as these cookies bake is simply irresistible, with the rich scent of peanut butter enveloping your senses. Below is a table summarizing the key texture and appearance details of these peanut butter cookies:

Texture Appearance Additions
Soft Golden brown Chocolate chips
Chewy Crisp edges
Substantial Soft center

Flavor Profile Description

tasting notes and analysis

Peanut butter takes center stage in every decadent bite of these cookies, enchanting your taste buds with its rich and nutty essence. The flavor profile of these peanut butter cookies is a delightful symphony of tastes that will leave you craving more.

Here's why:

  1. Peanut Butter Taste: The unmistakable flavor of creamy peanut butter is the star of these cookies, providing a robust and nutty undertone that lingers with each bite.
  2. Brown Sugar Sweetness: The addition of brown sugar adds a perfect touch of sweetness that complements the peanut butter taste, creating a well-balanced and indulgent flavor profile.
  3. Chocolate Chips: The chocolate chips scattered throughout the cookie dough offer bursts of rich and decadent flavor, contrasting beautifully with the nuttiness of the peanut butter and adding an extra layer of deliciousness to each cookie.

Together, these elements harmonize to create a flavor profile that's both comforting and irresistible, making these peanut butter cookies a favorite treat for any occasion.

Nutrition Information Breakdown

nutrition facts analysis breakdown

Shifting from the flavor profile description, let's now take a closer look at the nutrition information breakdown of these delectable peanut butter cookies. Each serving of these cookies contains 245 calories, making them a reasonable treat for your sweet cravings.

The 27g of carbohydrates offer a delightful sweetness, while the 4g of protein in a single cookie contributes to a balanced snack option. With 13g of fat per cookie, these treats provide a rich and flavorful experience that has garnered rave reviews.

Advertisement

To bake these scrumptious cookies, make sure you use a cookie sheet lined with parchment paper to prevent sticking. The recipe calls for unsalted butter to control the sodium content, which amounts to 152mg per serving.

It's important to enjoy these cookies in moderation due to their calorie and fat content. However, their protein and carbohydrate balance makes them a satisfying indulgence for any cookie lover.

Serving Suggestions and Reviews

creative culinary ideas shared

Enhance your cookie-eating experience by pairing these delightful peanut butter cookies with a glass of milk or a cup of coffee. Reviewers have expressed positive feedback on the cookies' taste and texture, with many delighted by the recipe's success. Taking the time to bake these cookies will be well worth it based on the glowing reviews and high ratings they've received.

Here are some things reviewers liked about this recipe:

  1. The cookies' soft and thick texture that makes them perfect for parties or gatherings.
  2. The cookies' ability to pair exceptionally well with a glass of milk or a cup of coffee, enhancing the overall flavor experience.
  3. The ease of storing the cookies for a few days without compromising on freshness, allowing for continued enjoyment over time.

Frequently Asked Questions

Is It Better to Use Butter or Shortening in Peanut Butter Cookies?

For peanut butter cookies, use butter for flavor and richness, or shortening to maintain shape. Butter yields softer texture, while shortening gives a firmer bite. The choice depends on your preference for taste and texture.

Why Are My Peanut Butter Cookies Always Hard?

Overbaking leads to hard cookies. Guarantee precise baking time. Too much flour or insufficient fat causes dry dough and hardness. Cream butter and sugar moderately to prevent crumbliness. Excessive mix-ins make cookies dense. Improper storage dries out cookies, making them hard.

Why Are My Peanut Butter Cookies Crumbling and Falling Apart?

Your peanut butter cookies may be crumbling due to overbaking, excess flour, insufficient fat, too much leavening agent, or inadequate mixing. Adjust baking time, ingredients, and mixing technique to achieve cookies that hold together perfectly.

Advertisement

What Are the Basic Ingredients for Peanut Butter Cookies?

You need creamy peanut butter, brown sugar, egg, and baking soda for peanut butter cookies. They taste nutty and sweet, with a soft, chewy texture. Add chocolate chips for extra flavor. Just mix, bake, and enjoy these delicious treats!

Conclusion

You've mastered the art of baking with this peanut butter cookie recipe!

Did you know that Americans consume over 7 billion cookies a year?

So next time you whip up a batch of these delicious treats, know that you're contributing to that sweet statistic.

Keep baking and enjoy every bite of these irresistible peanut butter cookies!

Advertisement
Continue Reading
Advertisement

Affiliate disclaimer

As an affiliate, we may earn a commission from qualifying purchases. We get commissions for purchases made through links on this website from Amazon and other third parties.

Vetted

Vetted2 months ago

Infusion Buds Butter Infuser & Decarboxylator – 2024 Review

I recently got to try out the Infusion Buds Butter Infuser & Decarboxylator Machine Combo, and I am excited to...

Vetted2 months ago

LEVO Lux – Premium Herbal Oil Infusion Machine – Review [2024]

I recently got to try out the LEVO Lux – Premium Herbal Oil Infusion Machine – Botanical Extractor – Herb...

Vetted2 months ago

STX Infuzium & Decarboxylator Bundle Review [2024]

Today, I am thrilled to share my thoughts on the PREMIUM PACK • STX Infuzium Butter-Oil-Tincture Infuser & STX Activation...

Vetted2 months ago

Review: ONGROK Small Butter Infuser [2024]

Introduction: I am thrilled to share my experience with the ONGROK Small Butter Infuser in this post. This device has...

Vetted2 months ago

Herbal Infuser Hi – Innovative Botanical Butter Maker [2024]

Today, I am thrilled to share with you my experiences with the Herbal Infuser Hi Countertop Botanical Butter Maker, Tincture...

Vetted2 months ago

Ardent FX Decarboxylator Review: Quick & Effortless! [2024]

I recently had the opportunity to try out the Ardent FX Decarboxylator 110V With Bluetooth Connectivity, and I must say,...

Vetted2 months ago

Infusion Buds Butter Infuser – Review & Accessories [2024]

Thank you for joining me as we explore a review of the Infusion Buds Butter Infuser & Decarboxylator Machine Combo....

Vetted2 months ago

Decarboxylator Machine Review: Easy & Odorless Herb Activation [2024]

I recently had the opportunity to try out the Decarboxylator Machine for Herbs, and I have to admit, it really...

Vetted2 months ago

Decarb Mini System Review: All-in-One Herbal Processing Solution [2024]

Today, I will be giving my thoughts on the Decarb Mini System. As someone who enjoys herbal infusions and tinctures,...

elevate steak with butter elevate steak with butter
Vetted2 months ago

12 Best Compound Butter Recipes for Elevating Your Steak Game

Kick your steak game up a notch with these 12 mouthwatering compound butter recipes that will take your taste buds...

mouthwatering butter cookie taste mouthwatering butter cookie taste
Vetted2 months ago

15 Best Butter Cookies That Will Melt In Your Mouth – Taste Test Results

Tantalize your taste buds with the top 15 butter cookies that promise a melt-in-your-mouth experience - a delightful journey awaits!

peanut butter ice cream peanut butter ice cream
Vetted2 months ago

15 Best Peanut Butter Ice Cream Flavors You Need to Try This Summer

Craving a creamy and decadent summer treat?

Advertisement

Trending