Connect with us

Recipes & Culinary Uses

How to Make a Roux Without Butter: A Simple Guide

Published

on

An image of a saucepan on medium heat, filled with a mixture of flour and oil sizzling together

I have always appreciated the luxurious, smooth consistency that a roux brings to dishes. However, when I wanted to make it without butter, I realized I needed to find a substitute.

After some experimenting, I discovered that there are plenty of options to create a delicious roux without butter.

In this article, I’ll share my favorite methods, along with tips and tricks for perfecting a butter-free roux.

Get ready to take your cooking to the next level with these alternative fat and flour combinations!

Key Takeaways

  • Using alternative fats such as oil or margarine can be a healthier option with lower saturated fat content.
  • Different alternative oils like vegetable oil, olive oil, or coconut oil can be used to make a roux without butter, each adding its own unique flavor profile.
  • Choosing the right flour is important, and options include all-purpose flour, whole wheat flour, and gluten-free flour alternatives depending on personal preference and dietary needs.
  • Perfecting a butterless roux requires practice and experimentation, including watching the roux closely to avoid burning and experimenting with spices and herbs for flavor variations.

The Importance of Roux in Cooking

Advertisement

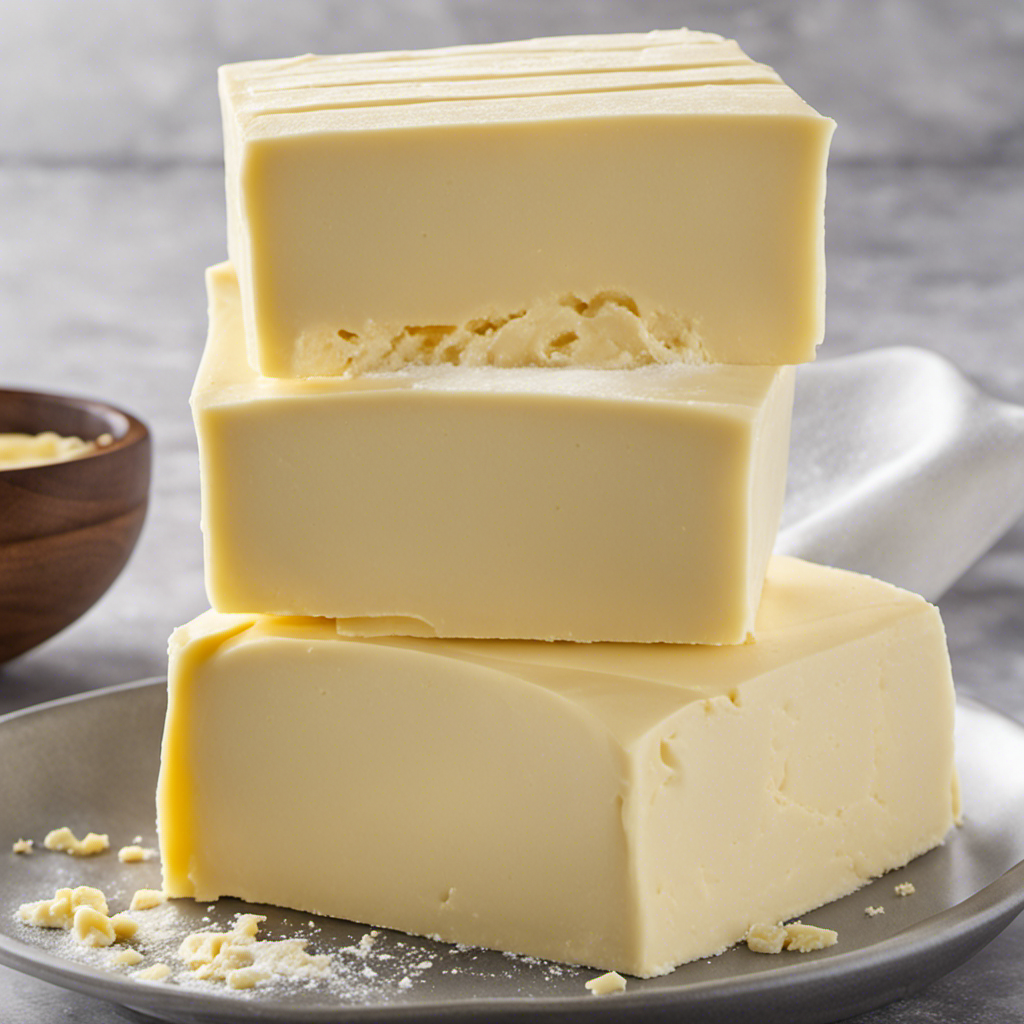
Roux is crucial in cooking because it adds depth and richness to your dishes. It is the foundation of many sauces, soups, and gravies.

While there are alternative fats that can be used in roux, such as vegetable oil or bacon fat, the benefits of using butter cannot be overlooked. Butter not only adds flavor, but it also helps to create a smooth and creamy texture in the roux. The fat in butter helps to bind the flour particles together, resulting in a thickening agent that can enhance the taste and texture of your dishes.

Additionally, the milk solids in butter can add a subtle nutty flavor to the roux. So, while there are alternatives, using butter in your roux can truly elevate your cooking to the next level.

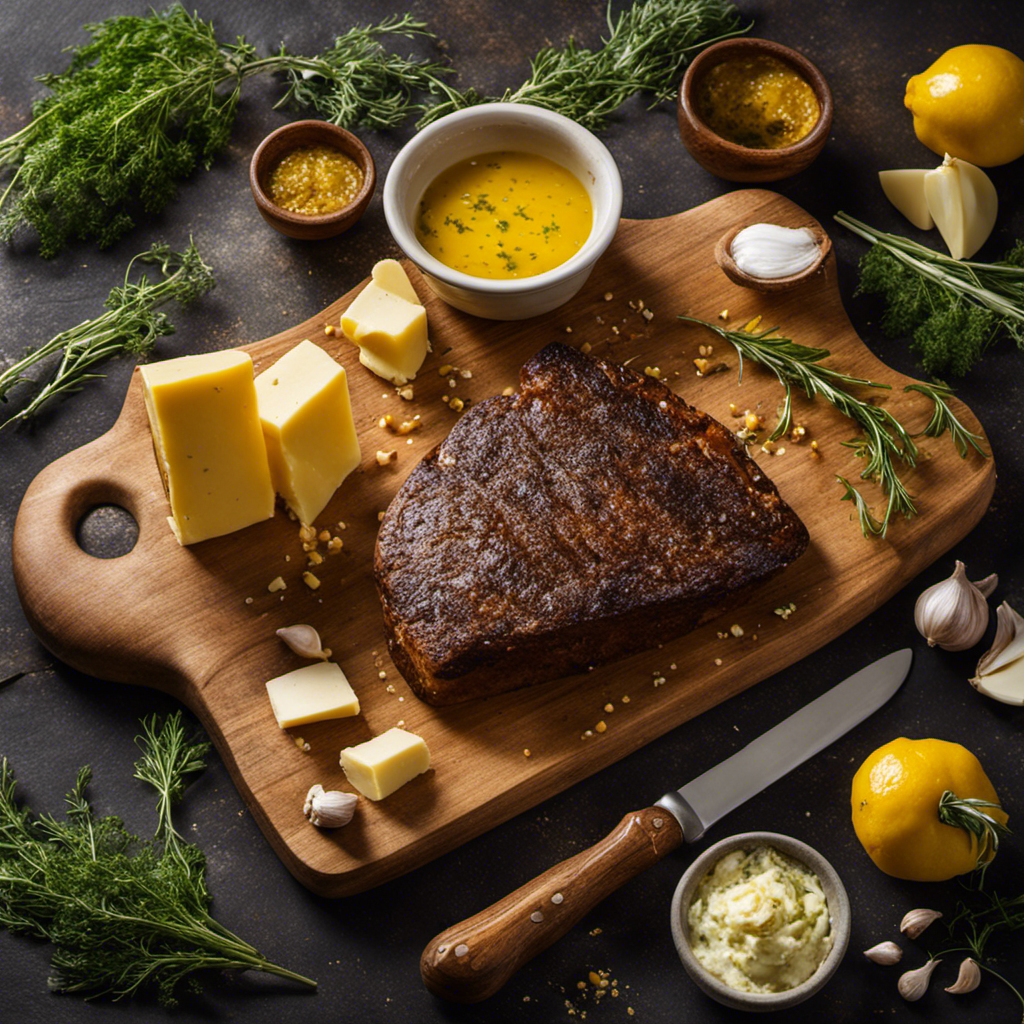
Alternative Fats for Making Roux

To create an alternative fat for your roux, you can use oil instead of butter. This not only provides a healthier option, but also opens up a world of flavors and health benefits. Here are four alternative oils for roux that you can try:

  1. Olive Oil: Known for its heart-healthy properties, olive oil adds a subtle fruity flavor to your roux.
  2. Coconut Oil: With its high smoke point, coconut oil is a great choice for high-heat cooking and imparts a hint of tropical sweetness.
  3. Avocado Oil: Rich in monounsaturated fats and vitamin E, avocado oil adds a creamy texture to your roux.
  4. Grapeseed Oil: Light and neutral in flavor, grapeseed oil is perfect for roux that won’t overpower the taste of your dish.

By using these alternative oils for roux, you not only reduce the saturated fat content, but also gain the health benefits associated with these oils.

Now, let’s move on to choosing the right flour for a butter-free roux.

Advertisement

Choosing the Right Flour for a Butter-Free Roux

When making a butter-free roux, it’s important to choose the right flour for the best results. The type of flour you use can greatly impact the texture and flavor of the final roux. There are several options to consider when selecting flour for a butter-free roux, including all-purpose flour, whole wheat flour, and gluten-free flour alternatives.

Let’s take a closer look at these different flour options and understand their impact on the final roux:

Flour Type Texture Flavor
All-Purpose Smooth Neutral
Whole Wheat Coarse Nutty
Gluten-Free Fine Mild

Choosing the right flour for your butter-free roux depends on your personal preference and dietary needs. All-purpose flour is a versatile option, while whole wheat flour adds a nutty flavor. Gluten-free flour alternatives are suitable for those with gluten sensitivities. Experiment with different flour types to find the perfect balance of texture and flavor for your roux.

Advertisement

Step-By-Step Instructions for Making a Roux Without Butter

When it comes to making a roux without butter, there are several alternatives that can be used.

One option is to substitute oil for the butter, such as vegetable oil or olive oil.

Another alternative is to use a non-dairy spread or margarine.

To ensure a successful substitution, it is important to choose an alternative that has a similar fat content and melting point as butter, and to follow the same cooking instructions for the roux.

Butter-Free Roux Alternatives

You can try using oil or margarine as an alternative to butter when making a roux without butter. Here are four benefits of using alternative fats in a roux:

Advertisement
  1. Healthier Option: Oil and margarine are lower in saturated fat compared to butter, making them a healthier choice for those watching their cholesterol levels.

  2. Dietary Restrictions: Using alternative fats allows individuals with lactose intolerance or dairy allergies to still enjoy dishes that require a roux.

  3. Flavor Variations: Different oils and margarines can impart unique flavors to your roux, adding depth and complexity to your dishes.

  4. Versatility: By using alternative fats, you open up the possibility of experimenting with different flavors and combinations, enhancing the overall culinary experience.

Tips for Successful Substitution

Using alternative fats such as oil or margarine can be a successful substitution for butter in your roux. When choosing an alternative fat, it’s important to consider its flavor and smoke point.

Oils like vegetable or canola are neutral in taste and have high smoke points, making them ideal for cooking techniques that require high temperatures. On the other hand, margarine can add a creamy flavor to your roux.

To create a butterless roux using oil or margarine, simply heat the fat in a saucepan over medium heat, then whisk in an equal amount of flour until smooth. Cook the roux, stirring constantly, until it reaches your desired color. This method allows you to achieve the same thickening power and richness as a traditional butter-based roux.

Transitioning into the subsequent section about ‘tips and tricks for perfecting a butterless roux’, it’s important to note that mastering the technique takes practice and experimentation.

Tips and Tricks for Perfecting a Butterless Roux

In my experience, I’ve found several alternatives to butter that can be used in a roux. Popular options include vegetable oil, olive oil, and even coconut oil. Each of these can lend a unique flavor to the dish.

Advertisement

The cooking time for a roux can vary depending on the desired color and thickness. It’s crucial to keep a close eye on the roux while cooking, as it can quickly go from golden to burnt if left unattended.

Lastly, experimenting with different flavor variations for a roux can elevate the taste of your dish. Adding spices like paprika or herbs like thyme can add depth and complexity to the roux, allowing you to customize it to your liking.

Butter Alternatives for Roux

There are several alternatives to butter that can be used when making a roux. As a knowledgeable chef who has experimented with various fats in roux, I can confidently share the benefits of using alternative fats. Here are four options to consider:

  1. Olive oil: It adds a subtle fruity flavor and works well in lighter dishes like seafood or vegetable-based roux.

  2. Vegetable oil: This neutral-tasting oil is a common choice, especially for those with dietary restrictions or allergies.

  3. Coconut oil: Perfect for adding a hint of tropical flavor, it pairs nicely with dishes that have Asian or Caribbean influences.

  4. Ghee: This clarified butter has a rich, nutty taste and adds a depth of flavor to your roux.

Using these butter-free alternatives not only caters to dietary preferences but also opens up a world of flavors to enhance your dishes.

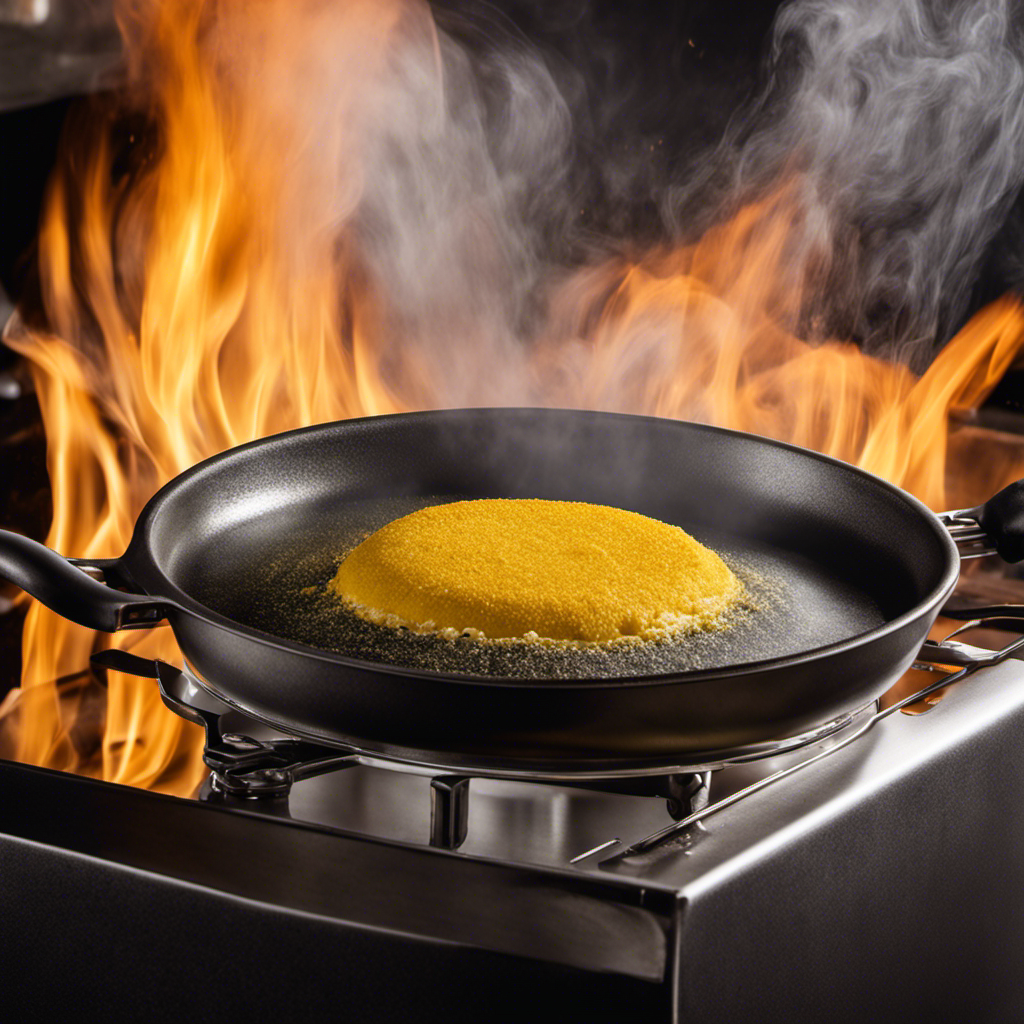
Cooking Time for Roux

In addition to using different types of fats as alternatives to butter in roux, it’s important to consider the cooking time for the roux itself. The cooking time can greatly affect the flavor and thickness of the roux.

Advertisement

Cooking techniques for roux vary depending on the desired outcome. For a white or blond roux, which is used in dishes like béchamel sauce, the cooking time is relatively short. The flour and fat are cooked together just until the mixture turns a pale golden color.

On the other hand, for a darker roux, such as a Cajun roux, the cooking time is longer. The flour and fat are cooked together until they reach a deep, rich brown color. This longer cooking time enhances the flavor of the roux and gives it a nutty aroma.

Regardless of the cooking time, the flour and fat mixture should be stirred continuously to prevent burning and to ensure even cooking. This is an important step in achieving a smooth texture and consistent thickness in the roux.

In addition to cooking techniques, thickening agents can also be used to achieve the desired consistency in roux. Common thickening agents include cornstarch, arrowroot, and potato starch. These can be added to the roux at the beginning or towards the end of the cooking process, depending on the recipe.

Understanding the cooking time and experimenting with different thickening agents will help you master the art of making roux without butter.

Advertisement

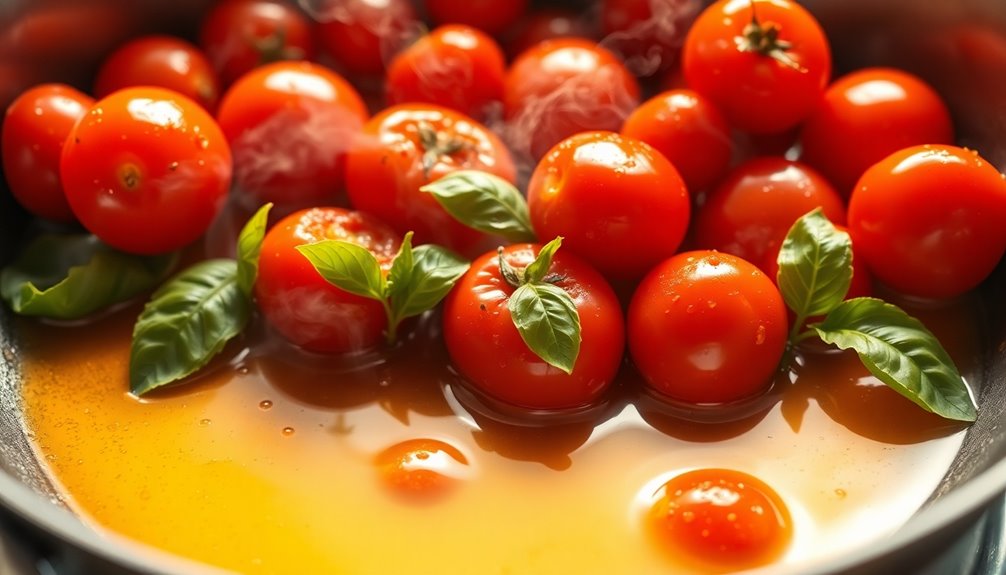
Flavor Variations for Roux

To achieve different flavor variations in your roux, consider using alternative fats and experimenting with various spices and seasonings.

1) Coconut oil: Using coconut oil instead of butter in your roux can add a subtle tropical flavor to your dishes.

2) Olive oil: Olive oil brings a hint of Mediterranean flair to your roux, perfect for dishes like pasta sauces or Mediterranean stews.

3) Bacon fat: For a rich and smoky flavor, try using bacon fat in your roux. It adds depth and complexity to dishes like gumbo or jambalaya.

4) Spices and seasonings: Don’t be afraid to get creative with your spices and seasonings. Adding cayenne pepper, smoked paprika, or garlic powder can elevate the flavor profile of your roux.

Advertisement

By using alternative fats and experimenting with spices, you can create unique and delicious flavor variations in your roux.

Now, let’s explore some delicious recipes that use butter-free roux.

Delicious Recipes That Use Butter-Free Roux

You can find delicious recipes that use butter-free roux to create rich flavors in your dishes. Butter-free roux is a great alternative for those who are lactose intolerant or following a dairy-free diet. By using different fats or oils, you can achieve unique flavor variations in your roux-based dishes. Here are some delicious recipes that showcase the versatility of butter-free roux:

Recipe Fat/Oil Used Flavor Variation
Cajun Gumbo Vegetable oil Spicy and robust
Mushroom Gravy Olive oil Earthy and savory
Chicken Pot Pie Coconut oil Creamy and tropical
Vegan Mac and Cheese Cashew cream Rich and nutty
Cauliflower Alfredo Avocado oil Creamy and light

These recipes prove that butter-free roux can still deliver amazing flavors. Experiment with different fats and oils to discover your favorite flavor combination. Enjoy the deliciousness!

Frequently Asked Questions

Can I Use Oil Instead of Butter to Make a Roux?

Yes, you can use oil instead of butter to make a roux. Oil is a great alternative for those who are lactose intolerant or following a vegan diet. It also adds a different flavor profile to your dishes.

Advertisement

What Are Some Alternative Fats That Can Be Used to Make a Roux Without Butter?

Using vegetable shortening instead of butter or coconut oil can be a great alternative for making a roux without butter. Both options provide a similar fat base and can still achieve the desired texture and flavor in your recipes.

How Do I Choose the Right Flour for Making a Butter-Free Roux?

Choosing the right flour for a butter-free roux is essential to achieve a smooth and thick sauce. To thicken sauces without using butter, I recommend opting for a high-protein flour like bread flour or even chickpea flour.

Can You Provide Step-By-Step Instructions for Making a Roux Without Butter?

Sure, I can provide step-by-step instructions for making a roux without butter. The key is to use alternative fats like oil. There are some differences between butter and oil in roux making, but it can still turn out delicious.

What Are Some Tips and Tricks for Perfecting a Butterless Roux?

To achieve a rich flavor in a butterless roux, try using alternative fats like olive oil or coconut oil. Additionally, incorporating flavorful ingredients like onions, garlic, and spices can enhance the taste.

Conclusion

In conclusion, I must say that making a roux without butter has truly opened my eyes to a whole new world of culinary possibilities. Who knew that alternative fats like olive oil or coconut oil could create such a rich and velvety base for sauces and soups?

Advertisement

The right flour, whether it be all-purpose or gluten-free, can make all the difference in achieving that perfect consistency.

So, fear not my friends, for a butterless roux is not only possible, but it might just be the secret ingredient that takes your dishes to the next level.

Bon appétit!

Continue Reading
Advertisement

Recipes & Culinary Uses

How to Make Creamy Butter Garlic Pasta

Published

on

By

An image of a steaming plate of al dente pasta twirled with a rich, golden butter garlic sauce

I am going to reveal to you the secret to making the most delicious butter garlic pasta you have ever tried.

Get ready to indulge in a symphony of flavors as tender pasta gets enveloped in a rich, velvety butter garlic sauce.

This recipe is simple yet sophisticated, perfect for impressing guests or treating yourself to a truly decadent meal.

So grab your apron and let’s dive into the magic of homemade butter garlic pasta.

Trust me, you won’t be able to resist.

Advertisement

Key Takeaways

  • Choose long and thin pasta like spaghetti or linguine for the best texture.
  • Cook the pasta al dente to prevent mushiness and allow the sauce to cling to the strands.
  • Prepare a well-seasoned and fragrant garlic butter sauce with sautéed minced garlic and optional herbs and spices.
  • Combine the cooked pasta with the simmered sauce, ensuring every strand is coated, and garnish with Parmesan cheese and parsley.

Choosing the Right Pasta

I’ll pick out the perfect type of pasta for my butter garlic pasta. When it comes to choosing the right pasta, there are so many options to consider. Different types of pasta shapes can greatly impact the overall texture and taste of the dish.

For a butter garlic pasta, I’d opt for a long and thin pasta shape like spaghetti or linguine. These types of pasta allow the butter garlic sauce to cling onto the strands, ensuring each bite is full of flavor.

Additionally, the importance of cooking the pasta until it’s al dente can’t be understated. Al dente pasta has a slight bite to it, providing a satisfying texture and preventing it from becoming mushy when combined with the butter garlic sauce.

Preparing the Garlic Butter Sauce

To start, I’ll heat up the olive oil in a skillet and sauté the minced garlic until it becomes fragrant. This step is crucial as it will infuse the sauce with a rich, savory flavor.

Advertisement

Once the garlic is golden and aromatic, I’ll enhance the garlic butter sauce by adding a handful of fresh herbs, such as chopped parsley or basil. These herbs not only add a burst of freshness but also contribute to the overall visual appeal of the dish.

Next, I’ll pour in a splash of white wine to the garlic butter sauce. The wine adds a subtle tanginess and complexity that elevates the flavors. This step is optional, but it truly takes the sauce to another level.

With the garlic butter sauce now perfectly seasoned and fragrant, it’s time to move on to boiling the pasta.

Boiling the Pasta

Advertisement

Once the water reaches a rolling boil, I add a generous amount of salt before adding the pasta. Achieving the perfect al dente texture is essential for a delicious butter garlic pasta. I carefully follow the instructions on the pasta package, cooking it for the recommended time minus a minute or two. This ensures that the pasta is cooked, but still firm to the bite.

To add a twist to the traditional garlic butter pasta, I sometimes incorporate a variety of herbs and spices into the boiling water. A pinch of red pepper flakes adds a subtle kick, while a handful of fresh basil leaves brings a refreshing aroma. These additions elevate the flavors and take the dish to a whole new level.

Cooking the Garlic Butter Sauce

While simmering the sauce, I stir in a knob of butter until it melts and blends seamlessly with the other ingredients. This step is crucial for creating a rich and flavorful garlic butter sauce that will elevate your pasta dish to new heights.

Here are three cooking techniques and flavor variations that you can experiment with to enhance the taste of your butter garlic pasta:

  • Sautéing the garlic: Instead of simply adding minced garlic to the sauce, try sautéing it in the butter until fragrant and golden brown. This will bring out the natural sweetness and depth of flavor in the garlic.

  • Adding herbs and spices: To take your sauce to the next level, consider incorporating herbs like parsley or basil, and spices like red pepper flakes or black pepper. These additions will add complexity and a touch of heat to your butter garlic pasta.

  • Using flavored butter: If you want to get creative with your flavor profile, try using flavored butter. You can find a wide variety of options at the grocery store or make your own by mixing in herbs, spices, or even cheese. This will infuse your sauce with a unique and delicious taste.

Combining the Pasta and Sauce

Advertisement

After the sauce has simmered to perfection, I pour it over the cooked pasta and toss until every strand is coated in the creamy goodness.

The combination of the rich butter and aromatic garlic creates a delectable flavor that’s hard to resist.

To enhance the dish even further, I like to garnish it with a sprinkle of freshly grated Parmesan cheese and a handful of chopped parsley. This adds a touch of freshness and brings out the flavors of the sauce.

As for serving suggestions, this butter garlic pasta pairs well with a simple green salad or some crusty garlic bread on the side.

Advertisement

For variations and substitutions, you can experiment with different types of pasta, such as spaghetti or fettuccine, and add in ingredients like sautéed mushrooms or grilled chicken for added protein.

The possibilities are endless, but one thing is for sure: this butter garlic pasta is a crowd-pleaser that will leave everyone wanting more.

Frequently Asked Questions

How Can I Make This Recipe Vegan-Friendly?

To make this recipe vegan-friendly, you can use vegan substitutes for butter, such as plant-based margarine or coconut oil. Additionally, opt for dairy-free options like almond milk or cashew cream instead of regular milk or cream.

Can I Use Gluten-Free Pasta for This Recipe?

Sure, you can use gluten-free pasta for this recipe. Just remember to follow the cooking instructions for gluten-free pasta and consider alternatives like rice or quinoa pasta for a delicious, gluten-free version.

Can I Substitute Olive Oil for Butter in the Garlic Butter Sauce?

Substituting olive oil or vegan butter in the garlic butter sauce can alter the taste and texture of the dish. Olive oil adds a rich, fruity flavor, while vegan butter provides a creamy and buttery texture.

Advertisement

How Can I Make This Dish Spicier?

To make this dish spicier, there are several ways to add heat. You can incorporate hot chili flakes, spicy red pepper sauce, or even diced jalapeños. Another alternative to garlic could be using ginger for a flavorful twist.

Can I Add Vegetables or Protein to This Pasta Dish?

Adding vegetables and protein to this pasta dish is a great idea. It not only enhances the nutritional value but also adds texture and flavor. I recommend sautéing some bell peppers and adding cooked chicken for a delicious and balanced meal.

Conclusion

In conclusion, making butter garlic pasta is a simple yet delicious dish that can be enjoyed by everyone.

The rich and creamy garlic butter sauce perfectly coats the al dente pasta, creating a mouthwatering combination of flavors.

This recipe allows you to indulge in a culinary experience that’s both satisfying and comforting, like a warm embrace on a chilly evening.

Advertisement

So why not give it a try and treat yourself to a delightful meal?

Continue Reading

Recipes & Culinary Uses

Easy Steps to Make Butter from Raw Milk Using a Mixer

Published

on

By

An image showcasing the step-by-step process of transforming creamy raw milk into luscious butter using a mixer

As I immerse myself in the realm of culinary exploration, I came across a hidden treasure: crafting butter from raw milk using a mixer. With just a few basic ingredients and my reliable mixer, I unveiled the key to producing smooth, homemade butter that would impress any chef.

In this article, I will guide you through the precise steps, from gathering the ingredients to storing the final product. Get ready to churn and savor the rich rewards of your own creation.

Let’s butter up!

Key Takeaways

  • Choose a mixer with a powerful motor and sturdy construction
  • Strain and pasteurize the raw milk before churning
  • Use a high-speed setting on the mixer for faster butter formation
  • Store homemade butter in airtight containers to maintain flavor and freshness

Gathering the Ingredients and Equipment

I’m gathering the ingredients and equipment needed to make butter from raw milk in my mixer.

Advertisement

To ensure a successful butter-making process, it’s crucial to choose the right mixer. Look for a mixer with a powerful motor and a sturdy construction that can handle the thick consistency of the cream. A high-speed setting is also desirable to expedite the churning process.

When it comes to sourcing raw milk, it’s important to prioritize safety and quality. Look for local farms or dairies that follow strict hygiene practices and ensure the cows are healthy and well-cared for. Freshness is key, so opt for milk that has been recently produced and stored properly.

Preparing the Raw Milk for Churning

To start preparing the raw milk for churning, I’ll first need to strain out any impurities. This ensures that the milk is clean and safe for consumption.

Before churning, it’s important to pasteurize the raw milk to eliminate any harmful bacteria that may be present. Pasteurization involves heating the milk to a specific temperature and holding it there for a set period of time. This process helps to destroy any potential pathogens without significantly altering the taste or nutritional composition of the milk.

Once the raw milk is pasteurized, there are different methods of churning it into butter. One method involves using a mixer, which agitates the milk until the fat globules separate from the liquid, forming butter.

Advertisement

Churning the Raw Milk in the Mixer

Using a high-speed setting, I’ll let the mixer agitate the milk until the fat globules separate and butter forms. The speed of the mixer plays a crucial role in the churning process. A higher speed will help the fat globules to separate more quickly, resulting in butter formation. The churning time will vary depending on the mixer speed and the amount of milk being churned. It is important to monitor the process closely to avoid over-churning, which can lead to a grainy texture. To give you an idea of the correlation between mixer speed and churning time, here is a table that summarizes the approximate time required for butter formation at different speeds:

Mixer Speed Churning Time (minutes)
Low 20-30
Medium 15-20
High 10-15
Very High 5-10
Turbo 2-5

Separating the Butter From the Buttermilk

After the churning process, I strain the mixture through a fine-mesh sieve to separate the butter from the buttermilk. The creamy liquid slowly drips down, leaving behind the beautiful golden butter. It’s a delicate process, requiring patience and precision.

As I watch the buttermilk flow through the sieve, I can’t help but appreciate the benefits of using raw milk for making butter. The rich and complex flavors of raw milk add depth and character to the final product. It’s like tasting a piece of the farm, with its grassy undertones and hints of sweetness.

Advertisement

To further enhance the butter’s taste, there are various methods for flavoring homemade butter. From the simplicity of sprinkling salt to the creativity of adding herbs and spices, the possibilities are endless.

Storing and Using Your Homemade Butter

When storing my homemade butter, I prefer to use airtight containers to keep it fresh and prevent any unwanted odors from seeping in. It’s important to protect the butter’s flavor and texture, as well as extend its shelf life. Additionally, I like to experiment with different flavors to add a unique twist to my butter. Some creative ways to flavor homemade butter include incorporating herbs like rosemary or thyme, adding spices like cinnamon or garlic powder, or mixing in sweet ingredients like honey or maple syrup. This allows me to customize my butter based on my preferences and the dishes I plan to use it in. Speaking of which, homemade butter has a multitude of uses in cooking and baking. It can be spread on toast, melted over vegetables, used as a base for sauces, or incorporated into pastry dough for flakier results. The possibilities are endless!

Flavor Ingredients Recommended Uses
Herb-infused Rosemary, thyme Mashed potatoes, roasted vegetables
Spiced Cinnamon, garlic powder Toast, pancakes
Sweet Honey, maple syrup Baked goods, waffles

Frequently Asked Questions

How Long Does It Take for the Raw Milk to Turn Into Butter in the Mixer?

To speed up the process of turning raw milk into butter in a mixer, you can increase the speed and duration of mixing. It is not possible to make butter in a mixer without using raw milk.

Advertisement

Can I Use Pasteurized Milk Instead of Raw Milk for Making Butter in a Mixer?

Using raw milk instead of pasteurized milk for making butter in a mixer has several benefits. It enhances the flavor and nutritional value of the butter. To achieve the best consistency, ensure the milk is fresh and at room temperature before churning.

What Is the Ideal Temperature for the Raw Milk Before Churning It in the Mixer?

The ideal temperature for raw milk before churning it in the mixer is around 50-55°F. This ensures proper fat separation and reduces churning time. It’s crucial to maintain the correct temperature for the best results.

Can I Add Flavorings or Herbs to the Butter While Churning It in the Mixer?

Yes, you can add flavorings or herbs to the butter while churning it in the mixer. This is a great way to incorporate flavor into homemade butter and experiment with different tastes.

Can I Use a Hand Mixer Instead of a Stand Mixer to Churn the Raw Milk Into Butter?

Using a hand mixer for churning raw milk into butter has its pros and cons. It can be more convenient and easier to handle, but may take longer and require more effort compared to a stand mixer. Other methods without a mixer include shaking in a jar or using a food processor.

Conclusion

In conclusion, making butter from raw milk in a mixer is a simple and rewarding process. By following the steps outlined above and using the right ingredients and equipment, you can transform fresh raw milk into delicious homemade butter.

Advertisement

Remember, practice makes perfect, so don’t be discouraged if your first attempt isn’t perfect. With a little patience and perseverance, you’ll be churning out creamy butter in no time, and soon you’ll be able to spread it on toast and enjoy the fruits of your labor.

Continue Reading

Recipes & Culinary Uses

Make Rich Butter from Raw Milk

Published

on

By

An image capturing the process of making butter from raw milk

Hey! Have you ever thought about how to turn raw milk into homemade butter? Look no further, I’ve got the solution for you.

In this article, I’ll take you through the step-by-step process of turning that creamy goodness into delicious homemade butter.

We’ll explore the benefits of using raw milk, learn how to separate the cream, and even discover different flavors you can infuse into your butter.

So, grab your apron and let’s get churning!

Key Takeaways

  • Raw milk contains essential vitamins, minerals, and enzymes that are destroyed during pasteurization.
  • Separating the cream from raw milk can be done through gravity separation, centrifugal separation, or cold separation.
  • Churning the cream into butter can be done through hand churning, using a stand mixer with a whisk attachment, or using a food processor with a blade attachment.
  • Washing and storing the freshly made butter involves cleaning the butter container and preserving its freshness by wrapping it tightly in wax paper or using an airtight container.

Understanding the Benefits of Raw Milk

Advertisement

Raw milk has numerous health benefits that are not found in pasteurized milk. Understanding the nutritional value of raw milk is important for those seeking a natural and wholesome source of nutrients.

Contrary to popular belief, raw milk is not a dangerous product when handled and consumed properly. In fact, it contains essential vitamins, minerals, and enzymes that are destroyed during the pasteurization process.

Raw milk is rich in beneficial bacteria and probiotics, which can support a healthy gut microbiome and enhance digestion. Additionally, raw milk is a good source of bioavailable nutrients such as calcium, protein, and healthy fats.

Debunking myths about raw milk is crucial to prevent misinformation and promote informed choices regarding our food.

Preparing the Raw Milk for Butter Making

To prepare the milk for butter making, it’s important to first skim off the cream. This step is crucial as it allows us to separate the high-fat cream from the milk, which is necessary for obtaining a good quality butter.

Advertisement

Here are three separating techniques to help you achieve the best results:

  1. Gravity separation: After allowing the milk to stand undisturbed for a few hours, the cream naturally rises to the top, making it easy to skim off with a spoon or ladle.

  2. Centrifugal separation: Using a cream separator machine, the milk is spun at high speeds, causing the heavier cream to separate from the lighter milk. This method is efficient and yields a higher cream quality.

  3. Cold separation: By refrigerating the milk overnight, the cream becomes denser and easier to separate. Skimming off the cold cream results in a richer and creamier butter.

Separating the Cream From the Raw Milk

If you want to achieve the best results when separating the cream from the milk, try using gravity separation, centrifugal separation, or cold separation techniques.

Gravity separation involves allowing the milk to sit undisturbed in a container for a period of time, allowing the cream to rise to the top.

Advertisement

Centrifugal separation utilizes a machine that spins the milk at high speeds, forcing the cream to separate from the milk.

Cold separation involves chilling the milk to a low temperature, causing the cream to solidify and separate from the milk.

These techniques are beneficial because consuming raw dairy has numerous health benefits, such as improved digestion, increased nutrient absorption, and enhanced immune function.

Additionally, if you don’t have access to a churn, these separation methods provide alternatives for obtaining cream for making butter.

Churning the Cream Into Butter

Once the cream has separated from the milk, you can start churning it into delicious butter. Churning is the process of agitating the cream until it transforms into butter.

Advertisement

Here are three techniques to help you achieve the perfect consistency:

  1. Hand Churning: This traditional method involves using a small churn or jar and physically shaking or rocking it back and forth until the cream turns into butter.

  2. Stand Mixer: If you have a stand mixer with a whisk attachment, you can use it to churn the cream. Start at a low speed and gradually increase until the butter forms.

  3. Food Processor: Another option is to use a food processor with a blade attachment. Pulse the cream until it separates into butter and buttermilk.

Troubleshooting common butter making problems:

  • If the cream isn’t thickening, ensure it is at the right temperature (around 50-55°F) and give it more time to churn.
  • If the butter is too soft, refrigerate it for a while before churning again.
  • If the butter is too hard, let it soften at room temperature or add a small amount of buttermilk to adjust the consistency.

After churning the cream into butter, it’s time to move on to the next step of washing and storing the freshly made butter.

Washing and Storing the Freshly Made Butter

When it comes to washing and storing freshly made butter, there are a few key points to consider.

Advertisement

First, cleaning the butter container is essential to maintain the quality of the butter. I recommend using warm soapy water and a soft sponge to remove any residue before drying it thoroughly.

Second, preserving the butter’s freshness is crucial to prolong its shelf life. To do this, I suggest wrapping the butter tightly in wax paper or placing it in an airtight container to protect it from air and odors.

Lastly, it’s important to store butter at the proper temperature. The recommended storage temperature for butter is between 32-40°F (0-4°C), as this helps to maintain its texture and prevent spoilage.

Cleaning the Butter Container

Before cleaning the butter container, make sure to remove any leftover butter residue. Cleaning the butter container is essential to maintain its freshness and prevent any cross-contamination. Here are three effective cleaning techniques to ensure a clean and sanitized container:

  1. Soak in hot, soapy water: Fill the container with hot water and add a few drops of dish soap. Let it sit for a few minutes to loosen any residue, then scrub with a sponge or brush.

  2. Use vinegar solution: Mix equal parts white vinegar and water in the container. Let it sit for about 15 minutes to dissolve any stubborn residue. Scrub with a sponge or brush, then rinse thoroughly.

  3. Bleach solution: Mix 1 tablespoon of bleach with 1 gallon of water. Let the container soak in the solution for 10 minutes, then scrub and rinse well.

Preserving Butter’s Freshness

After cleaning the butter container, the next step is to ensure that the butter stays fresh and maintains its texture for as long as possible. This is important because nobody wants to end up with rancid butter. To preserve the butter’s freshness, there are a few key things you can do. Firstly, storing the butter in an airtight container or wrapping it tightly in wax paper will help prevent it from being exposed to air and developing off flavors. Secondly, keeping the butter refrigerated at a consistent temperature, ideally around 40°F (4°C), will slow down the process of it going rancid. Lastly, if you want to store butter for an extended period of time, freezing it is a great option as it can extend its shelf life for several months. By following these steps, you can enjoy fresh and flavorful butter for all your culinary needs.

Advertisement
Preserving Butter’s Freshness
Store butter in an airtight container or wrap tightly in wax paper.
Refrigerate butter at a consistent temperature of around 40°F (4°C).
Freeze butter for extended storage, which can extend its shelf life for several months.
Follow these steps to enjoy fresh and flavorful butter for all your culinary needs.

Recommended Storage Temperature

Storing butter in the refrigerator at a consistent temperature of around 40°F (4°C) helps to maintain its freshness and prevent it from going rancid. Here are three recommended storage methods and the ideal temperature range for butter:

  1. Wrap it properly: Use parchment paper or airtight containers to wrap the butter. This will protect it from absorbing odors and prevent it from drying out.

  2. Keep it away from light: Exposure to light can cause butter to spoil faster. Store it in a cool, dark place, like the refrigerator’s butter compartment or a covered butter dish.

  3. Avoid temperature fluctuations: Butter can easily absorb flavors and odors from other foods in the fridge. To maintain its quality, store it away from strong-smelling foods and make sure the temperature remains constant.

Following these recommended storage methods and keeping the butter at the ideal temperature range will help to preserve its freshness and taste for longer periods.

Using Leftover Buttermilk in Recipes

You can easily use leftover buttermilk in recipes to add a tangy flavor. Buttermilk is a versatile ingredient that can enhance the taste and texture of various baked goods. It’s a great substitute for regular milk in recipes because it adds a unique tanginess and richness. Here are some creative uses for leftover buttermilk in baking:

Row Buttermilk Recipe Result
1 Pancakes Fluffy and Light and
tender texture fluffy pancakes
2 Biscuits Tender and Flaky and
flaky texture buttery biscuits
3 Cakes Moist and Moist and
tender texture tender cakes
4 Fried chicken Crispy and Juicy and
flavorful coating flavorful chicken

Exploring Variations and Flavors in Homemade Butter

When it comes to homemade butter, there are endless possibilities for adding unique flavors and enhancing its taste.

One way to do this is through unique butter infusions, where you can mix in various ingredients like garlic, herbs, or even fruit zest to create a personalized flavor profile.

Advertisement

Another option is to enhance the taste of your homemade butter by incorporating herbs such as rosemary, thyme, or basil, which can add a delightful aroma and taste.

Lastly, experimenting with flavored salts like smoked sea salt or truffle salt can take your butter to a whole new level, adding a burst of flavor that will elevate any dish.

Unique Butter Infusions

To add unique flavors to your butter, try infusing it with herbs or spices. Butter infusion techniques offer a creative way to elevate the taste of your homemade butter. Here are three ideas to get you started:

  1. Garlic and Herb Butter: Melt your butter, then add minced garlic and chopped fresh herbs like rosemary, thyme, or parsley. Let the flavors infuse for a few hours before refrigerating.

  2. Citrus Zest Butter: Grate the zest of an orange, lemon, or lime into your softened butter. Mix well and let it sit in the fridge for a while to let the citrus flavors infuse.

  3. Spiced Butter: Add a pinch of your favorite spices, such as cinnamon, nutmeg, or cardamom, to your softened butter. Mix thoroughly and let it sit in the fridge to develop the flavors.

Enhancing Taste With Herbs

Adding herbs to your butter is a simple and effective way to enhance the taste of your culinary creations. Not only does it add a burst of flavor, but it also adds a touch of freshness and complexity to your dishes. Experimenting with different herbal blends can elevate your butter to a whole new level. Whether you prefer a savory blend of rosemary and thyme or a more exotic combination of cilantro and lime, the possibilities are endless. To help you get started, here is a table showcasing some popular herb and spice combinations that you can try in your butter:

Herb/Spice Flavor Profile Best Pairings
Rosemary Earthy, piney Potatoes, lamb
Basil Sweet, peppery Tomatoes, mozzarella
Dill Fresh, tangy Fish, cucumbers
Cinnamon Warm, sweet Apples, baked goods

Experimenting With Flavored Salts

After experimenting with herbs to enhance the taste of my homemade butter, I decided to take my flavor exploration to the next level by experimenting with flavored salts. Flavored salts can add a unique and exciting twist to butter, elevating its taste and making it even more delicious.

Advertisement

Here are three ways I incorporated different salts into my flavored butter recipes:

  1. Smoked Salt Butter: I mixed smoked salt into softened butter, creating a smoky and savory spread that pairs perfectly with grilled meats and vegetables.

  2. Truffle Salt Butter: By combining truffle salt with butter, I created a luxurious and indulgent spread that adds a hint of earthy and aromatic flavor to any dish.

  3. Citrus Salt Butter: I zested some fresh citrus fruits and mixed the zest with sea salt before incorporating it into butter. The result was a bright and tangy butter that adds a burst of freshness to baked goods and seafood.

Frequently Asked Questions

Can I Make Butter From Pasteurized Milk?

Yes, you can make butter from pasteurized milk. It’s a simple process of churning the cream until it separates into butter and buttermilk. Homemade butter can be healthier than store-bought due to its freshness and lack of additives.

How Long Does It Take to Separate the Cream From the Raw Milk?

Separating cream from raw milk depends on various factors, such as temperature and milk fat content. Once separated, the cream can be churned into butter. The churning process can take anywhere from 10 to 30 minutes.

Can I Use an Electric Mixer Instead of a Churn to Make Butter?

Yes, you can use an electric mixer to make butter. However, it’s important to note that the process may differ slightly between churning raw milk and pasteurized milk.

How Long Can I Store Freshly Made Butter?

Freshly made butter can be stored in the refrigerator for up to two weeks. However, its shelf life can be extended by freezing it. Proper storage is essential to maintain its freshness and quality.

Advertisement

What Other Uses Are There for Leftover Buttermilk Besides Using It in Recipes?

Leftover buttermilk can be used in pancakes, biscuits, or even as a marinade for fried chicken. As for alternative methods for making butter, you can also use heavy cream and a mixer.

Conclusion

In conclusion, making butter from raw milk is a delightful and rewarding process. The benefits of raw milk are numerous, as it contains valuable enzymes and nutrients that are lost during pasteurization.

By separating the cream from the raw milk and churning it vigorously, you can easily transform it into creamy and delicious homemade butter.

Don’t forget to wash and store the butter properly to ensure its freshness. And don’t discard the leftover buttermilk! It can be used in various recipes to add flavor and moisture.

So, grab some raw milk and start your butter-making adventure today!

Advertisement
Continue Reading

Trending