Connect with us

Butter Tips and Tricks

Buttery Cheese Straws: The Addictive, Cheesy Snack That’s Impossible to Resist

Packed with buttery goodness and sharp cheddar flavor, these irresistible cheese straws are the ultimate indulgence for any cheese lover. Discover the history and recipe behind this beloved Southern snack.

Published

on

irresistibly addictive cheese straws

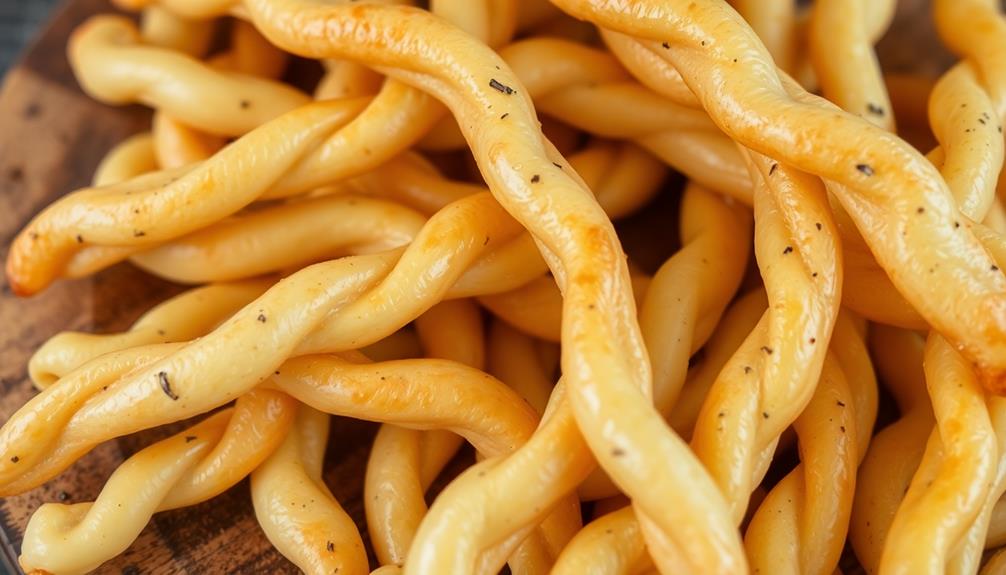
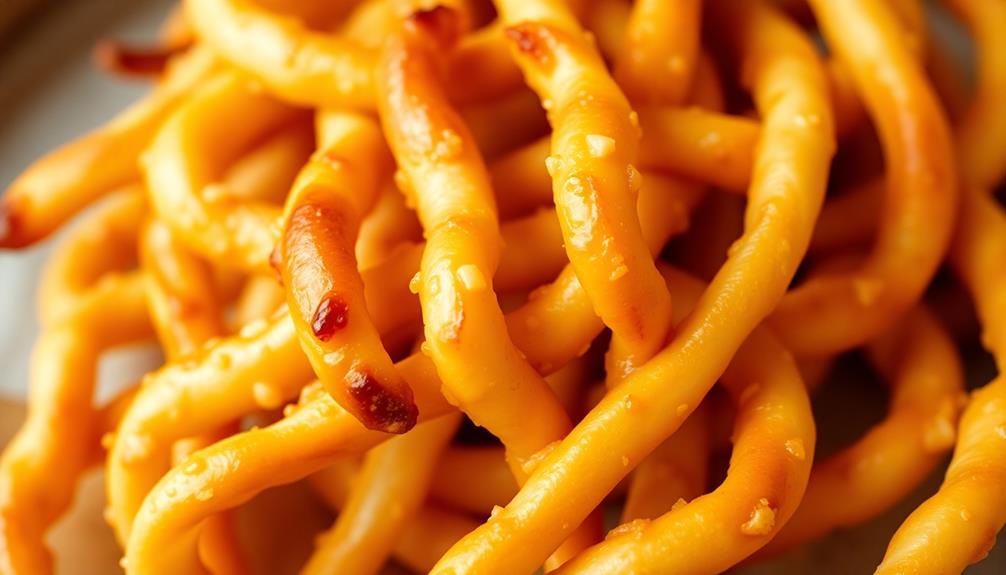
Buttery cheese straws are the addictive, cheesy snack that'll have you reaching for one after another, their irresistible aroma and flavor profile making them the perfect indulgence for any occasion. Originating in the Southern United States, these flaky, golden-brown delights are a timeless classic, evolving from simple biscuit dough and local cheeses. With just a few key ingredients like flour, butter, and sharp cheddar, you can craft your own batch, customizing the flavors to your liking. Serve them up at your next gathering, or enjoy them as a satisfying personal snack – either way, these moreish treats are sure to leave a lasting impression. Want to learn more about the history and cooking steps behind these beloved cheese straws?

Key Takeaways

  • Buttery Cheese Straws are a classic Southern snack with a rich, cheesy flavor profile and a crunchy, flaky texture that satisfies cravings.
  • The versatile snack can be enjoyed as an appetizer, wine accompaniment, or casual indulgence, making it a popular choice for gatherings and events.
  • The recipe's simplicity and high-quality ingredients, such as sharp cheddar cheese and unsalted butter, contribute to its irresistible taste and aroma.
  • Variations in cheese and spices allow for customization, ensuring the snack can be tailored to individual preferences and dietary needs.
  • While delicious for humans, pet owners should be mindful of potential health risks and consider safer snack alternatives for their furry companions.

History
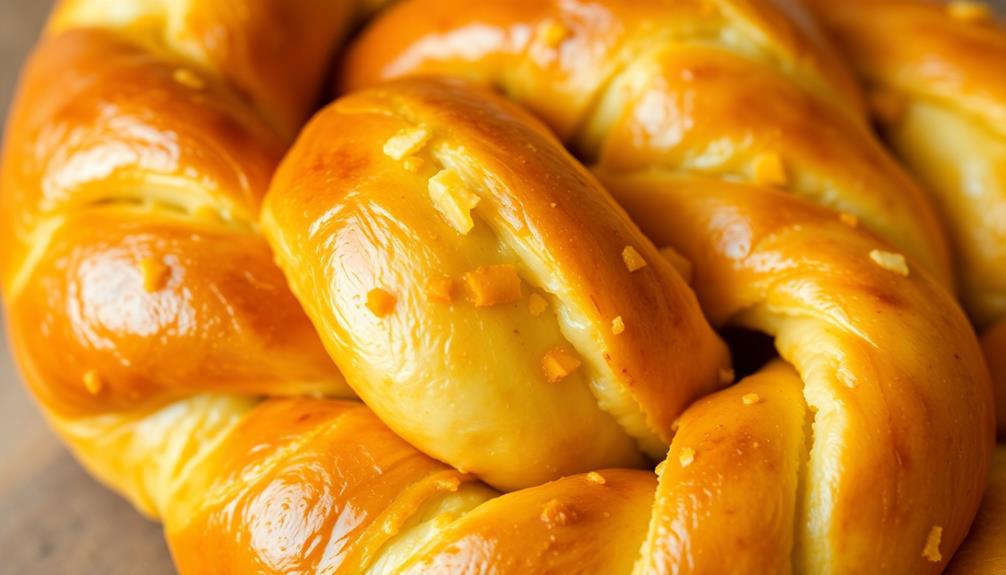
historical events and timelines

Originating in the Southern United States, cheese straws have a long and storied history as a beloved snack.

These buttery, savory treats date back to the 18th century, when resourceful Southern cooks began experimenting with leftover biscuit dough and local cheeses. They'd roll and twist the dough into thin, crunchy sticks, then bake them to golden perfection.

Over time, the recipe evolved, with the addition of spices like cayenne or paprika adding a delightful kick. Cheese straws quickly became a staple at Southern gatherings, from church socials to porch parties.

Today, they're enjoyed far beyond their regional roots, delighting snack lovers worldwide with their irresistible combination of flaky pastry and bold, cheesy flavor.

Whether homemade or store-bought, these buttery bites continue to hold a special place in the hearts and stomachs of countless fans, cementing their status as a true Southern classic.

Advertisement

Recipe

cooking instructions and ingredients

Buttery Cheese Straws are a classic Southern snack that can be enjoyed as an appetizer or a delightful accompaniment to a glass of wine. These flaky, cheesy bites are perfect for any occasion, from casual gatherings to elegant soirées.

To elevate your backyard gatherings, consider pairing these treats with eco-friendly natural pools to create a serene atmosphere for your guests. The secret to the perfect Cheese Straws lies in the use of high-quality ingredients and a delicate balance of flavors. The combination of savory cheese and the rich, buttery pastry creates a mouthwatering treat that's sure to impress your guests.

Ingredients:

  • 2 cups all-purpose flour
  • 1/2 teaspoon salt
  • 1 cup unsalted butter, chilled and cubed
  • 1 1/2 cups shredded sharp cheddar cheese
  • 2 tablespoons cold water

Directions:

Preheat your oven to 375°F (190°C). In a large mixing bowl, combine the flour and salt. Cut in the chilled butter until the mixture resembles coarse crumbs. Stir in the shredded cheese, then gradually add the cold water, mixing just until the dough comes together.

Divide the dough in half, shape each half into a disk, wrap in plastic wrap, and refrigerate for at least 30 minutes.

On a lightly floured surface, roll each dough disk into a long rectangle, about 1/8-inch thick. Cut the dough into long, narrow strips, about 1/2-inch wide. Transfer the strips to a parchment-lined baking sheet, spacing them about 1 inch apart.

Advertisement

Bake for 12 to 15 minutes, or until the Cheese Straws are golden brown and crispy. Allow them to cool on the baking sheet for 5 minutes before serving.

For best results, be sure to handle the dough gently and work quickly to maintain the flakiness of the pastry. You can also experiment with different types of cheese or add a pinch of cayenne pepper for a spicy twist. Enjoy your homemade Buttery Cheese Straws!

Cooking Steps

prepare cook serve enjoy

Preheat your oven to 375°F and get ready to roll out that dough.

Once it's nice and thin, you'll slice it into strips – just be careful with those sharp knives!

Now pop those buttery, cheesy strips into the oven and bake them until they're golden brown.

Can't wait to see how they turn out!

Advertisement

Step 1. Preheat Oven to 375°F

preheat oven 375 degrees

Preheating the oven to 375°F is a crucial step in ensuring your cheese straws bake evenly and develop that signature golden-brown crust. This temperature strikes the perfect balance, allowing the butter and cheese to melt together while creating a delicate, flaky texture.

As the oven heats up, you can gather your other ingredients and prepare your work surface. Make sure to line a baking sheet with parchment paper or a silicone mat to prevent sticking. This simple step will save you time and hassle when it comes time to transfer the shaped dough onto the pan.

Once the oven reaches the desired temperature, you'll know it's time to start shaping and baking your irresistible cheese straws. The aroma of buttery, cheesy goodness will soon fill your kitchen, and you'll be one step closer to indulging in this addictive snack.

Step 2. Roll the Dough
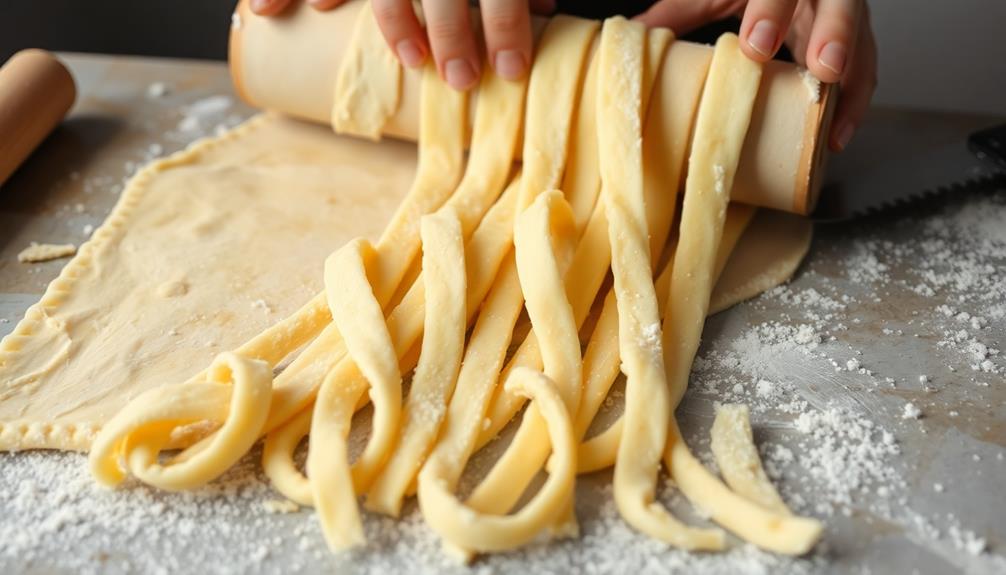
rolling the dough out

With the oven preheated, grab the chilled dough and place it on a lightly floured surface. Using a rolling pin, gently roll the dough out, being careful not to over-work it. Roll it into a long rectangle, about 1/4 inch thick. You want the dough to be even in thickness so the cheese straws bake evenly.

Once the dough is rolled out, use a sharp knife or a pizza cutter to cut the dough into long, thin strips, about 1/2 inch wide. Carefully transfer the strips to a parchment-lined baking sheet, spacing them apart so they don't touch. This will ensure they get perfectly crispy on all sides.

With the dough now cut into perfect cheese straw shapes, you're ready for the next step. Keep an eye on the clock, as these buttery, cheesy snacks bake up quickly in the hot oven.

Soon, your kitchen will be filled with the irresistible aroma of freshly baked cheese straws!

Advertisement

Step 3. Cut the Dough Into Strips

cut dough into strips

With the dough rolled out, use a sharp knife or pizza cutter to slice it into long, thin strips, about 1/2 inch wide.

Run the blade across the dough, making clean, even cuts to create uniform strips. Take your time and work carefully to ensure each piece is the same size.

These delicate, rectangular shapes will be the foundation of your buttery cheese straws. As you cut, keep the strips organized and try not to let them get jumbled together.

Gently lift and transfer the strips to a baking sheet, spacing them out so they don't touch. This will prevent the dough from sticking as it bakes.

With the dough cut, you're one step closer to enjoying those irresistible, flaky cheese straws. The next stage is to bake them to golden perfection, filling your kitchen with the mouthwatering aroma of butter and cheese.

Step 4. Bake Until Golden Brown
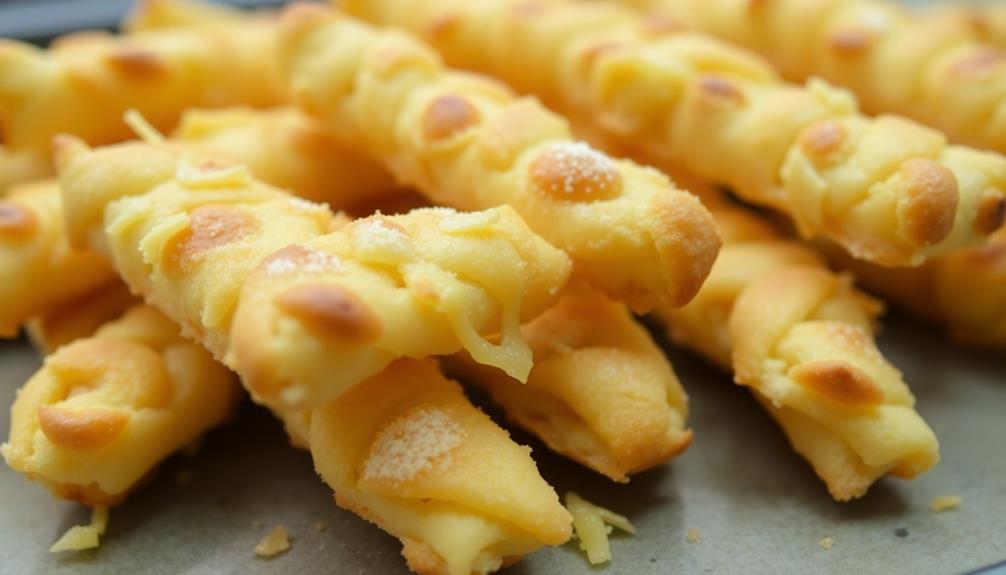
bake until golden brown

Preheat your oven to 375°F. Arrange the cut dough strips onto a couple of baking sheets, spacing them about an inch apart. This gives the cheese straws room to spread out and develop that mouthwatering, golden-brown crust as they bake.

Just like the careful balance in the refrigeration cycle, achieving the perfect bake requires attention to detail. Keep a close eye on them, as the high butter content means they can go from perfectly baked to burnt in the blink of an eye.

Advertisement

After about 12-15 minutes, you'll start to see the edges turn a lovely shade of toasty brown. That's your cue to give them a quick rotation, ensuring even browning all around.

Once they're a consistent golden-brown hue, they're ready to come out of the oven. Let them cool for a couple of minutes on the baking sheet before transferring to a wire rack.

These buttery, cheesy bites are irresistible when they're still slightly warm, with a satisfying crunch that gives way to a delightfully soft, flaky interior.

Step 5. Let Cool Before Serving

cool down before serving

Once the cheese straws have achieved that perfect golden-brown hue, it's time to let them cool before serving.

You'll want to transfer the piping hot, freshly baked straws to a wire rack or parchment-lined baking sheet. This allows the air to circulate around them, helping them to cool down gradually.

As they sit, you'll notice the straws firm up and develop that melt-in-your-mouth texture. Resist the urge to dive right in – patience is key here!

Advertisement

Give them about 10-15 minutes to cool completely. This resting period allows the flavors to meld and the texture to set.

Once cooled, the cheese straws will be perfectly crisp on the outside yet delightfully tender on the inside.

Now you can proudly present your homemade masterpieces to family and friends.

Get ready for oohs, aahs, and requests for the recipe – these buttery, cheesy bites are sure to disappear in no time!

Final Thoughts
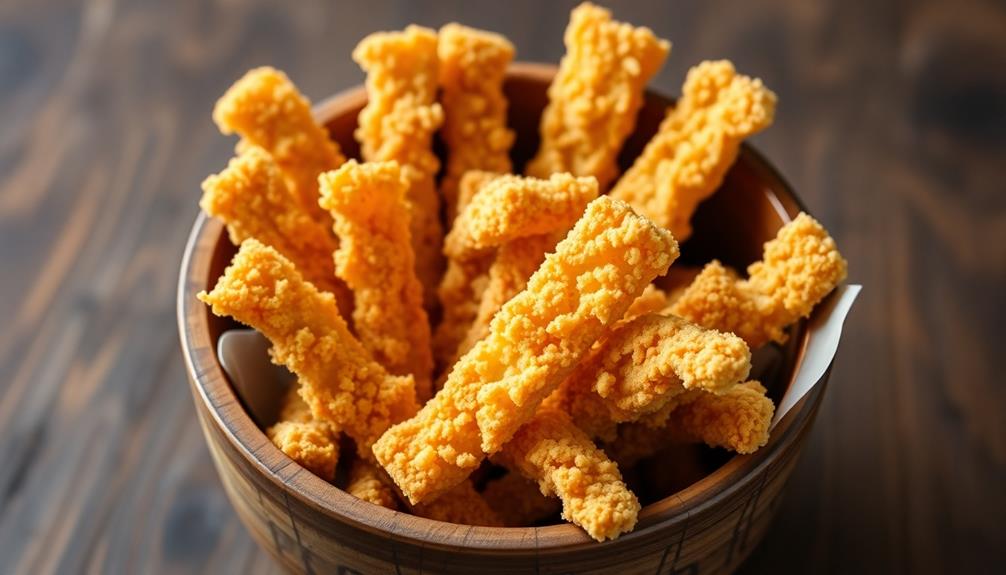
concluding reflections and insights

Ultimately, the Buttery Cheese Straws you've prepared are a delightful treat that can be enjoyed any time. The aroma of the freshly baked, golden-brown straws is simply irresistible, and the buttery richness combined with the sharp, tangy cheese creates a flavor explosion in your mouth.

These straws are the perfect snack for gatherings, movie nights, or simply indulging in a moment of personal indulgence. If you're also looking for safe snacks for your furry friends, consider alternatives to toxic foods like grapes, as they can lead to serious health issues in dogs dogs and grapes.

Advertisement

You'll find that the crunchy, flaky texture is truly satisfying, and the cheese adds a delightful depth of flavor that keeps you coming back for more.

Whether you enjoy them on their own or paired with a glass of wine, the Buttery Cheese Straws are sure to become a staple in your snack rotation.

Frequently Asked Questions

How Long Do Cheese Straws Typically Last After Baking?

Freshly baked cheese straws typically last 3-5 days when stored properly in an airtight container at room temperature. They'll remain crisp and flavorful, but you'll likely find it hard to resist devouring them in just a day or two.

Can Cheese Straws Be Frozen for Later Consumption?

Yes, you can freeze cheese straws for later consumption. Simply place them in an airtight container or freezer bag and they'll keep for several months. When you're ready to enjoy them, just thaw at room temperature.

What Is the Best Cheese to Use for Cheese Straws?

When making cheese straws, you'll want to use a sharp, hard cheese like cheddar or parmesan. These cheeses will give your straws a bold, flavorful punch that's sure to please. Experiment with different varieties to find your favorite!

Advertisement

How Can Cheese Straws Be Stored to Maintain Their Freshness?

To maintain their freshness, you should store cheese straws in an airtight container at room temperature. Avoid refrigerating them, as it can make them stale. Enjoy your cheese straws within a few days for the best texture and flavor.

Are Cheese Straws Suitable for Those With Dietary Restrictions?

Cheese straws may not be suitable for those with dietary restrictions. Depending on the recipe, they can be high in fat, calories, and contain ingredients like butter and cheese that may not align with certain dietary needs. It's essential to check the ingredients carefully.
Advertisement

Butter Tips and Tricks

Making Dairy-Free Compound Butters

Boldly create delicious dairy-free compound butters using plant-based ingredients—discover flavor combinations that will transform your meals into culinary masterpieces!

Published

on

By

dairy free compound butter recipes

Making dairy-free compound butters is simple and fun. Start with a plant-based base, like coconut oil or vegan margarine, and soften it for easier mixing. Add your favorite flavorings—fresh herbs, spices, or even citrus zest for brightness. Experiment with combinations like garlic and parsley or maple and cinnamon for sweetness. Once mixed, shape the blend into a log, wrap it in parchment, and chill until firm. These butters can enhance everything from grilled vegetables to baked goods. Ready to elevate your dishes? There's plenty more to explore about flavor variations and storage techniques!

Key Takeaways

  • Use dairy-free bases like coconut oil, avocado oil, or vegan margarine for making compound butters with similar texture and taste to traditional butter.
  • Combine softened dairy-free butter with fresh herbs, spices, or citrus zest to create flavorful compound butters.
  • Shape the mixture into a log, wrap in parchment paper, and refrigerate until firm for easy slicing.
  • Store in an airtight container for up to a week or freeze in ice cube trays for longer shelf life.
  • Experiment with unique combinations, such as garlic and herbs or sweet cinnamon with maple syrup, for diverse flavor profiles.

Understanding Compound Butters

crafting flavored butter blends

When you immerse yourself in the world of compound butters, you'll find they're a simple yet versatile way to elevate your cooking. Fundamentally, a compound butter is a mixture of softened butter and various flavoring ingredients, such as herbs, spices, or even sweet components. This combination allows you to create an array of flavors that can enhance meats, vegetables, breads, and more.

To make compound butter, you'll start with softened butter as your base. It's vital that the butter is soft enough to blend smoothly but not melted.

Next, you'll choose your flavorings. Fresh herbs like parsley or chives can add a bright touch, while spices like garlic or paprika can provide depth. You can also experiment with sweet elements like honey or citrus zest.

Once you've chosen your ingredients, simply mix them into the softened butter until well combined. Shape the mixture into a log, wrap it in parchment paper, and refrigerate until firm.

This allows you to slice off portions as needed, giving you the freedom to enhance your dishes with ease. With compound butters, you'll discover endless possibilities for flavor enhancement in your culinary creations.

Advertisement

Choosing Dairy-Free Bases

selecting non dairy alternatives

When you're choosing a dairy-free base for your compound butter, consider popular options like coconut oil or avocado oil.

These alternatives not only provide a creamy texture but also allow for unique flavor enhancements.

Think about what tastes you want to highlight, as this can elevate your butter to new heights.

Popular Dairy-Free Options

In recent years, the demand for dairy-free options has surged, leading to a variety of flavorful bases for your compound butters. You've got several choices that not only taste great but also provide a creamy texture without the dairy.

One popular option is coconut oil. Its natural richness adds a tropical flair to your butters, making it perfect for sweet or savory applications.

If you prefer something with a more neutral flavor, consider using avocado oil. It's smooth, versatile, and packed with healthy fats.

Advertisement

Another fantastic choice is nut butters, like almond or cashew butter. They bring a unique taste and creaminess, which can elevate your compound butter to new heights.

For a more traditional texture, try using vegan margarine. Many brands offer products that mimic the taste and consistency of dairy butter, making it an easy swap.

You can also opt for blended oils, like olive oil mixed with a bit of avocado oil, for a balanced flavor profile.

Each of these bases allows you to create delicious dairy-free compound butters that cater to your taste preferences while keeping your dietary needs in mind. Enjoy experimenting!

Flavor Enhancements to Consider

Choosing the right base for your dairy-free compound butters is just the beginning; enhancing those flavors takes your creations to a whole new level.

Advertisement

You can transform simple spreads into gourmet delights with a few creative additions. Here are some flavor enhancements to contemplate:

  1. Fresh Herbs: Chopped parsley, basil, or chives can add a vibrant freshness that elevates your butter.
  2. Citrus Zest: A little lemon, lime, or orange zest brings brightness and a revitalizing zing.
  3. Spices: Experiment with smoked paprika, garlic powder, or even cinnamon for a unique twist that complements your dishes.
  4. Nuts and Seeds: Finely chopped nuts like walnuts or seeds like sesame can introduce an exciting crunch and depth of flavor.

Flavor Combinations to Try

unique flavor pairings exploration

Discovering delightful flavor combinations for dairy-free compound butters opens up a world of culinary possibilities. You can easily elevate your meals by mixing various herbs, spices, and other ingredients. Here are a few combinations to inspire your creativity:

Flavor Base Suggested Add-Ins
Garlic Fresh parsley, lemon zest
Roasted red pepper Smoked paprika, basil
Fresh herbs (e.g., thyme) Olive oil, sea salt
Maple syrup Cinnamon, pecans
Cocoa powder Vanilla extract, sea salt

These combinations not only enhance the taste but also add a beautiful visual appeal. Imagine spreading garlic and parsley butter on warm, crusty bread or melting maple-infused butter over pancakes. Each blend brings a unique twist, making your dishes more exciting.

Experiment with different ratios to find what suits your palate best. You'll be amazed at how simple ingredients can transform your meals into gourmet experiences. So grab your favorite flavors and start creating your own signature dairy-free compound butters!

Step-by-Step Preparation

detailed instructional process

To make delicious dairy-free compound butters, you'll need a few essential ingredients.

We'll cover the best mixing techniques to guarantee a smooth blend and explore various flavor variations to suit your taste.

Let's get started on creating your own custom butter!

Advertisement

Essential Ingredients Required

Creating dairy-free compound butters is simple and requires just a handful of essential ingredients. With these basics, you'll be well on your way to crafting delicious spreads that elevate any dish.

Herbal teas can also be a wonderful addition to your culinary creations, adding unique flavors and health benefits to your meals. Here's what you need:

  1. Plant-Based Butter: Look for a high-quality dairy-free butter made from oils like coconut, olive, or avocado. This will be the base of your compound butter.
  2. Fresh Herbs or Spices: Choose your favorites—like basil, garlic, or rosemary—to infuse your butter with flavor. Fresh ingredients work best, but dried herbs can also be used.
  3. Acid: A splash of lemon juice, vinegar, or even a dash of mustard adds brightness and balances the richness of the butter.
  4. Salt: A pinch of salt enhances all the flavors and brings out the best in your compound butter. Adjust to your taste preference.

Once you gather these ingredients, you'll find it easy to create a variety of compound butters that can complement bread, vegetables, or proteins.

Get creative with combinations to discover unique flavors that suit your palate!

Mixing Techniques Explained

With your ingredients ready, it's time to mix them into a flavorful compound butter. Start by choosing a softened dairy-free butter base. This guarantees easy blending and a creamy texture. Place the softened butter in a mixing bowl.

Next, add your chosen flavorings—herbs, spices, or sweeteners—into the bowl. If you're using fresh ingredients, chop them finely to release their flavors. For dry spices, measure them out carefully to avoid overpowering the mix.

Advertisement

Using a hand mixer or a spatula, blend everything together on medium speed or with a firm hand. Scrape down the sides of the bowl periodically to incorporate all ingredients evenly.

Once the mixture is smooth and well-combined, taste it. Adjust the seasoning if necessary, adding a pinch more salt, herbs, or sweeteners as desired.

To finish, transfer your compound butter onto a piece of parchment paper. Shape it into a log, rolling it tightly, and twist the ends to seal.

Refrigerate for a couple of hours until firm. Your dairy-free compound butter is now ready to enhance any dish!

Flavor Variations Suggestions

Flavor variations can elevate your dairy-free compound butter to new culinary heights. By experimenting with different ingredients, you can create unique flavors that enhance everything from bread to vegetables.

Advertisement

Here are four delicious suggestions to get you started:

  1. Garlic & Herb: Mix in minced garlic, fresh parsley, and thyme for a classic combination that'll elevate any dish.
  2. Citrus Zest: Add lemon or orange zest along with a touch of sea salt for a invigorating, zesty twist.
  3. Smoky Chipotle: Blend in chipotle powder or finely chopped chipotle peppers for a smoky kick that pairs well with grilled meats.
  4. Maple & Cinnamon: Combine pure maple syrup and a dash of cinnamon for a sweet spread that's perfect on pancakes or toast.

To prepare your flavored butter, start with softened dairy-free butter and then incorporate your chosen ingredients.

Mix well until everything is evenly distributed. Once you've achieved the desired flavor, shape the butter into a log using parchment paper, and refrigerate until firm.

Slice and serve it as needed – your culinary creations will never be the same!

Storing Your Compound Butters

properly storing compound butters

Properly storing your compound butters guarantees they maintain their freshness and flavor for longer. Once you've made your delicious dairy-free creation, you have a couple of options for storage.

If you plan to use it within a week, simply wrap the butter tightly in parchment paper and place it in an airtight container. This keeps it fresh and ready for spreading. For added peace of mind, using an air purifier can help reduce allergens in your kitchen, ensuring a cleaner environment while you cook, contributing to your overall well-being.

For longer storage, consider freezing your compound butters. You can scoop the mixture into an ice cube tray or a silicone mold, then freeze until solid.

Advertisement

Once frozen, pop the cubes out and transfer them to a resealable freezer bag. This way, you can grab just the right amount whenever you need it.

Remember to label your bags with the date and flavor for easy identification. Compound butters can typically last up to three months in the freezer without losing quality.

When you're ready to use them, thaw them in the refrigerator overnight or let them sit at room temperature for a bit. With these storage tips, you'll always have your favorite compound butters on hand, ready to elevate your dishes!

Creative Uses for Compound Butters

innovative compound butter ideas

Storing your compound butters opens up a world of culinary possibilities, especially as the demand for innovative butter products continues to rise.

You've got a flavorful stash that can elevate your meals in exciting ways, which is particularly relevant in today's market where global butter consumption trends are shifting.

Here are some creative uses you can try:

Advertisement
  1. Grilled Vegetables: Melt a garlic-herb compound butter over grilled veggies for a burst of flavor.
  2. Pasta Dishes: Toss a spoonful of your favorite compound butter into hot pasta for a quick and delicious sauce.
  3. Baking: Substitute compound butter for regular butter in cookies or muffins to add a unique twist to your baked goods.
  4. Steak or Fish: Top a perfectly cooked steak or fish fillet with a dollop of compound butter just before serving for a rich, savory finish.

Frequently Asked Questions

Can I Use Margarine Instead of Dairy-Free Butter?

Yes, you can use margarine instead of dairy-free butter. Just verify the margarine is dairy-free, as some brands contain milk. Adjust your recipe as needed, since margarine might alter the flavor or texture slightly.

How Long Do Homemade Compound Butters Last in the Freezer?

You'd think homemade compound butters would last forever in the freezer, but they actually keep well for about three months. After that, their flavor and texture might start to decline, so enjoy them sooner!

Are There Nut-Free Dairy-Free Butter Options Available?

Yes, there are nut-free, dairy-free butter options available. You can choose coconut oil, sunflower seed butter, or soy-based spreads. These alternatives provide creamy textures and flavors without dairy or nuts, perfect for your dietary needs.

What Kitchen Tools Do I Need for Making Compound Butters?

To make compound butters, you'll need a mixing bowl, a fork or a hand mixer for blending, a spatula for scraping, and parchment paper for shaping. A knife's handy for spreading your creations later!

Can I Incorporate Fresh Herbs Into My Compound Butter?

Absolutely, you can incorporate fresh herbs into your butter. Just chop them finely and mix them in thoroughly. Experiment with different herbs to find what flavors you enjoy most and enhance your dishes beautifully.

Conclusion

Now that you've mastered the art of dairy-free compound butters, your culinary creations will soar to new heights, transforming even the simplest dish into a gourmet delight. With endless flavor combinations and easy preparation, you can impress family and friends with your creativity. So, go ahead and experiment with your favorite ingredients, and watch as your taste buds dance with joy. Your kitchen will become a haven of flavor, and your meals will never be the same again!

Advertisement
Continue Reading

Butter Tips and Tricks

Guide to European-Style Vegan Butter

Bite into the world of European-style vegan butter and discover how this creamy delight can transform your cooking—are you ready to explore its secrets?

Published

on

By

european vegan butter guide

European-style vegan butter is a rich, creamy alternative to traditional dairy butter that enhances the flavors of your dishes. It's made from high-quality plant oils and often includes emulsifiers for a smooth consistency. You'll find it perfect for cooking, baking, and spreading, offering a luxurious mouthfeel in pastries and sauces. Plus, it's typically lower in saturated fat and cholesterol-free, promoting better heart health. Popular brands like Miyoko's Creamery and Earth Balance deliver various flavors and textures. If you're curious about ingredient tips, cooking methods, and even homemade recipes, there's plenty more to explore!

Key Takeaways

  • European-style vegan butter mimics traditional butter with a rich, creamy texture and enhanced flavor, ideal for various culinary uses.
  • Key ingredients include high-quality oils, emulsifiers, nutritional yeast, and often fortification with Vitamin B12 for added health benefits.
  • It is cholesterol-free and typically lower in saturated fat, promoting heart health and overall well-being.
  • Popular brands like Earth Balance and Miyoko's Creamery offer versatile options for cooking, baking, and spreading.
  • Use a 1:1 substitution ratio for baking, and adjust recipes to accommodate the unique flavors of vegan butter.

What Is European-Style Vegan Butter?

european style vegan butter defined

European-style vegan butter is a plant-based alternative that closely mimics the rich, creamy texture and flavor of traditional European butter. You're likely aware that many people are shifting to plant-based diets, and this butter option fits perfectly into that lifestyle.

Unlike regular vegan butter, which may have a more straightforward flavor, European-style varieties often incorporate specific ingredients and techniques that enhance their depth and creaminess.

When you spread European-style vegan butter on your toast or use it in baking, you'll notice how well it performs in both cooking and flavor. It melts beautifully, allowing you to achieve that luxurious mouthfeel you'd get from dairy butter. It's perfect for making flaky pastries or rich sauces without sacrificing taste.

This type of vegan butter is versatile, making it a great substitute for various culinary applications. Whether you're sautéing vegetables, whipping up a batch of cookies, or simply spreading it on bread, you can enjoy the same delightful experience you'd expect from traditional butter.

If you're looking to explore plant-based options without compromising on flavor, European-style vegan butter is definitely worth trying.

Advertisement

Key Ingredients to Look For

essential elements to consider

When exploring European-style vegan butter, it's important to pay attention to the ingredients that contribute to its rich flavor and texture. Look for high-quality oils, such as coconut, olive, or avocado oil, which provide a creamy mouthfeel. These oils often blend well with natural flavors, enhancing the product's overall taste.

Another key component is emulsifiers, like sunflower lecithin or soy lecithin. These help maintain a smooth consistency and prevent separation. Additionally, many brands fortify their vegan butter with vitamins, particularly B12, to mimic the nutritional benefits found in traditional butter.

To help you identify the best options, here's a quick comparison of key ingredients:

Ingredient Purpose Benefits
Coconut Oil Creamy texture Rich in medium-chain fatty acids
Olive Oil Flavor Heart-healthy fats
Sunflower Lecithin Emulsifier Enhances texture
Nutritional Yeast Flavor enhancer Adds umami taste
Fortified B12 Nutritional boost Supports energy metabolism

Differences From Traditional Butter

non traditional butter alternatives

Vegan butter stands apart from traditional butter in several key ways, primarily due to its plant-based ingredients and absence of dairy. While traditional butter is made from cream, vegan butter is typically crafted from oils, nuts, or seeds, providing a different flavor and texture profile. You'll notice that many vegan butters include ingredients like coconut oil, olive oil, or cashews, which contribute to their unique taste.

Another significant difference lies in their functionality. Traditional butter has a higher fat content, which can affect baking and cooking. When you use vegan butter, you might need to experiment a bit to achieve similar results in recipes, especially in pastries or sauces, where fat plays an essential role.

Moreover, vegan butter often contains added emulsifiers and stabilizers to maintain consistency and spreadability, something you won't find in pure traditional butter. This can lead to a creamier texture or even a slightly different melting point.

Ultimately, while both types serve similar purposes in the kitchen, understanding these differences can help you make informed choices based on your cooking needs and dietary preferences.

Advertisement

Health Benefits of Vegan Butter

vegan butter health advantages

Choosing vegan butter can provide several health benefits that make it an appealing alternative to traditional butter. First off, vegan butter typically contains no cholesterol, which can help you maintain better heart health. By switching to vegan options, you're likely to lower your saturated fat intake, as many brands use healthier oils like olive or avocado oil. This can promote healthier cholesterol levels and reduce the risk of heart disease.

Additionally, many vegan butters are enriched with vitamins and nutrients that can benefit your overall well-being. For instance, you might find options fortified with Vitamin D and E, essential for maintaining healthy bones and skin.

Benefit Detail Impact
Cholesterol-Free No cholesterol, supporting heart health Reduces risk of heart disease
Lower Saturated Fat Made with healthy oils Improves cholesterol levels
Nutrient-Enriched Often fortified with vitamins Supports overall health

Popular Brands to Consider

top brands to explore

In recent years, numerous brands have emerged that offer delicious and versatile vegan butter options. These brands provide a range of flavors and textures, making it easier for you to find the perfect fit for your cooking and baking needs.

One popular option is Earth Balance, known for its creamy texture and rich taste. Their plant-based butter spreads easily and works well in a variety of recipes.

Another excellent choice is Miyoko's Creamery, which offers a cultured vegan butter that mimics traditional European butters with its rich flavor profile.

If you're looking for something more traditional, consider Flora's plant-based butter. It's crafted with oils and plant ingredients that give it a buttery taste without dairy.

For those who prefer a nut-based option, you can't go wrong with Nutiva's organic coconut oil-based vegan butter, which adds a unique flavor to your dishes.

Advertisement

How to Use Vegan Butter

vegan butter usage tips

Using vegan butter opens up a world of culinary possibilities.

You can spread it on toast for a quick snack or incorporate it into your favorite baking recipes for a rich, creamy texture.

Plus, if you're looking for alternatives, there are plenty of options that can still deliver great flavor and consistency.

Cooking and Baking Tips

Often, you'll find that vegan butter can be seamlessly integrated into your cooking and baking routines. When you're sautéing vegetables, use vegan butter to add richness and flavor without the dairy. It melts beautifully, allowing you to achieve that golden-brown finish you're after.

For baking, substitute vegan butter in a 1:1 ratio for regular butter in most recipes. This works well in cookies, pastries, and cakes. Just remember to let it soften to room temperature before creaming it with sugars. This helps create that perfect light and fluffy texture you want in baked goods.

If you're making a sauce or dressing, melt the vegan butter gently over low heat. You can whisk in herbs, garlic, or lemon juice for a delicious drizzle over steamed veggies or pasta.

Advertisement

When you're working with dough, like for pie crusts or biscuits, keep the vegan butter cold. Cut it into small pieces and mix it quickly into the flour to create a flaky texture.

Experimenting with different brands can lead to delightful discoveries, so don't hesitate to try various options to find your favorite!

Spreading on Toast

A warm slice of toast topped with vegan butter creates a simple yet satisfying breakfast or snack. To achieve the perfect spread, start with fresh, crusty bread or your favorite gluten-free option. Once you've toasted it to a golden crisp, grab your European-style vegan butter, which has a rich, creamy texture that melts beautifully.

For those who enjoy experimenting with flavors, consider utilizing specialized butter tools that can enhance your butter experience.

Using a butter knife, scoop a generous amount of vegan butter and spread it evenly across the toast. Be gentle; you want to guarantee the toast stays intact while letting the butter melt into every nook and cranny. If you prefer, you can let the butter sit at room temperature for a few minutes to soften it up, making spreading even easier.

Advertisement

For added flavor, consider sprinkling a pinch of sea salt or a dash of your favorite herbs on top. You can also layer on additional toppings like avocado, tomato slices, or a dollop of fruit preserves for a more indulgent treat.

Enjoy your toast warm, and savor the delightful combination of flavors and textures. With vegan butter, you're not just spreading; you're creating a delicious experience!

Vegan Butter Alternatives

Vegan butter alternatives offer a versatile option for enhancing your cooking and baking.

These plant-based spreads can elevate the flavor and texture of your dishes while keeping them cruelty-free.

Here are three easy ways to use vegan butter alternatives:

Advertisement
  1. Sautéing and Stir-Frying: Use vegan butter to sauté vegetables or stir-fry your favorite dishes. It adds a rich flavor while helping to achieve that golden-brown color you love.
  2. Baking: Replace regular butter with vegan alternatives in your baking recipes. Whether you're making cookies, cakes, or muffins, using vegan butter will yield delicious results without sacrificing taste.
  3. Sauces and Dressings: Melt vegan butter and incorporate it into sauces or dressings for a creamy texture. It works great in pasta dishes or as a drizzle over steamed vegetables.

Cooking and Baking Tips

culinary techniques and advice

When you're cooking or baking with European-style vegan butter, it's crucial to know how to substitute it for traditional butter effectively.

You can also explore melting and spreading techniques to get the best texture and flavor.

Plus, don't forget about flavor enhancements and pairings that can elevate your dishes to a whole new level.

Substituting Traditional Butter

While many recipes call for traditional butter, substituting it with European-style vegan butter is easier than you might think.

This creamy alternative can work wonders in your cooking and baking, allowing you to enjoy your favorite dishes without compromising on flavor or texture.

Here are three tips to make the switch seamless:

Advertisement
  1. Use a 1:1 Ratio: Generally, you can replace traditional butter with vegan butter in equal amounts. If a recipe calls for 1 cup of butter, simply use 1 cup of European-style vegan butter instead.
  2. Choose the Right Type: Some vegan butters are softer, while others are firmer. For baking, you might prefer a firmer variety as it holds its shape better. For spreading or cooking, a softer option will work perfectly.
  3. Mind the Flavor: European-style vegan butter often has a rich, slightly tangy flavor that can enhance your dishes. Be mindful of this when you're preparing sweet treats, as it might slightly alter the taste.

With these simple tips, you can confidently substitute traditional butter and still create delicious meals and baked goods!

Melting and Spreading Techniques

To achieve the best results when melting or spreading European-style vegan butter, it's essential to understand its unique properties. This type of vegan butter typically has a higher fat content, mimicking traditional European butter, which means it melts beautifully and spreads easily.

When melting, use low heat to prevent separation. You can place it in a saucepan over a gentle flame or microwave it in short bursts, stirring in between to guarantee even melting. Avoid overheating, as this can alter the texture and flavor.

For spreading, it's best to let your vegan butter soften at room temperature for about 15-20 minutes before using it. If you're in a hurry, you can cut it into small pieces to speed up the softening process.

When spreading on bread or baked goods, use a butter knife or a spatula to create an even layer. If you're working with frozen or very cold butter, slightly warming your knife under hot water can help glide it more smoothly.

These techniques will enhance your experience and assure your dishes shine with that perfect buttery touch.

Advertisement

Flavor Enhancements and Pairings

There's no shortage of ways to elevate the flavor of European-style vegan butter in your cooking and baking. By incorporating a few key enhancements, you can take your dishes from good to gourmet. Here are some ideas to get you started:

  1. Herbs and Spices: Infuse your vegan butter with fresh herbs like rosemary or thyme, or spices like smoked paprika and garlic powder. This adds depth and complexity to your dishes.
  2. Citrus Zest: A touch of lemon or orange zest can brighten the flavor profile of your butter. It works wonders in baked goods and savory recipes alike, adding a revitalizing twist.
  3. Nutritional Yeast: If you're after that cheesy flavor, sprinkle in some nutritional yeast. It's perfect for a buttery spread or to enhance sauces, giving them a savory richness.

Experimenting with these enhancements can make your European-style vegan butter a star ingredient in your kitchen.

Don't hesitate to mix and match according to your taste preferences and the dishes you're preparing!

Flavor Profiles and Pairings

taste combinations and suggestions

When exploring flavor profiles and pairings for European-style vegan butter, you'll discover a delightful range of tastes that elevate any dish. This vegan butter often features rich, creamy notes reminiscent of traditional dairy butter, making it an excellent base for various culinary creations.

You can enjoy herbed versions infused with garlic, chive, or dill, which pair beautifully with roasted vegetables, baked potatoes, or as a spread on crusty bread.

If you prefer something more indulgent, look for versions that include a hint of truffle or smoked flavors, perfect for enhancing pasta dishes or drizzling over popcorn.

For those who love sweetness, a vegan butter blended with maple or vanilla can be delightful on pancakes or in baked goods.

Advertisement

Don't forget about the tangy options, like lemon or nutritional yeast-infused butters, which work wonders in savory dishes or as a zesty topping for grilled corn.

Experiment with different combinations to find your favorite pairings.

Whether you're spreading it on toast, using it in a sauce, or incorporating it into a pastry, the versatility of European-style vegan butter allows you to explore and enjoy a world of flavors.

Homemade Vegan Butter Recipes

plant based butter alternatives guide

Creating your own European-style vegan butter at home opens up a world of flavor possibilities tailored to your taste. You can experiment with various ingredients to achieve the perfect spread.

Here's a simple recipe to get you started, along with some ideas to customize it.

Basic Vegan Butter Recipe

  1. Ingredients:
    • 1 cup coconut oil (softened)
    • 1/4 cup neutral oil (like grapeseed)
    • 1/4 cup non-dairy milk
    • 1 tsp salt
    • 1 tsp nutritional yeast (optional)
  2. Instructions:
    • Blend all ingredients in a food processor until smooth.
    • Taste and adjust salt or add herbs for a unique flavor.
    • Transfer to a container and refrigerate until firm.

Customization Ideas

  • Herbed Delight: Add fresh or dried herbs like chives or rosemary for a savory kick.
  • Garlic Infusion: Blend in roasted garlic for a rich, aromatic spread.
  • Sweet Twist: Mix in a touch of maple syrup or cinnamon for a sweet version.

With these basics, you can create your ideal vegan butter that enhances any meal!

Sustainability and Ethical Considerations

responsible environmental practices emphasized

When you choose European-style vegan butter, you're not just opting for a tasty alternative; you're also making a choice that can impact the environment.

Consider how the plant-based ingredients contribute to sustainability and how eco-friendly packaging options can further reduce your carbon footprint.

Advertisement

It's time to think about the broader implications of your food choices and their role in a more ethical lifestyle.

Plant-Based Ingredients Impact

The impact of plant-based ingredients on sustainability and ethics is profound and deserves attention. As you explore the world of European-style vegan butter, consider how these ingredients contribute to a more sustainable future.

Here are three key areas where plant-based choices make a difference:

1. Lower Carbon Footprint: Plant-based ingredients typically require fewer resources to produce compared to animal products. This means less deforestation, water usage, and greenhouse gas emissions, which helps combat climate change.

Additionally, the shift towards solar energy solutions can further reduce the carbon footprint associated with food production and processing.

Advertisement

2. Animal Welfare: Choosing vegan butter means you're opting for a product that doesn't involve animal exploitation. By supporting plant-based alternatives, you align your values with ethical considerations regarding animal rights.

3. Biodiversity Preservation: Plant-based diets promote the cultivation of a variety of crops, which can help preserve biodiversity.

This encourages sustainable farming practices and protects ecosystems from the harmful impacts of industrial agriculture.

Eco-Friendly Packaging Options

As you embrace European-style vegan butter, consider the impact of its packaging on sustainability. Choosing brands that prioritize eco-friendly packaging can greatly reduce your environmental footprint.

Look for products packaged in materials like glass, aluminum, or recyclable plastics, which are less harmful to the planet compared to traditional plastic. Some companies are even using biodegradable or compostable materials, making it easier for you to dispose of packaging responsibly.

Advertisement

When you opt for vegan butter in bulk or refillable containers, you not only cut down on waste but also save money in the long run. Additionally, support brands that focus on minimal packaging or use innovative designs that reduce excess materials. This conscious choice helps you align your values with your purchasing decisions.

Check for certifications like FSC (Forest Stewardship Council) or labels indicating recycled content, which can guide you toward more sustainable options. By being mindful of packaging, you contribute to a larger movement towards sustainability.

Every small choice counts, and your preference for eco-friendly packaging can encourage more companies to adopt responsible practices. Together, we can make a positive impact on the environment while enjoying delicious vegan butter.

Frequently Asked Questions

Can European-Style Vegan Butter Be Frozen for Long-Term Storage?

Yes, you can freeze European-style vegan butter for long-term storage. Just make sure to wrap it tightly to prevent freezer burn. When you're ready to use it, let it thaw in the fridge.

Is European-Style Vegan Butter Suitable for People With Nut Allergies?

If you're concerned about nut allergies, you'll want to check labels carefully. Many European-style vegan butters are nut-free, but some brands might include nuts. Always verify ingredients to confirm it's safe for you.

Advertisement

How Does European-Style Vegan Butter Compare in Price to Regular Vegan Butter?

European-style vegan butter often costs a bit more than regular vegan butter due to its specialized ingredients and production methods. You might find the price difference worth it for the richer flavor and texture it offers.

Can I Find European-Style Vegan Butter in Regular Grocery Stores?

You can often find European-style vegan butter in regular grocery stores, especially larger chains. If it's not on the shelf, check specialty or organic sections, or ask your store to contemplate stocking it.

What Is the Shelf Life of European-Style Vegan Butter Once Opened?

Once opened, European-style vegan butter typically lasts about two to three weeks in the fridge. Keep it tightly sealed, like a treasure chest, to preserve its delightful flavors and creamy texture for your culinary adventures!

Conclusion

In the grand tapestry of culinary delights, European-style vegan butter stands out, weaving together flavor and compassion in every spread. By choosing this plant-based alternative, you're not just indulging in rich taste but also embracing a lifestyle that echoes the harmony of nature, much like the idyllic scenes of a Monet painting. So, as you explore this buttery domain, remember you're savoring a choice that celebrates both your palate and the planet.

Advertisement
Continue Reading

Butter Tips and Tricks

Comparing Plant-Based Butter Alternatives

Keen to discover the best plant-based butter alternatives? Uncover the unique flavors and health benefits that could elevate your culinary creations!

Published

on

By

evaluating plant based butter options

When you're comparing plant-based butter alternatives, you'll find a variety of flavors and textures tailored to your needs. Nut-based butters offer rich, creamy options like almond or peanut, while coconut oil spreads provide a tropical kick. Soy-based butters are high in protein and mimic traditional butter's taste. Additionally, avocado and olive oil blends contribute healthy fats and enhance absorption of vitamins. Each alternative has distinct culinary uses, whether for baking, spreading, or cooking. Explore their nutritional benefits and cooking performance to find the perfect fit for your dishes. There's plenty more to uncover about these versatile options!

Key Takeaways

  • Plant-based butters vary in flavor profiles, with nut-based options offering rich tastes and coconut spreads providing a tropical essence.
  • Nutritional benefits differ; nut-based butters are high in healthy fats and protein, while soy-based options are lower in saturated fats.
  • Ingredient quality matters; opt for whole, natural ingredients and avoid hydrogenated oils and artificial additives for healthier choices.
  • Performance in cooking and baking can be similar to dairy butter, with most alternatives offering comparable moisture and texture in recipes.
  • Popular brands like Miyoko's Creamery and Earth Balance each have distinct flavors and best uses, catering to different culinary needs.

Overview of Plant-Based Butters

exploring plant based butter options

In recent years, plant-based butters have emerged as a popular alternative to traditional dairy butter, catering to the growing demand for vegan and lactose-free options. You might find these spreads made from a variety of sources, including oils, grains, and legumes. They offer a wide range of flavors and textures, making them versatile for cooking, baking, or simply spreading on toast.

When you look for plant-based butter, you'll often come across options like coconut oil, olive oil, and avocado oil. These ingredients provide healthy fats and can enhance the flavor of your dishes. Many brands also fortify their products with vitamins and minerals, ensuring you get a nutritious alternative without sacrificing taste.

What's great is that plant-based butters can mimic the creamy texture of dairy butter, allowing you to enjoy your favorite recipes without concern for dietary restrictions.

Plus, they're often lower in saturated fats, making them a heart-healthy choice. As you explore the world of plant-based butters, you'll discover that they can elevate your meals while aligning with your dietary preferences and values.

Nut-Based Butter Alternatives

nut butter substitutes available

When you think about nut-based butter alternatives, you're tapping into a world rich in flavor and nutrition.

These spreads not only offer unique taste profiles but also pack a punch regarding health benefits.

Advertisement

Let's explore how they compare in both nutrition and flavor to find the perfect fit for your meals.

Nutritional Benefits Overview

Nut-based butter alternatives offer a wealth of nutritional benefits that can enhance your diet. These alternatives, made from almonds, cashews, walnuts, and other nuts, are packed with healthy fats, protein, and essential vitamins and minerals. You'll find them rich in monounsaturated fats, which can support heart health by helping to lower bad cholesterol levels.

Additionally, many of these nut-based options are available as dairy-free butter alternatives, making them suitable for those with dietary restrictions.

In addition to healthy fats, nut-based butters provide a good source of protein. A serving can offer a substantial protein boost, making them an excellent choice for vegetarians or anyone looking to increase their protein intake. They also contain important nutrients like vitamin E, magnesium, and potassium, all of which play crucial roles in your body's overall function.

Moreover, nut-based butters are a great option if you're looking to maintain or lose weight. Their healthy fats and protein can help keep you feeling full longer, reducing the likelihood of snacking on less nutritious options.

Advertisement

Just be mindful of portion sizes, as they can be calorie-dense. By incorporating nut-based butter alternatives into your meals or snacks, you can enjoy delicious flavors while reaping the numerous health benefits they offer.

Flavor Profiles Comparison

Exploring the flavor profiles of nut-based butter alternatives reveals a delightful variety that can enhance your culinary creations.

Almond butter, with its subtly sweet, nutty flavor, lends itself well to both sweet and savory dishes. It's perfect for smoothies, spreads, and even baking.

Cashew butter, on the other hand, offers a creamy texture and a mild, slightly sweet taste, making it an ideal base for sauces and dips.

Peanut butter, a classic favorite, boasts a robust, earthy flavor that works wonders in desserts and sandwiches alike.

Advertisement

If you're looking for something a bit more exotic, try macadamia nut butter, which has a rich, buttery taste that can elevate your recipes to new heights.

Hazelnut butter brings a distinctive, sweet, and slightly earthy profile, excellent in both desserts and savory dishes.

When you experiment with these nut-based alternatives, you'll discover how they can transform your meals. Each option has its unique appeal, allowing you to tailor flavors to your preferences.

Coconut Oil Spreads

versatile coconut oil spreads

Coconut oil spreads have taken the culinary world by storm, offering a creamy and flavorful alternative to traditional butters. You'll find these spreads made from coconut oil blended with other ingredients, making them versatile for a range of uses. They're perfect for slathering on toast, enhancing baked goods, or even cooking.

One of the standout features of coconut oil spreads is their rich, tropical flavor. This can bring an exciting twist to your favorite recipes. Plus, they're typically dairy-free, making them suitable for vegans and those with lactose intolerance. You'll also appreciate that many brands offer organic options, ensuring you're getting a clean product.

When it comes to health benefits, coconut oil is known for its medium-chain triglycerides (MCTs), which can provide quick energy and may support metabolism. However, keep in mind that while coconut oil spreads are a great option, moderation is key due to their calorie content.

Advertisement

As you explore these spreads, consider the various brands available. Some might include added flavors, while others focus on pure coconut richness. Overall, coconut oil spreads can be a delightful addition to your plant-based pantry.

Soy-Based Butter Options

plant based butter alternatives

If you're looking for another plant-based alternative, soy-based butter options might pique your interest. These spreads often blend soy protein with oils, giving you a creamy texture that works well in various recipes.

One of the great things about soy-based butter is its versatility; you can use it for baking, cooking, or simply spreading on toast.

Soy butter typically contains fewer saturated fats compared to traditional dairy butter, making it a healthier choice for many. Plus, it's packed with protein, which is a bonus if you're trying to increase your intake.

However, if you have a soy allergy, you'll want to steer clear of these options, as they can trigger adverse reactions.

When you're shopping, check for enriched varieties that include vitamins A and D, as these nutrients help mimic the nutritional profile of dairy butter.

Advertisement

You'll also want to look for organic brands when possible, as they typically offer higher-quality ingredients without harmful pesticides.

Avocado and Olive Oil Blends

healthy cooking oil blends

Avocado and olive oil blends offer impressive nutritional benefits that can enhance your diet.

You'll find their flavor profiles bring a unique richness, making them versatile for various culinary uses.

Whether you're spreading it on toast or using it in cooking, these blends can elevate your meals effortlessly.

Nutritional Benefits Overview

While many people are exploring plant-based diets, blending avocado and olive oil offers impressive nutritional benefits. This combination not only enhances your meals but also supports your health in several ways.

Here's why you should consider incorporating this blend into your diet:

Advertisement

1. Heart Health: Both avocado and olive oil are rich in monounsaturated fats, which can help lower bad cholesterol levels, reducing your risk of heart disease.

Additionally, incorporating health benefits of various honeys into your diet can further support cardiovascular health.

2. Nutrient Absorption: Healthy fats aid in the absorption of fat-soluble vitamins (A, D, E, and K), ensuring your body utilizes the nutrients from your food effectively.

3. Antioxidant Boost: Olive oil is packed with antioxidants, which help combat oxidative stress, potentially lowering your risk of chronic diseases.

4. Anti-Inflammatory Properties: Avocado and olive oil contain compounds that may help reduce inflammation in your body, promoting overall wellness.

Advertisement

Flavor Profile Comparison

There's something uniquely delightful about the flavor profile of a blend combining avocado and olive oil. This combination offers a rich, creamy texture paired with a fruity, nutty essence that elevates any dish. When you spread it on bread or mix it into your favorite recipes, you'll notice how the avocado's buttery notes harmonize beautifully with the distinct, peppery undertones of olive oil.

To help you appreciate these flavors even more, here's a quick comparison:

Flavor Component Description
Avocado Creamy, buttery, and slightly sweet
Olive Oil Fruity, nutty, and peppery
Combined Experience Rich, smooth, and well-rounded
Ideal Pairings Bread, vegetables, and pasta

This blend not only enhances the taste of your meals but also provides a unique option for those seeking plant-based alternatives. It's perfect for experimenting in the kitchen, allowing you to explore different flavor combinations while still enjoying healthy fats. Give it a try, and you'll see how versatile and delicious this pairing can be!

Culinary Uses and Versatility

In the kitchen, avocado and olive oil blends shine as versatile ingredients that can elevate a wide range of dishes. Their creamy texture and rich flavor make them perfect for various culinary applications, allowing you to experiment and enjoy healthier alternatives.

Here are four ways you can incorporate these blends into your cooking:

Advertisement
  1. Spreads and Dips: Use the blend as a delicious spread on toast or as a base for creamy dips that will wow your guests at any gathering.
  2. Cooking and Sautéing: Replace traditional butter or oil with this blend for sautéed vegetables or proteins, adding a layer of flavor that's hard to resist.
  3. Baking: Incorporate it into your baking recipes for cookies or muffins, giving them a moist and delightful texture.
  4. Dressings and Marinades: Whip up a zesty salad dressing or marinade, enhancing the freshness of your dishes while keeping them healthy.

With avocado and olive oil blends, you're not just cooking—you're creating flavorful experiences that nourish both body and soul.

Embrace the versatility and let your culinary creativity flourish!

Ingredients to Look For

essential cooking components checklist

When choosing plant-based butter alternatives, it's essential to pay attention to the ingredients list. Look for options that use high-quality oils like olive, avocado, or coconut, as these provide healthy fats and essential nutrients.

Avoid products that contain hydrogenated oils, which can introduce trans fats into your diet and may be harmful to your heart health.

You'll also want to check for natural flavorings and avoid artificial additives or preservatives. Ingredients such as nutritional yeast can add a rich flavor while providing additional vitamins, particularly B12.

If you're sensitive to allergens, read labels carefully for common allergens like soy or nuts.

Moreover, consider the presence of emulsifiers, which help maintain a creamy texture. Glycerin or lecithin derived from plants are generally safe choices.

Advertisement

Flavor Profiles and Uses

culinary taste characteristics applications

When choosing a plant-based butter alternative, you'll notice that different brands offer unique taste profiles that can enhance your cooking.

Some are rich and creamy, while others might've a more nutty or herbaceous flavor.

Understanding these differences will help you find the best uses for each alternative in your favorite recipes.

Taste Comparisons of Brands

As you explore the world of plant-based butter alternatives, you'll quickly notice that different brands offer distinct flavor profiles and culinary uses.

Each brand has its unique taste, which can elevate your dishes or leave you craving more. Here's a quick look at four popular options:

  1. Miyoko's Creamery: If you're after a rich, creamy taste reminiscent of traditional butter, this brand shines. Perfect for spreading on warm bread or using in pastries.
  2. Earth Balance: Known for its slightly nutty flavor, it's a versatile choice that works well in both baking and cooking. You'll love how it enhances your favorite recipes.
  3. Flora Plant Butter: This option offers a light, buttery flavor, making it ideal for delicate dishes. It's a delightful choice for sautéing veggies or drizzling over popcorn.
  4. Nutiva: With a hint of coconut, Nutiva adds a tropical twist to your meals. It's great for greasing pans or adding to smoothies for a creamy texture.

Finding your favorite plant-based butter can transform your cooking experience, allowing you to enjoy delicious, buttery flavors while sticking to your dietary preferences.

Best Uses in Cooking

You'll discover that plant-based butter alternatives can elevate your culinary creations in various ways, depending on their flavor profiles.

Advertisement

For instance, a nut-based butter, like cashew or almond, infuses a creamy richness that works beautifully in sauces and baked goods. It enhances the nuttiness of cookies and adds depth to savory dishes.

If you opt for a coconut-based alternative, its subtle sweetness and slight tropical flavor shine in desserts and curries. Try it in your favorite chocolate cake or as a base for a luscious frosting. You'll appreciate how it complements flavors without overpowering them.

For a more traditional flavor, look for a soy or canola-based butter. These tend to mimic dairy butter closely, making them great for spreading on toast or using in classic recipes like mashed potatoes.

You can also use them for sautéing vegetables, as they offer a balanced taste that suits various cuisines.

Nutritional Comparisons

dietary analysis and evaluation

Nutritional comparisons between plant-based butter alternatives and traditional dairy butter reveal significant differences that can influence your dietary choices.

While dairy butter is high in saturated fats and cholesterol, plant-based options often offer healthier profiles.

Advertisement

Here are four key points to reflect on:

  1. Heart Health: Plant-based butters typically contain unsaturated fats, which can help lower bad cholesterol levels, promoting better heart health.
  2. Vitamins and Antioxidants: Many plant-based alternatives are fortified with vitamins like B12 and D, essential for those on a vegan diet, while dairy butter lacks these nutrients.
  3. Caloric Content: Some plant-based options have fewer calories than dairy butter, making them a lighter choice for those watching their weight.
  4. Dietary Restrictions: If you're lactose intolerant or have a dairy allergy, plant-based butters provide a safe and delicious alternative without compromising flavor.

Cooking and Baking Performance

culinary skills evaluation metrics

When it comes to cooking and baking, plant-based butter alternatives can perform surprisingly well, often matching or even exceeding the capabilities of traditional dairy butter. You'll find that many of these alternatives have a similar fat content, making them suitable for a variety of recipes.

Whether you're sautéing veggies, making a sauce, or whipping up a batch of cookies, you can confidently substitute plant-based butter without compromising flavor or texture.

In baking, plant-based butter usually provides a comparable rise and moisture, so your cakes and muffins should turn out just as fluffy and delicious. Many brands melt and cream just like dairy butter, allowing for smooth mixing and easy incorporation into your batter.

When it comes to cookies, you might notice a slightly different spread, but this can often be adjusted with simple tweaks to your recipe.

For cooking, plant-based options often handle high heat well, making them perfect for frying or roasting. Just keep an eye on the smoke point, as some alternatives may vary.

Advertisement

Choosing the Right Option

selecting the best choice

Finding the right plant-based butter alternative can enhance your cooking and baking experience even further. With so many options available, it's crucial to take into account your specific needs and preferences. Here are four factors to help you choose the best option:

1. Flavor: Think about the taste profile you want. Some alternatives have a strong coconut flavor, while others are more neutral. Pick one that complements your dishes.

Remember that butter adds flavor and moisture to baked goods, so finding a plant-based option that mimics this quality can elevate your recipes.

2. Texture: Different brands offer various consistencies. If you're baking, you might want something that mimics the creaminess of traditional butter.

3. Ingredient Quality: Check the label for high-quality, whole ingredients. Avoid those filled with preservatives or artificial additives to guarantee you're eating healthily.

4. Purpose: Reflect on what you'll be using it for. Some alternatives work better for cooking, while others shine in baking or spreading.

Advertisement

Frequently Asked Questions

Are Plant-Based Butters Suitable for People With Nut Allergies?

If you have nut allergies, you should carefully check the ingredients of plant-based butters. Some may contain nuts or be processed in facilities that handle nuts, which could pose a risk for you. Always read labels!

How Long Do Plant-Based Butters Typically Last Once Opened?

Once you open plant-based butter, it usually lasts about 1 to 3 months in the refrigerator. Always check for any off smells or discoloration to verify it's still good to use. Enjoy your cooking!

Can I Make My Own Plant-Based Butter at Home?

Yes, you can definitely make your own plant-based butter at home! Simply blend nuts or seeds with oils, add flavorings like garlic or herbs, and freeze for a delicious, customizable alternative to store-bought options.

Do Plant-Based Butters Contain Any Artificial Additives or Preservatives?

Many store-bought plant-based butters contain artificial additives or preservatives. For instance, a popular brand uses emulsifiers to improve texture. Always check labels to guarantee you're choosing a product that aligns with your health goals.

Are There Any Environmental Benefits to Using Plant-Based Butters?

Using plant-based butters can reduce your carbon footprint, conserve water, and lessen deforestation compared to dairy products. By choosing these alternatives, you're supporting sustainable practices and contributing to a healthier planet for future generations.

Advertisement

Conclusion

When it comes to plant-based butter alternatives, you might wonder if they truly match up to traditional butter. The truth is, while they offer unique flavors and health benefits, not all options perform the same in cooking or baking. By understanding the differences among nut, coconut, soy, and oil-based spreads, you can choose the perfect one for your needs. So, experiment with these alternatives and discover how they can elevate your meals without compromising on taste!

Continue Reading
Advertisement

Affiliate disclaimer

As an affiliate, we may earn a commission from qualifying purchases. We get commissions for purchases made through links on this website from Amazon and other third parties.

Vetted

Vetted4 months ago

Infusion Buds Butter Infuser & Decarboxylator – 2024 Review

I recently got to try out the Infusion Buds Butter Infuser & Decarboxylator Machine Combo, and I am excited to...

Vetted4 months ago

LEVO Lux – Premium Herbal Oil Infusion Machine – Review [2024]

I recently got to try out the LEVO Lux – Premium Herbal Oil Infusion Machine – Botanical Extractor – Herb...

Vetted4 months ago

STX Infuzium & Decarboxylator Bundle Review [2024]

Today, I am thrilled to share my thoughts on the PREMIUM PACK • STX Infuzium Butter-Oil-Tincture Infuser & STX Activation...

Vetted4 months ago

Review: ONGROK Small Butter Infuser [2024]

Introduction: I am thrilled to share my experience with the ONGROK Small Butter Infuser in this post. This device has...

Vetted4 months ago

Herbal Infuser Hi – Innovative Botanical Butter Maker [2024]

Today, I am thrilled to share with you my experiences with the Herbal Infuser Hi Countertop Botanical Butter Maker, Tincture...

Vetted4 months ago

Ardent FX Decarboxylator Review: Quick & Effortless! [2024]

I recently had the opportunity to try out the Ardent FX Decarboxylator 110V With Bluetooth Connectivity, and I must say,...

Vetted4 months ago

Infusion Buds Butter Infuser – Review & Accessories [2024]

Thank you for joining me as we explore a review of the Infusion Buds Butter Infuser & Decarboxylator Machine Combo....

Vetted4 months ago

Decarboxylator Machine Review: Easy & Odorless Herb Activation [2024]

I recently had the opportunity to try out the Decarboxylator Machine for Herbs, and I have to admit, it really...

Vetted4 months ago

Decarb Mini System Review: All-in-One Herbal Processing Solution [2024]

Today, I will be giving my thoughts on the Decarb Mini System. As someone who enjoys herbal infusions and tinctures,...

elevate steak with butter elevate steak with butter
Vetted4 months ago

12 Best Compound Butter Recipes for Elevating Your Steak Game

Kick your steak game up a notch with these 12 mouthwatering compound butter recipes that will take your taste buds...

mouthwatering butter cookie taste mouthwatering butter cookie taste
Vetted4 months ago

15 Best Butter Cookies That Will Melt In Your Mouth – Taste Test Results

Tantalize your taste buds with the top 15 butter cookies that promise a melt-in-your-mouth experience - a delightful journey awaits!

peanut butter ice cream peanut butter ice cream
Vetted4 months ago

15 Best Peanut Butter Ice Cream Flavors You Need to Try This Summer

Craving a creamy and decadent summer treat?

Advertisement

Trending