Connect with us

Recipes & Culinary Uses

How Many Tablespoons of Butter in 3/4 Stick: A Simple Guide

Published

on

An image showcasing a wooden cutting board with a butter knife gently slicing through 3/4 of a stick of butter

Can you help me with a cooking question: how many tablespoons are in 3/4 stick of butter?

If you’re like me, you want to get your measurements just right. Well, I’ve done the math for you and I’m here to share the answer.

Stick around and I’ll break it down for you, step by step, so you’ll never have to guess again.

Get ready to become a butter-measuring pro!

Key Takeaways

  • A 3/4 stick of butter is equivalent to 6 tablespoons.
  • To convert a fraction of a stick, like 3/4, into tablespoons, multiply the number of sticks by 8.
  • There are a total of 12 tablespoons in three-fourths of a stick of butter.
  • Converting sticks to tablespoons helps in accurate butter measurement.

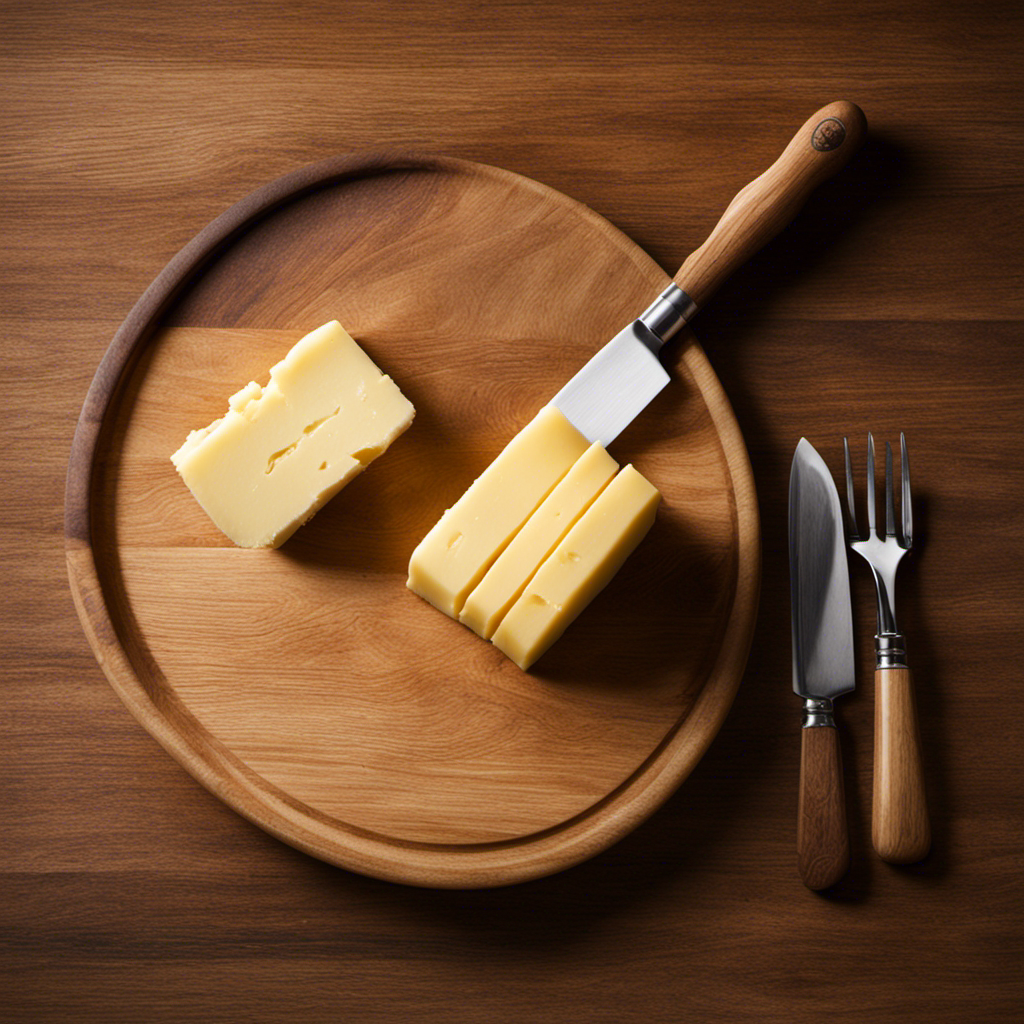
Understanding the Measurement: 3/4 Stick of Butter

Advertisement

I know that a 3/4 stick of butter is equivalent to 6 tablespoons. Understanding butter measurements is essential when it comes to following recipes accurately.

Butter is commonly sold in sticks, with each stick typically measuring 1/2 cup or 8 tablespoons. However, sometimes a recipe calls for a specific fraction of a stick, like 3/4. To convert this measurement into tablespoons, you simply multiply the number of sticks by 8. In this case, 3/4 of a stick is equal to 6 tablespoons.

It’s important to have a good grasp of converting butter measurements to ensure that your recipe turns out just right. Now that we understand the measurement of 3/4 stick of butter, let’s explore how to convert sticks to tablespoons for other measurements.

Converting Sticks to Tablespoons

There are a total of 12 tablespoons in three-fourths of a stick of butter.

When it comes to measuring butter, it’s important to understand the conversions between sticks and tablespoons. Butter is often sold in sticks, and each stick typically contains 8 tablespoons.

Advertisement

So, to determine the number of tablespoons in three-fourths of a stick, you can multiply 8 by 0.75 (which is the decimal equivalent of three-fourths). This calculation yields 6 tablespoons.

Therefore, if you’ve three-fourths of a stick of butter, you’ve 6 tablespoons. This conversion is useful when following recipes that require precise measurements.

Now that we know how to convert sticks to tablespoons, let’s move on to calculating the number of tablespoons in 3/4 stick of butter.

Calculating the Number of Tablespoons in 3/4 Stick of Butter

Advertisement

To calculate the number of tablespoons in three-fourths of a stick of butter, I simply multiply 8 by 0.75. This gives me a result of 6 tablespoons. However, it’s important to note that the equivalency of butter measurements can vary in different countries. In the United States, a stick of butter typically weighs 113 grams or 1/2 cup, which is equivalent to 8 tablespoons. However, in countries like Australia and New Zealand, a stick of butter is typically 250 grams, which is equivalent to 20 tablespoons. To ensure precise measurements, it’s useful to convert tablespoons to grams. For example, 1 tablespoon of butter is equal to approximately 14 grams. By converting tablespoons to grams, you can accurately measure the desired amount of butter for your recipe.

Tablespoons Grams
1 14
2 28
3 42
4 56
5 70

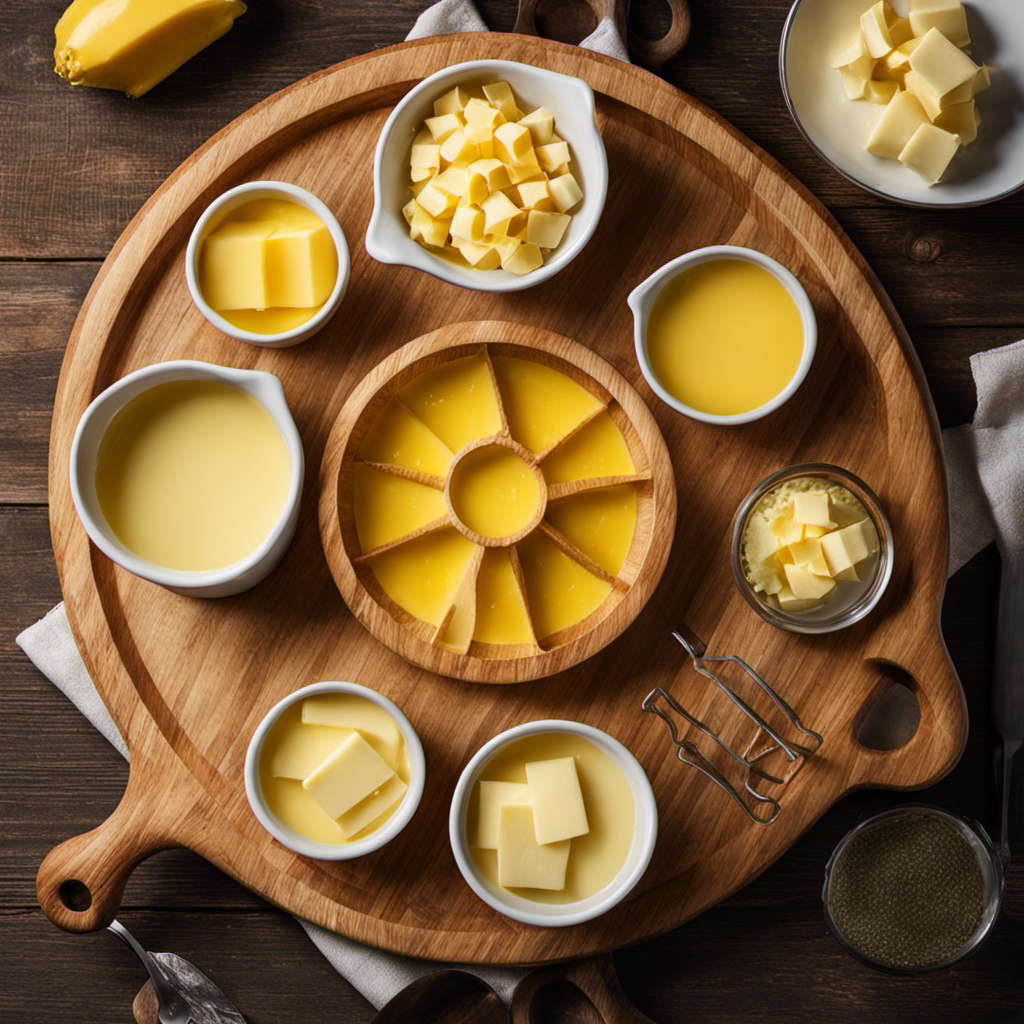
Tips for Measuring Butter Accurately

One helpful tip for accurately measuring butter is using a kitchen scale to weigh the desired amount. This method ensures precision and eliminates any guesswork. However, if you don’t have a kitchen scale, there are alternative ways to measure butter accurately. Here are some tips to help you measure butter without a scale:

  • Use the measurement markings on the butter wrapper: Many butter sticks come with measurement markings on the wrapper, indicating tablespoons or ounces. Simply cut off the desired amount according to these markings.

  • Convert from weight to volume: If a recipe calls for a specific weight of butter, you can convert it to volume measurements. For example, one stick of butter is equivalent to 8 tablespoons or 1/2 cup.

  • Use a butter dish with markings: Some butter dishes have markings that indicate tablespoon measurements. This can be a convenient option for quick and easy butter measurement.

Common mistakes in butter measurement include using the wrong conversion ratios or not clarifying whether the butter should be melted or softened. It’s important to carefully read the recipe instructions and measure the butter accurately to achieve the desired results in your baking or cooking endeavors.

Converting Tablespoons to Other Units of Measurement

Advertisement

I find it helpful to convert tablespoons to other units of measurement when I need to accurately measure ingredients for a recipe. Converting tablespoons to grams is especially useful when dealing with ingredients like flour or sugar, where precision is key. Similarly, converting sticks to cups is important when working with butter or margarine. Here’s a table that shows the conversion rates for tablespoons to grams and sticks to cups:

Measurement Tablespoons to Grams Sticks to Cups
1 tablespoon 14.3 grams 1/8 cup
2 tablespoons 28.6 grams 1/4 cup
3 tablespoons 42.9 grams 3/8 cup

Knowing these conversions can make it easier to follow recipes accurately and achieve consistent results. So the next time you come across a recipe that calls for tablespoons or sticks, you can confidently convert them to the units that work best for you.

Frequently Asked Questions

Can I Use Margarine Instead of Butter in This Recipe?

Sure, you can use margarine instead of butter in this recipe. Margarine is a suitable substitute, but keep in mind that it may alter the taste and texture. Consider the pros and cons before making the switch.

How Many Ounces Are in a Stick of Butter?

There are 16 tablespoons in a pound of butter. To convert sticks of butter to cups, the general rule is that 1 stick is equal to 1/2 cup. So, 3/4 stick of butter is approximately 3/8 cup.

How Much Butter Should I Use if the Recipe Calls for 2 Cups?

If a recipe calls for 2 cups of butter, you’ll need 4 sticks. To convert butter measurements, remember that 1 stick is equal to 8 tablespoons. Using butter in recipes adds richness and flavor.

Advertisement

Can I Use a Butter Substitute Like Coconut Oil or Olive Oil Instead?

Using coconut oil in baking can provide a unique flavor and texture to your dishes. However, if substituting for butter, keep in mind that coconut oil has a lower melting point. Olive oil, on the other hand, offers health benefits and can be a suitable alternative in some recipes.

What Is the Difference Between Salted and Unsalted Butter?

The difference between salted and unsalted butter lies in the presence or absence of salt. Salted butter contains added salt for flavor, while unsalted butter is pure butter without any added salt. Salted butter can be used in both sweet and savory recipes, while unsalted butter is more versatile in baking. Clarified butter is butter that has had its milk solids removed, resulting in a higher smoke point and longer shelf life. Cultured butter is made from cream that has been fermented, giving it a tangy flavor. Butter is generally considered healthier than margarine, as it is a natural product without any artificial ingredients or trans fats.

Conclusion

In the culinary world, understanding measurements is key to creating delicious dishes.

When it comes to butter, converting sticks to tablespoons allows for accurate measurements.

By calculating the number of tablespoons in 3/4 stick of butter, you can ensure your recipes turn out just right.

Advertisement

Remember to measure butter accurately to achieve the desired taste and texture.

And if you ever need to convert tablespoons to other units of measurement, you now have the knowledge to do so with confidence.

Happy cooking!

Continue Reading
Advertisement

Recipes & Culinary Uses

Mixer Magic: How to Make Fresh Butter

Published

on

By

-up image capturing a clear glass mixing bowl filled with thick, creamy liquid, as the whisk attachment of a stand mixer vigorously whips it, causing tiny droplets of butter to form and separate from the buttermilk

I have always thought that cooking is easy as pie. And what better way to demonstrate that than by making your own butter in a mixer?
Could you please rephrase that for me?

With just a few simple steps, you can transform ordinary cream into a creamy and delicious homemade butter. In this article, I’ll guide you through the process, from choosing the right mixer to adding your favorite flavors.

So let’s roll up our sleeves and get ready to whip up some buttery goodness!

Key Takeaways

  • Consider the speed settings and attachments available when choosing a mixer for making butter.
  • Ensure the cream is at room temperature for successful churning.
  • Use a medium-high speed for mixing the cream to achieve the desired consistency.
  • Properly drain and wash the butter to ensure a creamy and spreadable texture.

Choosing the Right Mixer for Making Butter

When choosing the right mixer for making butter, it’s important to consider the speed settings and attachments available. There are several reputable mixer brands on the market that offer a range of options.

Advertisement

One of the pros of using a mixer for making butter is the convenience it provides. With various speed settings, you can easily control the consistency of your butter. Additionally, many mixers come with attachments specifically designed for whipping cream or blending ingredients, which can be useful when making flavored butters.

However, there are also some cons to consider. Mixers can be expensive, and not all models are suitable for butter-making. It’s crucial to do your research and choose a mixer that has enough power and durability to handle the task effectively.

Gathering the Necessary Ingredients and Equipment

To gather the necessary ingredients and equipment, you’ll need to ensure you have everything ready before starting. Here’s a table outlining the key items you’ll need for making butter in a mixer:

Ingredient/Equipment Quantity
Heavy cream 2 cups
Salt 1/4 tsp
Mixer with whisk attachment 1
Bowl 1
Butter mold or storage container 1

To achieve the desired texture, it’s important to choose the right mixer. Look for a mixer with a powerful motor and a whisk attachment. This will ensure that the cream is whipped efficiently and will result in a smoother and creamier butter. Additionally, make sure the bowl you use is deep enough to prevent splattering. By following these steps and using the right equipment, you’ll be able to achieve the perfect texture for your homemade butter.

Preparing the Cream for Churning

Advertisement

Before you start, make sure you have the cream prepared for churning. Choosing the right churning method is essential for successful butter making. There are two main options: using a stand mixer or a hand mixer. Both can produce excellent results, but the stand mixer offers more convenience and control.

To prepare the cream, start by ensuring it is at room temperature. Cold cream will take longer to churn and may result in less creamy butter. Pour the cream into the mixer bowl, making sure not to overfill it. Set the speed to medium-high and let the mixer do its work.

If you encounter any problems during the churning process, troubleshooting common butter making problems is crucial. If the cream isn’t thickening, it might be due to insufficient fat content. Adding a small amount of heavy cream can help. If the butter separates into solids and buttermilk too quickly, reduce the speed to avoid over-churning.

Mixing the Cream to Form Butter

When it comes to mixing cream to form butter, there are a few key points to keep in mind.

Advertisement

First, the speed of the mixer is crucial in achieving the desired consistency. I’ve found that using a medium-high speed works best, as it allows the cream to come together without becoming overmixed.

Secondly, the churning time and technique also play a role in the final outcome. I’ve found that churning for about 10-15 minutes, or until the cream starts to separate into butter and buttermilk, is sufficient.

Mixer Speed for Cream

The mixer’s speed should be adjusted based on the consistency of the cream. The ideal mixer speed for making butter from cream is medium to high. Here are some tips for controlling the mixer speed:

  • Start at a low speed: Begin mixing the cream at a low speed to prevent splattering and ensure even distribution of the ingredients.
  • Gradually increase the speed: As the cream starts to thicken and form soft peaks, gradually increase the mixer speed to medium. This will help break down the fat globules and encourage the separation of butter from the buttermilk.
  • Watch for changes in consistency: Keep a close eye on the cream’s consistency. If it starts to look grainy or curdled, reduce the mixer speed to avoid over-mixing and producing a greasy butter.

Churning Time and Technique

To achieve the desired consistency, it’s important to monitor the churning time and technique when making homemade butter. The churning time can vary depending on several factors, such as the type of cream used, the temperature, and the speed of the mixer. It’s recommended to start with a low speed and gradually increase it until the cream starts to separate into butter and buttermilk. This process usually takes around 10-15 minutes, but it can vary. If the butter is not forming properly, it may be due to insufficient churning time or using cream that is too cold. On the other hand, if the butter is too soft or grainy, it may be a result of over-churning. It’s important to troubleshoot these common issues to ensure the best results.

Here is a table highlighting the recommended churning time variations for different types of cream:

Cream Type Churning Time
Heavy Cream 10-15 minutes
Whipping Cream 8-12 minutes
Double Cream 12-18 minutes

Separating Butter and Buttermilk

It’s important to gradually increase the speed of the mixer until the cream starts to separate into butter and buttermilk. This process usually takes around 10-15 minutes of continuous mixing.

Advertisement

Here are some troubleshooting tips for separating butter and buttermilk:

  • Make sure the cream is at the right temperature. It should be around 50-55°F for optimal separation.
  • If the butter isn’t forming, you can try adding a small amount of ice water to encourage separation.
  • If the butter separates but the buttermilk looks chunky or watery, it may be due to overmixing. Stop the mixer as soon as the separation occurs to prevent further mixing.
  • If the butter and buttermilk aren’t fully separating, you can strain the mixture through a cheesecloth or fine-mesh sieve to remove any remaining liquid.

Draining and Washing the Butter

When it comes to draining and washing butter, there are three key points to consider.

The first is removing excess liquid, which is important for achieving a creamy and spreadable texture.

Next, washing out impurities is crucial to ensure the butter is clean and free from any unwanted flavors or particles.

Removing Excess Liquid

First, drain the excess liquid from the butter by using a cheesecloth. This step is crucial in achieving a creamy consistency for your homemade butter.

Here are some tips for removing excess water and getting that perfect texture:

Advertisement
  • Gently squeeze the butter in the cheesecloth to remove any remaining liquid. Be careful not to squeeze too hard, as this can cause the butter to become too dense.

  • Place the butter in a bowl of cold water and gently knead it with your hands. This helps to further remove any water that may be trapped in the butter.

  • If you still notice excess liquid, you can try pressing the butter between two plates to help drain out any remaining water.

Washing Out Impurities

To remove impurities from the butter, you can wash it under cold water while gently kneading it. It is important to use cold water for this process as it helps to solidify the butter and make it easier to separate from any impurities. There are different methods you can use to wash out impurities in homemade butter. One method is to place the butter in a bowl of cold water and let it sit for a few minutes. Then, gently knead the butter with your hands to release any impurities. Another method is to wrap the butter in cheesecloth and immerse it in a bowl of cold water. Gently squeeze and knead the cheesecloth to release any impurities. Whichever method you choose, be sure to rinse the butter thoroughly to ensure all impurities are removed.

Method Steps Benefits
Cold Water Method 1. Place butter in a bowl of cold water. 2. Let it sit for a few minutes. 3. Gently knead the butter to release impurities. – Helps solidify the butter. – Easy to perform.
Cheesecloth Method 1. Wrap butter in cheesecloth. 2. Immerse in a bowl of cold water. 3. Gently squeeze and knead the cheesecloth to release impurities. – Provides a barrier for impurities. – Allows for easier removal.

Achieving Desired Texture

You can achieve the desired texture of your homemade butter by adjusting the amount of kneading and chilling time. Here are some tips to help you achieve the perfect consistency:

  • Kneading Time: For a softer and spreadable butter, knead the cream for a shorter period of time. This will result in a smoother and creamier texture. If you prefer a firmer butter, knead the cream for a longer period of time. This will help develop a more solid and compact texture.

  • Chilling Time: After kneading the cream, refrigerate it for at least 30 minutes before shaping it. This will allow the butter to firm up and hold its shape. If your butter is too soft or greasy, try chilling it for a longer period of time. This will help solidify the fat and improve the texture.

  • Troubleshooting Common Texture Issues: If your butter turns out grainy, it may be due to insufficient kneading. Simply knead it for a few more minutes until the grains disappear. If your butter is too hard or crumbly, it may have been over-kneaded. Try kneading it less next time to achieve a smoother texture.

Adding Salt or Flavorings (Optional

If you want to enhance the taste of your butter, consider adding salt or other flavorings. There are numerous flavoring variations you can experiment with to create a unique and delicious butter.

One popular option is to add a pinch of sea salt, which brings out the natural flavors of the butter and gives it a satisfying savory taste.

For those looking for a sweeter option, you can try adding a drizzle of honey or a sprinkle of cinnamon. Not only do these flavorings add a delightful twist to your butter, but they also offer health benefits. Honey, for example, is known for its antibacterial properties and can provide a natural source of antioxidants.

Advertisement

Storing and Using Homemade Butter

When storing your homemade butter, it is important to keep it in an airtight container to maintain its freshness and prevent it from absorbing any odors from the refrigerator. Here are some helpful tips for storing and using your homemade butter:

  • Store it in an airtight container: This will prevent your butter from picking up any unwanted flavors or odors from other foods in the fridge.
  • Keep it in the coldest part of the refrigerator: Butter tends to soften quickly at room temperature, so keeping it in the coldest part of the fridge will help it stay firm and fresh.
  • Freeze it for long-term storage: If you have made a large batch of butter, you can freeze it in smaller portions for later use. Just make sure to wrap it tightly in freezer-safe packaging.

Creative uses for homemade butter:

  • Baking: Homemade butter adds a rich and creamy flavor to baked goods like cookies, cakes, and pastries.
  • Cooking: Use homemade butter to sauté vegetables, cook eggs, or melt over grilled meats for a flavorful finish.
  • Spreads and sauces: Whip up delicious spreads like garlic herb butter or homemade hollandaise sauce using your homemade butter.

With proper storage and creative uses, your homemade butter will be a versatile and tasty addition to your culinary repertoire.

Frequently Asked Questions

Can I Use a Hand Mixer Instead of a Stand Mixer to Make Butter?

Yes, you can use a hand mixer instead of a stand mixer to make butter. Here are some tips for making butter with a hand mixer: use a deep bowl, start on low speed, and be patient.

Can I Use Any Type of Cream to Make Butter?

Yes, you can use any type of cream to make butter. Heavy cream is commonly used, but you can also use whipping cream or double cream. Additionally, you can make butter without a mixer using alternative methods like shaking cream in a jar or using a food processor.

Do I Need to Chill the Cream Before Churning It Into Butter?

Yes, it is necessary to chill the cream before churning it into butter. Chilling helps in achieving a better consistency and texture. It also enhances the homemade butter taste by allowing the fat to separate more easily.

How Long Does It Typically Take to Churn Cream Into Butter Using a Mixer?

To speed up the butter churning process, is there a way to make butter in a blender? It typically takes around 10-15 minutes to churn cream into butter using a mixer.

Advertisement

Can I Use Store-Bought Salted Butter to Add Flavor to My Homemade Butter?

Yes, you can use store-bought salted butter to add flavor to your homemade butter. Another option is to incorporate flavored oils during the churning process. Both methods will enhance the taste of your homemade butter.

Conclusion

In conclusion, making butter in a mixer is a delightful and rewarding experience. By choosing the right mixer and gathering the necessary ingredients and equipment, you are well on your way to creating a creamy and delicious homemade butter.

From preparing the cream and mixing it to perfection, to draining and washing the butter, every step is crucial in achieving that perfect consistency. And don’t forget to add a pinch of salt or your favorite flavorings for that extra touch of deliciousness.

So go ahead, store and savor your homemade butter, and let your taste buds dance with joy!

Advertisement
Continue Reading

Recipes & Culinary Uses

Make Rich Butter Using Whipping Cream

Published

on

By

An image showcasing the process of making butter from whipping cream: a glass jar filled with creamy liquid, a hand vigorously shaking it, and then separating the solid butter and liquid buttermilk

I understand your skepticism about the process of making butter from whipping cream, it may seem complicated and time-consuming. However, let me assure you that it is actually much simpler than you think!

In just a few simple steps, you can transform that carton of whipping cream in your fridge into a delicious, homemade butter. So grab your materials, chill that cream, and get ready to whip up some buttery goodness.

Trust me, once you taste the creamy, rich flavor of your homemade butter, you’ll never go back to store-bought again.

Key Takeaways

  • Select the right whipping cream with the desired fat content for the desired outcome in recipes.
  • Use a chilled bowl and whisk, and start at a low speed to gradually incorporate air while whipping.
  • Avoid overwhipping to prevent grainy butter and separation.
  • Separate and wash the butter properly to remove excess buttermilk and improve its shelf life.

Gathering the Materials

Before we begin, make sure you’ve gathered all the necessary materials. For making homemade butter, you will need some key items.

Advertisement

Firstly, you will need fresh whipping cream. Look for a high-quality cream with a high fat content for the best results.

Next, you will need a container to store your homemade butter. There are various options available, such as glass jars, plastic containers, or butter keepers. Choose one that suits your preference and ensures the butter stays fresh.

Moving on to flavors, there are plenty of ways to add a delicious twist to your homemade butter. You can experiment with herbs like garlic, thyme, or rosemary. Alternatively, you can try sweet flavors like honey or cinnamon. The possibilities are endless, so get creative and have fun exploring different flavors for your homemade butter.

Selecting the Right Whipping Cream

When choosing the right whipping cream, it’s important to consider the fat content. The fat content determines the richness and thickness of the cream, which can greatly affect the outcome of your recipes.

There are different types of cream available, each with varying fat content. Heavy cream, also known as heavy whipping cream, is the richest with a fat content of around 36%. It’s perfect for making whipped cream and adding richness to sauces and soups.

Advertisement

Light cream has a fat content of around 20% and is best for adding a touch of creaminess to coffee or tea.

Half-and-half is a mixture of milk and cream, with a fat content of around 10-12%. It’s commonly used in coffee and as a lighter alternative to heavy cream.

When it comes to salt alternatives, you can opt for unsalted butter or low-sodium cream if you’re watching your sodium intake.

Chilling the Whipping Cream

Advertisement

To achieve the best results, it’s crucial to chill the whipping cream before using it in your recipes. This helps the cream to whip up faster and hold its shape better. The chilling time and temperature of the cream are important factors to consider.

Discussion Point 1: Chilling Time
It is recommended to chill the whipping cream for at least 30 minutes before using it. This allows the fat in the cream to solidify slightly, which makes it easier to whip. If the cream is not chilled enough, it may take longer to reach the desired consistency and may not hold its shape as well.

Discussion Point 2: Temperature of the Cream
The whipping cream should be cold but not frozen. Ideally, it should be around 40°F (4°C). If the cream is too warm, it will not whip properly and may become runny. On the other hand, if it is too cold, it may be difficult to incorporate air into the cream and achieve the desired volume.

Table: Chilling Time Temperature of the Cream
At least 30 minutes Around 40°F (4°C)

Whipping the Cream

When it comes to whipping cream, there are a few key points to keep in mind.

First, mastering the whipping technique is crucial for achieving the perfect consistency. I’ll be sharing some helpful tips to ensure your cream whips up beautifully.

Advertisement

Second, having the right tools for the job makes a world of difference. I’ll be discussing the best tools to use for whipping cream, so you can achieve the best results.

Lastly, over-whipping can lead to some consequences that can ruin your whipped cream. I’ll be covering what those consequences are and how to avoid them.

Whipping Technique Tips

One important tip for whipping cream into butter is to ensure you’re using cold cream straight from the fridge. This is because cold cream has a higher fat content and will whip up more easily.

When it comes to whipping technique, there are a few key tips to keep in mind:

  • Use a chilled bowl and whisk: This helps to maintain the cold temperature of the cream and promotes better whipping.
  • Start at a low speed: Beginning at a low speed allows the cream to incorporate air gradually, preventing splattering.
  • Avoid overwhipping: Be careful not to overwhip the cream, as this can lead to grainy butter and separation of the milk solids.

Best Tools for Whipping

Using a chilled bowl and whisk will help you maintain the cold temperature of your ingredients and achieve better results.

However, if you don’t have access to these tools, there are alternatives for whipping cream. An electric mixer with a whisk attachment can be a great option, as it saves time and effort. Another alternative is a hand mixer, which is more portable and convenient for smaller batches.

Advertisement

Now, let’s address some common whipping issues. If your cream is not thickening, make sure it is cold and that you’re using the correct fat percentage. If the cream starts to curdle, stop whipping immediately, as this means you have over-whipped it.

Speaking of over-whipping, let’s discuss the consequences in the next section.

Over-Whipping Consequences

If you over-whip the cream, it will become grainy and lose its smooth texture. Over-whipping introduces too much air into the cream, causing it to thicken excessively and break down. As a result, the fat globules in the cream clump together, creating a grainy consistency. This is not ideal when using the cream for toppings or fillings.

Consequences of over-whipping:

  • Grainy texture
  • Loss of smoothness

While over-whipped cream may not be suitable for its original purpose, there are alternative uses for it:

Alternative uses for over-whipped cream:

Advertisement
  • Incorporate it into a cake batter for added moisture and richness.
  • Use it as a base for homemade butter, by continuing to whip until the fat separates from the liquid.

Adding Salt (Optional

I love adding salt to my dishes because it enhances the flavor and brings out the best in every ingredient.

But I know there’s an ongoing debate about whether to use salt or not, with some people advocating for a salt-free diet.

In this discussion, we’ll explore the benefits of adding salt and how it can transform a dish from ordinary to extraordinary.

Salt Enhances Flavor

Adding salt to the whipped cream enhances its flavor. Salt has the ability to bring out the natural sweetness and richness of the cream, creating a more balanced and enjoyable taste. But the benefits of adding salt to whipped cream go beyond flavor enhancement.

Firstly, consuming salt in moderation can have several health benefits. It helps to regulate fluid balance in the body, supports proper muscle function, and aids in nerve transmission.

Secondly, if you prefer to explore alternative flavor enhancements, there are various options to consider. You can add a splash of vanilla extract for a subtle sweetness, a drizzle of chocolate syrup for a decadent twist, or a sprinkle of cinnamon for a warm and spicy flavor. These alternatives offer unique tastes that can elevate your whipped cream to new heights.

Advertisement

Salt or No Salt

In my previous subtopic, I discussed how salt enhances the flavor of butter. Now, let’s tackle the age-old debate: salted or unsalted butter? It’s a discussion point that has divided many home cooks and chefs alike.

Some argue that salted butter adds an extra depth of flavor to dishes, while others prefer the versatility of unsalted butter. When it comes to health benefits, both options have their merits. Salted butter contains trace amounts of iodine, which is essential for thyroid function. On the other hand, unsalted butter allows you to control the sodium intake in your meals.

For those looking for alternative seasonings, there are plenty of options to explore. Herbs like rosemary, thyme, or garlic can add a burst of flavor to your butter. You can even experiment with spices like paprika or cayenne pepper for a little kick.

Ultimately, the choice between salted and unsalted butter and alternative seasonings comes down to personal preference and the specific dish you’re preparing.

Benefits of Adding Salt

When using salt, you’ll notice that it helps to enhance the flavors in your dishes. It’s a staple in most kitchens and adds that extra kick to your meals.

Advertisement

But did you know that there are alternatives to salt that can provide the same flavor enhancement? Some popular salt alternatives include herbs and spices like garlic powder, onion powder, and black pepper. These alternatives not only bring out the flavors in your food but also offer additional health benefits.

For example, garlic powder is known for its antioxidant properties and can boost your immune system. Onion powder is rich in vitamins and minerals, while black pepper aids digestion.

Continuing to Whip

Once the cream starts to thicken, you can keep whipping it to achieve the desired consistency for butter. Continuous whipping has its benefits.

Firstly, it helps to break down the fat globules in the cream, allowing them to stick together and form butter. This continuous agitation also helps to release excess moisture, resulting in a creamier and more spreadable butter.

Secondly, different whipping techniques can be employed to achieve different results. For a light and fluffy butter, whip the cream at a high speed until it forms soft peaks. If you prefer a denser and more solid butter, continue whipping until the cream becomes stiff and separates into butter and buttermilk.

Advertisement

Separating the Butterfat

To separate the butterfat, you’ll want to continue agitating the cream until it separates into butter and buttermilk. The butterfat content of different types of cream can vary, with heavy cream having a higher percentage compared to light cream. This difference in butterfat content affects the flavor and texture of the resulting butter.

When it comes to the history of butter making techniques, it dates back thousands of years. Ancient civilizations discovered that agitating cream could separate the butterfat from the liquid. They used various methods, such as shaking the cream in animal skin bags or churning it in wooden barrels. Over time, these techniques evolved, and today we have modern tools like stand mixers and butter churns to make the process easier.

Now, let’s move on to the next step: draining the buttermilk.

Draining the Buttermilk

Now, you can strain the mixture through a fine mesh sieve or cheesecloth to separate the buttermilk from the butter. Straining is an essential step in the butter-making process as it helps remove any remaining liquid from the solid butter.

As the mixture passes through the sieve or cheesecloth, the golden buttermilk will slowly drip down, leaving behind the creamy, velvety butter. Buttermilk, despite its name, is not actually made from butter. It is the liquid left over after churning butter from cream.

Advertisement

Besides being a delicious ingredient in pancakes and baked goods, buttermilk also offers several health benefits. It is rich in probiotics, calcium, and vitamins, making it good for digestion and bone health. In addition to its culinary uses, buttermilk has been historically used as a natural beauty remedy, helping to cleanse and exfoliate the skin.

Washing the Butter

When it comes to making homemade butter, there’s an important step that often gets overlooked – washing the butter.

In this discussion, we’ll explore the reasons why washing butter is necessary and the benefits it brings to the final product.

Additionally, we’ll delve into the proper techniques for washing butter to ensure the best results and achieve that smooth, creamy texture we all love.

Discussion Point 1: Why Wash Butter

Why wash butter? It helps remove excess buttermilk and improves the shelf life of your homemade butter. When making butter, it’s important to properly wash it to ensure the final product is of high quality.

Advertisement

Here are some key reasons why butter washing is essential:

  • Proper butter washing techniques:

  • Rinse the butter under cold water to remove any remaining buttermilk.

  • Knead the butter to remove excess moisture.

  • Benefits of adding salt:

  • Salt acts as a preservative, extending the shelf life of the butter.

  • Salt enhances the flavor and adds a subtle depth to the butter.

By following these proper butter washing techniques and adding a pinch of salt, you can achieve a creamy, flavorful, and longer-lasting homemade butter.

Now, let’s move on to discussing proper butter washing techniques in more detail.

Discussion Point 2: Proper Butter Washing Techniques

To achieve a creamy and longer-lasting homemade butter, it’s important to properly wash the butter and remove excess moisture. When it comes to butter washing techniques, there are a few variations you can try.

One method is using cold water. After churning the butter, you can place it in a bowl of cold water and gently knead it. The water will help remove any remaining buttermilk, which can cause the butter to spoil faster.

Advertisement

Another technique involves using ice water. This method is particularly effective in removing even more buttermilk and excess moisture, resulting in a smoother and firmer butter.

Whichever technique you choose, the benefits of proper butter washing are undeniable. Not only does it improve the taste and texture, but it also helps to extend the shelf life of your homemade butter.

Shaping the Butter

First, take the lump of butter and shape it into a round ball. Shaping the butter is an important step in creating a visually appealing final product. Here are some shaping techniques to consider:

  • Press and roll: Use the palm of your hand to press the butter into a flat shape, then gently roll it into a cylinder.
  • Knife sculpting: With a sharp knife, carefully carve the butter into intricate shapes or patterns.

Now, let’s talk about butter molds. Butter molds are a fun and creative way to shape your homemade butter. They come in various designs, such as flowers, animals, or even holiday-themed shapes. Simply press the softened butter into the mold, then gently tap it out to reveal the beautiful shape.

By shaping your butter with different techniques or using molds, you can add a personal touch to your homemade butter.

Now, let’s move on to the next step: storing and enjoying your creation.

Advertisement

Storing and Enjoying Your Homemade Butter

Now let’s talk about how to store and enjoy your homemade butter.

Homemade butter is better because it contains no preservatives or additives, giving you a pure and natural flavor.

To store your butter, wrap it tightly in wax paper or plastic wrap and keep it in the refrigerator. This will help it stay fresh for up to two weeks.

When it comes to enjoying your homemade butter, the possibilities are endless. Spread it on warm toast or freshly baked bread for a simple and satisfying treat. Use it to sauté vegetables or melt it over grilled steak for added richness and flavor. And don’t forget about baking! Homemade butter is perfect for making flaky pie crusts and delicious cookies.

Frequently Asked Questions

How Long Does It Take to Make Butter From Whipping Cream?

It doesn’t take long to make butter from whipping cream. Once the cream is whipped, it separates into butter and buttermilk. After that, you can store the homemade butter properly and even flavor it to your liking.

Advertisement

Can I Use Any Type of Salt When Adding It to the Butter?

Yes, you can use different types of salt when adding it to homemade butter. It’s a great way to add flavors and enhance the taste. I personally enjoy using sea salt or Himalayan pink salt for a unique twist.

Can I Use an Electric Mixer Instead of a Hand Whisk to Whip the Cream?

Yes, you can definitely use an electric mixer instead of a hand whisk to whip the cream. It’s quicker and more efficient. Plus, you’ll get that perfect fluffy texture for your homemade butter.

Can I Use Heavy Cream Instead of Whipping Cream to Make Butter?

Yes, heavy cream can be used as an alternative ingredient for making butter from cream. It contains a higher fat content than whipping cream, which helps in the butter-making process.

How Long Can I Store Homemade Butter in the Refrigerator Before It Goes Bad?

I’ll share some storage tips for homemade butter and signs of spoiled butter. It’s important to know how long we can keep it in the refrigerator before it goes bad.

Conclusion

In conclusion, making butter from whipping cream is a simple and rewarding process. By following the steps outlined in this article, you can create your own delicious homemade butter.

Advertisement

So why not give it a whirl? With a little patience and effort, you’ll be churning out creamy, flavorful butter that will have you saying, ‘It’s like butter wouldn’t melt in my mouth!’

So go ahead and embark on this butter-making adventure, and indulge in the rich and wholesome taste of your very own creation.

Continue Reading

Recipes & Culinary Uses

10 Easy Steps to Make Butter in a Jar

Published

on

By

An image featuring a glass jar filled with creamy, pale yellow liquid, surrounded by a flurry of motion as a hand vigorously shakes it

One often hears that the most wonderful things in life are those made at home, and this is especially evident when it comes to butter.

In this article, I’ll show you how to make butter in a jar using simple ingredients and tools.

With a little bit of churning and straining, you’ll have a creamy, delicious spread that will elevate any meal.

So, roll up your sleeves and get ready to embark on a butter-making adventure that will leave your taste buds begging for more.

Let’s dive in!

Advertisement

Key Takeaways

  • Choose high-fat heavy cream without additives or preservatives
  • Sterilize the jar to eliminate bacteria and contaminants
  • Gather necessary tools and equipment for the butter-making process
  • Experiment with flavor variations and proper storage techniques for homemade butter

Choosing the Right Ingredients

Before you begin, make sure you have the right ingredients for making butter in a jar. Choosing the right ingredients is crucial to achieving the perfect taste and texture.

For homemade butter, it’s best to use heavy cream that has a high fat content. Look for cream that is fresh and free from any additives or preservatives. Organic, grass-fed cream is also a great option if you prefer a more natural flavor.

Additionally, consider your taste preferences when selecting the ingredients. If you like salted butter, you can add a pinch of salt to the cream before shaking it.

Now that you have the right ingredients, let’s move on to preparing the jar and tools for making butter.

Advertisement

Preparing the Jar and Tools

When it comes to preparing the jar and tools for making butter, there are several key points to consider.

First, it is important to sterilize the jar to ensure that it is free from any bacteria or contaminants that could affect the quality and safety of the butter. This can be done by washing the jar in hot, soapy water and then boiling it in a pot of water for a few minutes.

Additionally, it is necessary to gather the necessary tools and equipment, such as a butter churn or a jar with a tight-fitting lid, a thermometer, and a clean cloth or cheesecloth for straining the butter.

Lastly, it is crucial to take safety precautions into account, such as wearing gloves to protect your hands from hot surfaces and using caution when working with boiling water.

Jar Sterilization Techniques

To ensure cleanliness, it’s important to sterilize the jar before making butter. Proper sterilization ensures that harmful bacteria and contaminants are eliminated, reducing the risk of spoilage and ensuring the butter remains safe to consume. There are several methods for sterilizing a jar, each with its own advantages and limitations:

Advertisement
  • Boiling: Placing the jar in boiling water for a few minutes effectively kills bacteria and other microorganisms.

  • Bleaching: Soaking the jar in a solution of bleach and water, then rinsing thoroughly, is another effective method.

  • Steam sterilization: Using a pressure cooker or steam sterilizer, the jar is exposed to high heat and pressure, effectively sterilizing it.

  • Oven sterilization: Placing the jar in an oven preheated to a specific temperature kills bacteria and sterilizes the jar.

  • Chemical sterilization: Using chemical sterilizing agents like hydrogen peroxide or food-grade sanitizers effectively sterilizes the jar.

Necessary Tools and Equipment

You’ll need a few necessary tools and equipment for the process.

First and foremost, choosing the right jar is crucial. Opt for a glass jar with a tight-fitting lid to ensure proper sealing and storage of your homemade butter. It should be of adequate size to accommodate the cream and allow room for shaking.

Additionally, cleanliness plays a vital role in butter-making. Make sure all your tools and equipment are thoroughly cleaned and sanitized to prevent any contamination. Sterilize the jar by boiling it in water for a few minutes or running it through the dishwasher on a hot setting.

Maintaining a clean environment throughout the process will help ensure the quality and safety of your homemade butter.

Safety Precautions to Consider

Ensure that all tools and equipment are cleaned and sanitized to maintain a safe environment throughout the butter-making process. When it comes to food handling, cleanliness precautions are of utmost importance. Here are some key precautions to consider:

Advertisement
  • Wash your hands thoroughly before and after handling any ingredients or equipment.
  • Clean all surfaces and utensils used in the butter-making process to prevent cross-contamination.
  • Use separate cutting boards and knives for raw ingredients such as herbs and spices.
  • Store ingredients properly to avoid spoilage and contamination.
  • Regularly inspect and clean your storage areas to prevent the growth of harmful bacteria.

By following these cleanliness precautions, you can ensure that your butter-making process remains safe and hygienic.

Churning the Cream

Start shaking the jar vigorously to churn the cream into butter. Churning cream is an essential step in the butter-making process. The type of cream used and the method of churning can greatly affect the outcome of the butter.

There are two main types of cream commonly used for making butter: heavy cream and whipping cream. Heavy cream contains a higher fat content, typically around 36-40%, which makes it ideal for butter-making. Whipping cream, on the other hand, has a lower fat content, usually around 30%, and may result in a softer, less dense butter.

When it comes to churning methods, there are various techniques you can employ. These include using a jar, a stand mixer, a food processor, or even a traditional churn. Each method has its advantages and disadvantages, so it’s important to choose the one that suits your preferences and equipment availability.

Experimenting with different cream types and churning methods can yield unique and delicious results in your homemade butter.

Straining the Buttermilk

To strain the buttermilk from the freshly churned butter, pour the mixture into a fine mesh sieve or cheesecloth-lined colander. This step is crucial in separating the liquid buttermilk from the solid butter.

Advertisement

Here are some key techniques and uses for straining buttermilk:

  • Cream separation: Straining helps separate the cream from the buttermilk, resulting in a creamy, rich butter.

  • Flavor enhancement: By removing the buttermilk, you can customize the flavor of your butter by adding herbs, spices, or even honey.

  • Baking ingredient: Buttermilk is a versatile ingredient in baking, adding moisture and tanginess to cakes, biscuits, and pancakes.

  • Culinary applications: Strained buttermilk can be used as a marinade for tenderizing meat or as a base for salad dressings and sauces.

  • Culturing: If you want to make your own cultured buttermilk, strain the liquid and let it sit at room temperature with a starter culture to develop tangy flavors.

Straining the buttermilk not only yields a smooth and creamy butter but also opens up a world of culinary possibilities.

Washing and Shaping the Butter

When it comes to making butter, two important factors to consider are the texture of the butter and the techniques used to shape it.

The texture of the butter can vary depending on how it is made and the quality of the cream used. Achieving the desired texture requires careful attention to the churning process and ensuring that all the buttermilk is properly removed.

Additionally, shaping the butter can be done in various ways, such as using molds or rolling it into logs, and each technique can result in a different appearance and presentation of the final product.

Advertisement

Texture of the Butter

You can tell the texture of the butter by shaking the jar and feeling how thick or creamy it is. The texture is an important factor in making flavored butter, as it determines how well the flavors will blend together.

Here are five key points to consider when assessing the texture of your butter:

  • Creaminess: A creamy texture indicates that the butter has a higher fat content and will be easier to spread.

  • Smoothness: A smooth texture suggests that the butter has been properly churned and will have a silky mouthfeel.

  • Firmness: The firmness of the butter can vary depending on the temperature at which it was stored. Softer butter is easier to work with when making flavored butter.

  • Consistency: The consistency of the butter should be uniform throughout, without any lumps or chunks.

  • Moisture content: Butter with a higher moisture content will have a softer texture, while butter with a lower moisture content will be firmer.

Understanding the texture of your butter is crucial when shaping it into various forms, as we will explore in the next section.

Butter Shaping Techniques

Now that we have discussed the texture of the butter, let’s move on to the exciting topic of butter shaping techniques.

Butter molding is a fascinating art form that allows you to create decorative butter shapes that will impress your guests at the dining table.

Advertisement

To start, ensure that your butter is at room temperature for easy shaping. Once softened, you can use various tools and techniques to mold the butter into intricate designs. From simple shapes like flowers and animals to more elaborate creations, the possibilities are endless.

One popular technique is using butter molds, which are specially designed containers that shape the butter into specific forms. These molds come in a variety of shapes, allowing you to create beautiful, detailed designs.

Another method is butter sculpting, where you use sculpting tools to carve delicate patterns and textures into the butter. This technique requires precision and patience but can result in stunning masterpieces.

With butter shaping techniques, you can elevate the presentation of your butter and add an artistic touch to your meals.

Storing and Enjoying Your Homemade Butter

To savor your homemade butter, try spreading it on warm toast or using it as a flavorful addition to your favorite recipes. Storing your homemade butter properly is essential to maintain its freshness and flavor.

Advertisement

Here are some storing techniques and flavor variations to enhance your butter experience:

  • Keep your butter in an airtight container to prevent it from absorbing other odors in the fridge.
  • For longer-term storage, you can freeze your butter. Wrap it tightly in wax paper or plastic wrap before placing it in a freezer bag.
  • To add a twist to your butter, experiment with different flavor variations like garlic and herb, cinnamon and honey, or even spicy chili.
  • If you prefer salted butter, incorporate sea salt or other coarse salts during the churning process.
  • Don’t forget to label your butter with the date of preparation to keep track of its freshness.

Frequently Asked Questions

Can I Use Any Type of Cream to Make Butter in a Jar?

Yes, you can use heavy cream instead of regular cream to make butter in a jar. It contains a higher fat content which aids in the separation process. However, flavored creams may not yield the desired results due to additional ingredients.

How Long Does It Take to Churn the Cream Into Butter?

It typically takes about 10-15 minutes to churn cream into butter, depending on various factors. The butter churn method can be faster than traditional methods, but it also requires more effort.

Can I Use a Blender or Mixer Instead of a Jar to Make Butter?

Yes, a blender or mixer can be used as alternatives to a jar to make butter. They provide a faster and more efficient way of churning the cream into butter, saving time and effort.

What Can I Do With the Leftover Buttermilk After Straining?

When it comes to the leftover buttermilk, there’s no need to waste it. Get creative with recipes using buttermilk, like pancakes or biscuits, to make the most of this tangy ingredient.

How Long Can I Store Homemade Butter in the Refrigerator?

Homemade butter can be stored in the refrigerator for up to two weeks, as long as it is kept in an airtight container. To maximize longevity, it is important to remove any excess buttermilk and rinse the butter thoroughly before storing.

Advertisement

Conclusion

In conclusion, making butter in a jar is a fun and rewarding process that anyone can do at home. By following the steps outlined in this article, you can create your own delicious homemade butter with just a few simple ingredients and tools.

It’s amazing how a simple act of churning cream can transform it into a creamy and flavorful spread. Just like how the process of churning butter requires patience and persistence, sometimes in life, we need to put in effort and work hard to achieve something truly amazing.

So why not give it a try and enjoy the fruits of your labor by spreading your homemade butter on warm toast or fresh biscuits?

Continue Reading

Trending