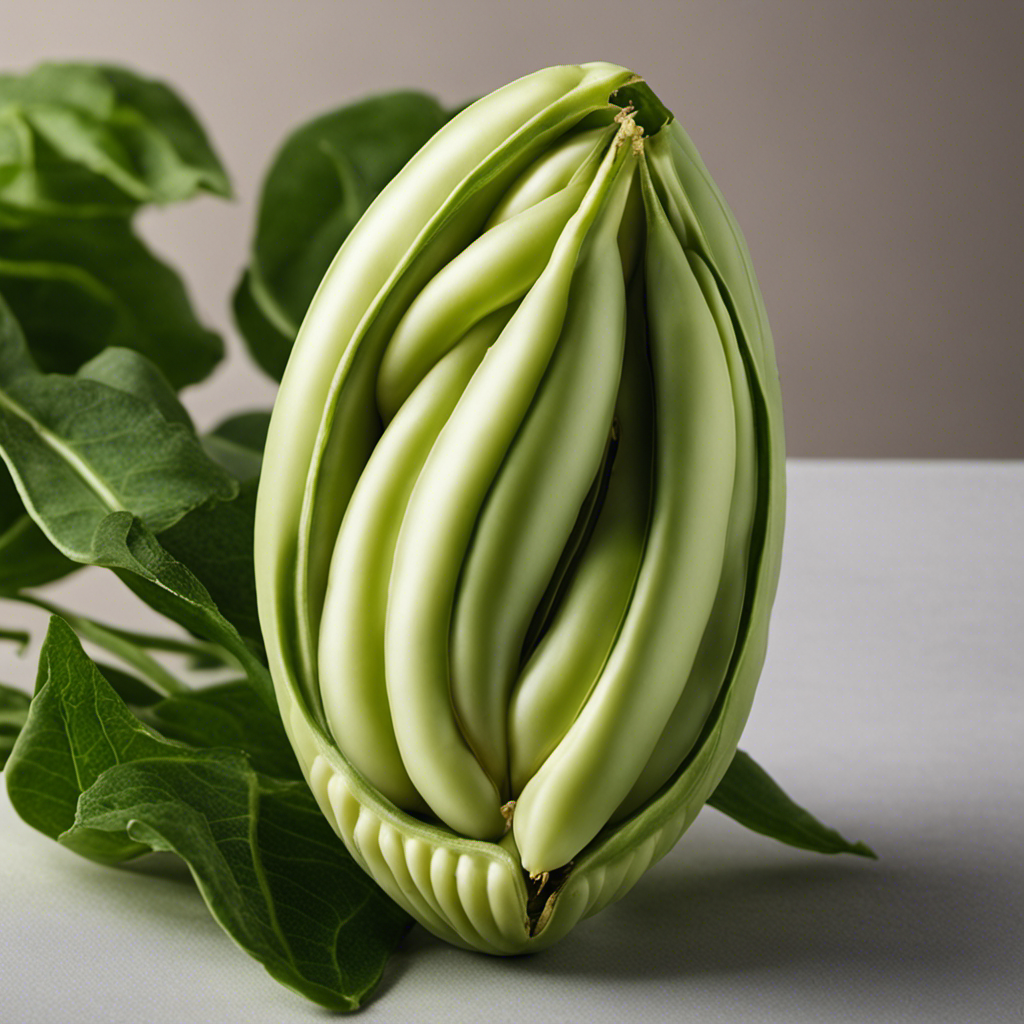
Connect with us

Recipes & Culinary Uses

What Are Butter Beans Called

Published

on

An image of a vibrant green pod bursting open, revealing plump, creamy beans nestled inside

I’ve always been curious about the different names we give to foods, especially when it comes to regional variations. Take butter beans, for instance. Growing up in the South, I’ve always known them by that name.

But what about other places? What are butter beans called in different parts of the world?

In this article, we’ll explore the various names for butter beans, both locally and internationally, and delve into the fascinating history and culinary significance of these versatile legumes.

Key Takeaways

  • Butter beans are also known as Lima beans or Sieva beans in the United States.
  • In the United Kingdom, they are called Broad beans or Horse beans.
  • In Australia, they are referred to as Butter beans or Lima beans.
  • Butter beans can be used in a variety of recipes such as soups, stews, salads, and casseroles.

The Origin of Butter Beans Names

The origin of butter beans names can be traced back to their rich and creamy texture.

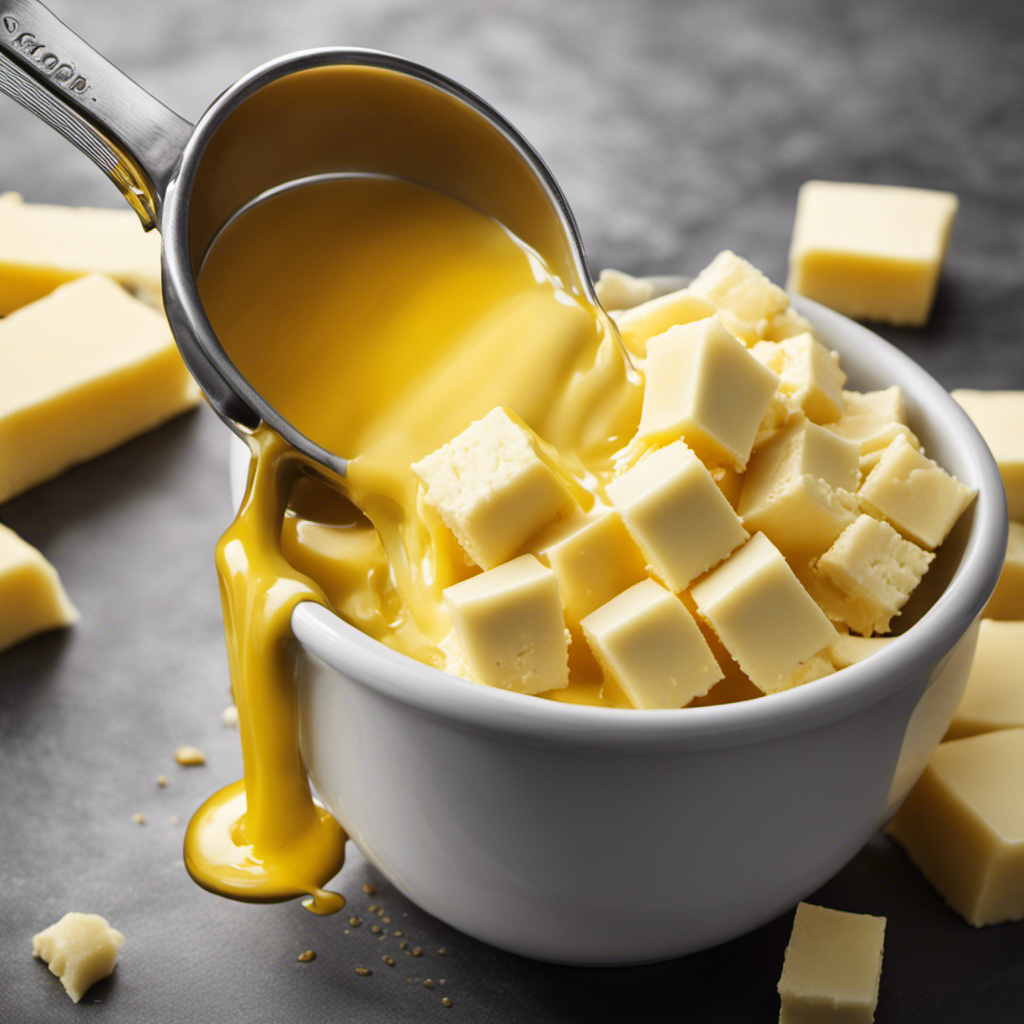
Butter beans, also known as lima beans, have a fascinating etymology. The name ‘butter beans’ comes from their smooth, buttery texture when cooked.

However, there are some common misconceptions about butter beans.

One misconception is that they are high in fat because of their name. In reality, butter beans are actually low in fat and are a great source of protein and fiber.

Another misconception is that they are only used in southern cuisine. While it is true that butter beans are popular in southern cooking, they are also enjoyed in various other dishes around the world.

Whether you call them butter beans or lima beans, their delicious taste and versatility make them a popular choice in many cuisines.

Regional Names for Butter Beans

You might be interested to know that butter beans have different names depending on the region. Regional variations in culinary terminology for butter beans reflect the diverse cultures and dialects around the world. Here is a table showcasing some of the regional names for butter beans:

Region Names for Butter Beans
United States Lima beans, Sieva beans
United Kingdom Broad beans, Horse beans
Australia Butter beans, Lima beans

These regional variations add a touch of uniqueness and reflect the rich culinary traditions of each region. In addition to their different names, butter beans also offer numerous nutritional benefits. They are an excellent source of protein, fiber, and essential vitamins and minerals. Incorporating butter beans into your diet can help improve digestion, promote heart health, and support weight management. Now let’s explore the culinary terminology for butter beans in more detail.

Culinary Terminology for Butter Beans

Butter beans, also known as lima beans, have a variety of aliases depending on the region and culinary traditions. In this discussion, we will explore the different names given to these versatile legumes and how they are used in unique and creative ways.

From soups and stews to salads and dips, butter beans have a rich history and a range of culinary applications that make them a fascinating ingredient to explore.

Butter Bean Aliases

Try calling butter beans by their other names, such as lima beans or Madagascar beans. These versatile legumes go by different monikers depending on the region, but their delicious taste and nutritional value remain the same. Here are some names you might come across:

  • Lima beans
  • Madagascar beans
  • Sieva beans
  • Rangoon beans
  • Burma beans

Butter beans are not just a staple in many cuisines, they also offer a range of health benefits. Packed with protein, fiber, and essential minerals like iron and potassium, they make a nutritious addition to any diet. From comforting soups and stews to hearty salads and casseroles, butter beans can be used in a variety of recipes to add a creamy texture and subtle flavor.

Now that we know the different names and nutritional value of butter beans, let’s explore their unique uses in the next section.

Unique Butter Bean Uses

Once you’ve discovered the numerous names and nutritional benefits of butter beans, it’s time to explore their unique uses in various dishes.

Butter beans, also known as lima beans, are versatile legumes that can be incorporated into a wide range of recipes. These creamy, buttery beans add a delightful texture and flavor to soups, stews, salads, and casseroles.

One popular butter bean recipe is a hearty vegetable soup, where the beans provide a satisfying creaminess. Another delicious option is a butter bean salad with fresh vegetables and a tangy vinaigrette dressing.

Apart from their delicious taste, butter beans also offer several health benefits. They are an excellent source of protein, fiber, and essential vitamins and minerals, making them a nutritious addition to any diet.

Butter Beans in Different Languages

In different languages, butter beans are known by various names. These delicious legumes, also called lima beans in English, have different names depending on the country and culture. Here are some examples of how butter beans are referred to in different languages:

  • Spanish: Habas
  • Italian: Fagioli di Lima
  • French: Haricots de Lima
  • Portuguese: Feijão Lima
  • German: Limabohnen

Butter beans are incredibly versatile and can be used in a wide range of recipes. From hearty stews and soups to creamy dips and salads, there are countless ways to incorporate butter beans into your meals. Not only are they delicious, but they are also packed with nutritional value. Butter beans are a great source of protein, fiber, and essential vitamins and minerals.

Now that we know the different names and the nutritional benefits of butter beans, let’s explore the historical names for these versatile legumes.

Historical Names for Butter Beans

Let’s delve into the past and discover the historical names for these versatile legumes.

Butter beans, also known as lima beans, have a rich history in Southern cuisine and hold great cultural symbolism in African American cooking.

These beans have been a staple in the Southern United States for centuries, with their creamy texture and buttery flavor adding depth to a variety of dishes.

In African American cooking, butter beans have come to represent prosperity and abundance. They are often used in dishes such as succotash, soups, and stews, symbolizing the nourishment and sustenance of the community.

Now that we understand the significance of butter beans in Southern cuisine and their cultural symbolism, let’s explore some popular synonyms for these delicious legumes.

Popular Synonyms for Butter Beans

You might be surprised to learn that there are several other names for these versatile legumes, such as lima beans, sieva beans, or Madagascar beans. Butter beans, as they are commonly known, are a delicious and nutritious addition to any meal. They are packed with essential nutrients such as protein, fiber, and vitamins.

Here are some interesting facts about butter beans:

  • Butter beans are a type of legume that belongs to the Fabaceae family.
  • They have a buttery texture and a mild, slightly nutty flavor.
  • Butter beans can be used in a variety of dishes, including soups, stews, salads, and casseroles.
  • They are a great source of plant-based protein, making them an excellent choice for vegetarians and vegans.
  • Butter beans are also rich in dietary fiber, which can help promote digestive health.

If you’re looking for some delicious butter bean recipes, try making a creamy butter bean soup or a hearty butter bean and vegetable stew. These recipes not only taste great but also provide all the nutritional benefits of butter beans.

Frequently Asked Questions

Are Butter Beans and Lima Beans the Same Thing?

Yes, butter beans and lima beans are the same thing. They are a good source of fiber and provide various health benefits. They are often used in soups, stews, and salads.

How Do Butter Beans Taste Compared to Other Types of Beans?

Butter beans, also known as lima beans, have a unique creamy texture and a mild, buttery flavor. Compared to other types of beans, they are rich in fiber, protein, and essential nutrients. Incorporating them into dishes like butter bean soup can provide numerous nutritional benefits.

Can Butter Beans Be Eaten Raw?

Butter beans can be eaten raw, but cooking them offers several benefits. When cooked, butter beans become softer, creamier, and more flavorful. Additionally, cooking enhances the nutritional value of butter beans by breaking down anti-nutrients and making them easier to digest.

Are Butter Beans a Good Source of Protein?

Butter beans are a good source of protein and have many benefits in a vegetarian diet. Compared to other plant-based protein sources, butter beans offer a nutritious option that can be enjoyed in a variety of dishes.

What Are Some Popular Recipes That Use Butter Beans?

Popular butter bean dishes include butter bean soup, butter bean salad, and butter bean curry. These dishes not only taste delicious, but also offer a range of health benefits, such as being a good source of protein and fiber.

Conclusion

In conclusion, butter beans, also known as lima beans, have a rich history and are known by various names across different regions and languages.

Their origins can be traced back to South America, and they have since become a staple in many cuisines around the world.

Whether you call them butter beans, lima beans, or any other name, these creamy and nutritious legumes are a versatile ingredient that can be enjoyed in a variety of dishes.

As the old adage goes, ‘Variety is the spice of life,’ and butter beans certainly add a flavorful and wholesome touch to any meal.

Continue Reading

Recipes & Culinary Uses

How to Make Butter at Home From Milk

Published

on

By

An image of a stainless steel churn on a rustic wooden countertop

As a passionate home cook, I’ve always found joy in creating my own ingredients from scratch. Making butter at home from milk is not only a rewarding process, but it also allows me to have full control over the quality and taste of the final product.

In this article, I’ll guide you through the steps of transforming ordinary milk into delicious homemade butter. Get ready to roll up your sleeves and experience the satisfaction of churning butter right in your own kitchen.

Key Takeaways

  • Gather the necessary ingredients and tools, including fresh milk, salt (optional), ice-cold water, and flavorings.
  • Churn the milk using a traditional or modern method until fat globules clump together to form butter with a smooth and creamy texture.
  • Separate the butter from the buttermilk by straining the mixture and rinsing the butter with cold water.
  • Store the homemade butter in an airtight container in the refrigerator and enjoy it as a spread or in cooking and baking.

Gathering the Necessary Ingredients

To make butter at home, you’ll need to gather the necessary ingredients. Start with fresh or store-bought milk. Make sure it is full-fat milk, as this will yield the best results. Other ingredients you’ll need include a pinch of salt (optional), ice-cold water, and any desired flavorings, such as herbs or spices.

For churning the milk into butter, you can use a hand mixer, a stand mixer with a whisk attachment, or even a mason jar with a tight-fitting lid. When separating the butter from the buttermilk, you can use a cheesecloth or a fine-mesh strainer.

Store your homemade butter in an airtight container in the refrigerator. Enjoy it on toast, baked goods, or in cooking and baking. If you encounter any issues, such as the butter not solidifying or the buttermilk being too watery, troubleshoot by adjusting the churning time or temperature.

Adding flavors to homemade butter is easy – simply mix in your desired herbs or spices while the butter is soft. Homemade butter has several health benefits, including being a good source of healthy fats and vitamins. Don’t throw away the leftover buttermilk – you can use it in various recipes, such as pancakes, biscuits, or salad dressings.

Lastly, if you want to take your butter-making to the next level, try making cultured butter at home by using live cultures or yogurt as a starter.

Preparing the Milk for Churning

Before beginning the churning process, it’s important to ensure the milk is at room temperature. This helps to promote the growth of beneficial bacteria and ensures a successful butter-making process.

To prepare the milk for churning, follow these steps:

  • Pasteurizing milk: Heat the milk to 161°F (72°C) for 15 seconds to kill any harmful bacteria while preserving the beneficial enzymes.
  • Adding culture: Introduce a starter culture, such as yogurt or buttermilk, to the milk. This helps to acidify the milk, creating a favorable environment for butter formation.

By pasteurizing the milk, you eliminate any potential health risks while retaining the essential components for butter-making. Adding a culture helps to enhance the flavor and texture of the final product.

Now that the milk is ready, it’s time to move on to the exciting process of churning it into butter.

Transition: With the milk properly prepared, let’s explore the next step in the butter-making process: churning.

Churning the Milk Into Butter

Now that you have prepared the milk, it’s time to start churning it into creamy, delicious butter.

Churning is the process of agitating the milk to separate the fat globules from the liquid, resulting in the formation of butter.

There are various methods of churning milk into butter, ranging from traditional butter making techniques to modern machinery.

One traditional method involves using a butter churn, which is a container with a paddle or dasher that is manually rotated. This motion causes the fat globules to collide and stick together, forming butter.

Another method is using a stand mixer or food processor, which provides a more convenient and efficient way to churn the milk.

Regardless of the method chosen, the key is to continue churning until the fat globules clump together and separate from the liquid, creating a smooth and creamy butter.

Separating the Butter From the Buttermilk

Once the churning is complete, you can strain the mixture to separate the butter from the buttermilk. To achieve a creamy and flavorful homemade butter, here are some important tips:

  • Use cold, high-quality cream for churning. This will result in a richer and tastier butter.
  • Add a pinch of salt to enhance the flavor of the butter.
  • Allow the cream to sit at room temperature for a few hours before churning. This helps to develop the flavor and improves the texture of the butter.
  • Churn the cream at a moderate speed to avoid over-churning, which can lead to a grainy texture.
  • Once the butter has formed, drain the buttermilk and rinse the butter with cold water to remove any remaining buttermilk.

Making butter at home has several benefits compared to store-bought options. It allows you to control the quality of ingredients, resulting in a healthier and more natural product. Additionally, homemade butter often has a fresher taste and creamier texture.

Now that the butter is separated from the buttermilk, let’s move on to the next step of storing and enjoying homemade butter.

Storing and Enjoying Homemade Butter

To store and enjoy your homemade butter, you’ll want to transfer it to an airtight container and keep it refrigerated. This will help maintain its freshness and prevent it from spoiling. When choosing a container, opt for one that is made of glass or food-grade plastic. Avoid using metal containers as they can react with the butter and affect its flavor. It’s also important to label the container with the date of preparation to keep track of its shelf life. Homemade butter can last up to two weeks when stored properly in the refrigerator.

Here is a table highlighting creative ways to flavor homemade butter and how to use it in baking recipes:

Flavoring Ideas Baking Recipes
Garlic and Herb Garlic bread, savory scones
Cinnamon Cinnamon rolls, apple pie
Honey Honey butter cookies, cornbread
Lemon and Dill Lemon dill butter salmon, roasted potatoes
Maple Maple pecan butter tart, pancakes

Experimenting with different flavors can add a unique twist to your homemade butter and elevate your baked goods to a whole new level of deliciousness.

Frequently Asked Questions

Can I Use Any Type of Milk to Make Butter at Home?

Yes, you can use any type of milk to make butter at home. However, it’s important to note that different types of milk may yield slightly different results in terms of taste and texture. Here are some tips for making butter at home.

How Long Does It Take to Churn the Milk Into Butter?

Churning milk into butter takes time and effort. Using proper techniques and following tips for consistency is crucial. It’s like turning cream into fluffy clouds—rewarding and satisfying.

Can I Use an Electric Mixer Instead of a Hand Churn?

Yes, an electric mixer can be used instead of a hand churn to make butter at home from milk. The pros of using an electric mixer are faster and easier churning, while the cons include potential over-churning and a less traditional experience.

How Can I Use the Leftover Buttermilk in Other Recipes?

I love using leftover buttermilk in baking! It adds a tangy flavor and moisture to cakes, biscuits, and pancakes. Some creative recipes include buttermilk ranch dressing, buttermilk fried chicken, and buttermilk pancakes.

How Long Can Homemade Butter Be Stored in the Refrigerator?

Homemade butter can be stored in the refrigerator for about 2-3 weeks, depending on the preservation methods used. It’s important to store it in an airtight container to maintain its freshness and extend its shelf life.

Conclusion

In conclusion, making butter at home from milk is a simple and rewarding process. By following the precise instructions provided, you can transform milk into delicious homemade butter.

The analytical perspective allows us to understand the chemical processes involved, while the informative approach ensures a comprehensive understanding of the butter-making process.

With accurate measurements and detailed explanations, you can confidently create your own butter. So go ahead, give it a try and experience the sheer delight of spreading your homemade butter on warm, freshly baked bread – it’s a taste sensation like no other!

Continue Reading

Recipes & Culinary Uses

How to Make Butter Balls

Published

on

By

An image that showcases the step-by-step process of shaping smooth, round butter balls

Do you crave a dollop of flavor to enhance your dining experience? Look no further!

In this article, we will guide you through the magical process of creating delectable butter balls. With just a few simple ingredients and tools, you’ll be able to craft these little balls of creamy goodness in no time.

So, put on your apron, grab your whisk, and prepare to embark on a buttery adventure that will leave your taste buds dancing with delight.

Key Takeaways

  • Experiment with different combinations of herbs and spices to create unique flavors in the butter balls.
  • Chilling the butter mixture in the refrigerator helps firm it up and allows the flavors to meld together for a more harmonious taste.
  • Roll the chilled butter mixture into small, bite-sized spheres and optionally roll them in finely chopped herbs, spices, or edible flowers for added flavor and presentation.
  • Store the butter balls in an airtight container in the refrigerator and let them come to room temperature before serving to enhance their versatility in various dishes and spreads.

Gathering the Ingredients and Tools

First, you’ll need to gather the ingredients and tools necessary for making butter balls. To begin, gather 1 cup of softened butter, 1 ¼ cups of powdered sugar, 1 teaspoon of vanilla extract, and a pinch of salt. These ingredients will create a smooth and flavorful base for your butter balls.

Additionally, you’ll need a mixing bowl, an electric mixer, a spatula, and a baking sheet lined with parchment paper. If you’re feeling adventurous, you can also experiment with alternative ingredients such as almond or coconut extract to add a unique twist to your butter balls.

Once you have everything ready, it’s time to move on to preparing the butter mixture.

Preparing the Butter Mixture

Next, you’ll need to mix together the softened butter, your choice of herbs and spices, and a pinch of salt in a bowl. This step is crucial for adding flavor to your butter balls.

As you mix in the herbs and spices, imagine the burst of savory goodness they will bring to each bite. Experiment with different combinations like garlic and rosemary, or perhaps a hint of lemon zest and thyme.

Once everything is well incorporated, cover the bowl with plastic wrap and place it in the refrigerator to chill. This will help the butter mixture firm up, making it easier to shape into balls later on. The chilling process also allows the flavors to meld together, resulting in a more harmonious taste.

Get ready to elevate your butter balls to a whole new level of deliciousness.

Shaping the Butter Balls

Now it’s time to take the chilled butter mixture and roll it into small, bite-sized spheres. Shaping butter balls requires some techniques to achieve the perfect form.

Start by scooping a small amount of the butter mixture with a spoon or a melon baller. Then, gently roll it between your palms, applying light pressure to create a smooth and round shape.

For a more decorative touch, you can roll the butter balls in finely chopped herbs, spices, or even edible flowers. Arrange them on a serving plate, or place them in a decorative butter dish for a stunning presentation.

These butter balls can be a delightful addition to a cheese platter or served alongside warm bread.

Now, let’s move on to the next step – adding flavors and variations to your butter balls.

Adding Flavors and Variations

To enhance the taste and create unique variations, you can experiment with different ingredients and seasonings for your butter balls. By adding different flavors, you can elevate your butter balls to a whole new level. Here are some ideas to get you started:

Flavor Ingredients Creative Uses
Garlic and Herb Garlic, parsley, thyme Spread on bread or use in pasta dishes
Citrus Lemon or orange zest Use in baking or melt over grilled fish
Spicy Chili flakes, paprika Add a kick to roasted vegetables or steaks
Sweet Honey, cinnamon Delicious on pancakes or toast

There are endless possibilities when it comes to flavored butter balls. Get creative and experiment with different combinations to find your favorites. Once you have made your butter balls, it’s time to move on to storing and serving them.

TRANSITION: Now that you have created your delicious flavored butter balls, let’s talk about the best way to store and serve them.

Storing and Serving the Butter Balls

When it comes to storing and serving your flavorful creations, remember to keep your butter balls chilled in an airtight container to maintain their freshness. Storing butter balls properly is essential to preserve their taste and texture.

After shaping your butter into small balls, place them in the refrigerator for at least an hour to firm up. Once chilled, transfer the butter balls to an airtight container to prevent them from absorbing any odors or flavors from the fridge. This will ensure that your butter balls stay fresh and delicious.

When it’s time to serve, take out the desired amount and let them come to room temperature for a few minutes. Butter balls are versatile and can be used in various ways – spread them on toast, melt them on steamed vegetables, or use them to enhance the flavor of your favorite dishes. Get creative and enjoy the rich, creamy goodness of your homemade butter balls!

Conclusion

So there you have it, a step-by-step guide on how to make butter balls.

Now that you know the secrets to creating these delectable delights, you can impress your friends and family with your culinary skills.

Imagine the look on their faces as they bite into these creamy, flavorful bites of heaven.

The possibilities are endless when it comes to adding your own unique twist to the recipe.

So go ahead, gather your ingredients and tools, and embark on this buttery adventure.

Get ready to indulge in the buttery goodness that awaits!

Continue Reading

Recipes & Culinary Uses

How to Make Brownies With Weed Butter

Published

on

By

An image showcasing a close-up of fudgy, decadent brownies with a subtle hint of green peeking through the rich chocolate, enticing readers to learn the secret behind their magical ingredient

Hey there, fellow baking enthusiasts! Ever wondered how to take your brownie recipe to a whole new level? Well, I’ve got a little secret ingredient that’ll surely elevate your baking game: weed butter.

Now, before you start raising eyebrows, let me assure you that this article is all about responsible and informed baking. I’ll guide you through the process of making your very own batch of deliciously potent weed brownies.

So, get ready to embark on a mouthwatering journey that combines the best of baking and cannabis. Let’s dive in!

Key Takeaways

  • Different weed strains have different effects, so choose a balanced strain with a combination of THC and CBD for making weed butter.
  • Decarboxylate cannabis in the oven to activate THC before making weed butter.
  • Use proper dosing techniques and start with a lower dose to avoid overconsumption and unpleasant side effects.
  • Store weed brownies properly in a cool, dark place and consume within a week for optimal freshness and potency.

Selecting the Right Strain for Weed Butter

To make the best brownies with weed butter, you’ll need to choose the right strain of cannabis. When it comes to selecting the best cannabis strain for edibles, it’s important to understand the effects that different weed strains can have.

Some strains are known for their uplifting and energizing effects, while others are more relaxing and calming. For edibles, you’ll want to choose a strain that has a balanced combination of THC and CBD. THC is responsible for the psychoactive effects, while CBD provides a more calming and therapeutic experience. Finding the right balance will ensure that your brownies have the desired effects.

Now that you know the importance of choosing the right strain, let’s move on to making weed butter from scratch.

Making Weed Butter From Scratch

First, you’ll need to gather the necessary ingredients for making weed butter from scratch. To make weed butter, you’ll need unsalted butter, ground cannabis, and water. Start by decarboxylating your cannabis in the oven to activate the THC.

Next, melt the butter and add the ground cannabis. Simmer the mixture on low heat for a few hours, stirring occasionally. The alternative method of making weed-infused butter involves using a slow cooker, which can simplify the process.

The benefits of using weed butter in other recipes are numerous. Not only does it add a unique flavor to your dishes, but it also allows for a more controlled and precise dosage of cannabis.

Once the butter has cooled, strain out the plant matter, and you’re left with homemade weed butter ready to be used in all sorts of delicious recipes.

Infusing Weed Butter Into Your Brownie Mix

Once you’ve infused your homemade weed butter into your brownie mix, the rich and potent flavors will elevate your brownies to a whole new level of deliciousness. Infusing weed butter into your brownie mix is a simple and effective way to create alternative edibles that pack a punch.

Here are three infusing techniques to help you make the most of your weed butter brownies:

  1. Double Boiler Method: Place a heatproof bowl over a pot of simmering water, and melt your weed butter in the bowl. Once melted, add it to your brownie mix and stir well to ensure even distribution.

  2. Stovetop Method: Melt your weed butter in a saucepan on low heat, stirring continuously to prevent burning. Once melted, add it to your brownie mix and mix thoroughly.

  3. Microwave Method: Melt your weed butter in a microwave-safe bowl, heating in short bursts and stirring in between. Once melted, add it to your brownie mix and mix well.

With these infusing techniques, you can create delectable weed butter brownies that are sure to impress. Enjoy responsibly!

Baking Perfectly Potent Weed Brownies

For perfectly potent weed brownies, ensure you mix the infused butter thoroughly into the brownie batter. This step is crucial to evenly distribute the cannabis throughout the mixture, ensuring each bite is infused with the desired dose.

When it comes to dosing techniques, it’s important to note that the potency of your brownies will depend on the strength of your infused butter. To control the dosage, start by calculating the total amount of THC in your butter and divide it by the number of servings. This will give you an idea of how much THC is in each brownie.

If you’re looking for alternative cannabis-infused desserts, consider trying recipes like cannabis-infused cookies, cakes, or even ice cream. Just remember to adjust the dosage accordingly and always label your edibles clearly.

Happy baking!

Dos and Don’ts of Dosing Weed Brownies

When it comes to making weed brownies, proper dosage of weed butter is crucial. Overconsumption can lead to unpleasant experiences, so it’s important to know how much weed butter to use for the desired effect.

To ensure consistent potency, there are a few tips to keep in mind. First, use a reliable recipe that provides specific instructions on the amount of weed butter needed. This will help you avoid using too much or too little.

Second, properly measure the weed butter. Use a kitchen scale to weigh the butter accurately, as eyeballing it can result in inaccurate dosing. This step is crucial for achieving the desired effect and avoiding any potential negative experiences.

Proper Weed Butter Dosage

To determine the proper dosage of weed butter for your brownies, it’s essential to consider the potency and desired effects. Here are three important things to consider:

  1. Weed butter infusion methods: The potency of your weed butter depends on how you infuse it. Common methods include using a stovetop, slow cooker, or a specialized cannabis-infused butter machine. Each method may result in varying levels of THC extraction, so it’s important to choose a method that suits your desired potency.

  2. Calculating THC content: To accurately calculate the THC content in your weed butter, you need to know the percentage of THC in your starting cannabis material. This information can usually be found on the packaging of your cannabis product. From there, you can use a simple formula to determine the approximate THC content in your infused butter.

  3. Desired effects: Understanding your desired effects is crucial in determining the proper dosage of weed butter. If you’re a beginner or have a low tolerance, it’s recommended to start with a lower dose and gradually increase as needed. It’s important to remember that the effects of edibles can take longer to kick in and can be more potent, so patience is key.

Avoid Overconsumption Risks

Understanding the potential risks of overconsumption is crucial in ensuring a safe and enjoyable experience with cannabis-infused edibles. While edibles can provide a longer-lasting and more intense high compared to smoking or vaping, it’s important to consume them responsibly.

Overconsumption can lead to unpleasant side effects such as anxiety, paranoia, and even hallucinations. To avoid these risks, it is recommended to start with a low dose, especially if you are a beginner. Give your body enough time to process the edible before consuming more.

It’s also important to be aware of the potency of the edible you are consuming, as different products can have varying levels of THC. By practicing responsible consumption practices and being aware of the risks, you can have a safe and enjoyable experience with cannabis-infused edibles.

Tips for Consistent Potency

When it comes to making weed butter brownies, maintaining consistent effects can be a challenge. However, there are a few tips that can help you adjust the potency levels and ensure a consistent experience every time. Here’s what you need to know:

  1. Use precise measurements: To achieve consistent potency, it’s crucial to measure your ingredients accurately. This applies not only to the amount of weed butter you use but also to the other ingredients in your recipe.

  2. Test potency before baking: Before adding the weed butter to your brownie mix, try a small amount to gauge its potency. This will give you an idea of how strong the final product will be and allow you to adjust the amount of weed butter accordingly.

  3. Keep notes: Maintaining a record of your recipes and the effects they produce can help you fine-tune the potency levels over time. By noting the amount of weed butter used and the resulting effects, you can make adjustments to achieve your desired experience.

Following these tips will help you create consistently potent weed butter brownies that deliver the desired effects every time.

Storing and Enjoying Your Weed Brownies

Once they’ve cooled, you can store your weed brownies in an airtight container to keep them fresh. Proper storage techniques are essential to maintain the potency and flavor of your infused brownies. Here are some tips for storing and enjoying your weed brownies:

Technique Description
Store in a cool, dark place Heat and light can degrade the potency of the cannabinoids in your brownies. Keep them away from direct sunlight or high temperatures.
Separate from regular brownies To avoid confusion or accidental consumption, it’s best to store your weed brownies separately from regular ones. Label the container clearly.
Use within a week Although the brownies can last longer, it’s recommended to consume them within a week to ensure optimal freshness and potency.
Freeze for long-term storage If you have a large batch or want to save them for later, you can freeze your weed brownies in an airtight container. Thaw them before serving.
Best serving methods Enjoy your weed brownies by cutting them into small, manageable pieces. Start with a low dosage and wait at least an hour before consuming more. Remember to always store them securely and out of reach of children or pets.

Frequently Asked Questions

Can I Use Any Strain of Weed to Make Weed Butter, or Are There Specific Strains That Work Best?

Any strain of weed can be used to make weed butter, but there are specific strains that work best for making edibles. When infusing weed butter, consider the potency, flavor profile, and desired effects of the strain.

How Long Does It Take to Make Weed Butter From Scratch?

To make weed butter from scratch, it typically takes a few hours. After infusing the butter with cannabis, you can use it to enhance various recipes. Remember to store the weed butter properly to maintain its potency.

Can I Use Store-Bought Brownie Mix or Do I Have to Make the Mix From Scratch?

I can use store-bought brownie mix for weed brownies, but it’s important to properly dose them. The homemade mix gives more control over the ingredients, but store-bought is convenient.

How Do I Know if My Weed Brownies Are Potent Enough?

To properly dose weed brownies, start by using a reliable recipe and accurately measuring the amount of weed butter. Test the potency by starting with a small piece and waiting for the effects. Adjust the dosage accordingly for future batches.

How Long Can I Store My Weed Brownies Before They Go Bad?

The shelf life of weed brownies depends on how they are stored. To ensure the best quality, store them in an airtight container in a cool, dark place. They can last up to a week, but it’s best to consume them within a few days for optimal freshness.

Conclusion

In conclusion, making brownies with weed butter is a fun and delicious way to enjoy the benefits of marijuana. By selecting the right strain for your weed butter and infusing it into your brownie mix, you can create perfectly potent treats.

However, it is important to be mindful of dosing to avoid any unwanted effects. Did you know that a recent survey found that 42% of cannabis users prefer edibles as their preferred method of consumption?

So why not try making your own weed brownies and join the growing number of people who enjoy this tasty and alternative way of experiencing the effects of marijuana.

Continue Reading

Trending