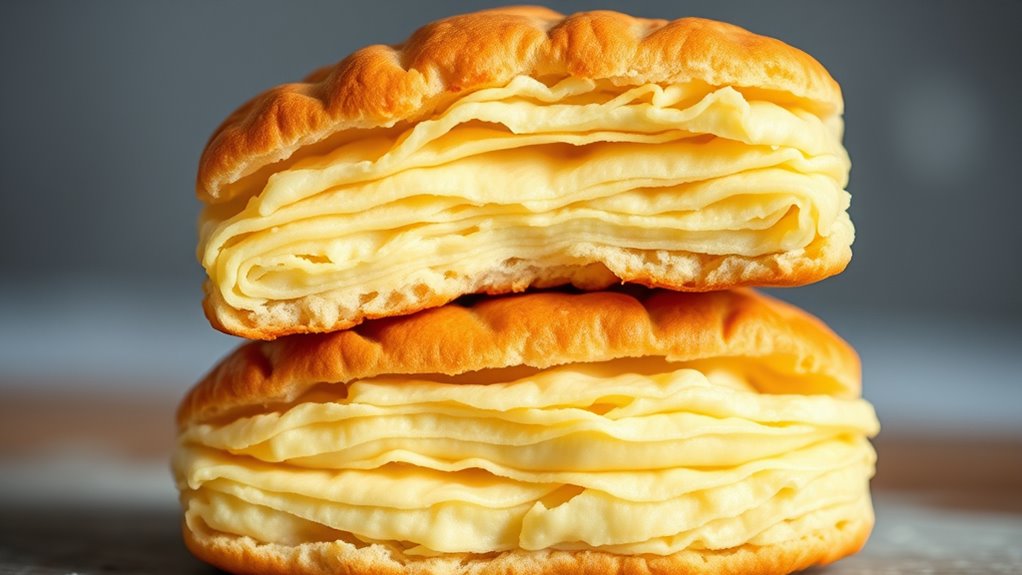

To achieve lofty, flaky two-stage butter biscuits, start with cold butter and handle the dough quickly to maintain layers. Use the two-stage method to blend ingredients just enough, then chill the dough thoroughly before shaping. Fold and re-roll carefully to build layers, keeping everything cold to prevent melting. Proper cutting and gentle handling help form even shapes. Keep these tips in mind, and you’ll master the secrets to perfect, airy biscuits—if you keep exploring further.
Key Takeaways
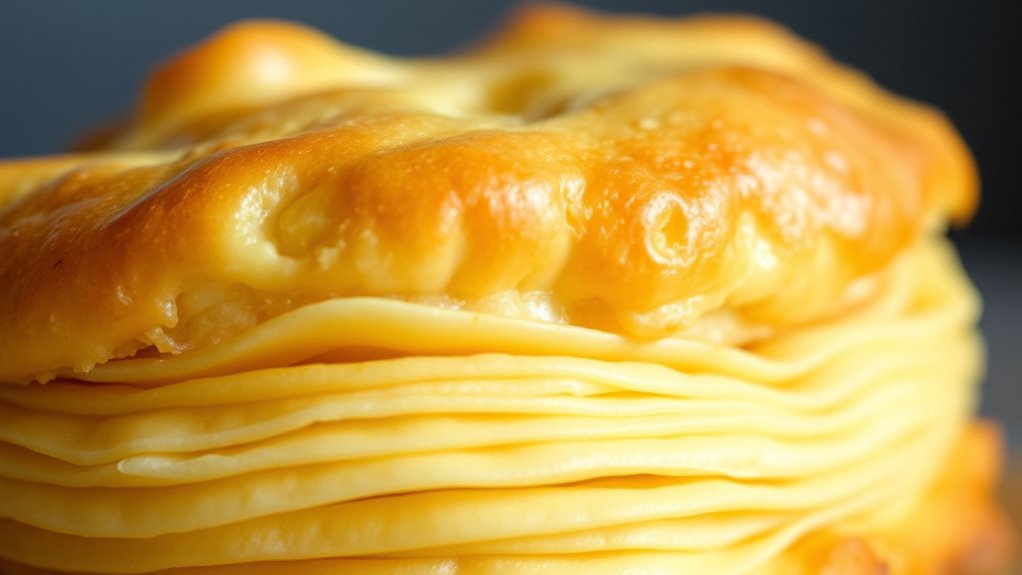
- Use cold butter and minimal handling to maintain distinct layers and promote flakiness during layering and baking.
- Chill the dough thoroughly before rolling and cutting to set layers and prevent spreading.
- Roll dough evenly with an even pressure, then fold or re-roll scraps gently to build multiple flaky layers.
- Cut biscuits with sharp, straight-down presses to preserve layer integrity and prevent sealing edges.
- Bake at the correct temperature without opening the oven early to maximize oven spring and achieve loft.
Understanding the Two-Stage Technique
To understand the two-stage technique for making butter biscuits, it’s important to recognize that this method involves two distinct mixing and chilling steps. This approach helps achieve the ideal butter consistency and best dough hydration. During the first stage, you mix ingredients until the dough just comes together, keeping the butter slightly cold but soft enough to incorporate smoothly. Proper dough hydration ensures the mixture isn’t too dry or sticky, which affects the biscuit’s texture. After this initial mix, chilling the dough allows the fat to firm up, preventing melting during baking and creating flaky layers. The second stage involves gently handling the chilled dough, which helps preserve its layered structure. Mastering this process results in biscuits with a tender, flaky crumb and a light, lofted rise.
Preparing the Perfect Dough Base
Achieving the perfect dough base starts with selecting high-quality ingredients and measuring them accurately. Pay close attention to butter consistency; it should be cold but still malleable, not greasy or overly firm. Proper butter consistency ensures even mixing and helps create layers for loft. Keep the dough temperature controlled—ideally just above freezing—to prevent the butter from melting during preparation. Use chilled ingredients and work quickly to maintain this temperature. When combining ingredients, avoid overmixing, which can warm the dough and affect layering. The goal is a smooth, cohesive dough that holds its shape without becoming sticky. By managing butter consistency and dough temperature carefully, you set a solid foundation for achieving flaky, lofty biscuits. Additionally, understanding the role of butter in creating layered textures can significantly improve your baking results.
The Importance of Cold Butter and Chilling
Using cold butter keeps it firm, which helps create distinct layers in your biscuits. Chilling the dough prevents overmixing, resulting in a tender, flaky texture. When you handle butter and dough properly, your biscuits will turn out beautifully layered and perfectly crumbly. Incorporating techniques like sound vibrations can enhance your baking process by promoting relaxation and mindfulness, making the experience more enjoyable.
Keeps Butter Firm
Keeping the butter cold is vital for creating flaky, tender biscuits. When butter stays firm, it maintains the right butter consistency, which is essential for layering and loft. Cold butter prevents the dough temperature from rising too much during mixing, helping achieve the desired flaky texture. To keep butter firm:
- Use chilled butter straight from the refrigerator.
- Handle butter minimally to avoid warming it with your hands.
- Work quickly to prevent butter from softening.
- Chill the dough before shaping to maintain its temperature and butter firmness.
- Maintaining color accuracy in your ingredients ensures the butter remains visually identifiable as cold, aiding in proper layering.
Enhances Layering Effect
Cold butter and proper chilling play a crucial role in creating distinct, flaky layers in your biscuits. When the butter stays cold, it resists fully blending into the flour, resulting in uneven butter distribution that forms pockets of steam during baking. This process enhances the layering effect, giving your biscuits their characteristic loft and flakiness. Maintaining the dough at the right temperature ensures a consistent dough consistency, which is easier to handle and roll out without becoming sticky or tough. Chilling the dough after shaping allows the layers to set, preventing the butter from melting prematurely. As a result, the layers remain well-defined, and your biscuits develop that desirable airy, flaky texture you’re aiming for. Proper chilling truly elevates the layering effect in your finished biscuits. Temperature control during the process helps maintain the integrity of the layers and ensures optimal results.
Prevents Overmixing
Maintaining the dough at a cold temperature during mixing helps prevent overworking the butter, which can cause it to melt and fully integrate into the flour. Overmixing can lead to excessive gluten development, reducing dough elasticity and resulting in tough biscuits. To avoid this, keep the dough chilled throughout the process. Additionally, incorporating emotional support techniques for those involved can help manage stress and maintain focus during baking. Consider these tips:
- Use cold ingredients and refrigerate equipment beforehand.
- Mix just until ingredients are combined to prevent overworking.
- Handle the dough minimally, folding instead of stirring.
- Chill the dough between stages to maintain temperature and prevent gluten overdevelopment.
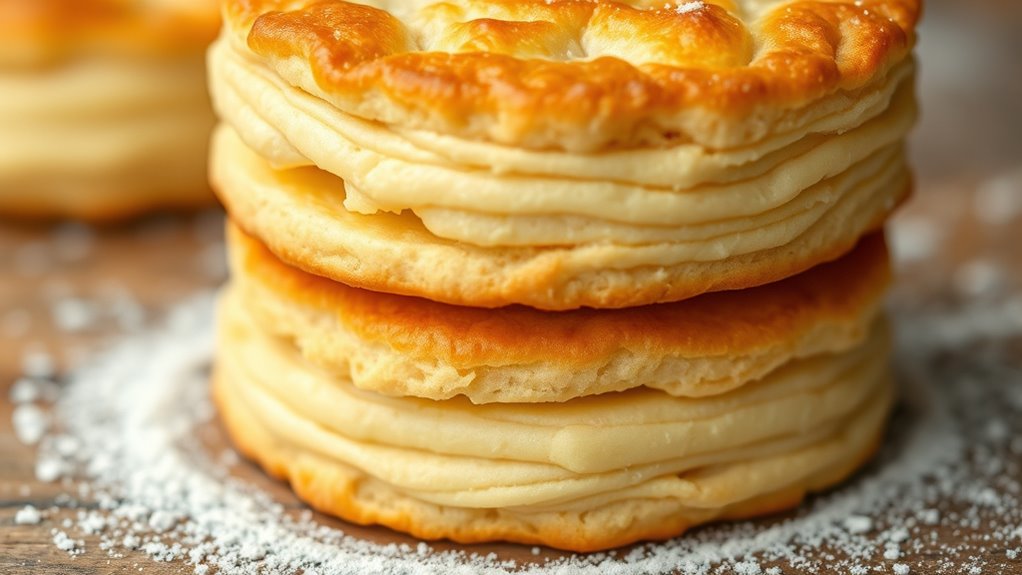
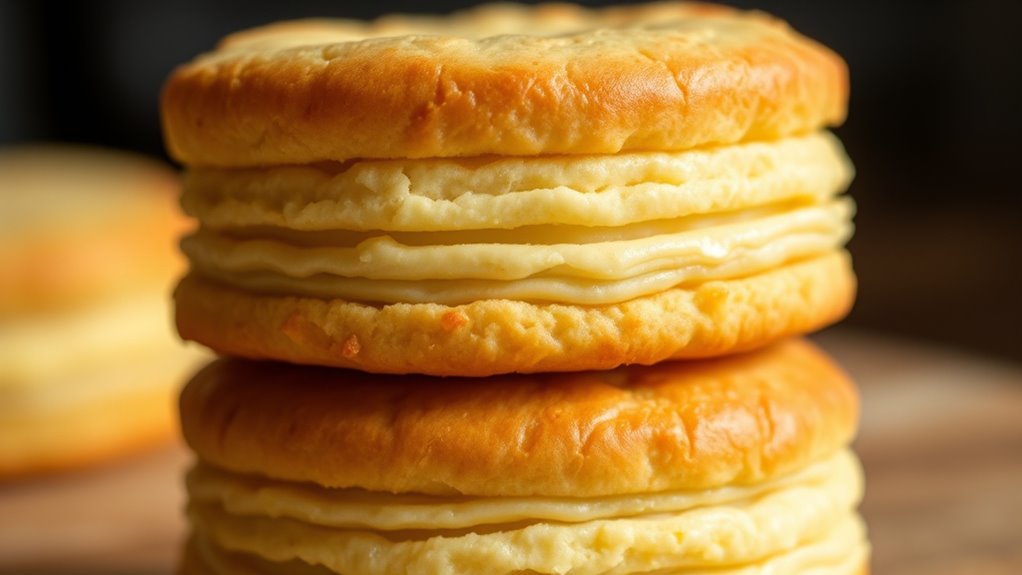
Layering and Folding for Flakiness
To achieve those irresistibly flaky layers in your butter biscuits, you need to focus on proper layering and folding. Start by ensuring your butter has the right consistency—cold but pliable—so it folds easily without melting. When you incorporate the butter, use folding techniques that create multiple thin layers, which trap air and produce flakiness. After mixing the dough, turn it out onto a lightly floured surface, then fold it over itself several times, pressing down gently each time. This process aligns the layers and encourages the formation of flaky strata. Be careful not to overwork the dough; gentle folds preserve the butter’s integrity and maximize layering. Incorporating educational toys into baking lessons can make the learning process more engaging for children interested in cooking. With proper butter consistency and technique, your biscuits will develop those beautiful, airy layers you’re aiming for.
Achieving Even Thickness and Shape
To get your biscuits evenly thick, make sure to roll the dough to a consistent size. Using the same size cookie cutter helps keep their shape uniform. Chilling the dough before cutting guarantees they hold their shape during baking. Additionally, maintaining a uniform thickness throughout the dough ensures even baking and a professional appearance.
Roll to Uniform Thickness
Ensuring an even thickness and shape when rolling out your biscuit dough is essential for uniform baking. To achieve this, focus on maintaining consistent dough consistency and using an effective rolling technique. Here are four tips:
- Start with chilled dough to prevent stickiness and ensure better control.
- Use gentle, even pressure while rolling, working from the center outward.
- Rotate the dough a quarter turn after each roll to keep thickness uniform.
- Aim for a specific target thickness by periodically checking with a ruler or thickness guide.
- Incorporate natural materials like linen or wood to help prevent sticking and facilitate even rolling.
Use Consistent Cookie Cutters
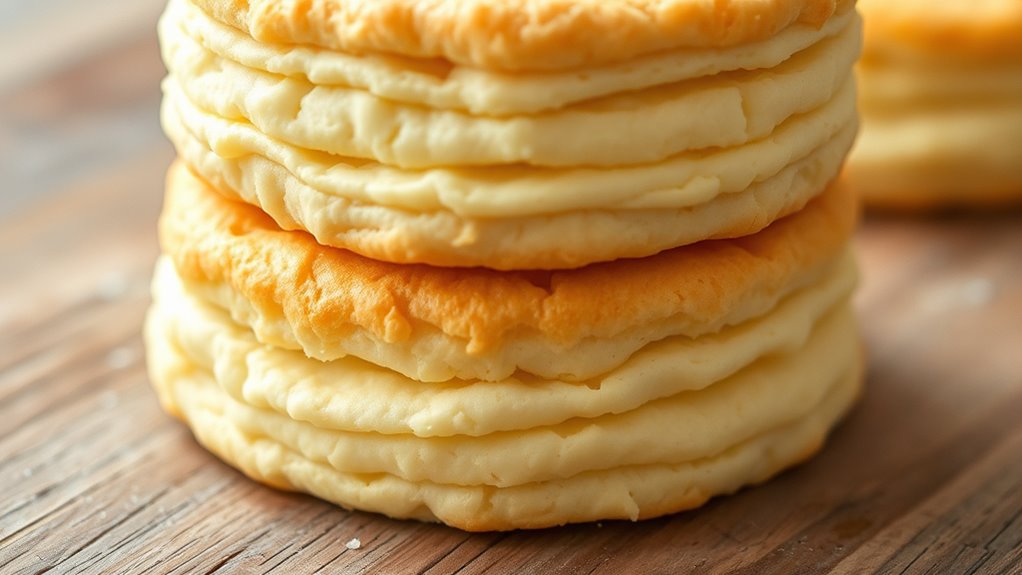
Using consistent cookie cutters is key to achieving even biscuit shapes and uniform thickness. When you select the same cookie cutter shape, you guarantee each biscuit looks uniform and stacks neatly. Consistent shapes also help maintain dough consistency, preventing uneven edges or thin spots. Make sure your cookie cutter is sharp and clean to cut smoothly through the dough, reducing deformation. Press straight down without twisting to keep the shape intact. If you’re using different shapes, be mindful of how their sizes affect layering and loft. Using uniform cookie cutters simplifies the process, helping you achieve a professional look and consistent bake. With this approach, your biscuits will have even thickness and a beautiful, symmetrical appearance every time.
Chill for Even Shape
Chilling your dough is a crucial step for achieving even thickness and shape. Proper chilling helps control butter temperature, preventing melting and uneven spreading. When the dough firms up, it maintains a consistent dough consistency, making it easier to roll out smoothly. To optimize this step:
- Wrap the dough tightly to avoid dryness.
- Chill for at least 30 minutes, or until firm.
- Use a rolling pin with even pressure to maintain uniform thickness.
- Rest the dough briefly after rolling to settle any inconsistencies.
This process ensures your biscuits keep a consistent shape during baking, resulting in evenly layered, lofted biscuits. Proper chilling also helps prevent spreading, so your layers stay distinct and your biscuits turn out perfectly uniform.
Proper Cutting and Handling of the Dough
To achieve perfectly shaped biscuits, you need to handle the dough carefully and cut it properly. Maintaining good dough elasticity is essential; avoid overworking it, which can make the biscuits tough. When it’s time to cut, use sharp cutters to get clean edges and prevent tearing. Press straight down without twisting, as twisting can seal the edges and hinder rise. Keep the dough cold to preserve its shape and elasticity. Re-roll scraps gently, handling the dough as little as possible to avoid warming it. Use consistent cutting techniques for uniform biscuits. Proper handling ensures your biscuits will have sharp, defined layers and a tender crumb. Being aware of narcissistic traits in your interactions can help you maintain boundaries and avoid manipulation during the process. With careful cutting and gentle handling, you set the foundation for a light, flaky texture.
Baking Tips for Light, Fluffy Results

Proper baking techniques can make all the difference in achieving biscuits that are light and fluffy. First, confirm your oven temperature is accurate—too hot and the biscuits will brown too quickly; too low and they won’t rise properly. Second, keep your butter cold and crumble it into the dry ingredients just before baking to prevent premature melting. Third, avoid overworking the dough, which can develop gluten and make biscuits dense. Fourth, bake until the tops are golden brown, and don’t open the oven door too early, as sudden temperature drops can deflate your biscuits. By controlling oven temperature, managing butter melting, and handling the dough carefully, you’ll maximize loft and achieve airy, tender biscuits every time.
Frequently Asked Questions
Can I Substitute Gluten-Free Flour in This Recipe?
You can definitely try a gluten substitute or flour alternatives in this recipe. Keep in mind, gluten-free flours often behave differently, so you might need to adjust the amount or add a binder like xanthan gum. Use a blend of gluten-free flours for best results, and consider adding a little extra liquid. Experimenting with different flour alternatives can help you achieve a light, fluffy biscuit with the right texture.
How Do Humidity Levels Affect the Dough Consistency?
When it comes to humidity impact, it’s a game changer. You’ll notice that high humidity can make your dough stickier and softer, while low humidity dries it out, making it tougher to work with. To keep dough texture just right, adjust your flour or liquid amounts accordingly. Don’t fight the weather—embrace it, and tweak your ingredients to keep that perfect, flaky consistency.
What Are Alternative Fats to Butter for Layering?
When looking for alternative fats to butter for layering, you can try vegan butter or coconut oil. Vegan butter mimics butter’s properties, providing good spreadability and flavor, making it a solid choice. Coconut oil adds richness and creates flaky layers, especially if it’s solid when layered. Both options work well, but keep in mind that coconut oil’s strong flavor might influence your biscuit’s taste, so choose based on your preference.
Can I Make These Biscuits Dairy-Free?
Yes, you can make these biscuits dairy-free by using dairy free alternatives. Switch out butter with plant-based fats like coconut oil, vegan margarine, or shortening. These options help maintain the flaky layers and rich texture, just like butter. Keep in mind, you might need to adjust the quantity slightly for the best results. With the right dairy free alternatives, you’ll still get delicious, lofty biscuits everyone will love.
How Long Can the Layered Dough Be Stored Before Baking?
A stitch in time saves nine, and proper dough refrigeration can save your biscuits from disappointment. You can store your layered dough in the fridge for up to 24 hours before baking. Just wrap it tightly to prevent drying out, and keep an eye on the storage duration. After that, the dough might lose its freshness and rise less effectively, so it’s best to bake within that window for ideal loft and flavor.
Conclusion
Mastering the two-stage butter biscuit method is like revealing a secret garden of flaky, airy layers. By layering, chilling, and handling your dough with care, you turn simple ingredients into something extraordinary. Think of each step as a brushstroke in a masterpiece—your biscuits will rise to new heights, delighting everyone at the table. So go ahead, embrace the process, and let your baking create a symphony of texture and flavor that’s truly unforgettable.