Connect with us

Savory Main Dishes

Indian Butter Chicken: The Rich, Creamy Recipe That Will Spice Up Your Dinner!

Luscious and aromatic, this Indian butter chicken recipe promises to elevate your dinner with its rich, creamy sauce and tender, spice-infused chicken. Learn how to make this beloved dish.

Published

on

creamy indian butter chicken

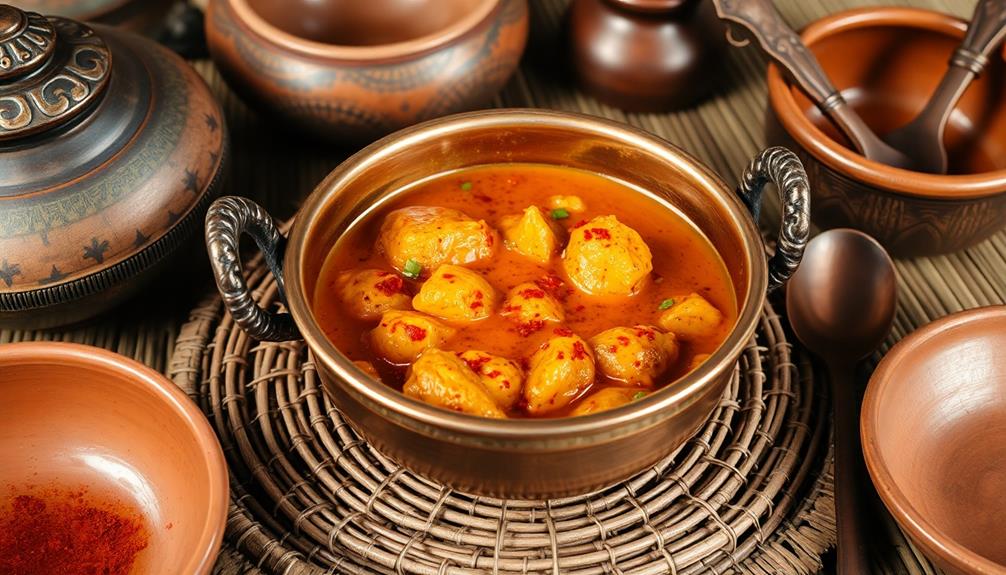
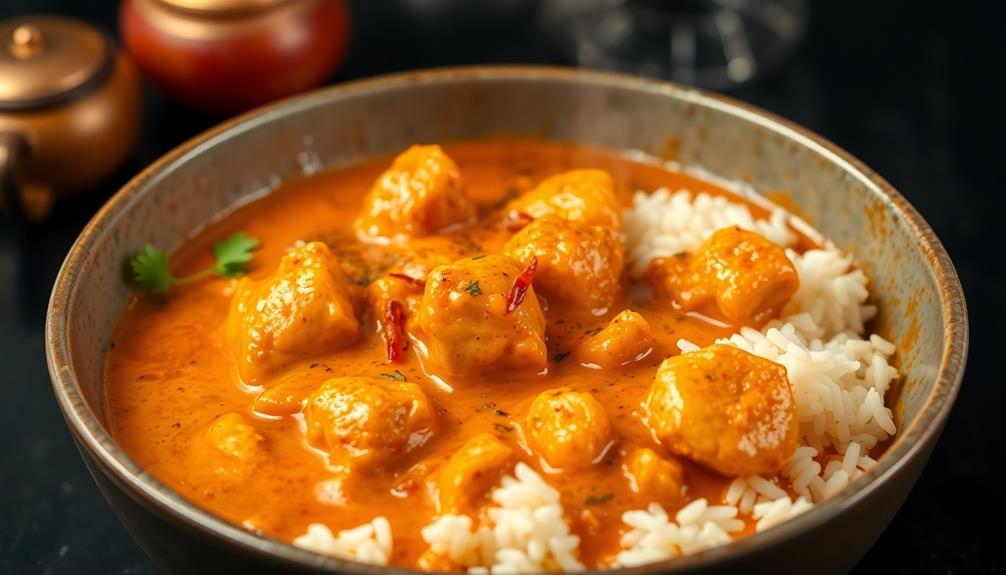
Indian butter chicken is the rich, creamy dish that'll transport your taste buds straight to the bustling streets of Delhi, delivering an unparalleled flavor explosion that's sure to spice up your dinner. Created in the 1950s, this beloved recipe features tender chicken simmered in a silky, spiced tomato-butter sauce – it's a melding of fragrant spices, velvety texture, and a perfect balance of sweetness and tanginess that engages your taste buds in a harmonious blend. Eager to discover the secrets behind this Indian masterpiece and how to make it at home?

Key Takeaways

  • Authentic Indian butter chicken recipe featuring tender chicken in a rich, creamy tomato-based sauce infused with aromatic spices.
  • Highlighted by a marination process that tenderizes the chicken and enhances flavor, resulting in a velvety texture.
  • Versatile dish that can be served with basmati rice or traditional Indian breads like naan, offering a satisfying dining experience.
  • Vibrant orange-red hue and fragrant aroma make this dish a visual and olfactory delight, perfect for impressing guests.
  • Represents the diverse culinary traditions of India, showcasing the harmonious blend of sweetness, tanginess, and spices in every bite.

History
historical events and narratives

Butter chicken, or murgh makhani, is a beloved Indian dish with a rich and storied history. Originating in the 1950s in Delhi, this iconic recipe was created by Kundan Lal Gujral, the founder of the Moti Mahal restaurant. Gujral wanted to find a way to use up leftover tandoori chicken, leading him to smother the tender meat in a silky, spiced tomato-butter sauce. The result was an instant hit, captivating diners with its perfect balance of savory, creamy, and aromatic flavors.

Over the decades, butter chicken has become a staple of Indian cuisine, spreading across the country and eventually the world. Today, it remains one of the most popular and beloved Indian dishes, enjoyed for its comforting yet complex taste.

The rich sauce, infused with warming spices like cardamom and cumin, envelops juicy chicken in a velvety embrace, creating a truly irresistible meal. Whether served with fluffy basmati rice or naan bread, butter chicken is a true culinary delight that continues to enchant and satisfy diners everywhere.

Recipe
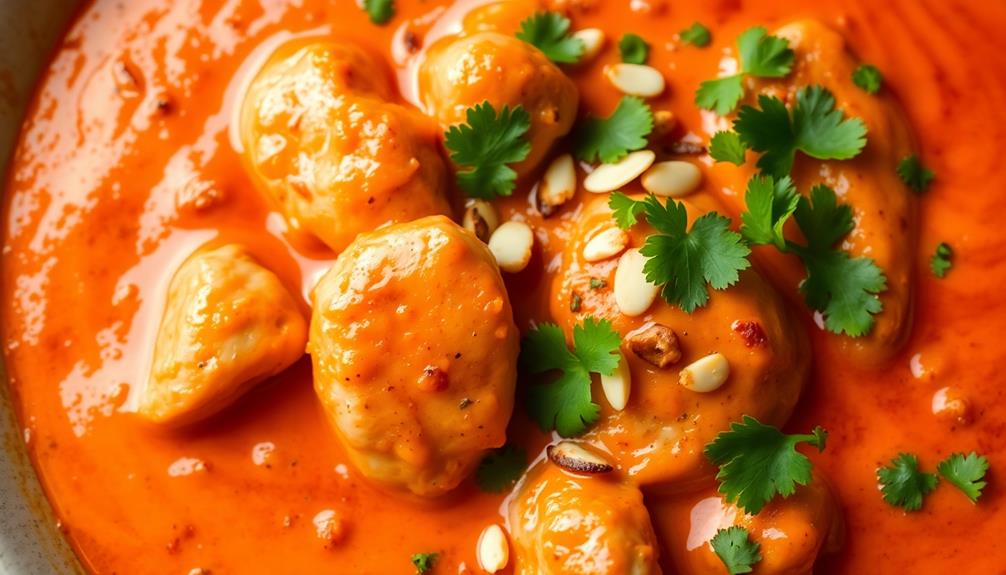
cooking instructions and ingredients

Butter chicken, also known as murgh makhani, is a beloved Indian dish that combines succulent chicken in a rich, creamy, and flavorful sauce. This iconic dish originated in the 1950s in New Delhi and has since become a global favorite.

The key to a delicious butter chicken lies in the careful balance of spices and the slow simmering of the sauce, which allows the flavors to meld together harmoniously. The result is a dish that's both comforting and indulgent, making it the perfect choice for a family gathering or a special occasion.

  • 1 lb (450 g) boneless, skinless chicken thighs, cut into bite-size pieces
  • 1 cup (240 ml) tomato puree
  • 1/2 cup (120 ml) heavy cream
  • 2 tablespoons (30 ml) ghee (clarified butter) or unsalted butter
  • 1 onion, finely chopped
  • 3 garlic cloves, minced
  • 1 tablespoon (15 ml) grated ginger
  • 1 teaspoon (5 ml) ground cumin
  • 1 teaspoon (5 ml) ground coriander
  • 1/2 teaspoon (2.5 ml) cayenne pepper
  • 1/2 teaspoon (2.5 ml) paprika
  • 1/2 teaspoon (2.5 ml) garam masala
  • Salt and freshly ground black pepper, to taste
  • Chopped cilantro, for garnish

In a large skillet or saucepan, heat the ghee or butter over medium heat. Add the onion and sauté until translucent, about 5 minutes.

Add the garlic and ginger, and cook for an additional minute until fragrant. Add the chicken pieces and brown them on all sides, about 5-7 minutes.

Advertisement

Pour in the tomato puree, heavy cream, and all the spices (cumin, coriander, cayenne, paprika, and garam masala). Season with salt and pepper to taste.

Bring the mixture to a simmer and let it cook for 20-25 minutes, stirring occasionally, until the chicken is cooked through and the sauce has thickened.

To achieve the best results, it's important to use high-quality ingredients and to let the sauce simmer slowly to allow the flavors to develop fully.

Serve the butter chicken hot, garnished with chopped cilantro, and accompany it with basmati rice or naan bread for a complete and authentic Indian meal.

Cooking Steps
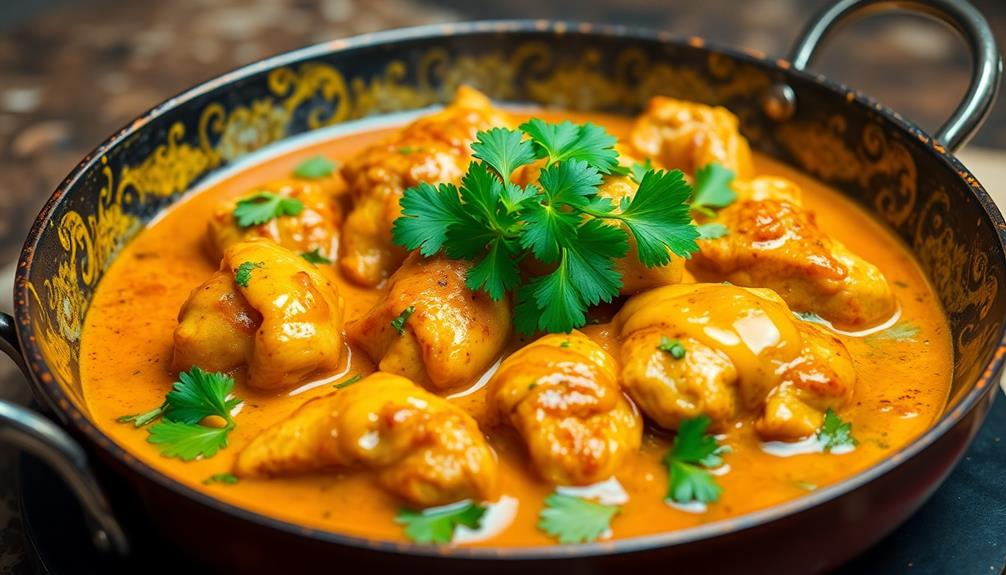
step by step cooking instructions

First, you'll need to marinate the chicken in a tangy yogurt mixture seasoned with aromatic spices.

Next, sauté some onions and ginger-garlic paste to build the flavor base.

Advertisement

Then, add a rich tomato puree and simmer it all together with a touch of cream for a creamy, indulgent sauce.

Step 1. Marinate Chicken in Yogurt, Spices
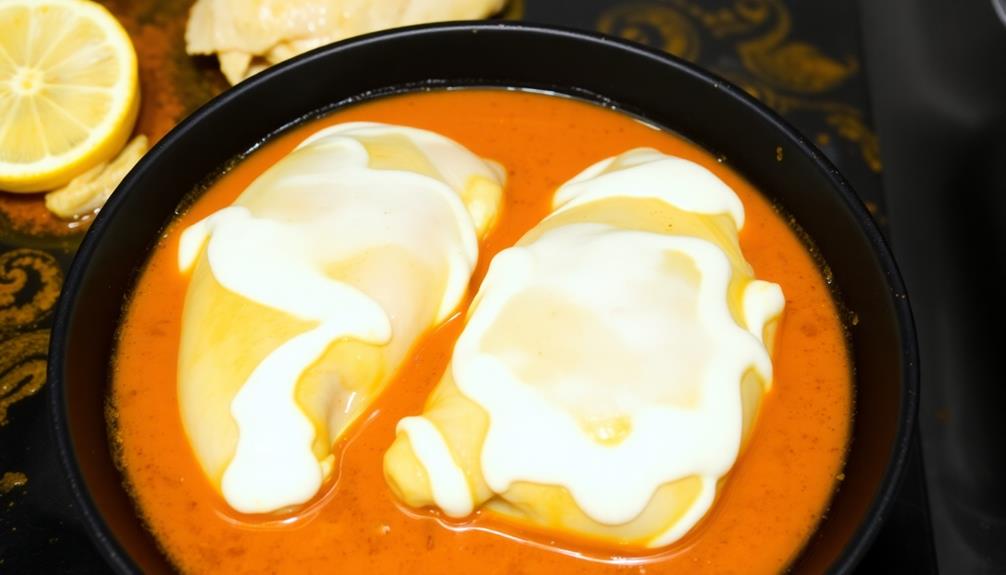
marinate chicken with yogurt

Juicy chicken pieces await their transformation in the aromatic marinade.

In a large bowl, combine tangy yogurt, fragrant garlic, and a flavorful blend of aromatic spices like cumin, coriander, and garam masala. Stir everything together until the chicken is fully coated, ensuring each piece is evenly seasoned.

Cover the bowl and let the chicken marinate in the refrigerator for at least 30 minutes, or up to 4 hours if time allows. This process allows the spices to permeate the meat, infusing it with a depth of flavor that will tantalize your taste buds.

As the chicken marinates, the yogurt tenderizes the meat, resulting in a juicy, tender texture that will melt in your mouth.

When you're ready to cook, the chicken will be perfectly seasoned and primed for the next step in this mouthwatering butter chicken adventure.

Advertisement

Step 2. Sauté Onions and Ginger-Garlic Paste
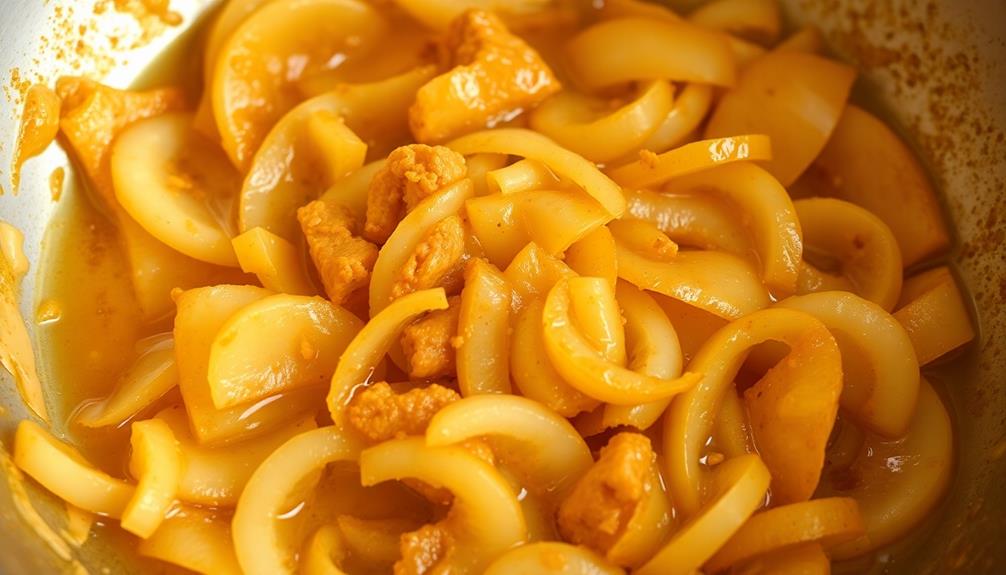
saut onions and ginger garlic

With the chicken now marinated to perfection, it's time to start cooking. In a large skillet or Dutch oven, heat a generous amount of oil over medium-high heat. Once the oil is shimmering, add the diced onions and sauté them until they're soft and translucent, about 5 minutes.

Next, toss in the minced ginger and garlic. The aroma from these aromatic ingredients will immediately fill your kitchen, making your mouth water in anticipation. Sauté the mixture for an additional 2-3 minutes, stirring constantly to prevent burning. The onions should be lightly golden, and the ginger and garlic should be fragrant and slightly softened.

This flavorful base of onions, ginger, and garlic is the foundation for the rich, creamy butter chicken sauce that's to come. Be sure to scrape up any browned bits from the bottom of the pan, as these bits of flavor will add depth and complexity to the final dish.

Step 3. Add Tomato Puree
incorporate tomato puree now

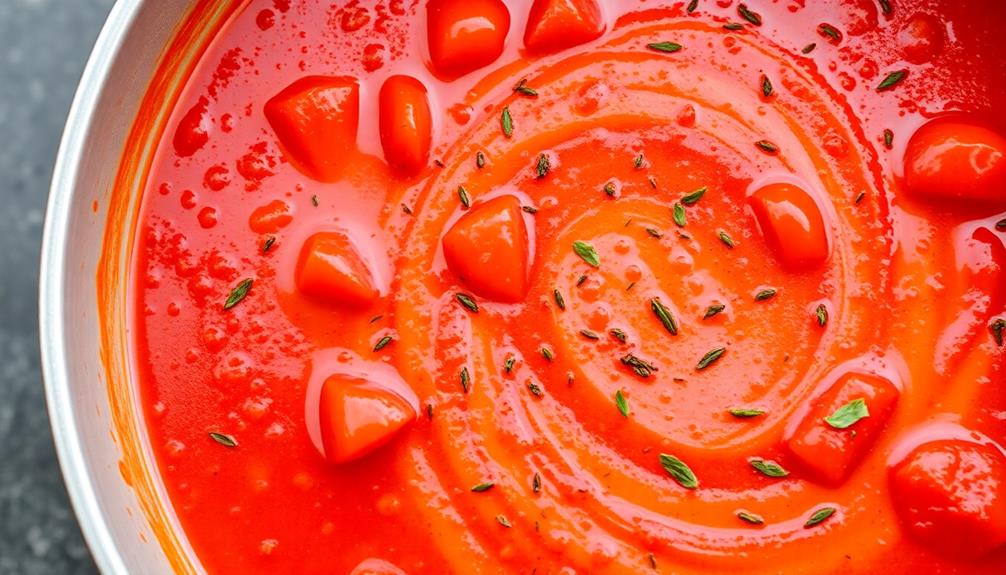
Next, add the tomato puree to the sautéed onion and garlic mixture. This vibrant red sauce will infuse the dish with a bold, tomatoey flavor that perfectly complements the rich, creamy butter chicken.

Grab your whisk and give the mixture a good stir, ensuring the tomato puree is fully incorporated. You'll notice the color of the sauce deepen and become more vibrant as the tomato puree cooks down.

The tomato puree will also help thicken the sauce, creating a luxurious, velvety texture that coats the chicken beautifully.

As the flavors meld together, your kitchen will be filled with the enticing aroma of simmering spices and tangy tomatoes. This step is crucial for building the complex, layered flavors that make butter chicken so irresistible.

Advertisement

Keep stirring occasionally until the sauce has reached your desired consistency, then move on to the next step – adding the chicken and cream.

Step 4. Add Cream and Simmer
add cream then simmer

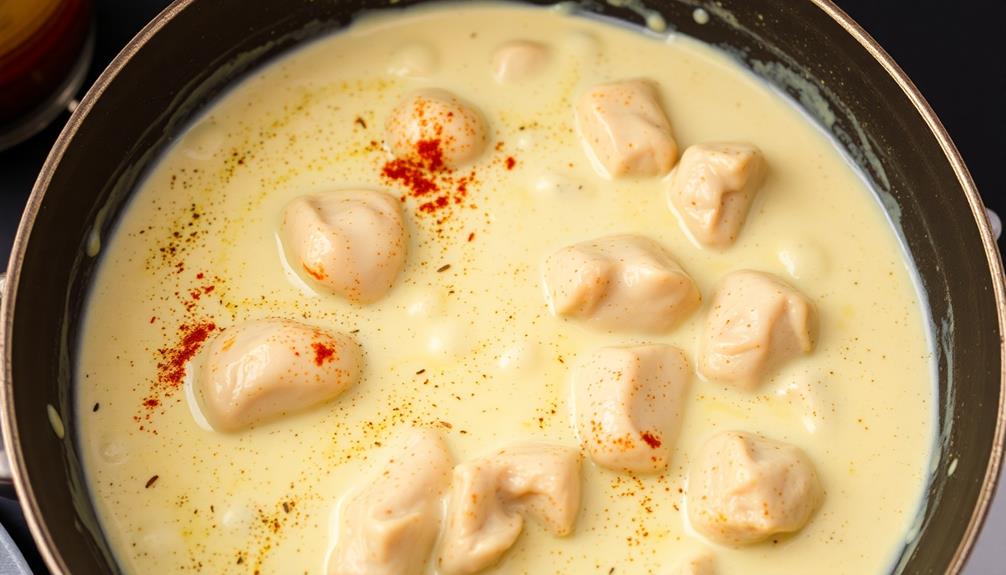
After the tomato puree has been incorporated, you'll want to stir in the heavy cream. This will create a luxuriously creamy texture that's essential for authentic butter chicken. Slowly pour in the cream, whisking constantly to ensure it blends seamlessly into the simmering sauce.

You'll notice the color shifting to a rich, orangey-red hue as the cream mellows the tanginess of the tomatoes.

Now, let the mixture simmer for about 10-15 minutes, stirring occasionally, until the sauce has thickened to your desired consistency. The longer it simmers, the more the flavors will meld and intensify.

Be patient – this slow cooking process is what'll transform the sauce into that signature velvety smoothness. Periodically taste and adjust the seasoning as needed, adding more spices or a touch of sugar to balance the flavors.

The end result should be an incredibly indulgent, aromatic sauce that coats the chicken in decadence.

Advertisement

Step 5. Stir in Garnishes and Serve Hot
garnish stir serve hot

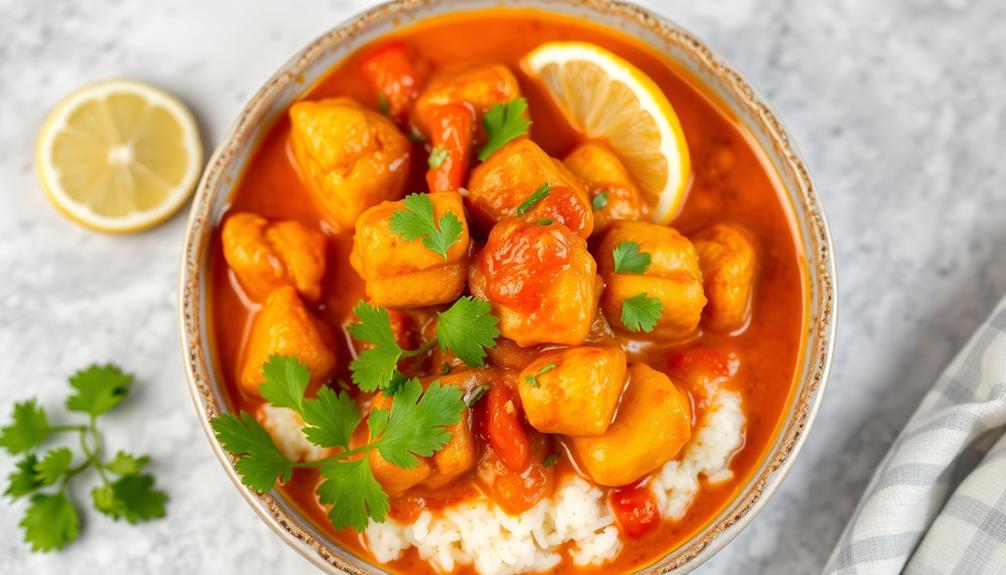
Garnished with a sprinkle of chopped cilantro and a squeeze of fresh lemon juice, the rich, creamy butter chicken is now ready to serve. The vibrant green herbs and bright citrus notes will brighten up the dish, perfectly complementing the deep, savory flavors.

Go ahead and spoon the saucy chicken over fluffy basmati rice or naan bread, allowing the aromatic sauce to soak in. Don't forget to offer wedges of lemon on the side, so your guests can add an extra zing of acidity to their meal.

The velvety texture and bold spices make this butter chicken an absolute delight. Take a moment to admire the shimmering orange-red hue before taking that first bite. Savor the way the tender chicken and creamy sauce melt together, creating a harmonious balance of flavors that will have your taste buds doing a happy dance.

Serve this Indian masterpiece hot and watch it disappear in no time!

Final Thoughts
concluding reflections and insights

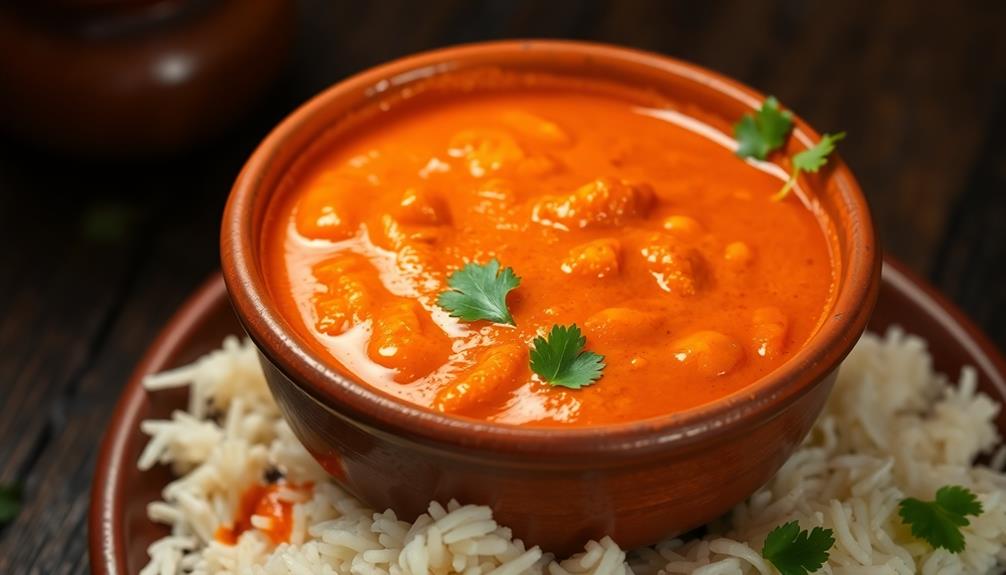
Having enjoyed the rich and flavorful dish, you can now confidently say that this Indian Butter Chicken recipe is a true delight. The fragrant spices, the velvety texture, and the perfect balance of sweetness and tanginess have left your taste buds thoroughly satisfied.

This dish isn't only a treat for your senses but also a testament to the vibrant and diverse culinary traditions of India.

As you savor the last bites, you can't help but feel a sense of accomplishment. Mastering this recipe has opened up a whole new world of flavors, and you're eager to experiment with more authentic Indian dishes in the future.

Advertisement

The key lies in embracing the unique blend of spices and techniques that make Indian cuisine so captivating.

Reflecting on your culinary journey, you realize that this butter chicken dish hasn't only nourished your body but also your appreciation for the rich cultural heritage it represents.

With each bite, you've been transported to the bustling streets of India, where the aroma of spices and the sizzle of cooking pans create a symphony of flavors.

Frequently Asked Questions

Is Butter Chicken a Traditional Indian Dish?

Yes, butter chicken is a traditional Indian dish. It's a creamy, tomato-based curry that originated in northern India and has become a popular dish around the world. It's a comforting and flavorful meal you'll love.

How Can I Make Butter Chicken Less Spicy?

To make butter chicken less spicy, reduce the amount of chili powder or cayenne pepper used. You can also add more tomatoes or cream to the dish to balance out the heat.

Advertisement

Can I Make Butter Chicken in a Slow Cooker?

Yes, you can make butter chicken in a slow cooker. Simply add all the ingredients to the slow cooker, cover, and cook on low for 6-8 hours or on high for 3-4 hours. This method ensures the flavors meld together perfectly.

How Long Does Leftover Butter Chicken Last?

Leftover butter chicken can last 3-4 days when stored properly in the refrigerator. Keep it in an airtight container, and you can reheat it on the stovetop or in the microwave when you're ready to enjoy it again.

What Sides Go Well With Butter Chicken?

Butter chicken pairs perfectly with naan, basmati rice, or a fresh salad. Try serving it with roasted vegetables or lentil dahl for a heartier meal. The creamy sauce complements a variety of sides, so feel free to experiment.
Continue Reading
Advertisement

Savory Main Dishes

Butter Chicken Pasta: The Fusion Dish That Combines Comfort and Spice

Savor the captivating fusion of tender chicken, aromatic spices, and hearty pasta in the indulgent delight that is Butter Chicken Pasta.

Published

on

By

spicy comfort food fusion

Butter chicken pasta is the ingenious fusion dish that combines the beloved comfort of tender, aromatic chicken in a rich, creamy sauce with the heartiness of perfectly cooked pasta. Originating in northern India, this dish evolved through innovative chefs who blended fragrant spices, juicy chicken, and hearty noodles. The result is a mouthwatering meal that delights the senses – the velvety sauce, the tender chicken, and the perfectly al dente pasta create a symphony of flavors and textures. Whether you're hosting a dinner party or enjoying a cozy weeknight, this dish promises to transport you on a culinary adventure. Let's dive deeper into the history, recipe, and cooking tips that make butter chicken pasta a standout fusion feast.

Key Takeaways

  • Butter Chicken Pasta is a fusion dish that blends the rich, creamy flavors of butter chicken with the comfort of hearty pasta.
  • The dish originated in northern India during the 1950s and has since evolved through the culinary creativity of home cooks and chefs.
  • Key ingredients include boneless chicken thighs, unsalted butter, heavy cream, tomato puree, and aromatic spices like garam masala, ginger, and garlic.
  • The preparation involves sautéing onions in butter, adding spices, incorporating cream for a velvety texture, and simmering the chicken in the sauce.
  • The final dish offers a unique and satisfying dining experience, with a vibrant presentation and enticing aroma that makes it suitable for various occasions.

History

historical events and analysis

The origins of butter chicken pasta can be traced back to the 1950s in northern India. This beloved dish emerged as a fusion of two iconic culinary traditions – the rich, creamy butter chicken and the comforting pasta.

As the popularity of butter chicken grew, innovative chefs began experimenting, blending the aromatic spices and tender chicken with the satisfying texture of pasta. What resulted was a harmonious marriage of flavors, where the velvety butter chicken sauce envelops the al dente noodles, creating a truly delightful experience.

Over the years, this dish has evolved, with home cooks and restaurants putting their own unique spin on the recipe. From using different pasta shapes to incorporating additional vegetables, the variations are endless, yet they all share the common thread of blending the warmth of butter chicken with the versatility of pasta.

Today, butter chicken pasta has become a beloved comfort food, offering a delicious way to indulge in the rich, creamy goodness of this iconic Indian dish.

Recipe

cooking instructions and ingredients

Butter Chicken Pasta is a delightful fusion of two beloved dishes – creamy butter chicken and hearty pasta. This recipe combines the rich, aromatic flavors of Indian cuisine with the comforting textures of Italian pasta, creating a unique and satisfying meal.

The key to this dish is the carefully crafted butter chicken sauce, which serves as the foundation. The sauce is made by simmering chicken in a fragrant blend of spices, tomatoes, and cream, resulting in a luscious and flavorful base that coats the pasta perfectly.

Advertisement
  • Boneless, skinless chicken thighs, cubed
  • Unsalted butter
  • Heavy cream
  • Tomato puree
  • Garam masala
  • Ginger, minced
  • Garlic, minced
  • Paprika
  • Salt and pepper to taste
  • Penne or fusilli pasta

Begin by sautéing the chicken in butter until golden brown. Add the ginger, garlic, garam masala, and paprika, and continue cooking until the spices are fragrant. Pour in the tomato puree and heavy cream, then simmer the mixture until the chicken is cooked through and the sauce has thickened.

Meanwhile, cook the pasta according to package instructions until al dente. Drain the pasta and toss it with the butter chicken sauce, ensuring the pasta is evenly coated. Serve hot, garnished with fresh cilantro or parsley if desired.

When cooking this dish, be mindful of the sauce consistency. If the sauce seems too thick, add a splash of pasta cooking water to thin it out. Additionally, feel free to adjust the spice level to your preference by adding more or less garam masala. Enjoy this flavorful fusion of Indian and Italian cuisines!

Cooking Steps

culinary preparation instructions

First, you'll need to prepare and chop the onions.

Next, sauté the onions in butter until they're softened and fragrant.

Then, add the spices like cumin, paprika, and garlic powder to build that delicious butter chicken flavor.

Step 1. Prepare and Chop the Onions

chop onions for preparation

Begin by chopping 1 medium-sized onion into small, even pieces. Take your time and focus on creating uniform cubes, around 1/4-inch in size. This will ensure the onions cook evenly and release their delicious flavor into the dish.

Don't be afraid to add a bit of elbow grease – the satisfying crunch of the knife against the onion is all part of the experience. As you work, inhale the pungent aroma wafting up. It may make your eyes water, but don't worry, that's just the onion's way of saying hello. Embrace the challenge and keep slicing.

Advertisement

In addition to enhancing flavor, onions can provide health benefits, much like the vitamins found in cilantro. Before long, you'll have a neat pile of finely chopped onion, ready to sizzle in the pan.

Feel proud of your knife skills – these perfectly diced pieces will be the foundation for your mouthwatering Butter Chicken Pasta. Now, let's move on to the next step and get this dish started!

Step 2. Sauté the Onions in Butter

saut onions in butter

With your perfectly diced onions ready, it's time to start cooking. In a large skillet, melt the butter over medium heat. As the butter sizzles, carefully add the onions, ensuring they're evenly distributed in the pan.

Gently stir the onions, allowing them to soak up the rich, golden butter. The aroma of the melting butter will fill the air, tempting your senses.

Sauté the onions, stirring occasionally, until they become soft and translucent, about 5-7 minutes. Be mindful not to let them brown too quickly – you want them to slowly caramelize, developing a sweet, slightly nutty flavor.

As the onions cook, they'll release their natural juices, creating a flavorful base for the rest of the dish. Keep a close eye on the onions, adjusting the heat as needed to maintain a steady sauté.

Advertisement

Once they've reached the perfect softness, you're ready to move on to the next step in your delicious Butter Chicken Pasta adventure.

Step 3. Add the Spices

incorporate spices into mixture

Next, add the aromatic spices to the sautéed onions. Sprinkle in some garam masala, a fragrant blend of warm Indian spices like cumin, coriander, and cardamom. The earthy aroma will instantly fill the air, tantalizing your senses.

For a hearty addition, consider serving this dish alongside a side of Idli Sambar, a South Indian staple that complements rich flavors beautifully. Followed by a pinch of turmeric, which will lend the dish a vibrant golden hue.

Don't forget the ground coriander and paprika – they'll add depth of flavor and a hint of smoky sweetness. Stir the spices into the onions, allowing them to toast and bloom, releasing their essential oils.

This spice mixture is the foundation of the dish, infusing the chicken and sauce with an authentic Indian flair. Take a deep breath and savor the intoxicating scents wafting through the kitchen. Your taste buds are in for a real treat!

With the spices added, you're one step closer to recreating the bold, comforting flavors of butter chicken, just waiting to be tossed with tender pasta.

Advertisement

Step 4. Add the Cream

incorporate the cream mixture

Once the spices have been toasted and the aroma has filled the kitchen, it's time to add the cream.

Slowly pour in the heavy cream, stirring gently to incorporate it into the fragrant sauce. As the cream meets the warm mixture, it will begin to thicken and meld together, creating a rich, velvety texture.

Make sure to scrape the bottom of the pan to prevent any burning or sticking. The cream will temper the heat of the spices, resulting in a harmonious balance of flavors.

Breathe in the tantalizing scent – the cream has transformed the dish, rounding out the edges and adding a luxurious creaminess.

Don't be afraid to add a bit more cream if the sauce seems too thick. You want a smooth, pourable consistency that will coat the pasta beautifully.

With the cream incorporated, the butter chicken pasta is well on its way to flavor perfection.

Advertisement

Step 5. Add the Chicken

add chicken at step 5

Now that the creamy sauce has been prepared, it's time to incorporate the star of the dish – the chicken.

Dice the chicken breasts into bite-sized cubes, about an inch in size. This will ensure the chicken cooks through evenly and pairs perfectly with the pasta.

Carefully add the chicken to the simmering sauce, stirring to coat each piece. Let the chicken soak up all those delicious flavors as it simmers for 8-10 minutes, until it's cooked through.

The chicken will turn opaque and tender, transforming the sauce into a harmonious fusion of spices and protein.

As the chicken cooks, the sauce will thicken slightly, creating a luxurious texture that coats each penne noodle.

Get ready for an explosion of flavor in every bite!

Advertisement

Final Thoughts

concluding reflections and insights

Overall, this butter chicken pasta recipe is a delightful fusion of two beloved classics. The rich, creamy sauce and tender chicken combined with the satisfying texture of pasta creates a truly indulgent dish.

By incorporating nectar-rich plants into your garden, you can attract hummingbirds that will add a touch of life to your outdoor space, similar to how this dish brings vibrant flavors to your table. Although it may require a few extra steps, the end result is well worth the effort. The blend of aromatic spices and the luxurious butter chicken flavors elevate this pasta to new heights, making it a comforting yet sophisticated meal.

Whether you're hosting a dinner party or simply craving a cozy weeknight dinner, this butter chicken pasta is sure to impress. The vibrant colors and mouthwatering aroma will have everyone eager to dig in.

Plus, the leftovers make for a fantastic lunch the next day. So, why not give this recipe a try and experience the joy of combining two beloved classics into one delectable dish? Your taste buds will thank you.

Frequently Asked Questions

Can I Use Regular Chicken Instead of Boneless?

Absolutely, you can use regular chicken instead of boneless. The cooking time may need to be adjusted, but the dish will still be delicious. Don't be afraid to experiment with different types of chicken to find your perfect version.

How Long Does the Sauce Need to Simmer?

You'll want to let the sauce simmer for about 20-30 minutes to allow the flavors to fully develop. This simmering time helps the spices and cream meld together into a rich, creamy sauce.

Advertisement

Can I Use Heavy Cream Instead of Half-And-Half?

Sure, you can use heavy cream instead of half-and-half. The result will be a richer, creamier sauce, but it may be a bit heavier. Just keep an eye on the consistency as it simmers to get your desired texture.

Do I Need to Marinate the Chicken?

Yes, you'll want to marinate the chicken for this dish. Marinating the chicken helps tenderize it and infuses it with the bold flavors of the sauce. Don't skip this important step – it'll make a big difference in the final result.

Can I Make the Sauce in Advance?

You can definitely make the sauce in advance. Prepare the sauce, let it cool completely, and store it in the refrigerator for up to 3 days. When ready to serve, simply reheat the sauce and toss with the cooked pasta and chicken.

Continue Reading

Savory Main Dishes

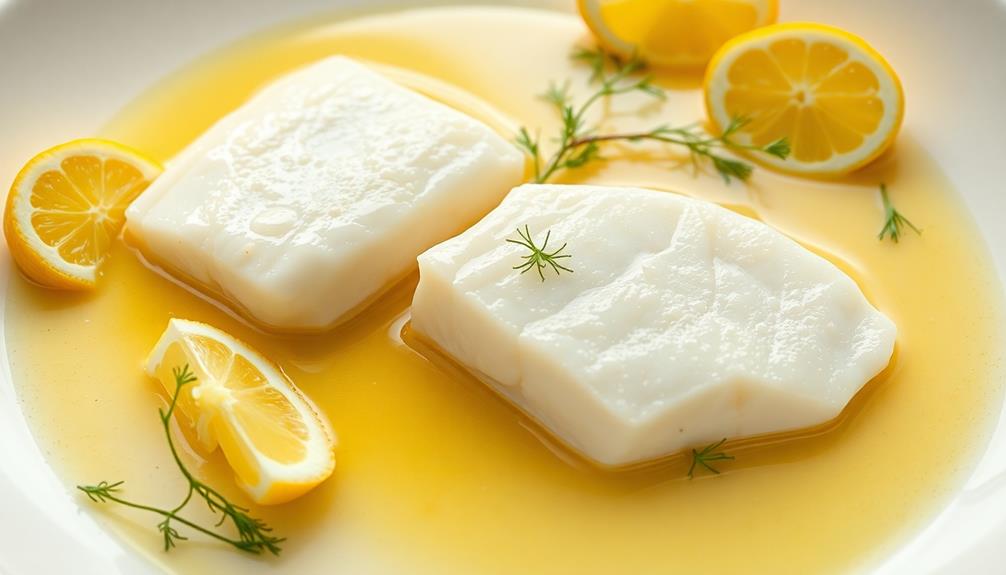
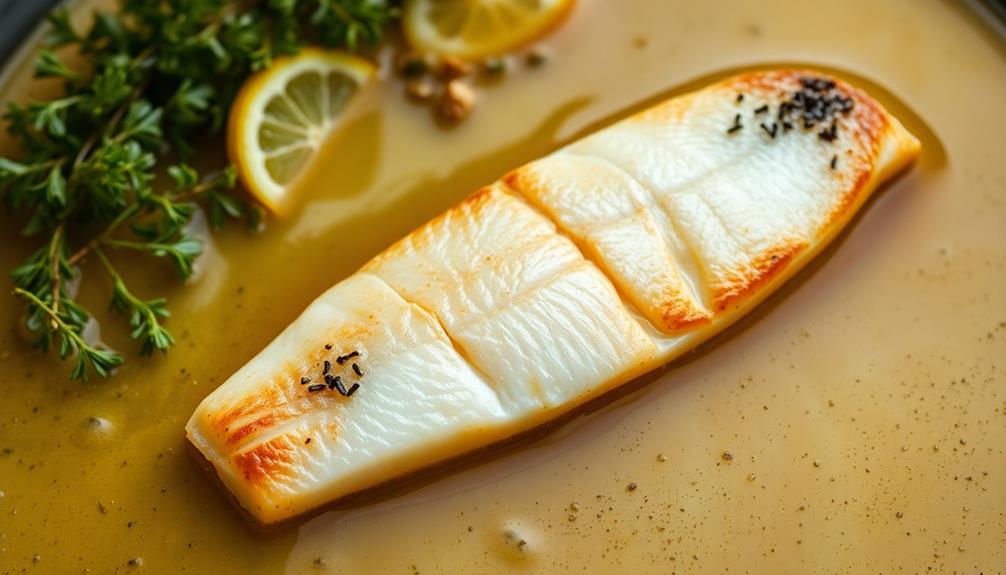
Swedish Butter-Poached Cod: A Tender, Flavorful Twist on Classic Cod

Delightfully tender and flavorful, Swedish butter-poached cod offers a unique twist on this classic seafood dish, elevating it to new culinary heights.

Published

on

By

tender swedish butter poached cod

Swedish butter-poached cod offers a delightfully tender and flavorful twist on this classic seafood dish. Originating from Scandinavia's bountiful cod catch, the time-honored technique of gently poaching the fish in a rich, creamy butter sauce enhances its natural sweetness, creating a luxurious and satisfying final product. With high-quality ingredients and careful attention to balancing flavors and textures, this dish captivates the senses and showcases the cherished culinary traditions of Sweden. Serve it immediately for the best experience, complementing the cod with fluffy mashed potatoes, fresh salads, or seasonal vegetables – an unforgettable celebration of the sea's bounty.

Key Takeaways

  • The Swedish butter-poached cod dish originates from Scandinavia, particularly Sweden, and has a centuries-old technique that enhances the natural sweetness and tenderness of the fish.
  • The method of poaching the cod in butter creates a luxurious, creamy sauce that complements the flaky texture of the fish, reflecting a cherished aspect of Swedish culinary heritage.
  • The recipe emphasizes the use of high-quality ingredients, including fresh cod, unsalted butter, heavy cream, lemon juice, salt, and white pepper, resulting in a satisfying and indulgent final dish.
  • The cooking techniques, such as gentle melting of butter, basting the cod, and monitoring doneness, are crucial to achieving the desired flavor and texture of the dish.
  • The butter-poached cod can be served immediately with accompaniments like mashed potatoes, fresh salads, seasonal vegetables, or crusty bread, creating a visually appealing and harmonious dining experience.

History

past events and narratives

Hailing from the frigid waters of Scandinavia, the tradition of butter-poached cod has long been a culinary cornerstone in Swedish cuisine. This beloved technique dates back centuries, when resourceful Nordic cooks sought to make the most of the abundant cod catch.

By gently poaching the fish in rich, creamy butter, they discovered a remarkably tender and flavorful preparation that quickly became a beloved national dish.

Over the generations, the art of butter-poached cod has been meticulously refined, with each cook adding their own unique touches. Some might incorporate aromatic herbs, lemon, or even a splash of white wine to enhance the delicate sea flavor.

Others prefer to let the pure, buttery essence of the cod shine through. Regardless of the precise method, this technique has endured as a cherished example of Sweden's culinary heritage – a simple yet sublime way to celebrate the bounty of the sea.

Recipe

delicious dish preparation guide

Butter-poached cod is a delicate and indulgent dish that showcases the natural sweetness of fresh cod. The technique of poaching the fish in a rich, creamy butter sauce infuses it with unparalleled flavor and a silky-smooth texture.

This Swedish-inspired recipe is a celebration of simplicity, allowing the high-quality ingredients to shine. The end result is a luxurious and satisfying meal that's sure to impress your guests.

Advertisement

Ingredients:

  • 4 (6-ounce) cod fillets
  • 1 cup unsalted butter, cubed
  • 1/4 cup heavy cream
  • 2 tablespoons fresh lemon juice
  • 1 teaspoon kosher salt
  • 1/4 teaspoon ground white pepper

Instructions:

In a large skillet, combine the butter, cream, lemon juice, salt, and white pepper. Bring the mixture to a gentle simmer over medium heat, stirring occasionally, until the butter is melted and the sauce is smooth.

Reduce the heat to low and add the cod fillets, spooning the sauce over the top to ensure even coverage. Gently poach the cod, turning occasionally, until it flakes easily with a fork, about 10-12 minutes.

To ensure the best texture and flavor, be sure to use high-quality, fresh cod fillets. Additionally, take care not to overcook the fish, as it can become dry and tough.

Serve the butter-poached cod immediately, spooning the rich, creamy sauce over the top.

Advertisement

Cooking Steps

step by step cooking instructions

Melt the butter in a skillet over medium heat until it's nice and bubbly.

Gently add the cod fillets and use a spoon to baste the butter over the fish as it cooks.

Keep an eye on it until the cod turns opaque and flakes easily – that's when it's ready to serve!

Pair it with your favorite sides for a delightful Swedish-inspired meal.

Step 1. Melt Butter Over Medium Heat

melt butter medium heat

To begin the cooking process, grab a saucepan and let the butter slowly melt over medium heat. While you're at it, consider the benefits of a smart toilet's self-cleaning capabilities to enhance your home hygiene.

You'll want to keep a close eye on it, gently swirling the pan occasionally. As the butter starts to melt, it'll slowly transform from a solid, firm state into a silky, golden liquid. Be patient – you don't want to rush this step, as the key is to melt the butter gradually, allowing it to reach the perfect temperature.

Once the butter is fully melted, you'll notice it starts to shimmer and bubble slightly. This means it's reached the ideal temperature for poaching the cod.

Advertisement

The gentle heat will help the butter maintain its delicate flavor and creamy texture, ensuring your fish cooks up perfectly tender and infused with that signature Swedish butter taste. Keep the heat at medium, adjusting as needed to maintain this steady, gentle temperature. Your saucepan of melted butter is now ready for the next step in the recipe.

Step 2. Add Cod Fillets

add cod fillets now

Gently lower the cod fillets into the hot, shimmering butter. Watch as the fish sinks beneath the golden surface, sizzling softly. The aroma of melted butter and fresh seafood fills the air, making your mouth water in anticipation.

Carefully arrange the fillets in a single layer, ensuring they've enough room to cook evenly. As the butter gently poaches the cod, the flesh transforms, becoming tender and flaky. Use a spoon to baste the fillets, allowing the butter to infuse every bite with its rich, creamy flavor.

The cod will gradually turn opaque, signaling it's ready to be removed from the heat. Lift the fillets out one by one, letting the excess butter drip back into the pan. Arrange the perfectly poached cod on a plate, admiring its delicate texture and golden hue.

This simple yet elegant preparation showcases the natural sweetness of the fish, creating a truly mouthwatering dish.

Step 3. Spoon Butter Over Cod Occasionally

spoon butter over cod

As the cod simmers in the aromatic butter, periodically spoon the melted liquid over the fillets. This simple action will help baste the fish, keeping it moist and infusing it with the rich, buttery flavor.

Gently ladle the butter over the top and sides of the cod, ensuring every inch is coated. You'll notice the fish start to turn a lovely, opaque white color as it cooks.

Advertisement

To ensure a clean cooking environment, consider using an air purifier for optimal usage while preparing your meal, especially if you're in a space with noticeable odors or dust. The butter will also develop a delightful golden hue, indicating it's reached the perfect temperature.

Continue spooning the butter over the cod every 2-3 minutes, allowing the fillets to soak up the aromatic goodness. This process not only bastes the fish, but also creates a luxurious sauce that will complement the tender, flaky texture of the cod.

Be careful not to overspoil, as you don't want the cod to become greasy. Just a light, even coating is all you need to achieve that mouthwatering, butter-poached perfection.

Step 4. Cook Until Opaque

cook until fully opaque

After a few minutes of basting, the cod should begin to turn opaque and flake easily with a fork. This is a key sign that the fish is cooked through and ready to be served.

As the butter gently poaches the cod, you'll notice the once-translucent flesh gradually becoming solid and white. Gently insert a fork into the thickest part of the fillet – if it glides through without resistance and the fish flakes apart, it's reached the perfect doneness.

Keep a close eye during this final cooking stage, as cod can go from undercooked to overcooked in a matter of moments. Baste the fish with the fragrant, buttery sauce every minute or so, ensuring every bite is infused with rich, creamy flavor.

Advertisement

Once the cod is completely opaque and flakes with ease, it's time to remove it from the heat and plate it up. Get ready to savor the delicate, buttery texture and delicious results of your labor!

Step 5. Serve Immediately With Desired Accompaniments

serve immediately with accompaniments

Once the cod has reached the perfect doneness, it's time to serve it immediately with your desired accompaniments. This is the moment you've been waiting for – the chance to savor the tender, buttery cod in all its glory.

Don't let it sit and cool; transfer the gently poached fillets to plates or a serving platter right away. It's essential to recognize the importance of serving food promptly, as it can enhance the overall dining experience, much like understanding the emotional dynamics in relationships that individuals with BPD often navigate.

Now, it's up to you to choose the perfect pairings. Perhaps you'll opt for a bed of fluffy mashed potatoes, their creamy texture complementing the cod beautifully. Or maybe you'll go for a fresh, vibrant salad – the crisp greens and tangy dressing providing a delightful contrast to the rich fish.

Don't be afraid to get creative! Steamed vegetables, fragrant rice, or crusty bread would also make excellent accompaniments, allowing the delicate flavor of the cod to shine.

Regardless of your choice, be sure to drizzle the reserved poaching liquid over the top, infusing every bite with that irresistible buttery goodness.

Advertisement

Dive in and enjoy the fruits of your culinary labor – this Swedish-inspired cod dish is sure to impress.

Final Thoughts

concluding reflections summary

Ultimately, the Swedish butter-poached cod is a delectable dish that showcases the refined simplicity of Nordic cuisine.

Tender, flaky fish cradled in a rich, silky sauce – it's a harmonious balance of flavors and textures that captivates the senses. The secret lies in the meticulous technique, where the cod is poached ever-so-gently in a fragrant butter bath, ensuring a melt-in-your-mouth experience with every bite.

This recipe is a true testament to the power of restraint and attention to detail. By allowing the natural sweetness of the cod to shine, and by complementing it with the subtle richness of the butter, the dish emerges as a symphony of simplicity.

Serve it with your choice of accompaniments, whether it's a bed of fluffy mashed potatoes, a vibrant salad, or some crusty bread to soak up every last drop of the luxurious sauce.

Enjoy this Swedish delight and savor the essence of the sea in every forkful.

Advertisement

Frequently Asked Questions

Can I Substitute Another Type of Fish for the Cod?

Absolutely, you can substitute another type of fish for the cod. Many white, flaky fish like halibut, haddock, or tilapia would work well in this recipe, providing a similar texture and flavor profile.

How Long Does the Butter-Poaching Process Usually Take?

The butter-poaching process typically takes around 10-15 minutes. It allows the fish to cook gently, resulting in a tender, flavorful texture. The specific time may vary depending on the thickness of the fish fillets you're using.

What Are Some Recommended Side Dishes to Serve With the Cod?

For the butter-poached cod, you could serve it with roasted vegetables like asparagus or Brussels sprouts to complement the rich, flavorful fish. A simple salad or a side of mashed potatoes would also pair nicely.

Can the Dish Be Made Ahead of Time and Reheated?

Yes, you can make this dish ahead of time. The cod can be poached, flaked, and stored in the refrigerator for up to 3 days. When ready to serve, simply reheat the cod gently in the butter-poaching liquid.

Are There Any Variations or Modifications to the Traditional Recipe?

You can try variations like using different types of fish, adding herbs and spices, or swapping the butter for olive oil or lemon juice. Get creative and experiment to find your own signature twist on the dish.

Advertisement
Continue Reading

Savory Main Dishes

Butter-Basted Scallops: The Secret to Golden, Perfectly Seared Scallops

Perfect scallops start with a simple trick – butter basting. Discover the secret to golden, melt-in-your-mouth scallops that will impress your guests.

Published

on

By

perfectly seared butter basted scallops

Elevate your scallop game with the secret to a perfect searbutter basting! Start by thoroughly drying those fresh beauties to unlock their golden-brown potential. Next, let the butter sizzle in the skillet until it's rich and nutty, then gently lower in the scallops. The magic happens as you continuously baste them with the hot, flavorful butter, creating a crunchy exterior and melt-in-your-mouth interior. Resist the temptation to overcrowd the pan for optimal caramelization. Once they're perfectly seared, transfer those luscious scallops to your plate and prepare to impress. Intrigued? Let's dive deeper into the techniques that'll make you a scallop master.

Key Takeaways

  • Butter-basting creates a rich, golden-brown crust on scallops while enhancing their natural sweetness and tender texture.
  • Thoroughly drying the scallops with paper towels is crucial for achieving the perfect sear.
  • Continuously basting the scallops with hot butter ensures even cooking and a delectable flavor profile.
  • Precise temperature control and timing are essential for preventing overcooking and ensuring scallops remain tender and juicy.
  • Serving butter-basted scallops immediately after cooking maximizes their enjoyment, with optional garnishes like fresh herbs or lemon juice.

History

comprehensive study of past

Scallops have been enjoyed for centuries, with references to their consumption dating back to ancient Greek and Roman civilizations. These delectable shellfish were prized for their sweet, buttery flavor and delicate texture.

Throughout the Middle Ages, scallops were a popular ingredient in European cuisine, often served as a symbol of wealth and status.

In the 18th and 19th centuries, scallops became more widely available as fishing and transportation methods improved. This allowed the dish to reach a broader audience, becoming a beloved staple in coastal communities around the world.

Today, scallops remain a cherished ingredient, known for their versatility and ability to transform simple ingredients into something truly extraordinary. Whether seared, baked, or served raw, the humble scallop continues to captivate the palates of food enthusiasts everywhere.

Recipe

cooking instructions and ingredients

Butter-Basted Scallops are a luxurious and flavorful dish that can be easily prepared at home. The key to achieving a perfectly seared and tender scallop lies in the technique of basting the seafood with butter, which imparts a rich, velvety texture and a golden-brown crust.

Scallops are a delicate and versatile ingredient that pair beautifully with the nutty, browned butter. This recipe highlights the natural sweetness of the scallops, allowing them to take center stage while the butter enhances their delicate flavor.

Advertisement
  • Fresh sea scallops
  • Unsalted butter
  • Olive oil
  • Kosher salt
  • Freshly ground black pepper

Begin by patting the scallops dry with paper towels and seasoning them generously with salt and pepper.

Heat a large, heavy-bottomed skillet over high heat and add a drizzle of olive oil. When the oil is shimmering, add the scallops in a single layer, making sure not to overcrowd the pan.

Sear the scallops for 2-3 minutes per side, or until a golden-brown crust forms. As the scallops cook, continuously baste them with the butter, using a spoon to spoon the hot butter over the tops of the scallops.

When the scallops are cooked through, about 4-6 minutes total, transfer them to a plate.

Serve the butter-basted scallops immediately, garnished with a sprinkle of freshly ground black pepper, if desired.

For best results, use fresh, high-quality scallops and take care not to overcook them, as they can become tough and rubbery.

Advertisement

Cooking Steps

recipe preparation instructions

First, you'll want to pat your scallops dry with some paper towels to remove any excess moisture.

Next, heat up some butter in a skillet over medium-high heat.

Then, add those beautifully prepped scallops to the hot skillet and baste them with the reserved butter as they cook.

Step 1. Pat Scallops Dry With Paper Towels

pat scallops dry

Start by thoroughly patting the scallops dry with paper towels. This crucial step is the key to achieving a perfect sear on your scallops.

Gently blot the scallops, pressing down firmly to absorb as much moisture as possible. You want the scallops to be completely dry on the surface, as any excess water will prevent them from browning beautifully.

Take your time with this process – it's worth the extra effort. Ensure each scallop is meticulously patted dry, leaving no damp spots. This will allow the scallops to develop that coveted caramelized crust when you add them to the hot pan.

With the scallops prepped and ready to go, you're one step closer to creating a restaurant-worthy dish in your own kitchen.

Advertisement

Get excited – the best part is about to happen!

Step 2. Heat Butter in Skillet

heat butter in skillet

Next, heat a large skillet over medium-high heat. Once it's nice and hot, drop in a few tablespoons of unsalted butter.

Watch as it quickly melts and starts to sizzle – that's exactly what you want! The butter will begin to brown and develop a rich, nutty aroma.

Tilt the pan to coat the entire surface with the melted butter. This even coating will ensure your scallops get that beautiful golden-brown sear all around.

Be sure to keep a close eye on the butter, as it can go from perfectly browned to burnt in the blink of an eye.

Once the butter is just starting to turn golden, it's time to add your scallops. Arrange them in a single layer, making sure they've plenty of space between each one.

Advertisement

This will prevent steaming and allow them to sear to perfection. Get ready for the delightful sound of sizzling scallops!

Step 3. Add Scallops to Hot Skillet

add scallops to skillet

With the butter sizzling and ready, you can now add your scallops to the hot skillet. Carefully lower them into the pan, making sure they've plenty of room to sear and caramelize. You'll hear that satisfying sizzle as the scallops hit the hot surface.

Take care not to overcrowd the pan, as this can cause the scallops to steam rather than develop that gorgeous golden-brown crust.

As the scallops cook, use a pair of tongs to gently flip them over after about 2-3 minutes. You're looking for that signature caramelization – a rich, deep-brown color that indicates the perfect sear.

Baste the scallops continuously with the hot, fragrant butter, allowing it to coat and baste each one. This will help them develop that mouthwatering, buttery flavor and texture.

Cook for another 2-3 minutes on the second side, until the scallops are opaque throughout. Remove them from the heat and get ready to enjoy your perfectly seared, butter-basted scallops.

Advertisement

Step 4. Baste Scallops With Reserved Butter

baste scallops with butter

Once the scallops are seared, it's time to baste them with the reserved butter. This simple technique is the secret to achieving that gorgeous, golden-brown crust while keeping the insides tender and juicy.

Butter, being a source of vitamins A, D, E, and K, not only enhances the flavor but also adds nutritional value to your dish butter health benefits.

Grab the skillet and tilt it slightly, allowing the reserved butter to pool at the edge. Using a large spoon, begin basting the scallops, spooning the warm, fragrant butter over the tops and sides.

Watch as the butter sizzles and foams, creating a delectable glaze that coats the scallops. Continue basting for about 1-2 minutes, making sure to cover every inch of the scallops.

The butter will impart a rich, buttery flavor and help the outsides develop that coveted caramelized crust. Once the scallops are beautifully basted, remove the skillet from heat and transfer the scallops to a serving plate.

Get ready to enjoy tender, flavorful scallops that are sure to impress.

Advertisement

Step 5. Remove Scallops From Heat

remove scallops from heat

Once the scallops have been beautifully basted, it's time to remove them from the heat.

You'll want to act quickly, as those golden-brown beauties can go from perfectly seared to tough and rubbery in the blink of an eye. Using your trusty tongs, gently lift the scallops from the sizzling pan and transfer them to a plate or platter.

Be careful not to overcrowd them, as you want to allow any excess butter to drip off.

With the scallops safely off the heat, take a moment to admire their gorgeous caramelized exteriors.

The rich, buttery aroma wafting through the air is sure to make your mouth water in anticipation.

Now, it's time to serve these delectable scallops while they're hot and at their absolute best.

Advertisement

Whether you're enjoying them as an appetizer or as part of a larger meal, these butter-basted beauties are sure to impress.

Get ready to savor every last bite!

Final Thoughts

concluding reflections and insights

The butter-basted scallops make for a truly delightful and indulgent dish. You'll be amazed at how the simple technique of basting the scallops in butter transforms them into golden, perfectly seared morsels. The rich, velvety texture and sweet, buttery flavor will have you relishing every bite.

While the preparation may seem daunting at first, with a little practice, you'll be able to achieve restaurant-quality results at home. Impress your friends and family with this elegant yet easy-to-execute recipe. The key is to pay close attention to the scallops, basting them constantly, and removing them from the heat at just the right moment.

Savor the satisfying crunch of the seared exterior and the tender, succulent interior. These butter-basted scallops are sure to become a new favorite in your household, perfect for special occasions or everyday indulgence.

Frequently Asked Questions

How Can I Tell if Scallops Are Fresh?

You can tell if scallops are fresh by their appearance and smell. Look for scallops that are plump, moist, and have a sweet, mild aroma. Avoid scallops with an fishy or ammonia-like odor, as they're likely not fresh.

Advertisement

What's the Best Way to Store Scallops?

To store scallops, keep them in their original packaging or an airtight container in the coldest part of your refrigerator. Don't let them sit in any liquid and use them within 2-3 days for best quality.

Can I Use Frozen Scallops for This Recipe?

Sure, you can use frozen scallops for this recipe. Just make sure to thaw them completely before cooking, pat them dry, and sear them over high heat to get that perfect golden-brown crust.

How Long Do Seared Scallops Last in the Fridge?

Seared scallops typically last 3-4 days in the fridge. Be sure to store them in an airtight container and consume them within this timeframe for maximum freshness and food safety. Enjoy your delicious scallops!

Can I Use the Same Method for Other Types of Seafood?

Absolutely! The same searing method can be used for various types of seafood, such as shrimp, fish fillets, or even calamari. Just adjust the cooking time based on the thickness and size of the seafood you're working with.

Advertisement
Continue Reading
Advertisement

Affiliate disclaimer

As an affiliate, we may earn a commission from qualifying purchases. We get commissions for purchases made through links on this website from Amazon and other third parties.

Vetted

Vetted4 months ago

Infusion Buds Butter Infuser & Decarboxylator – 2024 Review

I recently got to try out the Infusion Buds Butter Infuser & Decarboxylator Machine Combo, and I am excited to...

Vetted4 months ago

LEVO Lux – Premium Herbal Oil Infusion Machine – Review [2024]

I recently got to try out the LEVO Lux – Premium Herbal Oil Infusion Machine – Botanical Extractor – Herb...

Vetted4 months ago

STX Infuzium & Decarboxylator Bundle Review [2024]

Today, I am thrilled to share my thoughts on the PREMIUM PACK • STX Infuzium Butter-Oil-Tincture Infuser & STX Activation...

Vetted4 months ago

Review: ONGROK Small Butter Infuser [2024]

Introduction: I am thrilled to share my experience with the ONGROK Small Butter Infuser in this post. This device has...

Vetted4 months ago

Herbal Infuser Hi – Innovative Botanical Butter Maker [2024]

Today, I am thrilled to share with you my experiences with the Herbal Infuser Hi Countertop Botanical Butter Maker, Tincture...

Vetted4 months ago

Ardent FX Decarboxylator Review: Quick & Effortless! [2024]

I recently had the opportunity to try out the Ardent FX Decarboxylator 110V With Bluetooth Connectivity, and I must say,...

Vetted4 months ago

Infusion Buds Butter Infuser – Review & Accessories [2024]

Thank you for joining me as we explore a review of the Infusion Buds Butter Infuser & Decarboxylator Machine Combo....

Vetted4 months ago

Decarboxylator Machine Review: Easy & Odorless Herb Activation [2024]

I recently had the opportunity to try out the Decarboxylator Machine for Herbs, and I have to admit, it really...

Vetted4 months ago

Decarb Mini System Review: All-in-One Herbal Processing Solution [2024]

Today, I will be giving my thoughts on the Decarb Mini System. As someone who enjoys herbal infusions and tinctures,...

elevate steak with butter elevate steak with butter
Vetted4 months ago

12 Best Compound Butter Recipes for Elevating Your Steak Game

Kick your steak game up a notch with these 12 mouthwatering compound butter recipes that will take your taste buds...

mouthwatering butter cookie taste mouthwatering butter cookie taste
Vetted4 months ago

15 Best Butter Cookies That Will Melt In Your Mouth – Taste Test Results

Tantalize your taste buds with the top 15 butter cookies that promise a melt-in-your-mouth experience - a delightful journey awaits!

peanut butter ice cream peanut butter ice cream
Vetted4 months ago

15 Best Peanut Butter Ice Cream Flavors You Need to Try This Summer

Craving a creamy and decadent summer treat?

Advertisement

Trending