Connect with us

Butter Basics

French Elegance: How to Use a French Butter Dish!

Master the art of French butter preservation with our guide to using a French butter dish – discover the secrets behind its timeless elegance!

Published

on

butter dish usage guide

Embrace French elegance with a French butter dish, an ideal way to keep your butter fresh and effortlessly spreadable. Start by softening your butter at room temperature and pressing it tightly into the lid's cavity, ensuring no air pockets. Fill the base with a small amount of cold water to create an airtight seal when you place the lid on. Check the water level every couple of days and add a pinch of salt to prevent mold. This tool not only preserves your butter but also adds a touch of sophistication to your table. Explore further for more tips on perfecting this technique.

Key Takeaways

  • Press softened butter tightly into the lid cavity to eliminate air pockets.
  • Fill the base with cold water until it touches the lid for an airtight seal.
  • Add a pinch of salt to the water to prevent mold formation.
  • Change the water every 2-3 days to maintain butter freshness.
  • Ensure the lid fits snugly over the base to preserve butter's texture and flavor.
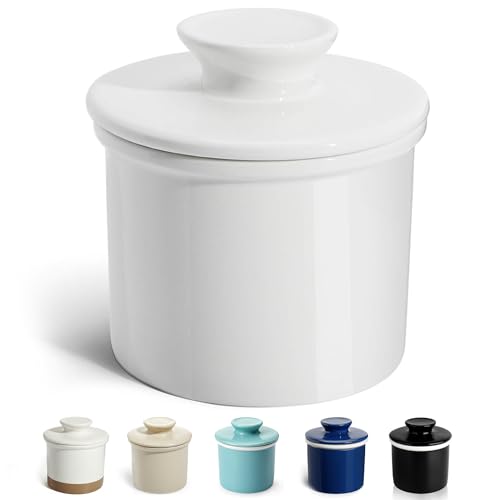
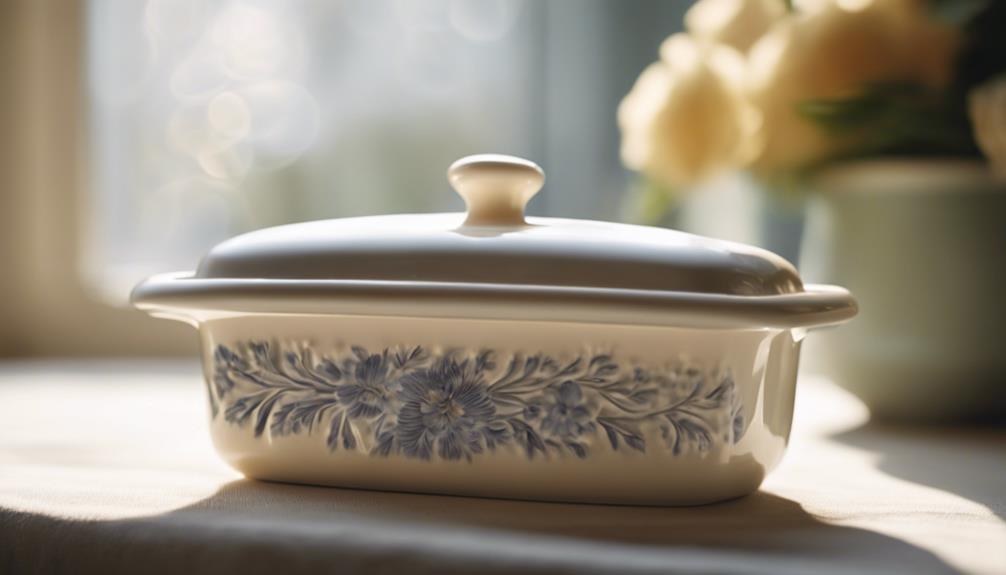
Understanding the French Butter Dish

The French Butter Dish, made up of a lid and base, keeps your butter fresh and spreadable. This ingenious tool, also known as a French butter keeper, originated in the 19th century and has since become a beloved kitchen staple.

By using water in its base, the dish creates an airtight seal around your butter, ensuring it stays fresh without refrigeration. This means you can keep your butter at room temperature, making it perfectly spreadable whenever you need it.

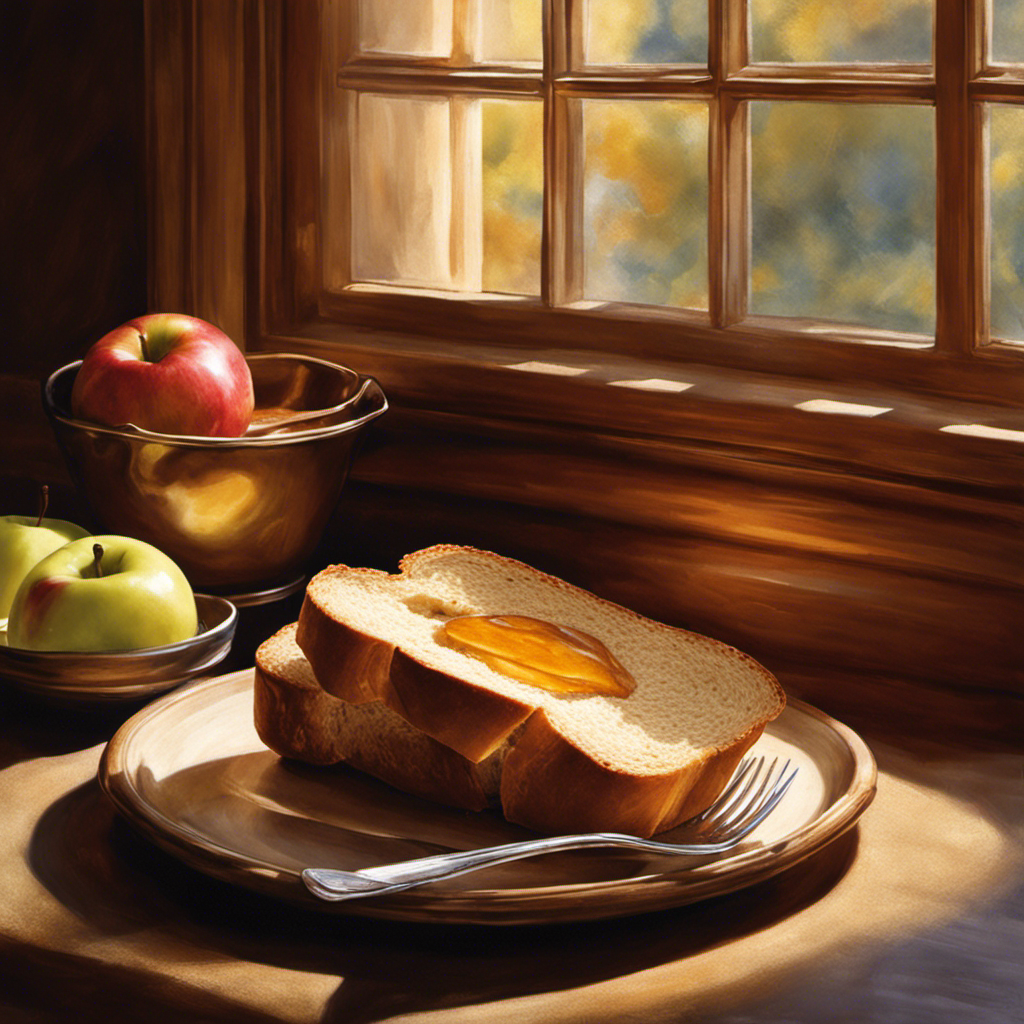
Imagine the convenience of having soft, easily spreadable butter ready for your morning toast or baking needs. No more struggling with hard, unyielding butter straight from the fridge. The French butter keeper makes this possible by protecting the fats in your butter from oxidizing, which can lead to unpleasant off flavors.

This preservation method enhances the taste and quality of your butter, making it a favorite among culinary enthusiasts, including the renowned Julia Child.

The Science Behind It

exploring the science within

By understanding the principles of oxidation and airtight seals, you'll appreciate how the French Butter Dish maintains butter's freshness and flavor. The butter dish's design leverages water in the base to create an airtight seal around the butter, effectively preventing oxidation. This seal forms a protective barrier, which keeps the butter fresh and free from off flavors.

When butter is in contact with air, it can quickly become rancid due to oxidation. The French Butter Dish slows down this oxidation process to a considerable extent. The water in the base acts as a shield, ensuring the butter inside remains at its best quality for a week or longer. To further enhance its effectiveness, you can add a pinch of salt to the water to prevent mold formation, ensuring the butter stays fresh and safe to eat.

Advertisement

The French Butter Dish is also ideal for kitchens with varying temperatures. It effectively maintains the right texture and flavor of the butter, making it easier to spread.

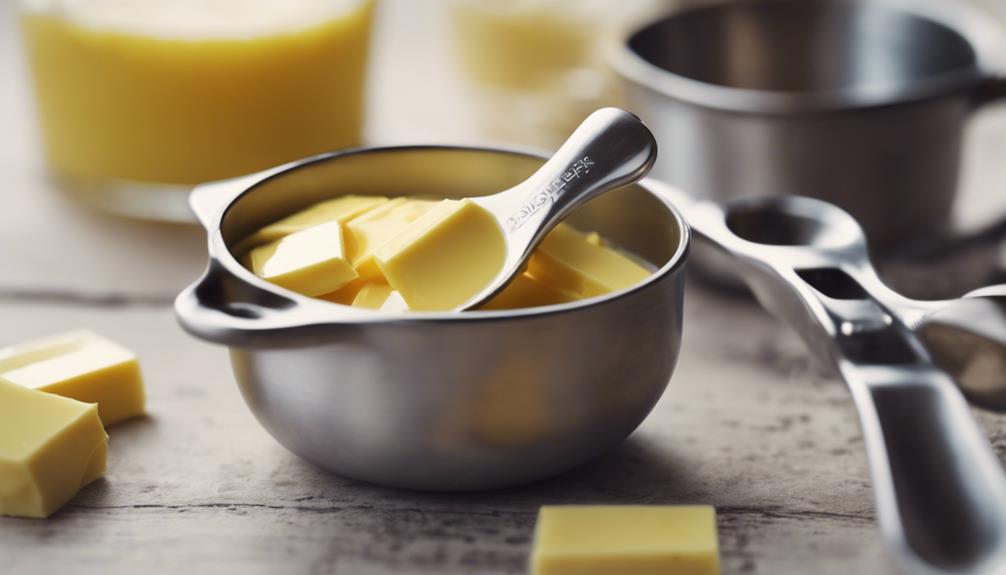
Choosing the Right Size

selecting correct clothing measurements

When selecting a French butter dish, think about how much butter you typically use. A standard dish suits daily needs for one stick, while a larger one is perfect for family meals.

Matching the dish size to your habits guarantees you always have the right amount of butter on hand.

Ideal Butter Quantity

Choosing the appropriate size French Butter Dish guarantees you always have the perfect amount of butter on hand for your needs. Whether you're a solo diner or preparing breakfast for the whole family, the right dish ensures you've got just the right amount of butter inside.

Here's how you can choose the ideal size:

  1. Individual Use: A small French Butter Dish is perfect if you only need a modest amount of butter.
  2. Family Breakfasts: Opt for a larger dish that can hold more butter, making it easier to serve everyone.
  3. Standard Daily Use: Most regular dishes fit one stick of butter, which is excellent for everyday use.
  4. Special Occasions: A bigger dish is useful for holidays or gatherings when you need extra butter.

Consider your daily butter consumption and the number of people you're serving. A petite French Butter Dish is ideal for keeping just the right amount of butter inside for individual use, while a larger dish suits family settings.

Daily Usage Needs

Selecting the appropriate size French Butter Dish for your daily needs guarantees you always have the ideal amount of butter readily available. When choosing a French Butter Dish, consider how much butter you use daily. If you frequently enjoy buttered toast or use butter in your cooking, a standard-sized dish that fits one stick of butter may be perfect. This size allows you to keep your butter soft and spreadable without having to replenish constantly.

Advertisement

For smaller households or individuals, a petite dish might be more suitable. It provides just enough space to keep your butter fresh and easily accessible.

On the other hand, if you have a larger family or host frequent breakfast gatherings, a larger French Butter Dish can secure everyone has enough soft butter to go around.

The key to daily convenience lies in finding the right size that matches your butter consumption habits. The right dish won't only keep your butter at the perfect consistency but also make it easier to manage your kitchen routine. Proper sizing sets the foundation for a practical and enjoyable butter dish experience, guaranteeing you always have the right amount of French Butter at hand.

Family Vs. Individual

Choosing the right size French Butter Dish depends on whether you're catering to a family or just yourself. If your household consists of multiple butter lovers, a larger dish will be your best bet. However, if you're flying solo, a smaller dish tailored to individual butter needs will suffice.

Here are four key points to keep in mind:

Advertisement
  1. Household Size: A large family requires more butter, so a bigger dish ensures you won't constantly refill.
  2. Frequency of Use: Daily breakfast gatherings? Opt for a larger dish. Occasional use? A petite one does the trick.
  3. Storage Space: A smaller French Butter Dish takes up less room, perfect for compact kitchens.
  4. Serving Style: For elegant dinner parties, a larger dish offers generous portions, while a small one suits intimate meals.

Choosing the correct size sets the foundation for a seamless butter storage experience. A standard dish typically holds one stick of butter, ideal for daily use. Balancing the dish's capacity with your butter consumption habits is key to maximizing functionality. Whether you need a family-friendly size or one that caters to individual butter needs, the right French Butter Dish will enhance your dining experience.

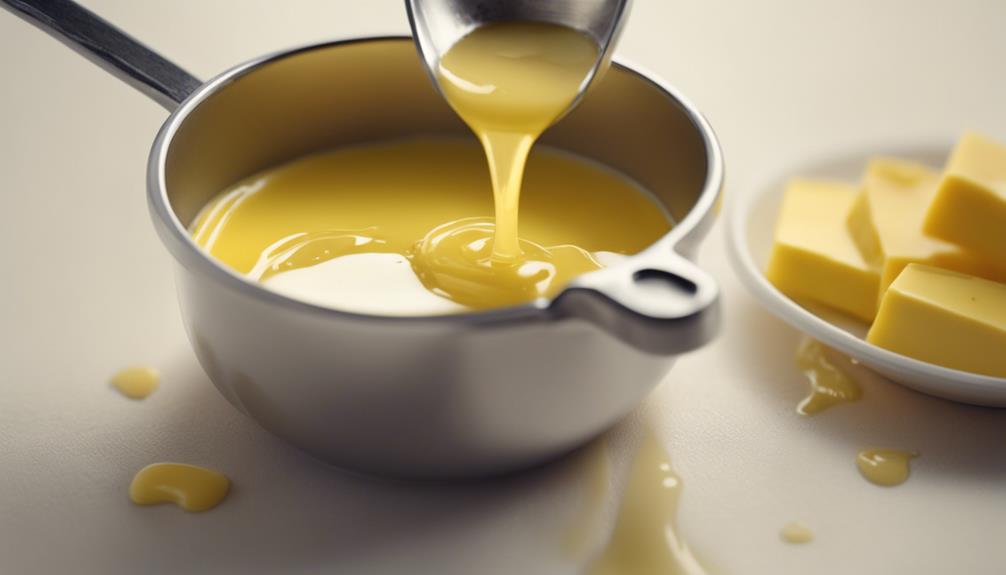
Preparing Your Butter

smooth creamy spreadable delight

To prepare your butter for the French Butter Dish, soften 1-2 sticks at room temperature until they're easy to spread. This step is vital because softened butter will pack more smoothly and evenly into the dish.

Once your butter is softened, take the lid of the French Butter Dish and get ready to pack it. Using a knife or your fingers, carefully place the softened butter into the lid. Make sure to press it tightly into the lid cavity, ensuring there are no air pockets.

The goal is to have the butter flush with the lip of the cup, creating a perfect seal when the lid is placed into the dish. This tight packing is essential for maintaining the freshness and spreadability of your French Butter.

Keep in mind that properly preparing your butter is the key to best usage of the French Butter Dish. By ensuring the butter is well-packed and flush with the lid, you're setting yourself up for a seamless and elegant butter experience. The butter in the lid will stay fresh and ready for use, allowing you to enjoy that touch of French elegance every time you spread it.

Filling the Water Reservoir

preparing for the coffee

After packing the butter into the lid, it's time to fill the water reservoir to maintain its freshness. This step is important for creating an airtight seal that keeps your butter fresh and flavorful in the butter crock.

Here's how you can do it effectively:

  1. Clean the Base: Before you fill the base, make sure it's clean and dry. Any leftover residue can affect the quality of the water and, subsequently, the butter.
  2. Add Water: Pour a small amount of cold water into the base of the butter crock. Typically, 1/4 to 1/2 inch of water is sufficient.
  3. Check the Water Level: The water should be high enough to come into contact with the inverted lid but not overflow. This ensures the airtight seal is created.
  4. Regular Maintenance: Change the water every 2-3 days to maintain the best freshness and taste of your butter.

An effective water barrier is necessary because it protects the butter from air exposure, which can cause rancidity. By keeping the water fresh and at the right level, you maintain your butter in excellent condition.
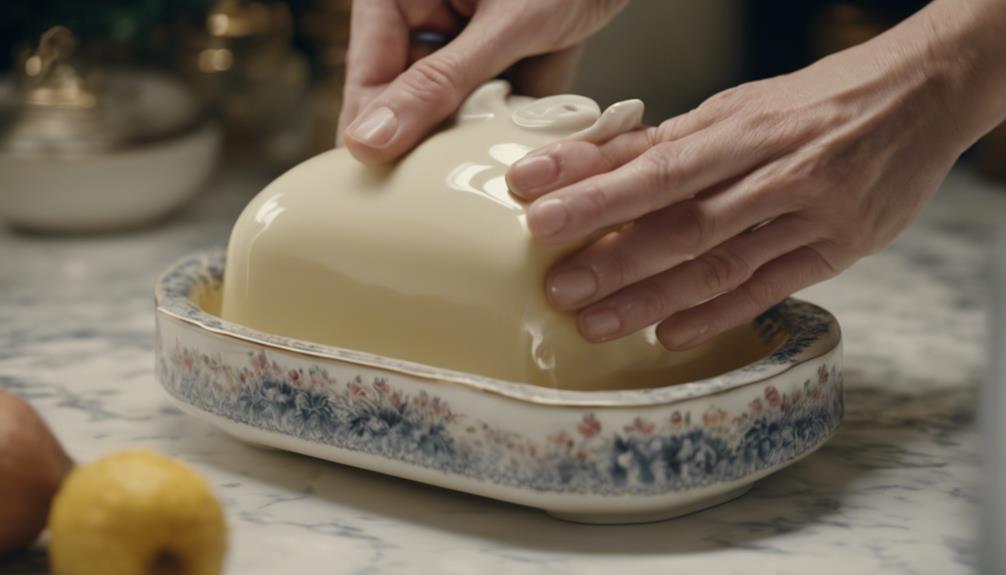
Placing the Lid

covering a simmering pot

When placing the lid on your French butter dish, make sure it fits snugly to create an effective seal.

This step is important for keeping the butter fresh and maintaining its texture.

Advertisement

A properly positioned lid will protect the butter from external elements, making sure it remains spreadable and flavorful.

Proper Lid Placement

Gently place the lid on the butter dish to ensure it creates an airtight seal. This step is essential for maintaining your butter fresh and protected from external elements. Proper lid placement is key to preserving the butter's best temperature and spreadable consistency.

An airtight seal not only preserves the butter's flavor and texture but also extends its shelf life.

To achieve the most favorable results, follow these steps:

  1. Ensure Clean Edges: Make sure the edges of both the lid and the dish are clean and free from butter residue. This helps the lid sit properly and create a tight seal.
  2. Align Correctly: Carefully align the lid with the dish so that it sits evenly. Misalignment can prevent the lid from sealing correctly.
  3. Press Gently But Firmly: Apply gentle yet firm pressure to the lid to ensure it fits snugly onto the dish.
  4. Check for Gaps: After placing the lid, check for any gaps that might allow air to enter. Adjust if necessary.

Sealing Butter Effectively

Placing the lid correctly on your French butter dish is vital for maintaining an airtight seal that keeps your butter fresh and flavorful. To achieve this, make sure the lid fits snugly over the dish. A proper seal not only preserves the butter's freshness but also keeps it spreadable and ready to use.

When you place the lid on the dish, ensure there are no gaps where air can seep in. This helps in maintaining the butter's texture and flavor by preventing external elements like dust, moisture, and odors from affecting its quality.

Advertisement

The airtight seal is essential because it acts as a barrier, protecting your butter from spoilage and maintaining its freshness longer. The lid's role in sealing the butter effectively can't be emphasized enough. By creating this airtight environment, you extend the butter's shelf life even when stored outside the fridge. This is particularly advantageous if you enjoy having soft, easily spreadable butter at room temperature.

Ensuring Freshness

To preserve your butter stays fresh and spreadable, place the lid securely on your French butter dish. The lid not only conserves the butter's flavor and texture but also creates an airtight seal that keeps external elements at bay.

Here's how you can make sure you're doing it right:

  1. Check the Fit: Make sure the lid fits snugly over the dish. Any gaps can compromise the airtight seal.
  2. Press Down Gently: Apply slight pressure when placing the lid to make certain it locks into place, creating an airtight environment.
  3. Regularly Inspect: Occasionally check for any cracks or wear in the lid that could impact the seal.
  4. Store Properly: Keep the French butter dish in a cool, dry place to maintain best freshness.

Storing Your Butter

keep butter in fridge

For best outcomes, pack softened butter tightly into the lid cavity of your French butter dish. This ensures the butter maintains its shape and is easy to spread. Once the lid is filled, place it into the base, making sure the water touches the butter to create an airtight seal. This seal keeps the butter fresh and spreadable at room temperature.

To further improve the freshness, consider adding a pinch of salt to the water. This simple step helps to prevent mold formation, especially if you live in a humid climate. Remember to refill the water in the base about once a week to guarantee the butter stays fresh.

In hot weather, you might want to refrigerate the French butter dish to sustain the butter's consistency. Otherwise, the butter may become too soft or even melt. Here's a quick reference table to help you:

Advertisement
Task Frequency Tip
Pack softened butter Every refill Use a spatula to avoid air pockets
Refill water in base Weekly Add a pinch of salt to prevent mold
Refrigerate butter dish During hot weather Keeps the butter's consistency intact

Maintaining Your Butter Dish

butter dish care tips

Maintaining your French butter dish is straightforward and maximizes your butter stays fresh and delicious. By following a few simple steps, you can optimize your butter stays at its best for longer periods.

First, always keep an eye on the water reservoir. This is essential for maintaining the airtight seal that keeps your butter fresh. Here are some key points to remember:

  1. Check the water level regularly – Ensure the water reservoir in the base is always filled. This helps create the airtight seal necessary for preserving the butter.
  2. Refill as needed – Refill the water every few days to keep the butter spreadable.
  3. Add a pinch of salt – To prevent mold formation, add a pinch of salt to the water.
  4. Clean periodically – Regular cleaning of your French butter dish keeps it in optimal condition and maximizes the freshness of your butter.

Enhancing Your Table Setting

elevate your dining experience

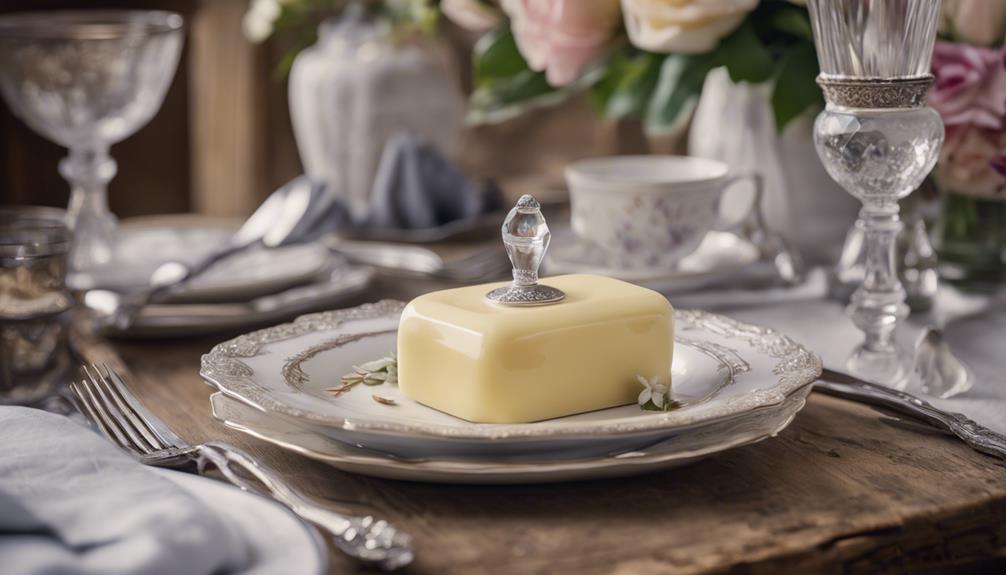
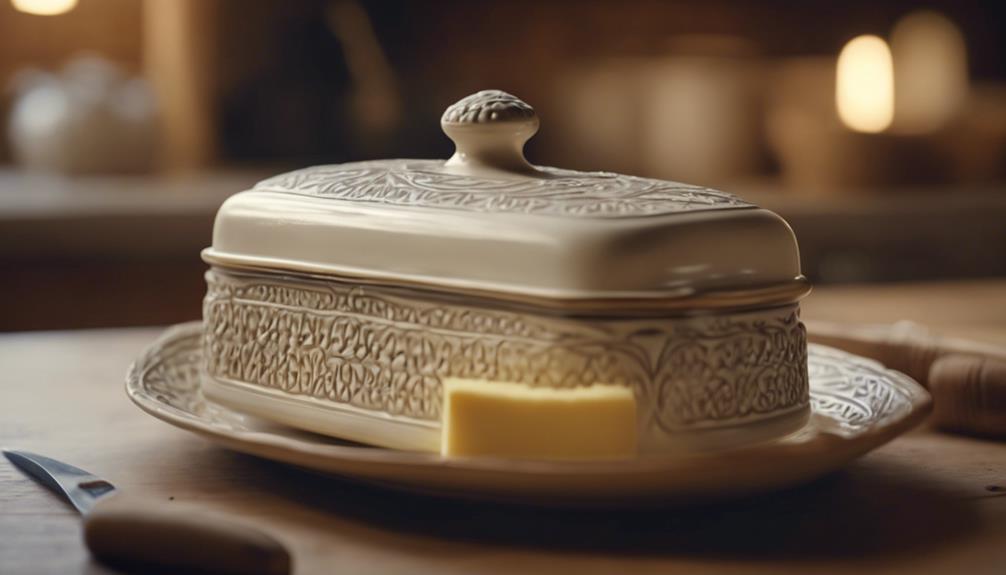
A French butter dish instantly elevates your table setting, infusing it with elegance and a touch of culinary tradition. When you incorporate this charming piece, you're not just adding functionality; you're making a statement. Typically crafted from porcelain, a French butter dish brings a refined, sophisticated element to your dining experience.

Imagine your guests' delight when they see a beautiful French butter dish at the center of your table setting. It's not just about the aesthetics; it's about the experience. The porcelain material not only looks stunning but also keeps your butter at the perfect spreadable consistency. This small yet significant detail can transform an ordinary meal into a memorable dining occasion.

Incorporating a French butter dish into your table setting adds a layer of authenticity and charm. It's a nod to French culinary traditions, showing that you appreciate the finer things in life. Whether you're hosting a casual brunch or an elegant dinner, this porcelain piece seamlessly fits any occasion, enhancing your overall table decor.

Frequently Asked Questions

How to Use a French Butter Dish?

To use a French butter dish, fill the lid with room temperature butter. Add water to the base for an airtight seal. Regularly refill the water and add salt to prevent mold. Enjoy fresh, spreadable butter daily.

What Is the Correct Way to Use a Butter Dish?

Using a butter dish is like giving your butter a cozy home. Pack softened butter into the lid cavity, fill the base with water, and seal it. Refill the water regularly and add salt to prevent mold.

Advertisement

Why Do You Put Water in a French Butter Dish?

You put water in a French butter dish to create an airtight seal that preserves freshness. This water barrier also regulates temperature, ensuring the butter stays spreadable. Adding salt to the water can prevent mold and extend freshness.

What Is the Benefit of the French Butter Dish?

The benefit of the French butter dish is that it keeps your butter fresh and spreadable at room temperature. You'll enjoy enhanced taste and texture, as it prevents oxidation and off flavors. Perfectly spreadable butter awaits!

Conclusion

You've set the scene with a French butter dish, but the magic is just beginning. Imagine the delight of spreading perfectly softened butter on your morning toast.

As you fill the water reservoir and place the lid, you're not just preserving butter; you're embracing elegance.

Now, the suspense builds—will you amaze your guests with this touch of French sophistication? Maintain it well, and your table setting will always have that je ne sais quoi.

Advertisement

Ready to impress?

Continue Reading
Advertisement

Butter Basics

What if You Buttered Up Your Life with “Butter”?

Published

on

By

An image of a slice of toast with melted butter, oozing with richness and flavor

Have you thought about the idea of making your own delicious and nutritious butter at home? Imagine being able to create that rich, creamy delicacy right in your own kitchen!

In this article, we will delve into the world of butter, exploring its various types and culinary uses. We will also uncover the science behind making perfect butter at home and dive into the fascinating history of this beloved ingredient.

Get ready to embark on a buttery adventure that will leave you craving for more.

Key Takeaways

  • Grass-fed butter is rich in essential vitamins and fatty acids, promoting healthy skin, bones, and immune system.
  • Homemade butter allows for control over ingredients, avoiding unhealthy additives or preservatives.
  • Flavored butter options and vegan alternatives offer diverse culinary exploration and cater to different dietary preferences.
  • Proper temperature during the butter-making process is crucial for achieving the desired consistency and yield.

The Health Benefits of Homemade Butter

If you make your own butter, you’ll enjoy the health benefits that come with it. One of the main benefits of grass-fed butter is its high nutrient content. Grass-fed cows produce milk that is rich in vitamins A, D, E, and K. These vitamins are essential for maintaining healthy skin, strong bones, and a properly functioning immune system.

Advertisement

Grass-fed butter also contains a healthy balance of omega-3 and omega-6 fatty acids, which are important for brain health and reducing inflammation in the body.

Additionally, making your own butter at home allows you to control the ingredients, giving you the freedom to create flavored butter using herbs, spices, or even fruits. This allows you to add extra flavor and nutrients to your dishes without relying on store-bought options that may contain unhealthy additives or preservatives.

Exploring Different Types of Butter

There are various types of butter available for exploration. When it comes to flavored butter, the options are endless. From savory garlic butter to sweet cinnamon butter, these variations add a burst of flavor to any dish.

Additionally, for those following a vegan lifestyle, there are plenty of vegan butter alternatives to choose from. Made from plant-based oils like coconut or olive, these spreads provide a similar creamy texture and taste. They are perfect for baking or spreading on toast.

Exploring different types of butter can be a fun and delicious journey, allowing you to elevate your meals and cater to different dietary preferences. So go ahead and indulge in the world of flavored butter and vegan alternatives to discover new and exciting flavors.

Advertisement

Butter as a Culinary Ingredient: Tips and Tricks

To enhance your culinary skills, try incorporating butter into your recipes using these helpful tips and tricks.

Butter is not only a rich and creamy ingredient, but it can also be used as a vegan alternative. For those who follow a plant-based diet, there are several substitutes available such as vegan butter or margarine made from plant oils. These alternatives can be used in baking, cooking, or spreading on toast.

Additionally, using flavored butter can elevate your dishes to a whole new level. Get creative with flavor combinations like garlic and herb butter for roasted vegetables or lemon and dill butter for grilled fish. The possibilities are endless, and flavored butter can add depth and complexity to your favorite recipes.

Advertisement

The Science Behind Making Perfect Butter at Home

Creating homemade butter is a fascinating process that involves churning cream until it separates into butter and buttermilk. The chemistry of churning butter is a delicate balance of fat and water molecules. Temperature plays a crucial role in butter making.

Here are some key points to consider:

  • Cream should be at a slightly warmer temperature, around 50-55°F, to ensure proper separation.
  • Churning at too low a temperature can result in a longer process and less yield.
  • Conversely, churning at too high a temperature can cause the butter to become greasy and not hold its shape well.
  • The ideal temperature range allows for the fat globules to coalesce and form a solid mass.
  • The process can be accelerated by using colder cream or a colder churning environment.

Understanding the chemistry and temperature requirements of butter making ensures a successful outcome.

Now, let’s uncover the history of butter: from ancient times to today.

Uncovering the History of Butter: From Ancient Times to Today

Advertisement

Let’s delve into the fascinating history of butter, from ancient times to today.

Butter has played a significant role in the cultural traditions of various regions around the world. In Europe, for example, butter has been a staple in cooking and baking for centuries, symbolizing richness and indulgence.

In India, ghee, a form of clarified butter, holds great cultural and religious significance and is used in traditional ceremonies and rituals.

The environmental impact of butter production, however, is a growing concern. The dairy industry contributes to greenhouse gas emissions and deforestation, as well as water pollution from runoff.

Sustainable practices, such as organic farming and reducing food waste, are being implemented to mitigate these effects.

Advertisement

It is crucial to balance the cultural importance of butter with sustainable production methods for a better future.

Frequently Asked Questions

How Many Calories Are in a Serving of Homemade Butter?

A serving of homemade butter typically contains around 100-120 calories. It is important to note that butter is high in saturated fat and should be consumed in moderation. However, it does provide some nutritional benefits, such as being a good source of vitamin A.

What Is the Shelf Life of Homemade Butter?

The shelf life of homemade butter varies depending on storage methods. It can last up to two weeks in the refrigerator and up to six months in the freezer. Proper storage is crucial to maintain its freshness.

Can Homemade Butter Be Used as a Substitute for Margarine in Baking Recipes?

If I were to use homemade butter as a substitute for margarine in baking, I would ensure it’s properly chilled and the moisture content is controlled. This way, the butter can provide a richer flavor and better texture to the baked goods.

Are There Any Potential Allergens in Homemade Butter?

There are potential health risks associated with homemade butter, including the possibility of allergens. It’s important to consider the source of ingredients and proper hygiene practices. Store-bought butter may offer more safety assurances.

Advertisement

Can Homemade Butter Be Frozen for Long-Term Storage?

Yes, you can freeze homemade butter for long-term storage. It’s important to wrap it tightly to prevent freezer burn. There are many homemade butter recipes available online that can guide you through the process.

Conclusion

As I churned the cream, a sense of satisfaction washed over me. The process of making homemade butter had not only given me a delicious spread for my toast, but also a deeper understanding of its health benefits and culinary versatility.

Each rich, golden pat symbolized the nourishment and creativity that butter brings to our lives. Delving into its history, I saw how this humble ingredient has stood the test of time, evolving with us.

So, next time you see a stick of butter, remember the power it holds and the possibilities it offers.

Advertisement
Continue Reading

Butter Basics

What Happens if You Use Expired Shea Butter on Your Skin?

Published

on

By

An image of a cracked, discolored jar of expired shea butter, oozing with a rancid odor

As someone who is passionate about taking care of my skin, I have learned the importance of using high-quality products. But what happens if we accidentally use expired shea butter? Let me tell you, the results are not good.

Signs of expired shea butter include changes in texture, loss of nutritional benefits, and potential skin irritation. Plus, there’s a risk of mold or bacteria growth.

In this article, I’ll delve into the potential dangers and safety concerns of using expired shea butter, so you can make informed decisions for your skincare routine.

Key Takeaways

  • Using expired shea butter can lead to reduced skin softness and decreased skin elasticity.
  • Expired shea butter may cause dry and rough skin, as well as a lack of natural glow.
  • There is a potential risk of mold or bacteria growth on expired shea butter, which can result in skin irritations, infections, and allergic reactions.
  • To ensure safety and effectiveness, it is important to check the expiration date, store shea butter properly, and avoid using expired products to prevent bacterial or fungal contamination.

Signs of Expired Shea Butter

If you’re wondering how to tell if your shea butter has expired, you can look for changes in texture and smell. Shea butter typically has a shelf life of about two years, but it can start to deteriorate over time.

Advertisement

When shea butter expires, it may become grainy or lumpy instead of smooth and creamy. The texture can be a clear indicator that the shea butter is past its prime. Additionally, the smell of expired shea butter can change, becoming rancid or unpleasant.

It’s important to note that using expired shea butter may not be harmful to your skin, but it may not provide the same beneficial effects as fresh shea butter.

Now, let’s dive into the changes in texture and consistency that can occur when shea butter expires.

Changes in Texture and Consistency

To change the texture and consistency of your expired shea butter, simply store it in a warm environment. When shea butter expires, it can become dry, hard, or grainy. However, by subjecting it to heat, you can bring it back to its original smoothness.

Here are some changes you may notice in the appearance of expired shea butter:

Advertisement
  • Loss of its creamy consistency
  • Formation of lumps or clumps
  • Development of a rancid smell

It’s important to note that expired shea butter may not be as effective as fresh shea butter in providing the same nourishing benefits for your skin. Additionally, the shelf life of shea butter can vary depending on how it is stored. Properly stored shea butter can last up to two years, but exposure to air, heat, and light can shorten its lifespan.

Loss of Nutritional Benefits

When shea butter expires, it loses its nutritional benefits and may not provide the same nourishing effects for your skin. As the expiration date approaches, the effectiveness of shea butter decreases, leading to weakened nourishing properties. The natural vitamins and fatty acids that make shea butter so beneficial gradually break down over time, resulting in a diminished ability to moisturize and protect the skin.

The expiration process causes the shea butter to become less potent, reducing its ability to soothe dryness, heal damaged skin, and improve elasticity. Using expired shea butter may not only be less effective but could also potentially cause skin irritations or allergic reactions.

To ensure maximum benefits, it’s essential to check the expiration date and replace your shea butter when needed.

Advertisement

Potential Skin Irritation

Allergic reactions are possible when using expired shea butter, as the quality and potency of the ingredients may have degraded over time. It is important to note that everyone’s skin reacts differently, so what may cause an allergic reaction in one person may not affect another.

Additionally, expired shea butter can also lead to increased bacterial growth, which can further irritate the skin and potentially cause infections.

Allergic Reactions Possible

Using expired shea butter can potentially cause allergic reactions. It is important to be aware of the potential side effects that can occur when using expired skincare products.

Here are some key points to consider:

  • Skin irritation: Expired shea butter may contain harmful bacteria or mold, which can irritate the skin and cause redness, itching, or rashes.

  • Decreased effectiveness: Over time, shea butter can lose its beneficial properties, such as its moisturizing and healing abilities. Using expired shea butter may not provide the desired results.

  • Risk of infection: Expired shea butter can harbor increased bacterial growth, which can lead to skin infections or other complications.

Therefore, it is crucial to always check the expiration dates on skincare products and avoid using expired shea butter to prevent potential allergic reactions and other negative effects on the skin.

Advertisement

Increased Bacterial Growth

The risk of infection can significantly increase due to the increased bacterial growth in expired shea butter. When shea butter expires, it becomes more susceptible to increased microbial contamination. Bacteria can thrive in expired shea butter, leading to a higher chance of contamination when it is applied to the skin. This increased bacterial growth can pose a serious risk to our health.

Additionally, expired shea butter may also have diminished efficacy. Over time, the beneficial properties of shea butter, such as its moisturizing and healing abilities, can deteriorate, making it less effective in providing the desired results.

It is important to check the expiration date of shea butter before using it to ensure its safety and efficacy.

Decreased Effectiveness for Moisturizing

When shea butter expires, its hydration properties become weakened, resulting in a decreased effectiveness for moisturizing the skin.

Additionally, the nourishing benefits of expired shea butter diminish, causing a loss in its ability to provide essential nutrients to the skin.

Advertisement

As a result, the skin may experience reduced softness and a lack of moisture retention, leading to potential dryness and discomfort.

Weakened Hydration Properties

Expired shea butter may not have its full hydration properties intact. When shea butter expires, it can lead to weakened hydration properties, resulting in decreased moisturizing effectiveness. This means that using expired shea butter on your skin may not provide the same level of hydration and moisture as fresh shea butter.

Here are some emotional responses that may arise from using expired shea butter:

  • Frustration: Feeling disappointed that the shea butter you were counting on for hydration is not as effective as expected.
  • Discomfort: Experiencing dryness and roughness on your skin due to the weakened hydration properties.
  • Wasted effort: Realizing that you have been using expired shea butter and the time and money spent on it have gone to waste.

Using expired shea butter not only results in weakened hydration properties but also leads to a loss of nourishing benefits for your skin.

Loss of Nourishing Benefits

Using expired shea butter can result in a loss of the nourishing benefits it provides to your skin. Shea butter is known for its moisturizing and healing properties, but these qualities diminish over time. The expiration date on the packaging indicates the period during which the shea butter is at its best.

Once it has expired, the butter may start to oxidize and degrade, leading to a decrease in its effectiveness. The nourishing vitamins and fatty acids present in shea butter may become less potent, making it less beneficial for your skin. It’s important to check the expiration date and use fresh shea butter to ensure you are receiving all the nourishing benefits it has to offer.

Advertisement

Reduced Skin Softness

When shea butter expires, not only does it lose its nourishing benefits, but it can also lead to reduced skin softness. Expired shea butter may not provide the same level of hydration and moisture to the skin as fresh shea butter does. This can result in several negative effects on the skin, including reduced skin elasticity and decreased moisturization.

Using expired shea butter can leave your skin feeling dry, rough, and lacking the natural glow it once had. The decreased moisturization can also lead to the development of fine lines and wrinkles, making you appear older than you actually are. To ensure optimal skin softness and health, it is important to use fresh shea butter that hasn’t expired.

Potential Mold or Bacteria Growth

If shea butter is expired, there’s a chance that mold or bacteria could grow on it. Using expired shea butter can pose potential health risks as these microorganisms can cause skin irritations, infections, or allergic reactions. It is crucial to properly store shea butter to maintain its freshness and extend its shelf life. Here are some recommended storage methods to prevent the growth of mold or bacteria:

Storage Method Description
Keep it sealed Ensure the shea butter container is tightly sealed after each use to prevent air and moisture from entering, creating an environment conducive to bacterial growth.
Store in a cool place Shea butter should be stored in a cool, dry place away from direct sunlight and heat sources. Elevated temperatures can accelerate the growth of bacteria and mold.
Avoid contamination Do not touch the shea butter directly with your fingers. Instead, use a clean, dry spoon or spatula to scoop out the desired amount to minimize the risk of introducing bacteria.

Safety Concerns and Allergic Reactions

To avoid potential health risks and allergic reactions, it’s important to check the expiration date of your shea butter and store it properly. Expired shea butter can lead to various skin reactions, such as rashes, itching, and redness. The shelf life of shea butter can vary depending on the processing and storage conditions.

Here are a few key points to keep in mind:

Advertisement
  • Expired shea butter may lose its effectiveness and may not provide the desired benefits for your skin.
  • Using expired shea butter can increase the risk of bacterial or fungal contamination, which can lead to infections.
  • Allergic reactions can occur when using expired shea butter, especially if you have sensitive skin or existing allergies.

To ensure your safety and get the most out of your shea butter, always check the expiration date and store it in a cool, dry place away from direct sunlight.

Frequently Asked Questions

Can Expired Shea Butter Be Harmful if Used on the Skin?

Expired shea butter can be harmful if used on the skin. It may lose its effectiveness for hair care and can cause potential side effects on sensitive skin. It’s important to check the expiration date and avoid using expired products.

How Long Does Shea Butter Usually Last Before It Expires?

Shea butter typically lasts up to two years before it expires. To ensure its longevity, store it in a cool, dry place away from direct sunlight. Signs of expiration include a rancid smell and a change in texture.

Can Using Expired Shea Butter Cause Skin Allergies or Irritation?

Using expired shea butter can potentially cause skin allergies or irritation. It’s important to note that expired skincare products may lose their effectiveness and could harbor harmful bacteria, posing risks to skin health.

Can Expired Shea Butter Still Be Effective for Treating Dry Skin?

Using expired shea butter on hair may not provide the same benefits as fresh shea butter. However, it can still be effective for treating dry skin, including eczema.

Is It Safe to Use Shea Butter That Has Mold or Bacteria Growth on It?

Using shea butter with mold or bacteria growth can pose potential health risks. To prevent this, store shea butter in a clean, airtight container in a cool, dry place. Always check for expiration dates to ensure safety.

Advertisement

Conclusion

In conclusion, using expired shea butter can have negative effects on your skin and overall health. The signs of expired shea butter include changes in texture and consistency, as well as a loss of nutritional benefits. It may also cause potential skin irritation and decrease its effectiveness for moisturizing.

Furthermore, there is a risk of mold or bacteria growth, which can be harmful to your skin. To ensure safety and avoid allergic reactions, it’s important to check the expiration date and use fresh shea butter.

So remember, don’t let your skin suffer, and always use fresh shea butter to keep it nourished and healthy.

Continue Reading

Butter Basics

What Does Indian Butter Chicken Taste Like: A Flavorful Experience

Published

on

By

An image that showcases the rich, creamy texture of Indian Butter Chicken, with tender chunks of marinated chicken, immersed in a vibrant orange sauce, infused with a medley of aromatic spices

Curious about trying Indian butter chicken? Get ready for a burst of delicious flavors!

This mouthwatering dish is a symphony of traditional Indian flavors, packed with a creamy and rich sauce that will make your taste buds dance with delight.

The combination of aromatic spices creates a perfect balance of sweet and savory, while the tender and juicy chicken takes it to a whole new level.

Get ready to be transported to a world of delectable aromas and flavors that will leave you craving more.

Key Takeaways

  • Indian butter chicken embodies the essence of Indian cuisine, combining spices and ingredients from diverse regional variations.
  • The creamy and rich sauce in Indian butter chicken creates a symphony of flavors that complement the chicken, leaving you completely satisfied.
  • The flavorful spice blend in Indian butter chicken, including spices like cumin, coriander, turmeric, and garam masala, creates a harmonious balance of heat, sweetness, and creaminess.
  • The succulent and tender chicken in Indian butter chicken is infused with flavor through the marinade and cooking techniques, enhancing the overall taste of the dish.

Traditional Indian Flavors

Advertisement

If you’re craving traditional Indian flavors, you’ll love the rich and aromatic taste of Indian butter chicken. This dish perfectly embodies the essence of Indian cuisine with its unique blend of spices and ingredients.

Indian butter chicken has been influenced by the diverse regional variations found across India, resulting in a dish that is both familiar and distinct. From the fiery flavors of North Indian cuisine to the subtle and delicate tastes of South Indian cuisine, every bite of butter chicken is a journey through the diverse culinary landscape of India.

The combination of tender chicken, marinated in a flavorful blend of spices and cooked in a creamy and rich sauce, creates a harmonious balance of flavors that will leave you craving for more.

Creamy and Rich Sauce

Get ready to indulge in a culinary experience like no other with this discussion on the flavorful spice blend and succulent chicken pieces that make up this mouthwatering dish.

The aroma of the spices will instantly transport you to the bustling streets of India, while the tender chicken pieces will melt in your mouth, leaving you craving for more.

Advertisement

Each bite is a symphony of flavors, with the spices perfectly complementing the juicy chicken, creating a harmonious blend that will leave you completely satisfied.

Flavorful Spice Blend

You’ll love the flavorful spice blend in Indian butter chicken. This popular Indian dish is known for its aromatic and rich taste, thanks to the spice-infused marinade.

The combination of spices like cumin, coriander, turmeric, and garam masala creates a symphony of flavors that will tantalize your taste buds. The marinade not only adds depth to the chicken but also helps to tenderize it, resulting in succulent and juicy pieces of meat.

As the chicken cooks in the creamy and buttery tomato sauce, the flavors meld together, creating a harmonious balance of heat, sweetness, and creaminess. The spices add a subtle kick that is not overpowering but still provides a delightful warmth.

Get ready to savor the explosion of flavors in every bite as the succulent chicken pieces are coated in the fragrant and spiced sauce.

Advertisement

Succulent Chicken Pieces

The succulent chicken pieces become incredibly tender as they cook in the creamy tomato sauce. The juicy marinade penetrates the meat, infusing it with a burst of flavor. The chicken takes on a rich, savory taste that is enhanced by the spices and herbs in the marinade.

The cooking techniques used in Indian butter chicken are essential in achieving the perfect texture and taste. The chicken is first marinated in a mixture of yogurt, lemon juice, and various spices for several hours. This allows the flavors to develop and tenderize the meat.

Then, the chicken is cooked in a buttery tomato sauce, allowing it to absorb the creamy goodness. The result is a dish that is succulent and full of flavor, with the chicken practically melting in your mouth.

Mouthwatering Spices

Advertisement

Experience the explosion of flavors in each bite as the mouthwatering spices in Indian butter chicken tantalize your taste buds. Indian butter chicken is known for its sensational flavor combination and tantalizing aroma that will leave you craving for more. The rich and creamy tomato-based sauce is infused with a blend of aromatic spices, creating a harmonious balance of heat and tanginess. The use of spices like cumin, coriander, turmeric, and garam masala adds depth and complexity to the dish. The tender chicken pieces are marinated in a yogurt-based marinade, which helps to tenderize the meat and enhance the flavors. Each bite is a burst of flavors, with the spices dancing on your palate and leaving a lingering warmth. It is a culinary experience that is truly unforgettable.

Flavor Description
Spicy The spices in Indian butter chicken add a kick of heat, creating a satisfying spicy flavor.
Tangy The tomato-based sauce provides a tangy and slightly acidic taste that balances out the spices.
Creamy The richness of the creamy sauce adds a smooth and velvety texture to the dish.

Perfect Balance of Sweet and Savory

Now that we’ve explored the mouthwatering spices that make up Indian butter chicken, let’s dive into its perfect balance of sweet and savory flavors. When you take that first bite, you’ll be greeted with a symphony of tastes that will leave you craving for more.

The sweet and tangy notes dance on your tongue, creating a delightful explosion of flavors. The complex flavor profile of Indian butter chicken is a result of the carefully selected spices, such as garam masala, fenugreek leaves, and yogurt, which all come together to create a harmonious blend.

The sweetness comes from the caramelized onions and the richness of the cream, while the tanginess is provided by the tomato-based gravy. This combination creates a dish that is both comforting and exciting, making Indian butter chicken a true culinary masterpiece.

Tender and Juicy Chicken

When you take that first bite, you’ll be amazed by how tender and juicy the chicken in Indian butter chicken is. The succulent pieces of chicken are perfectly cooked, with a melt-in-your-mouth texture that is truly satisfying.

Advertisement

The flavors seep into every crevice of the meat, creating a taste explosion in your mouth. The chicken is marinated in a blend of aromatic spices, yogurt, and lemon juice, which not only tenderizes the meat but also infuses it with a myriad of delicious flavors.

As you chew, you can taste the subtle hints of cumin, coriander, and garam masala, along with the rich creaminess of the buttery tomato sauce. The combination of tender chicken and juicy flavors is what makes Indian butter chicken a true culinary delight.

Aromatic and Fragrant Dish

When it comes to Indian butter chicken, you’re in for a flavor explosion. The bold flavors and spices used in this dish will tantalize your taste buds and leave you craving for more.

The creamy tomato-based sauce adds a luscious and rich element to the dish, perfectly complementing the succulent and tender chicken.

Trust me, once you try this dish, you won’t be able to get enough of its delectable combination of flavors and textures.

Advertisement

Bold Flavors and Spices

Bold flavors and spices are what give Indian butter chicken its distinct taste. This classic dish is known for its explosion of flavors that will tantalize your taste buds. The combination of traditional spices like cumin, coriander, and garam masala creates a rich and aromatic profile that is truly unforgettable. The use of these bold flavors elevates the dish to a whole new level, making it a favorite among Indian food enthusiasts. The table below highlights some of the key spices used in Indian butter chicken:

Spice Flavor Profile
Cumin Earthy and nutty
Coriander Citrusy and floral
Garam Masala Warm and pungent

These spices work harmoniously together, creating a symphony of flavors that will make your taste buds dance. As you indulge in the bold flavors of Indian butter chicken, you’ll soon discover why it has become a beloved dish worldwide. And while the spices play a crucial role in its taste, it’s the creamy tomato-based sauce that takes this dish to the next level. [Transition to subsequent section: ‘creamy tomato-based sauce’]

Creamy Tomato-Based Sauce

The creamy tomato-based sauce in Indian butter chicken is what adds a luscious and velvety texture to the dish. This sauce is made by simmering tomatoes, onions, garlic, ginger, and a blend of aromatic spices such as cumin, coriander, and turmeric. The result is a rich and flavorful sauce that coats the tender pieces of chicken, infusing them with a burst of Indian spices.

The creaminess comes from the addition of butter and cream, which adds a luxurious and indulgent touch to the dish. The combination of the tangy tomatoes, aromatic spices, and creamy texture creates a harmonious balance of flavors.

Indian butter chicken is a beloved dish in Indian cuisine, known for its rich, comforting, and satisfying taste.

Advertisement

Succulent, Tender Chicken

The succulent, tender chicken in this dish is cooked to perfection, resulting in a melt-in-your-mouth texture that is incredibly satisfying.

The marinated chicken is packed with flavor, infusing every bite with a burst of aromatic spices.

The juicy meat is so tender that it practically falls off the bone, making it a delight to eat.

The marinade adds an extra layer of richness, ensuring that each piece of chicken is well-seasoned and packed with deliciousness.

The cooking process seals in the moisture, resulting in a juicy and succulent texture that is hard to resist.

Advertisement

Whether you’re a fan of chicken or not, this dish will captivate your taste buds and leave you craving for more.

Conclusion

So, now you know what Indian butter chicken tastes like! It’s a culinary delight that combines the traditional flavors of India with a creamy and rich sauce. The mouthwatering spices create a perfect balance of sweet and savory, making every bite a treat for your taste buds.

The tender and juicy chicken adds a satisfying texture to the dish. And let’s not forget about the aromatic and fragrant aroma that fills the air when this dish is being prepared. In fact, did you know that butter chicken is one of the most popular Indian dishes worldwide? It’s no surprise considering its irresistible flavors and delightful combination of ingredients.

So why not give it a try and experience the magic of Indian butter chicken for yourself?

Advertisement
Continue Reading
Advertisement

Affiliate disclaimer

As an affiliate, we may earn a commission from qualifying purchases. We get commissions for purchases made through links on this website from Amazon and other third parties.

Advertisement

Trending