Connect with us

Recipes & Culinary Uses

5 Ways to Use Cocoa Butter in Your Beauty Routine

Published

on

An image showcasing a pair of hands gently massaging creamy cocoa butter onto smooth, glowing skin

I have always had challenges with dry skin, particularly in the winter months. However, I found the amazing benefits of cocoa butter.

This rich and creamy ingredient has become a staple in my skincare routine, helping me achieve smooth and moisturized skin.

In this article, I’ll share with you the benefits of cocoa butter and how to properly incorporate it into your skincare routine.

Get ready to say goodbye to dryness and hello to glowing, nourished skin.

Key Takeaways

  • Cocoa butter moisturizes and nourishes the skin, leaving it soft and smooth.
  • It contains antioxidants that protect the skin from damage caused by free radicals.
  • Cocoa butter has well-documented effectiveness in reducing the appearance of scars and stretch marks.
  • It soothes dry and irritated skin conditions and restores the skin’s moisture barrier.

Benefits of Cocoa Butter

Advertisement

You’ll love the benefits of cocoa butter for your skin. It helps to moisturize and nourish, leaving it feeling soft and smooth.

When choosing the right cocoa butter product, it’s important to look for one that is 100% pure and unrefined. This ensures that it retains all its natural goodness and effectiveness.

Cocoa butter is rich in antioxidants, which can help protect your skin from damage caused by free radicals. It also contains fatty acids that deeply hydrate and improve the elasticity of your skin.

The effectiveness of cocoa butter in reducing the appearance of scars and stretch marks has been well-documented. Additionally, it has soothing properties that can help alleviate dry and irritated skin conditions.

Incorporating cocoa butter into your skincare routine is a great way to achieve a healthy and radiant complexion.

Advertisement

Choosing the Right Cocoa Butter Product

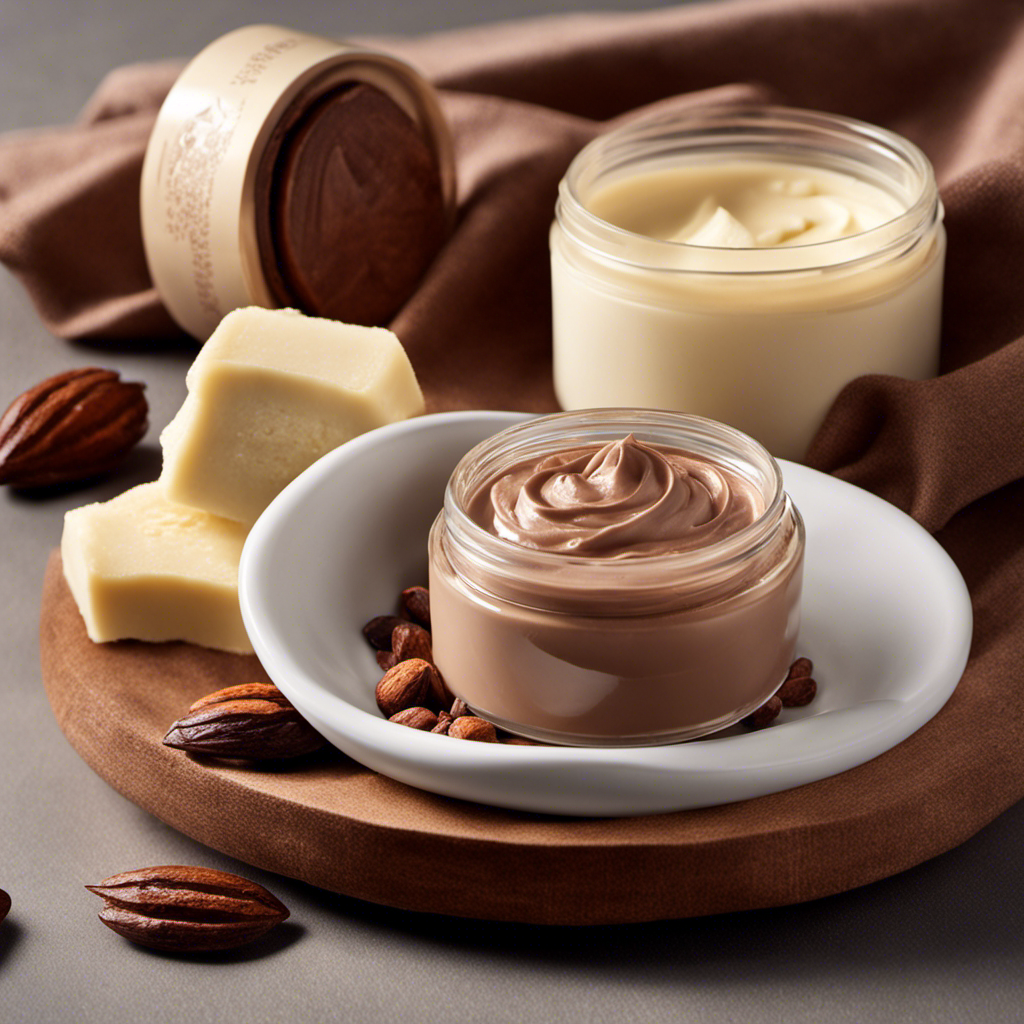
When selecting the appropriate product, it’s important to consider the ingredients and its intended use. Cocoa butter and shea butter are both popular choices for skincare, but they have some key differences. Here are some factors to consider when choosing between them:

  • Cocoa butter has a rich, chocolatey scent that can evoke feelings of comfort and indulgence.
  • Shea butter has a nutty aroma that can make you feel grounded and connected to nature.

Different types of cocoa butter products include solid bars, lotions, creams, and lip balms.

Understanding these factors can help you make an informed decision about which product suits your needs and preferences.

Now that you know how to choose the right cocoa butter product, let’s move on to preparing your skin for its application.

Preparing Your Skin for Cocoa Butter

Advertisement

When it comes to preparing your skin for cocoa butter, there are a few key points to keep in mind.

First, exfoliating your skin before applying cocoa butter can help improve absorption and ensure that the product penetrates deeply.

Additionally, it’s important to hydrate your skin before application, as this can create a smooth and supple surface for the cocoa butter to be applied on.

Lastly, removing dead skin cells is crucial to allow the cocoa butter to effectively moisturize and nourish your skin.

Exfoliating for Better Absorption

To achieve better absorption, it’s important to exfoliate your skin before applying cocoa butter. Exfoliating removes dead skin cells and unclogs pores, allowing the cocoa butter to penetrate deeper into the skin.

Advertisement

Here are some effective exfoliating techniques to consider:

  • Physical exfoliation: Using a scrub or brush to physically remove dead skin cells.
  • Chemical exfoliation: Using products like alpha hydroxy acids (AHAs) or beta hydroxy acids (BHAs) to dissolve dead skin cells.
  • Exfoliating tools: Such as exfoliating gloves or loofahs to gently slough off dead skin.

Regular exfoliation offers numerous benefits for your skin, including:

  • Smoother texture and brighter complexion.
  • Improved absorption of skincare products.
  • Reduction in the appearance of fine lines and wrinkles.

By exfoliating before applying cocoa butter, you can maximize its effectiveness and enjoy its nourishing benefits.

Now, let’s move on to the next step: hydrating before application.

Hydrating Before Application

Make sure you hydrate your skin before applying anything else. Hydrating your skin is essential for achieving optimal results when using cocoa butter or any other moisturizer. When your skin is properly hydrated, it becomes more receptive to the moisturizing benefits of cocoa butter, allowing it to penetrate deeper and nourish your skin from within.

To effectively hydrate your skin, start by cleansing your face with a gentle cleanser to remove any dirt or impurities. Then, pat your skin dry with a clean towel.

Next, apply a hydrating toner or facial mist to replenish moisture and balance the pH of your skin. Follow this with a lightweight, hydrating serum or essence to provide an extra boost of hydration. Finally, seal in all the moisture with a moisturizer or facial oil.

Advertisement

Removing Dead Skin Cells

Exfoliating regularly is essential for removing dead skin cells and revealing a smoother complexion. Dead skin cells can accumulate on the surface of the skin, leading to a dull and uneven appearance. By exfoliating, you can effectively slough off these dead cells and promote the growth of new, healthier skin cells.

Here are some exfoliating techniques that can help you achieve a more radiant complexion:

  • Physical exfoliation: Using a gentle scrub or brush to manually remove dead skin cells.
  • Chemical exfoliation: Applying products with ingredients like alpha hydroxy acids (AHAs) or beta hydroxy acids (BHAs) to dissolve dead skin cells.
  • Exfoliating masks: Using masks formulated with ingredients like clay or enzymes to gently exfoliate the skin.

By incorporating these exfoliating techniques into your skincare routine, you can achieve a smoother and more revitalized complexion.

Now, let’s move on to the next step – applying cocoa butter to dry skin.

Applying Cocoa Butter to Dry Skin

When your skin is dry, you can apply cocoa butter to moisturize and nourish it. Cocoa butter is a natural ingredient that is rich in antioxidants and fatty acids, making it an excellent choice for preventing dry skin. It helps to restore the skin’s moisture barrier, keeping it hydrated and supple. Additionally, cocoa butter has been found to have numerous benefits for eczema, a common skin condition characterized by dry, itchy, and inflamed skin. Its emollient properties help to soothe and relieve the symptoms of eczema, promoting healing and reducing inflammation. By incorporating cocoa butter into your skincare routine, you can effectively prevent dry skin and experience the many benefits it offers for eczema.

Benefits of Cocoa Butter for Eczema
Soothes Itching and Irritation
Reduces Inflammation
Promotes Healing

Using Cocoa Butter for Stretch Marks

In my experience, cocoa butter has been an effective remedy for reducing the appearance of stretch marks.

Advertisement

Not only does it help to moisturize and nourish the skin, but it also promotes elasticity and collagen production.

When applying cocoa butter to stretch marks, I recommend using gentle circular motions to massage the product into the skin, focusing on the affected areas for maximum absorption and results.

Effectiveness of Cocoa Butter

The effectiveness of cocoa butter can vary depending on individual skin types and conditions. However, it is widely known for its moisturizing properties and has been used for centuries to nourish and hydrate the skin. Here are three reasons why cocoa butter is effective:

  • Deep hydration: Cocoa butter contains natural emollients that penetrate deep into the skin, providing long-lasting moisture and preventing dryness.

  • Skin elasticity: Regular use of cocoa butter can improve skin elasticity, making it more supple and reducing the appearance of fine lines and wrinkles.

  • Healing properties: Cocoa butter is rich in antioxidants and vitamins, which help to repair damaged skin cells and promote a healthy complexion.

Overall, cocoa butter is an effective moisturizer that can benefit a wide range of skin types, leaving your skin feeling smooth, hydrated, and rejuvenated.

Application Techniques for Stretch Marks?

Applying cocoa butter regularly can help improve the appearance of stretch marks by nourishing the skin and promoting elasticity. Stretch marks are a common concern for many individuals, especially during periods of rapid growth or weight gain. While there is no surefire way to prevent stretch marks entirely, using natural remedies such as cocoa butter can help minimize their appearance.

Advertisement

Cocoa butter is rich in antioxidants and fatty acids, which help to moisturize and nourish the skin. By keeping the skin hydrated and supple, cocoa butter can improve the elasticity of the skin, making it less prone to developing stretch marks.

To effectively use cocoa butter for stretch mark prevention, it is recommended to apply it generously to the affected areas twice daily, massaging it into the skin in circular motions.

Cocoa Butter for Chapped Lips

To soothe your chapped lips, you can apply cocoa butter for instant relief. Cocoa butter is a natural moisturizer that helps nourish and hydrate the skin.

Here are three reasons why cocoa butter is beneficial for chapped lips:

  • Deep Hydration: Cocoa butter has excellent emollient properties, which means it helps lock in moisture and prevent dryness. It forms a protective barrier on the lips, keeping them soft and supple.

  • Healing Properties: Cocoa butter contains antioxidants that promote skin cell regeneration. Applying cocoa butter to chapped lips helps speed up the healing process, reducing pain and discomfort.

  • Natural Protection: Cocoa butter acts as a shield against harsh environmental factors, such as cold weather and wind. It helps prevent further damage to the delicate skin on your lips.

In addition to chapped lips, cocoa butter can also be beneficial for other dry areas of the body, such as cracked heels and dry cuticles. Its moisturizing properties help soften and nourish these areas, promoting overall skin health.

Advertisement

Incorporating Cocoa Butter Into Your Skincare Routine

When incorporating cocoa butter into your skincare routine, it’s important to be consistent and apply it regularly for best results.

Cocoa butter is a natural ingredient known for its moisturizing properties, making it ideal for dry skin. By incorporating cocoa butter into your daily routine, you can reap the benefits of its hydrating and nourishing effects.

This rich butter helps to lock in moisture and create a protective barrier on the skin, preventing dryness and promoting a smoother, more supple complexion. Not only does cocoa butter provide intense hydration, but it also contains antioxidants that can help to combat free radicals and promote healthier-looking skin.

So, if you’re looking for a natural solution to dry skin, incorporating cocoa butter into your daily routine is a must.

Now, let’s move on to some tips for storing cocoa butter properly…

Advertisement

Tips for Storing Cocoa Butter Properly

Now that you know how to incorporate cocoa butter into your skincare routine, it’s important to understand the proper way to store it. Proper storage is crucial in preventing cocoa butter from melting and losing its beneficial properties.

Here are some tips to ensure your cocoa butter stays in top condition:

  • Keep it in a cool, dry place: Store your cocoa butter in a location away from direct sunlight and heat sources. Excessive heat can cause it to melt and lose its texture.

  • Use airtight containers: Transfer your cocoa butter into airtight containers to prevent moisture and air from getting in. This will help maintain its quality and prevent rancidity.

  • Avoid frequent temperature changes: Rapid changes in temperature can cause condensation, which can affect the texture and quality of your cocoa butter.

Frequently Asked Questions

Can Cocoa Butter Be Used on Sensitive Skin?

Yes, cocoa butter can be used on sensitive skin. It has numerous benefits, including its ability to soothe and moisturize. Cocoa butter is often recommended for conditions like eczema due to its nourishing properties.

What Is the Recommended Frequency of Applying Cocoa Butter to Dry Skin?

The recommended frequency for applying cocoa butter to dry skin depends on individual needs, but generally, using it daily or as needed can provide the benefits of moisturizing, nourishing, and rejuvenating the skin.

Are There Any Potential Side Effects or Allergies Associated With Cocoa Butter?

I’ll admit, cocoa butter sounds like a miracle for dry skin. But let’s address the elephant in the room – potential side effects and allergies. It’s important to be cautious and aware of any potential skin reactions when using cocoa butter.

Advertisement

Can Cocoa Butter Be Used on All Types of Stretch Marks?

Yes, cocoa butter can be used on all types of stretch marks. It is effective for both old and new stretch marks. Additionally, cocoa butter is also beneficial for reducing the appearance of acne scars.

How Long Does It Typically Take to See Results When Using Cocoa Butter for Chapped Lips?

It usually takes a few days to see results when using cocoa butter for chapped lips. I’ve found it to be effective in moisturizing and healing dry hands as well as providing benefits for my hair.

Conclusion

In conclusion, cocoa butter is a versatile and beneficial ingredient to incorporate into your skincare routine. It can help moisturize and nourish the skin, reduce the appearance of stretch marks, and soothe chapped lips.

One interesting statistic is that cocoa butter is rich in antioxidants, which can help fight free radicals and protect the skin from environmental damage.

So, why not give cocoa butter a try and enjoy its many benefits for your skin?

Advertisement
Continue Reading
Advertisement

Recipes & Culinary Uses

Creamy Delight: Best Butter Pecan Ice Cream Recipe for Summer!

Yearning for a creamy summer treat that will leave you craving more?

Published

on

By

butter pecan ice cream

Savor a delicious summer treat with our Butter Pecan Ice Cream recipe. Mix butter, brown sugar, cream, and pecans for a creamy delight. Melt butter, cook pecans, whisk eggs, and blend for a rich flavor. Add pecans, cream, and vanilla, then freeze to perfection. Master this easy-to-follow recipe for a tasty dessert to beat the heat.

Key Takeaways

  • Rich and creamy blend of butter, brown sugar, and heavy cream
  • Toasted pecans for a nutty crunch and flavor
  • Easy-to-follow steps for homemade ice cream perfection
  • Customization options with variations like bourbon or chocolate
  • Perfect summer treat with a decadent, refreshing taste

Recipe Ingredients for Butter Pecan Ice Cream

To create a delectable batch of butter pecan ice cream, gather the essential ingredients listed in the recipe.

You'll need:

  • Butter
  • Brown sugar
  • Heavy cream
  • Pecans

These ingredients combine to bring out the rich and nutty flavors of this classic dessert.

The brown sugar adds a caramel-like sweetness, while the heavy cream contributes to a creamy texture that's essential for a decadent treat.

Pecans, when toasted in butter, provide a delightful crunch and enhance the overall flavor profile of the ice cream.

Cooking Instructions for Homemade Ice Cream

making ice cream at home

Start by melting butter in a skillet to infuse the pecans with a rich, nutty flavor for your homemade butter pecan ice cream.

Here's a quick guide to help you make this creamy delight:

Advertisement
  • Melt butter and cook pecans for flavor.
  • Whisk eggs and combine with half-and-half and brown sugar for a creamy base.
  • Cook until thickened, then mix with eggs in a bowl.
  • Add cream, pecans, and vanilla extract.
  • Freeze the mixture in an ice cream maker.

Following these steps will guarantee your homemade butter pecan ice cream turns out rich and delicious.

Remember to carefully adhere to the manufacturer's instructions for your ice cream maker to achieve the perfect consistency.

Enjoy the process of creating this delightful treat that will surely be a hit during the summer months.

Ice Cream Preparation Steps

ice cream recipe instructions

Mix half and half with brown sugar over medium heat in a large bowl to prepare the ice cream base.

Next, whisk beaten eggs and temper them with the warm milk mixture to create a smooth custard.

Once done, thicken the mixture on low heat, then cool it over an ice bath to achieve ideal texture.

After that, stir in heavy cream, vanilla extract, maple extract, and a pinch of salt for rich flavor.

Advertisement

Remember to refrigerate the mixture for 1 1/2 – 2 hours before churning it into creamy butter pecan ice cream.

This process ensures that the flavors meld together beautifully and the ice cream attains the perfect consistency for scooping and savoring.

Nutritional Information and Tips

healthy eating guidance provided

Considering the rich and creamy nature of homemade butter pecan ice cream, it's important to be mindful of its nutritional content and serving size. When indulging in this delectable dessert, remember these essential tips:

  • Portion Control: Enjoy in moderation to savor the flavors without overindulging.
  • Brown Sugar Sweetness: Opt for a moderate amount of brown sugar to balance sweetness without overwhelming the palate.
  • Room Temperature Ingredients: Confirm ingredients like butter and heavy cream are at room temperature for a smoother texture.
  • Nutritional Awareness: Be mindful that homemade butter pecan ice cream can vary in nutritional content, so adjust ingredients accordingly.
  • Consultation: Seek advice from a nutritionist or healthcare provider for personalized guidance on incorporating this treat into a balanced diet.

Homemade Butter Pecan Ice Cream Variations

delicious homemade ice cream

Explore creative twists on traditional butter pecan ice cream by incorporating different nuts, spirits, sauces, chocolates, and dairy-free alternatives.

For a unique flavor, try substituting pecans with walnuts or almonds in the full recipe. Toast the nuts in a separate bowl until browned and fragrant, then chop them finely enough to coat in the ice cream mixture.

To add a boozy kick, mix in a splash of bourbon or rum to the base as you churn the ice cream. For an extra indulgent touch, swirl in caramel sauce or fudge ripple throughout the mixture.

Incorporate chunks of chocolate or chocolate-covered nuts for a delightful contrast in texture, giving each bite a sweet surprise.

Advertisement

If you prefer a lighter, dairy-free option, consider using coconut milk or almond milk as a substitute for traditional dairy products. These alternatives provide a creamy base while catering to plant-based diets.

Experiment with these variations to create a personalized butter pecan ice cream that suits your taste preferences.

Frequently Asked Questions

What Is the Secret to Making Ice Cream Very Creamy?

To make ice cream very creamy, you use a rich base of ingredients like heavy cream, eggs, and sugar. Chilling the base before churning is crucial for a smoother texture. Adding vanilla extract enhances creaminess, and slow churning prevents a dense outcome.

What Flavor Is the Ice Cream in Butter Pecan?

The ice cream in butter pecan is a delightful blend of buttery richness, vanilla sweetness, and maple undertones, perfectly paired with toasted pecans for a nutty crunch. This flavor combination creates a harmonious and indulgent treat.

What's the Difference Between Butter Pecan Ice Cream and Praline Pecan Ice Cream?

In butter pecan ice cream, you'll savor the buttery richness of pecans blended with a creamy base. On the other hand, praline pecan ice cream highlights caramelized sweetness with a swirl of praline sauce for a delightful flavor contrast.

Advertisement

What Age Group Eats Butter Pecan Ice Cream?

You'll find that adults and older individuals, typically in the 30-60 age group, enjoy butter pecan ice cream. It's a favorite among those with a more refined palate, drawn to its rich and nutty flavor.

Conclusion

So there you have it, folks! Whip up this buttery, nutty delight for a taste of summer in every scoop.

Don't cry over spilled milk – grab a cone and enjoy this creamy treat that's sure to satisfy your sweet tooth.

Get churning and indulge in the best butter pecan ice cream you've ever tasted!

Advertisement
Continue Reading

Recipes & Culinary Uses

Festive Favorites: Best Peanut Butter Blossoms Recipe for Holidays!

Unleash the ultimate holiday baking magic with the best Peanut Butter Blossoms recipe – an irresistible treat that will elevate your festive celebrations!

Published

on

By

holiday baking with flair

Elevate your holiday baking with the ultimate Peanut Butter Blossoms recipe. Cream together peanut butter, butter, sugars, and salt, then add egg and vanilla. Roll dough into balls, coat in brown sugar, bake until golden, then press a Hershey's kiss on top. Adjust baking time as needed. Explore ingredient swaps for a personalized touch. Enjoy with hot cocoa or pair with savory dishes. For more tips, ideas, and customization options, the recipe holds more festive surprises.

Key Takeaways

  • Cream together peanut butter, butter, sugars for rich flavor.
  • Bake at 375°F for 8-10 minutes for soft, chewy cookies.
  • Customize with ingredient swaps like almond butter or maple syrup.
  • Pair with savory dishes or hot cocoa for holiday enjoyment.
  • Press Hershey kisses onto warm cookies for a classic finish.

Ingredients for Peanut Butter Blossoms

For the classic Peanut Butter Blossoms recipe, gather peanut butter, butter, sugar, an egg, and Hershey's kisses as your essential ingredients.

Peanut butter is the star, offering a rich flavor that blends perfectly with the sweetness of the cookies.

Butter plays a pivotal role by adding moisture and richness to the dough, ensuring a soft and chewy texture.

The sugar not only sweetens the cookies but also contributes to their festive appeal, making them a perfect treat for any occasion.

Finally, the Hershey's kisses on top provide a delightful chocolatey finish that elevates these cookies to a whole new level of deliciousness.

Advertisement

Together, these ingredients create a harmonious blend of flavors and textures that make Peanut Butter Blossoms a beloved classic for holiday baking or any time you crave a sweet and satisfying treat.

Recipe Steps for Peanut Butter Blossoms

bake peanut butter cookies

To make Peanut Butter Blossoms, start by creaming together peanut butter, butter, sugars, and salt until light and fluffy.

Next, add in the egg and vanilla extract, making sure to mix well to combine all the ingredients thoroughly.

Then, gradually incorporate the dry ingredients into the wet mixture until a smooth dough forms.

Once the dough is ready, roll it into balls and coat each ball generously in brown sugar.

Place the sugar-coated dough balls on a baking sheet, making sure to leave enough space between them for spreading during baking.

Advertisement

Bake the cookies in a preheated oven until they turn a beautiful golden brown.

As soon as the cookies are out of the oven, press a Hershey's kiss into the center of each cookie gently.

The heat from the freshly baked cookies will melt the chocolate just enough to adhere it to the cookie.

These Peanut Butter Blossoms are a delightful treat perfect for Christmas celebrations!

Pro Tips for Making Peanut Butter Blossoms

baking perfect peanut blossoms

To enhance your peanut butter blossom baking experience, consider adjusting the baking time based on your oven's performance for best results.

Additionally, explore ingredient substitutions to cater to dietary preferences or allergies without compromising the flavor or texture of the cookies.

Advertisement

These pro tips can help you customize your peanut butter blossoms while ensuring delicious outcomes.

Baking Time Recommendations

Achieving the ideal texture for your peanut butter blossoms involves baking them at 375°F for 8-10 minutes. This baking duration guarantees that the cookies have a soft and chewy consistency while allowing the Hershey kisses on top to be softened but not completely melted.

Once out of the oven, remember to press the Hershey kisses onto the cookies immediately to secure them in place for that classic appearance.

For the best outcomes, chill the cookie dough for about 30 minutes before baking. This step helps the cookies maintain their shape and prevents excessive spreading during baking, ensuring your peanut butter blossom cookies are perfectly formed and ready to impress during your holiday baking.

Shortening or extending the baking time can alter the texture of the cookies. A quick bake of 6-8 minutes produces softer and chewier cookies, while longer baking times yield a slightly crispier consistency. Stick to the recommended 8-10 minutes for the best soft and chewy peanut butter blossoms.

Advertisement

Ingredient Substitutions

Consider incorporating different ingredients to elevate the flavor and nutritional profile of your peanut butter blossoms. For a healthier option, swap out shortening with unsalted butter to achieve a unique texture and taste in your cookies.

Try using natural peanut butter instead of creamy to add a wholesome twist to the classic recipe. If you're looking to reduce the glycemic impact, substitute brown sugar with coconut sugar in your baking. For a natural sweetener alternative, replace regular granulated sugar with maple syrup in the cookie dough mixture.

Additionally, for a distinct flavor experience, experiment with almond butter as a substitute for peanut butter in your blossoms. These ingredient substitutions can bring a new dimension to your peanut butter blossoms, making them not only delicious but also tailored to your dietary preferences.

Upgrade your baking game this holiday season with these creative twists on a beloved recipe!

Serving Suggestions for Peanut Butter Blossoms

peanut butter cookie recipe

Enhance the enjoyment of your peanut butter blossoms by pairing them with savory dishes like lasagna tortellini soup for a satisfying meal. These classic cookies also complement family-friendly dinners such as easy ground beef shepherd's pie and creamy broccoli cheddar soup, making for a delightful combination. The holiday season calls for cozy treats, and the sweet nuttiness of peanut butter blossoms pairs perfectly with a warm cup of hot cocoa. Whether you're participating in a cookie exchange or looking for a festive touch to your holiday dessert spread, consider rolling the cookies in red, green, and white sugar sprinkles to add a pop of color and fun.

Serving Suggestions Pairing Ideas
Lasagna Tortellini Soup Comforting and hearty meal alongside the cookies
Easy Ground Beef Shepherd's Pie Delicious combination for a family dinner
Creamy Broccoli Cheddar Soup Perfect accompaniment to the nutty cookie flavors

12 Days of Christmas Cookies Recipes

baking traditions for the holidays

Indulge in a variety of delightful Christmas cookie recipes each day during the holiday season. One standout choice is the classic Peanut Butter Blossoms. These holiday cookies feature a peanut butter base topped with a Hershey's kiss, making them a beloved treat for cookie exchanges and festive gatherings.

The process of making these cookies is simple yet rewarding. Start by rolling the dough balls in sugar before baking to add a sweet crunch to each bite. The combination of rich peanut butter flavor and the chocolatey goodness of the Hershey's kiss creates a perfect balance of sweetness.

Advertisement

When enjoying these Christmas cookies, consider pairing them with a glass of milk for a classic and satisfying treat.

Whether you're baking them for your family, a cookie exchange, or a holiday party, Peanut Butter Blossoms are sure to be a hit. Make each day of the holiday season a little sweeter with these delicious cookies.

User Engagement Features

user interaction enhancements

Let's talk about how user interaction features and personalization options enhance your experience with the Peanut Butter Blossoms recipe.

You can engage with others by leaving comments and sharing your results, creating a sense of community around this holiday treat.

Personalization options like name and email entry fields help tailor the experience to your preferences, making it more engaging and enjoyable.

User Interaction Features

Utilizing user engagement features on the website allows for increased participation and feedback from visitors. The comment section enables users to interact with each other and provide valuable feedback on the Peanut Butter Blossoms recipe or share their experiences with Hershey's kisses. By incorporating a reply option, users can engage in conversations, fostering a sense of community around baking these delightful peanut butter cookies.

Advertisement

Moreover, the inclusion of name and email fields not only allows for personalization but also facilitates communication between the website and its visitors. This data storage feature guarantees that users can conveniently access their information for future visits, enhancing their overall user experience.

These user engagement features play an essential role in creating an interactive platform where users can engage, provide feedback, and communicate effectively. Such interaction not only enriches the user experience but also encourages visitors to actively participate in the community surrounding the Peanut Butter Blossoms recipe.

Personalization Options

Enhance your website's user engagement by incorporating personalized options such as commenting, replying, and sharing feedback on the Peanut Butter Blossoms recipe. This level of user interaction not only fosters a sense of community building but also encourages customization and feedback. By allowing users to share their thoughts, results, and experiences with the festive favorites, you create a more engaging and interactive user experience. Additionally, providing users with the option to save their data for future visits and encouraging them to tag @preppykitchen and use #preppykitchen when trying the recipe further enhances their engagement.

Personalization Options Description Benefits
Commenting Users can leave comments on the Peanut Butter Blossoms recipe, sharing their thoughts and experiences. Fosters community building and user engagement.
Replying Users can reply to comments and engage in discussions with other users about the recipe. Encourages active participation and interaction.
Feedback Sharing Users can share feedback on the recipe, providing valuable insights for improvement. Enhances user experience and customization.

Additional Information

clarifying specific details provided

You may find it interesting to know more about the history of the Peanut Butter Blossoms recipe and its cultural significance during the holidays.

  • The Peanut Butter Blossoms recipe's popularity is backed by IRI MULO data, making it a sought-after choice for holiday baking.
  • Copyright for this beloved recipe belongs to The J.M. Smucker Company, a reputable name in the food industry known for quality products.
  • These delightful cookies aren't only perfect for serving at holiday parties but also make excellent gifts due to their festive appeal.

Frequently Asked Questions

Why Are My Peanut Butter Blossoms Dry?

If your peanut butter blossoms are dry, it could be due to using too much flour, overbaking, using natural peanut butter that requires stirring, or not enough butter/shortening. Guarantee precise measurements and follow the recipe closely to maintain moisture.

Why Did My Peanut Butter Blossoms Go Flat?

When making peanut butter blossoms, going flat happens due to overmixing, too much flour, insufficient chilling, or low oven temperature. Remember to avoid these pitfalls. Preheat the oven properly and follow the recipe for perfect blossoms!

What Is America's Favorite Christmas Cookie?

America's favorite Christmas cookie is Peanut Butter Blossoms. Loved for their peanut butter-chocolate combo and nostalgic Hershey's Kiss center, these easy-to-make treats are a holiday staple at parties and gatherings. They're a must-have during the festive season.

Advertisement

What Is Baskin Robbins Peanut Butter Blossom?

You asked about Baskin Robbins Peanut Butter Blossom. It's a delectable seasonal ice cream flavor featuring creamy peanut butter ice cream with a ribbon of more peanut butter and chocolate cookie pieces. Indulge in this festive treat!

Conclusion

Indulge in the warm, gooey goodness of these peanut butter blossoms this holiday season. With the perfect blend of creamy peanut butter and rich chocolate, these cookies are sure to bring joy to your festivities.

Picture yourself surrounded by loved ones, sharing laughter and memories as you enjoy these delicious treats. Let the aroma of freshly baked cookies fill your home and create a cozy, festive atmosphere.

Happy baking and happy holidays!

Advertisement
Continue Reading

Recipes & Culinary Uses

Bite-Sized Treats: Best Peanut Butter Ball Recipe You'll Love!

Adore these heavenly peanut butter balls with a delectable mix of smooth peanut butter, powdered sugar, and vanilla—perfect for indulging in bite-sized bliss!

Published

on

By

delicious peanut butter balls

You'll adore these easy and heavenly peanut butter balls. Mix smooth peanut butter, powdered sugar, and vanilla extract for a delectable dough. Roll into small balls and chill. Dip in melted chocolate, then refrigerate to set. Enhance the flavor with rum extract, nuts, or crushed pretzels. Get creative with colorful sprinkles and different chocolate coatings. Use quality chocolate coating and adjust mix consistency. Store them in the fridge or freezer. Enjoy these mouthwatering treats alone or at gatherings. More tips and delightful variations await!

Key Takeaways

  • Creamy peanut butter, powdered sugar, and vanilla create a smooth dough.
  • Incorporate nuts, rum extract, or pretzels for flavor and texture variety.
  • Use quality chocolate coating like candy melts for best results.
  • Chill peanut butter balls before dipping for easier handling.
  • Store in the fridge or freezer for convenient snacking and serving.

Ingredients and Preparation

To create irresistible peanut butter balls, gather creamy peanut butter, powdered sugar, and vanilla extract as your key ingredients.

Begin by mixing the peanut butter, butter, sugar, and vanilla until you have a smooth dough. Roll this mixture into small balls and chill them before dipping them in melted chocolate.

The type of chocolate you use, such as dark or milk chocolate, will enhance the flavor of your peanut butter balls. After dipping, make sure to refrigerate the balls until the chocolate sets for a perfect finish.

This process guarantees that each bite-sized treat isn't only visually appealing but also bursting with delicious peanut butter and chocolate flavors.

Variations and Enhancements

creative modifications and improvements

You can elevate the flavor of your peanut butter balls by incorporating unique ingredients like chopped nuts or rum extract.

Experiment with different chocolate coatings such as white almond bark or dark chocolate candy melts for a varied taste experience.

Advertisement

Get creative by adding finishing touches like colorful sprinkles to make your peanut butter balls visually appealing.

Flavorful Ingredient Additions

Enhance the flavor of your peanut butter balls by incorporating unique ingredient variations and enhancements. While the classic combination of peanut butter, powdered sugar, and butter creates a delicious dough for your treats, you can take it up a notch by adding flavorful ingredient additions.

Consider mixing in crushed pretzels for a salty crunch that complements the sweetness of the peanut butter. Chopped nuts like almonds or pecans can also add a delightful texture and nutty taste to your chocolate-covered peanut butter balls.

For a burst of fruity flavor, try incorporating dried cranberries or raisins into the dough. These additions not only provide a contrast in texture but also introduce a hint of sweetness that pairs well with the creamy peanut butter.

Another option is to include a sprinkle of cinnamon or a dash of vanilla extract to elevate the overall taste profile of your peanut butter balls. Experiment with these flavorful ingredient additions to create a unique and delectable twist on the classic treat.

Advertisement

Chocolate Coating Options

Experiment with different types of chocolate coatings – dark, white, or milk chocolate – to suit your preferences and elevate the flavor of your peanut butter balls.

When considering the chocolate coating for your crunchy peanut butter treats, here are some options to enhance your culinary creation:

  1. Choose Candy Melts or Almond Bark: Opt for candy melts or almond bark for a smooth and firm chocolate coating that sets well on your peanut butter balls.
  2. Avoid Chocolate Chips: Steer clear of using chocolate chips for coating, as they may contain stabilizers that hinder smooth melting, affecting the overall texture.
  3. Add Colored Sprinkles: For a festive touch, sprinkle colored sprinkles on top of the chocolate coating before it sets to add a pop of color and extra crunch to your peanut butter balls.

Experimenting with different chocolate coatings and techniques can take your peanut butter balls to the next level, ensuring a delightful and indulgent treat for any occasion.

Creative Finishing Touches

To elevate the flavor profile of your peanut butter balls, consider incorporating creative finishing touches through various enhancements and unique variations.

You can enhance the texture by adding chopped nuts or crispy rice cereal to the peanut butter mixture, providing a delightful crunch with every bite.

Experiment with different flavors by using almond extract or rum extract instead of vanilla for a twist on the traditional taste.

Advertisement

For a festive touch, roll the balls in crushed graham crackers, sprinkles, or a sprinkle of sea salt to add a pop of flavor.

Drizzle white chocolate over the dark, semi-sweet, or milk chocolate coating for a visually appealing contrast that will impress your guests.

If you enjoy a crunchy element, try coating the balls in crushed pretzels or toasted coconut before the chocolate sets.

These creative enhancements will take your peanut butter balls to the next level, making them a standout treat at any gathering.

Tools and Tips

crafting with precision

Consider using a 1 tablespoon cookie scoop for consistent sizing when preparing your peanut butter balls. This tool will help guarantee all your treats are uniform in size, making for a neat presentation and even cooking.

Here are some additional tools and tips to enhance your peanut butter ball-making experience:

Advertisement
  1. Invest in Quality Chocolate Coating: Opt for candy melts or almond bark for a smooth and firm chocolate coating on your peanut butter balls. These coatings melt easily and provide a professional finish to your treats.
  2. Adjust Peanut Butter Mixture Consistency: If your peanut butter mixture is too sticky or too dry, adjust the consistency by adding more peanut butter or powdered sugar. This will help you achieve the perfect texture for shaping your balls.
  3. Refrigerate Before Dipping: Prior to dipping your peanut butter balls in chocolate, chill them in the refrigerator. This step will make the balls firmer, making them easier to handle and coat without falling apart.

Storage and Serving Suggestions

great suggestion for storage

For best freshness and presentation of your peanut butter balls, follow these storage and serving suggestions.

To keep your peanut butter balls tasting delicious, store them properly. You can store them in an airtight container in the fridge for up to 1 week or in the freezer for up to 2 months. When freezing, remember to thaw the frozen peanut butter balls before serving by bringing them to room temperature. To prevent them from sticking together, separate the layers of peanut butter balls with wax paper.

Here is a helpful table summarizing the storage and serving suggestions:

Storage Serving Frozen
Airtight container Display on festive tray Thaw before serving
Fridge – 1 week Pair with hot cocoa Bring to room temp
Freezer – 2 months Enjoy at holiday gatherings
Separate with wax paper

Additional Peanut Butter Desserts

peanut butter dessert recipes

Explore a variety of delectable peanut butter desserts to satisfy your sweet cravings.

  1. Peanut Butter Blossom Cookies: Indulge in the classic combination of peanut butter cookies topped with a chocolate kiss for a delightful treat.
  2. Peanut Butter Chocolate Mug Cake: Whip up this easy-to-make single-serving dessert that combines the rich flavors of peanut butter and chocolate in a mug for a quick fix.
  3. Peanut Butter Overload Cookies: For those who can't get enough peanut butter, these cookies are loaded with peanut butter chips, chocolate chips, and chopped peanuts for an explosion of flavor in every bite.

These additional peanut butter desserts offer a diverse selection to cater to your cravings.

Whether you're in the mood for a classic treat like Peanut Butter Blossom Cookies, a quick fix with Peanut Butter Chocolate Mug Cake, or a flavor-packed experience with Peanut Butter Overload Cookies, there's something for every peanut butter lover.

Enjoy these easy-to-make delights whenever you need a sweet pick-me-up!

Recipe Instructions and Nutritional Information

cooking guidance and facts

To create these delectable Peanut Butter Balls, start by blending peanut butter, butter, sugar, and vanilla to form a dough. Roll the mixture into small balls and place them on a baking sheet lined with parchment paper. Chill the peanut butter balls in the refrigerator for about 30 minutes until firm.

Once chilled, melt chocolate in a heatproof bowl over simmering water or in the microwave. Dip each chilled peanut butter ball into the melted chocolate, ensuring they're evenly coated. Place the coated balls back on the parchment paper and let the chocolate set.

Advertisement

Each serving of these delightful treats contains approximately 114 calories.

Store the finished peanut butter balls in the fridge for up to 2 weeks or freeze them for up to 3 months.

Enjoy these decadent bite-sized snacks whenever you crave a sweet and nutty indulgence.

Frequently Asked Questions

Can I Use Chunky Peanut Butter Instead of Creamy for This Recipe?

Yes, you can use chunky peanut butter instead of creamy for this recipe. It will add a delightful texture and extra crunch to your peanut butter balls. Enjoy experimenting with different variations!

How Long Do Chocolate Covered Peanut Butter Balls Stay Fresh?

Like a sweet memory, chocolate-covered peanut butter balls stay fresh for up to two weeks when stored in an airtight container in the fridge. Indulge in these delectable treats within that time frame for best taste.

Advertisement

Can I Freeze the Peanut Butter Balls for Later Enjoyment?

Yes, you can freeze the peanut butter balls for later enjoyment. Simply place them in an airtight container or freezer bag. When ready to indulge, let them thaw in the fridge for a few hours.

What Type of Chocolate Is Best for Coating the Peanut Butter Balls?

For coating the peanut butter balls, semi-sweet or milk chocolate works best. They provide a delicious contrast to the creamy peanut butter filling. Simply melt the chocolate, dip the balls, and enjoy the sweet treat!

Can I Add Chopped Nuts or Sprinkles to the Peanut Butter Balls for Extra Flavor?

You can definitely add chopped nuts or sprinkles to the peanut butter balls for extra flavor. It's a great way to customize your treats and add a delightful crunch or colorful touch to each bite.

Conclusion

Indulge in these irresistible peanut butter balls that are sure to satisfy your sweet tooth cravings.

With just a few simple ingredients and easy-to-follow instructions, you can enjoy these bite-sized treats in no time.

Advertisement

So go ahead, treat yourself to a little taste of heaven and experience the perfect combination of creamy peanut butter and rich chocolate.

You won't be able to resist coming back for more!

Continue Reading
Advertisement

Affiliate disclaimer

As an affiliate, we may earn a commission from qualifying purchases. We get commissions for purchases made through links on this website from Amazon and other third parties.

Advertisement

Trending