Butter Tips and Tricks
3 Simple Ways to Soften Butter Quickly
2025
Making butter soft can sometimes seem troublesome, but worry no more! I’ve gathered the easiest, fastest, and most classic techniques to ensure you get that ideally soft, easy-to-spread butter.
Whether you prefer the room temperature approach, the microwave shortcut, the stove-top technique, or the gentle water bath method, I’ve got you covered.
So, let’s dive in and discover the secrets to effortlessly softening butter for all your baking and cooking needs.
Key Takeaways
- Softening butter without heat can be achieved by using a rolling pin or pounding/rolling the butter between parchment paper.
- Hot water can be used to soften butter by submerging a heatproof dish containing the butter in a bowl or glass filled with hot water.
- Softening butter at room temperature by leaving it out on the counter in a butter dish ensures it stays fresh and free from unwanted odors or flavors.
- Microwaving butter in short bursts of time, grating or pounding it, are alternatives to achieving desired softness without uneven melting.
Different Methods for Softening Butter
There are several different methods for softening butter. One alternative technique for those without a microwave or stove is to use a rolling pin. To soften the butter using this method, take the cold butter out of the refrigerator and place it between two sheets of parchment paper. Then, using a rolling pin, gently pound and roll the butter until it becomes soft and pliable. This method requires a bit of physical effort, but it is effective in softening the butter evenly.
Another method for quick softening in a pinch is to use hot water. To soften the butter with hot water, fill a glass or bowl with hot water from the tap. Then, place the cold butter in a small, heatproof dish and submerge it in the hot water for a few minutes. Make sure not to let any water get into the butter. After a few minutes, remove the butter from the water and it should be soft and ready to use.
These two methods offer convenient alternatives for softening butter when you don’t have access to a microwave or stove.
Room Temperature: The Simplest Way to Soften Butter
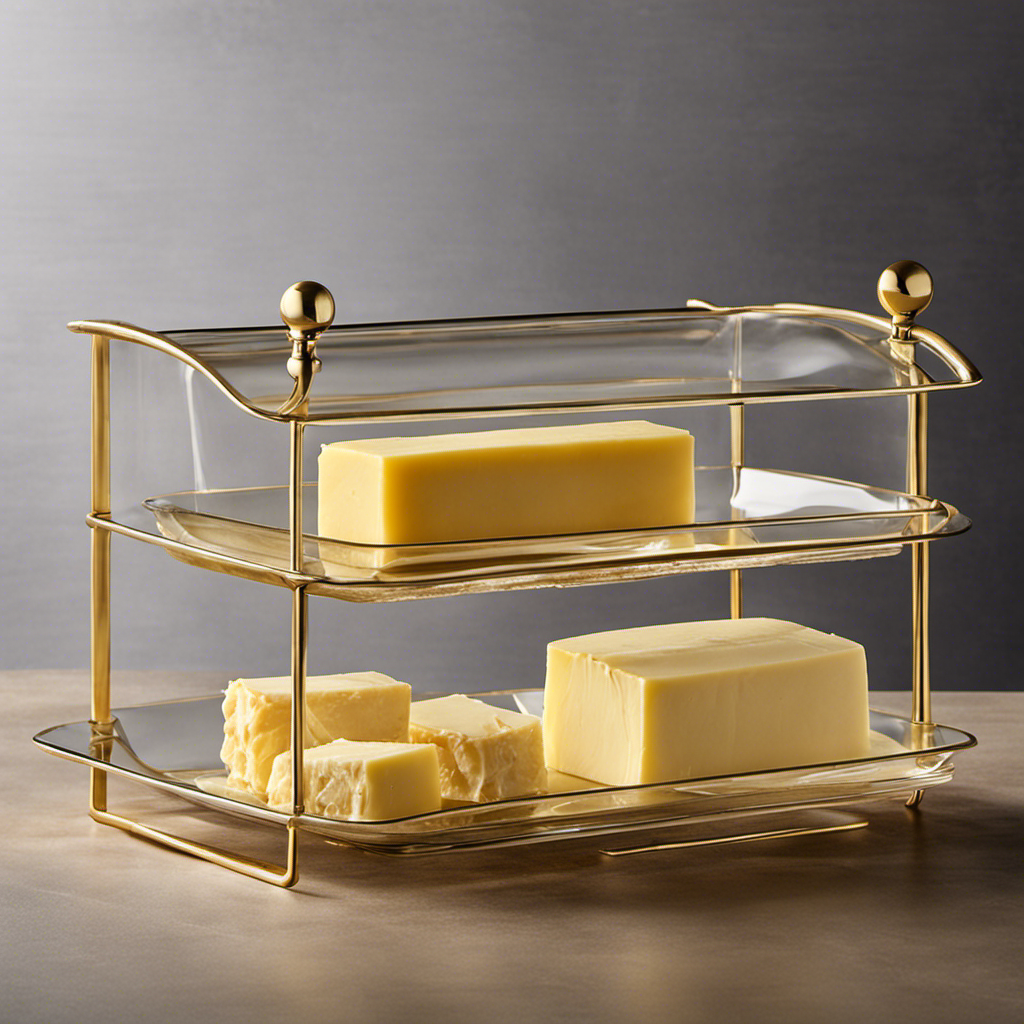
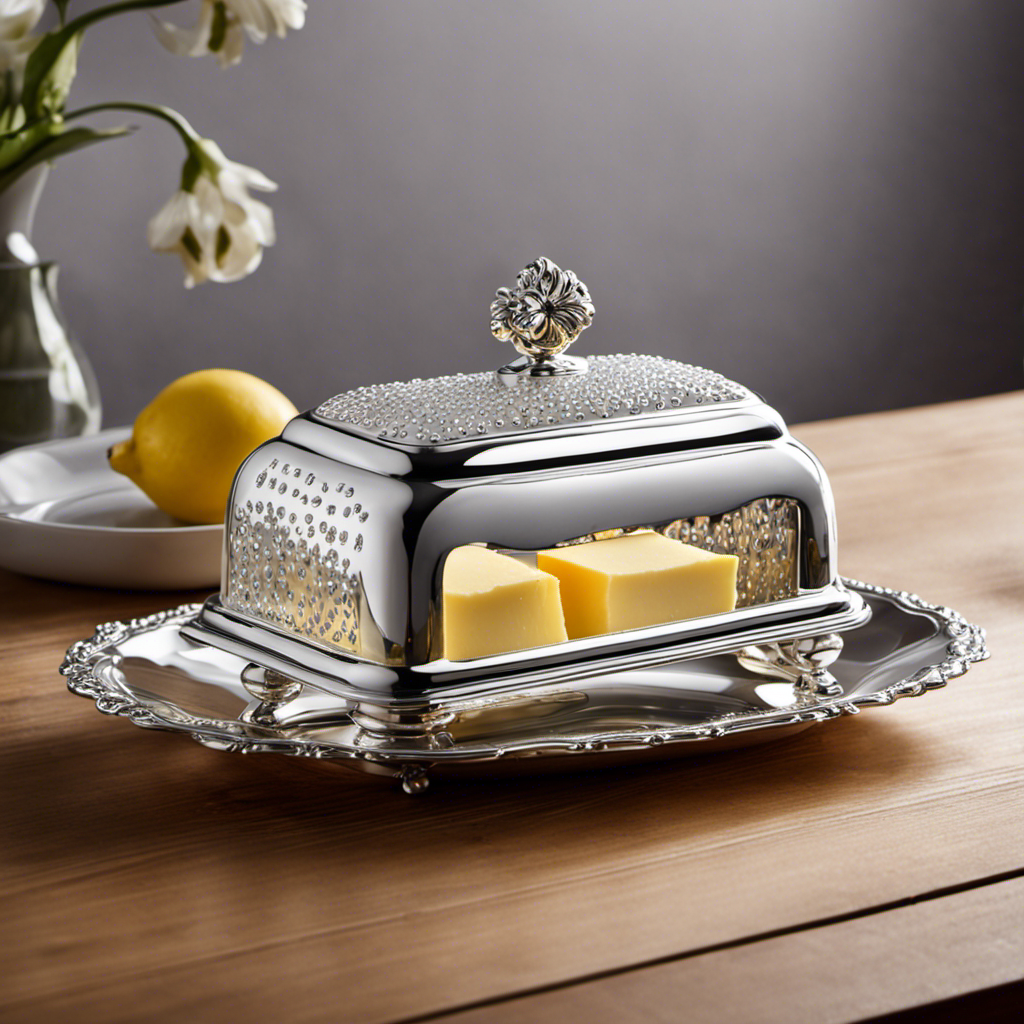
One of the easiest ways to achieve room temperature for your butter is by leaving it out on the counter. This classic method has been used for years and is still effective today. By using a butter dish, you can keep your butter soft and spreadable at all times.
Here are three reasons why using a butter dish is a great way to keep your butter at room temperature:
-
Convenience: Having a dedicated butter dish on your counter allows you to easily access the butter whenever you need it. No more struggling with cold, hard butter straight from the fridge.
-
Freshness: Leaving the butter out in a covered dish ensures that it remains fresh and free from any unwanted odors or flavors that may be present in the fridge.
-
Alternative Uses: Room temperature butter can be used in a variety of recipes, such as baking, cooking, and spreading on toast. Its soft and creamy texture makes it versatile and easy to incorporate into different dishes.
Using a butter dish not only keeps your butter soft, but it also opens up a world of possibilities for alternative uses. So go ahead, leave that butter out on the counter and enjoy the convenience and versatility of room temperature butter.
Using the Microwave: Quick and Easy Softening Technique
Using the microwave is a quick and easy technique to achieve the desired softness for your butter. Compared to the stovetop method, the microwave offers several pros and cons.
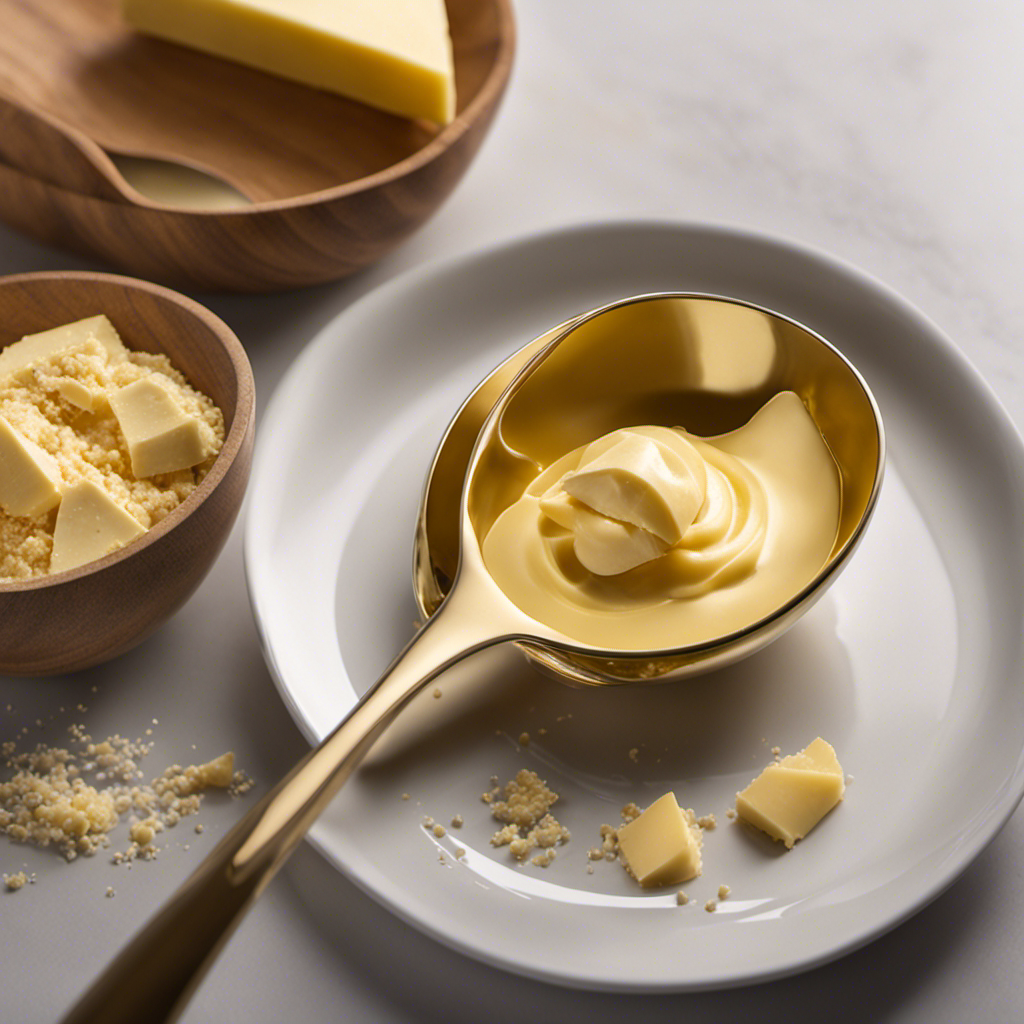
One advantage is its speed. Microwaving butter takes only a few seconds, making it ideal for those who need softened butter in a hurry. However, one downside is that the microwave can sometimes melt the butter unevenly or even cause it to become liquid. To avoid this, it’s important to use short bursts of microwave time and check the butter frequently.
Alternatively, if you don’t have a microwave or prefer not to use it, there are other techniques for softening cold butter. These include grating the butter or pounding it with a rolling pin between two sheets of parchment paper. Both methods help to soften the butter without melting it completely.
Softening Butter on the Stove: A Traditional Approach
To achieve the desired softness for your butter, try the traditional approach of softening it on the stove. This method allows for gradual and controlled melting, ensuring that your butter doesn’t become too liquid or lose its texture.
Here’s how you can soften butter on the stove:
-
Using a double boiler: Fill a saucepan with water and bring it to a simmer. Place a heatproof bowl on top of the saucepan, making sure it doesn’t touch the water. Place the butter in the bowl and allow it to melt slowly, stirring occasionally until it reaches the desired consistency.
-
Softening butter in the oven: Preheat your oven to the lowest temperature setting. Place the butter in an oven-safe dish and let it sit in the oven for a few minutes, checking it regularly. Once it starts to soften, remove it from the oven and give it a stir.
-
Remember to keep an eye on the butter while it’s on the stove or in the oven to avoid overheating or melting it completely.
Softening Butter in a Water Bath: A Gentle and Controlled Method
Softening your butter in a water bath is a gentle and controlled method that ensures the butter doesn’t become too liquid or lose its texture. The benefits of using a water bath for softening butter are numerous.
Firstly, it allows for gradual and even heat distribution, preventing any hot spots that could cause the butter to melt unevenly. Secondly, the water bath method keeps the butter at a consistent temperature, which is ideal for achieving the perfect softness.
To achieve the perfect consistency when softening butter in a water bath, there are a few tips to keep in mind. Firstly, make sure to use a heatproof bowl that fits snugly over the saucepan. This will prevent any steam from escaping and help maintain a constant temperature. Secondly, bring the water to a gentle simmer, not a rolling boil, as excessive heat can cause the butter to melt too quickly. Lastly, stir the butter occasionally to promote even melting and softening.
Frequently Asked Questions
Can I Use Melted Butter Instead of Softened Butter in Recipes?
Yes, melted butter can be used as a substitute for softened butter in recipes. However, it may affect the texture and consistency of your baked goods. It’s best to follow the recipe instructions for optimal results.
How Long Does It Take for Butter to Soften at Room Temperature?
To soften butter quickly and evenly, here are some tips: 1) Cut the butter into small cubes. 2) Let it sit at room temperature for about 30 minutes. These steps will ensure perfectly softened butter for your recipes.
Can I Use a Hairdryer to Soften Butter Quickly?
Using a hairdryer to soften butter quickly is not recommended. It can cause the butter to melt unevenly and become too soft. There are better alternatives, such as cutting the butter into small pieces or using a microwave.
Can I Freeze Butter to Soften It Faster?
I’ve heard freezing butter can help soften it faster, but I’m not sure if it actually works. Are there any alternative methods for softening butter that might be more effective?
Is It Safe to Soften Butter in the Oven?
Microwaving butter can be safe but requires caution to prevent melting or uneven softening. Alternatively, using a hot water bath is a better method as it gently and evenly softens the butter without risk of overheating.
Conclusion
In conclusion, softening butter is a simple yet crucial step in many baking and cooking recipes. Whether you choose to let it come to room temperature naturally, use the microwave for a quick fix, or melt it on the stove, there are various methods to suit your needs.
As the old adage goes, ‘Patience is a virtue,’ and taking the time to properly soften butter will ensure better results in your culinary creations. So, next time you’re in the kitchen, remember to give your butter the tender treatment it deserves.
Diana’s meticulous nature and editorial prowess set the gold standard for our content. With over a decade in the culinary and publishing industries, her guidance ensures that every article perfectly blends information and entertainment. A culinary experimenter, Diana loves whipping up new butter-based concoctions in her kitchen.
Butter Tips and Tricks
How to Store Compound Butters
Find out how to store compound butters for maximum freshness and flavor, and discover more creative uses for these delicious spreads.
To store compound butters, keep them in airtight containers to preserve their rich flavors. You can either refrigerate them at 34°F to 40°F for up to one month or freeze them for longer shelf life of up to six months. For freezing, shape the butter into logs or discs, wrap tightly in plastic wrap, and place in a container or resealable freezer bag, ensuring to remove as much air as possible. Label each package with the type and date to keep track of freshness. If you're curious about how to use your butter creatively, there's more to explore.
Key Takeaways
- Store compound butters in airtight containers to prevent oxidation and maintain flavor quality.
- Refrigerate at 34°F to 40°F for optimal freshness, lasting about one month.
- Freezing extends shelf life up to six months; consider shaping into logs or discs for easy storage.
- Label containers with the butter type and date of preparation for freshness tracking.
- Use clean utensils to avoid contamination and regularly check for off smells or discoloration.
Understanding Compound Butters
Although you might be familiar with regular butter, compound butters take this staple to a whole new level. They're created by blending butter with various flavorings, like herbs, spices, garlic, or even citrus zest. This simple process transforms your basic butter into a versatile ingredient that can elevate countless dishes.
Compound butter recipes can easily enhance your culinary creations, allowing for an array of flavor combinations that can complement any meal.
You can easily customize compound butters to suit your palate. If you love garlic, try mixing in roasted garlic and fresh parsley. For a kick, consider adding chili powder or smoked paprika. Want something sweet? Blend in honey and cinnamon for a delightful spread on warm toast.
Using compound butter is as easy as spreading it on a piece of bread, melting it over grilled meats, or incorporating it into sauces. It's a fantastic way to add depth and complexity to your meals without much effort.
Since these butters are so rich in flavor, you'll find they work wonders in both savory and sweet dishes. Once you grasp the basics of compound butters, you'll never look at regular butter the same way again.
You're ready to explore the endless flavor possibilities that await you!
Choosing the Right Ingredients
When selecting ingredients for your compound butter, focus on freshness and quality to maximize flavor. Start with high-quality unsalted butter as your base. This lets the flavors of your added ingredients shine without the interference of salt.
Next, consider herbs and spices. Fresh herbs like parsley, chives, or thyme deliver bright notes, while dried spices such as garlic powder or smoked paprika add depth. Always opt for organic or locally sourced options when possible.
Don't forget about additional flavor enhancers. Citrus zest from lemons or limes can brighten your butter, while roasted garlic adds a rich, savory dimension. For sweetness, try mixing in honey or maple syrup for a unique twist.
When it comes to texture, think about incorporating nuts, seeds, or cheese. These elements give your compound butter an interesting mouthfeel and can elevate your dishes.
Lastly, avoid overly pungent ingredients that might overpower the butter's natural taste. Balance is key, so choose ingredients that complement each other well.
With the right choices, your compound butter will be a flavorful addition to any meal.
Preparing Your Compound Butter
Start by softening your unsalted butter to room temperature, which makes it easier to mix in your chosen ingredients. You want the butter to be creamy but not melted, so leave it out for about 30 minutes before you start.
Once it's soft, place it in a mixing bowl.
Next, add your selected flavorings like herbs, spices, garlic, or citrus zest. Use a fork or a spatula to blend the ingredients thoroughly into the butter. Make sure everything is evenly distributed for a consistent taste.
If you're feeling adventurous, you can even mix in a bit of cheese or nuts for added texture.
After mixing, taste your compound butter. Adjust the seasoning as needed—perhaps a pinch of salt or a squeeze of lemon juice can elevate the flavor.
Once you're satisfied, shape the mixture into a log or press it into a container. This makes it easier to slice later on.
Best Storage Containers
Choosing the right storage container for your compound butter is crucial to preserving its flavor and texture. You have several options to weigh, each with its own benefits.
Plastic wrap is a simple and effective choice. Just scoop your compound butter onto a sheet, roll it tightly, and twist the ends to seal. This method prevents air exposure, keeping your butter fresh.
If you prefer a more structured option, silicone molds are fantastic. They allow you to freeze your butter in portion sizes, making it easy to grab what you need later.
A small, airtight glass jar is another excellent choice. These jars not only keep your butter safe from air but also make for an attractive presentation if you plan to serve it.
For those who want to store larger quantities, think about using freezer-safe containers with tight-fitting lids. They prevent freezer burn and maintain the butter's quality.
Whatever container you choose, be certain it's labeled with the date and type of butter. This helps you keep track of freshness and guarantees you enjoy your delicious compound butter at its best!
Refrigeration Guidelines
To keep your compound butters fresh, it's essential to store them at the ideal temperature range in your fridge.
Using an airtight container not only helps maintain flavor but also extends their shelf life.
Let's explore some tips to guarantee your butters stay delicious for as long as possible.
Ideal Temperature Range
When it comes to storing compound butters, maintaining the right temperature is essential for preserving their flavor and texture. Ideally, you should keep your compound butters in the refrigerator, where temperatures range from 34°F to 40°F (1°C to 4°C). This range helps to prevent spoilage while keeping the butter spreadable.
Here are some key points to take into account:
- Refrigeration: Always store your compound butters in the refrigerator unless you plan to use them within a few hours.
- Freezing: If you want to extend the shelf life, freezing is a great option. Compound butters can last up to six months in the freezer.
- Serving Temperature: Before serving, let your butter sit at room temperature for about 15-30 minutes to soften, making it easier to spread.
- Check for Freshness: Regularly check your butter for any off smells or discoloration, which can indicate spoilage.
Airtight Container Importance
Storing your compound butters in an airtight container is crucial for maintaining their quality and flavor. When you use an airtight container, you limit the butter's exposure to air, which can lead to oxidation. Oxidation not only diminishes the taste but also affects the color and texture of your butter.
Choose a container that seals tightly to create a barrier against humidity and odors in your refrigerator. Both of these factors can compromise the integrity of your compound butter. If possible, opt for glass or high-quality plastic containers, as they often provide better sealing capabilities than flimsy options.
After packing your compound butter, make sure there's no excess air trapped inside before sealing the lid. If you're using plastic wrap or parchment paper, wrap it tightly to minimize air exposure.
Remember to label your containers with the date and flavor so you can easily identify what you have on hand. This way, you'll enjoy the fresh taste of your compound butters each time you reach for them.
Following these guidelines helps keep your delicious creations ready to enhance any dish.
Shelf Life Tips
Knowing how to properly store your compound butters helps you maximize their shelf life. When you follow these refrigeration guidelines, you'll enjoy their flavors longer:
- Temperature: Keep your compound butter in the coldest part of the fridge, ideally below 40°F (4°C). This helps prevent spoilage and maintains freshness.
- Use an Airtight Container: Although you've heard this before, it's essential. An airtight container prevents exposure to air, which can lead to oxidation and off-flavors.
- Label and Date: Always label your containers with the type of butter and the date you made it. This way, you'll know how long it's been stored and when it's time to use it up.
- Use Within a Month: For the best quality, consume your compound butters within one month. While they can last longer, their flavor might start to decline, so it's best to enjoy them fresh.
Freezing Techniques
Freezing compound butters is a great way to preserve their flavor and versatility for future use. To freeze your compound butters effectively, start by shaping them into logs or discs. This not only makes them easier to store but also allows for convenient portioning when you're ready to use them.
Use parchment paper or plastic wrap to tightly encase each log or disc, ensuring no air can seep in.
Next, place the wrapped butters in an airtight container or a resealable freezer bag. If you're using a bag, try to remove as much air as possible before sealing it. Label each package with the type of butter and the date you made it. This way, you'll keep track of your flavors and know when they're best used.
When storing in the freezer, aim for a temperature of 0°F (-18°C) or lower. Compound butters can typically last up to six months in the freezer, maintaining their taste and texture.
Remember to keep your freezer organized, so you can easily find your compound butters when you need them. Enjoy the convenience of having flavorful butters ready for any dish!
Thawing and Using Frozen Butter
When you're ready to use your frozen compound butter, it's important to thaw it safely to maintain its flavor and texture.
You can try quick methods like placing it in the fridge overnight or using a microwave on low settings.
Once thawed, get creative and experiment with different ways to incorporate it into your meals!
Safe Thawing Methods
To safely thaw frozen compound butters, it's essential to choose methods that preserve their texture and flavor. Here are four effective thawing techniques you can use:
- Refrigerator Thawing: Place the butter in the fridge overnight. This slow method guarantees even thawing while maintaining its quality.
- Cold Water Bath: Seal the butter in a waterproof bag and submerge it in cold water for about 30 minutes. This method is quicker than refrigerator thawing and still keeps the butter's integrity.
- Microwave Thawing: If you're in a hurry, use the microwave on the defrost setting. Make sure to check often to avoid melting. Just a few seconds can make a difference!
- Room Temperature Thawing: Leave the butter at room temperature for about an hour. This method works well but requires your attention to prevent it from getting too soft.
Each of these methods guarantees your compound butter retains its flavor and texture, making it ready for your culinary creations.
Enjoy your butter at its best!
Creative Usage Ideas
Compound butters can elevate your dishes in delightful ways, and knowing how to use them creatively makes all the difference. Start by thawing your frozen compound butter in the fridge overnight or use the microwave in short bursts at low power. Once it's soft, you can easily blend it into sauces or spread it on warm bread.
Think about using compound butter as a finishing touch. When your steak or fish is nearly done cooking, add a slice on top. It'll melt beautifully, infusing the dish with flavor. You can also toss it with vegetables right before serving, turning a simple side into something special.
Another fun idea is to use compound butter in baking. Incorporate it into cookie or muffin recipes for an unexpected twist. You can even create savory mashed potatoes by mixing in a dollop of herb-infused butter.
Don't forget to experiment with your breakfast, too! Melt some compound butter over scrambled eggs or pancakes for a flavorful kick.
With these ideas, you'll discover just how versatile and delicious frozen compound butters can be in your kitchen!
Labeling and Dating Storage
Properly labeling and dating your compound butters is essential to ensuring their freshness and preventing waste.
When you take the time to organize your storage, you'll always know what you have on hand and when it needs to be used. Here are some simple steps to follow for effective labeling and dating:
- Use Airtight Containers: Store your compound butters in airtight containers to prevent exposure to air and moisture.
- Label Clearly: Write the name of the compound butter on the container. Be specific, like "Garlic Herb Butter" or "Spicy Chili Butter."
- Date It: Always include the date you made the butter. This helps you keep track of its freshness.
- Use a Permanent Marker: A permanent marker is your best friend for labeling. It won't smudge, and it'll remain readable even in the freezer.
Tips for Maintaining Freshness
When it comes to keeping your compound butters fresh, a few simple practices can make all the difference. First, always store your compound butters in airtight containers. This prevents exposure to air, which can lead to oxidation and rancidity. If you're using plastic wrap, make sure it's tightly wrapped, ensuring no air pockets remain.
Next, consider portioning your butter into smaller amounts. This way, you only need to open what you'll use, keeping the rest sealed and fresh. You can also freeze your compound butters in ice cube trays. Once frozen, transfer the cubes to a resealable bag, allowing you to grab just the right amount when needed.
Keep your compound butters in the coldest part of the fridge or freezer. Avoid placing them in the door, where temperatures fluctuate. Additionally, check the condition of your butters regularly. If you notice any off smells or discoloration, it's best to discard them.
Lastly, remember to always use clean utensils when scooping out your butter. This helps prevent contamination and extends the life of your delicious creations. By following these tips, you'll enjoy your compound butters at their best for longer!
Frequently Asked Questions
Can I Use Dairy-Free Substitutes for Compound Butter?
Absolutely, you can use dairy-free substitutes for compound butter! Try coconut oil or vegan butter as a base. Mix in herbs or spices, and you'll create delicious, dairy-free spreads that enhance any dish you make.
How Long Can Compound Butter Sit at Room Temperature?
Think of compound butter as a delicate flower. It can sit at room temperature for about two hours before it wilts. After that, refrigerate it to keep its flavor and freshness intact. Enjoy your culinary creations!
Is It Safe to Refreeze Thawed Compound Butter?
Yes, you can refreeze thawed compound butter, but it's best if you do so within a few days. Just remember, the texture might change slightly, so use it in cooked dishes for the best results.
Can I Mix Different Flavors in One Batch of Compound Butter?
Imagine a painter blending vibrant colors on a canvas. You can absolutely mix different flavors in one batch of compound butter, creating a delicious masterpiece that enhances your dishes and tantalizes your taste buds. Enjoy experimenting!
What Are the Best Herbs for Compound Butter Flavoring?
When choosing herbs for compound butter, you can't go wrong with fresh basil, thyme, or chives. Experiment with rosemary or parsley too. Each adds a unique twist, enhancing your butter's flavor profile beautifully.
Conclusion
In the kitchen, compound butters are like little gems, each one holding a burst of flavor waiting to enhance your dishes. By storing them properly, you preserve their unique essence, much like a painter safeguarding their palette. Remember to label and date your creations, ensuring they remain vibrant and ready to elevate any meal. With the right techniques, you'll always have these flavorful treasures at your fingertips, ready to transform the ordinary into something extraordinary.
From sneaky childhood butter licks to penning some of our most popular articles, Jamie’s journey with butter has been lifelong. His culinary background gives him a unique perspective, allowing him to craft mouthwatering articles that educate and tantalize equally. Jamie’s travel adventures revolve around finding the world’s best buttery treats when he isn’t writing.
Butter Tips and Tricks
Understanding Butter Shelf Life
Master the essentials of butter shelf life to keep it fresh and flavorful, but discover the hidden tips that can transform your butter storage.
Understanding butter's shelf life is key to keeping it fresh and tasty. Salted butter generally lasts longer due to the preservative properties of salt. Proper storage is essential; keep butter in airtight containers in the fridge to slow spoilage. You can freeze it for extended shelf life, but make sure to wrap it tightly. Watch for signs of spoilage, like off smells or discoloration, as these indicate it's time to toss it. By mastering these basics, you can enjoy your butter longer and maintain its rich flavor. There's much more to explore about butter storage and preservation techniques.
Key Takeaways
- Salted butter has a longer shelf life due to salt's preservative properties compared to unsalted butter.
- Proper refrigeration slows spoilage; keep butter tightly sealed in airtight containers to maintain quality.
- Signs of spoilage include off smells, discoloration, changes in texture, mold growth, and unpleasant taste.
- For long-term storage, freeze butter in smaller portions wrapped tightly to prevent freezer burn.
- Clean utensils should always be used to avoid bacterial contamination and preserve the butter's integrity.
Types of Butter
When it comes to butter, you've got several types to choose from, each with its own unique qualities.
The most common is sweet cream butter, made from pasteurized cream. It's got a rich, creamy flavor and works well in baking, cooking, or spreading on bread. You might also encounter unsalted butter, which allows you to control the saltiness of your recipes.
Then there's salted butter, which contains added salt for flavor and increased shelf life.
If you're looking for a more intense taste, consider European-style butter. This variety has a higher butterfat content and often boasts a more complex flavor profile, perfect for gourmet dishes.
Clarified butter, or ghee, is another option. It's made by simmering butter to remove water and milk solids, resulting in a rich, nutty flavor that's great for high-heat cooking.
Factors Affecting Shelf Life
Several factors come into play that can impact the shelf life of butter. First, the type of butter you choose matters. Salted butter typically lasts longer than unsalted butter because salt acts as a preservative.
If you're using butter made from grass-fed cows, it might also have a different shelf life due to its fat composition. Historically, butter has been a cherished ingredient in various culinary traditions, valued for its versatility and nutrition; therefore, understanding its longevity is vital.
Butter's role in culinary traditions also suggests that consumers appreciate quality and preservation methods.
Next, the packaging influences butter's longevity. If the butter's exposed to air, light, or moisture, it can spoil more quickly. That's why you should always check for tight seals and avoid using damaged packaging.
Temperature is another vital factor. Butter should be kept cool but not frozen, as extreme temperatures can change its texture and flavor.
Lastly, the presence of additives can affect shelf life too. Some butters contain preservatives, while others may have natural ingredients that could shorten their usability.
Proper Storage Techniques
To keep your butter fresh and flavorful, proper storage techniques are essential. First, always store your butter in the refrigerator. The cold temperature slows down spoilage and helps maintain its quality.
Butter should be kept in an airtight container to prevent absorption of odors, as it can easily pick up flavors from other foods in the fridge. For long-term storage, consider freezing it. Wrap the butter tightly in aluminum foil or plastic wrap, and place it in an airtight container or freezer bag to prevent freezer burn butter storage tips.
If you plan to use your butter within a week or two, you can keep it in a butter dish on the counter, but make sure it's covered. This method allows for easy spreading while still protecting it from contaminants.
Avoid exposing butter to light, heat, or strong odors, as these can affect its taste and texture.
Always use clean utensils to scoop out your butter, as this helps prevent bacteria from contaminating the rest of the product.
Signs of Spoilage
Here are some signs that your butter might be spoiled:
Although butter can have a long shelf life, it's important to recognize the signs of spoilage to guarantee your food remains safe and delicious. Spoiled butter can ruin your recipes and may even cause foodborne illnesses, so it's vital to check for any indicators before using it.
Proper storage methods, such as using airtight containers, can also help maintain butter quality and extend its usability.
- Off smell: If your butter has a sour or rancid odor, it's time to toss it out. Fresh butter should have a creamy, pleasant scent.
- Discoloration: Look for any unusual yellow or brown spots. While some color variation is normal, significant discoloration can be a red flag.
- Texture changes: If your butter feels gritty or grainy instead of smooth, it may indicate spoilage.
- Mold growth: Any visible mold on the surface means the butter is no longer safe to eat.
- Unpleasant taste: If you taste a bit and it doesn't taste right, trust your instincts and discard it.
Best Practices for Usage
When using butter, it's important to follow best practices to guarantee you get the most out of its flavor and texture. First, always store butter in the refrigerator to keep it fresh. If you buy in bulk, consider freezing some. Divide it into smaller portions, wrapping each securely in plastic wrap or foil to prevent freezer burn.
Next, use clean utensils to scoop butter from the container. This helps avoid contamination and extends its shelf life.
When cooking or baking, let the butter come to room temperature to achieve the right consistency for mixing, especially in recipes that require creaming.
If you're unsure about the freshness of your butter, check for any off smells or discoloration before use.
When cooking, consider the smoke point of butter; for higher heat, use clarified butter or a blend with oil to prevent burning.
Frequently Asked Questions
Can I Freeze Butter for Long-Term Storage?
Yes, you can freeze butter for long-term storage. Just wrap it tightly in plastic wrap or foil, then place it in an airtight container. This prevents freezer burn and keeps it fresh for months.
Does Salted Butter Last Longer Than Unsalted Butter?
Salted butter's like a protective cloak; it lasts longer than unsalted butter. The salt acts as a preservative, giving you extra time to enjoy its creamy goodness without worrying about spoilage. So, stock up!
How Can I Tell if Butter Is Still Good After Opening?
To tell if butter's still good after opening, check for off smells, discoloration, or mold. If it smells fine and looks normal, it's likely safe to use. Always trust your instincts when evaluating freshness.
Can I Use Expired Butter Safely in Recipes?
You can use expired butter in recipes, but check for signs of spoilage first. If it smells off or shows discoloration, it's best to toss it. Fresh butter guarantees better flavor and safety in your dishes.
What Is the Ideal Temperature for Butter Storage?
Did you know butter stays fresh for about 1-3 months when stored properly? For ideal storage, keep it in the fridge at 32-35°F. This preserves flavor and texture, ensuring your recipes turn out delicious.
Conclusion
In the world of butter, "A stitch in time saves nine." By understanding the types of butter and how to store them properly, you can enjoy their rich flavor without worry. Keep an eye out for signs of spoilage, and remember that proper usage practices can extend their shelf life. With a little care, you'll make the most of your butter, ensuring it stays fresh and delicious for all your culinary creations.
From sneaky childhood butter licks to penning some of our most popular articles, Jamie’s journey with butter has been lifelong. His culinary background gives him a unique perspective, allowing him to craft mouthwatering articles that educate and tantalize equally. Jamie’s travel adventures revolve around finding the world’s best buttery treats when he isn’t writing.
Butter Tips and Tricks
What Does “Eat It from the Back” Mean? Unveiling the Mystery
Curious about the slang “Eat It from the Back”? Discover its meaning and the context behind this provocative phrase in our detailed explanation.
Language always changes and grows, just like we do. New phrases pop up, surprising us and sparking our interest. Have you heard someone say “eat it from the back” and wondered what it means?
You’re not the only one curious. Slang can make a group feel closer, or leave some feeling left out. In this article, we’re going to look into what “eat it from the back” really means, where it comes from, and how knowing this slang makes your conversations richer. Let’s explore the secrets of today’s slang!
Key Takeaways
- Understanding slang enhances communication.
- “Eat it from the back” is a provocative phrase with varied interpretations.
- Slang evolves with cultural shifts.
- Context is key in deciphering meanings.
- Learning slang can build connections with others.
Understanding Slang: What “Eat It from the Back” Represents
Slang adds a fun and informal side to language. It’s not like formal language at all. Slang shows what’s going on in culture and groups. The term “eat it from the back” is a great example. It shows a certain way of thinking or doing things, unlike traditional words.
Definitions and Usage
To know what “eat it from the back” means, we look at slang overall. It starts in groups of friends and becomes their special way to talk. This phrase means different things based on where and how it’s used. You might hear it in friendly chats, on social media, or in movies. It’s often there to be funny or make a point.
It speaks to those who get the hidden meanings. Knowing slang like this helps you join in on modern talks. It’s especially true with young people and certain groups.
Knowing terms like “eat it from the back” makes talking fun. It lets you show yourself and link up with others in a lighthearted way.
The Evolution of Slang in Modern Language
Slang’s evolution is a captivating journey showing how society and culture change over time. It highlights the inventive nature of language and its need to adapt to new ways of talking. Today’s slang comes from many places, like social media, youth culture, and schools.
Going back, slang started as casual talk among certain groups. In 1895, Willard C. Gore at the University of Michigan found an interesting fact. He and two hundred students collected about five hundred slang words used then. Around 10% described people on campus, and another 25% were about school work. These facts show that slang mirrors our direct surroundings, proving how language evolves.
Now, slang continues to change in interesting ways. For example, “cuffing” refers to starting relationships during the holidays. And terms like “ghosting” or “breadcrumbing” are popular in dating, showing how technology affects our words. These terms help us talk about complex social issues easily.
However, people older than 22 often find new slang confusing. Around 70% of them might not understand Gen Z slang, which indicates a language evolution gap. Teenagers, using social media a lot, shape their special vocabulary. About 95% of them use these platforms to spread new terms. Although slang changes fast, it reflects the values and subtleties of our culture.
Cultural Context: When and Where This Phrase is Used
The phrase “Eat it from the Back” shows how culture impacts our language and how we talk. You’ll hear it at parties, on the web, and during casual chats. Knowing what slang words mean helps people connect and understand each other better in social language.
At fun events, saying this can make people laugh and help friends get along. Yet, in serious settings, it might cause confusion. The phrase’s meaning changes with the cultural scene, showing how differently people interpret it.
Looking into how cultures see phrases like “Eat it from the Back” teaches us about language’s evolution. What we value and expect influences how we understand these phrases. Cultural norms help us agree on meanings within groups but can confuse those outside these circles.
This mix of slang and culture makes us think about language’s impact. Knowing where expressions fit in helps us get better at socializing. Appreciating this can improve how we communicate, bringing us closer to people from all walks of life.
Social Setting | Usage of the Phrase | Potential Reactions |
---|---|---|
Parties | Humorous banter among friends | Laughter and lightheartedness |
Online Forums | Casual discussions, often playful | Engagement or confusion |
Formal Gatherings | Rarely used, often inappropriate | Surprise or discomfort |
Casual Conversations | Informal yet relatable | Acceptance or raised eyebrows |
What Does “Eat It from the Back” Mean? Unveiling the Mystery
The term “eat it from the back” has fascinating roots. It shows how language changes over time. Knowing where it comes from helps us understand its playful side and different meanings.
This exploration also looks at the slang’s common misconceptions. Sometimes, these misunderstandings can hide what the phrase truly means.
Origins of the Phrase
This saying comes from modern slang. It’s often used in a fun way, especially in casual talk and media. Understanding its start shows us how language can evolve, making new meanings.
Common Interpretations and Misunderstandings
People interpret “eat it from the back” in many ways. It might seem funny to some but offensive to others. These slang misunderstandings can cause confusion. Knowing the various meanings can make conversations clearer.
Comparative Phrases: Similar Slang and Their Meanings
“Eat it from the back” becomes more understandable when we look at similar slang. Slang has subtle differences because of where it comes from. American and British slang, for instance, don’t always mean the same thing. This shows how rich language can be.
Here are some slang phrases you might hear:
- Shake it off – Often means getting over a problem, much like facing challenges head-on.
- Piece of cake – Something very easy to do.
- Hit the books – To study very hard, showing commitment.
Like “Eat it from the back,” these phrases express experiences. They carry cultural weight that goes beyond just words.
Let’s look at slang from American and British English. Here are the subtle differences and what they mean:
American Slang | British Slang | Meaning |
---|---|---|
Soda | Fizzy Drink | Refers to carbonated drinks. |
Eighty-six | No longer available | To remove something, often from a list. |
Kick the bucket | Shuffle off this mortal coil | A light-hearted way to talk about death. |
Cool | Brilliant | Shows that you like something or someone. |
This table shows how slang adds unique touches to the way we talk. Seeing the slang side by side helps us appreciate language more.
The Importance of Context in Understanding Slang
Understanding context is key when it comes to slang, like “Eat it from the Back.” Your grasp of these phrases depends a lot on the situation. This look into language context shows how a phrase can mean different things based on intent and how it’s received.
In friendly chats, this phrase can cause laughs and playful talk. But in formal settings, it might be confusing or even upsetting. This shows how slang’s meaning can change with the situation. Knowing slang is important for clear communication.
Context helps us get the meaning of slang. For example:
- Social Media Posts: Slang makes these posts feel casual and engaging.
- Text Messages: Abbreviations like TYSM make texts seem friendly.
- Online Communities: A shared slang makes communication feel immediate, something hard to get otherwise.
Understanding these elements helps us express ourselves better and connect with others. Knowing how meaning changes with context improves our talking skills. It helps us make our point clear.
Situation | Meaning of “Eat it from the Back” | Contextual Impact |
---|---|---|
Casual Gathering | Playful or humorous interaction | Enhances relatability, often leads to laughter |
Professional Setting | Potentially offensive or inappropriate | Can create misunderstandings or discomfort |
Social Media Interaction | Trendy or popular among peers | Creates a sense of belonging and shared culture |
Real-Life Examples: When You Might Hear This Phrase
Knowing real-life slang is key to fitting in with others in daily life. The phrase “eat it from the back” pops up in casual talks for its funny or shocking effect. Here’s when you might hear eat it from the back examples:
- Humorous Banter: In jokes among friends, it adds fun during lighthearted teases or stories. For example, while sharing a laugh, someone might say, “So I told him to just go ahead and eat it from the back” to highlight the joke’s silliness.
- Online Interactions: It’s common in social media’s slang-filled spaces. In comments or memes, it’s used to boost the funny side or show amazement. You might find a comment like, “Dude really went ahead and ate it from the back!” under a trending post.
- Pop Culture References: It appears in movies, shows, or songs where slang captures the audience’s interest. A funny movie scene with this phrase gets people talking, spreading its use in casual chat.
This phrase’s different uses show its flexibility. It brings a special touch to chats among friends or in the public eye.
Responses and Reactions: How People View This Slang
The phrase “eat it from the back” has many slang reactions. People from different backgrounds see it in various ways. For some, it’s funny or a way to show their style and humor. Especially younger folks, those between 18-24 years old, like using slang.
Statistics show that most people use slang every day. About 80% of them do, showing how common slang is in our chats. Nearly half of these slang words come from the internet. This shows how our digital world shapes the way we talk. A good 65% of folks think slang is cool, making it popular in daily life. But not everyone likes it. Some find certain phrases rude or not okay.
How people react to slang like “eat it from the back” varies:
Response Type | Description | Percentage |
---|---|---|
Positive | Enjoys the humor and creativity of slang | 65% |
Negative | Finds the phrase offensive or disrespectful | 25% |
Neutral | Indifferent toward slang usage | 10% |
Slang shows what society thinks and feels. It can tell us which group we fit into. Or, it might show why different ages don’t always get each other. As we talk more on social media, slang grows 30% more popular each year. Understanding what people think about slang helps us talk better with each other.
Conclusion
We’ve looked into what “eat it from the back” means in this article. We talked about its meanings, how it’s used, and its place in modern slang. This phrase shows us how our language mirrors society’s changing views and norms. Understanding slang helps us see the depth in our daily chats.
Slang shows the wide scope of human interaction. It’s shaped by our experiences and relationships. As we explored, slang can express emotions, fears, and hopes. Keeping an open mind towards slang makes our conversations richer. It helps us understand each other better, across different groups.
Being open to how language changes improves how we communicate every day. Slang shows the lively side of language and its importance in culture. By valuing this, you’re better equipped for today’s varied ways of expressing ourselves. Language isn’t just words. It’s a bond that connects us to the rich experiences we all share.
FAQ
What does “Eat it from the Back” mean?
How is slang different from formal language?
Why has slang evolved over time?
In what social settings might I hear “Eat it from the Back”?
What are some common interpretations of the phrase?
How does “Eat it from the Back” compare to other slang phrases?
Why is context important when interpreting slang?
Can you provide examples of when the phrase might be used?
How do people react to the phrase “Eat it from the Back”?
Sunny’s articles radiate enthusiasm, much like her sunny disposition. As our resident “Butter Geek”, she delves deep into the latest butter trends, ensuring our readers are always in the know. Beyond her writing, Sunny’s passion lies in exploring vegan butter alternatives and hosting butter-tasting soirées.
-
Recipes & Culinary Uses6 months ago
Make Homemade Butter from Milk at Home
-
Shopping Guides6 months ago
Where to Buy Raw Butter
-
Butter Tips and Tricks8 months ago
How Many Tablespoons of Butter in 3/4 Cup: A Simple Guide
-
Butter Tips and Tricks8 months ago
Churn Butter the Old Fashioned Way: 3 Traditional Steps
-
Butter Basics5 months ago
Quick Conversion: How Many Tablespoons of Butter Is 1/4 Cup?
-
Butter Tips and Tricks8 months ago
How Much Heavy Cream to Make Butter: A Step-by-Step Guide
-
Butter Tips and Tricks8 months ago
How Many Sticks of Butter in 2/3 Cup: A Simple Guide
-
Recipes & Culinary Uses6 months ago
Make Creamy Butter From Buttermilk