Connect with us

Butter Tips and Tricks

How to Make Vaping Liquid from Buds Using a Butter Maker

Published

on

An image showcasing the process of transforming buds into vaping liquid using a butter maker

I have found a revolutionary technique to create e-liquid for vaping out of buds by utilizing a butter maker.

Did you know that homemade vaping liquid can provide a more personalized and potent experience?

In this article, I’ll guide you through the process step by step, sharing my expertise on selecting the right butter maker, activating the cannabinoids in the buds, infusing butter with cannabis, and much more.

Get ready to elevate your vaping experience with this informative and precise guide.

Table of Contents

Key Takeaways

  • Choosing the right butter maker involves considering factors such as size, materials, and ease of use.
  • Infusing butter with cannabis is a crucial step in making vaping liquid, and there are various methods for infusion.
  • Decarboxylation is essential for activating cannabinoids in the buds and enhancing the potency of the vaping liquid.
  • Proper grinding techniques and mixing infused butter with solvents like propylene glycol and vegetable glycerin are important for maximizing cannabinoid extraction.

[bulkimporter_image id=’2′]

Advertisement

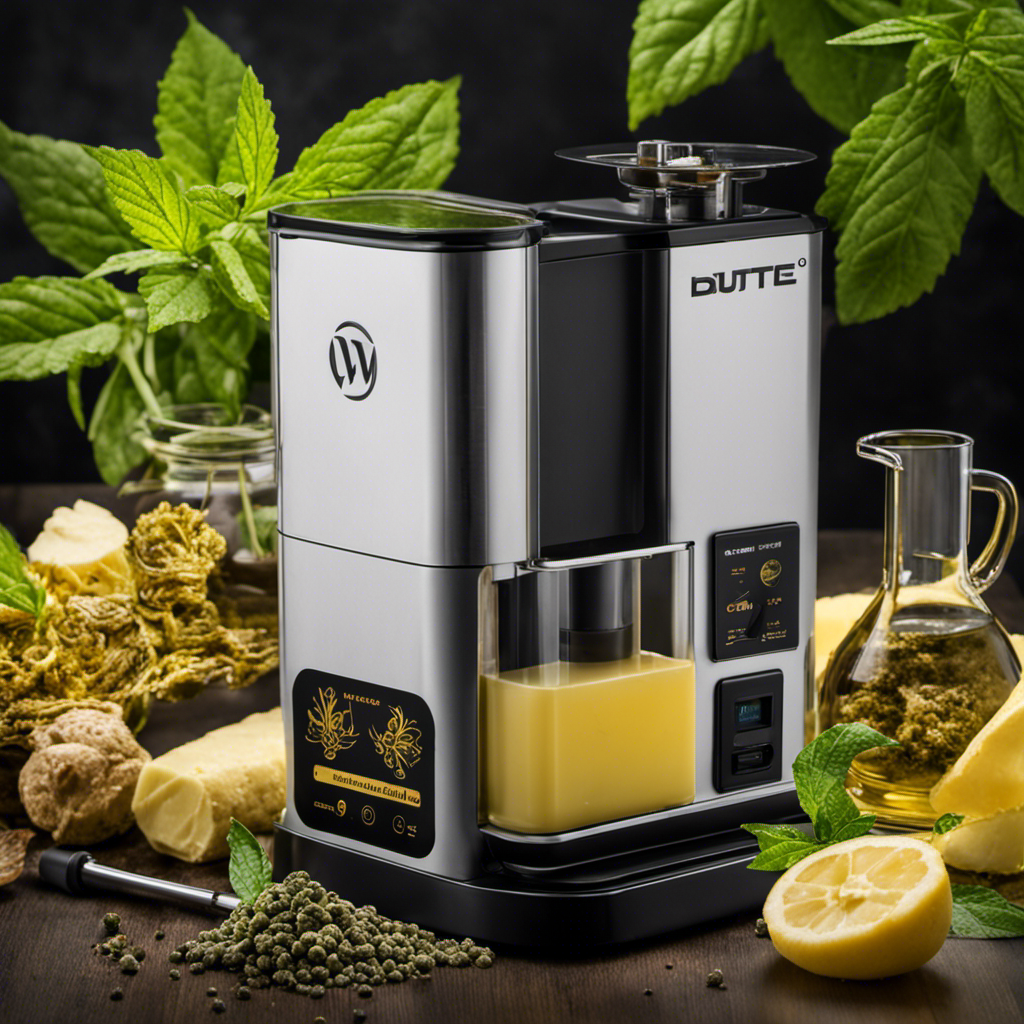
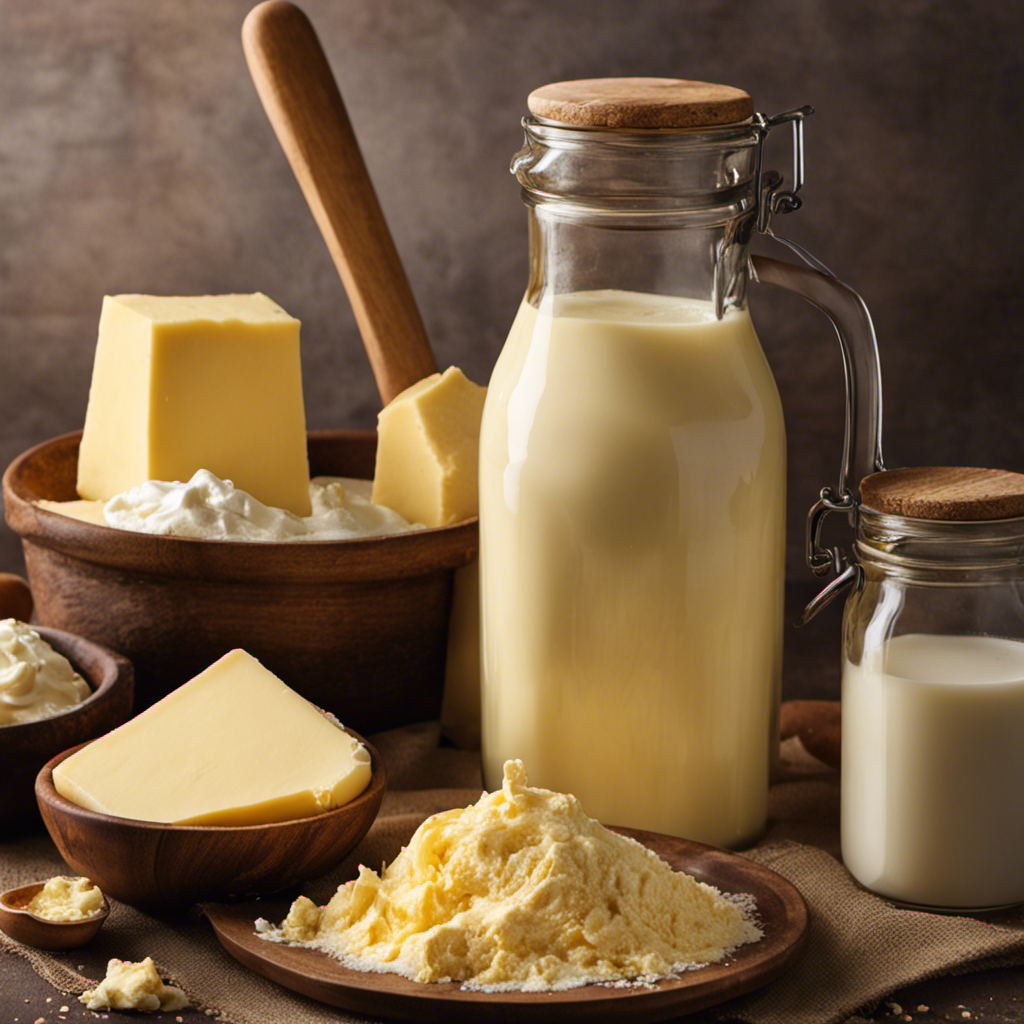
Choosing the Right Butter Maker for Making Vaping Liquid

To choose the right butter maker for making vaping liquid, you’ll need to consider factors such as size, materials, and ease of use.

When it comes to butter maker options, there are a few key factors to keep in mind. Firstly, the size of the butter maker will determine how much vaping liquid you can produce at a time. If you plan on making large batches, you’ll want to opt for a larger butter maker.

Secondly, the materials used in the butter maker can affect the quality of the vaping liquid. Stainless steel butter makers are a popular choice as they are durable and easy to clean.

Advertisement

Lastly, ease of use is an important factor to consider. Look for a butter maker that has clear instructions and is user-friendly.

Now that we’ve covered the basics of choosing a butter maker, let’s discuss the best methods for infusion. One popular method is using the decarboxylation process to activate the cannabinoids in the buds before infusing them into the butter. This ensures a more potent vaping liquid.

Another effective method is using a slow cooker, as it allows for a controlled and consistent temperature during the infusion process.

[bulkimporter_image id=’3′]

Advertisement

Decarboxylation: Activating the Cannabinoids in the Buds

First, you’ll need to activate the cannabinoids in the buds through decarboxylation. This process involves heating the buds at a specific temperature to convert the non-psychoactive cannabinoids, such as THCA, into their active forms, like THC. Without decarboxylation, your vaping liquid won’t have the desired effects.

To successfully activate the cannabinoids, you’ll need to follow these steps:

  1. Preheat your oven to 240°F (115°C).
  2. Break up your buds into smaller pieces and spread them evenly on a baking sheet.
  3. Place the baking sheet in the preheated oven and bake for 45 minutes to an hour. This time and temperature combination will ensure proper decarboxylation without degrading the cannabinoids.
  4. Remove the baking sheet from the oven and let the buds cool completely.
  5. Once cooled, your buds are now ready for infusion into your vaping liquid.

[bulkimporter_image id=’4′]

Selecting High-Quality Cannabis Buds for Making Vaping Liquid

Advertisement

When selecting high-quality cannabis buds, it’s important to consider factors such as aroma, trichome density, and overall appearance. These characteristics can give you a good indication of the potency and quality of the strain.

Here are some key things to look for when choosing potent strains and understanding terpene profiles:

  • Aroma: A strong, pungent smell is often a sign of high-quality cannabis. Look for buds with a pleasant, distinct smell that is indicative of the strain’s terpene profile. Terpenes are the compounds responsible for the aroma and flavor of the plant.

  • Trichome Density: Trichomes are the tiny, crystal-like structures that cover the surface of the buds. They contain the majority of the plant’s cannabinoids, including THC and CBD. Look for buds with a dense coating of trichomes, as this indicates a higher concentration of cannabinoids.

  • Overall Appearance: High-quality buds should have vibrant colors, such as deep greens, purples, or oranges. Avoid buds that are dry, brittle, or have an excessive amount of stems or seeds.

  • Potency: Research the strain’s THC and CBD levels to determine its potency. Higher THC levels typically result in a more potent experience, while higher CBD levels may provide more medicinal benefits.

[bulkimporter_image id=’5′]

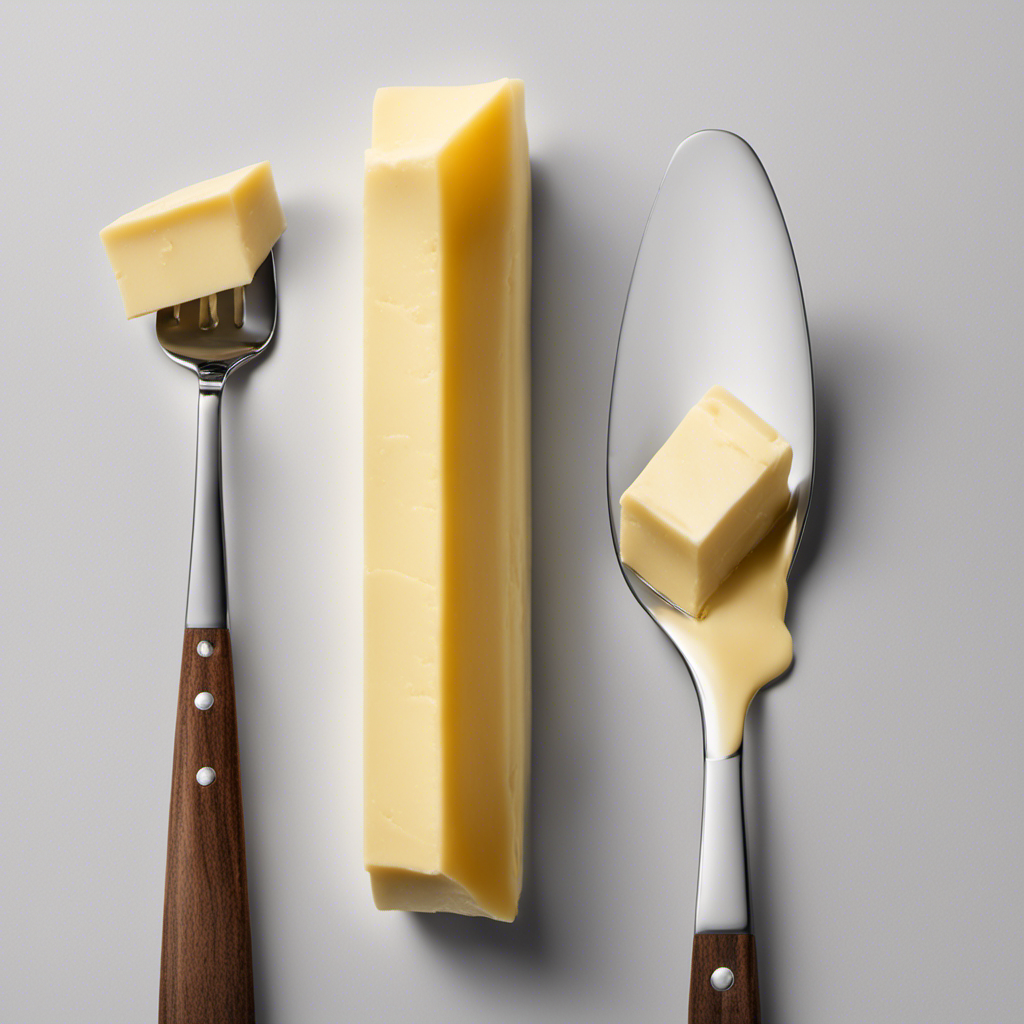
Grinding the Buds to the Optimal Consistency

Grinding the buds to the optimal consistency ensures a smooth vaping experience. When it comes to making vaping liquid from cannabis buds, the way you grind them plays a crucial role in maximizing cannabinoid extraction. Proper grinding techniques help to expose more surface area of the buds, allowing for better extraction of the desired compounds.

Advertisement

To achieve the optimal consistency, it is recommended to use a grinder specifically designed for cannabis. These grinders have sharp teeth that finely shred the buds without causing excessive damage. Avoid using scissors or your hands, as these methods can result in uneven grinding and loss of precious cannabinoids.

To help you understand the importance of grinding, here is a table showcasing the effects of different grinding techniques on cannabinoid extraction:

Grinding Technique Cannabinoid Extraction
Fine Grinding High
Medium Grinding Moderate
Coarse Grinding Low
No Grinding Negligible
Over-Grinding Decreased

As you can see, achieving the right consistency is crucial for maximizing cannabinoid extraction. Fine grinding allows for the most efficient extraction, while over-grinding can actually decrease the extraction efficiency.

[bulkimporter_image id=’6′]

Advertisement

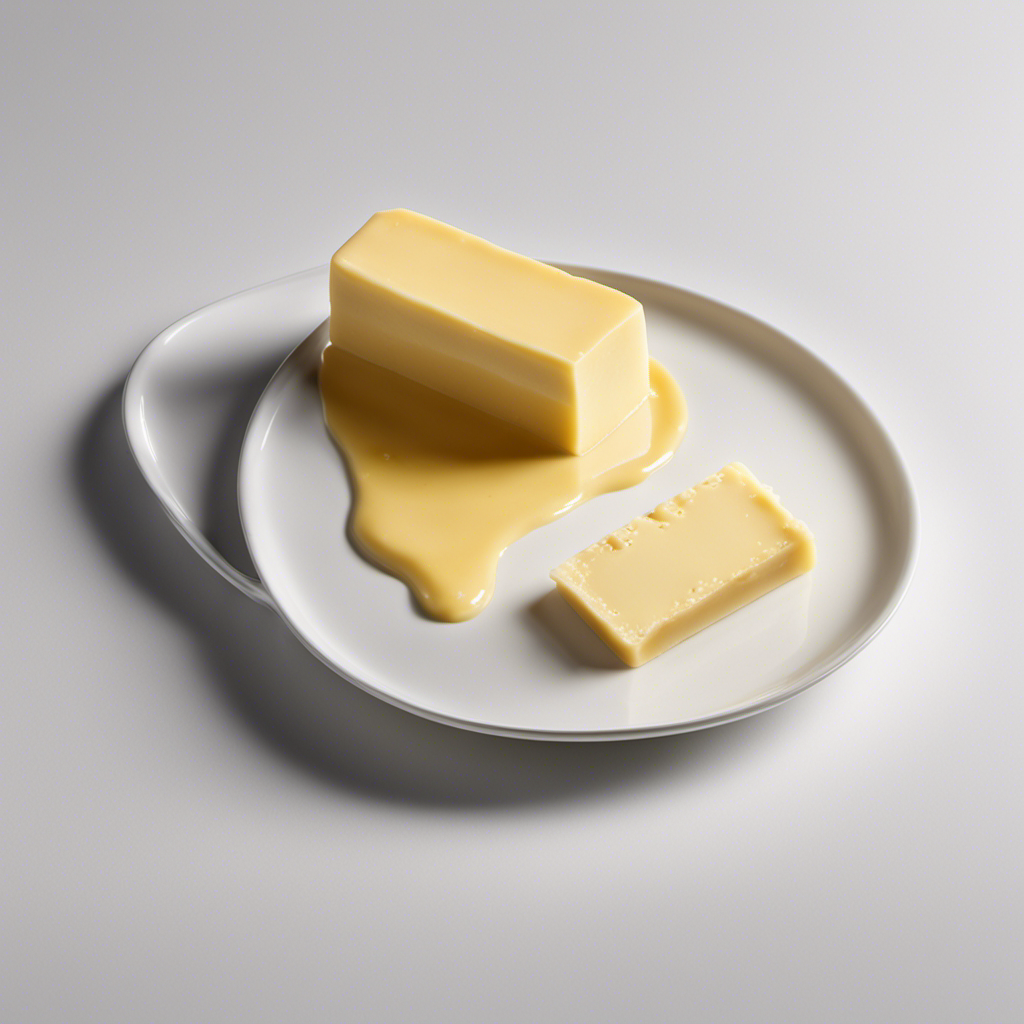
Infusing Butter With Cannabis for Vaping Liquid

When it comes to creating vaping liquid from cannabis, the process of infusing butter plays a crucial role.

There are various methods for infusing butter with cannabis, each with its own advantages and considerations. Understanding these infusion methods is essential for achieving optimal potency and flavor in your vaping experience.

Additionally, exploring the different flavor options available for vaping allows you to personalize your cannabis consumption and enhance your overall enjoyment.

Advertisement

Butter Infusion Methods

To infuse butter with the buds, you’ll want to start by decarboxylating them in the oven. This process involves heating the cannabis at a low temperature to activate its psychoactive compounds. Once decarboxylated, you can proceed with the butter infusion techniques to create a potent vaping liquid.

Here are four methods to optimize infusion time:

  • Slow Cooker Method: Mix the decarboxylated buds with butter in a slow cooker, and let it cook on low heat for several hours. This method ensures a thorough infusion of cannabinoids into the butter.

  • Double Boiler Method: Place a heatproof bowl with butter and decarboxylated buds on top of a pot of simmering water. Stir occasionally for a couple of hours to infuse the butter evenly.

  • Sous Vide Method: Seal the decarboxylated buds and butter in a vacuum-sealed bag and immerse it in a water bath at a controlled temperature for a few hours. This precise method ensures maximum extraction of cannabinoids.

  • Mason Jar Method: Combine decarboxylated buds and butter in a mason jar, seal it tightly, and place it in a pot of simmering water. Let it infuse for a few hours, making sure to monitor the water level.

By using these techniques, you can optimize your infusion time and ensure a potent vaping liquid.

Now, let’s explore how to determine the potency of your final product.

Vaping Liquid Potency

In the previous subtopic, we discussed different butter infusion methods for making vaping liquid from buds. Now, let’s explore the potency of vaping liquid and its effects on lung health.

Advertisement

When it comes to vaping liquid dosage, it’s crucial to understand that the potency can vary depending on the concentration of THC or CBD in the liquid. To help you understand this better, here is a table showcasing different dosage levels and their potential effects:

Dosage Level Effects
Low Mild relaxation and euphoria
Moderate Increased relaxation and pain relief
High Intense euphoria and potential impairment

It’s important to note that vaping liquid, like any other form of cannabis consumption, may have an impact on lung health. While vaping is generally considered less harmful than smoking, it is not without risks. Some studies suggest that vaping can cause lung irritation and inflammation, although more research is needed to fully understand the long-term effects.

Now that we have a better understanding of vaping liquid potency and its potential effects on lung health, let’s move on to exploring the exciting world of flavor options for vaping.

Flavor Options for Vaping

Now that we’ve covered the potency and effects of vaping liquid, let’s explore the exciting world of flavor options available for vaping.

When it comes to vaping, the possibilities for flavors are virtually endless. Here are some popular options to consider:

Advertisement
  • Fruity flavors: From juicy watermelon to tangy citrus, fruity flavors can transport you to a tropical paradise with every puff.

  • Dessert flavors: Indulge your sweet tooth with flavors like creamy vanilla custard or rich chocolate brownie.

  • Minty flavors: Refresh your senses with cool and invigorating mint flavors that leave a refreshing aftertaste.

  • Terpene-infused flavors: Terpenes are aromatic compounds found in cannabis, and adding them to your vaping liquid can provide additional benefits such as relaxation or focus enhancement.

For those who enjoy a hands-on approach, DIY flavoring options are also available. By mixing different flavor concentrates, you can create your own unique blends and tailor your vaping experience to your preferences.

Understanding the importance of proper temperature control is crucial in order to maximize the flavor and enjoyment of your vaping experience.

[bulkimporter_image id=’7′]

Understanding the Importance of Proper Temperature Control

Make sure you’re closely monitoring the temperature while using the butter maker to ensure the proper extraction of cannabinoids from the buds.

Advertisement

Proper temperature control is crucial in achieving optimal extraction of cannabinoids for making vaping liquid. When the temperature is too low, the cannabinoids may not fully activate, resulting in a weaker and less potent vaping liquid. On the other hand, if the temperature is too high, it can cause the cannabinoids to degrade, leading to a loss of potency and flavor.

To achieve the proper temperature control, it is essential to follow the manufacturer’s instructions for your specific butter maker. Most butter makers have adjustable temperature settings, allowing you to set the desired temperature for extraction. It is recommended to start at a lower temperature, around 160-180°F (71-82°C), and gradually increase it if needed. This gradual increase helps to prevent overheating and ensures a more controlled extraction process.

Using a reliable thermometer is also highly recommended to accurately monitor the temperature. Insert the thermometer into the butter maker and keep a close eye on the temperature throughout the extraction process. Adjust the heat accordingly to maintain the desired temperature range.

[bulkimporter_image id=’8′]

Advertisement

Mixing the Infused Butter With Propylene Glycol and Vegetable Glycerin

To mix the infused butter with propylene glycol and vegetable glycerin, you’ll need to combine the two ingredients in a ratio that suits your desired potency and flavor. This step is crucial in creating a quality vaping liquid from your buds.

Here are some tips to help you get started:

  • Using alternative solvents: Instead of solely relying on butter as a solvent, incorporating propylene glycol and vegetable glycerin can enhance the vaping experience. These solvents have a lower boiling point, making them more suitable for vaping.

  • Experimenting with different ratios: Finding the right balance of propylene glycol, vegetable glycerin, and infused butter is essential. Start with a small batch and adjust the ratios until you achieve the desired potency and flavor. Keep in mind that a higher vegetable glycerin content will result in thicker vapor, while more propylene glycol will create a stronger throat hit.

  • Proper mixing technique: Ensure that all the ingredients are thoroughly mixed. You can use a magnetic stirrer or gently heat the mixture in a double boiler to aid in the blending process.

  • Testing and adjusting: After mixing, it’s important to test your vaping liquid. Take small puffs and consider adjusting the ratios if needed. Remember, experimentation is key to finding the perfect balance.

[bulkimporter_image id=’9′]

Calculating the Proper Ratios for the Vaping Liquid

Finding the perfect balance of propylene glycol, vegetable glycerin, and infused butter is crucial when calculating the proper ratios for your customized vaping liquid. The dosage of each ingredient plays a significant role in determining the overall quality and flavor of your vaping experience.

Advertisement

To calculate the correct dosage, you need to consider the potency of your infused butter and the desired strength of the vaping liquid. Start by determining the desired concentration of THC or CBD in your liquid, and then adjust the ratios accordingly.

If you prefer a stronger vaping liquid, you may increase the amount of infused butter, while reducing the proportion of propylene glycol and vegetable glycerin. On the other hand, if you want a milder flavor, you can decrease the dosage of infused butter and increase the ratio of propylene glycol and vegetable glycerin. This will help you achieve the perfect balance between potency and flavor.

Once you have calculated the correct dosage, you can move on to adjusting the flavor profile by adding additional flavorings or extracts. By experimenting with different combinations, you can create a vaping liquid that suits your personal preferences.

Now that you have calculated the proper ratios for your vaping liquid, let’s move on to using a double boiler method to combine the ingredients.

Advertisement
[bulkimporter_image id=’10’]

Using a Double Boiler Method to Combine the Ingredients

Using a double boiler method, you’ll effortlessly combine the propylene glycol, vegetable glycerin, and infused butter to create your vaping liquid. This method ensures a gradual and controlled heating process, preventing any overheating or burning of the ingredients. It also helps to maintain the potency of the infused butter, ensuring that you get the most out of your buds.

To make the vaping liquid using a double boiler, follow these simple steps:

  • Fill the bottom pot of the double boiler with water and place it on the stove over low heat.
  • Place the top pot of the double boiler on top of the bottom pot.
  • Add the propylene glycol, vegetable glycerin, and infused butter to the top pot.
  • Stir the mixture gently until everything is well combined and the butter has melted completely.

By using this method, you can have full control over the heating process, allowing for a smoother and more consistent vaping experience. However, if you prefer a quicker method, you can also use a microwave to combine the ingredients. Just be sure to use a microwave-safe container and heat the mixture in short intervals, stirring in between to ensure even heating.

Additionally, don’t be afraid to experiment with different strains of cannabis when making your vaping liquid. Each strain has its own unique flavor profile, and by trying out different combinations, you can create a truly customized and enjoyable vaping experience. So go ahead and explore the world of flavors that cannabis has to offer!

Advertisement
[bulkimporter_image id=’11’]

Straining the Mixture to Remove Plant Matter and Impurities

When it comes to straining the mixture to remove plant matter and impurities, efficient techniques are essential for achieving a high-quality vaping liquid.

By utilizing proper straining methods, such as using fine mesh filters or cheesecloth, one can effectively separate the desired liquid from any unwanted particles.

This not only ensures a smoother vaping experience but also enhances the overall quality of the liquid by filtering out impurities that could potentially affect its taste or texture.

Efficient Straining Techniques

To achieve maximum efficiency when straining, it’s important to use a fine mesh strainer or cheesecloth. These tools help remove unwanted plant matter and impurities from your vaping liquid, ensuring a smoother and cleaner experience.

Advertisement

Here are some techniques that can improve efficiency and reduce waste during the straining process:

  • Use a fine mesh strainer or cheesecloth: These tools have smaller holes, allowing for better filtration and finer results.

  • Press the mixture gently: Applying too much force can push through unwanted particles, affecting the quality of the final product.

  • Strain in batches: Instead of straining the entire mixture at once, strain small amounts at a time to ensure thorough filtration.

  • Clean and reuse your strainer or cheesecloth: By rinsing and drying them properly, you can extend their lifespan and reduce waste.

Filtering Out Impurities

It’s important to ensure that the strainer or cheesecloth has been properly cleaned and dried in order to remove any impurities from the filtration process.

Improving filtration techniques is essential to ensure the purity and quality of the liquid. While traditional methods like using a strainer or cheesecloth are effective, there are alternative purification methods that can be employed to enhance the filtration process.

One such method is activated charcoal filtration, which helps remove toxins and impurities from the liquid. Another option is using a coffee filter, which can provide a finer filtration and remove even smaller particles.

These alternative methods can help improve the overall quality of the liquid and ensure a clean and enjoyable vaping experience. By incorporating these techniques, you can enhance the liquid’s quality and make it even more satisfying to vape.

Advertisement

Enhancing Liquid’s Quality

Using activated charcoal filtration or a coffee filter can improve the quality of the liquid by removing impurities and toxins. This step is crucial in ensuring a clean and safe vaping experience.

Filtration doesn’t just stop at removing impurities; it also plays a role in enhancing the taste and effectiveness of the liquid. Here are some ways filtration can improve your vaping liquid:

  • Removing unwanted particles and debris
  • Enhancing the clarity of the liquid
  • Increasing the smoothness of the vapor
  • Improving the overall flavor profile

[bulkimporter_image id=’12’]

Achieving the Desired Flavors With Terpenes or Flavorings

You can enhance the flavors of your vaping liquid by adding terpenes or flavorings to achieve the desired taste. Terpenes are organic compounds found in plants that give them their unique aroma and flavor. They can be extracted from various sources using different methods such as steam distillation, solvent extraction, or cold pressing. Each method has its pros and cons, so it’s important to do your research and choose the one that suits your needs best.

If you prefer a more DIY approach, there are also flavoring techniques that you can try. For example, you can infuse your vaping liquid with fruits, herbs, or spices to create your own custom flavors. Simply steep the desired ingredient in your liquid for a certain period of time to allow the flavors to infuse. Remember to strain the liquid before using it to remove any solid particles.

Advertisement

In the next section, we’ll explore storing and aging the vaping liquid for enhanced flavor. By properly storing your liquid in a cool, dark place, you can allow the flavors to meld together and develop over time. This aging process can result in a smoother and more complex flavor profile. So, let’s dive into the art of storing and aging your vaping liquid to unlock even more delicious flavors.

[bulkimporter_image id=’13’]

Storing and Aging the Vaping Liquid for Enhanced Flavor

By properly storing and aging your vaping liquid, the flavors will meld together and develop over time, resulting in a smoother and more complex flavor profile. Aging techniques play a crucial role in flavor infusion, allowing the different components of the liquid to blend harmoniously.

Here are some tips to ensure optimal flavor development:

Advertisement
  • Keep your vaping liquid in a cool, dark place to protect it from heat and light, which can degrade the flavors.
  • Store the liquid in glass bottles to prevent any potential interactions with plastic containers.
  • Shake the bottles regularly to promote the mixing of flavors and prevent any separation.
  • Give the liquid enough time to age, as certain flavors may take longer to develop than others.

Properly aging your vaping liquid can greatly enhance the overall vaping experience by intensifying and refining the flavors. The aging process allows the flavors to meld together, resulting in a more harmonious and enjoyable taste.

However, before enjoying the flavors, it is important to test the potency and quality of the vaping liquid.

[bulkimporter_image id=’14’]

Testing the Potency and Quality of the Vaping Liquid

After storing and aging the vaping liquid for enhanced flavor, it’s important to test its potency and quality. Testing the vaping liquid ensures that it meets your desired standards and provides a consistent vaping experience. There are several testing methods you can use to analyze the results.

One common testing method is to use a portable vaporizer or vape pen to vaporize a small amount of the liquid. By inhaling the vapor and paying attention to its taste, aroma, and effects, you can assess its potency and overall quality. Additionally, you can send a sample of the liquid to a lab for more precise testing, such as cannabinoid profiling or residual solvent analysis.

Advertisement

Once you have the test results, it’s crucial to analyze them carefully. Look for any discrepancies or unexpected findings that may indicate issues with the vaping liquid. For example, if the potency is significantly lower than expected, it may suggest that the decarboxylation process was not sufficient, or the extraction method needs improvement.

[bulkimporter_image id=’15’]

Filling and Refilling Vape Cartridges With the Homemade Liquid

Once the homemade liquid has been tested for potency and quality, it’s time to fill and refill vape cartridges. This step is crucial to ensure a smooth vaping experience and prevent any leaks or spills. Here are some techniques to help you refill your cartridges like a pro:

  • Choose the right cartridge: Select a cartridge that is compatible with your vape pen and can hold the desired amount of liquid. Different cartridges have different capacities, so make sure to check the specifications.

  • Start with a clean cartridge: Before refilling, clean the cartridge thoroughly to remove any residue or leftover liquid. This will prevent any unwanted flavors mixing with your homemade liquid.

  • Fill the cartridge carefully: Use a syringe or dropper to fill the cartridge slowly and avoid overfilling. This will prevent leaks and ensure that the liquid is evenly distributed.

  • Secure the cartridge tightly: After refilling, make sure to screw the cartridge tightly onto the vape pen. A loose cartridge can lead to leaks and a messy vaping experience.

By following these refilling techniques and taking the necessary precautions, you can enjoy a hassle-free vaping experience and prevent any leaks or spills.

Advertisement

Happy vaping!

[bulkimporter_image id=’16’]

Troubleshooting Common Issues and Improving the Vaping Experience

When it comes to vaping, two key factors that can greatly impact the overall experience are flavor profiles and vapor production.

Enhancing flavor profiles involves finding the right balance of ingredients and techniques to create a more enjoyable and satisfying taste.

Advertisement

On the other hand, resolving vapor production issues requires troubleshooting and adjusting various elements, such as airflow and coil resistance, to ensure a consistent and satisfying amount of vapor is produced.

Enhancing Flavor Profiles

To enhance the flavor profiles of your vaping liquid, you’ll want to experiment with different strains of buds and various flavor additives. Here are some tips to help you enhance your vaping experience:

  • Try different strains of buds: Each strain has its own unique flavor profile, so experimenting with different strains can help you find the perfect flavor combination for your vaping liquid.

  • Mix flavors: Don’t be afraid to mix different flavors together to create your own unique blend. For example, you could mix fruity flavors with creamy flavors to create a delicious and satisfying vape.

  • Add flavor additives: Flavor additives like menthol or vanilla can enhance the taste of your vaping liquid. Start with a few drops and adjust according to your preference.

  • Experiment with ratios: Changing the ratio of buds to flavor additives can also affect the flavor profile of your vaping liquid. Play around with different ratios until you find the perfect balance.

By experimenting with different flavor combinations, you can create a vaping liquid that suits your taste preferences.

Now, let’s move on to resolving vapor production.

Resolving Vapor Production

If you’re experiencing low vapor production, adjusting your device’s wattage settings could help improve the amount of vapor you’re getting. Increasing the wattage can provide more power to the coil, resulting in higher temperatures and increased vapor production. However, it’s important to find the right balance, as setting the wattage too high can lead to a burnt taste or even damage the coil. To troubleshoot vapor issues, refer to the table below for general wattage recommendations based on the resistance of your coil:

Advertisement
Coil Resistance Recommended Wattage
0.1 – 0.2 ohms 80 – 120 watts
0.3 – 0.4 ohms 40 – 60 watts
0.5 – 0.6 ohms 30 – 40 watts
1.0 – 1.2 ohms 10 – 16 watts

Frequently Asked Questions

Can I Use Any Type of Butter Maker for Making Vaping Liquid?

Yes, you can use any type of butter maker for making vaping liquid. Different methods for making vaping liquid with a butter maker exist, and using a butter maker offers benefits such as efficiency and convenience.

How Do I Know if the Cannabinoids in the Buds Have Been Properly Activated During Decarboxylation?

To ensure accurate cannabinoid activation during decarboxylation, it is crucial to monitor the temperature and time. This process converts inactive cannabinoids into their active form, enhancing the potency and effects of the vaping liquid.

What Characteristics Should I Look for in High-Quality Cannabis Buds for Making Vaping Liquid?

When it comes to making vaping liquid, the characteristics of high-quality cannabis buds are crucial. Look for dense, sticky buds with a strong aroma and vibrant colors. These indicators signal the potential for a potent and flavorful vaping experience.

How Fine Should I Grind the Buds for Optimal Consistency in the Vaping Liquid?

When it comes to grinding buds for vaping liquid, achieving optimal consistency is key. You want to ensure that the buds are finely ground to maximize surface area and aid in the decarboxylation process.

Can I Use Any Type of Flavorings or Terpenes to Achieve the Desired Flavors in the Vaping Liquid?

Yes, you can use various flavorings or terpenes to achieve desired flavors in the vaping liquid. However, it is important to ensure the safety of these additives and consider any potential health concerns they may pose.

Advertisement

Conclusion

In conclusion, making vaping liquid from buds with a butter maker is a rewarding and enjoyable process. By choosing the right butter maker and selecting high-quality cannabis buds, you can ensure a potent and flavorful vaping experience.

Through proper decarboxylation and grinding techniques, you can activate the cannabinoids and achieve the optimal consistency. Infusing butter with cannabis and aging the liquid will enhance its flavor.

By testing the potency and quality, and troubleshooting any issues, you can improve your vaping experience. So, grab your butter maker and enjoy the satisfaction of creating your own homemade vaping liquid.

Continue Reading
Advertisement

Butter Tips and Tricks

Butter Hacks: 2/3 Cup Butter Is How Many Tablespoons?

Published

on

By

converting butter measurements easily

If you’ve ever wondered, 2/3 cup of butter equals around 10.67 tablespoons. This handy conversion guarantees your recipes turn out just right.

Key Takeaways

  • 2/3 cup of butter equals 10.67 tablespoons.
  • Useful for recipes specifying butter in tablespoons.
  • Ensures precise measurements in cooking.
  • Simplifies adjusting butter quantities.
  • Essential for accurate recipe results.

The Full Conversion Chart

Exploring the entire conversion chart for butter measurements can simplify your cooking endeavors. Understanding the different measurements for butter, such as blocks, sticks, cups, tablespoons, and weight in grams, allows you to easily adapt recipes to suit your needs.

For example, knowing that a block of butter weighs 5.33 ounces and that this is equivalent to 2.67 ounces in stick form can be incredibly helpful when following a recipe that specifies one form over the other.

Furthermore, realizing that 1/6 pound of butter is equal to one cup, or that one tablespoon of butter is approximately 80 milliliters, enables you to make precise adjustments based on what measuring tools you have available.

This detailed chart provides you with the flexibility to confidently experiment in the kitchen, ensuring that your dishes turn out just right every time. Whether you’re baking, sautéing, or simply spreading butter on your toast, having a solid grasp on these conversions will surely enhance your culinary skills.

How Much Is 1 Stick?

price of a single stick

To accurately measure butter, understanding the quantity in 1 stick is important for following recipes effectively. One stick of butter equals 8 tablespoons, approximately 4 ounces or 113 grams in weight, and fills half a cup. When working with recipes that call for butter, this information is vital for precise measurements.

Butter sticks are conveniently marked with tablespoon measurements, simplifying the process of cutting the right amount. By knowing how much butter is in 1 stick, you can easily adapt recipes to suit your needs without any guesswork.

Advertisement

Whether you’re baking a batch of cookies or whipping up a savory sauce, having this knowledge at your fingertips guarantees your dishes turn out just right every time. So next time you reach for a stick of butter, remember these measurements to ensure cooking or baking success.

Measuring Butter From Sticks

butter measurement using sticks

When measuring butter from sticks, make certain you understand that each stick is equivalent to 8 tablespoons or 1/2 cup. This means that if a recipe calls for 2/3 cup of butter, you’d need 1 stick plus 2 and 2/3 tablespoons of butter. Understanding this conversion is essential for accurately measuring butter in various recipes.

Measuring butter from sticks is a convenient way to portion out the right amount for your cooking or baking needs. By knowing that one stick equals 8 tablespoons, you can easily adjust the quantity of butter required for a recipe.

Whether you’re using butter in cups, tablespoons, or sticks, being able to convert between these measurements guarantees that your dishes turn out just right.

Next time you reach for a stick of butter, remember that it contains 8 tablespoons or 1/2 cup. This knowledge will simplify your cooking process and help you achieve consistent results in the kitchen.

Butter in Tablespoons (Tbsp.)

butter measurement in tablespoons

When measuring butter in tablespoons (Tbsp.), it’s essential to know that 2/3 cup of butter is equivalent to 10 and 2/3 tablespoons. Understanding this butter conversion can simplify your cooking and baking experience.

Here are a few key points to keep in mind:

Advertisement
  • Converting cups to tablespoons: To convert 2/3 cup of butter to tablespoons, multiply 2/3 by 16 (since 1 cup equals 16 tablespoons).
  • Precise measurement: The calculation results in 10.67 tablespoons, which can be rounded to 10 and 2/3 tablespoons. This accuracy is vital for achieving consistent results in your recipes.
  • Convenience in recipes: Knowing the butter measurements in tablespoons can be handy when a recipe specifies butter in this unit rather than cups, making it easier to follow instructions accurately.

Mastering butter measurements in tablespoons allows you to confidently navigate various recipes and secures your dishes turn out just right.

Butter Vs. Margarine Conversion

dairy debate butter or margarine

For a straightforward butter versus margarine conversion comparison, consider the differences in teaspoons and tablespoons.

ButterMargarine
1 Teaspoon1 Teaspoon
1 Tablespoon1 Tablespoon
1/4 Cup1/4 Cup

When substituting butter for margarine in recipes, bear in mind the conversion rate between the two. While both butter and margarine serve as fats in baking and cooking, they have slightly different compositions due to their ingredients. If a recipe calls for margarine but you prefer to use butter, a simple swap can be made using the table above. Remember that the water content in butter is higher than in margarine, which can affect the final texture of your dish. Experimenting with different ratios based on the conversion table can help you achieve the desired result.

Olive Oil Conversion

cooking with olive oil

To convert olive oil measurements effectively in your recipes, remember the following equivalences:

  • 1/4 Cup of olive oil is equivalent to 1/4 Cup of butter/margarine.
  • 1/4 Cup + 2 Tablespoons of olive oil is equal to 1/2 Cup of butter/margarine.
  • 1/2 Cup of olive oil is the same as 1/2 Cup + 1 Tablespoon of butter/margarine.

When substituting olive oil for butter or margarine in your recipes, keep these conversions in mind to guarantee your dish turns out just right. Whether you’re aiming for a healthier option or simply prefer the taste of olive oil, knowing how to make these conversions can make a significant difference in your cooking.

Next time you reach for olive oil instead of butter, confidently adjust your measurements using these simple equivalences.

Healthy Alternative: Olive Oil

heart healthy cooking with olives

Looking to make healthier choices in your cooking? Olive oil can be a great alternative to butter, providing a higher content of monounsaturated fats.

Benefits of Olive Oil

Consider incorporating olive oil into your cooking routine as a healthier alternative to butter, thanks to its rich content of monounsaturated fats. Substituting butter with olive oil not only reduces saturated fat intake but also maintains a similar texture and flavor profile in your dishes.

Here are some benefits of using olive oil:

  • Healthier Fat Option: Olive oil is packed with monounsaturated fats, which are considered heart-healthy fats that can help lower bad cholesterol levels.
  • Versatility in Cooking: From baking to sautéing and creating flavorful dressings, olive oil proves to be a versatile ingredient suitable for various cooking methods.
  • Unique Flavor Profile: Unlike butter, olive oil adds a distinct taste to your dishes, enhancing the overall flavor experience while offering a healthier alternative.

Incorporating olive oil into your daily cooking not only brings health benefits but also contributes to a more balanced and flavorful diet.

Cooking With Olive Oil

Enhance your cooking routine by incorporating olive oil as a healthier alternative to butter in various dishes. Olive oil offers a distinct flavor profile that can elevate the taste of your meals while providing several health benefits. Rich in monounsaturated fats, olive oil is considered heart-healthy and can help lower bad cholesterol levels.

Advertisement

When cooking with olive oil, you have the flexibility to use it in different methods such as sautéing, roasting, and making salad dressings. This versatility makes it a great choice for a wide range of recipes. By substituting butter with olive oil, you can reduce your saturated fat intake without compromising on flavor.

Next time you’re in the kitchen, consider reaching for olive oil instead of butter. Not only will you be making a healthier choice, but you’ll also be adding a delicious twist to your favorite dishes. Experiment with olive oil in your cooking and discover the wonderful benefits it can bring to your meals.

Contact & Copyright Information

contact and copyright details

For more details on butter and olive oil conversions, contact Monadnock Oil and Vinegar, LLC at their Dublin branch by dialing 603-563-7066 or at their Amherst branch at 603-589-9954.

If you prefer email correspondence, you can reach them at [emailprotected].

Remember that all content related to butter and olive oil conversions is protected by copyright owned by Monadnock Oil and Vinegar, LLC. Reproduction rights are reserved from 2015 to 2024, and any unauthorized use is strictly prohibited.

If you intend to use or refer to their content, make sure you have the appropriate permissions to avoid any copyright violations.

Advertisement

Frequently Asked Questions

How Many Tablespoons Is 2/3 Cup in a Stick of Butter?

To know how many tablespoons are in 2/3 cup of butter in a stick, remember it’s around 10 2/3 tablespoons or about 1 stick plus 2 tablespoons. This helps you accurately measure butter for recipes.

Is 1 Stick of Butter the Same as 1 2 Cup?

Yes, 1 stick of butter is equal to 1/2 cup. That means a stick of butter contains 8 tablespoons. Understanding these measurements can make your cooking and baking experiences smoother and more precise.

How Many Tablespoons Is a Full Cup of Butter?

To measure a full cup of butter, you’d need 16 tablespoons. That’s the scoop for your baking adventures. Remember this handy conversion to make your kitchen creations a piece of cake!

How Much Is 1 Cup of Butter in Stick Butter?

To convert 1 cup of butter to sticks, you need 2 sticks. For tablespoons, that’s 16 tablespoons. Knowing these conversions helps in precise measuring for recipes. It’s essential for successful baking and cooking.

Conclusion

Remember, when it comes to butter hacks, knowing how to convert measurements can make all the difference in your cooking.

Advertisement

As the saying goes, ‘A little butter can make everything better.’

So next time you’re in the kitchen and wondering how many tablespoons are in 2/3 cup of butter, you’ll be prepared to whip up something delicious with ease.

Happy cooking!

Continue Reading

Butter Tips and Tricks

How Many Sticks of Butter in 1 Cup: A Step-by-Step Guide

Published

on

By

An image showing a neatly arranged stack of 10 tablespoons of butter, each tablespoon represented by a smooth, rectangular slab with rounded edges, resembling traditional stick-shaped butter

Ever wondered how many sticks of butter are in one cup? Well, I have the answer for you!

Picture this: you’re in the middle of baking your favorite recipe and suddenly realize you’re out of butter. Panic sets in as you scramble to figure out the conversion from cups to sticks. But fear not!

In this article, I’ll break it down for you, providing all the information you need to know about the butter-to-cup ratio and how to make your baking adventures a breeze.

Key Takeaways

  • 1 cup of butter is equal to 2 sticks or 16 tablespoons.
  • Converting butter measurements from cups to sticks or vice versa is crucial for accurate recipe adjustments.
  • Different brands may have varying measurements for butter, so it’s important to be aware of equivalents.
  • Using the measurement markings on the butter wrapper allows for precise cutting of fractional amounts.
[bulkimporter_image id=’2′]

Understanding the Butter-to-Cup Ratio

1 cup of butter is equal to 2 sticks. When it comes to converting butter measurements, it’s important to understand the ratios.

If a recipe calls for tablespoons of butter, 1 stick is equivalent to 8 tablespoons. So, if you need 1 cup of butter, you’ll need 16 tablespoons or 2 sticks.

It’s also important to note the difference between salted and unsalted butter. Salted butter contains added salt, while unsalted butter does not. This can affect the taste and overall flavor of your dish.

When a recipe calls for unsalted butter, it’s best to stick to that recommendation to have better control over the amount of salt in the recipe. However, if you only have salted butter on hand, you can reduce the amount of added salt in the recipe.

[bulkimporter_image id=’3′]

Converting Butter Measurements: Cups to Sticks

When it comes to baking, understanding the butter cup to stick ratio is crucial. Knowing how many sticks of butter make up one cup can make or break a recipe.

In addition to the ratio, having an accurate conversion method from cups to sticks is essential for precise measurements.

Lastly, it’s important to familiarize oneself with common butter measurements to ensure successful baking endeavors.

Butter Cup to Stick Ratio

To determine the ratio of sticks of butter to cups, we can use this conversion chart. Understanding butter measurements is essential for baking and cooking. Converting butter ratios is a common task in the kitchen.

The standard stick of butter in the United States weighs 1/2 cup or 8 tablespoons. Therefore, if a recipe calls for 1 cup of butter, you will need 2 sticks. If the recipe calls for 1/2 cup of butter, you will need 1 stick.

It’s important to note that butter measurements can vary by country, so always consult a reliable conversion chart if you’re working with international recipes. By knowing the butter cup to stick ratio, you can confidently adapt recipes to suit your needs.

Accurate Conversion Method

The most accurate way to convert measurements is by consulting a reliable conversion chart. When it comes to measuring butter, it can be tricky since it often comes in sticks or cups. Here are some tips to help you accurately measure butter:

  1. Use a conversion chart: This will give you the exact measurement equivalents for butter, whether it’s in sticks or cups.
  2. Soften the butter: If a recipe calls for melted butter, measure it in its solid form and then melt it. This ensures accurate measurements.
  3. Use a kitchen scale: Weighing the butter can give you precise measurements, especially when dealing with small amounts.
  4. Know the standard measurements: One stick of butter is equal to 1/2 cup or 8 tablespoons. A cup of butter, on the other hand, is equal to 2 sticks or 16 tablespoons.

Common Butter Measurements?

Knowing the equivalents for different measurements of butter, such as tablespoons and sticks, can be helpful when following recipes. It ensures that you are adding the right amount of butter, which can greatly impact the outcome of your dish. Here are some common butter measurement equivalents to keep in mind:

Measurement Equivalent
1 stick 1/2 cup (8 tablespoons)
1/2 stick 1/4 cup (4 tablespoons)
1/4 stick 1/8 cup (2 tablespoons)
1 tablespoon 1/16 cup (1/2 stick)

When measuring butter, it’s important to be accurate. Use a kitchen scale for precise measurements, especially if the recipe calls for weight measurements. If you don’t have a scale, use a butter dish with marked measurements. Softened butter should be leveled off with a knife. When using tablespoons, make sure to fill them completely and level off the excess with a straight edge. These tips will help you measure butter accurately and achieve the best results in your recipes.

[bulkimporter_image id=’4′]

The Standard Size of a Stick of Butter

A stick of butter is typically equal to 1/2 cup. Understanding butter packaging and different butter measurements in other countries can be confusing.

Here are some key points to help you navigate the world of butter measurements:

  1. In the United States, butter is commonly sold in sticks, with each stick weighing 1/4 pound or 1/2 cup. This makes it easy to measure and use in recipes.
  2. In some European countries, butter is sold in blocks or tubs, with measurements listed in grams or kilograms. It’s important to convert these measurements to cups or ounces for American recipes.
  3. In Australia, butter is usually sold in 250g or 500g blocks, which can be converted to cups or ounces using conversion charts.
  4. When traveling or using international recipes, it’s helpful to familiarize yourself with the local butter measurements to ensure accurate results.
[bulkimporter_image id=’5′]

How Much Butter Is in 1 Cup

When it comes to baking, understanding the butter to cup ratio is crucial. Knowing how much butter is in 1 cup can help ensure that your recipes turn out perfectly.

Additionally, learning how to convert butter measurements can be helpful when using recipes from different countries or regions.

Lastly, if you’re looking for butter substitutes in baking, there are several options available that can still provide the moisture and richness that butter brings to baked goods.

Butter to Cup Ratio

To measure the butter to cup ratio, you can easily convert sticks of butter to cups. Understanding butter density is key to accurately converting butter measurements from tablespoons to cups. Here’s a step-by-step guide:

  1. Start by knowing that one stick of butter is equal to 1/2 cup. This is a common measurement used in many recipes.
  2. If your recipe calls for a different amount of butter in cups, you can use this conversion: 1 cup of butter is equivalent to 2 sticks or 16 tablespoons.
  3. To convert tablespoons to cups, divide the number of tablespoons by 16. For example, if you have 8 tablespoons of butter, it would be equal to 1/2 cup.
  4. Remember, when measuring butter, it’s important to consider its density. Softened or melted butter may take up less space compared to cold or solid butter.

Converting Butter Measurements

Understanding the conversion of butter measurements can help me confidently adjust my recipe. When it comes to baking or cooking, accuracy is key. Knowing the equivalents of butter can save me time and ensure the perfect outcome.

One cup of butter is equal to two sticks or 16 tablespoons. This information is crucial when a recipe calls for a specific amount of butter in cups, but I only have sticks. Conversely, if a recipe specifies butter in sticks, I can easily convert it to cups by dividing the number of sticks by two.

To measure butter accurately, I can use a kitchen scale or the markings on the butter wrapper. Softened butter should be packed into measuring cups, while solid butter should be cut according to the desired quantity.

With these tips, I can confidently use the correct amount of butter in my recipes.

Butter Substitutes in Baking

If you’re looking to substitute butter in your baking, there are various options available that can still yield delicious results. Here are four butter alternatives that not only provide a healthier option but also offer unique flavors and health benefits:

  1. Coconut oil: This versatile alternative adds a subtle tropical taste to your baked goods and is rich in healthy fats, promoting heart health.
  2. Avocado: Creamy and nutrient-dense, mashed avocado can replace butter in certain recipes, providing a boost of vitamins and minerals.
  3. Greek yogurt: With its tangy flavor and creamy texture, Greek yogurt adds moisture and protein to your baked treats while reducing the fat content.
  4. Applesauce: A natural sweetener and fat substitute, applesauce adds moisture and tenderness to your baked goods, making them lighter and healthier.
[bulkimporter_image id=’6′]

Butter Conversion: Cups to Sticks Simplified

You can easily convert 1 cup of butter to sticks by knowing that it equals 2 sticks.

When it comes to butter storage, it is important to consider the packaging. Butter is typically sold in wrapped blocks or sticks. The packaging not only protects the butter from external factors like air and light but also keeps it fresh for longer periods.

The most common packaging for butter is a waxed paper or foil wrapper. This type of packaging helps to maintain the butter’s quality and prevent it from spoiling. It is recommended to store butter in its original packaging or transfer it to an airtight container to maintain its freshness.

Proper butter storage ensures that it remains usable for a longer time and retains its flavor and texture.

[bulkimporter_image id=’7′]

Calculating Sticks of Butter for Your Recipe

To calculate the number of sticks needed for your recipe, it’s helpful to divide the total amount of butter by the conversion factor of 2. This will give you the accurate measurement in sticks.

Here are some tips for understanding butter measurements and achieving accurate conversions:

  1. Always use the conversion factor of 2 when converting cups to sticks of butter.
  2. Make sure to measure butter in its solid form for precise results.
  3. If your recipe calls for a fraction of a stick, you can easily cut it using the measurement markings on the wrapper.
  4. Remember that butter is sold in different sizes, so check the weight or volume on the packaging to ensure accuracy.

Now that you understand how to calculate the number of sticks needed for your recipe, let’s move on to some tips for measuring butter in cups.

[bulkimporter_image id=’8′]

Tips for Measuring Butter in Cups

When measuring butter in cups, it’s important to remember that different brands may have different measurements on their packaging. To ensure accuracy in your recipes, it’s helpful to be aware of butter measurement equivalents.

One cup of butter is equal to 2 sticks or 16 tablespoons. However, some brands of butter may label their packaging differently, so it’s always a good idea to double-check.

If you don’t have measuring cups or sticks of butter, there are alternative methods for measuring butter. One option is to use a kitchen scale to measure the desired amount in grams or ounces. Another option is to use the markings on the butter wrapper itself. Most butter sticks have measurements marked on the packaging, allowing you to easily cut off the desired amount.

[bulkimporter_image id=’9′]

Butter Conversions Made Easy: Cups to Sticks

When it comes to baking or cooking with butter, it’s important to have a clear understanding of the measurement equivalents. Knowing how many sticks of butter are in a cup can save time and ensure accurate results.

In this discussion, we will explore simple conversion techniques for butter measurements, providing you with the knowledge and confidence to easily adapt recipes to your preferred measurements.

Butter Measurement Equivalents

You can easily convert 1 cup of butter into sticks by dividing it into 2 sticks. This is a common measurement used in baking and cooking.

When it comes to understanding butter ratios and ensuring accurate measuring, here are some tips to keep in mind:

  1. Use a liquid measuring cup: Butter is a solid, but using a liquid measuring cup allows for more precise measurements.
  2. Soften the butter: To accurately measure butter, it should be softened to room temperature. This ensures that it is easily spreadable and can be measured accurately.
  3. Use a knife or bench scraper: When measuring butter, use a knife or bench scraper to level off the top. This will provide a consistent and accurate measurement.
  4. Pack it tightly: If a recipe calls for packed butter, make sure to tightly pack the butter into the measuring cup. This will give you the correct amount needed for the recipe.

Simple Conversion Techniques

To simplify conversions, try using a kitchen scale for more precise measurements. When it comes to baking, accurate measurements are crucial for the success of your recipe. Butter measurement equivalents in recipes can sometimes be confusing, especially when converting between different units.

Converting butter measurements for baking can be made easier by using a kitchen scale. By weighing the butter, you can accurately determine the amount needed for your recipe. For example, if a recipe calls for 1 cup of butter, you can weigh it on the scale to get the precise measurement in grams or ounces. This eliminates any guesswork and ensures that your baked goods turn out just right.

Now, let’s move on to how to substitute sticks of butter for cups.

[bulkimporter_image id=’10’]

How to Substitute Sticks of Butter for Cups

If you’re substituting sticks of butter for cups, it’s important to know that one stick of butter is equivalent to 1/2 cup. This knowledge is crucial for measuring accuracy in recipes.

Here are four key points to keep in mind when substituting sticks of butter for cups:

  1. Butter substitutes: In case you don’t have sticks of butter on hand, you can use other ingredients as substitutes. Options include margarine, shortening, coconut oil, or even applesauce for a healthier alternative.
  2. Measuring accuracy: When measuring butter in stick form, it’s essential to accurately cut the stick to the correct length. Each stick is typically 8 tablespoons or 1/2 cup, so make sure to measure it precisely.
  3. Conversions: If a recipe calls for a specific amount of cups, you may need to convert it to sticks of butter. Remember that two sticks of butter are equal to 1 cup, so adjust accordingly.
  4. Recipe adjustments: When substituting sticks of butter for cups, consider the impact on your recipe. Butter provides moisture and flavor, so using different substitutes may affect the final texture and taste.
[bulkimporter_image id=’11’]

Common Butter Measurements: Cups Vs Sticks

When baking, it’s helpful to know the difference between measuring butter in cups versus sticks. Understanding butter measurements and being able to convert between cups and sticks can make a big difference in the outcome of your baked goods. Here’s a simple table to help you understand the conversion:

Cups Sticks Grams
1 0.5 113
2 1 227
3 1.5 340

For example, if a recipe calls for 1 cup of butter, you can use 2 sticks or 227 grams. Similarly, if a recipe calls for 3 sticks of butter, you can use 1.5 cups or 340 grams. Having this understanding and being able to convert between cups and sticks will ensure that your baked goods turn out perfectly every time.

Frequently Asked Questions

Can I Use Margarine Instead of Butter When Measuring in Cups or Sticks?

Sure, you can use margarine instead of butter when measuring in cups or sticks. However, keep in mind that margarine has a different texture and flavor, so it may affect the outcome of your recipe. The butter vs margarine debate is a matter of personal preference.

How Much Does a Stick of Butter Weigh in Ounces?

A stick of butter weighs 4 ounces. Converting butter measurements can be tricky, but knowing that a stick of butter is 1/2 cup or 8 tablespoons helps in cooking and baking.

Can I Use Salted Butter Instead of Unsalted Butter in a Recipe That Calls for Measuring in Cups?

Yes, you can use salted butter instead of unsalted butter in a recipe that calls for measuring in cups. Just remember to adjust the amount of salt in the recipe accordingly.

Are There Any Special Considerations When Measuring Butter in High-Altitude Baking?

When baking at high altitudes, there are special considerations for measuring butter. The altitude affects the air pressure, which can impact the texture and rising of baked goods. Adjustments may be needed to ensure successful results.

Is There a Difference in Measurement if the Butter Is Cold or at Room Temperature When Using Cups or Sticks?

When measuring butter, it’s important to note that the accuracy may vary depending on whether the butter is cold or at room temperature. This applies to both measuring cups and sticks.

Conclusion

In conclusion, understanding the butter-to-cup ratio is crucial when it comes to baking. Converting measurements from cups to sticks can be simplified by knowing that one cup of butter is equal to two sticks.

It is important to note that a standard stick of butter typically measures 1/2 cup or 8 tablespoons. When measuring butter in cups, it is recommended to use precise measuring tools to ensure accurate results.

Remember, as the saying goes, “Measure twice, bake once!”

Continue Reading

Butter Tips and Tricks

How Many Cups of Butter Equal a Stick: A Simple Guide

Published

on

By

An image showing a neatly arranged cup filled with liquid butter, surrounded by a stack of butter sticks, one by one, gradually being poured into the cup until it reaches the brim

Ever thought about how many cups of butter are in one stick? Well, I have the answer for you! Deciphering butter measurements can be tricky, but don’t worry, I’m here to make it easier for you.

In this article, we’ll explore the standard stick of butter and how to convert it to cups. We’ll also delve into equivalents and measurements, as well as provide a handy butter conversion chart.

So, let’s dive in and demystify the world of butter measurements together!

Key Takeaways

  • One stick of butter is equal to 1/2 cup or 8 tablespoons.
  • Butter can be measured in grams or ounces for more precise measurements.
  • Conversion charts and kitchen scales are useful tools for accurate measurement conversion.
  • Knowing the equivalents (e.g., 1 stick = 1/2 cup, 2 sticks = 1 cup) helps measure butter accurately in recipes.

[bulkimporter_image id=’2′]

Understanding Butter Measurements

There’s no need to worry about how many cups of butter are in a stick because it’s a common measurement used in recipes. When it comes to accurately measuring butter, it’s important to understand the conversion from sticks to cups.

One stick of butter is equal to 1/2 cup or 8 tablespoons. This measurement is widely accepted and used in baking and cooking. However, it’s good to know that butter can also be measured in grams or ounces for more precise measurements.

To convert butter measurements for recipes, you can use a kitchen scale or refer to conversion charts that provide the equivalent measurements. Understanding these conversions ensures that you can accurately measure and use butter in your favorite recipes.

Advertisement

Now, let’s dive into the details of the standard stick of butter.

[bulkimporter_image id=’3′]

The Standard Stick of Butter

To determine the amount of butter in a standard stick, you’ll need to understand the conversion ratio. Understanding butter packaging and different butter measurements is crucial to accurately measuring ingredients in recipes. Here are some key points to keep in mind:

  • A standard stick of butter in the United States weighs 1/2 cup or 8 tablespoons.
  • The measurements on butter packaging are typically marked in tablespoons and cups.
  • European butter is often sold in 250-gram blocks, which is approximately 1 cup or 2 sticks of butter.
  • Some recipes may call for butter in ounces or grams, so it’s important to have a kitchen scale for precise measurements.
  • It’s also helpful to know that butter comes in different fat percentages, such as salted and unsalted.

[bulkimporter_image id=’4′]

Converting Sticks to Cups

When it comes to converting sticks to cups, it is important to understand the stick to cup ratio for accurate measurement conversion.

The stick to cup ratio is 1 stick of butter equals 1/2 cup. This means that if a recipe calls for 1 cup of butter, you will need 2 sticks.

Stick to Cup Ratio

The stick to cup ratio for butter is approximately 1/2 cup per stick. This ratio is important to know when it comes to baking and following recipes accurately.

Here are a few key points to keep in mind when it comes to butter measurements and baking conversions:

Advertisement

  • 1 stick of butter is equal to 1/2 cup or 8 tablespoons.
  • If a recipe calls for 1 cup of butter, you will need 2 sticks.
  • To convert tablespoons to cups, divide the number of tablespoons by 16.
  • It’s important to note that butter measurements can vary depending on the brand or type of butter you are using, so always check the packaging for accurate measurements.
  • When in doubt, it’s always a good idea to weigh your butter using a kitchen scale for precise measurements.

Knowing the stick to cup ratio and understanding butter measurements is essential for successful baking and achieving the desired results in your recipes.

Accurate Measurement Conversion

Remember, accurately converting measurements is crucial for achieving the desired results in your baking recipes.

When it comes to understanding butter measurements, it’s important to measure accurately to ensure your baked goods turn out just right.

Butter is often measured in sticks, and it’s helpful to know that one stick of butter is equal to 1/2 cup or 8 tablespoons.

This knowledge is especially handy when a recipe calls for a certain amount of cups and you only have sticks of butter on hand.

By measuring butter accurately, you can ensure that your recipes turn out perfectly every time.

Advertisement

Now that we understand how to measure butter correctly, let’s explore the equivalents and measurements for other common baking ingredients.

[bulkimporter_image id=’5′]

Equivalents and Measurements

You’ll need to know how many cups of butter are in a stick for accurate measurements. When it comes to butter measurement equivalents, it’s important to have the right conversions. Here are a few key measurements to keep in mind:

  • 1 stick of butter is equal to 1/2 cup
  • 1/2 stick of butter is equal to 1/4 cup
  • 2 sticks of butter is equal to 1 cup
  • 4 sticks of butter is equal to 2 cups
  • 8 sticks of butter is equal to 4 cups

Knowing these equivalents will help you measure butter accurately in your recipes.

Now that you have a good understanding of how many cups are in a stick of butter, let’s move on to the next section about how much butter is in a cup.

[bulkimporter_image id=’6′]

How Much Butter Is in a Cup

When it comes to baking or cooking, understanding the butter-to-cup ratio is crucial. Knowing how much butter is in a cup can make a huge difference in the outcome of your recipe.

In this discussion, we will explore the conversion of butter measurements and how to accurately measure the right amount of butter for your culinary endeavors.

Advertisement

Butter-To-Cup Ratio

To figure out the butter-to-cup ratio, divide the number of cups by the number of sticks. This ratio is essential when converting butter measurements or finding butter equivalents. Here are some important points to consider:

  • 1 stick of butter is equal to 1/2 cup.
  • 2 sticks of butter make 1 cup.
  • If a recipe calls for 1 cup of butter, you will need 2 sticks.
  • For 1/4 cup of butter, use half a stick.
  • To measure 1/3 cup of butter, you’ll need 5 and 1/3 tablespoons.

Understanding the butter-to-cup ratio allows for accurate measurements in recipes. Whether you’re baking cookies or making a savory dish, having the correct amount of butter is crucial for achieving the desired taste and texture.

Converting Butter Measurements?

Understanding how to convert butter measurements is essential for accurate recipe preparation. When it comes to converting butter measurements, there are a few common mistakes that people often make.

One of the most common mistakes is not knowing the correct conversion ratio. In the United States, butter is typically sold in sticks, with each stick weighing 1/2 cup or 8 tablespoons. However, in some recipes, butter may be measured in grams or ounces.

Another mistake people make is not properly measuring the butter. It is important to use a kitchen scale or measuring cups to ensure precise measurements.

Additionally, some recipes may call for melted butter, which can be measured differently than solid butter.

Advertisement

Understanding these conversions and avoiding these common mistakes will help ensure that your recipes turn out perfectly every time.

[bulkimporter_image id=’7′]

Measuring Butter for Baking

There’s no need to guess how many cups of butter are in a stick when measuring for baking. As someone who loves to bake, I have found that using the right tools for measuring butter is crucial for accurate results. Here are the best tools for measuring butter:

  • Measuring cups: These are the most common tools used for measuring butter. Make sure to use a dry measuring cup and pack the butter firmly for accurate measurements.

  • Kitchen scale: For precise measurements, a kitchen scale is the way to go. It allows you to measure the exact amount of butter required for your recipe.

  • Butter dish with markings: Some butter dishes come with markings that indicate the measurements. This makes it convenient to measure the required amount of butter directly from the dish.

  • Butter cutter: A butter cutter is a handy tool that helps you measure the butter by slicing it into tablespoons or teaspoons.

  • Butter wrappers: Butter wrappers often have measurements marked on them, making it easy to cut the butter into the desired amount.

By using these tools, you can ensure that your butter is measured accurately for your recipes.

Now, let’s move on to the next section where we will discuss a butter conversion chart.

[bulkimporter_image id=’8′]

Butter Conversion Chart

Now that we know how to measure butter for baking, let’s talk about butter conversion chart and how to convert butter for recipes.

Advertisement

It’s common to come across recipes that call for butter in different measurements, such as cups, tablespoons, or grams. To make things easier, there are some standard butter measurement equivalents that can be used for conversion.

For example, one stick of butter is equal to half a cup or 8 tablespoons. So if a recipe calls for 1 cup of butter, you would need 2 sticks or 16 tablespoons. It’s important to have these conversions handy to ensure you’re using the correct amount of butter in your recipes.

Now that we understand the butter conversion chart, let’s move on to some tips for measuring butter accurately.

[bulkimporter_image id=’9′]

Tips for Measuring Butter

To accurately measure butter, it’s helpful to soften it beforehand. Softening butter makes it easier to measure and ensures accurate results in your cooking. Here are some tips for measuring butter for cooking:

  • Take the butter out of the refrigerator and let it sit at room temperature for about 30 minutes before measuring.
  • Use a sharp knife to cut the butter into tablespoon-sized portions.
  • Fill a measuring cup with water and place the cut butter into the cup, submerging it completely.
  • Remove the butter from the water and drain any excess water.
  • Measure the butter in tablespoons or cups, depending on your recipe’s requirements.

[bulkimporter_image id=’10’]

Common Butter Measurement Mistakes

A common mistake when measuring butter is not using a sharp knife to cut it into proper portions. Accurately measuring butter is crucial in baking to achieve the desired results.

When butter is too soft or melted, it can throw off the texture and consistency of your baked goods. To measure butter accurately, start by using a sharp knife to cut the stick into tablespoon-sized portions. Then, use a measuring spoon to scoop out the desired amount.

Advertisement

It’s important to level off the butter with the back of a knife to ensure precise measurements. Another common mistake is eyeballing the amount of butter, which can lead to inconsistent results.

Frequently Asked Questions

Can I Use Margarine Instead of Butter in Baking Recipes?

I prefer using butter over margarine in baking recipes because it adds more flavor and richness. Margarine can affect the texture of baked goods, often making them softer and less tender. So, while margarine can be used as a substitute for butter in some recipes, it’s important to consider the impact on taste and texture.

How Can I Accurately Measure Butter Without Using a Scale?

When it comes to accurately measuring butter without a scale, it can be a bit tricky. But fear not! I’ve got you covered. Let me walk you through the process of converting butter measurements like a pro.

Can I Substitute Oil for Butter in a Recipe?

Substituting butter with oil in a recipe can have pros and cons. Oil can add moisture and make baked goods lighter, but it may also affect the taste and texture. The best oil substitutes for baking are vegetable oil, coconut oil, and olive oil.

How Much Butter Should I Use if the Recipe Calls for a Certain Number of Sticks?

When converting butter measurements, accurately measuring the amount of butter needed is crucial. If a recipe calls for a certain number of sticks, I can help you determine how much butter to use.

Advertisement

Can I Use Unsalted Butter Instead of Salted Butter in Baking Recipes?

Using unsalted butter for baking has its pros and cons. Pros include having more control over the saltiness of the recipe, while cons include potentially missing out on the flavor that salted butter provides.

Conclusion

In conclusion, understanding butter measurements is essential for successful baking. While a standard stick of butter is equivalent to 1/2 cup or 8 tablespoons, it’s important to note that this can vary depending on the brand or region.

To convert sticks to cups, simply divide the number of sticks by 2. Additionally, knowing that 1 cup of butter is equivalent to 2 sticks can help when following recipes.

By following a butter conversion chart and being mindful of common measurement mistakes, bakers can ensure accurate and delicious results.

Advertisement

Continue Reading

Trending