Connect with us

Recipes & Culinary Uses

Make Your Own Sunflower Butter Easily

Published

on

An image capturing the process of making sunflower butter: a golden field of sunflowers swaying in the breeze, a hand picking ripe sunflower seeds, a blender whirling them into a creamy spread

I’ve always loved nut butters, but when I found sunflower butter, it changed the game. The smooth texture, the nutty taste, and its versatility in recipes made it my new favorite spread.

So, I decided to learn how to make it myself. Turns out, it’s incredibly simple and requires just a few steps. In this article, I’ll guide you through the process of making your own delicious sunflower butter, packed with all its health benefits.

Get ready to elevate your snack game with homemade sunflower butter!

Key Takeaways

  • Choose organic sunflower seeds to avoid chemicals and minimize allergic reactions.
  • Roast the seeds at 350°F (175°C) for 15-20 minutes to enhance taste and provide health benefits.
  • Blend roasted sunflower seeds with flavors like honey, cinnamon, or vanilla extract for variety.
  • Store sunflower butter in an airtight container in the refrigerator to maintain freshness and prevent spoilage.

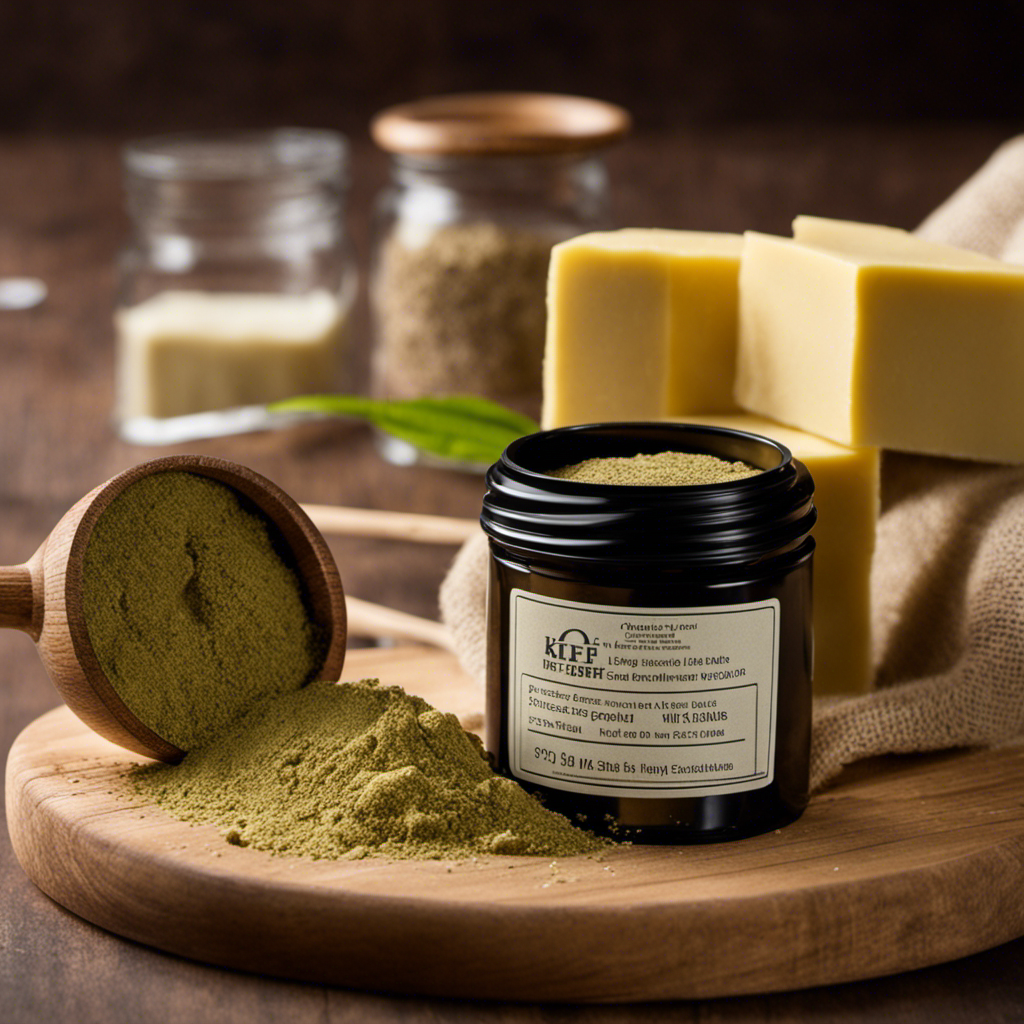
Selecting the Right Sunflower Seeds

To make the best sunflower butter, you’ll want to start by selecting the right sunflower seeds. When it comes to sunflower seed allergies, it’s important to choose seeds that are safe for consumption. Opting for organic seeds can be a good choice, as they are grown without the use of synthetic pesticides or fertilizers. This means that the seeds are less likely to contain any harmful residues that could trigger allergic reactions.

Advertisement

Non-organic seeds, on the other hand, may have been treated with chemicals that could potentially cause allergies in sensitive individuals. By selecting organic sunflower seeds, you can minimize the risk of allergic reactions and enjoy a healthier sunflower butter.

Now that we have chosen the right seeds, let’s move on to the next step of roasting them.

Roasting the Sunflower Seeds

When it comes to roasting sunflower seeds, there are a few key points to keep in mind.

First, the optimal roasting temperature is typically around 350°F (175°C), which allows the seeds to cook evenly and develop a delicious crunch.

In terms of roasting time, it’s recommended to roast the seeds for about 15-20 minutes, or until they turn a golden brown color.

Advertisement

As for seasoning options, you can get creative and add flavors like salt, garlic powder, or even a sprinkle of chili powder to enhance the taste of your roasted sunflower seeds.

Optimal Roasting Temperature

The optimal temperature for roasting sunflower seeds is around 350 degrees Fahrenheit. This temperature allows the seeds to develop a crispy texture and a rich, nutty flavor. Roasting sunflower seeds at higher temperatures can cause them to burn, while lower temperatures may result in a less desirable texture.

Roasting sunflower seeds at the optimal temperature not only enhances their taste but also provides several health benefits. Sunflower seeds are a good source of vitamin E, which acts as an antioxidant and helps protect cells from damage. They also contain healthy fats, fiber, and protein, making them a nutritious snack option.

To further understand the benefits of roasting sunflower seeds at the optimal temperature, let’s take a look at the following table:

Temperature (Fahrenheit) Texture Flavor
325 Soft Mild
350 Crispy Nutty
375 Crunchy Robust
400 Burnt Bitter

Roasting Time Recommendations

For best results, you’ll want to roast your sunflower seeds at the recommended temperature for approximately 15-20 minutes. Roasting techniques play a crucial role in flavor infusion, and getting the timing just right is key to achieving that perfect crunch and taste.

Advertisement

Here are four reasons why following the recommended roasting time is essential:

  1. Optimal texture: Roasting for the suggested time allows the seeds to develop a crispy exterior while maintaining a slightly chewy center, resulting in a delightful eating experience.

  2. Enhanced nuttiness: Roasting for the correct duration brings out the natural nuttiness of sunflower seeds, intensifying their flavor profile and making them even more enjoyable.

  3. Avoiding bitterness: Over-roasting can lead to a bitter taste, so sticking to the recommended time ensures that your sunflower seeds retain their pleasant flavor.

  4. Consistency: Following the suggested roasting time consistently ensures that you achieve the same delicious results every time you make roasted sunflower seeds.

Now that we know the importance of roasting time, let’s explore the exciting world of seasoning options for seeds.

Seasoning Options for Seeds?

Let’s dive into the variety of seasoning options available to enhance the flavor of your roasted seeds. Whether you’re looking for a savory or sweet twist, there are endless possibilities to elevate the taste of your snacks. For popcorn lovers, try sprinkling some nutritional yeast, garlic powder, or chili powder for a delicious and savory kick. If you’re roasting vegetables, consider flavor pairings such as olive oil and balsamic vinegar, lemon and dill, or honey and thyme. These combinations will bring out the natural flavors of the vegetables and add a delightful depth to your dishes. To help you explore even more options, here’s a table highlighting some popular seasoning choices for both popcorn and roasted vegetables:

Popcorn Seasonings Roasted Vegetable Flavor Pairings
Parmesan cheese Rosemary and garlic
Cinnamon sugar Maple syrup and bacon
Ranch seasoning Basil and tomato
BBQ seasoning Smoked paprika and cumin
Truffle salt Lemon pepper and parsley

Now, armed with these seasoning ideas, you can take your roasted seeds to the next level and delight your taste buds with a burst of flavor. Have fun experimenting and enjoy the delicious results!

Blending the Sunflower Seeds

Start by adding the sunflower seeds to the blender and pulsing until they become a smooth butter consistency. This step is crucial in creating a delicious and creamy sunflower butter.

Advertisement

Now, let me share with you some reasons why investing in a good blender for this task is worth it:

  1. Efficiency: A high-powered blender will quickly and effortlessly blend the sunflower seeds into butter, saving you time and effort.

  2. Smooth Texture: A good blender will ensure a silky-smooth consistency, free from any lumps or graininess.

  3. Versatility: Investing in a blender opens up a world of possibilities beyond sunflower butter. You can make other alternative spreads like almond or cashew butter.

  4. Cost-Effective: Making your own sunflower butter using a blender is more cost-effective than buying store-bought alternatives, and you have control over the ingredients used.

With the right blender at hand, you can easily create delicious and healthy alternative spreads like sunflower butter in no time.

Adding Flavor Variations

To add some variety to your homemade spread, try incorporating different flavors like honey, cinnamon, or even a touch of vanilla extract. These flavor combinations can take your sunflower butter to the next level, bringing a delightful twist to your taste buds. Here are some serving suggestions and flavor variations to consider:

Flavor Combination Ingredients Serving Suggestion
Honey and Cinnamon 1 tbsp honey, 1/2 tsp cinnamon Spread on toast or drizzle over pancakes for a sweet and spicy kick.
Vanilla and Almond 1/2 tsp vanilla extract, 1 tbsp almond butter Use in baking as a substitute for traditional nut butters.
Maple and Pecan 1 tbsp maple syrup, 1 tbsp chopped pecans Enjoy on a warm biscuit or as a dip for apple slices.

Experiment with these combinations or create your own unique flavors to suit your preferences. The possibilities are endless!

Storing and Preserving Sunflower Butter

When it comes to storing and preserving sunflower butter, there are a few key points to keep in mind.

Advertisement

First, understanding the shelf life of sunflower butter is crucial for maintaining its quality and freshness.

Proper storage techniques, such as storing in a cool, dry place and sealing the container tightly, can help prolong the shelf life.

Lastly, it is important to be aware of the risks of spoilage and take preventative measures, such as avoiding cross-contamination and regularly checking for signs of mold or off flavors.

Shelf Life Tips

The shelf life of sunflower butter is typically around 6-9 months when stored in a cool and dry place. To ensure the maximum shelf life and freshness of your sunflower butter, here are some tips that can help extend its shelf life and reduce oxidation:

  1. Keep it sealed: Make sure to tightly seal the container after each use. This will prevent air from entering and causing oxidation, which can lead to rancidity.

  2. Store it in a cool place: Heat can accelerate the oxidation process, so it’s important to store sunflower butter in a cool area away from direct sunlight and other sources of heat.

  3. Avoid moisture exposure: Moisture can promote the growth of mold and bacteria, leading to spoilage. Keep your sunflower butter dry and away from areas with high humidity.

  4. Use clean utensils: Always use clean and dry utensils when scooping out sunflower butter to prevent any contamination that may reduce its shelf life.

By following these simple tips, you can ensure that your sunflower butter stays fresh and delicious for as long as possible.

Advertisement

Now, let’s move on to discussing proper storage techniques.

Proper Storage Techniques

Storing in a cool, dry place and using clean utensils are key factors in maintaining the freshness and quality of your sunflower butter.

Proper storage techniques can help prevent rancidity and extend the shelf life of your homemade sunflower butter. To keep it fresh, store the butter in an airtight container or jar. Make sure the container is clean and dry before transferring the butter into it.

It is also important to keep the butter away from direct sunlight and heat sources, as they can accelerate the process of rancidity. If you live in a hot and humid climate, consider storing the sunflower butter in the refrigerator to prolong its freshness.

Preventing Spoilage Risks

To prevent spoilage risks, you should keep your homemade sunflower butter in a cool and dry place. Here are four reasons why proper storage is crucial for extending the shelf life of your sunflower butter:

Advertisement
  1. Freshness: Storing your sunflower butter correctly ensures that it stays fresh for longer periods. This means you can enjoy it for weeks or even months without any concerns about spoilage.

  2. Taste: By preventing oxidation, which occurs when sunflower butter is exposed to air, you can maintain its delicious taste. Proper storage helps retain the natural flavors and prevent any rancid or bitter aftertaste.

  3. Nutritional Value: Sunflower butter contains essential nutrients like vitamin E and healthy fats. Storing it properly preserves these nutrients, ensuring you get the maximum nutritional benefits from your homemade butter.

  4. Cost-saving: By preventing spoilage, you can avoid wasting your homemade sunflower butter. This not only saves you money but also reduces food waste, contributing to a more sustainable lifestyle.

Using Sunflower Butter in Recipes

You can use sunflower butter as a delicious and nutritious alternative to peanut butter in your favorite recipes.

Sunflower butter is a versatile ingredient that can be used as a spread on toast, crackers, or fruit. It can also be incorporated into desserts to add a unique and nutty flavor.

One way to use sunflower butter is by substituting it for peanut butter in cookies, brownies, and cakes. The creamy texture and rich taste of sunflower butter make it a perfect addition to baked goods.

Additionally, sunflower butter can be used as a filling for sandwiches, such as sunflower butter and jelly or sunflower butter and banana.

The possibilities are endless when it comes to using sunflower butter in your recipes, so get creative and enjoy the delicious and nutritious benefits it has to offer.

Advertisement

Health Benefits of Sunflower Butter

When looking for a nutritious alternative, consider the health benefits of using sunflower butter in your recipes. Here are four reasons why incorporating sunflower butter into your diet can be beneficial:

  1. Skin health: Sunflower butter is rich in vitamin E, which is known for its antioxidant properties and ability to promote healthy skin. Regular consumption of sunflower butter can help improve the appearance of your skin and protect it from damage caused by free radicals.

  2. Heart health: Sunflower butter is a good source of monounsaturated fats, which are known to lower bad cholesterol levels and reduce the risk of heart disease. Including sunflower butter in your diet can help improve your heart health and lower the risk of cardiovascular problems.

  3. Nutrient-rich: Sunflower butter is packed with essential nutrients like protein, fiber, magnesium, and vitamin B6. These nutrients are important for overall health and can support proper functioning of the body.

  4. Vegan-friendly: Sunflower butter is a great option for those following a vegan diet as it is made from plant-based ingredients and does not contain any animal products. It can be used as a substitute for traditional butter in a variety of vegan recipes, providing a creamy and flavorful alternative.

Incorporating sunflower butter into your diet can offer numerous health benefits, including improved skin health, heart health, and a boost of essential nutrients. Whether you’re looking to enhance your recipes or follow a vegan lifestyle, sunflower butter is a versatile and nutritious choice.

Frequently Asked Questions

How Many Sunflower Seeds Do I Need to Make Sunflower Butter?

To make sunflower butter, you’ll need a good amount of sunflower seeds. The number depends on how much butter you want to make. Sunflower butter is a great alternative to nut butters and offers various health benefits.

Can I Use Raw Sunflower Seeds Instead of Roasted Ones?

Yes, you can use raw sunflower seeds instead of roasted ones to make sunflower butter. However, using roasted seeds enhances the flavor and creates a smoother texture in the final product.

Can I Add Honey or Maple Syrup to Sweeten the Sunflower Butter?

Yes, you can add honey or maple syrup to sweeten sunflower butter. They are both great alternative sweeteners that can enhance the flavor of the butter. Just add a small amount and adjust to taste.

Advertisement

How Long Does Sunflower Butter Last in the Refrigerator?

Sunflower butter typically lasts for about 3-4 months in the refrigerator. To maximize its shelf life, store it in an airtight container and keep it away from heat and sunlight.

Can I Use Sunflower Butter as a Substitute for Peanut Butter in Baking Recipes?

Yes, you can use sunflower butter as a substitute for peanut butter in baking recipes. It adds a nutty flavor and is a great option for those with peanut allergies. Plus, sunflower butter is rich in Vitamin E and antioxidants.

Conclusion

In conclusion, making your own sunflower butter is a simple and rewarding process. By selecting the right sunflower seeds and roasting them to perfection, you can create a smooth and creamy spread that is packed with flavor.

With the option to add various flavor variations, you can customize your sunflower butter to suit your taste preferences. Not only is sunflower butter delicious, but it also offers numerous health benefits, making it a nutritious choice for your meals and snacks.

So why wait? Start making your own sunflower butter today and elevate your culinary creations to a whole new level of deliciousness!

Advertisement
Continue Reading
Advertisement

Recipes & Culinary Uses

Creamy Delight: Best Butter Pecan Ice Cream Recipe for Summer!

Yearning for a creamy summer treat that will leave you craving more?

Published

on

By

butter pecan ice cream

Savor a delicious summer treat with our Butter Pecan Ice Cream recipe. Mix butter, brown sugar, cream, and pecans for a creamy delight. Melt butter, cook pecans, whisk eggs, and blend for a rich flavor. Add pecans, cream, and vanilla, then freeze to perfection. Master this easy-to-follow recipe for a tasty dessert to beat the heat.

Key Takeaways

  • Rich and creamy blend of butter, brown sugar, and heavy cream
  • Toasted pecans for a nutty crunch and flavor
  • Easy-to-follow steps for homemade ice cream perfection
  • Customization options with variations like bourbon or chocolate
  • Perfect summer treat with a decadent, refreshing taste

Recipe Ingredients for Butter Pecan Ice Cream

To create a delectable batch of butter pecan ice cream, gather the essential ingredients listed in the recipe.

You'll need:

  • Butter
  • Brown sugar
  • Heavy cream
  • Pecans

These ingredients combine to bring out the rich and nutty flavors of this classic dessert.

The brown sugar adds a caramel-like sweetness, while the heavy cream contributes to a creamy texture that's essential for a decadent treat.

Pecans, when toasted in butter, provide a delightful crunch and enhance the overall flavor profile of the ice cream.

Cooking Instructions for Homemade Ice Cream

making ice cream at home

Start by melting butter in a skillet to infuse the pecans with a rich, nutty flavor for your homemade butter pecan ice cream.

Here's a quick guide to help you make this creamy delight:

Advertisement
  • Melt butter and cook pecans for flavor.
  • Whisk eggs and combine with half-and-half and brown sugar for a creamy base.
  • Cook until thickened, then mix with eggs in a bowl.
  • Add cream, pecans, and vanilla extract.
  • Freeze the mixture in an ice cream maker.

Following these steps will guarantee your homemade butter pecan ice cream turns out rich and delicious.

Remember to carefully adhere to the manufacturer's instructions for your ice cream maker to achieve the perfect consistency.

Enjoy the process of creating this delightful treat that will surely be a hit during the summer months.

Ice Cream Preparation Steps

ice cream recipe instructions

Mix half and half with brown sugar over medium heat in a large bowl to prepare the ice cream base.

Next, whisk beaten eggs and temper them with the warm milk mixture to create a smooth custard.

Once done, thicken the mixture on low heat, then cool it over an ice bath to achieve ideal texture.

After that, stir in heavy cream, vanilla extract, maple extract, and a pinch of salt for rich flavor.

Advertisement

Remember to refrigerate the mixture for 1 1/2 – 2 hours before churning it into creamy butter pecan ice cream.

This process ensures that the flavors meld together beautifully and the ice cream attains the perfect consistency for scooping and savoring.

Nutritional Information and Tips

healthy eating guidance provided

Considering the rich and creamy nature of homemade butter pecan ice cream, it's important to be mindful of its nutritional content and serving size. When indulging in this delectable dessert, remember these essential tips:

  • Portion Control: Enjoy in moderation to savor the flavors without overindulging.
  • Brown Sugar Sweetness: Opt for a moderate amount of brown sugar to balance sweetness without overwhelming the palate.
  • Room Temperature Ingredients: Confirm ingredients like butter and heavy cream are at room temperature for a smoother texture.
  • Nutritional Awareness: Be mindful that homemade butter pecan ice cream can vary in nutritional content, so adjust ingredients accordingly.
  • Consultation: Seek advice from a nutritionist or healthcare provider for personalized guidance on incorporating this treat into a balanced diet.

Homemade Butter Pecan Ice Cream Variations

delicious homemade ice cream

Explore creative twists on traditional butter pecan ice cream by incorporating different nuts, spirits, sauces, chocolates, and dairy-free alternatives.

For a unique flavor, try substituting pecans with walnuts or almonds in the full recipe. Toast the nuts in a separate bowl until browned and fragrant, then chop them finely enough to coat in the ice cream mixture.

To add a boozy kick, mix in a splash of bourbon or rum to the base as you churn the ice cream. For an extra indulgent touch, swirl in caramel sauce or fudge ripple throughout the mixture.

Incorporate chunks of chocolate or chocolate-covered nuts for a delightful contrast in texture, giving each bite a sweet surprise.

Advertisement

If you prefer a lighter, dairy-free option, consider using coconut milk or almond milk as a substitute for traditional dairy products. These alternatives provide a creamy base while catering to plant-based diets.

Experiment with these variations to create a personalized butter pecan ice cream that suits your taste preferences.

Frequently Asked Questions

What Is the Secret to Making Ice Cream Very Creamy?

To make ice cream very creamy, you use a rich base of ingredients like heavy cream, eggs, and sugar. Chilling the base before churning is crucial for a smoother texture. Adding vanilla extract enhances creaminess, and slow churning prevents a dense outcome.

What Flavor Is the Ice Cream in Butter Pecan?

The ice cream in butter pecan is a delightful blend of buttery richness, vanilla sweetness, and maple undertones, perfectly paired with toasted pecans for a nutty crunch. This flavor combination creates a harmonious and indulgent treat.

What's the Difference Between Butter Pecan Ice Cream and Praline Pecan Ice Cream?

In butter pecan ice cream, you'll savor the buttery richness of pecans blended with a creamy base. On the other hand, praline pecan ice cream highlights caramelized sweetness with a swirl of praline sauce for a delightful flavor contrast.

Advertisement

What Age Group Eats Butter Pecan Ice Cream?

You'll find that adults and older individuals, typically in the 30-60 age group, enjoy butter pecan ice cream. It's a favorite among those with a more refined palate, drawn to its rich and nutty flavor.

Conclusion

So there you have it, folks! Whip up this buttery, nutty delight for a taste of summer in every scoop.

Don't cry over spilled milk – grab a cone and enjoy this creamy treat that's sure to satisfy your sweet tooth.

Get churning and indulge in the best butter pecan ice cream you've ever tasted!

Advertisement
Continue Reading

Recipes & Culinary Uses

Festive Favorites: Best Peanut Butter Blossoms Recipe for Holidays!

Unleash the ultimate holiday baking magic with the best Peanut Butter Blossoms recipe – an irresistible treat that will elevate your festive celebrations!

Published

on

By

holiday baking with flair

Elevate your holiday baking with the ultimate Peanut Butter Blossoms recipe. Cream together peanut butter, butter, sugars, and salt, then add egg and vanilla. Roll dough into balls, coat in brown sugar, bake until golden, then press a Hershey's kiss on top. Adjust baking time as needed. Explore ingredient swaps for a personalized touch. Enjoy with hot cocoa or pair with savory dishes. For more tips, ideas, and customization options, the recipe holds more festive surprises.

Key Takeaways

  • Cream together peanut butter, butter, sugars for rich flavor.
  • Bake at 375°F for 8-10 minutes for soft, chewy cookies.
  • Customize with ingredient swaps like almond butter or maple syrup.
  • Pair with savory dishes or hot cocoa for holiday enjoyment.
  • Press Hershey kisses onto warm cookies for a classic finish.

Ingredients for Peanut Butter Blossoms

For the classic Peanut Butter Blossoms recipe, gather peanut butter, butter, sugar, an egg, and Hershey's kisses as your essential ingredients.

Peanut butter is the star, offering a rich flavor that blends perfectly with the sweetness of the cookies.

Butter plays a pivotal role by adding moisture and richness to the dough, ensuring a soft and chewy texture.

The sugar not only sweetens the cookies but also contributes to their festive appeal, making them a perfect treat for any occasion.

Finally, the Hershey's kisses on top provide a delightful chocolatey finish that elevates these cookies to a whole new level of deliciousness.

Advertisement

Together, these ingredients create a harmonious blend of flavors and textures that make Peanut Butter Blossoms a beloved classic for holiday baking or any time you crave a sweet and satisfying treat.

Recipe Steps for Peanut Butter Blossoms

bake peanut butter cookies

To make Peanut Butter Blossoms, start by creaming together peanut butter, butter, sugars, and salt until light and fluffy.

Next, add in the egg and vanilla extract, making sure to mix well to combine all the ingredients thoroughly.

Then, gradually incorporate the dry ingredients into the wet mixture until a smooth dough forms.

Once the dough is ready, roll it into balls and coat each ball generously in brown sugar.

Place the sugar-coated dough balls on a baking sheet, making sure to leave enough space between them for spreading during baking.

Advertisement

Bake the cookies in a preheated oven until they turn a beautiful golden brown.

As soon as the cookies are out of the oven, press a Hershey's kiss into the center of each cookie gently.

The heat from the freshly baked cookies will melt the chocolate just enough to adhere it to the cookie.

These Peanut Butter Blossoms are a delightful treat perfect for Christmas celebrations!

Pro Tips for Making Peanut Butter Blossoms

baking perfect peanut blossoms

To enhance your peanut butter blossom baking experience, consider adjusting the baking time based on your oven's performance for best results.

Additionally, explore ingredient substitutions to cater to dietary preferences or allergies without compromising the flavor or texture of the cookies.

Advertisement

These pro tips can help you customize your peanut butter blossoms while ensuring delicious outcomes.

Baking Time Recommendations

Achieving the ideal texture for your peanut butter blossoms involves baking them at 375°F for 8-10 minutes. This baking duration guarantees that the cookies have a soft and chewy consistency while allowing the Hershey kisses on top to be softened but not completely melted.

Once out of the oven, remember to press the Hershey kisses onto the cookies immediately to secure them in place for that classic appearance.

For the best outcomes, chill the cookie dough for about 30 minutes before baking. This step helps the cookies maintain their shape and prevents excessive spreading during baking, ensuring your peanut butter blossom cookies are perfectly formed and ready to impress during your holiday baking.

Shortening or extending the baking time can alter the texture of the cookies. A quick bake of 6-8 minutes produces softer and chewier cookies, while longer baking times yield a slightly crispier consistency. Stick to the recommended 8-10 minutes for the best soft and chewy peanut butter blossoms.

Advertisement

Ingredient Substitutions

Consider incorporating different ingredients to elevate the flavor and nutritional profile of your peanut butter blossoms. For a healthier option, swap out shortening with unsalted butter to achieve a unique texture and taste in your cookies.

Try using natural peanut butter instead of creamy to add a wholesome twist to the classic recipe. If you're looking to reduce the glycemic impact, substitute brown sugar with coconut sugar in your baking. For a natural sweetener alternative, replace regular granulated sugar with maple syrup in the cookie dough mixture.

Additionally, for a distinct flavor experience, experiment with almond butter as a substitute for peanut butter in your blossoms. These ingredient substitutions can bring a new dimension to your peanut butter blossoms, making them not only delicious but also tailored to your dietary preferences.

Upgrade your baking game this holiday season with these creative twists on a beloved recipe!

Serving Suggestions for Peanut Butter Blossoms

peanut butter cookie recipe

Enhance the enjoyment of your peanut butter blossoms by pairing them with savory dishes like lasagna tortellini soup for a satisfying meal. These classic cookies also complement family-friendly dinners such as easy ground beef shepherd's pie and creamy broccoli cheddar soup, making for a delightful combination. The holiday season calls for cozy treats, and the sweet nuttiness of peanut butter blossoms pairs perfectly with a warm cup of hot cocoa. Whether you're participating in a cookie exchange or looking for a festive touch to your holiday dessert spread, consider rolling the cookies in red, green, and white sugar sprinkles to add a pop of color and fun.

Serving Suggestions Pairing Ideas
Lasagna Tortellini Soup Comforting and hearty meal alongside the cookies
Easy Ground Beef Shepherd's Pie Delicious combination for a family dinner
Creamy Broccoli Cheddar Soup Perfect accompaniment to the nutty cookie flavors

12 Days of Christmas Cookies Recipes

baking traditions for the holidays

Indulge in a variety of delightful Christmas cookie recipes each day during the holiday season. One standout choice is the classic Peanut Butter Blossoms. These holiday cookies feature a peanut butter base topped with a Hershey's kiss, making them a beloved treat for cookie exchanges and festive gatherings.

The process of making these cookies is simple yet rewarding. Start by rolling the dough balls in sugar before baking to add a sweet crunch to each bite. The combination of rich peanut butter flavor and the chocolatey goodness of the Hershey's kiss creates a perfect balance of sweetness.

Advertisement

When enjoying these Christmas cookies, consider pairing them with a glass of milk for a classic and satisfying treat.

Whether you're baking them for your family, a cookie exchange, or a holiday party, Peanut Butter Blossoms are sure to be a hit. Make each day of the holiday season a little sweeter with these delicious cookies.

User Engagement Features

user interaction enhancements

Let's talk about how user interaction features and personalization options enhance your experience with the Peanut Butter Blossoms recipe.

You can engage with others by leaving comments and sharing your results, creating a sense of community around this holiday treat.

Personalization options like name and email entry fields help tailor the experience to your preferences, making it more engaging and enjoyable.

User Interaction Features

Utilizing user engagement features on the website allows for increased participation and feedback from visitors. The comment section enables users to interact with each other and provide valuable feedback on the Peanut Butter Blossoms recipe or share their experiences with Hershey's kisses. By incorporating a reply option, users can engage in conversations, fostering a sense of community around baking these delightful peanut butter cookies.

Advertisement

Moreover, the inclusion of name and email fields not only allows for personalization but also facilitates communication between the website and its visitors. This data storage feature guarantees that users can conveniently access their information for future visits, enhancing their overall user experience.

These user engagement features play an essential role in creating an interactive platform where users can engage, provide feedback, and communicate effectively. Such interaction not only enriches the user experience but also encourages visitors to actively participate in the community surrounding the Peanut Butter Blossoms recipe.

Personalization Options

Enhance your website's user engagement by incorporating personalized options such as commenting, replying, and sharing feedback on the Peanut Butter Blossoms recipe. This level of user interaction not only fosters a sense of community building but also encourages customization and feedback. By allowing users to share their thoughts, results, and experiences with the festive favorites, you create a more engaging and interactive user experience. Additionally, providing users with the option to save their data for future visits and encouraging them to tag @preppykitchen and use #preppykitchen when trying the recipe further enhances their engagement.

Personalization Options Description Benefits
Commenting Users can leave comments on the Peanut Butter Blossoms recipe, sharing their thoughts and experiences. Fosters community building and user engagement.
Replying Users can reply to comments and engage in discussions with other users about the recipe. Encourages active participation and interaction.
Feedback Sharing Users can share feedback on the recipe, providing valuable insights for improvement. Enhances user experience and customization.

Additional Information

clarifying specific details provided

You may find it interesting to know more about the history of the Peanut Butter Blossoms recipe and its cultural significance during the holidays.

  • The Peanut Butter Blossoms recipe's popularity is backed by IRI MULO data, making it a sought-after choice for holiday baking.
  • Copyright for this beloved recipe belongs to The J.M. Smucker Company, a reputable name in the food industry known for quality products.
  • These delightful cookies aren't only perfect for serving at holiday parties but also make excellent gifts due to their festive appeal.

Frequently Asked Questions

Why Are My Peanut Butter Blossoms Dry?

If your peanut butter blossoms are dry, it could be due to using too much flour, overbaking, using natural peanut butter that requires stirring, or not enough butter/shortening. Guarantee precise measurements and follow the recipe closely to maintain moisture.

Why Did My Peanut Butter Blossoms Go Flat?

When making peanut butter blossoms, going flat happens due to overmixing, too much flour, insufficient chilling, or low oven temperature. Remember to avoid these pitfalls. Preheat the oven properly and follow the recipe for perfect blossoms!

What Is America's Favorite Christmas Cookie?

America's favorite Christmas cookie is Peanut Butter Blossoms. Loved for their peanut butter-chocolate combo and nostalgic Hershey's Kiss center, these easy-to-make treats are a holiday staple at parties and gatherings. They're a must-have during the festive season.

Advertisement

What Is Baskin Robbins Peanut Butter Blossom?

You asked about Baskin Robbins Peanut Butter Blossom. It's a delectable seasonal ice cream flavor featuring creamy peanut butter ice cream with a ribbon of more peanut butter and chocolate cookie pieces. Indulge in this festive treat!

Conclusion

Indulge in the warm, gooey goodness of these peanut butter blossoms this holiday season. With the perfect blend of creamy peanut butter and rich chocolate, these cookies are sure to bring joy to your festivities.

Picture yourself surrounded by loved ones, sharing laughter and memories as you enjoy these delicious treats. Let the aroma of freshly baked cookies fill your home and create a cozy, festive atmosphere.

Happy baking and happy holidays!

Advertisement
Continue Reading

Recipes & Culinary Uses

Bite-Sized Treats: Best Peanut Butter Ball Recipe You'll Love!

Adore these heavenly peanut butter balls with a delectable mix of smooth peanut butter, powdered sugar, and vanilla—perfect for indulging in bite-sized bliss!

Published

on

By

delicious peanut butter balls

You'll adore these easy and heavenly peanut butter balls. Mix smooth peanut butter, powdered sugar, and vanilla extract for a delectable dough. Roll into small balls and chill. Dip in melted chocolate, then refrigerate to set. Enhance the flavor with rum extract, nuts, or crushed pretzels. Get creative with colorful sprinkles and different chocolate coatings. Use quality chocolate coating and adjust mix consistency. Store them in the fridge or freezer. Enjoy these mouthwatering treats alone or at gatherings. More tips and delightful variations await!

Key Takeaways

  • Creamy peanut butter, powdered sugar, and vanilla create a smooth dough.
  • Incorporate nuts, rum extract, or pretzels for flavor and texture variety.
  • Use quality chocolate coating like candy melts for best results.
  • Chill peanut butter balls before dipping for easier handling.
  • Store in the fridge or freezer for convenient snacking and serving.

Ingredients and Preparation

To create irresistible peanut butter balls, gather creamy peanut butter, powdered sugar, and vanilla extract as your key ingredients.

Begin by mixing the peanut butter, butter, sugar, and vanilla until you have a smooth dough. Roll this mixture into small balls and chill them before dipping them in melted chocolate.

The type of chocolate you use, such as dark or milk chocolate, will enhance the flavor of your peanut butter balls. After dipping, make sure to refrigerate the balls until the chocolate sets for a perfect finish.

This process guarantees that each bite-sized treat isn't only visually appealing but also bursting with delicious peanut butter and chocolate flavors.

Variations and Enhancements

creative modifications and improvements

You can elevate the flavor of your peanut butter balls by incorporating unique ingredients like chopped nuts or rum extract.

Experiment with different chocolate coatings such as white almond bark or dark chocolate candy melts for a varied taste experience.

Advertisement

Get creative by adding finishing touches like colorful sprinkles to make your peanut butter balls visually appealing.

Flavorful Ingredient Additions

Enhance the flavor of your peanut butter balls by incorporating unique ingredient variations and enhancements. While the classic combination of peanut butter, powdered sugar, and butter creates a delicious dough for your treats, you can take it up a notch by adding flavorful ingredient additions.

Consider mixing in crushed pretzels for a salty crunch that complements the sweetness of the peanut butter. Chopped nuts like almonds or pecans can also add a delightful texture and nutty taste to your chocolate-covered peanut butter balls.

For a burst of fruity flavor, try incorporating dried cranberries or raisins into the dough. These additions not only provide a contrast in texture but also introduce a hint of sweetness that pairs well with the creamy peanut butter.

Another option is to include a sprinkle of cinnamon or a dash of vanilla extract to elevate the overall taste profile of your peanut butter balls. Experiment with these flavorful ingredient additions to create a unique and delectable twist on the classic treat.

Advertisement

Chocolate Coating Options

Experiment with different types of chocolate coatings – dark, white, or milk chocolate – to suit your preferences and elevate the flavor of your peanut butter balls.

When considering the chocolate coating for your crunchy peanut butter treats, here are some options to enhance your culinary creation:

  1. Choose Candy Melts or Almond Bark: Opt for candy melts or almond bark for a smooth and firm chocolate coating that sets well on your peanut butter balls.
  2. Avoid Chocolate Chips: Steer clear of using chocolate chips for coating, as they may contain stabilizers that hinder smooth melting, affecting the overall texture.
  3. Add Colored Sprinkles: For a festive touch, sprinkle colored sprinkles on top of the chocolate coating before it sets to add a pop of color and extra crunch to your peanut butter balls.

Experimenting with different chocolate coatings and techniques can take your peanut butter balls to the next level, ensuring a delightful and indulgent treat for any occasion.

Creative Finishing Touches

To elevate the flavor profile of your peanut butter balls, consider incorporating creative finishing touches through various enhancements and unique variations.

You can enhance the texture by adding chopped nuts or crispy rice cereal to the peanut butter mixture, providing a delightful crunch with every bite.

Experiment with different flavors by using almond extract or rum extract instead of vanilla for a twist on the traditional taste.

Advertisement

For a festive touch, roll the balls in crushed graham crackers, sprinkles, or a sprinkle of sea salt to add a pop of flavor.

Drizzle white chocolate over the dark, semi-sweet, or milk chocolate coating for a visually appealing contrast that will impress your guests.

If you enjoy a crunchy element, try coating the balls in crushed pretzels or toasted coconut before the chocolate sets.

These creative enhancements will take your peanut butter balls to the next level, making them a standout treat at any gathering.

Tools and Tips

crafting with precision

Consider using a 1 tablespoon cookie scoop for consistent sizing when preparing your peanut butter balls. This tool will help guarantee all your treats are uniform in size, making for a neat presentation and even cooking.

Here are some additional tools and tips to enhance your peanut butter ball-making experience:

Advertisement
  1. Invest in Quality Chocolate Coating: Opt for candy melts or almond bark for a smooth and firm chocolate coating on your peanut butter balls. These coatings melt easily and provide a professional finish to your treats.
  2. Adjust Peanut Butter Mixture Consistency: If your peanut butter mixture is too sticky or too dry, adjust the consistency by adding more peanut butter or powdered sugar. This will help you achieve the perfect texture for shaping your balls.
  3. Refrigerate Before Dipping: Prior to dipping your peanut butter balls in chocolate, chill them in the refrigerator. This step will make the balls firmer, making them easier to handle and coat without falling apart.

Storage and Serving Suggestions

great suggestion for storage

For best freshness and presentation of your peanut butter balls, follow these storage and serving suggestions.

To keep your peanut butter balls tasting delicious, store them properly. You can store them in an airtight container in the fridge for up to 1 week or in the freezer for up to 2 months. When freezing, remember to thaw the frozen peanut butter balls before serving by bringing them to room temperature. To prevent them from sticking together, separate the layers of peanut butter balls with wax paper.

Here is a helpful table summarizing the storage and serving suggestions:

Storage Serving Frozen
Airtight container Display on festive tray Thaw before serving
Fridge – 1 week Pair with hot cocoa Bring to room temp
Freezer – 2 months Enjoy at holiday gatherings
Separate with wax paper

Additional Peanut Butter Desserts

peanut butter dessert recipes

Explore a variety of delectable peanut butter desserts to satisfy your sweet cravings.

  1. Peanut Butter Blossom Cookies: Indulge in the classic combination of peanut butter cookies topped with a chocolate kiss for a delightful treat.
  2. Peanut Butter Chocolate Mug Cake: Whip up this easy-to-make single-serving dessert that combines the rich flavors of peanut butter and chocolate in a mug for a quick fix.
  3. Peanut Butter Overload Cookies: For those who can't get enough peanut butter, these cookies are loaded with peanut butter chips, chocolate chips, and chopped peanuts for an explosion of flavor in every bite.

These additional peanut butter desserts offer a diverse selection to cater to your cravings.

Whether you're in the mood for a classic treat like Peanut Butter Blossom Cookies, a quick fix with Peanut Butter Chocolate Mug Cake, or a flavor-packed experience with Peanut Butter Overload Cookies, there's something for every peanut butter lover.

Enjoy these easy-to-make delights whenever you need a sweet pick-me-up!

Recipe Instructions and Nutritional Information

cooking guidance and facts

To create these delectable Peanut Butter Balls, start by blending peanut butter, butter, sugar, and vanilla to form a dough. Roll the mixture into small balls and place them on a baking sheet lined with parchment paper. Chill the peanut butter balls in the refrigerator for about 30 minutes until firm.

Once chilled, melt chocolate in a heatproof bowl over simmering water or in the microwave. Dip each chilled peanut butter ball into the melted chocolate, ensuring they're evenly coated. Place the coated balls back on the parchment paper and let the chocolate set.

Advertisement

Each serving of these delightful treats contains approximately 114 calories.

Store the finished peanut butter balls in the fridge for up to 2 weeks or freeze them for up to 3 months.

Enjoy these decadent bite-sized snacks whenever you crave a sweet and nutty indulgence.

Frequently Asked Questions

Can I Use Chunky Peanut Butter Instead of Creamy for This Recipe?

Yes, you can use chunky peanut butter instead of creamy for this recipe. It will add a delightful texture and extra crunch to your peanut butter balls. Enjoy experimenting with different variations!

How Long Do Chocolate Covered Peanut Butter Balls Stay Fresh?

Like a sweet memory, chocolate-covered peanut butter balls stay fresh for up to two weeks when stored in an airtight container in the fridge. Indulge in these delectable treats within that time frame for best taste.

Advertisement

Can I Freeze the Peanut Butter Balls for Later Enjoyment?

Yes, you can freeze the peanut butter balls for later enjoyment. Simply place them in an airtight container or freezer bag. When ready to indulge, let them thaw in the fridge for a few hours.

What Type of Chocolate Is Best for Coating the Peanut Butter Balls?

For coating the peanut butter balls, semi-sweet or milk chocolate works best. They provide a delicious contrast to the creamy peanut butter filling. Simply melt the chocolate, dip the balls, and enjoy the sweet treat!

Can I Add Chopped Nuts or Sprinkles to the Peanut Butter Balls for Extra Flavor?

You can definitely add chopped nuts or sprinkles to the peanut butter balls for extra flavor. It's a great way to customize your treats and add a delightful crunch or colorful touch to each bite.

Conclusion

Indulge in these irresistible peanut butter balls that are sure to satisfy your sweet tooth cravings.

With just a few simple ingredients and easy-to-follow instructions, you can enjoy these bite-sized treats in no time.

Advertisement

So go ahead, treat yourself to a little taste of heaven and experience the perfect combination of creamy peanut butter and rich chocolate.

You won't be able to resist coming back for more!

Continue Reading
Advertisement

Affiliate disclaimer

As an affiliate, we may earn a commission from qualifying purchases. We get commissions for purchases made through links on this website from Amazon and other third parties.

Advertisement

Trending