Connect with us

Recipes & Culinary Uses

Create Rich Sage Brown Butter in 5 Easy Steps

Published

on

An image that showcases the gradual transformation of golden butter as it sizzles in a pan, releasing a fragrant aroma

Curious about how to enhance your dishes with a burst of savory flavor? Sage brown butter is the perfect solution!

This golden elixir, made by melting and browning butter with aromatic sage leaves, will take your culinary creations to the next level. With its rich and nutty taste, sage brown butter adds depth and complexity to everything from roasted vegetables to pasta dishes.

Join me as I guide you through the simple yet transformative process of making this delectable concoction.

Key Takeaways

  • Choose vibrant and green leaves of sage for the best flavor.
  • Properly melt and brown the butter to achieve a rich and nutty taste.
  • Infuse the butter with sage flavors by simmering fresh sage leaves in the melted butter.
  • Strain the butter to remove sage leaves and impurities for a refined final product.

Selecting and Preparing Fresh Sage

Before you start making the sage brown butter, make sure you have fresh sage leaves on hand.

Advertisement

When it comes to selecting and preparing sage leaves, there are a few key things to keep in mind. First, always choose leaves that are vibrant and green, avoiding any that are wilted or discolored.

To preserve the freshness of your sage, store it in the refrigerator wrapped in a damp paper towel or in a plastic bag with some air holes.

When you’re ready to use the sage, gently wash the leaves under cool water and pat them dry with a clean towel. Removing the tough stems is also important, as they can be bitter. Simply hold the stem at the base and strip the leaves off with your fingers.

With these simple steps, you’ll have perfectly prepared sage leaves for your delicious sage brown butter.

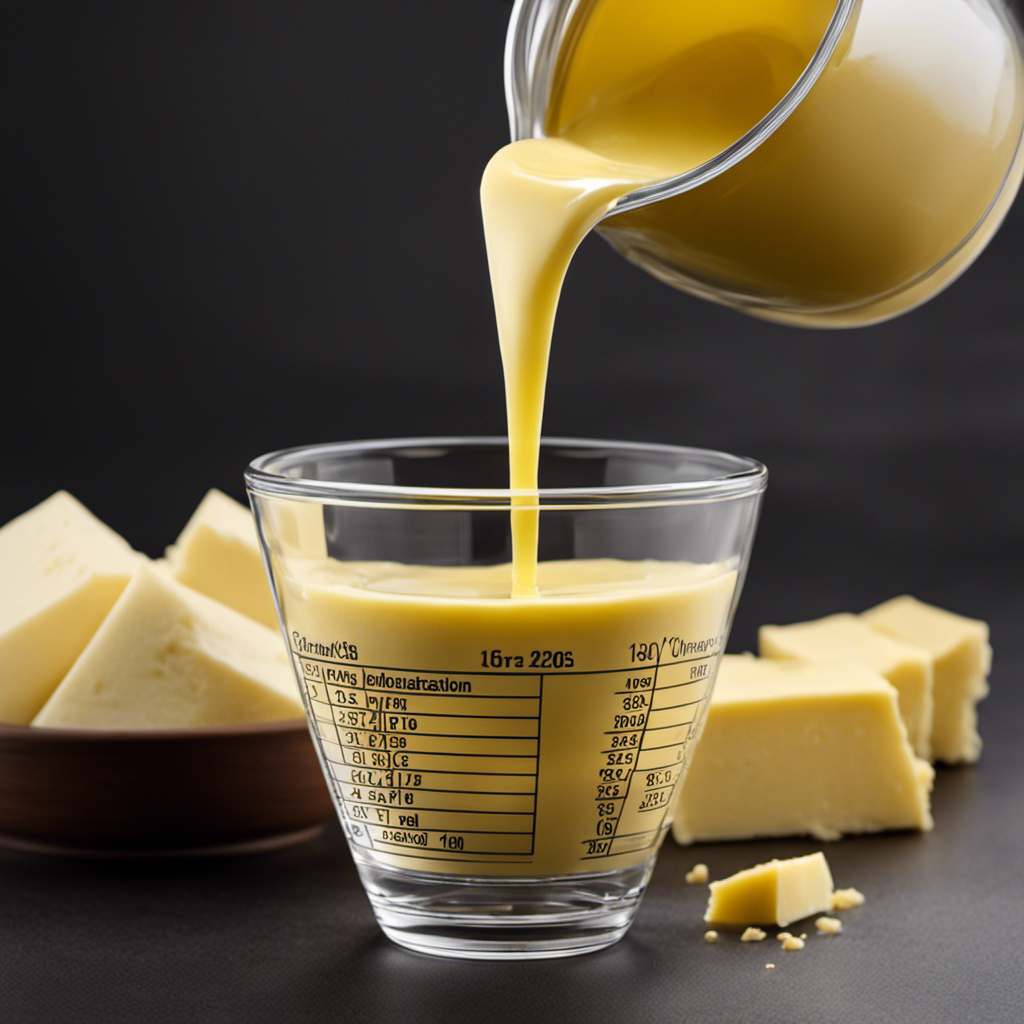
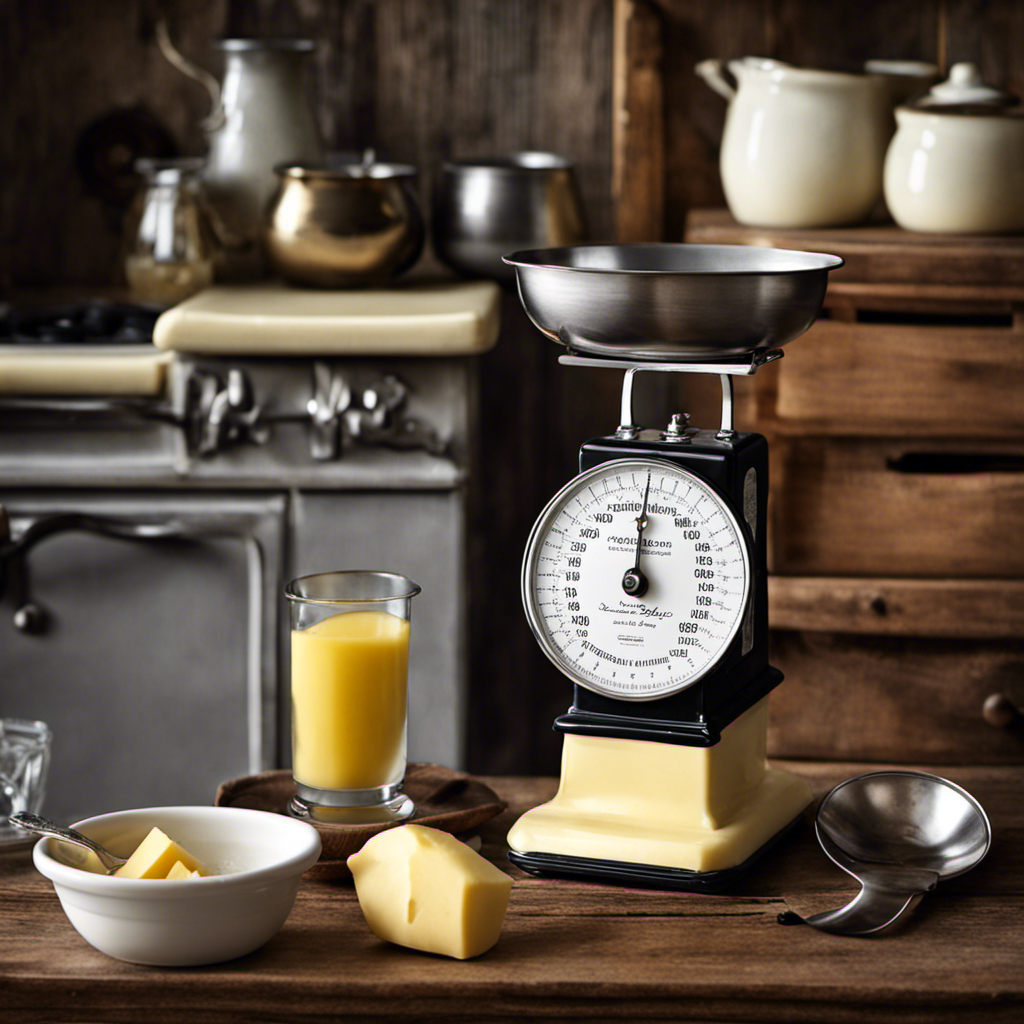
Melting and Browning the Butter

While melting and browning the butter, it’s important to keep a close eye on the stove to prevent burning. This melting technique and browning process are crucial for achieving the rich and nutty flavor of sage brown butter. Here are some key steps to follow:

Advertisement
  1. Use a medium heat: Start by melting the butter in a saucepan over medium heat. This allows the butter to melt evenly without scorching.

  2. Swirl the pan: Continuously swirl the pan to ensure even heat distribution. This helps the butter to brown evenly and prevents any hot spots.

  3. Watch for color change: As the butter melts, it will go through different stages. First, it will foam, then the foam will subside, and finally, the butter will turn a golden brown color. Pay close attention to prevent any burning.

  4. Remove from heat: Once the butter reaches a beautiful golden brown color and releases a nutty aroma, immediately remove it from the heat to prevent further browning.

Now that the butter is perfectly melted and browned, it’s time to move on to the next step: adding sage to the butter.

Adding Sage to the Butter

After browning the butter, it’s time to infuse it with the aromatic flavor of sage. Adding sage to the butter will transform it into a flavorful seasoning that can elevate any dish. Sage is a herb known for its earthy and slightly peppery taste, making it a perfect match for butter.

To create herb-infused butter, simply follow these steps:

Advertisement
  1. Melt the browned butter in a saucepan over low heat.
  2. Add fresh sage leaves to the melted butter.
  3. Allow the sage to simmer in the butter for about 5 minutes, stirring occasionally.
  4. Remove the saucepan from heat and let the butter cool slightly.
  5. Strain the butter to remove the sage leaves, leaving behind the infused butter.

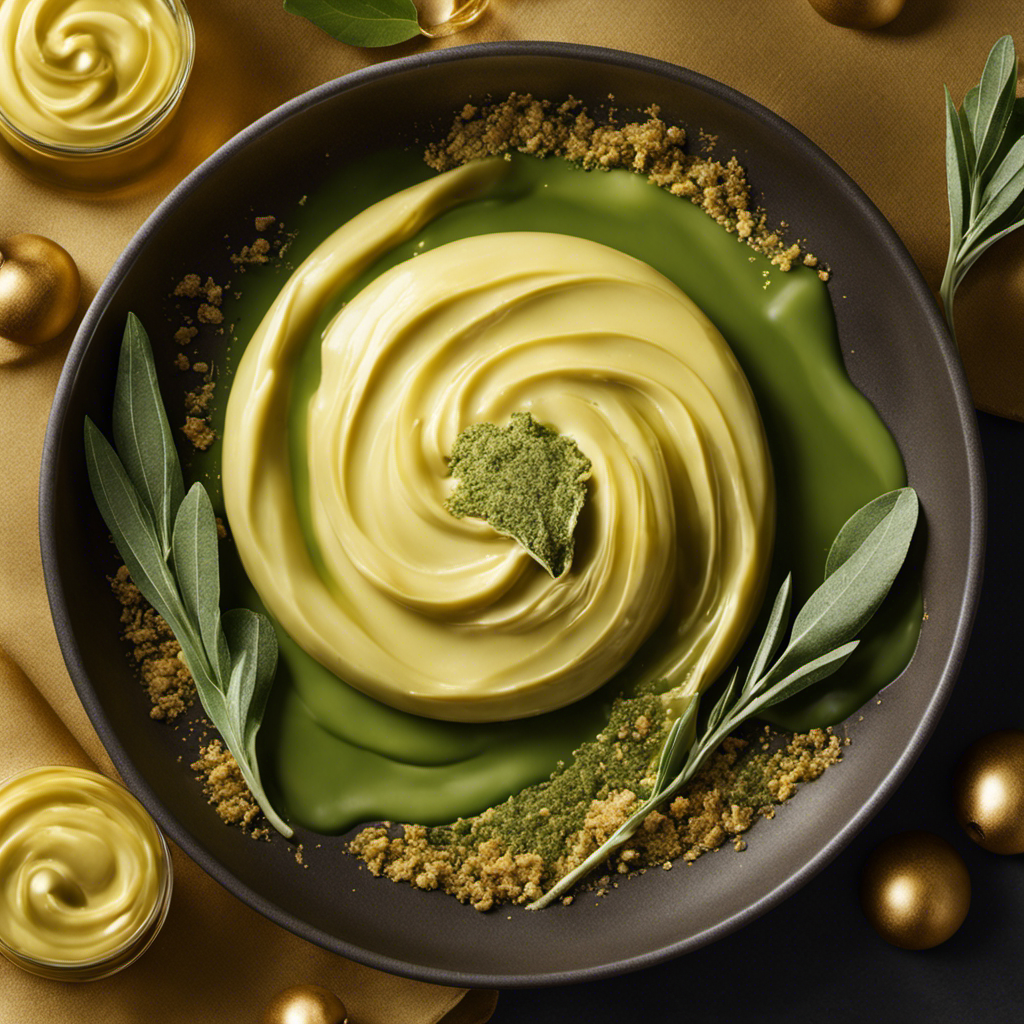
The result is a rich and aromatic butter that can be used to enhance the flavor of roasted vegetables, pasta dishes, or even spread on warm bread. The combination of the nutty brown butter and the herbal notes of sage creates a truly delightful culinary experience.

Infusing the Butter With Sage Flavors

To infuse the butter with the flavors of sage, simply simmer fresh sage leaves in the melted butter for about 5 minutes. This infusing technique allows the butter to absorb the aromatic essence of the sage, creating a deliciously fragrant and flavorful compound butter.

Here are some flavor pairings to enhance your sage brown butter:

  1. Lemon zest: Add a bright and citrusy note to your butter by grating some fresh lemon zest into the mixture. This adds a refreshing tang that pairs perfectly with the earthiness of sage.

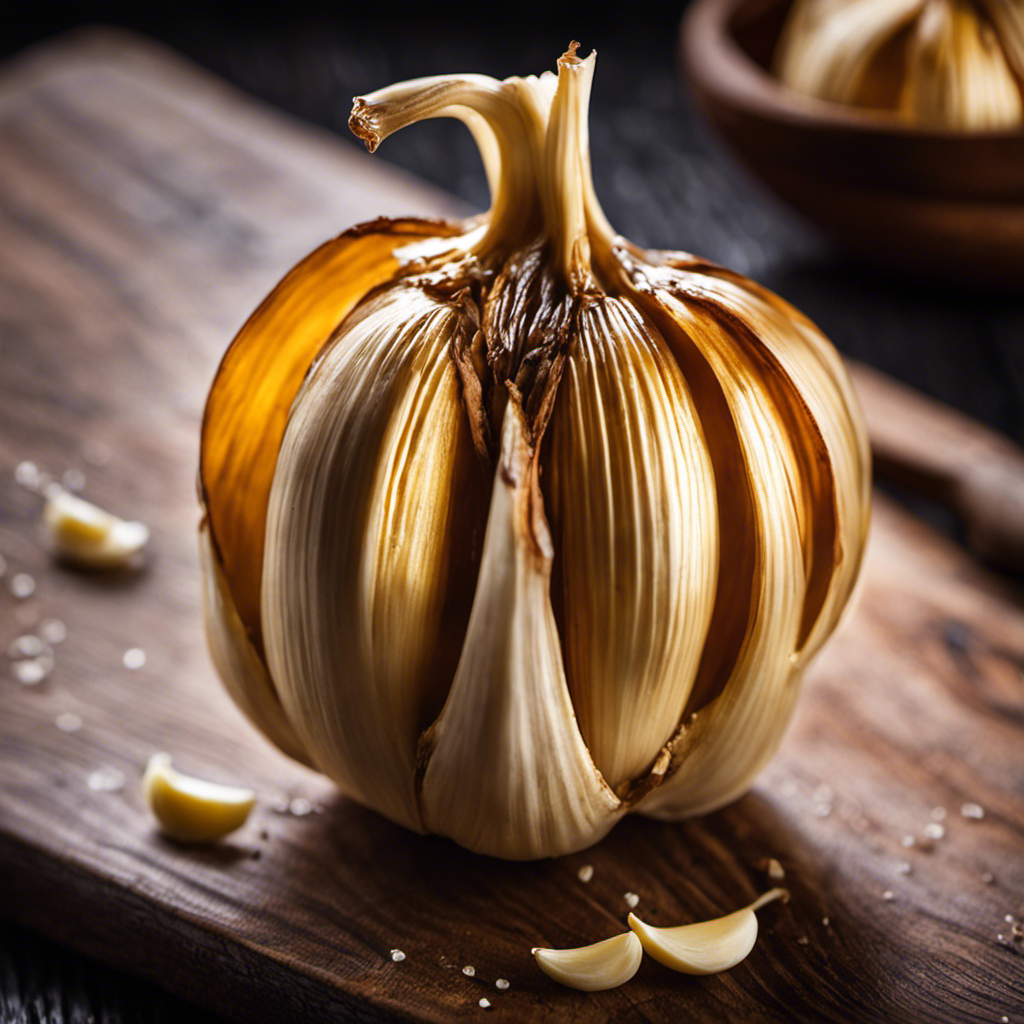
  2. Garlic: For a savory and garlicky twist, mince some garlic cloves and sauté them in the butter before adding the sage leaves. The combination of garlic and sage creates a bold and robust flavor profile.

  3. Parmesan cheese: Sprinkle in some finely grated Parmesan cheese to give your sage brown butter a rich and nutty taste. The saltiness of the cheese complements the herbal notes of the sage beautifully.

  4. Black pepper: A dash of freshly ground black pepper adds a subtle hint of spiciness to the butter, balancing out the other flavors and adding depth to the overall taste.

With these infusing techniques and flavor pairings, your sage brown butter will elevate any dish, from pasta to roasted vegetables, with its irresistible aroma and taste.

Straining Out the Sage Leaves

Advertisement

Now that you’ve simmered the sage leaves in the melted butter, strain out the leaves to achieve a smooth and velvety texture. Straining the butter is an important step in the process of making sage brown butter, as it removes any bits of sage leaves and impurities, ensuring a refined and flavorful final product. There are different straining methods you can use, depending on your preference and the tools you have available. One common method is to pour the melted butter through a fine-mesh sieve or cheesecloth-lined strainer into a bowl. This helps to catch any solids while allowing the smooth butter to pass through. Another option is to use a coffee filter placed in a funnel, which provides a more thorough strain. Once strained, you can enhance the flavor of the sage brown butter by adding other herbs like thyme or rosemary. This adds complexity and depth to the butter, making it even more delicious.

Straining Methods Advantages Disadvantages
Fine-mesh sieve Easy to use Some solids may pass through
Cheesecloth-lined strainer Effective in removing solids Requires extra equipment
Coffee filter and funnel Thorough strain Takes longer to strain

Experiment with different straining methods and herb combinations to find your perfect sage brown butter. Enjoy the rich, aromatic flavor it brings to your dishes!

Storing and Using Sage Brown Butter

When storing sage brown butter, it’s important to keep it in an airtight container in the refrigerator to maintain its freshness and flavor.

Here are some techniques for storing and using sage brown butter:

  1. Refrigerate: Store the sage brown butter in the coldest part of the refrigerator to ensure it stays solid and doesn’t melt.

  2. Airtight Container: Transfer the butter to a clean, airtight container to prevent any odors from seeping in and to maintain its rich aroma.

  3. Label and Date: Don’t forget to label the container with the date of preparation. Sage brown butter can last for up to two weeks in the refrigerator.

  4. Recipe Substitutions: Sage brown butter adds a unique flavor to dishes, but if you run out or need a substitute, you can try using regular butter with a sprinkle of dried sage or other herbs for a similar taste.

Tips for Achieving the Perfect Brown Butter

Achieving the perfect brown butter requires patiently melting the butter over low heat until it turns a rich, nutty color. This step is crucial for infusing the butter with a deep, caramelized flavor that elevates any dish.

Advertisement

To ensure success, it’s important to use a heavy-bottomed pan and keep a close eye on the butter as it melts. Stirring occasionally prevents the butter from burning and promotes even browning.

Once the butter reaches a golden hue, remove it from the heat and let it cool slightly before transferring to an airtight container for storage. When storing brown butter, it’s best to keep it in the refrigerator, where it will last for several weeks.

Now that you’ve mastered the art of achieving perfect brown butter, let’s explore the various variations and flavor enhancements you can experiment with to take your dishes to the next level.

Variations and Flavor Enhancements

When it comes to cooking, I love experimenting with unique ingredient combinations to create bold and unexpected flavors. From pairing sweet and savory ingredients to combining different cultural flavors, the possibilities are endless.

In addition, I’ve discovered that the cooking techniques I use can greatly enhance the depth of flavors in my dishes. Whether it’s slow roasting, braising, or using a variety of spices and herbs, these techniques add layers of complexity that take a dish from ordinary to extraordinary.

Advertisement

Unique Ingredient Combinations

To create unique flavor combinations, you can experiment with adding unexpected ingredients to your sage brown butter recipe. Here are some cooking techniques and recipe suggestions to elevate your dish to the next level:

  1. Citrus Twist: Add a burst of freshness by squeezing a little lemon or orange juice into the brown butter. The tangy citrus flavor pairs beautifully with the earthy sage.

  2. Nutty Delight: Enhance the nuttiness of the brown butter by stirring in a handful of toasted pine nuts or chopped walnuts. The crunch and richness will take your sage brown butter to new heights.

  3. Sweet and Savory: For a delightful contrast, try incorporating a touch of honey or maple syrup into the mix. The hint of sweetness complements the savory sage and creates a harmonious balance.

  4. Spice it Up: Give your sage brown butter a kick by adding a pinch of red pepper flakes or a dash of cayenne pepper. The subtle heat will add depth and complexity to your dish.

Cooking Techniques for Depth

By incorporating various cooking techniques, you can deepen the flavor of your sage brown butter recipe.

When it comes to baking, achieving depth of flavor is key. One technique that can enhance the taste of your brown butter is browning the butter itself. This process involves melting the butter over low heat until it turns a rich golden color and develops a nutty aroma. This enhances the natural flavors of the butter and adds a caramelized note to your dish.

Another technique is infusing the butter with sage. Simply melt the butter and add fresh sage leaves, allowing them to steep for a few minutes. This imparts a subtle earthy and herbaceous flavor to the butter, elevating the taste of your dish.

Serving Ideas and Recipe Suggestions

When it comes to creating unique flavor combinations, the possibilities are endless. Whether it’s a surprising blend of sweet and savory or a fusion of different cuisines, experimenting with flavors can take your dishes to the next level.

Advertisement

Not only does it add excitement to your meals, but it also allows for versatility in dishes, making it easy to adapt recipes to suit different tastes and dietary preferences.

Unique Flavor Combinations

Experimenting with unique flavor combinations can elevate your culinary creations to a whole new level. When it comes to cooking, the possibilities are endless. By mixing unexpected ingredients and experimenting with herbs, you can create dishes that are both delicious and exciting.

Here are four unique ingredient pairings to inspire your culinary adventures:

  1. Lemon and Thyme: The bright citrus flavor of lemon pairs perfectly with the earthy notes of thyme. Whether you’re making roasted chicken or sautéed vegetables, this combination will add a refreshing twist to your dishes.

  2. Raspberry and Basil: The sweetness of ripe raspberries combined with the aromatic freshness of basil creates a delightful contrast. Try adding this combination to salads, desserts, or even cocktails for a burst of flavor.

  3. Coconut and Curry: The creamy richness of coconut milk combined with the warm and fragrant spices of curry creates a complex and satisfying flavor profile. Use this combination to elevate your curries, soups, or even roasted vegetables.

  4. Honey and Rosemary: The sweetness of honey paired with the piney and floral aroma of rosemary creates a harmonious blend. Drizzle honey infused with rosemary over grilled meats or vegetables for a unique and delicious twist.

By experimenting with these unique ingredient pairings and exploring the world of herbs, you can take your cooking to new heights and surprise your taste buds with exciting flavors.

Versatility in Dishes

You can elevate your culinary creations to a whole new level by exploring the versatility in dishes. The beauty of cooking lies in the endless possibilities and creative uses of ingredients.

Advertisement

From simple salads to complex main courses, there are countless ways to incorporate versatility in recipes. Take, for example, the humble potato. It can be mashed, roasted, fried, or even turned into a creamy soup.

By experimenting with different cooking techniques and flavor combinations, you can transform a basic ingredient into a show-stopping dish. Don’t be afraid to think outside the box and combine unexpected ingredients. Maybe a sprinkle of cinnamon in your savory stew will add a unique twist.

The key is to let your imagination run wild and embrace the endless potential of versatile dishes.

Frequently Asked Questions

Can I Use Dried Sage Instead of Fresh Sage in This Recipe?

Yes, you can use dried sage instead of fresh sage in this recipe. Dried sage has a more concentrated flavor, so you may want to use less. It’s a great substitute for fresh sage in many recipes.

How Long Does It Take for the Butter to Melt and Brown?

When making sage brown butter, it’s important to pay attention to the melting and browning process. To achieve perfect browning, melt the butter over medium heat and stir constantly. Use low heat to prevent burning.

Advertisement

Can I Use a Different Type of Butter, Such as Margarine or Ghee?

Yes, you can use margarine or ghee instead of butter for a different flavor. However, keep in mind that the taste and texture may vary. You can also experiment with alternative herbs or spices to infuse the butter.

Can I Use Other Herbs or Spices to Infuse the Butter Instead of Sage?

Sure, you can definitely use other herbs or spices to infuse the butter. It’s like adding a splash of color to a blank canvas. Experiment with rosemary, thyme, or even chili flakes for infused butter recipes that complement different dishes.

How Long Can I Store Sage Brown Butter and How Should It Be Stored?

I store sage brown butter in an airtight container in the fridge. It can last for up to 2 weeks, but I usually finish it within a few days because it’s so delicious!

Conclusion

In conclusion, making sage brown butter is a simple yet flavorful way to elevate your dishes. By following the steps outlined in this article, you can create a rich and fragrant butter infused with the essence of sage.

Imagine drizzling this golden goodness over roasted vegetables or tossing it with freshly cooked pasta for a quick and delicious meal.

Advertisement

One example of how sage brown butter can transform a dish is by adding a spoonful to a bowl of creamy mashed potatoes, creating a savory and aromatic side dish that will impress your guests.

So go ahead and give it a try – your taste buds will thank you!

Continue Reading
Advertisement

Recipes & Culinary Uses

Creamy Delight: Best Butter Pecan Ice Cream Recipe for Summer!

Yearning for a creamy summer treat that will leave you craving more?

Published

on

By

butter pecan ice cream

Savor a delicious summer treat with our Butter Pecan Ice Cream recipe. Mix butter, brown sugar, cream, and pecans for a creamy delight. Melt butter, cook pecans, whisk eggs, and blend for a rich flavor. Add pecans, cream, and vanilla, then freeze to perfection. Master this easy-to-follow recipe for a tasty dessert to beat the heat.

Key Takeaways

  • Rich and creamy blend of butter, brown sugar, and heavy cream
  • Toasted pecans for a nutty crunch and flavor
  • Easy-to-follow steps for homemade ice cream perfection
  • Customization options with variations like bourbon or chocolate
  • Perfect summer treat with a decadent, refreshing taste

Recipe Ingredients for Butter Pecan Ice Cream

To create a delectable batch of butter pecan ice cream, gather the essential ingredients listed in the recipe.

You'll need:

  • Butter
  • Brown sugar
  • Heavy cream
  • Pecans

These ingredients combine to bring out the rich and nutty flavors of this classic dessert.

The brown sugar adds a caramel-like sweetness, while the heavy cream contributes to a creamy texture that's essential for a decadent treat.

Pecans, when toasted in butter, provide a delightful crunch and enhance the overall flavor profile of the ice cream.

Cooking Instructions for Homemade Ice Cream

making ice cream at home

Start by melting butter in a skillet to infuse the pecans with a rich, nutty flavor for your homemade butter pecan ice cream.

Here's a quick guide to help you make this creamy delight:

Advertisement
  • Melt butter and cook pecans for flavor.
  • Whisk eggs and combine with half-and-half and brown sugar for a creamy base.
  • Cook until thickened, then mix with eggs in a bowl.
  • Add cream, pecans, and vanilla extract.
  • Freeze the mixture in an ice cream maker.

Following these steps will guarantee your homemade butter pecan ice cream turns out rich and delicious.

Remember to carefully adhere to the manufacturer's instructions for your ice cream maker to achieve the perfect consistency.

Enjoy the process of creating this delightful treat that will surely be a hit during the summer months.

Ice Cream Preparation Steps

ice cream recipe instructions

Mix half and half with brown sugar over medium heat in a large bowl to prepare the ice cream base.

Next, whisk beaten eggs and temper them with the warm milk mixture to create a smooth custard.

Once done, thicken the mixture on low heat, then cool it over an ice bath to achieve ideal texture.

After that, stir in heavy cream, vanilla extract, maple extract, and a pinch of salt for rich flavor.

Advertisement

Remember to refrigerate the mixture for 1 1/2 – 2 hours before churning it into creamy butter pecan ice cream.

This process ensures that the flavors meld together beautifully and the ice cream attains the perfect consistency for scooping and savoring.

Nutritional Information and Tips

healthy eating guidance provided

Considering the rich and creamy nature of homemade butter pecan ice cream, it's important to be mindful of its nutritional content and serving size. When indulging in this delectable dessert, remember these essential tips:

  • Portion Control: Enjoy in moderation to savor the flavors without overindulging.
  • Brown Sugar Sweetness: Opt for a moderate amount of brown sugar to balance sweetness without overwhelming the palate.
  • Room Temperature Ingredients: Confirm ingredients like butter and heavy cream are at room temperature for a smoother texture.
  • Nutritional Awareness: Be mindful that homemade butter pecan ice cream can vary in nutritional content, so adjust ingredients accordingly.
  • Consultation: Seek advice from a nutritionist or healthcare provider for personalized guidance on incorporating this treat into a balanced diet.

Homemade Butter Pecan Ice Cream Variations

delicious homemade ice cream

Explore creative twists on traditional butter pecan ice cream by incorporating different nuts, spirits, sauces, chocolates, and dairy-free alternatives.

For a unique flavor, try substituting pecans with walnuts or almonds in the full recipe. Toast the nuts in a separate bowl until browned and fragrant, then chop them finely enough to coat in the ice cream mixture.

To add a boozy kick, mix in a splash of bourbon or rum to the base as you churn the ice cream. For an extra indulgent touch, swirl in caramel sauce or fudge ripple throughout the mixture.

Incorporate chunks of chocolate or chocolate-covered nuts for a delightful contrast in texture, giving each bite a sweet surprise.

Advertisement

If you prefer a lighter, dairy-free option, consider using coconut milk or almond milk as a substitute for traditional dairy products. These alternatives provide a creamy base while catering to plant-based diets.

Experiment with these variations to create a personalized butter pecan ice cream that suits your taste preferences.

Frequently Asked Questions

What Is the Secret to Making Ice Cream Very Creamy?

To make ice cream very creamy, you use a rich base of ingredients like heavy cream, eggs, and sugar. Chilling the base before churning is crucial for a smoother texture. Adding vanilla extract enhances creaminess, and slow churning prevents a dense outcome.

What Flavor Is the Ice Cream in Butter Pecan?

The ice cream in butter pecan is a delightful blend of buttery richness, vanilla sweetness, and maple undertones, perfectly paired with toasted pecans for a nutty crunch. This flavor combination creates a harmonious and indulgent treat.

What's the Difference Between Butter Pecan Ice Cream and Praline Pecan Ice Cream?

In butter pecan ice cream, you'll savor the buttery richness of pecans blended with a creamy base. On the other hand, praline pecan ice cream highlights caramelized sweetness with a swirl of praline sauce for a delightful flavor contrast.

Advertisement

What Age Group Eats Butter Pecan Ice Cream?

You'll find that adults and older individuals, typically in the 30-60 age group, enjoy butter pecan ice cream. It's a favorite among those with a more refined palate, drawn to its rich and nutty flavor.

Conclusion

So there you have it, folks! Whip up this buttery, nutty delight for a taste of summer in every scoop.

Don't cry over spilled milk – grab a cone and enjoy this creamy treat that's sure to satisfy your sweet tooth.

Get churning and indulge in the best butter pecan ice cream you've ever tasted!

Advertisement
Continue Reading

Recipes & Culinary Uses

Festive Favorites: Best Peanut Butter Blossoms Recipe for Holidays!

Unleash the ultimate holiday baking magic with the best Peanut Butter Blossoms recipe – an irresistible treat that will elevate your festive celebrations!

Published

on

By

holiday baking with flair

Elevate your holiday baking with the ultimate Peanut Butter Blossoms recipe. Cream together peanut butter, butter, sugars, and salt, then add egg and vanilla. Roll dough into balls, coat in brown sugar, bake until golden, then press a Hershey's kiss on top. Adjust baking time as needed. Explore ingredient swaps for a personalized touch. Enjoy with hot cocoa or pair with savory dishes. For more tips, ideas, and customization options, the recipe holds more festive surprises.

Key Takeaways

  • Cream together peanut butter, butter, sugars for rich flavor.
  • Bake at 375°F for 8-10 minutes for soft, chewy cookies.
  • Customize with ingredient swaps like almond butter or maple syrup.
  • Pair with savory dishes or hot cocoa for holiday enjoyment.
  • Press Hershey kisses onto warm cookies for a classic finish.

Ingredients for Peanut Butter Blossoms

For the classic Peanut Butter Blossoms recipe, gather peanut butter, butter, sugar, an egg, and Hershey's kisses as your essential ingredients.

Peanut butter is the star, offering a rich flavor that blends perfectly with the sweetness of the cookies.

Butter plays a pivotal role by adding moisture and richness to the dough, ensuring a soft and chewy texture.

The sugar not only sweetens the cookies but also contributes to their festive appeal, making them a perfect treat for any occasion.

Finally, the Hershey's kisses on top provide a delightful chocolatey finish that elevates these cookies to a whole new level of deliciousness.

Advertisement

Together, these ingredients create a harmonious blend of flavors and textures that make Peanut Butter Blossoms a beloved classic for holiday baking or any time you crave a sweet and satisfying treat.

Recipe Steps for Peanut Butter Blossoms

bake peanut butter cookies

To make Peanut Butter Blossoms, start by creaming together peanut butter, butter, sugars, and salt until light and fluffy.

Next, add in the egg and vanilla extract, making sure to mix well to combine all the ingredients thoroughly.

Then, gradually incorporate the dry ingredients into the wet mixture until a smooth dough forms.

Once the dough is ready, roll it into balls and coat each ball generously in brown sugar.

Place the sugar-coated dough balls on a baking sheet, making sure to leave enough space between them for spreading during baking.

Advertisement

Bake the cookies in a preheated oven until they turn a beautiful golden brown.

As soon as the cookies are out of the oven, press a Hershey's kiss into the center of each cookie gently.

The heat from the freshly baked cookies will melt the chocolate just enough to adhere it to the cookie.

These Peanut Butter Blossoms are a delightful treat perfect for Christmas celebrations!

Pro Tips for Making Peanut Butter Blossoms

baking perfect peanut blossoms

To enhance your peanut butter blossom baking experience, consider adjusting the baking time based on your oven's performance for best results.

Additionally, explore ingredient substitutions to cater to dietary preferences or allergies without compromising the flavor or texture of the cookies.

Advertisement

These pro tips can help you customize your peanut butter blossoms while ensuring delicious outcomes.

Baking Time Recommendations

Achieving the ideal texture for your peanut butter blossoms involves baking them at 375°F for 8-10 minutes. This baking duration guarantees that the cookies have a soft and chewy consistency while allowing the Hershey kisses on top to be softened but not completely melted.

Once out of the oven, remember to press the Hershey kisses onto the cookies immediately to secure them in place for that classic appearance.

For the best outcomes, chill the cookie dough for about 30 minutes before baking. This step helps the cookies maintain their shape and prevents excessive spreading during baking, ensuring your peanut butter blossom cookies are perfectly formed and ready to impress during your holiday baking.

Shortening or extending the baking time can alter the texture of the cookies. A quick bake of 6-8 minutes produces softer and chewier cookies, while longer baking times yield a slightly crispier consistency. Stick to the recommended 8-10 minutes for the best soft and chewy peanut butter blossoms.

Advertisement

Ingredient Substitutions

Consider incorporating different ingredients to elevate the flavor and nutritional profile of your peanut butter blossoms. For a healthier option, swap out shortening with unsalted butter to achieve a unique texture and taste in your cookies.

Try using natural peanut butter instead of creamy to add a wholesome twist to the classic recipe. If you're looking to reduce the glycemic impact, substitute brown sugar with coconut sugar in your baking. For a natural sweetener alternative, replace regular granulated sugar with maple syrup in the cookie dough mixture.

Additionally, for a distinct flavor experience, experiment with almond butter as a substitute for peanut butter in your blossoms. These ingredient substitutions can bring a new dimension to your peanut butter blossoms, making them not only delicious but also tailored to your dietary preferences.

Upgrade your baking game this holiday season with these creative twists on a beloved recipe!

Serving Suggestions for Peanut Butter Blossoms

peanut butter cookie recipe

Enhance the enjoyment of your peanut butter blossoms by pairing them with savory dishes like lasagna tortellini soup for a satisfying meal. These classic cookies also complement family-friendly dinners such as easy ground beef shepherd's pie and creamy broccoli cheddar soup, making for a delightful combination. The holiday season calls for cozy treats, and the sweet nuttiness of peanut butter blossoms pairs perfectly with a warm cup of hot cocoa. Whether you're participating in a cookie exchange or looking for a festive touch to your holiday dessert spread, consider rolling the cookies in red, green, and white sugar sprinkles to add a pop of color and fun.

Serving Suggestions Pairing Ideas
Lasagna Tortellini Soup Comforting and hearty meal alongside the cookies
Easy Ground Beef Shepherd's Pie Delicious combination for a family dinner
Creamy Broccoli Cheddar Soup Perfect accompaniment to the nutty cookie flavors

12 Days of Christmas Cookies Recipes

baking traditions for the holidays

Indulge in a variety of delightful Christmas cookie recipes each day during the holiday season. One standout choice is the classic Peanut Butter Blossoms. These holiday cookies feature a peanut butter base topped with a Hershey's kiss, making them a beloved treat for cookie exchanges and festive gatherings.

The process of making these cookies is simple yet rewarding. Start by rolling the dough balls in sugar before baking to add a sweet crunch to each bite. The combination of rich peanut butter flavor and the chocolatey goodness of the Hershey's kiss creates a perfect balance of sweetness.

Advertisement

When enjoying these Christmas cookies, consider pairing them with a glass of milk for a classic and satisfying treat.

Whether you're baking them for your family, a cookie exchange, or a holiday party, Peanut Butter Blossoms are sure to be a hit. Make each day of the holiday season a little sweeter with these delicious cookies.

User Engagement Features

user interaction enhancements

Let's talk about how user interaction features and personalization options enhance your experience with the Peanut Butter Blossoms recipe.

You can engage with others by leaving comments and sharing your results, creating a sense of community around this holiday treat.

Personalization options like name and email entry fields help tailor the experience to your preferences, making it more engaging and enjoyable.

User Interaction Features

Utilizing user engagement features on the website allows for increased participation and feedback from visitors. The comment section enables users to interact with each other and provide valuable feedback on the Peanut Butter Blossoms recipe or share their experiences with Hershey's kisses. By incorporating a reply option, users can engage in conversations, fostering a sense of community around baking these delightful peanut butter cookies.

Advertisement

Moreover, the inclusion of name and email fields not only allows for personalization but also facilitates communication between the website and its visitors. This data storage feature guarantees that users can conveniently access their information for future visits, enhancing their overall user experience.

These user engagement features play an essential role in creating an interactive platform where users can engage, provide feedback, and communicate effectively. Such interaction not only enriches the user experience but also encourages visitors to actively participate in the community surrounding the Peanut Butter Blossoms recipe.

Personalization Options

Enhance your website's user engagement by incorporating personalized options such as commenting, replying, and sharing feedback on the Peanut Butter Blossoms recipe. This level of user interaction not only fosters a sense of community building but also encourages customization and feedback. By allowing users to share their thoughts, results, and experiences with the festive favorites, you create a more engaging and interactive user experience. Additionally, providing users with the option to save their data for future visits and encouraging them to tag @preppykitchen and use #preppykitchen when trying the recipe further enhances their engagement.

Personalization Options Description Benefits
Commenting Users can leave comments on the Peanut Butter Blossoms recipe, sharing their thoughts and experiences. Fosters community building and user engagement.
Replying Users can reply to comments and engage in discussions with other users about the recipe. Encourages active participation and interaction.
Feedback Sharing Users can share feedback on the recipe, providing valuable insights for improvement. Enhances user experience and customization.

Additional Information

clarifying specific details provided

You may find it interesting to know more about the history of the Peanut Butter Blossoms recipe and its cultural significance during the holidays.

  • The Peanut Butter Blossoms recipe's popularity is backed by IRI MULO data, making it a sought-after choice for holiday baking.
  • Copyright for this beloved recipe belongs to The J.M. Smucker Company, a reputable name in the food industry known for quality products.
  • These delightful cookies aren't only perfect for serving at holiday parties but also make excellent gifts due to their festive appeal.

Frequently Asked Questions

Why Are My Peanut Butter Blossoms Dry?

If your peanut butter blossoms are dry, it could be due to using too much flour, overbaking, using natural peanut butter that requires stirring, or not enough butter/shortening. Guarantee precise measurements and follow the recipe closely to maintain moisture.

Why Did My Peanut Butter Blossoms Go Flat?

When making peanut butter blossoms, going flat happens due to overmixing, too much flour, insufficient chilling, or low oven temperature. Remember to avoid these pitfalls. Preheat the oven properly and follow the recipe for perfect blossoms!

What Is America's Favorite Christmas Cookie?

America's favorite Christmas cookie is Peanut Butter Blossoms. Loved for their peanut butter-chocolate combo and nostalgic Hershey's Kiss center, these easy-to-make treats are a holiday staple at parties and gatherings. They're a must-have during the festive season.

Advertisement

What Is Baskin Robbins Peanut Butter Blossom?

You asked about Baskin Robbins Peanut Butter Blossom. It's a delectable seasonal ice cream flavor featuring creamy peanut butter ice cream with a ribbon of more peanut butter and chocolate cookie pieces. Indulge in this festive treat!

Conclusion

Indulge in the warm, gooey goodness of these peanut butter blossoms this holiday season. With the perfect blend of creamy peanut butter and rich chocolate, these cookies are sure to bring joy to your festivities.

Picture yourself surrounded by loved ones, sharing laughter and memories as you enjoy these delicious treats. Let the aroma of freshly baked cookies fill your home and create a cozy, festive atmosphere.

Happy baking and happy holidays!

Advertisement
Continue Reading

Recipes & Culinary Uses

Bite-Sized Treats: Best Peanut Butter Ball Recipe You'll Love!

Adore these heavenly peanut butter balls with a delectable mix of smooth peanut butter, powdered sugar, and vanilla—perfect for indulging in bite-sized bliss!

Published

on

By

delicious peanut butter balls

You'll adore these easy and heavenly peanut butter balls. Mix smooth peanut butter, powdered sugar, and vanilla extract for a delectable dough. Roll into small balls and chill. Dip in melted chocolate, then refrigerate to set. Enhance the flavor with rum extract, nuts, or crushed pretzels. Get creative with colorful sprinkles and different chocolate coatings. Use quality chocolate coating and adjust mix consistency. Store them in the fridge or freezer. Enjoy these mouthwatering treats alone or at gatherings. More tips and delightful variations await!

Key Takeaways

  • Creamy peanut butter, powdered sugar, and vanilla create a smooth dough.
  • Incorporate nuts, rum extract, or pretzels for flavor and texture variety.
  • Use quality chocolate coating like candy melts for best results.
  • Chill peanut butter balls before dipping for easier handling.
  • Store in the fridge or freezer for convenient snacking and serving.

Ingredients and Preparation

To create irresistible peanut butter balls, gather creamy peanut butter, powdered sugar, and vanilla extract as your key ingredients.

Begin by mixing the peanut butter, butter, sugar, and vanilla until you have a smooth dough. Roll this mixture into small balls and chill them before dipping them in melted chocolate.

The type of chocolate you use, such as dark or milk chocolate, will enhance the flavor of your peanut butter balls. After dipping, make sure to refrigerate the balls until the chocolate sets for a perfect finish.

This process guarantees that each bite-sized treat isn't only visually appealing but also bursting with delicious peanut butter and chocolate flavors.

Variations and Enhancements

creative modifications and improvements

You can elevate the flavor of your peanut butter balls by incorporating unique ingredients like chopped nuts or rum extract.

Experiment with different chocolate coatings such as white almond bark or dark chocolate candy melts for a varied taste experience.

Advertisement

Get creative by adding finishing touches like colorful sprinkles to make your peanut butter balls visually appealing.

Flavorful Ingredient Additions

Enhance the flavor of your peanut butter balls by incorporating unique ingredient variations and enhancements. While the classic combination of peanut butter, powdered sugar, and butter creates a delicious dough for your treats, you can take it up a notch by adding flavorful ingredient additions.

Consider mixing in crushed pretzels for a salty crunch that complements the sweetness of the peanut butter. Chopped nuts like almonds or pecans can also add a delightful texture and nutty taste to your chocolate-covered peanut butter balls.

For a burst of fruity flavor, try incorporating dried cranberries or raisins into the dough. These additions not only provide a contrast in texture but also introduce a hint of sweetness that pairs well with the creamy peanut butter.

Another option is to include a sprinkle of cinnamon or a dash of vanilla extract to elevate the overall taste profile of your peanut butter balls. Experiment with these flavorful ingredient additions to create a unique and delectable twist on the classic treat.

Advertisement

Chocolate Coating Options

Experiment with different types of chocolate coatings – dark, white, or milk chocolate – to suit your preferences and elevate the flavor of your peanut butter balls.

When considering the chocolate coating for your crunchy peanut butter treats, here are some options to enhance your culinary creation:

  1. Choose Candy Melts or Almond Bark: Opt for candy melts or almond bark for a smooth and firm chocolate coating that sets well on your peanut butter balls.
  2. Avoid Chocolate Chips: Steer clear of using chocolate chips for coating, as they may contain stabilizers that hinder smooth melting, affecting the overall texture.
  3. Add Colored Sprinkles: For a festive touch, sprinkle colored sprinkles on top of the chocolate coating before it sets to add a pop of color and extra crunch to your peanut butter balls.

Experimenting with different chocolate coatings and techniques can take your peanut butter balls to the next level, ensuring a delightful and indulgent treat for any occasion.

Creative Finishing Touches

To elevate the flavor profile of your peanut butter balls, consider incorporating creative finishing touches through various enhancements and unique variations.

You can enhance the texture by adding chopped nuts or crispy rice cereal to the peanut butter mixture, providing a delightful crunch with every bite.

Experiment with different flavors by using almond extract or rum extract instead of vanilla for a twist on the traditional taste.

Advertisement

For a festive touch, roll the balls in crushed graham crackers, sprinkles, or a sprinkle of sea salt to add a pop of flavor.

Drizzle white chocolate over the dark, semi-sweet, or milk chocolate coating for a visually appealing contrast that will impress your guests.

If you enjoy a crunchy element, try coating the balls in crushed pretzels or toasted coconut before the chocolate sets.

These creative enhancements will take your peanut butter balls to the next level, making them a standout treat at any gathering.

Tools and Tips

crafting with precision

Consider using a 1 tablespoon cookie scoop for consistent sizing when preparing your peanut butter balls. This tool will help guarantee all your treats are uniform in size, making for a neat presentation and even cooking.

Here are some additional tools and tips to enhance your peanut butter ball-making experience:

Advertisement
  1. Invest in Quality Chocolate Coating: Opt for candy melts or almond bark for a smooth and firm chocolate coating on your peanut butter balls. These coatings melt easily and provide a professional finish to your treats.
  2. Adjust Peanut Butter Mixture Consistency: If your peanut butter mixture is too sticky or too dry, adjust the consistency by adding more peanut butter or powdered sugar. This will help you achieve the perfect texture for shaping your balls.
  3. Refrigerate Before Dipping: Prior to dipping your peanut butter balls in chocolate, chill them in the refrigerator. This step will make the balls firmer, making them easier to handle and coat without falling apart.

Storage and Serving Suggestions

great suggestion for storage

For best freshness and presentation of your peanut butter balls, follow these storage and serving suggestions.

To keep your peanut butter balls tasting delicious, store them properly. You can store them in an airtight container in the fridge for up to 1 week or in the freezer for up to 2 months. When freezing, remember to thaw the frozen peanut butter balls before serving by bringing them to room temperature. To prevent them from sticking together, separate the layers of peanut butter balls with wax paper.

Here is a helpful table summarizing the storage and serving suggestions:

Storage Serving Frozen
Airtight container Display on festive tray Thaw before serving
Fridge – 1 week Pair with hot cocoa Bring to room temp
Freezer – 2 months Enjoy at holiday gatherings
Separate with wax paper

Additional Peanut Butter Desserts

peanut butter dessert recipes

Explore a variety of delectable peanut butter desserts to satisfy your sweet cravings.

  1. Peanut Butter Blossom Cookies: Indulge in the classic combination of peanut butter cookies topped with a chocolate kiss for a delightful treat.
  2. Peanut Butter Chocolate Mug Cake: Whip up this easy-to-make single-serving dessert that combines the rich flavors of peanut butter and chocolate in a mug for a quick fix.
  3. Peanut Butter Overload Cookies: For those who can't get enough peanut butter, these cookies are loaded with peanut butter chips, chocolate chips, and chopped peanuts for an explosion of flavor in every bite.

These additional peanut butter desserts offer a diverse selection to cater to your cravings.

Whether you're in the mood for a classic treat like Peanut Butter Blossom Cookies, a quick fix with Peanut Butter Chocolate Mug Cake, or a flavor-packed experience with Peanut Butter Overload Cookies, there's something for every peanut butter lover.

Enjoy these easy-to-make delights whenever you need a sweet pick-me-up!

Recipe Instructions and Nutritional Information

cooking guidance and facts

To create these delectable Peanut Butter Balls, start by blending peanut butter, butter, sugar, and vanilla to form a dough. Roll the mixture into small balls and place them on a baking sheet lined with parchment paper. Chill the peanut butter balls in the refrigerator for about 30 minutes until firm.

Once chilled, melt chocolate in a heatproof bowl over simmering water or in the microwave. Dip each chilled peanut butter ball into the melted chocolate, ensuring they're evenly coated. Place the coated balls back on the parchment paper and let the chocolate set.

Advertisement

Each serving of these delightful treats contains approximately 114 calories.

Store the finished peanut butter balls in the fridge for up to 2 weeks or freeze them for up to 3 months.

Enjoy these decadent bite-sized snacks whenever you crave a sweet and nutty indulgence.

Frequently Asked Questions

Can I Use Chunky Peanut Butter Instead of Creamy for This Recipe?

Yes, you can use chunky peanut butter instead of creamy for this recipe. It will add a delightful texture and extra crunch to your peanut butter balls. Enjoy experimenting with different variations!

How Long Do Chocolate Covered Peanut Butter Balls Stay Fresh?

Like a sweet memory, chocolate-covered peanut butter balls stay fresh for up to two weeks when stored in an airtight container in the fridge. Indulge in these delectable treats within that time frame for best taste.

Advertisement

Can I Freeze the Peanut Butter Balls for Later Enjoyment?

Yes, you can freeze the peanut butter balls for later enjoyment. Simply place them in an airtight container or freezer bag. When ready to indulge, let them thaw in the fridge for a few hours.

What Type of Chocolate Is Best for Coating the Peanut Butter Balls?

For coating the peanut butter balls, semi-sweet or milk chocolate works best. They provide a delicious contrast to the creamy peanut butter filling. Simply melt the chocolate, dip the balls, and enjoy the sweet treat!

Can I Add Chopped Nuts or Sprinkles to the Peanut Butter Balls for Extra Flavor?

You can definitely add chopped nuts or sprinkles to the peanut butter balls for extra flavor. It's a great way to customize your treats and add a delightful crunch or colorful touch to each bite.

Conclusion

Indulge in these irresistible peanut butter balls that are sure to satisfy your sweet tooth cravings.

With just a few simple ingredients and easy-to-follow instructions, you can enjoy these bite-sized treats in no time.

Advertisement

So go ahead, treat yourself to a little taste of heaven and experience the perfect combination of creamy peanut butter and rich chocolate.

You won't be able to resist coming back for more!

Continue Reading

Trending