Connect with us

Recipes & Culinary Uses

10 Steps to Make Creamy Pistachio Butter at Home

Published

on

An image showcasing the step-by-step process of making pistachio butter: a bowl filled with roasted pistachios, a food processor whirling them into a creamy consistency, and a jar filled with smooth homemade pistachio butter

As someone who adores pistachios, I’m constantly searching for fresh and innovative ways to savor these delectable nuts. That’s why I’m excited to reveal my reliable technique for crafting rich, irresistible pistachio butter.

In just a few simple steps, you’ll be able to create a spread that is not only packed with flavor but also loaded with health benefits. So grab your apron and let’s dive into the world of homemade pistachio butter together.

Trust me, it’s worth every nutty effort!

Key Takeaways

  • Pistachio butter is a nutritious spread packed with essential nutrients like healthy fats, protein, and fiber.
  • Incorporating pistachio butter into your diet provides numerous health benefits due to its high content of vitamins and minerals.
  • The choice between roasted and raw pistachios will determine the flavor and texture of the butter.
  • Consider whether to use salted or unsalted nuts based on personal preference and dietary needs.

The Health Benefits of Pistachio Butter

Pistachio butter is a delicious and nutritious spread that can provide various health benefits. Made from roasted and ground pistachios, this creamy and nutty butter is packed with essential nutrients.

Advertisement

It is a great source of healthy fats, protein, and fiber, making it a satisfying and filling snack. Pistachio butter also contains important vitamins and minerals, such as vitamin E, potassium, and magnesium, which contribute to overall health and well-being.

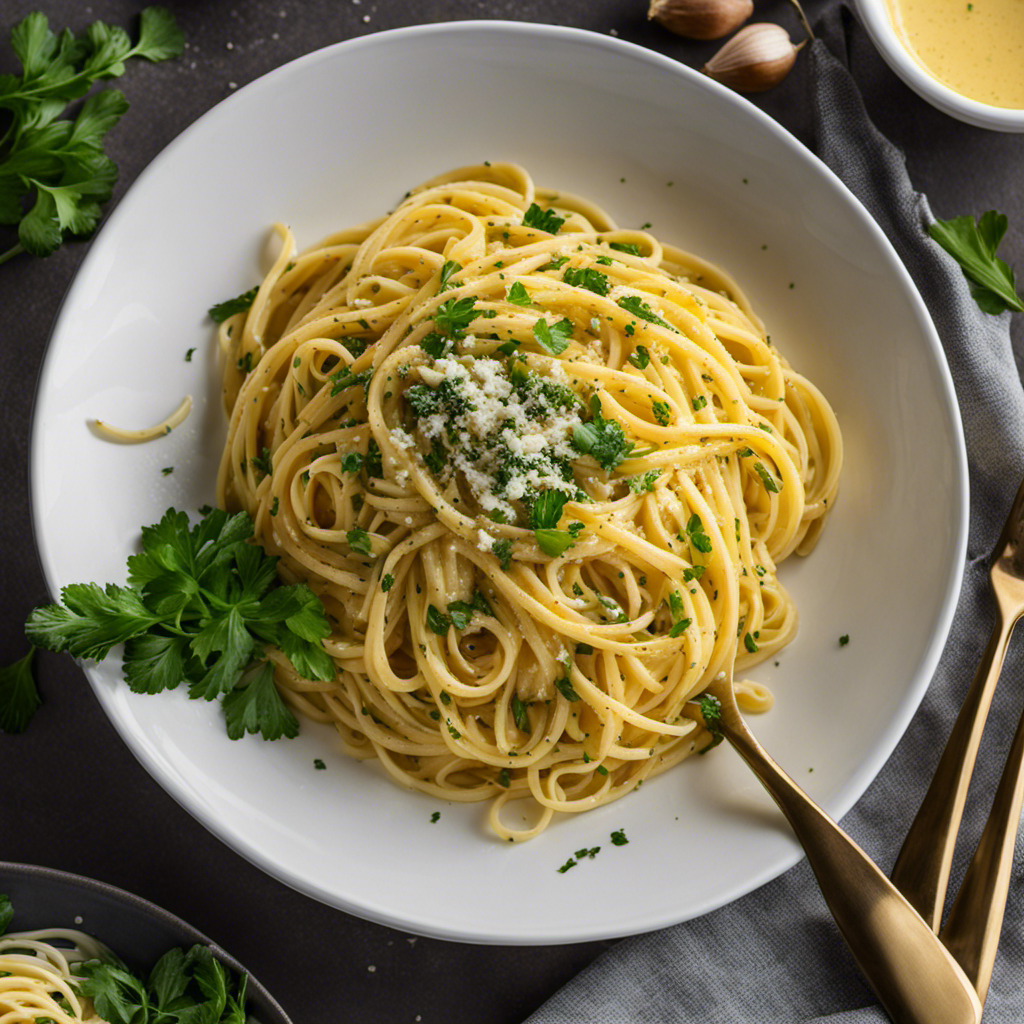
The rich and distinctive flavor of pistachios adds a unique twist to any dish. It pairs well with fruits like apples and pears, or can be spread on toast, added to smoothies, or used as a dip for vegetables.

Incorporating pistachio butter into your diet not only adds a delicious element to your meals, but it also provides numerous health benefits.

Choosing the Right Pistachios for Your Butter

When it comes to making pistachio butter, the choice between roasted or raw pistachios and salted or unsalted nuts can have a significant impact on the final outcome.

Roasted pistachios add a deep, nutty flavor to the butter, while raw pistachios result in a more mild and subtly sweet taste.

Advertisement

Similarly, salted nuts bring a savory and slightly tangy element to the butter, while unsalted nuts allow the natural flavors of the pistachios to shine through.

Roasted or Raw Pistachios

To enhance the flavor of your pistachio butter, you can choose between using roasted or raw pistachios. Both options have their own unique characteristics that can elevate the taste of your homemade butter.

Here are three factors to consider when deciding between roasted and raw pistachios:

  1. Flavor: Roasted pistachios have a deep, nutty flavor with a hint of smokiness. The roasting process intensifies the natural sweetness of the nuts, resulting in a rich and robust taste. On the other hand, raw pistachios have a milder flavor, allowing the natural nuttiness to shine through without any added complexities.

  2. Texture: Roasted pistachios have a slightly crunchier texture compared to raw ones. The roasting process adds a pleasant crispness, which can provide a delightful contrast when blended into a creamy butter. Raw pistachios, on the other hand, have a softer and more tender texture, resulting in a smoother and silkier butter.

  3. Color: Roasted pistachios have a darker hue, ranging from golden brown to deep amber. This darker color can lend a beautiful caramel tone to your pistachio butter, making it visually appealing and appetizing. Raw pistachios, on the other hand, have a lighter shade of green, which can give your butter a vibrant and fresh appearance.

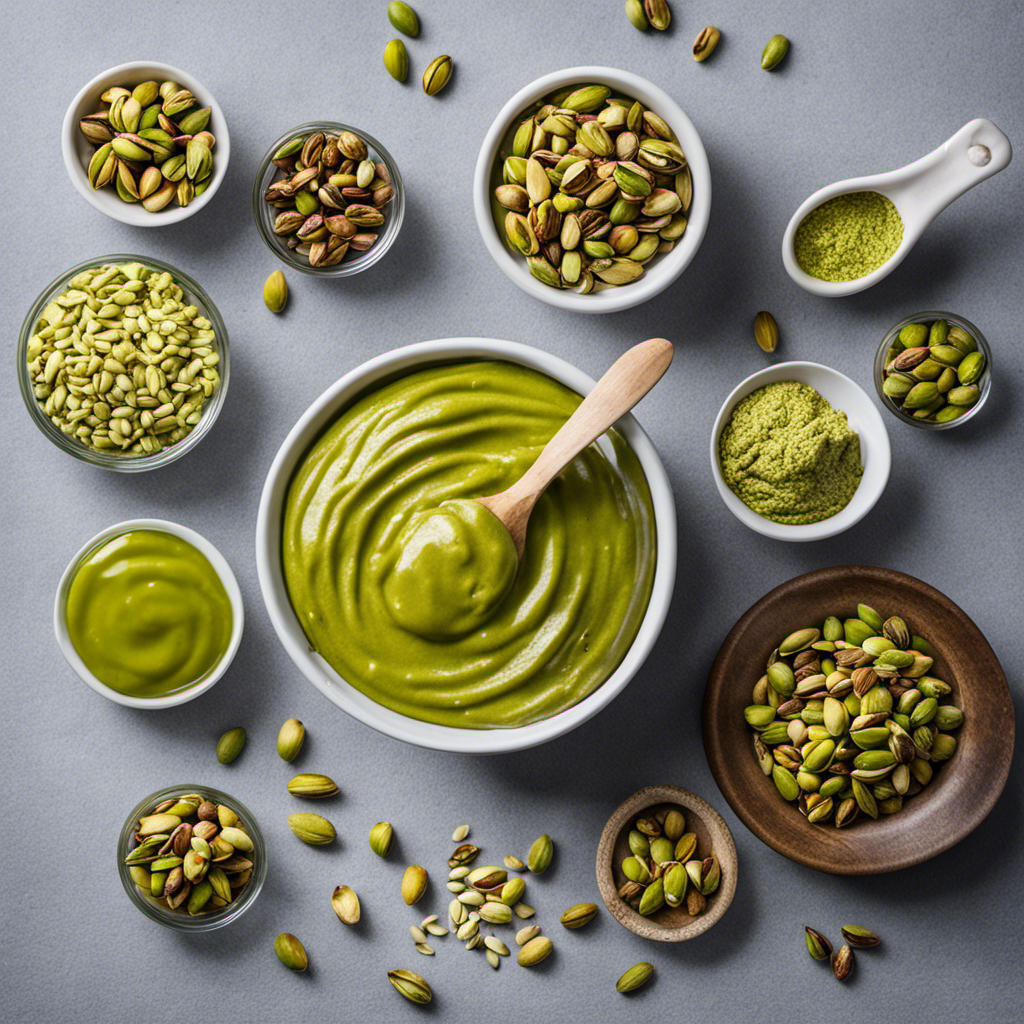
Whether you choose roasted or raw pistachios, the process of making pistachio butter remains the same. Start by grinding the nuts in a food processor until they transform into a smooth and creamy consistency. Add a pinch of salt and a drizzle of honey or maple syrup for added sweetness, if desired. Blend everything together until well combined, and voila! You have a delectable pistachio butter that can be enjoyed on toast, in baked goods, or simply eaten by the spoonful.

Experiment with both roasted and raw pistachios to find your preferred flavor profile. Whether you crave the boldness of roasted pistachios or the simplicity of raw ones, pistachio butter is sure to be a delicious and versatile addition to your pantry. So go ahead, indulge in the lusciousness of homemade pistachio butter and savor the nutty goodness it brings to your culinary creations.

Advertisement

Salted or Unsalted Nuts?

If you prefer a bolder flavor, opt for salted nuts when making your homemade pistachio butter. The choice between salted and unsalted nuts can greatly impact the taste of your final product.

Salted nuts add a savory and slightly salty kick to the creamy pistachio butter, enhancing its overall flavor profile. However, it’s important to note that salted nuts can also increase the sodium content in your pistachio butter. If you’re watching your sodium intake, it’s best to go for unsalted nuts. They still provide the rich and nutty taste without the added salt.

Regardless of your choice, making pistachio butter at home is a simple and rewarding process. Just blend roasted pistachios with a touch of salt, if desired, until smooth and creamy. Enjoy the deliciousness spread on toast, drizzled over desserts, or simply eaten by the spoonful.

Roasting Pistachios: A Step-by-Step Guide

Advertisement

After roasting the pistachios, let them cool before proceeding to the next step. Roasting pistachios brings out their natural nutty flavor and enhances their crunchiness.

Here are three different roasting methods to try:

  1. Oven Roasting: Preheat the oven to 350°F (175°C). Spread the pistachios in a single layer on a baking sheet and roast for about 10-12 minutes, or until they are lightly golden and fragrant.

  2. Stovetop Roasting: Heat a dry skillet over medium heat. Add the pistachios and stir constantly for 5-7 minutes, until they are toasted and aromatic.

  3. Microwave Roasting: Place the pistachios in a microwave-safe bowl and microwave on high for 1 minute intervals, stirring after each interval, until they are crisp and golden.

The optimal roasting time may vary depending on the size and freshness of the pistachios, so keep a close eye on them to prevent burning.

The roasted pistachios will have a delightful aroma and a satisfying crunch, making them perfect for making homemade pistachio butter.

Grinding Pistachios to Perfection

When it comes to making the perfect pistachio butter, achieving a smooth consistency is key.

Advertisement

To achieve this, it’s important to use optimal grinding techniques. By using a high-powered food processor or blender, you can ensure that the pistachios are ground to a fine and creamy texture, resulting in a butter that is velvety and spreadable.

Optimal Grinding Techniques

To achieve optimal grinding techniques for your pistachio butter, start by using a food processor or blender. Here are three key tips to ensure the best results:

  1. Grinding Speed: Set your food processor or blender to a medium-high speed to break down the pistachios efficiently. Too low of a speed may result in a grainy texture, while too high of a speed can overheat the pistachios and affect the flavor.

  2. Nut Butter Consistency: Check the consistency frequently during the grinding process. Stop and scrape down the sides of the bowl to ensure even grinding. If the pistachios are not breaking down smoothly, add a small amount of oil (such as neutral-tasting vegetable oil) to help achieve a creamy texture.

  3. Patience is Key: Grinding pistachios into butter takes time. Be patient and allow the machine to do its work. It may take several minutes of continuous blending to achieve the desired smoothness.

By following these techniques, you’ll be well on your way to achieving a creamy and delicious pistachio butter.

Now, let’s move on to the next step: achieving a smooth consistency.

Achieving Smooth Consistency

To achieve a smooth consistency, you’ll want to ensure that you are regularly pausing to scrape down the sides of the bowl during the grinding process. This step is crucial for optimal blending techniques when making pistachio butter.

Advertisement

As a food writer and recipe developer, I’ve encountered my fair share of consistency issues, but I’ve learned some useful tips along the way.

First, make sure your pistachios are roasted and cooled before grinding. This will enhance their flavor and ensure a smoother texture.

Second, be patient. Grinding pistachios into butter takes time, so don’t rush the process.

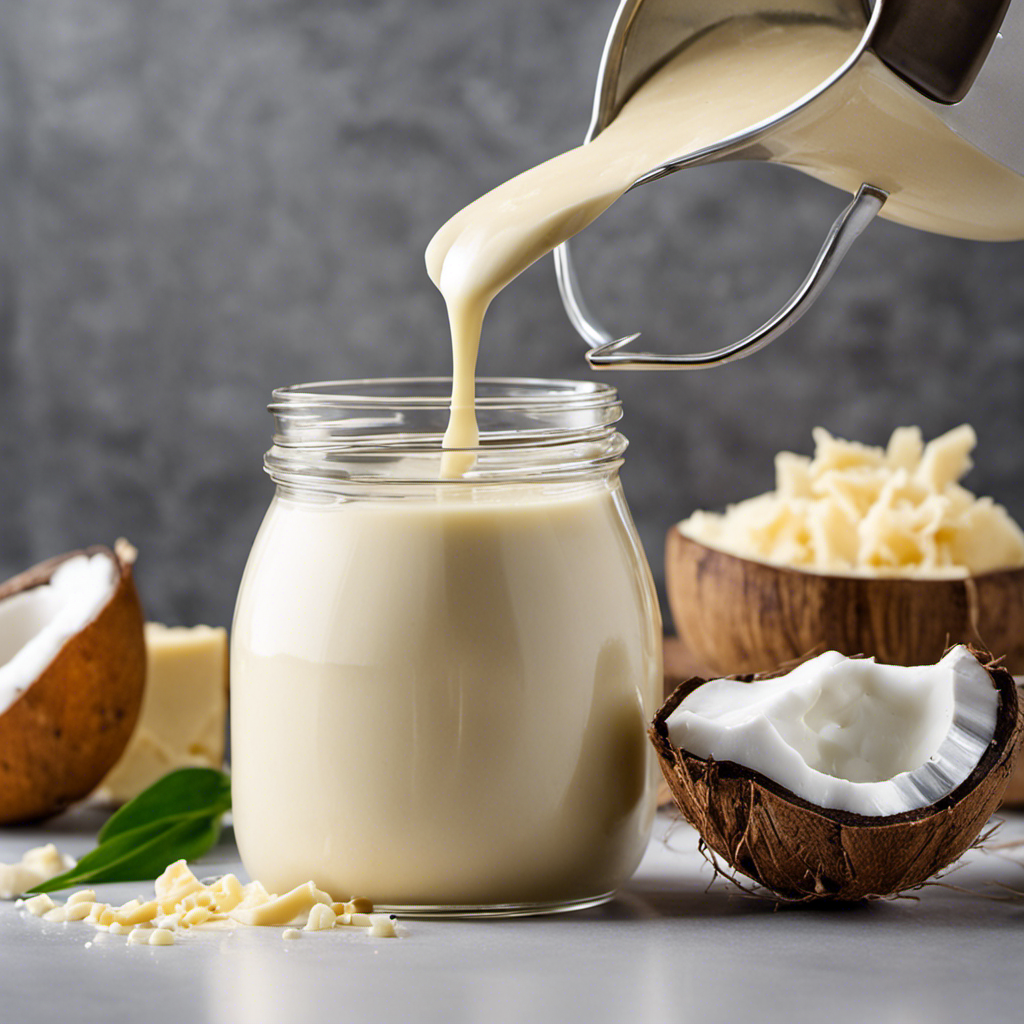
Lastly, if you find that your pistachio butter is too thick or grainy, try adding a little bit of oil, such as almond or coconut oil, to help achieve a creamier consistency.

Adding Flavor Variations to Your Pistachio Butter

For added variety, you can mix in different flavors to your pistachio butter. Here are three unique combinations to enhance the taste of your homemade spread:

Advertisement
  1. Chocolate Pistachio Butter: Add a few tablespoons of cocoa powder to your pistachio butter for a rich and decadent twist. The combination of creamy pistachios with the deep, bittersweet flavor of chocolate is simply irresistible.

  2. Honey Roasted Pistachio Butter: Roast your pistachios in the oven until they are golden and fragrant. Then, blend them with a drizzle of honey to create a sweet and nutty spread. The hint of caramelization from the roasting process adds a delightful depth of flavor.

  3. Spiced Pistachio Butter: Sprinkle in a pinch of cinnamon, nutmeg, and cardamom to give your pistachio butter a warm and aromatic touch. These spices complement the natural nuttiness of pistachios and create a delightful balance of flavors.

Experimenting with different flavor pairings is a fantastic way to elevate your pistachio butter and create a unique and personalized spread. Get creative and let your taste buds guide you!

Sweet Vs. Savory Pistachio Butter Recipes

When it comes to pistachio butter, there’s a debate between sweet and savory flavor preferences. Some people love the rich sweetness of adding honey or maple syrup to their pistachio butter, while others prefer the savory notes of garlic, herbs, and spices.

In this discussion, we’ll explore the different recipe variations for sweet and savory pistachio butter, providing detailed instructions and mouthwatering descriptions to help you decide which one to try first.

Flavor Preferences: Sweet? Savory

Are you more of a fan of sweet or savory flavors for your pistachio butter?

When it comes to pistachio butter, there are endless possibilities for experimenting with different flavor combinations. Here are three reasons why you should explore both the sweet and savory flavor profiles:

Advertisement
  1. Sweetness adds a delightful twist to the rich and nutty taste of pistachio butter. Imagine the creamy texture of pistachio butter combined with the sweetness of honey or maple syrup. It’s a match made in heaven!

  2. On the other hand, savory flavors can bring a whole new dimension to your pistachio butter. Picture the earthy and aromatic notes of roasted garlic or herbs like rosemary and thyme. These savory additions can take your pistachio butter to a whole new level of deliciousness.

  3. By experimenting with different flavor combinations, you can cater to different taste preferences and create a variety of options for your pistachio butter lovers.

Now that we’ve explored the sweet and savory flavors, let’s dive into some recipe variations: sweet or savory?

Recipe Variations: Sweet or Savory?

If you’re feeling adventurous, you can try adding a touch of sweetness or opting for a savory twist in your pistachio butter recipes.

Pistachio butter is a versatile ingredient that can be used in a variety of dishes, both sweet and savory.

For those with a sweet tooth, there are endless possibilities. You can use the pistachio butter to make delicious desserts like pistachio butter cookies, pistachio butter brownies, or even pistachio butter fudge. The creamy, nutty flavor of the pistachios pairs perfectly with the sweetness of these treats.

On the other hand, if you prefer a savory option, you can use the pistachio butter as a base for a delicious dip. Mix it with some herbs and spices, like garlic and lemon zest, to create a flavorful pistachio dip that pairs perfectly with fresh vegetables or crackers.

Advertisement

The options are endless when it comes to pistachio butter, so don’t be afraid to get creative in the kitchen!

Storing and Preserving Homemade Pistachio Butter

To keep your homemade pistachio butter fresh and flavorful, store it in an airtight container in the refrigerator.

Here are three important things to know about storing and preserving your pistachio butter:

  1. Shelf life: Homemade pistachio butter can typically be stored in the refrigerator for up to two weeks. However, it’s best to check for any signs of spoilage, such as an off smell or mold, before consuming.

  2. Airtight container: Using an airtight container is crucial to prevent oxidation and maintain the quality of the pistachio butter. This will help to preserve its creamy texture and rich flavor.

  3. Avoid moisture: It’s important to keep your pistachio butter away from moisture, as it can cause the butter to become rancid or develop mold. Make sure the container is tightly sealed and stored in a dry area of the refrigerator.

By following these storing methods, you can enjoy your homemade pistachio butter for longer and savor its delicious taste.

Now, let’s explore some creative ways to use pistachio butter in your recipes.

Advertisement

Creative Ways to Use Pistachio Butter in Your Recipes

One great way to incorporate pistachio butter into your recipes is by spreading it on toast or bagels for a delicious and nutritious breakfast option.

The creamy texture and rich flavor of pistachio butter make it a perfect substitute for traditional spreads like peanut butter or cream cheese.

It adds a unique twist to your morning routine, giving you a burst of nutty goodness that will leave you craving more.

But don’t stop there! Pistachio butter can be used in a variety of desserts as well.

From cookies to cakes, it adds a delightful nuttiness that pairs perfectly with sweet treats.

Advertisement

Imagine biting into a soft, chewy cookie with a hint of salty pistachio flavor.

Or indulging in a velvety pistachio buttercream frosting on top of a moist chocolate cake.

The possibilities are endless when it comes to using this versatile ingredient in your culinary creations.

So go ahead, get creative and explore the world of pistachio butter desserts.

Your taste buds will thank you.

Advertisement

Pistachio Butter as a Nutritional Substitute

Incorporating pistachio butter into your recipes is a great way to enjoy a nutritious and flavorful alternative to traditional spreads. Not only does pistachio butter add a rich and creamy texture to dishes, but it also provides a host of health benefits. Here’s why you should consider incorporating pistachio butter into your daily meals:

  1. Nutritional Powerhouse: Pistachio butter is packed with essential nutrients like healthy fats, protein, fiber, and vitamins. It can help support heart health, aid in digestion, and promote satiety.

  2. Versatility: Pistachio butter can be used in a variety of recipes, from smoothies and oatmeal to sauces and baked goods. Its nutty and slightly sweet flavor adds depth to both sweet and savory dishes.

  3. Easy to Make: Making pistachio butter at home is a breeze. Simply blend roasted pistachios in a food processor until smooth and creamy. You can customize the consistency and flavor by adding a pinch of salt or a drizzle of honey.

By incorporating pistachio butter into your daily meals, you can elevate your dishes with its unique flavor and reap the nutritional benefits it offers. So, why not give it a try and discover the wonders of this delicious spread?

Now that you know the benefits of incorporating pistachio butter into your recipes, let’s move on to some troubleshooting tips for making pistachio butter.

Troubleshooting Tips for Making Pistachio Butter

Having trouble achieving a smooth consistency when blending roasted pistachios in a food processor? Don’t worry, you’re not alone. Making pistachio butter can be a bit tricky, but with the right troubleshooting techniques, you’ll be enjoying a creamy and delicious spread in no time.

One common mistake people make is not roasting the pistachios properly. To bring out their natural oils and enhance their flavor, it’s essential to roast them at a low temperature for about 10-15 minutes, until they become fragrant and slightly golden.

Advertisement

Another mistake is overloading the food processor. Instead of blending a large batch all at once, try pulsing smaller amounts in intervals. This will ensure that the pistachios are evenly ground and prevent the motor from overheating.

Lastly, make sure to scrape down the sides of the food processor regularly. This will help incorporate any stray pieces and ensure a smooth and creamy consistency.

Homemade Pistachio Butter Vs. Store-Bought: Is It Worth the Effort?

After troubleshooting tips for making pistachio butter, let’s discuss whether homemade pistachio butter is worth the effort compared to store-bought versions.

As a food writer and recipe developer, I can confidently say that making your own pistachio butter not only allows you to customize the flavor and texture but also provides numerous health benefits. Here’s why it’s worth the extra time and effort:

  1. Health benefits: Homemade pistachio butter is a nutritious alternative to store-bought spreads, as it contains no added sugars or preservatives. Pistachios are packed with protein, fiber, and healthy fats, promoting heart health and aiding in weight management.

  2. Taste comparison: The taste of homemade pistachio butter is unparalleled. It has a rich, nutty flavor with hints of sweetness and a silky-smooth texture. Store-bought versions often lack the depth and freshness that homemade pistachio butter offers.

  3. Customization: When making your own pistachio butter, you have full control over the ingredients and can add flavors like vanilla, honey, or cinnamon to suit your taste preferences. This customization elevates the overall experience and makes it truly worth the effort.

Frequently Asked Questions

How Many Calories Are in a Serving of Pistachio Butter?

A serving of pistachio butter typically contains around 160-180 calories. It is also rich in nutrients like healthy fats, protein, and fiber. Pistachio butter can be a delicious and nutritious addition to your diet.

Advertisement

Can Pistachio Butter Be Used as a Replacement for Other Nut Butters in Recipes?

Yes, pistachio butter can be used as a replacement for other nut butters in recipes. It offers similar health benefits and can add a unique flavor and texture to dishes like smoothies, baked goods, and sauces.

Does Pistachio Butter Need to Be Refrigerated After Opening?

Yes, pistachio butter needs to be refrigerated after opening. This helps to extend its shelf life and maintain its freshness. Proper storage is important for preserving the taste and quality of the butter.

Can I Make Pistachio Butter Using Pre-Shelled Pistachios?

Yes, you can make pistachio butter using pre-shelled pistachios. It saves time and effort, making the process of making pistachio butter at home more convenient. Plus, the taste and texture are just as delicious!

Can Pistachio Butter Be Frozen for Long-Term Storage?

Yes, pistachio butter can be frozen for long-term storage. The best storage containers for pistachio butter are airtight containers or freezer bags. Just make sure to thaw it properly before using.

Conclusion

In conclusion, making your own pistachio butter is definitely worth the effort.

Advertisement

Not only does it allow you to control the ingredients and customize the flavors to your liking, but it also provides numerous health benefits.

From the rich and creamy texture to the delightful nutty flavor, homemade pistachio butter is a culinary delight that can elevate any dish.

So why not give it a try and indulge in this delicious and nutritious spread? Your taste buds will thank you!

And remember, Rome wasn’t built in a day, so take your time and enjoy the process of creating your very own pistachio butter masterpiece.

Advertisement
Continue Reading
Advertisement

Recipes & Culinary Uses

7 Easy Steps to Make Seafood Butter at Home

Published

on

By

An image that showcases a glistening golden butter melting over a steaming platter of succulent seafood

I have always had a passion for seafood, and there is nothing quite like a flavorful, homemade butter to elevate any seafood dish.

Making your own seafood butter may sound intimidating, but it’s actually quite simple. In this article, I’ll guide you through the process of creating your own flavorful butter for seafood, using the right ingredients and equipment.

From clarifying butter to adding herbs and spices, you’ll learn all the tips and tricks to enhance your seafood dishes with this delectable homemade butter.

Key Takeaways

  • Unsalted butter is preferred for seafood dishes to allow the natural flavors of the seafood to shine through.
  • Clarified butter has a higher smoke point, making it ideal for sautéing or pan-searing seafood.
  • Homemade seafood butter allows for customization and experimentation with flavors.
  • Using high-quality butter ensures superior taste and freshness.

Types of Butter to Use for Seafood

When making butter for seafood, you’ll want to use unsalted butter for the best flavor. While there are different butter alternatives available, such as clarified butter or ghee, unsalted butter is the preferred choice for seafood dishes.

Advertisement

The absence of salt allows the natural flavors of the seafood to shine through without overpowering them. It also gives you more control over the seasoning of your dish, as you can add salt to taste.

Unsalted butter has a creamy and rich texture that complements the delicate flavors of seafood, enhancing its taste and adding a luscious mouthfeel.

Essential Ingredients for Homemade Seafood Butter

One of the essential ingredients for homemade seafood butter is a high-quality unsalted butter. There are a few different types to consider when making butter for seafood. Here are three options that work well:

  1. European-style butter: This type of butter has a higher fat content, resulting in a richer and creamier flavor. It adds a decadent touch to seafood dishes.

  2. Clarified butter: This is butter that has been melted and strained to remove the milk solids. It has a higher smoke point, making it perfect for sautéing or pan-searing seafood.

  3. Cultured butter: Made from fermented cream, cultured butter has a tangy flavor that pairs wonderfully with seafood. It adds a unique depth of flavor to any dish.

Making your own seafood butter has several benefits. First, you have control over the ingredients, ensuring that you use high-quality butter. Second, you can customize the flavors by adding herbs, spices, or even citrus zest. Finally, homemade seafood butter allows you to experiment and create unique and delicious combinations.

Now that we know what types of butter to use and the benefits of homemade seafood butter, let’s move on to the equipment needed for making this delectable condiment.

Advertisement

Equipment Needed for Making Seafood Butter

To prepare this delectable condiment, you’ll need a few essential pieces of equipment. First and foremost, a heavy-bottomed saucepan is crucial for melting the butter without scorching it.

A fine mesh strainer is also necessary to remove any impurities from the butter during the clarifying process.

Additionally, a heatproof container with a lid will be needed to store the clarified butter once it is done.

Now, let’s talk about the types of seafood that pair exceptionally well with homemade butter. From succulent lobster tails to delicate scallops, the rich and creamy flavor of homemade butter enhances the natural sweetness of seafood, creating a harmonious and indulgent taste.

The benefits of using homemade butter for seafood dishes are numerous. Not only does it add a luxurious touch, but it also allows you to control the quality and freshness of the butter, ensuring a superior taste.

Advertisement

With the equipment ready, let’s move on to the next section for step-by-step instructions on how to clarify butter.

Step-by-Step Instructions for Clarifying Butter

Grab your heavy-bottomed saucepan and start melting the butter over low heat. Clarifying butter is a simple process that removes impurities and solids, leaving behind a golden, pure liquid that is perfect for drizzling over seafood.

Here are three tips for achieving the perfect consistency:

  1. Strain it: Once the butter has melted, carefully pour it through a fine-mesh sieve or cheesecloth to remove any remaining solids. This step ensures a smooth and silky texture.

  2. Skim the foam: As the butter melts, foam will rise to the surface. Use a spoon or skimmer to gently remove the foam, as it can affect the texture and flavor of the clarified butter.

  3. Choose the right seafood: Clarified butter pairs well with a variety of seafood, such as lobster, crab, shrimp, and scallops. The rich, nutty flavor of the butter complements the delicate flavors of these seafood options.

Adding Flavors to Seafood Butter: Herbs and Spices

Advertisement

When it comes to adding flavors to seafood butter, the combination of herbs and spices can take your culinary creations to the next level.

The best herb combinations can vary depending on the type of seafood you’re working with, but some classic options include dill and lemon zest for a fresh and tangy flavor, or thyme and garlic for a savory and aromatic profile.

As for spice pairing suggestions, don’t be afraid to experiment with a pinch of cayenne for a subtle kick, or smoked paprika for a smoky and earthy undertone.

Best Herb Combinations

The best herb combinations for making butter for seafood are garlic and dill. These two herbs bring out the natural flavors of seafood and add a savory and aromatic touch to the butter. When combined, garlic and dill create a harmonious balance of flavors that enhance the taste of seafood dishes.

Here are three reasons why using fresh herbs in your seafood butter is beneficial:

Advertisement
  1. Enhanced Flavor: Fresh herbs have a vibrant and intense flavor that can elevate the taste of your seafood butter. The aromatic notes of garlic and the delicate taste of dill complement the richness of the butter and enhance the overall flavor profile.

  2. Health Benefits: Garlic is known for its numerous health benefits, including its ability to boost the immune system and reduce inflammation. Dill, on the other hand, is rich in antioxidants and can aid digestion. Incorporating these herbs into your butter adds a nutritional boost to your seafood dishes.

  3. Visual Appeal: Fresh herbs not only add flavor but also enhance the visual appeal of your dishes. The vibrant green color of dill and the aromatic cloves of garlic can make your seafood butter visually enticing and appetizing.

Spice Pairing Suggestions

One way to enhance the flavors of your dishes is by using spice pairing suggestions. By combining different spices, you can create a unique and delicious flavor profile for your seafood butter. Here are some spice pairing recommendations to elevate your seafood butter to the next level:

Spice Pairing
Paprika Garlic
Cumin Lemon
Cayenne Pepper Dill

Incorporating these alternative flavorings for seafood butter will add depth and complexity to your dishes. Whether you prefer a smoky and spicy flavor or a tangy and herbaceous taste, there’s a spice pairing that will suit your palate. Now that we’ve explored spice pairing suggestions, let’s move on to infusing seafood butter with citrus zest to further enhance its flavor.

Infusing Seafood Butter With Citrus Zest

To infuse your seafood butter with citrus zest, start by zesting your favorite citrus fruit directly into the melted butter. The warmth of the butter will release the oils in the zest, creating a burst of bright, tangy flavor.

Here are three ways to elevate your seafood recipes with this infused butter:

  1. Lemon Butter: Zest a fresh lemon into the melted butter for a classic and versatile citrus flavor that pairs well with any seafood dish.

  2. Orange Butter: For a sweeter, more subtle citrus taste, zest an orange into the butter. This infusion adds a touch of brightness to rich seafood like lobster or scallops.

  3. Lime Butter: Zesting a lime into the butter creates a vibrant and zesty flavor that complements lighter seafood options like fish or shrimp.

By infusing your butter with citrus zest, you can add a burst of flavor to your seafood dishes.

Advertisement

Now, let’s explore the options for chilling and storing homemade seafood butter.

Options for Chilling and Storing Homemade Seafood Butter

When it comes to chilling and storing homemade seafood butter, there are a few key points to consider.

First, you have the option of refrigeration or freezing. Refrigeration will keep the butter fresh for a shorter period of time, usually up to two weeks, while freezing can extend the shelf life for several months.

It’s important to take into account the shelf life considerations and how long you plan to store the butter before deciding which method is best for you.

Refrigeration Vs. Freezing

If you’re debating whether to refrigerate or freeze your butter for seafood, it’s best to keep it in the refrigerator. Here’s why:

Advertisement
  1. Refrigeration benefits: By storing your seafood butter in the refrigerator, you can maintain its freshness and quality for a longer period. The cool temperatures slow down the bacterial growth, preventing spoilage. Moreover, refrigeration helps to preserve the butter’s flavor and texture, ensuring that it enhances the taste of your seafood dishes.

  2. Freezing drawbacks: While freezing can extend the shelf life of butter, it may negatively impact its quality. Freezing can cause the butter to become grainy and lose its smooth texture. Additionally, when thawed, the water content in the butter may separate, resulting in an undesirable consistency. Freezing can also affect the flavor of the butter, potentially altering its taste and aroma.

To ensure the best results, I recommend refrigerating your seafood butter. It will maintain its freshness and quality, enhancing your seafood dishes with its creamy and delicious flavor.

Shelf Life Considerations

Storing your seafood butter in the refrigerator helps maintain its freshness and quality for a longer period. The cool temperature slows down the growth of bacteria, ensuring that your seafood butter stays safe to consume. It’s important to keep it in an airtight container to prevent any odors or flavors from seeping in.

When it comes to long-term storage, the refrigerator is your best bet. If you have leftover seafood butter that you don’t plan on using within a week or two, you can also consider freezing it for even longer storage. Just make sure to wrap it tightly in plastic wrap or place it in a freezer bag to protect it from freezer burn.

Although frozen seafood butter may lose some of its creamy texture, it can still be used as a flavoring agent in various dishes, making it a versatile ingredient even beyond its original purpose.

Creative Ways to Use Seafood Butter in Your Recipes

Once you’ve made your delicious seafood butter, you can use it in a variety of creative ways in your recipes. The rich and savory flavor of the butter adds a delightful twist to any dish.

Advertisement

Here are three different uses and flavor variations to try:

  1. Grilled Seafood: Brush the seafood butter onto shrimp, lobster, or fish before grilling. The butter will melt and infuse the seafood with its delectable taste, creating a succulent and flavorful dish.

  2. Pasta Sauce: Melt the seafood butter and toss it with cooked pasta for a simple yet indulgent pasta dish. Add some grated Parmesan cheese and freshly chopped herbs for an extra burst of flavor.

  3. Garlic Bread: Spread the seafood butter onto slices of bread and toast them until golden brown. The buttery, garlicky goodness will make your taste buds sing.

With these different uses and flavor variations, your seafood butter will elevate your recipes to a whole new level of deliciousness.

Frequently Asked Questions

Can I Use Margarine Instead of Butter for Making Seafood Butter?

Sure, you can use margarine instead of butter for making seafood butter. However, using real butter has its benefits. It adds a rich flavor and creamy texture that enhances the taste of the seafood.

Can I Use Flavored Butter for Seafood Dishes?

Using flavored butter alternatives in seafood dishes can enhance the taste and provide a unique twist. The benefits of using flavored butter for seafood include adding depth of flavor and complementing the natural flavors of the seafood.

How Long Can I Store Homemade Seafood Butter in the Refrigerator?

I store homemade seafood butter in the refrigerator for up to two weeks. It’s important to properly seal and label the container to ensure freshness. Preserving seafood butter allows me to have it ready whenever I need it.

Advertisement

Can I Use Frozen Butter for Making Seafood Butter?

Sure, you can use frozen butter for making seafood butter. It’s a great alternative if you don’t have fresh butter on hand. Just make sure to thaw it before using.

Can I Use Plant-Based Butter Alternatives for Making Seafood Butter?

Yes, you can use plant-based butter alternatives for making seafood butter. Vegan butter alternatives are a great option for those who prefer cooking with plant-based spreads. They provide a similar creamy texture and flavor to traditional butter.

Conclusion

In conclusion, making homemade seafood butter is a simple and rewarding process.

By clarifying butter and infusing it with herbs, spices, or citrus zest, you can create a flavorful accompaniment to enhance any seafood dish.

Whether you choose to use it as a dip, a sauce, or to baste your seafood while grilling, the possibilities are endless.

Advertisement

So why settle for store-bought when you can elevate your seafood experience with a personalized touch?

Get creative and let your taste buds rejoice in the deliciousness of homemade seafood butter.

Continue Reading

Recipes & Culinary Uses

How to Make Delicious Butter Flavored Oil at Home

Published

on

By

An image showcasing the process of making butter-flavored oil: a transparent glass jar filled with melted golden butter, pouring into a clear bottle of light olive oil

I have always been a firm believer that adding a touch of butter makes everything taste better. That’s why learning how to make butter-flavored oil was a total game-changer for me in the kitchen!

In this article, I’ll guide you through the simple process of infusing your favorite oil with that rich, creamy buttery taste. With just a few ingredients and some easy steps, you’ll have a versatile and delicious condiment ready to enhance your dishes.

Get ready to elevate your cooking with homemade butter flavored oil!

Key Takeaways

  • Select the right oil for making butter flavored oil
  • Infuse the oil with butter flavor for a rich and creamy taste
  • Choose the best butter for infusion to enhance the flavor
  • Strain and store the butter flavored oil properly to maintain its quality and shelf life

Selecting the Right Oil

When selecting the right oil for making butter flavored oil, it’s important to consider the smoke point. Choosing the right oil can greatly impact the taste and quality of your final product.

Advertisement

I recommend experimenting with different oils to find the one that best suits your preferences. Oils with a high smoke point, such as avocado oil or refined coconut oil, are ideal for making butter flavored oil as they can withstand high heat without burning or producing a strong odor. These oils provide a neutral base that allows the butter flavor to shine through.

Now that you know the importance of selecting the right oil, let’s move on to the next step: infusing the oil with butter flavor.

Infusing the Oil With Butter Flavor

To infuse the oil with a delicious buttery flavor, start by melting butter in a saucepan. Once the butter has melted completely, add your chosen oil to the saucepan. The heat from the melted butter will help infuse the oil with its rich and savory flavor.

If you’re looking for butter flavor alternatives, you can also use vegan butter or butter extract to achieve a similar taste.

The benefits of using butter flavored oil are numerous. It not only adds a delightful taste to your dishes, but also brings a smooth and creamy texture. Additionally, butter flavored oil is a healthier alternative to using actual butter, as it contains fewer calories and less saturated fat.

Advertisement

Choosing the Best Butter for Infusion

One option is to use vegan butter as a substitute for achieving that delicious buttery flavor when infusing the oil. Vegan butter is made from plant-based oils, such as coconut or almond oil, and is free from any animal products. It is a great choice for those who follow a vegan or dairy-free diet.

When choosing the right butter for infusion, there are a few factors to consider:

  • Flavor: Experiment with different types of vegan butter to find the one that best matches the flavor you desire. Some may have a stronger buttery taste, while others may have a more subtle flavor.

  • Ingredients: Look for a vegan butter that is made from high-quality, natural ingredients, without any artificial additives or preservatives.

  • Texture: Consider the texture of the vegan butter, as it can affect the overall consistency of the infused oil.

  • Shelf Life: Check the expiration date and storage recommendations to ensure the vegan butter stays fresh for a longer period of time.

Preparing the Ingredients

To prepare the ingredients, you’ll want to gather all the necessary items before you begin. When it comes to flavor infusion, there are different methods you can try.

Advertisement

One popular method is infusing oil with herbs and spices. Experimenting with different herb and spice combinations allows you to create unique and delicious flavors. Start by selecting your favorite herbs and spices, such as rosemary, thyme, garlic, or chili flakes.

Next, gather a high-quality oil, like olive or sunflower oil, and a clean glass jar with a tight-fitting lid. Wash and dry the herbs and spices, then add them to the jar. Pour the oil over the herbs and spices, making sure they are completely submerged.

Close the lid tightly and let the mixture sit for at least 24 hours to infuse the flavors. After that, strain the oil to remove any solids, and your homemade flavored oil is ready to use!

Infusing the Oil and Butter Mixture

Advertisement

Once the herbs and spices have been added to the jar, pour the oil over them and ensure they are completely submerged. This is a crucial step in infusing the oil with the flavors of the herbs and spices.

To create a harmonious blend of flavors, consider experimenting with different infusing techniques and flavor combinations. Here are some ideas to get you started:

  • Classic Italian: Basil, oregano, rosemary, and garlic.
  • Asian Fusion: Ginger, lemongrass, cilantro, and chili flakes.
  • Mediterranean Delight: Thyme, marjoram, lemon zest, and black pepper.
  • Savory Herb Garden: Sage, parsley, chives, and dill.

By combining different herbs and spices, you can create unique and delicious flavor profiles in your infused oil. Remember to let the oil infuse for at least a week to allow the flavors to develop fully.

Use your infused butter flavored oil to enhance the taste of your dishes, whether it’s drizzling over roasted vegetables, marinating meat, or simply dipping bread.

Enjoy the process of experimenting with different flavors and infusing techniques to create your own signature butter flavored oil.

Straining and Storing the Butter Flavored Oil

After infusing the oil with herbs and spices, strain the mixture to remove any solids and transfer it to a clean, airtight container for storage. Straining the butter flavored oil is an essential step to ensure a smooth and flavorful end product.

Advertisement

There are a few different straining techniques you can use, depending on your preference and the tools you have on hand. One popular method is to line a fine-mesh strainer with cheesecloth and pour the oil through it, catching any solids in the cloth. Another option is to use a coffee filter or a paper towel placed inside a funnel to strain the oil. Whichever method you choose, be sure to press the solids gently to extract as much flavor as possible.

Once strained, the butter flavored oil should be stored in a clean, airtight container to preserve its freshness and flavor. Make sure the container is completely dry to prevent any moisture from spoiling the oil.

Now that we have our butter flavored oil ready, let’s move on to some tips and variations for using it in our recipes.

Tips and Variations for Using Butter Flavored Oil

When using butter flavored oil in your recipes, remember to adjust the amount of salt you add, as the oil already contains some.

Butter flavored oil is a great substitute for butter in baking and cooking. It provides the rich, creamy taste of butter without the cholesterol and saturated fat.

Advertisement

Here are some benefits of using butter flavored oil in your recipes:

  • Healthier option: Butter flavored oil is lower in fat and calories compared to butter, making it a healthier choice for those watching their intake.

  • Easy to use: Butter flavored oil can be used in the same way as regular oil or melted butter, making it convenient and versatile.

  • Enhanced flavor: The buttery taste of the oil adds a delicious flavor to your dishes, enhancing their overall taste and appeal.

  • Longer shelf life: Butter flavored oil has a longer shelf life compared to butter, allowing you to keep it on hand for longer periods without worrying about spoilage.

Incorporating butter flavored oil into your baking and cooking can bring numerous benefits, from healthier options to enhanced flavors. Give it a try and see how it elevates your recipes.

Frequently Asked Questions

Can I Use Any Type of Oil for Making Butter Flavored Oil?

Yes, you can use different types of oil for making butter flavored oil. However, some oils may work better than others in infusing the butter flavor. It’s important to choose a neutral-flavored oil to let the butter flavor shine through.

Can I Use Margarine Instead of Butter for Infusing the Oil?

Using margarine instead of butter for infusing oil has pros and cons. Margarine can alter the flavor of the infused oil, giving it a different taste. It’s important to consider personal preference and desired outcome when making this substitution.

How Long Can I Store the Butter Flavored Oil?

When it comes to long term storage of butter flavored oil, it’s important to follow best storage practices. This ensures the oil stays fresh and flavorful. Be sure to store it in a cool, dark place to maintain its quality.

Advertisement

Can I Use Dried Herbs for Adding Additional Flavor to the Oil?

Sure, you can use dried herbs to add flavor to your oil, but using fresh herbs will give you a more vibrant taste. There are various methods for infusing oil with herbs, like heat infusion or cold infusion.

Can I Use the Leftover Strained Butter for Other Recipes?

Yes, you can definitely use the leftover strained butter in baking or other recipes. It adds a rich, buttery flavor that enhances the taste of your dishes. Get creative and explore different ways to incorporate it into your cooking!

Conclusion

In conclusion, making butter flavored oil is a simple process that can elevate your cooking to new levels of flavor. By infusing your chosen oil with the rich taste of butter, you can add a deliciously decadent touch to your dishes.

For example, imagine drizzling this oil over freshly popped popcorn, creating a movie night snack that is both buttery and aromatic.

With a little creativity and experimentation, the possibilities for using butter flavored oil are endless. So why not give it a try and elevate your culinary creations today?

Advertisement
Continue Reading

Recipes & Culinary Uses

How to Make Creamy Butter from Pasteurized Milk

Published

on

By

An image showcasing the step-by-step process of making butter from pasteurized milk: a glass jar filled with creamy milk, shaking motion blurred hands, milk separating into butter and buttermilk, and finally, a lump of freshly churned butter

I have always been intrigued by the transformation of milk into butter. It is incredible how something as basic as pasteurized milk can be changed into a luxurious and creamy spread.

In this article, I’ll guide you through the step-by-step process of making butter from pasteurized milk. We’ll explore the science behind butter making, troubleshoot common issues, and discover the health benefits of homemade butter.

Get ready to embark on a delicious and informative butter-making journey!

Key Takeaways

  • Pasteurization kills harmful bacteria and pathogens in milk, making it safe for consumption.
  • Churning separates butterfat from liquid in pasteurized milk to create homemade butter.
  • The process of churning butter involves agitating cream to encourage fat globules to clump together.
  • Homemade butter offers the advantage of customization, flavor enhancement, and control over ingredients compared to processed butter.

The Importance of Using Pasteurized Milk

Using pasteurized milk is essential for making butter because it ensures the butter is safe to consume. Pasteurization is a process that involves heating the milk to kill harmful bacteria and pathogens that can cause foodborne illnesses. By using pasteurized milk, we can minimize the risk of contamination and ensure the health benefits of homemade butter.

Advertisement

Pasteurization does not significantly affect the nutritional value of the milk, as it retains most of its vitamins and minerals. Additionally, pasteurized milk is readily available in grocery stores, making it convenient for butter-making purposes.

Now that we understand the importance of using pasteurized milk, let’s move on to the next step of gathering the necessary equipment for making butter.

Gathering the Necessary Equipment

To gather the necessary equipment, you’ll need a blender, a large bowl, and a fine-mesh strainer. These tools are essential for successfully making butter from pasteurized milk. The blender will help you separate the butterfat from the liquid, while the large bowl will catch the liquid for further use. The fine-mesh strainer will ensure that no unwanted particles end up in your final product.

When choosing the right milk for making butter, it is important to opt for pasteurized milk. Pasteurization helps eliminate harmful bacteria and ensures the milk is safe for consumption. Additionally, pasteurized milk has a longer shelf life, making it easier to store and use for making butter.

Step-by-Step Guide to Churning Butter

Advertisement

First, you’ll need a clean and spacious workspace to start churning your homemade butter. The science behind churning involves the separation of fat from the liquid in milk. This process can be achieved by agitating the cream until the fat globules clump together and separate from the buttermilk. To achieve the perfect consistency, it is essential to control the temperature and timing during the churning process. Here is a step-by-step guide to churning butter:

Step Procedure Time (minutes)
1 Pour the cream into a churn or mixer. 10
2 Begin churning at a low speed to break up the fat globules. 20
3 Increase the speed gradually to encourage the fat to clump together. 30
4 Once the fat has separated from the buttermilk, stop churning and strain the butter. 40

Understanding the Science Behind Butter Making

Understanding the science behind butter making involves recognizing the separation of fat from the liquid in milk and the process of agitating the cream. When cream is churned, the fat globules in the cream collide with each other, causing them to stick together and eventually form butter. Here are some key points to consider when delving into the science behind churning:

  • Cream contains fat globules that are dispersed in water.
  • Agitating the cream causes the fat globules to come together and form clumps.
  • The clumps of fat globules trap air and water, resulting in the formation of butter.
  • The process of churning also helps release buttermilk, which can be used in various culinary applications.

Homemade butter offers several benefits in cooking. Firstly, it has a rich and creamy flavor that enhances the taste of dishes. Secondly, it allows for better control over the ingredients used, ensuring a healthier option. Lastly, it can be customized by adding herbs, spices, or even sweeteners, adding a unique and personalized touch to your culinary creations.

Understanding the science behind churning and the benefits of homemade butter can greatly elevate your cooking skills and enhance your dishes.

Tips for Achieving the Perfect Consistency

Advertisement

When churning your own butter, you can achieve the perfect consistency by ensuring that the cream is chilled before starting the process. This step is crucial in achieving a smooth texture in your homemade butter. Cold cream helps to separate the butterfat from the liquid, resulting in a better consistency.

Another important tip is to avoid over-churning the cream. Over-churning can lead to a grainy texture, so it’s important to stop churning as soon as the butter starts to form clumps.

Additionally, make sure to strain the butter after churning to remove any excess liquid, which can also affect the texture.

By following these tips, you can avoid common mistakes and achieve a smooth and creamy homemade butter.

Advertisement

Now, let’s explore the next section about adding flavors and enhancements to your butter.

Adding Flavors and Enhancements to Your Butter

When it comes to adding flavors and enhancements to butter, there are endless possibilities to explore. Creative butter combinations can elevate the taste of any dish, allowing for a unique and personalized culinary experience.

From savory options like garlic and herbs to sweet additions like honey and cinnamon, the versatility of butter makes it a perfect canvas for experimentation and flavor infusion.

Creative Butter Combinations

To get creative with your butter, try blending in different herbs and spices for unique flavor combinations. Flavored butter recipes are a fantastic way to elevate your dishes and add a burst of flavor.

Here are some unique butter pairings that you can experiment with:

Advertisement
  • Garlic and Parsley: This classic combination adds a delicious savory flavor to your butter, perfect for spreading on bread or melting over grilled meats.

  • Lemon and Dill: The bright citrusy notes of lemon combined with the fresh taste of dill create a refreshing and zesty butter that pairs well with seafood.

  • Cinnamon and Brown Sugar: Transform your butter into a sweet treat by blending in cinnamon and brown sugar. This combination is great for spreading on toast or pancakes.

  • Chili and Lime: Add a kick to your butter by mixing in chili and lime zest. This spicy and tangy combination is excellent for adding a bold flavor to grilled corn or roasted vegetables.

Flavorful Butter Additions

Now that we’ve explored some creative butter combinations, let’s dive into the world of flavorful butter additions.

By experimenting with different flavor pairings, you can create unique and delicious homemade spreads that will elevate any dish.

One popular option is adding herbs and spices to your butter. For example, mixing in chopped garlic and parsley can give your butter a savory kick, perfect for spreading on warm bread or melting over grilled meats.

Another option is incorporating sweet ingredients like honey or cinnamon for a delightful twist. The possibilities are endless, so don’t be afraid to get creative and try out different combinations.

In the next section, we will discuss the best practices for storing and preserving your homemade butter, ensuring its freshness and quality.

Advertisement

Storing and Preserving Homemade Butter

If you want to store and preserve your homemade butter, you can simply place it in an airtight container and keep it in the refrigerator. This will help maintain its freshness and extend its shelf life. However, there are a few techniques you can follow to ensure your butter stays in optimal condition for longer periods of time:

  • Keep the butter away from strong-smelling foods to prevent flavor absorption.
  • Store the butter in the coldest part of the refrigerator, preferably in the back.
  • Wrap the butter tightly in wax or parchment paper to prevent it from picking up any off flavors.
  • If you want to store butter for an extended period, consider freezing it in a freezer-safe container or wrapped tightly in plastic wrap.

Troubleshooting Common Butter Making Issues

One common issue when making homemade butter is that it may not solidify properly if the cream was not chilled enough before churning. To troubleshoot this problem, it is important to ensure that the cream is thoroughly chilled before starting the churning process. Additionally, using cream with a higher fat content can help achieve a better solidification of the butter.

Another common issue is the butter turning out too soft or greasy. This can be caused by over-churning the cream, which leads to the fat separating and resulting in a softer consistency. To avoid this, it is crucial to monitor the churning process closely and stop once the butter has formed solid clumps.

By addressing these common butter making issues, you can ensure a successful homemade butter-making experience.

Transition: Now that we have discussed troubleshooting tips for common butter making issues, let’s delve into the health benefits of homemade butter.

Health Benefits of Homemade Butter

When it comes to discussing the nutritional value of butter, it’s important to understand the differences between processed and homemade butter.

Advertisement

Processed butter often contains added ingredients, such as stabilizers and preservatives, which can affect its nutritional composition.

On the other hand, homemade butter is typically made from pure cream, which means it contains higher amounts of beneficial nutrients like vitamins A, D, and E.

In this discussion, we will explore the nutritional differences between processed and homemade butter and how they can impact our overall health.

Nutritional Value of Butter

The nutritional value of butter can vary depending on the quality of the milk used. When it comes to health benefits, homemade butter can provide several advantages. Here are some key points to consider regarding the nutritional content of butter:

  • Rich in healthy fats: Butter is a good source of healthy saturated fats, which are essential for brain function and hormone production.

  • Vitamins and minerals: Butter contains fat-soluble vitamins like A, D, E, and K, which are important for various bodily functions. It also provides small amounts of minerals like calcium, phosphorus, and selenium.

  • Conjugated linoleic acid (CLA): Homemade butter from grass-fed cows may contain higher levels of CLA, a fatty acid associated with potential health benefits, including reduced inflammation and improved heart health.

  • Antioxidants: Butter contains small amounts of antioxidants like beta-carotene and vitamin E, which help protect the body against free radicals.

Overall, homemade butter can be a nutritious addition to a balanced diet, providing essential fats, vitamins, and minerals.

Advertisement

Processed Vs Homemade Butter

If you’re looking for a healthier option, consider opting for homemade butter instead of processed butter. Processed butter often contains additives and preservatives that can be harmful to your health.

On the other hand, homemade butter is made from fresh ingredients and can be customized to your preferences. There are many homemade butter recipes available that are easy to follow and require minimal ingredients.

One popular recipe involves churning pasteurized milk until it separates into butter and buttermilk. This process ensures that you have control over the quality and purity of your butter.

Additionally, making your own butter allows you to experiment with different flavors by adding herbs, spices, or even fruits. So, why settle for processed butter when you can enjoy the taste and health benefits of homemade butter?

Exploring Different Varieties of Butter

To explore different varieties of butter, you can try mixing in various herbs and spices for added flavor. Here are four creative butter combinations that you can experiment with:

Advertisement
  • Garlic and Herb: Mix minced garlic, chopped fresh herbs like parsley, thyme, and rosemary, and a pinch of salt into softened butter. This aromatic blend is perfect for spreading on bread or melting over cooked vegetables.

  • Lemon and Dill: Combine grated lemon zest, freshly squeezed lemon juice, chopped fresh dill, and a sprinkle of salt into softened butter. This tangy and refreshing butter is great for seafood dishes or as a dip for grilled shrimp.

  • Chili and Lime: Add finely chopped red chili pepper, lime zest, lime juice, and a touch of salt to softened butter. The spicy kick and zesty lime flavor make this butter ideal for adding heat to grilled corn or slathering on grilled chicken.

  • Maple and Cinnamon: Mix pure maple syrup, ground cinnamon, and a pinch of salt into softened butter. This sweet and warm butter is a delightful addition to pancakes, waffles, or even a simple slice of toast.

Creative Ways to Use Homemade Butter in Recipes

When it comes to homemade butter, the flavor-enhancing benefits are truly remarkable. The rich and creamy taste of homemade butter can elevate any dish, from baked goods to savory dishes.

Additionally, homemade butter offers versatility in cooking, allowing for a wide range of culinary creations that can satisfy any palate.

Flavor-Enhancing Benefits

Enhancing the flavor of your homemade butter can be achieved by using high-quality, pasteurized milk. When it comes to flavor extraction and taste enhancement, the quality of the milk used plays a vital role. Here are four reasons why using high-quality, pasteurized milk can improve the taste of your homemade butter:

  • Freshness: High-quality milk ensures that your butter will have a fresher taste, as it is sourced from reputable farms that prioritize freshness and quality.

  • Creaminess: Pasteurized milk contains a higher fat content, resulting in a creamier texture and richer flavor in your butter.

  • Nutritional Value: High-quality milk is packed with essential nutrients and vitamins, which can contribute to a more flavorful and nutritious homemade butter.

  • Consistency: Using pasteurized milk ensures a consistent flavor profile in your butter, allowing you to achieve the desired taste every time.

Versatility in Cooking

Using high-quality milk in your recipes allows for greater versatility in your cooking. It enhances the flavor and texture of various dishes. The quality of the ingredients plays a crucial role in the final outcome when it comes to cooking techniques. High-quality milk, with its rich and creamy consistency, can be used in a wide range of recipes to elevate the taste and mouthfeel.

From creamy soups and sauces to fluffy pancakes and custards, the possibilities are endless. The richness of the milk adds depth and complexity to savory dishes, while enhancing the sweetness in desserts. High-quality milk can be a great source of inspiration for creating unique and delicious recipes.

Advertisement

Its versatility allows you to experiment with different flavors and textures, ensuring a delightful culinary experience.

Frequently Asked Questions

How Long Does It Take to Make Butter From Pasteurized Milk?

It takes approximately 20 minutes to make butter from pasteurized milk without using a churner. Alternative methods, such as shaking cream vigorously in a jar or using a food processor, can expedite the process.

Can I Use Unpasteurized Milk to Make Butter?

Yes, using unpasteurized milk for butter making is possible, but it poses safety risks. Unpasteurized milk may contain harmful bacteria that can cause foodborne illnesses. It’s recommended to use pasteurized milk for butter making to ensure safety.

What Type of Equipment Do I Need to Make Butter From Pasteurized Milk?

To make butter from pasteurized milk, you will need a few key pieces of equipment. One option is to use a stand mixer with a whisk attachment. Another alternative is to use a hand-held mixer or a food processor.

Can I Add Salt to My Homemade Butter?

Yes, you can add salt to homemade butter to enhance its flavor. When choosing salt, opt for fine-grained or kosher salt as they dissolve easily. Add a pinch or to taste during the churning process.

Advertisement

How Long Can Homemade Butter Be Stored?

Proper storage is crucial to maximize the shelf life of homemade butter. It can last up to three weeks when stored in an airtight container in the refrigerator.

Conclusion

In conclusion, making butter from pasteurized milk is a rewarding and scientific process that anyone can enjoy.

By following the step-by-step guide and understanding the science behind butter making, you can achieve the perfect consistency for your homemade butter.

The health benefits of homemade butter are numerous, and exploring different varieties can add a unique touch to your culinary creations.

So gather your equipment, churn away, and let the creamy richness of homemade butter transport you to a world of culinary delight.

Advertisement
Continue Reading

Trending