Connect with us

Recipes & Culinary Uses

How to Make Maple Butter: A Delicious DIY Recipe

Published

on

An image showcasing the step-by-step process of making maple butter: a glass jar filled with golden maple syrup pouring into a mixing bowl, a hand whisking the syrup until it thickens and becomes a creamy, luscious spread

You can never have enough of a good thing, as the saying goes. This is especially true when it comes to maple butter.

In this article, I’ll show you how to make this irresistibly creamy and sweet spread right in the comfort of your own kitchen.

With just a few simple steps and some basic ingredients, you’ll have a delectable treat that will elevate your breakfasts, desserts, and everything in between.

So, let’s dive in and satisfy our taste buds with homemade maple butter.

Key Takeaways

  • Melting the butter using a double boiler or low heat setting is essential for making maple butter.
  • Maple syrup is the key ingredient in maple butter, but alternatives like honey or agave nectar can be used for different flavor variations.
  • Proper storage in the refrigerator is necessary to keep maple butter fresh for several weeks.
  • Maple butter can be used in various ways, such as pairing with grilled chicken or roasted vegetables, topping warm bread, drizzling over pancakes or waffles, and mixing into frosting for cakes or cupcakes.

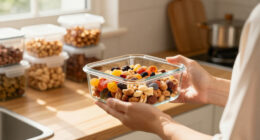
Gathering the Ingredients

Advertisement

First, you’ll need to gather all of the necessary ingredients for making maple butter. To start, you’ll want to make sure you have high-quality maple syrup. There are different variations of maple syrup, such as Grade A Dark Amber or Grade B, each with its own distinct flavor profile. Depending on your preference, you can choose the one that suits your taste best.

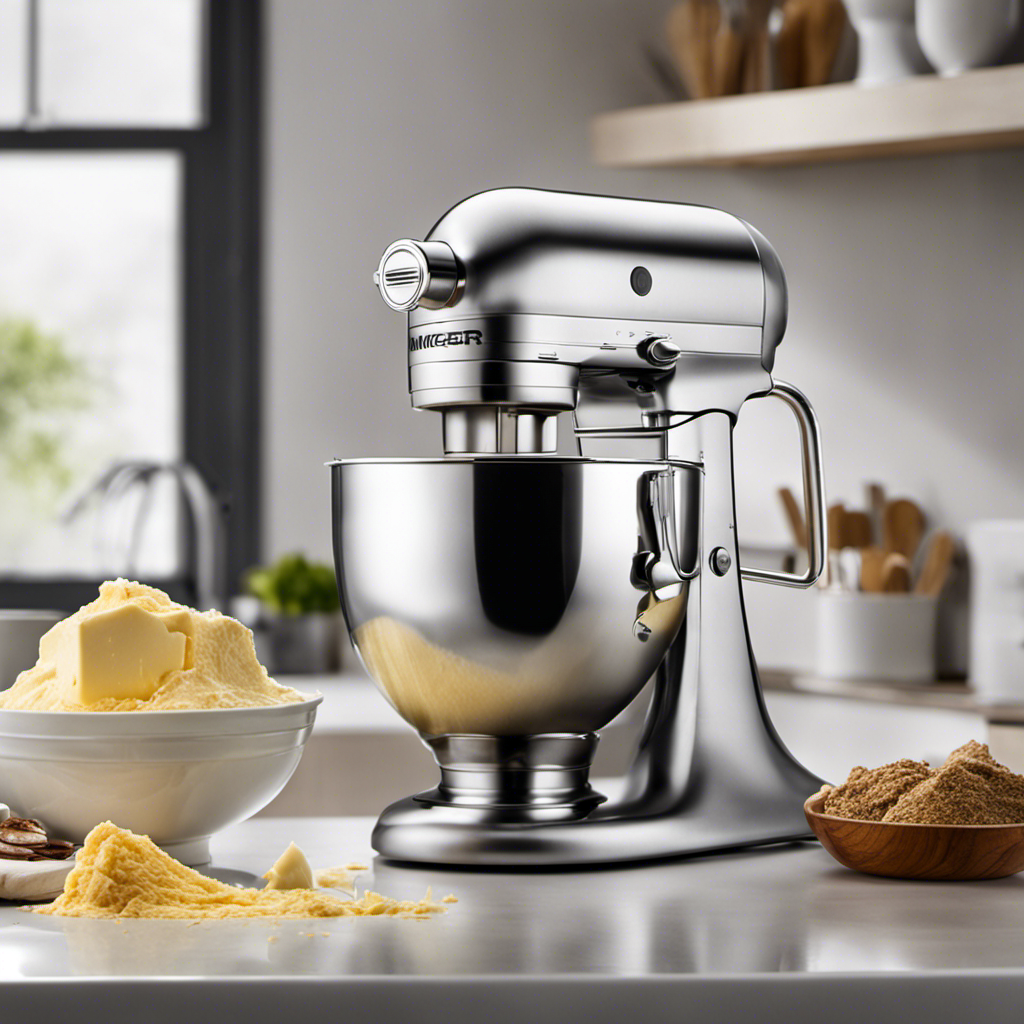
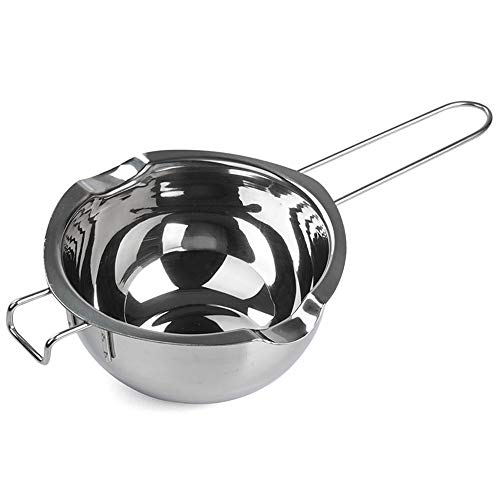
Additionally, you’ll need unsalted butter, preferably at room temperature, to ensure easy mixing and creamy texture. When it comes to melting the butter, it’s important to use optimal techniques to avoid burning or scorching. A double boiler is ideal for this, as it provides gentle, indirect heat.

Once you have all the ingredients ready, we can move on to the equipment needed for making maple butter.

Equipment Needed

To prepare this delicious spread, you’ll need a mixer and a saucepan. These two essential pieces of equipment will help you create the perfect maple butter.

First, let’s talk about the mixer. You’ll want to set it to its lowest speed, as we don’t want to incorporate too much air into the mixture. This will help us achieve that smooth and creamy texture we’re aiming for.

Advertisement

As for the saucepan, it’s important to choose one that is large enough to hold all the ingredients and has a sturdy handle for easy pouring. When melting the butter, it’s crucial to keep it at an optimal temperature, around 120°F to 140°F, to ensure a smooth and even consistency.

Using gentle melting techniques, like a double boiler or a low heat setting, will help prevent any scorching or separating of the butter.

Step 1: Melting the Butter

When it comes to melting butter, there are a few techniques that can be used to achieve the perfect consistency.

Advertisement

One method is using a double boiler, which involves placing a heatproof bowl over a pot of simmering water. This gentle heat helps to ensure that the butter melts evenly and without burning.

Another option is melting the butter in the microwave, which is quick and convenient but requires careful monitoring to prevent overheating.

The optimal melting temperature for butter is around 90°F to 95°F, as this allows it to become completely liquid without separating or losing its desirable properties.

Butter Melting Techniques

If you want to melt the butter for your maple butter, start by placing it in a microwave-safe bowl.

There are different methods for melting butter, each offering its own benefits.

Advertisement

One popular technique is browning the butter, which adds a rich, nutty flavor to your maple butter. To do this, simply melt the butter in a saucepan over medium heat and continue cooking until the milk solids turn golden brown.

Another method is butter clarifying, which involves removing the milk solids and water from the melted butter. This results in a clear, pure butter that is perfect for making maple butter.

Regardless of the technique you choose, it’s important to melt the butter at an optimal temperature. This ensures that the butter is fully melted and doesn’t become too hot or burn.

Optimal Melting Temperature

The optimal temperature for melting butter is crucial to avoid overheating or burning it. When it comes to melting butter, it’s important to use the right cooking utensils and follow the proper melting techniques.

To begin, you’ll need a small saucepan and a heat-resistant spatula. Place the saucepan on low heat and add the butter. Allow it to slowly melt, stirring occasionally with the spatula to ensure even melting. Avoid using high heat as it can cause the butter to burn or turn brown.

Advertisement

The ideal temperature for melting butter is around 140-150°F (60-65°C). At this temperature, the butter will be smooth and creamy, perfect for incorporating other ingredients.

Now that the butter is melted, let’s move on to step 2: adding the maple syrup.

Step 2: Adding the Maple Syrup

Now that you’ve melted the butter, you’ll want to add the maple syrup to the mixture. Maple syrup is a key ingredient in making maple butter, but if you’re looking for alternatives, you can also try using honey or agave nectar for a different flavor profile.

Maple syrup adds a rich, sweet taste to the butter, giving it that distinct maple flavor. Once you’ve added the maple syrup, make sure to mix it well with the melted butter until it is fully incorporated.

Maple butter has a variety of uses, from spreading it on toast or pancakes to using it as a glaze for roasted vegetables or meats. The possibilities are endless!

Advertisement

Now that we’ve added the maple syrup, let’s move on to the next step: mixing the ingredients together.

Step 3: Mixing the Ingredients

Once you’ve added the maple syrup, you’ll want to thoroughly mix the ingredients together until they are well combined. This step is crucial in achieving the perfect maple butter consistency. As you mix, you’ll notice the syrup blending with the softened butter, creating a smooth and creamy texture.

The aroma of the sweet maple syrup begins to fill the room, tantalizing your senses. The rich and velvety flavor of the maple butter is already starting to take shape. You can almost taste the sweetness and warmth on your tongue.

At this stage, you can get creative and add different flavor options to your maple butter. You can experiment with cinnamon, vanilla extract, or even a hint of nutmeg to enhance the taste. Mixing the ingredients together not only ensures a consistent texture but also allows the flavors to meld together, resulting in a decadent spread that will elevate any breakfast or dessert.

Step 4: Heating the Mixture

After you’ve thoroughly mixed the ingredients, you’ll need to heat the mixture to achieve the desired consistency. This step is crucial in transforming the maple syrup and butter into a smooth and velvety spread.

Advertisement

To begin, place a saucepan over medium heat and add the mixture. It’s important to keep a close eye on it as it heats up. The heating time will vary depending on the quantity and the stove, but it typically takes around 10-15 minutes.

As the mixture heats, use a wooden spoon to stir continuously in a gentle figure-eight motion. This stirring technique helps evenly distribute the heat and prevent any scorching.

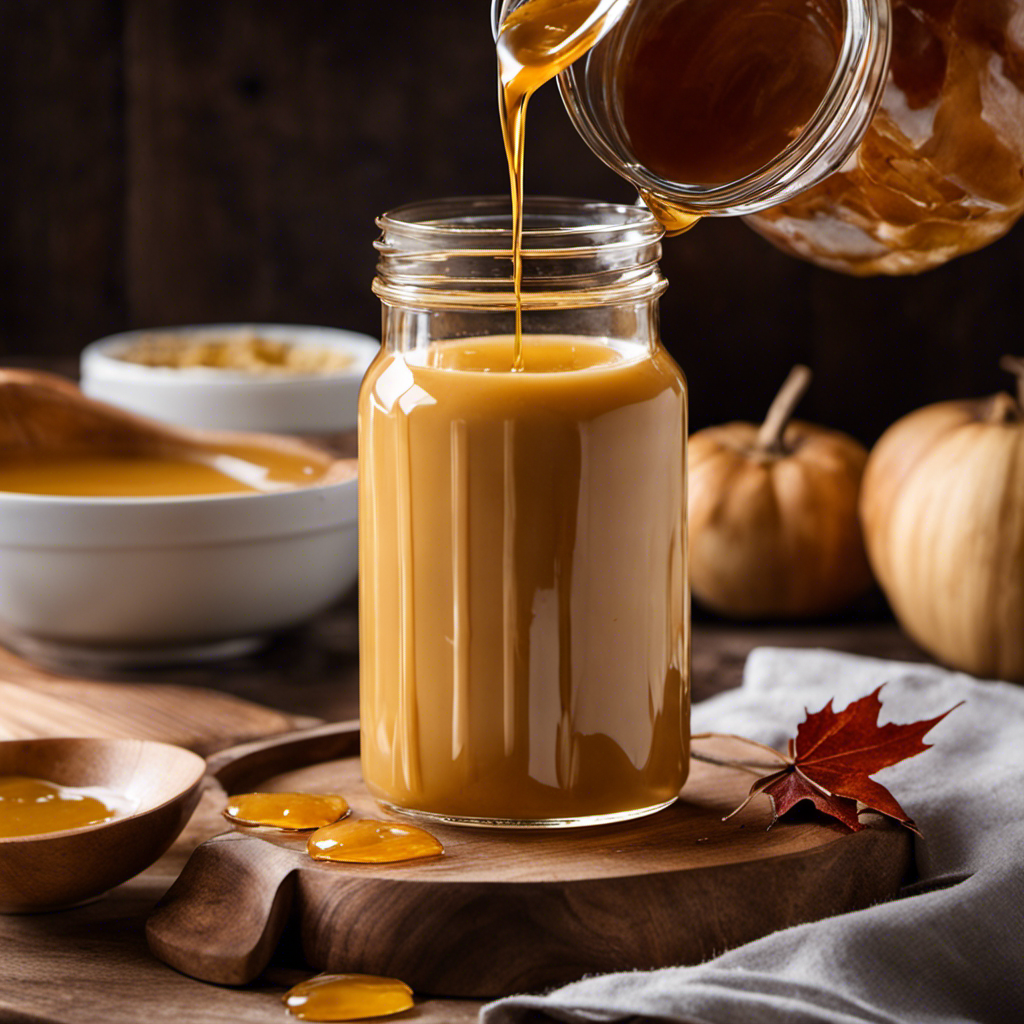
The maple butter is ready when it thickens slightly and becomes glossy. Once achieved, remove it from the heat and allow it to cool before transferring it into a jar.

Step 5: Cooling and Storing the Maple Butter

When it comes to storing maple butter, choosing the right container is crucial. In my experience, the best storage container for maple butter is a glass jar with an airtight lid. This helps to preserve its rich flavor and creamy texture.

While refrigeration is not necessary, it can help extend the shelf life of the maple butter, keeping it fresh for longer periods of time.

Advertisement

Best Storage Container

To find the best storage container for your homemade maple butter, you should consider using a glass jar with an airtight lid. Glass jars are ideal for storing maple butter because they are non-reactive and won’t absorb any flavors or odors from the butter. The airtight lid will help to keep the butter fresh for longer periods of time by preventing air from entering the container.

Here are some alternative containers you could consider:

  • Plastic containers: While not as ideal as glass, plastic containers with airtight lids can also be used to store maple butter. Just make sure the container is food-safe and BPA-free.

  • Silicone molds: If you prefer individual portions of maple butter, silicone molds are a great option. They are flexible and easy to pop the butter out of once it’s solidified.

Refrigeration Necessary

You should refrigerate your homemade maple butter to keep it fresh for longer periods of time. While there are refrigeration alternatives and homemade butter alternatives out there, refrigeration is still the best method to preserve the quality of your maple butter.

The cool temperature of the refrigerator helps to slow down the growth of bacteria and mold, ensuring that your maple butter stays safe to consume. This is especially important if you’ve made a large batch and want to enjoy it over a longer period. While some may suggest using other methods like freezing or canning, these alternatives may alter the texture and taste of your maple butter. So, to maintain the deliciousness of your homemade maple butter, refrigeration is the way to go.

Now, let’s talk about the shelf life length of your maple butter.

Advertisement

Shelf Life Length?

If stored properly, the shelf life of your homemade maple butter can be extended for several weeks. To ensure the freshness and quality of your maple butter, it is important to store it in the best storage container.

I recommend using airtight glass jars or plastic containers with tight-fitting lids. These containers will help to prevent air and moisture from entering, which can lead to spoilage.

When it comes to refrigeration, it is necessary to keep your maple butter chilled. The cold temperature will help to preserve its flavor and texture. However, if you prefer a softer consistency, you can store it at room temperature for a shorter period of time.

Now that we’ve covered the shelf life, let’s move on to some tips for flavor variations.

Tips for Flavor Variations

Experiment with different spices, like cinnamon or nutmeg, to add a unique twist to your maple butter. Adding spices not only enhances the flavor of the butter but also allows for creative uses in various dishes. Here are some flavor variations and their suggested uses:

Advertisement
Flavor Variation Description Suggested Uses
Cinnamon Warm and aromatic spice that pairs well with sweet dishes Spread on toast, pancakes, or waffles
Nutmeg Rich and slightly sweet spice with a hint of warmth Incorporate into baked goods or sprinkle on top of hot beverages
Ginger Zesty and slightly spicy spice that adds a refreshing kick Use in marinades for meats or mix into salad dressings
Vanilla Sweet and creamy spice that complements the natural sweetness of maple Stir into coffee, yogurt, or oatmeal
Cardamom Floral and aromatic spice with a hint of citrus Add to smoothies or mix into ice cream

Serving Suggestions

Looking for ways to enhance your dishes? Try incorporating these flavor variations into your meals for a delightful twist. When it comes to serving ideas and pairing suggestions, there are endless possibilities to elevate your culinary creations. Here are some suggestions to get you started:

  • For a savory dish:

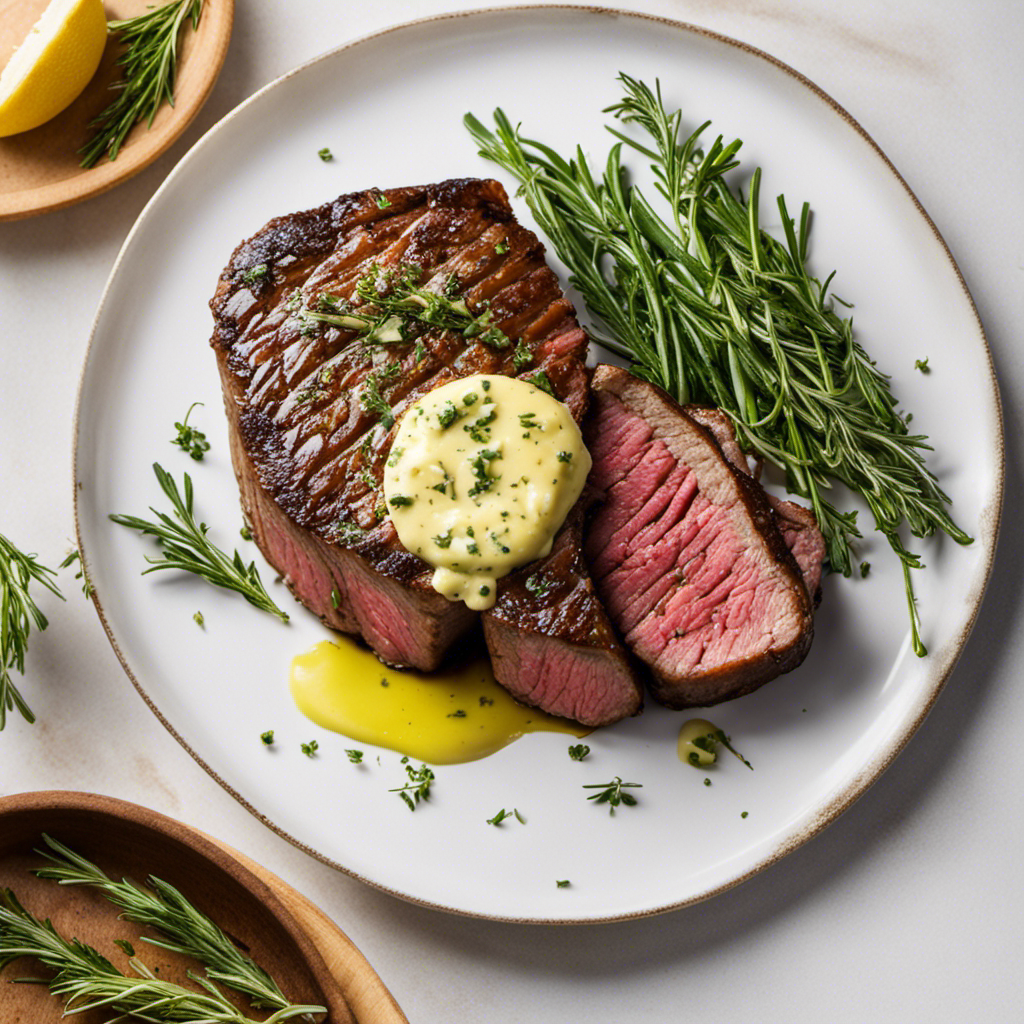
  • Pair a rich and creamy maple butter with grilled chicken or roasted vegetables for a burst of sweetness and depth.

  • Spread maple butter on warm, crusty bread and top it with thinly sliced prosciutto for a delicious appetizer.

  • For a sweet treat:

  • Drizzle maple butter over pancakes or waffles, along with fresh berries and a dollop of whipped cream, for a decadent breakfast or brunch.

  • Mix maple butter into your favorite frosting recipe to add a unique flavor to cakes or cupcakes.

Experiment with these serving ideas and pairing suggestions, and let your taste buds take you on a mouthwatering journey.

Frequently Asked Questions

When it comes to making maple butter, there are a few key points to consider.

First, the ingredients. Maple butter typically consists of just two ingredients: maple syrup and butter.

Second, the cooking temperature. It’s important to heat the mixture to a specific temperature to ensure the butter and syrup combine properly.

Advertisement

Lastly, the shelf life. Maple butter can be stored in the refrigerator for several weeks, but it’s best to consume it within a month for optimal freshness.

Maple Butter Ingredients

To make maple butter, you’ll need butter, maple syrup, and a pinch of salt. Maple butter is a delicious spread that adds a sweet and rich flavor to any dish.

However, if you’re looking for alternatives or want to experiment with different flavors, there are a few options you can try:

  • Honey butter: Substitute the maple syrup with honey for a different twist on the classic recipe.
  • Cinnamon butter: Add a teaspoon of ground cinnamon to the mixture for a warm and aromatic flavor.

When it comes to sweet vs. savory maple butter recipes, the possibilities are endless. For a sweet option, you can add a drizzle of caramel sauce or a sprinkle of powdered sugar. On the other hand, if you prefer a savory twist, you can mix in some herbs like rosemary or thyme, or even a hint of garlic for a unique and tasty spread.

Cooking Temperature for Maple Butter

If you’re wondering about the cooking temperature, be sure to keep it low and slow to prevent the butter from burning and to allow the flavors to meld together perfectly. Cooking maple butter requires patience and precision. I have tested different temperatures to find the ideal one for achieving the best results. Here’s what I discovered:

Temperature (°F) Result Notes
200 Too low Butter didn’t fully melt and flavors didn’t develop
250 Perfect Smooth and creamy texture with rich maple flavor
300 Too high Butter started to brown and taste slightly burnt

Shelf Life of Maple Butter

The shelf life of maple butter can vary depending on storage conditions and the presence of any additives. Properly stored, maple butter can last for several months, maintaining its rich flavor and smooth texture. Here are some key factors that can affect the shelf life of maple butter:

Advertisement
  • Storage conditions:

  • Keep maple butter in a cool, dry place away from direct sunlight.

  • Store it in an airtight container to prevent exposure to air and moisture.

  • Additives:

  • Avoid adding any perishable ingredients, such as fresh fruit or dairy products, to your maple butter recipes.

  • These additives can shorten the shelf life and increase the risk of spoilage.

Preserving maple butter is essential to enjoy its delightful taste for longer. By following these tips, you can ensure that your homemade maple butter stays fresh and delicious for as long as possible.

Troubleshooting Tips

One common issue when making maple butter is that it can turn out too runny if the butter is too soft. But don’t worry, there are a few troubleshooting techniques that can help you achieve the perfect consistency.

First, make sure to use cold butter. Soft butter will not emulsify properly with the maple syrup, resulting in a runny texture.

Another common mistake is adding too much maple syrup. While it may be tempting to add extra sweetness, too much syrup can make the butter too thin. Start with a small amount and gradually add more until you achieve the desired flavor.

Lastly, be patient when mixing. Slowly incorporate the syrup into the butter, allowing it to blend together thoroughly.

Advertisement

Frequently Asked Questions

How Long Does It Take for the Maple Butter to Cool and Solidify?

It takes about an hour for the maple butter to cool and solidify. Once it’s ready, the texture of the solidified butter is smooth and creamy, perfect for spreading on toast or pancakes.

Can I Use Margarine Instead of Butter for This Recipe?

Yes, you can use margarine instead of butter for this recipe. It will still give you a creamy texture for your maple butter. Just follow the same steps as with butter.

Can I Use Pancake Syrup Instead of Maple Syrup?

Yes, you can use pancake syrup instead of maple syrup. However, I recommend using real maple syrup for its rich flavor and natural sweetness. It adds a unique taste that can enhance your recipe.

How Long Can I Store Maple Butter in the Refrigerator?

Maple butter can be stored in the refrigerator for up to three months. However, for longer shelf life, you can also freeze it. Just make sure to use airtight containers to maintain its freshness and flavor.

Can I Use Salted Butter Instead of Unsalted Butter for This Recipe?

Yes, you can use salted butter instead of unsalted butter for the maple butter recipe. The salted butter will add a hint of savory flavor to the sweet maple, creating a delicious combination.

Advertisement

Conclusion

In conclusion, making maple butter is a simple and delicious way to elevate your breakfast or dessert. By melting butter and adding maple syrup, you create a creamy and sweet spread that will leave your taste buds wanting more.

Whether you choose to enjoy it on toast, pancakes, or even in your morning coffee, maple butter is sure to add a touch of indulgence to any dish. Just imagine the perfect stack of fluffy pancakes, topped with a generous dollop of maple butter, and drizzled with warm maple syrup. Pure bliss!

Continue Reading
Advertisement

Recipes & Culinary Uses

Creamy Delight: Best Butter Pecan Ice Cream Recipe for Summer!

Yearning for a creamy summer treat that will leave you craving more?

Published

on

By

butter pecan ice cream

Savor a delicious summer treat with our Butter Pecan Ice Cream recipe. Mix butter, brown sugar, cream, and pecans for a creamy delight. Melt butter, cook pecans, whisk eggs, and blend for a rich flavor. Add pecans, cream, and vanilla, then freeze to perfection. Master this easy-to-follow recipe for a tasty dessert to beat the heat.

Key Takeaways

  • Rich and creamy blend of butter, brown sugar, and heavy cream
  • Toasted pecans for a nutty crunch and flavor
  • Easy-to-follow steps for homemade ice cream perfection
  • Customization options with variations like bourbon or chocolate
  • Perfect summer treat with a decadent, refreshing taste

Recipe Ingredients for Butter Pecan Ice Cream

To create a delectable batch of butter pecan ice cream, gather the essential ingredients listed in the recipe.

You'll need:

  • Butter
  • Brown sugar
  • Heavy cream
  • Pecans

These ingredients combine to bring out the rich and nutty flavors of this classic dessert.

The brown sugar adds a caramel-like sweetness, while the heavy cream contributes to a creamy texture that's essential for a decadent treat.

Pecans, when toasted in butter, provide a delightful crunch and enhance the overall flavor profile of the ice cream.

Cooking Instructions for Homemade Ice Cream

making ice cream at home

Start by melting butter in a skillet to infuse the pecans with a rich, nutty flavor for your homemade butter pecan ice cream.

Here's a quick guide to help you make this creamy delight:

Advertisement
  • Melt butter and cook pecans for flavor.
  • Whisk eggs and combine with half-and-half and brown sugar for a creamy base.
  • Cook until thickened, then mix with eggs in a bowl.
  • Add cream, pecans, and vanilla extract.
  • Freeze the mixture in an ice cream maker.

Following these steps will guarantee your homemade butter pecan ice cream turns out rich and delicious.

Remember to carefully adhere to the manufacturer's instructions for your ice cream maker to achieve the perfect consistency.

Enjoy the process of creating this delightful treat that will surely be a hit during the summer months.

Ice Cream Preparation Steps

ice cream recipe instructions

Mix half and half with brown sugar over medium heat in a large bowl to prepare the ice cream base.

Next, whisk beaten eggs and temper them with the warm milk mixture to create a smooth custard.

Once done, thicken the mixture on low heat, then cool it over an ice bath to achieve ideal texture.

After that, stir in heavy cream, vanilla extract, maple extract, and a pinch of salt for rich flavor.

Advertisement

Remember to refrigerate the mixture for 1 1/2 – 2 hours before churning it into creamy butter pecan ice cream.

This process ensures that the flavors meld together beautifully and the ice cream attains the perfect consistency for scooping and savoring.

Nutritional Information and Tips

healthy eating guidance provided

Considering the rich and creamy nature of homemade butter pecan ice cream, it's important to be mindful of its nutritional content and serving size. When indulging in this delectable dessert, remember these essential tips:

  • Portion Control: Enjoy in moderation to savor the flavors without overindulging.
  • Brown Sugar Sweetness: Opt for a moderate amount of brown sugar to balance sweetness without overwhelming the palate.
  • Room Temperature Ingredients: Confirm ingredients like butter and heavy cream are at room temperature for a smoother texture.
  • Nutritional Awareness: Be mindful that homemade butter pecan ice cream can vary in nutritional content, so adjust ingredients accordingly.
  • Consultation: Seek advice from a nutritionist or healthcare provider for personalized guidance on incorporating this treat into a balanced diet.

Homemade Butter Pecan Ice Cream Variations

delicious homemade ice cream

Explore creative twists on traditional butter pecan ice cream by incorporating different nuts, spirits, sauces, chocolates, and dairy-free alternatives.

For a unique flavor, try substituting pecans with walnuts or almonds in the full recipe. Toast the nuts in a separate bowl until browned and fragrant, then chop them finely enough to coat in the ice cream mixture.

To add a boozy kick, mix in a splash of bourbon or rum to the base as you churn the ice cream. For an extra indulgent touch, swirl in caramel sauce or fudge ripple throughout the mixture.

Incorporate chunks of chocolate or chocolate-covered nuts for a delightful contrast in texture, giving each bite a sweet surprise.

Advertisement

If you prefer a lighter, dairy-free option, consider using coconut milk or almond milk as a substitute for traditional dairy products. These alternatives provide a creamy base while catering to plant-based diets.

Experiment with these variations to create a personalized butter pecan ice cream that suits your taste preferences.

Frequently Asked Questions

What Is the Secret to Making Ice Cream Very Creamy?

To make ice cream very creamy, you use a rich base of ingredients like heavy cream, eggs, and sugar. Chilling the base before churning is crucial for a smoother texture. Adding vanilla extract enhances creaminess, and slow churning prevents a dense outcome.

What Flavor Is the Ice Cream in Butter Pecan?

The ice cream in butter pecan is a delightful blend of buttery richness, vanilla sweetness, and maple undertones, perfectly paired with toasted pecans for a nutty crunch. This flavor combination creates a harmonious and indulgent treat.

What's the Difference Between Butter Pecan Ice Cream and Praline Pecan Ice Cream?

In butter pecan ice cream, you'll savor the buttery richness of pecans blended with a creamy base. On the other hand, praline pecan ice cream highlights caramelized sweetness with a swirl of praline sauce for a delightful flavor contrast.

Advertisement

What Age Group Eats Butter Pecan Ice Cream?

You'll find that adults and older individuals, typically in the 30-60 age group, enjoy butter pecan ice cream. It's a favorite among those with a more refined palate, drawn to its rich and nutty flavor.

Conclusion

So there you have it, folks! Whip up this buttery, nutty delight for a taste of summer in every scoop.

Don't cry over spilled milk – grab a cone and enjoy this creamy treat that's sure to satisfy your sweet tooth.

Get churning and indulge in the best butter pecan ice cream you've ever tasted!

Advertisement
Continue Reading

Recipes & Culinary Uses

Festive Favorites: Best Peanut Butter Blossoms Recipe for Holidays!

Unleash the ultimate holiday baking magic with the best Peanut Butter Blossoms recipe – an irresistible treat that will elevate your festive celebrations!

Published

on

By

holiday baking with flair

Elevate your holiday baking with the ultimate Peanut Butter Blossoms recipe. Cream together peanut butter, butter, sugars, and salt, then add egg and vanilla. Roll dough into balls, coat in brown sugar, bake until golden, then press a Hershey's kiss on top. Adjust baking time as needed. Explore ingredient swaps for a personalized touch. Enjoy with hot cocoa or pair with savory dishes. For more tips, ideas, and customization options, the recipe holds more festive surprises.

Key Takeaways

  • Cream together peanut butter, butter, sugars for rich flavor.
  • Bake at 375°F for 8-10 minutes for soft, chewy cookies.
  • Customize with ingredient swaps like almond butter or maple syrup.
  • Pair with savory dishes or hot cocoa for holiday enjoyment.
  • Press Hershey kisses onto warm cookies for a classic finish.

Ingredients for Peanut Butter Blossoms

For the classic Peanut Butter Blossoms recipe, gather peanut butter, butter, sugar, an egg, and Hershey's kisses as your essential ingredients.

Peanut butter is the star, offering a rich flavor that blends perfectly with the sweetness of the cookies.

Butter plays a pivotal role by adding moisture and richness to the dough, ensuring a soft and chewy texture.

The sugar not only sweetens the cookies but also contributes to their festive appeal, making them a perfect treat for any occasion.

Finally, the Hershey's kisses on top provide a delightful chocolatey finish that elevates these cookies to a whole new level of deliciousness.

Advertisement

Together, these ingredients create a harmonious blend of flavors and textures that make Peanut Butter Blossoms a beloved classic for holiday baking or any time you crave a sweet and satisfying treat.

Recipe Steps for Peanut Butter Blossoms

bake peanut butter cookies

To make Peanut Butter Blossoms, start by creaming together peanut butter, butter, sugars, and salt until light and fluffy.

Next, add in the egg and vanilla extract, making sure to mix well to combine all the ingredients thoroughly.

Then, gradually incorporate the dry ingredients into the wet mixture until a smooth dough forms.

Once the dough is ready, roll it into balls and coat each ball generously in brown sugar.

Place the sugar-coated dough balls on a baking sheet, making sure to leave enough space between them for spreading during baking.

Advertisement

Bake the cookies in a preheated oven until they turn a beautiful golden brown.

As soon as the cookies are out of the oven, press a Hershey's kiss into the center of each cookie gently.

The heat from the freshly baked cookies will melt the chocolate just enough to adhere it to the cookie.

These Peanut Butter Blossoms are a delightful treat perfect for Christmas celebrations!

Pro Tips for Making Peanut Butter Blossoms

baking perfect peanut blossoms

To enhance your peanut butter blossom baking experience, consider adjusting the baking time based on your oven's performance for best results.

Additionally, explore ingredient substitutions to cater to dietary preferences or allergies without compromising the flavor or texture of the cookies.

Advertisement

These pro tips can help you customize your peanut butter blossoms while ensuring delicious outcomes.

Baking Time Recommendations

Achieving the ideal texture for your peanut butter blossoms involves baking them at 375°F for 8-10 minutes. This baking duration guarantees that the cookies have a soft and chewy consistency while allowing the Hershey kisses on top to be softened but not completely melted.

Once out of the oven, remember to press the Hershey kisses onto the cookies immediately to secure them in place for that classic appearance.

For the best outcomes, chill the cookie dough for about 30 minutes before baking. This step helps the cookies maintain their shape and prevents excessive spreading during baking, ensuring your peanut butter blossom cookies are perfectly formed and ready to impress during your holiday baking.

Shortening or extending the baking time can alter the texture of the cookies. A quick bake of 6-8 minutes produces softer and chewier cookies, while longer baking times yield a slightly crispier consistency. Stick to the recommended 8-10 minutes for the best soft and chewy peanut butter blossoms.

Advertisement

Ingredient Substitutions

Consider incorporating different ingredients to elevate the flavor and nutritional profile of your peanut butter blossoms. For a healthier option, swap out shortening with unsalted butter to achieve a unique texture and taste in your cookies.

Try using natural peanut butter instead of creamy to add a wholesome twist to the classic recipe. If you're looking to reduce the glycemic impact, substitute brown sugar with coconut sugar in your baking. For a natural sweetener alternative, replace regular granulated sugar with maple syrup in the cookie dough mixture.

Additionally, for a distinct flavor experience, experiment with almond butter as a substitute for peanut butter in your blossoms. These ingredient substitutions can bring a new dimension to your peanut butter blossoms, making them not only delicious but also tailored to your dietary preferences.

Upgrade your baking game this holiday season with these creative twists on a beloved recipe!

Serving Suggestions for Peanut Butter Blossoms

peanut butter cookie recipe

Enhance the enjoyment of your peanut butter blossoms by pairing them with savory dishes like lasagna tortellini soup for a satisfying meal. These classic cookies also complement family-friendly dinners such as easy ground beef shepherd's pie and creamy broccoli cheddar soup, making for a delightful combination. The holiday season calls for cozy treats, and the sweet nuttiness of peanut butter blossoms pairs perfectly with a warm cup of hot cocoa. Whether you're participating in a cookie exchange or looking for a festive touch to your holiday dessert spread, consider rolling the cookies in red, green, and white sugar sprinkles to add a pop of color and fun.

Serving Suggestions Pairing Ideas
Lasagna Tortellini Soup Comforting and hearty meal alongside the cookies
Easy Ground Beef Shepherd's Pie Delicious combination for a family dinner
Creamy Broccoli Cheddar Soup Perfect accompaniment to the nutty cookie flavors

12 Days of Christmas Cookies Recipes

baking traditions for the holidays

Indulge in a variety of delightful Christmas cookie recipes each day during the holiday season. One standout choice is the classic Peanut Butter Blossoms. These holiday cookies feature a peanut butter base topped with a Hershey's kiss, making them a beloved treat for cookie exchanges and festive gatherings.

The process of making these cookies is simple yet rewarding. Start by rolling the dough balls in sugar before baking to add a sweet crunch to each bite. The combination of rich peanut butter flavor and the chocolatey goodness of the Hershey's kiss creates a perfect balance of sweetness.

Advertisement

When enjoying these Christmas cookies, consider pairing them with a glass of milk for a classic and satisfying treat.

Whether you're baking them for your family, a cookie exchange, or a holiday party, Peanut Butter Blossoms are sure to be a hit. Make each day of the holiday season a little sweeter with these delicious cookies.

User Engagement Features

user interaction enhancements

Let's talk about how user interaction features and personalization options enhance your experience with the Peanut Butter Blossoms recipe.

You can engage with others by leaving comments and sharing your results, creating a sense of community around this holiday treat.

Personalization options like name and email entry fields help tailor the experience to your preferences, making it more engaging and enjoyable.

User Interaction Features

Utilizing user engagement features on the website allows for increased participation and feedback from visitors. The comment section enables users to interact with each other and provide valuable feedback on the Peanut Butter Blossoms recipe or share their experiences with Hershey's kisses. By incorporating a reply option, users can engage in conversations, fostering a sense of community around baking these delightful peanut butter cookies.

Advertisement

Moreover, the inclusion of name and email fields not only allows for personalization but also facilitates communication between the website and its visitors. This data storage feature guarantees that users can conveniently access their information for future visits, enhancing their overall user experience.

These user engagement features play an essential role in creating an interactive platform where users can engage, provide feedback, and communicate effectively. Such interaction not only enriches the user experience but also encourages visitors to actively participate in the community surrounding the Peanut Butter Blossoms recipe.

Personalization Options

Enhance your website's user engagement by incorporating personalized options such as commenting, replying, and sharing feedback on the Peanut Butter Blossoms recipe. This level of user interaction not only fosters a sense of community building but also encourages customization and feedback. By allowing users to share their thoughts, results, and experiences with the festive favorites, you create a more engaging and interactive user experience. Additionally, providing users with the option to save their data for future visits and encouraging them to tag @preppykitchen and use #preppykitchen when trying the recipe further enhances their engagement.

Personalization Options Description Benefits
Commenting Users can leave comments on the Peanut Butter Blossoms recipe, sharing their thoughts and experiences. Fosters community building and user engagement.
Replying Users can reply to comments and engage in discussions with other users about the recipe. Encourages active participation and interaction.
Feedback Sharing Users can share feedback on the recipe, providing valuable insights for improvement. Enhances user experience and customization.

Additional Information

clarifying specific details provided

You may find it interesting to know more about the history of the Peanut Butter Blossoms recipe and its cultural significance during the holidays.

  • The Peanut Butter Blossoms recipe's popularity is backed by IRI MULO data, making it a sought-after choice for holiday baking.
  • Copyright for this beloved recipe belongs to The J.M. Smucker Company, a reputable name in the food industry known for quality products.
  • These delightful cookies aren't only perfect for serving at holiday parties but also make excellent gifts due to their festive appeal.

Frequently Asked Questions

Why Are My Peanut Butter Blossoms Dry?

If your peanut butter blossoms are dry, it could be due to using too much flour, overbaking, using natural peanut butter that requires stirring, or not enough butter/shortening. Guarantee precise measurements and follow the recipe closely to maintain moisture.

Why Did My Peanut Butter Blossoms Go Flat?

When making peanut butter blossoms, going flat happens due to overmixing, too much flour, insufficient chilling, or low oven temperature. Remember to avoid these pitfalls. Preheat the oven properly and follow the recipe for perfect blossoms!

What Is America's Favorite Christmas Cookie?

America's favorite Christmas cookie is Peanut Butter Blossoms. Loved for their peanut butter-chocolate combo and nostalgic Hershey's Kiss center, these easy-to-make treats are a holiday staple at parties and gatherings. They're a must-have during the festive season.

Advertisement

What Is Baskin Robbins Peanut Butter Blossom?

You asked about Baskin Robbins Peanut Butter Blossom. It's a delectable seasonal ice cream flavor featuring creamy peanut butter ice cream with a ribbon of more peanut butter and chocolate cookie pieces. Indulge in this festive treat!

Conclusion

Indulge in the warm, gooey goodness of these peanut butter blossoms this holiday season. With the perfect blend of creamy peanut butter and rich chocolate, these cookies are sure to bring joy to your festivities.

Picture yourself surrounded by loved ones, sharing laughter and memories as you enjoy these delicious treats. Let the aroma of freshly baked cookies fill your home and create a cozy, festive atmosphere.

Happy baking and happy holidays!

Advertisement
Continue Reading

Recipes & Culinary Uses

Bite-Sized Treats: Best Peanut Butter Ball Recipe You'll Love!

Adore these heavenly peanut butter balls with a delectable mix of smooth peanut butter, powdered sugar, and vanilla—perfect for indulging in bite-sized bliss!

Published

on

By

delicious peanut butter balls

You'll adore these easy and heavenly peanut butter balls. Mix smooth peanut butter, powdered sugar, and vanilla extract for a delectable dough. Roll into small balls and chill. Dip in melted chocolate, then refrigerate to set. Enhance the flavor with rum extract, nuts, or crushed pretzels. Get creative with colorful sprinkles and different chocolate coatings. Use quality chocolate coating and adjust mix consistency. Store them in the fridge or freezer. Enjoy these mouthwatering treats alone or at gatherings. More tips and delightful variations await!

Key Takeaways

  • Creamy peanut butter, powdered sugar, and vanilla create a smooth dough.
  • Incorporate nuts, rum extract, or pretzels for flavor and texture variety.
  • Use quality chocolate coating like candy melts for best results.
  • Chill peanut butter balls before dipping for easier handling.
  • Store in the fridge or freezer for convenient snacking and serving.

Ingredients and Preparation

To create irresistible peanut butter balls, gather creamy peanut butter, powdered sugar, and vanilla extract as your key ingredients.

Begin by mixing the peanut butter, butter, sugar, and vanilla until you have a smooth dough. Roll this mixture into small balls and chill them before dipping them in melted chocolate.

The type of chocolate you use, such as dark or milk chocolate, will enhance the flavor of your peanut butter balls. After dipping, make sure to refrigerate the balls until the chocolate sets for a perfect finish.

This process guarantees that each bite-sized treat isn't only visually appealing but also bursting with delicious peanut butter and chocolate flavors.

Variations and Enhancements

creative modifications and improvements

You can elevate the flavor of your peanut butter balls by incorporating unique ingredients like chopped nuts or rum extract.

Experiment with different chocolate coatings such as white almond bark or dark chocolate candy melts for a varied taste experience.

Advertisement

Get creative by adding finishing touches like colorful sprinkles to make your peanut butter balls visually appealing.

Flavorful Ingredient Additions

Enhance the flavor of your peanut butter balls by incorporating unique ingredient variations and enhancements. While the classic combination of peanut butter, powdered sugar, and butter creates a delicious dough for your treats, you can take it up a notch by adding flavorful ingredient additions.

Consider mixing in crushed pretzels for a salty crunch that complements the sweetness of the peanut butter. Chopped nuts like almonds or pecans can also add a delightful texture and nutty taste to your chocolate-covered peanut butter balls.

For a burst of fruity flavor, try incorporating dried cranberries or raisins into the dough. These additions not only provide a contrast in texture but also introduce a hint of sweetness that pairs well with the creamy peanut butter.

Another option is to include a sprinkle of cinnamon or a dash of vanilla extract to elevate the overall taste profile of your peanut butter balls. Experiment with these flavorful ingredient additions to create a unique and delectable twist on the classic treat.

Advertisement

Chocolate Coating Options

Experiment with different types of chocolate coatings – dark, white, or milk chocolate – to suit your preferences and elevate the flavor of your peanut butter balls.

When considering the chocolate coating for your crunchy peanut butter treats, here are some options to enhance your culinary creation:

  1. Choose Candy Melts or Almond Bark: Opt for candy melts or almond bark for a smooth and firm chocolate coating that sets well on your peanut butter balls.
  2. Avoid Chocolate Chips: Steer clear of using chocolate chips for coating, as they may contain stabilizers that hinder smooth melting, affecting the overall texture.
  3. Add Colored Sprinkles: For a festive touch, sprinkle colored sprinkles on top of the chocolate coating before it sets to add a pop of color and extra crunch to your peanut butter balls.

Experimenting with different chocolate coatings and techniques can take your peanut butter balls to the next level, ensuring a delightful and indulgent treat for any occasion.

Creative Finishing Touches

To elevate the flavor profile of your peanut butter balls, consider incorporating creative finishing touches through various enhancements and unique variations.

You can enhance the texture by adding chopped nuts or crispy rice cereal to the peanut butter mixture, providing a delightful crunch with every bite.

Experiment with different flavors by using almond extract or rum extract instead of vanilla for a twist on the traditional taste.

Advertisement

For a festive touch, roll the balls in crushed graham crackers, sprinkles, or a sprinkle of sea salt to add a pop of flavor.

Drizzle white chocolate over the dark, semi-sweet, or milk chocolate coating for a visually appealing contrast that will impress your guests.

If you enjoy a crunchy element, try coating the balls in crushed pretzels or toasted coconut before the chocolate sets.

These creative enhancements will take your peanut butter balls to the next level, making them a standout treat at any gathering.

Tools and Tips

crafting with precision

Consider using a 1 tablespoon cookie scoop for consistent sizing when preparing your peanut butter balls. This tool will help guarantee all your treats are uniform in size, making for a neat presentation and even cooking.

Here are some additional tools and tips to enhance your peanut butter ball-making experience:

Advertisement
  1. Invest in Quality Chocolate Coating: Opt for candy melts or almond bark for a smooth and firm chocolate coating on your peanut butter balls. These coatings melt easily and provide a professional finish to your treats.
  2. Adjust Peanut Butter Mixture Consistency: If your peanut butter mixture is too sticky or too dry, adjust the consistency by adding more peanut butter or powdered sugar. This will help you achieve the perfect texture for shaping your balls.
  3. Refrigerate Before Dipping: Prior to dipping your peanut butter balls in chocolate, chill them in the refrigerator. This step will make the balls firmer, making them easier to handle and coat without falling apart.

Storage and Serving Suggestions

great suggestion for storage

For best freshness and presentation of your peanut butter balls, follow these storage and serving suggestions.

To keep your peanut butter balls tasting delicious, store them properly. You can store them in an airtight container in the fridge for up to 1 week or in the freezer for up to 2 months. When freezing, remember to thaw the frozen peanut butter balls before serving by bringing them to room temperature. To prevent them from sticking together, separate the layers of peanut butter balls with wax paper.

Here is a helpful table summarizing the storage and serving suggestions:

Storage Serving Frozen
Airtight container Display on festive tray Thaw before serving
Fridge – 1 week Pair with hot cocoa Bring to room temp
Freezer – 2 months Enjoy at holiday gatherings
Separate with wax paper

Additional Peanut Butter Desserts

peanut butter dessert recipes

Explore a variety of delectable peanut butter desserts to satisfy your sweet cravings.

  1. Peanut Butter Blossom Cookies: Indulge in the classic combination of peanut butter cookies topped with a chocolate kiss for a delightful treat.
  2. Peanut Butter Chocolate Mug Cake: Whip up this easy-to-make single-serving dessert that combines the rich flavors of peanut butter and chocolate in a mug for a quick fix.
  3. Peanut Butter Overload Cookies: For those who can't get enough peanut butter, these cookies are loaded with peanut butter chips, chocolate chips, and chopped peanuts for an explosion of flavor in every bite.

These additional peanut butter desserts offer a diverse selection to cater to your cravings.

Whether you're in the mood for a classic treat like Peanut Butter Blossom Cookies, a quick fix with Peanut Butter Chocolate Mug Cake, or a flavor-packed experience with Peanut Butter Overload Cookies, there's something for every peanut butter lover.

Enjoy these easy-to-make delights whenever you need a sweet pick-me-up!

Recipe Instructions and Nutritional Information

cooking guidance and facts

To create these delectable Peanut Butter Balls, start by blending peanut butter, butter, sugar, and vanilla to form a dough. Roll the mixture into small balls and place them on a baking sheet lined with parchment paper. Chill the peanut butter balls in the refrigerator for about 30 minutes until firm.

Once chilled, melt chocolate in a heatproof bowl over simmering water or in the microwave. Dip each chilled peanut butter ball into the melted chocolate, ensuring they're evenly coated. Place the coated balls back on the parchment paper and let the chocolate set.

Advertisement

Each serving of these delightful treats contains approximately 114 calories.

Store the finished peanut butter balls in the fridge for up to 2 weeks or freeze them for up to 3 months.

Enjoy these decadent bite-sized snacks whenever you crave a sweet and nutty indulgence.

Frequently Asked Questions

Can I Use Chunky Peanut Butter Instead of Creamy for This Recipe?

Yes, you can use chunky peanut butter instead of creamy for this recipe. It will add a delightful texture and extra crunch to your peanut butter balls. Enjoy experimenting with different variations!

How Long Do Chocolate Covered Peanut Butter Balls Stay Fresh?

Like a sweet memory, chocolate-covered peanut butter balls stay fresh for up to two weeks when stored in an airtight container in the fridge. Indulge in these delectable treats within that time frame for best taste.

Advertisement

Can I Freeze the Peanut Butter Balls for Later Enjoyment?

Yes, you can freeze the peanut butter balls for later enjoyment. Simply place them in an airtight container or freezer bag. When ready to indulge, let them thaw in the fridge for a few hours.

What Type of Chocolate Is Best for Coating the Peanut Butter Balls?

For coating the peanut butter balls, semi-sweet or milk chocolate works best. They provide a delicious contrast to the creamy peanut butter filling. Simply melt the chocolate, dip the balls, and enjoy the sweet treat!

Can I Add Chopped Nuts or Sprinkles to the Peanut Butter Balls for Extra Flavor?

You can definitely add chopped nuts or sprinkles to the peanut butter balls for extra flavor. It's a great way to customize your treats and add a delightful crunch or colorful touch to each bite.

Conclusion

Indulge in these irresistible peanut butter balls that are sure to satisfy your sweet tooth cravings.

With just a few simple ingredients and easy-to-follow instructions, you can enjoy these bite-sized treats in no time.

Advertisement

So go ahead, treat yourself to a little taste of heaven and experience the perfect combination of creamy peanut butter and rich chocolate.

You won't be able to resist coming back for more!

Continue Reading

Trending