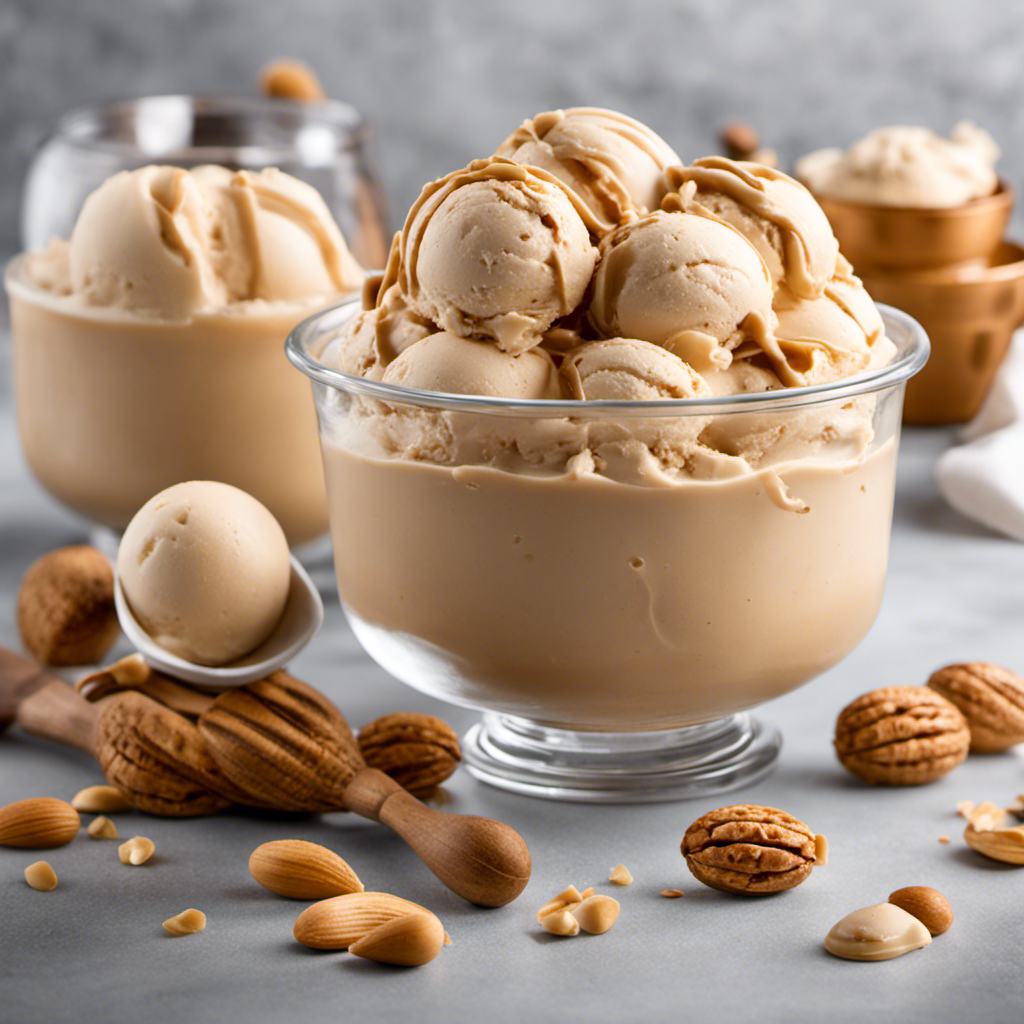
I have found the ideal recipe for guilt-free indulgence – a low calorie peanut butter ice cream made using an ice cream maker. If you’re in the mood for something sweet and creamy, search no more.
In this article, I’ll guide you through the process of creating this delectable treat that won’t derail your healthy eating goals. From selecting the right ingredients to freezing the ice cream to perfection, I’ll share my tips and tricks to ensure you achieve the creamiest texture every time.
Let’s dive in!
Key Takeaways
- Choose natural sweeteners and plant-based alternatives to reduce sugar content and make a guilt-free treat.
- Use seed butters as a substitute for peanut butter for those with allergies or preferences.
- Chill the ice cream maker bowl thoroughly before using for a smoother and creamier texture.
- Store the churned ice cream in an airtight container in the freezer to enhance smoothness and allow flavors to develop over time.
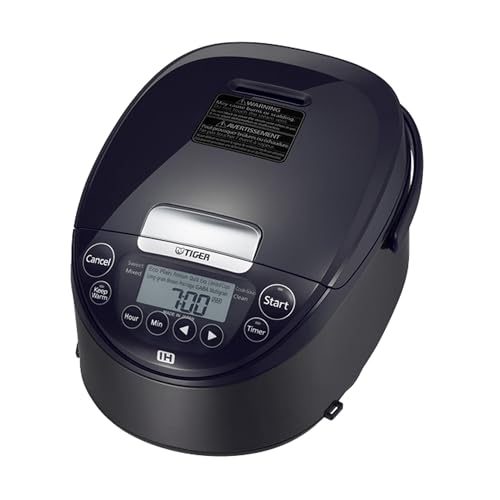
Tiger JPW-H18U Induction Heating Rice Cooker and Warmer with 14 Menu Presets and LCD Display (10-Cup, Mauve Black)
Induction Heating Technology: Heats the inner pot evenly to bring out the rice’s natural sweetness.
As an affiliate, we earn on qualifying purchases.
Selecting the Right Ingredients
You’ll need to choose the right ingredients for your low-calorie peanut butter ice cream. When it comes to sweetening your ice cream, opt for natural sweeteners like honey or maple syrup instead of refined sugar. These alternatives not only add sweetness but also provide additional nutrients.
Another key ingredient swap is substituting dairy with plant-based alternatives like almond milk or coconut milk. These options are lower in calories and saturated fat, making them a healthier choice. Be sure to choose unsweetened varieties to keep the sugar content in check.
By incorporating natural sweeteners and plant-based alternatives, you can create a delicious and guilt-free peanut butter ice cream.
Now, let’s move on to preparing the ice cream maker.

Zojirushi NW-JEC10BA Pressure Induction Heating (IH) Rice Cooker & Warmer, 5.5-Cup, Made in Japan
Capacity Up to 5.5 cups uncooked rice / 1.0 liter
As an affiliate, we earn on qualifying purchases.
Preparing the Ice Cream Maker
When it comes to preparing the ice cream maker, there are three key points to consider: chilling the bowl, adding the ingredients, and setting the timer.
Chilling the bowl is essential as it helps to create the perfect temperature for the ice cream mixture to freeze and solidify.
Adding the ingredients in the right order and quantity ensures that the ice cream will have the desired taste and texture.
Chilling the Bowl
Once the bowl is thoroughly chilled, it’s time to start making your low-calorie peanut butter ice cream. Chilling the bowl is an important step in the ice cream making process. It helps ensure that the ice cream freezes properly and achieves a creamy texture. There are a few chilling techniques you can use to get the best results.
- Place the bowl in the freezer for at least 24 hours before making the ice cream.
- If you’re short on time, you can also chill the bowl in the refrigerator for a few hours. However, this may not yield the same results as freezing.
- Some alternative freezing methods include using ice and salt in a large plastic bag and placing the bowl inside. Another option is using an ice cream maker attachment that can be pre-frozen.
Adding the Ingredients
To properly incorporate all the flavors, start by slowly adding the ingredients to the chilled bowl. When making low-calorie peanut butter ice cream with an ice cream maker, you have a variety of mix-in options to enhance the flavor and texture.
One popular choice is adding chopped dark chocolate or crushed peanuts for a delightful crunch. Another option is to swirl in some low-sugar caramel sauce to give it a sweet and creamy twist. Not only does this ice cream taste amazing, but it also offers some nutritional benefits. Peanut butter is a good source of healthy fats and protein, while dark chocolate provides antioxidants.
By carefully mixing in these ingredients, you can create a guilt-free treat that satisfies your cravings.
Now, let’s move on to setting the timer for the ice cream maker.
Setting the Timer
Before starting the timer, make sure the ice cream mixture is thoroughly chilled. This step is crucial for achieving the perfect consistency and preventing any issues with the timer. Once the mixture is chilled, it’s time to set the timer on your ice cream maker.
Here are some important timer settings and troubleshooting tips to keep in mind:
-
Timer Settings:
-
Set the timer according to the manufacturer’s instructions.
-
Typically, the timer should be set for around 20-30 minutes.
-
Adjust the timer based on your desired level of creaminess.
-
Troubleshooting Common Timer Issues:
-
If the ice cream is not freezing properly, check the temperature of the freezer bowl and adjust if necessary.
-
If the timer stops before the ice cream is fully frozen, it may be due to overheating. Allow the ice cream maker to cool down before continuing.
-
If the timer is not working at all, check the power source and make sure it is properly connected.
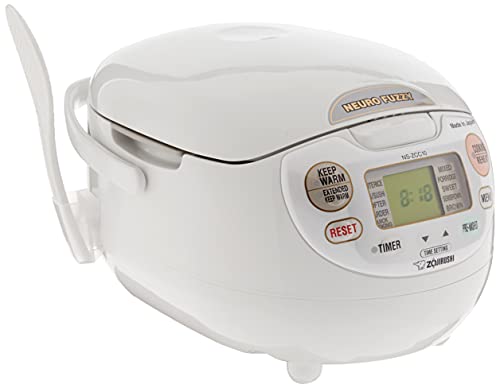
Zojirushi NS-ZCC10 5-1/2-Cup Neuro Fuzzy Rice Cooker and Warmer, Premium White
5-1/2-cup computerized rice cooker and warmer with advanced Neuro Fuzzy logic technology. Wall mountable
As an affiliate, we earn on qualifying purchases.
Making the Peanut Butter Base
While preparing the peanut butter base, you’ll need to mix together the low-fat milk, peanut butter, and sweetener until well combined.
When it comes to the sweetener, there are various options you can mix in to suit your taste and dietary preferences. One popular choice is using alternative sweeteners like stevia or monk fruit extract, which are low in calories and have minimal impact on blood sugar levels. These sweeteners are a great alternative to traditional sugar and can help reduce the calorie content of your peanut butter ice cream.
Additionally, you can experiment with different types of peanut butter, such as crunchy or smooth, to add texture and flavor. Remember to thoroughly mix the ingredients to ensure a smooth and creamy base for your ice cream.

Zojirushi NP-HCC10XH Induction Heating System Rice Cooker and Warmer, 5.5-Cup, Stainless Dark Gray
Induction rice cooker and warmer. Electrical Rating : 1,230 Watts
As an affiliate, we earn on qualifying purchases.
Churning the Ice Cream Mixture
When it comes to churning ice cream, there are several key points to consider for achieving the perfect texture and creaminess.
First, the churning technique plays a crucial role in creating a smooth and creamy ice cream. Different techniques, such as intermittent churning or continuous churning, can yield different results.
Secondly, the optimal churning time is essential to avoid over-churning or under-churning the mixture. It is important to follow the recipe or guidelines closely to ensure the ice cream reaches the desired consistency.
Lastly, temperature control during the churning process is of utmost importance. Maintaining a consistent temperature helps prevent ice crystals from forming and ensures a velvety texture in the final product.
Churning Techniques for Creaminess
To achieve a creamy texture, it’s important to churn the low calorie peanut butter ice cream in the ice cream maker for at least 20 minutes. Churning speed and technique play a crucial role in controlling the texture of the ice cream.
Here are some tips to achieve a smooth and creamy consistency:
- Start with a pre-chilled ice cream mixture to ensure faster churning and better texture control.
- Set the churning speed to a moderate level. Too slow, and the ice cream may not freeze properly. Too fast, and it may become icy.
- Periodically scrape down the sides of the ice cream maker to prevent ice crystals from forming and to ensure even freezing.
- Avoid over-churning, as it can lead to a grainy or buttery texture. Pay attention to the manufacturer’s instructions for the recommended churning time.
Following these techniques will help you achieve a velvety smooth and creamy low calorie peanut butter ice cream.
Optimal Churning Time
Achieving a velvety smooth and creamy texture for your homemade treat depends on finding the optimal churning time. The importance of timing cannot be overstated when it comes to making ice cream. Churning too little can result in a grainy texture, while churning too long can lead to an icy consistency. It’s all about finding the perfect balance.
To help you understand the impact of churning time on the final product, I have created a table below:
| Churning Time | Texture |
|---|---|
| 10 minutes | Creamy |
| 15 minutes | Smooth |
| 20 minutes | Rich |
As you can see, the longer you churn, the richer and smoother the texture becomes. However, be cautious not to go beyond the recommended churning time for your specific ice cream recipe.
In addition to perfecting the churning time, experimenting with flavors can elevate your homemade ice cream to another level. Don’t be afraid to get creative and try different combinations. From classic vanilla to unique flavors like lavender or salted caramel, the possibilities are endless. So, go ahead and unleash your inner ice cream artist!
Importance of Temperature Control
Maintaining proper temperature control throughout the ice cream-making process is crucial for achieving the desired texture and consistency in your homemade treat. Temperature control plays a vital role in the freezing process, ensuring that the ice cream freezes evenly and prevents the formation of ice crystals.
Here are three reasons why temperature control is important:
-
Optimal Freezing: By maintaining the correct temperature, the liquid ice cream base freezes at a slow and steady rate, resulting in smoother and creamier ice cream.
-
Emulsion Stability: Temperature control helps stabilize the emulsion in the ice cream base, preventing separation and ensuring a smooth and cohesive texture.
-
Flavor Preservation: Proper temperature control preserves the delicate flavors of the ingredients, allowing them to shine through in every bite.
Adding Mix-Ins for Extra Flavor
Don’t forget to include your favorite mix-ins, like chocolate chips or crushed cookies, for extra flavor in your low-calorie peanut butter ice cream.
When making low-calorie ice cream, it’s important to find sweetener alternatives that can help cut down on the calorie content without sacrificing taste. One option is using natural sweeteners like honey or agave syrup, which can add sweetness without the added calories. Another alternative is using low-calorie artificial sweeteners like stevia or erythritol. These options can provide the desired sweetness while keeping the calorie count low.
Additionally, experimenting with different flavors can help enhance the taste of your ice cream. You can try adding a swirl of caramel or a sprinkle of cinnamon to give your peanut butter ice cream a unique twist.
Now that we’ve discussed adding mix-ins and experimenting with flavors, let’s move on to incorporating low-calorie sweeteners into the recipe.
Incorporating Low-Calorie Sweeteners
When it comes to incorporating low-calorie sweeteners into our diet, it’s important to consider not only the taste but also the health benefits they provide.
Sweeteners can help satisfy our sweet tooth without adding excessive calories, making them a great option for those looking to manage their weight or reduce their sugar intake.
However, not all sweeteners are created equal, so it’s essential to know which ones are the best choices for our health and overall well-being.
Health Benefits of Sweeteners
You can choose healthier sweeteners for your low calorie peanut butter ice cream, such as stevia or monk fruit extract. These natural sweeteners offer several benefits compared to artificial sweeteners.
-
Benefits of Natural Sweeteners
-
Stevia: Derived from the stevia plant, stevia is a calorie-free sweetener that doesn’t raise blood sugar levels. It has been shown to have antioxidant properties and may help lower blood pressure.
-
Monk Fruit Extract: Also known as Luo Han Guo, monk fruit extract is a natural sweetener that is low in calories and has zero glycemic impact. It contains antioxidants and may have anti-inflammatory properties.
-
Both stevia and monk fruit extract provide sweetness without the negative health effects associated with artificial sweeteners.
-
Impact of Artificial Sweeteners
-
Artificial sweeteners like aspartame and sucralose are commonly used in low calorie foods but have been linked to negative health effects including metabolic disorders, weight gain, and increased cravings for sweet foods.
-
Research suggests that artificial sweeteners may disrupt the body’s natural ability to regulate calorie intake, leading to overeating and weight gain.
-
Artificial sweeteners may also negatively impact gut health and have been associated with an increased risk of developing type 2 diabetes.
Best Low-Calorie Sweeteners
To find the best low-calorie sweetener, consider trying stevia or monk fruit extract for a healthier alternative. These natural sweeteners are excellent choices for those looking to reduce their sugar intake and manage their weight. They are also great options for diabetics, as they have a minimal impact on blood sugar levels.
Here is a table comparing the nutritional information of stevia and monk fruit extract:
| Sweetener | Calories per teaspoon | Glycemic Index | Health Benefits |
|---|---|---|---|
| Stevia | 0 | 0 | Natural, zero-calorie, may lower blood pressure |
| Monk Fruit Extract | 0 | 0 | Natural, zero-calorie, may have antioxidant properties |
Both stevia and monk fruit extract offer sweetness without the added calories or negative health effects of artificial sweeteners. They are natural alternatives that can be used in a variety of recipes, including beverages and baked goods. So, whether you are looking to reduce your calorie intake or manage your blood sugar levels, give stevia or monk fruit extract a try as the best sweeteners for diabetics and natural alternatives to artificial sweeteners.
Freezing the Ice Cream to Perfection
Once the ice cream mixture is ready, simply pour it into your ice cream maker and let it do its magic, transforming it into a creamy and delicious treat.
Freezing the ice cream properly is key to achieving the perfect texture and preventing ice crystals from forming. Here are some freezing techniques and tips for preventing ice crystals:
- Make sure your ice cream maker is pre-chilled before using it.
- Place the ice cream mixture in the freezer for about 30 minutes before churning to ensure it’s cold.
- Churn the ice cream for the recommended time stated in your ice cream maker’s instructions.
- Transfer the churned ice cream into a lidded container and press a piece of parchment paper onto the surface to prevent ice crystals.
- Store the ice cream in the coldest part of your freezer.
- Avoid frequent opening and closing of the freezer door to maintain a consistent temperature.
Following these freezing techniques and tips will help you achieve a smooth and creamy low-calorie peanut butter ice cream without any unwanted ice crystals.
Enjoy!
Serving and Storing the Homemade Ice Cream
When serving your homemade ice cream, it’s important to use an ice cream scoop to create perfectly round and smooth scoops. This not only enhances the serving presentation but also ensures that each scoop is the same size, giving a professional touch to your dessert.
To prevent the formation of ice crystals, it is crucial to store the ice cream properly. Transfer the ice cream to an airtight container, pressing a piece of parchment paper against the surface before sealing the lid. This will create a barrier between the ice cream and the air, reducing the chance of ice crystals forming.
Additionally, storing the ice cream in the coldest part of your freezer will help maintain its texture and prevent the formation of ice crystals.
Variations and Substitutions for Dietary Needs
If you’re looking to accommodate dietary needs, there are various substitutions you can make in your homemade ice cream recipe. Here are some variations and substitutions for allergies and vegan diets:
-
For those with dairy allergies or lactose intolerance, you can use non-dairy milk alternatives such as almond milk, coconut milk, or oat milk as a substitute for regular milk.
-
If you’re following a vegan diet, you can replace traditional cream with coconut cream or cashew cream for a creamy texture.
-
For nut allergies, consider using seed butters like sunflower seed butter or pumpkin seed butter instead of peanut butter.
By making these substitutions, you can create delicious ice cream that fits your dietary needs.
Now, let’s move on to some tips and tricks for achieving the creamiest texture in your homemade ice cream.
Tips and Tricks for Achieving the Creamiest Texture
To achieve the creamiest texture in your homemade ice cream, try using full-fat coconut milk instead of regular milk. Full-fat coconut milk contains a higher fat content than regular milk, which helps create a smoother and creamier consistency.
Additionally, chilling techniques play a crucial role in reducing ice crystals and achieving a velvety texture. It is recommended to chill the ice cream mixture thoroughly before churning it in an ice cream maker. This allows the fat in the coconut milk to solidify, resulting in a rich and creamy texture.
Another technique is to store the churned ice cream in an airtight container in the freezer for a few hours after churning. This further reduces ice crystal formation and enhances the smoothness of the final product.
Frequently Asked Questions
Can I Make This Recipe Without an Ice Cream Maker?
Yes, you can make homemade ice cream without an ice cream maker. There are alternative methods like using a blender or freezer bags. Tips for achieving a creamy texture include using full-fat ingredients and incorporating air while freezing.
Can I Use Regular Peanut Butter Instead of Low-Calorie Peanut Butter?
Using regular peanut butter instead of low-calorie may result in a higher calorie ice cream. However, it can still be delicious. Consider other low-calorie alternatives, like powdered peanut butter, to maintain the health benefits.
How Long Should I Churn the Ice Cream Mixture in the Ice Cream Maker?
I churn the ice cream mixture in the ice cream maker for about 20-30 minutes for a creamy texture. For tips on achieving a creamy texture and how to properly store homemade ice cream, keep reading.
Can I Use Regular Sugar Instead of Low-Calorie Sweeteners?
No, regular sugar cannot be substituted for low-calorie sweeteners in the ice cream. Using honey instead may alter the texture, resulting in a less creamy consistency. It’s best to stick with low-calorie sweeteners for a healthier option.
How Long Should I Freeze the Ice Cream Before Serving It?
I usually freeze my homemade ice cream for at least 4 hours before serving. It allows the ice cream to firm up and develop a creamy texture. As for toppings, you can add fresh fruit, crushed nuts, or a drizzle of low-calorie chocolate sauce.
Conclusion
In conclusion, making low calorie peanut butter ice cream with an ice cream maker is a delicious and guilt-free treat.
By carefully selecting the right ingredients and following the steps outlined in this article, you can create a creamy and satisfying dessert that won’t derail your healthy eating goals.
Whether you choose to stick with the classic peanut butter flavor or experiment with different mix-ins, this homemade ice cream is sure to be a crowd-pleaser.
So grab your ice cream maker and get ready to indulge in a healthier frozen delight!