As someone who loves goat milk, I have a little secret to share with you: making goat butter is simpler than you may realize.
With just a few simple steps, you can transform that creamy, delicious milk into a velvety spread that will elevate your culinary creations to a whole new level.
So grab your equipment, roll up your sleeves, and get ready to embark on a butter-making journey that will have you savoring the taste of homemade goodness in no time.
Key Takeaways
- Consider the breed and quality of goat milk.
- Use fresh, raw goat milk without additives or preservatives.
- Pasteurization ensures the milk is safe to consume.
- Control temperature throughout the butter-making process.
LUSHYUM Chocolate Melting Pot Candy Melts Melter with 2 Insert Pots and Spatula, 4 Cups Capacity Warmer Machine, Ideal Dipping Tool Kitchen Supplies for Making Cake Pop Covered Strawberries Fondue
Keep Your Chocolate Always Smooth: Tired of clumpy chocolate? LUSHYUM Chocolate Melting Pot makes it easy to keep...
As an affiliate, we earn on qualifying purchases.
Selecting the Right Goat Milk
When selecting the right goat milk, it’s important to consider the breed and quality.
Goat milk has numerous benefits, making it a popular choice for those seeking an alternative to cow’s milk. It is easier to digest, contains less lactose, and is rich in essential nutrients like calcium and vitamins.
There are different types of goat milk available, each with its own unique characteristics. Some popular breeds include Nubian, Saanen, and Alpine, each producing milk with varying fat content and flavor profiles.
Additionally, the quality of the milk is crucial. Look for milk that is fresh, free from any off-putting odors, and produced by healthy goats raised in a clean environment.
2026 Upgrade Chocolate Melting Pot,2x1L Chocolate Melting Machine with Candy Dipping Tools,Electric Chocolate Tempering Machine for Chocolate,Candy,Butter Making Warming Coffee Milk Wine(80W, 110V)
Dual-Zone Chocolate Melting Pots:The 2x1L compartment can simultaneously melt two different types and concentrations of chocolate. The dual...
As an affiliate, we earn on qualifying purchases.
Gathering the Necessary Equipment
First, you’ll need to gather all the necessary equipment for making your own homemade goat butter. Here are the three essential items you’ll need:
-
A high-quality goat milk: When it comes to making goat butter, not all types of goat milk are created equal. Look for fresh, raw goat milk that’s free from any additives or preservatives. This will ensure the best flavor and texture for your homemade butter.
-
A butter churn or food processor: To transform the goat milk into butter, you’ll need a tool that can agitate the milk to separate the fat. A traditional butter churn or a powerful food processor will do the job. Make sure it’s clean and in good working condition before you start.
-
Cheese cloth or a fine-mesh strainer: Once the butter has formed, you’ll need to separate it from the liquid, known as buttermilk. To do this, you can use a cheesecloth or a fine-mesh strainer. This will help remove any remaining liquid and leave you with smooth, creamy goat butter.

Wilton Candy Melts Candy Melting Pot - Melt Station for Chocolate & Fondue - Features Dishwasher-Safe Insert & Easy-Pour Spout - Fits on a Tabletop - 2.5-Cup Capacity
Effortless Candy Melting: The Wilton Candy Melting Pot melts cheese and chocolate into the perfect consistency for dipping...
As an affiliate, we earn on qualifying purchases.
Pasteurizing the Goat Milk
Before we move on to the next step of making goat butter, it’s important to discuss the process of pasteurizing the goat milk. This step ensures the milk is safe to consume by eliminating harmful bacteria.
Temperature and duration are key factors in pasteurization, as the milk needs to be heated to a specific temperature for a certain amount of time. Additionally, it is crucial to follow safety precautions such as using clean equipment and maintaining a hygienic environment to prevent any contamination during the pasteurization process.
Temperature and Duration
To make goat butter, you’ll need to ensure that the temperature and duration are just right. Temperature control is crucial during the butter-making process to achieve the desired consistency and flavor. Here are three important points to keep in mind:
-
Chilling the cream: After collecting the fresh goat milk, it is essential to chill it to around 45°F (7°C). This helps in separating the cream from the milk effectively.
-
Softening the cream: Once chilled, allow the cream to reach room temperature, around 68°F (20°C). This step ensures that the cream is soft and easy to work with during the churning process.
-
Churning at the right temperature: The ideal temperature for butter churning is between 55-60°F (13-16°C). This range promotes the formation of butter granules and prevents the cream from turning into whipped cream.
Troubleshooting common issues may arise during the butter-making process, such as over-churning or insufficient churning. By maintaining the correct temperature and duration, you can avoid these problems and successfully make delicious goat butter.
Safety Precautions
Remember, it’s important to follow safety precautions while making goat butter to ensure a hygienic and risk-free process. One key aspect of safety is controlling the temperature throughout the butter-making process. Maintaining the correct temperature is crucial for achieving a smooth texture and preventing the growth of harmful bacteria. Additionally, being aware of goat butter alternatives can be helpful, especially if you or someone you know has a dairy intolerance or allergy. There are various alternatives available, such as plant-based butters made from coconut oil or avocado oil. These alternatives offer a similar taste and texture, making them suitable substitutes for traditional goat butter. By following safety precautions and being mindful of temperature control, you can enjoy the process of making goat butter while ensuring a safe and delicious end product.
| Safety Precautions |
|---|
| Wash hands thoroughly before starting. |
| Use clean utensils and equipment. |
| Store ingredients properly to prevent contamination. |

LUSHYUM Chocolate Melting Pot Candy Melts Melter with 2 Insert Pots and Spatula, 4 Cups Capacity Warmer Machine, Ideal Dipping Tool Kitchen Supplies for Making Cake Pop Covered Strawberries Fondue
Keep Your Chocolate Always Smooth: Tired of clumpy chocolate? LUSHYUM Chocolate Melting Pot makes it easy to keep...
As an affiliate, we earn on qualifying purchases.
Separating the Cream From the Milk
After milking the goat, I strain the milk to separate the cream. This step is crucial in the butter making process as it allows us to extract the rich and creamy part of the milk that will later be churned into butter.
Here are three effective methods for separating the cream:
-
Gravity Separation: By allowing the milk to sit undisturbed in a container for several hours, the cream naturally rises to the top, making it easy to skim off.
-
Centrifugation: Using a centrifuge, the milk is spun at high speeds, causing the cream to separate from the milk solids. The cream can then be collected from the top.
-
Skimming: With a ladle or spoon, skim off the cream that has risen to the surface of the milk. This method requires patience and precision to avoid disturbing the milk.
Churning the Cream Into Butter
Churning the cream turns it into a delicious homemade spread. Achieving a creamy texture in your goat butter is key, and I’m here to share some tips to help you along the way. First, make sure your cream is at the right temperature, around 55-60°F, as this will ensure proper churning. Next, use a churn that allows for consistent agitation to evenly distribute the fat. If you’re having trouble getting the desired texture, try adding a small amount of ice water to help break up the fat globules. And if your butter is not forming or is too soft, it could be due to insufficient churning time or too high of a cream temperature. Troubleshooting common churning issues can be frustrating, but with these tips, you’ll be well on your way to achieving that creamy goat butter you’ve been dreaming of.
| Tips for Achieving a Creamy Texture | Troubleshooting Common Churning Issues |
|---|---|
| Use cream at 55-60°F | Butter not forming or too soft |
| Consistent agitation in the churn | Insufficient churning time |
| Add a small amount of ice water | Cream temperature too high |
Washing and Kneading the Butter
To achieve a smooth texture, start by washing and kneading the butter until the water runs clear. This step is crucial in removing any residual milk solids and excess moisture from the butter.
Here are the three key techniques for washing and kneading the butter effectively:
-
Fill a large bowl with cold water and place the butter inside. Gently knead the butter with your hands, allowing the water to penetrate it. This helps to separate the remaining milk solids.
-
Drain the water and repeat the process until the water runs clear. The repeated kneading will help remove any remaining impurities, resulting in a purer and smoother butter.
-
Once the butter is clean, transfer it onto a clean surface and knead it further to remove any excess water. Use a spatula or your hands to press and fold the butter, gradually squeezing out the moisture.
Salting and Flavoring the Butter
When it comes to salting and flavoring butter, there are two main choices to consider: salted or unsalted.
Salted butter already has salt added to it during the churning process, while unsalted butter is left plain.
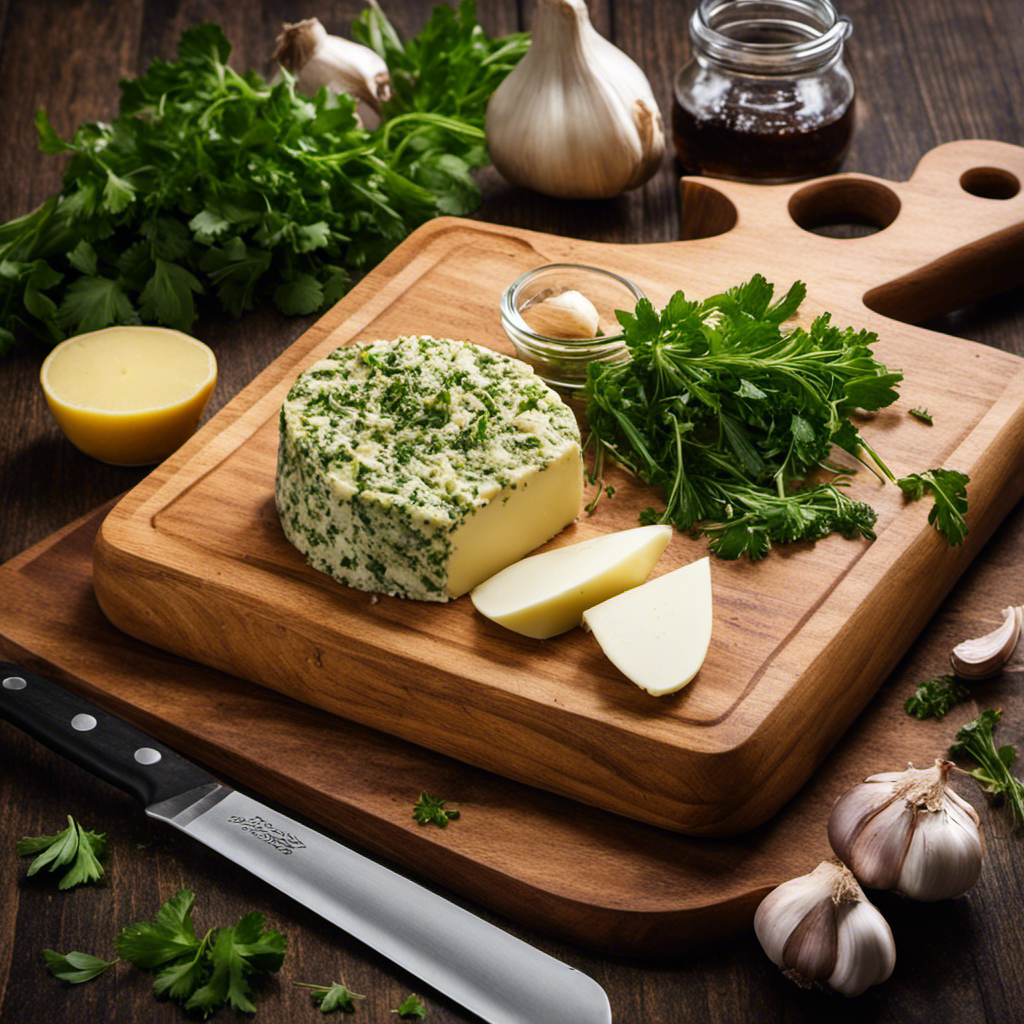
Additionally, some people like to take their butter a step further by adding herbs or spices for an extra burst of flavor.
These additions can range from simple choices like garlic and herbs to more adventurous options like chili flakes or citrus zest.
Salted or Unsalted
In the process of making goat butter, you have the option to choose between salted or unsalted. Here are three key points to consider when deciding which option is best for you:
-
Health benefits: Goat butter is a healthier alternative to cow butter as it contains less cholesterol and saturated fat. It is also rich in essential nutrients like vitamins A, D, and E. Choosing unsalted goat butter allows you to control your sodium intake, which is beneficial for individuals with high blood pressure or those watching their salt intake.
-
Culinary uses: Goat butter adds a unique flavor to dishes. Its tangy and slightly sweet taste enhances both savory and sweet recipes. Use it to sauté vegetables, spread on toast, or as a substitute for cow butter in baking. The creaminess and richness of goat butter make it a versatile ingredient in your kitchen.
-
Flavor preference: Salted or unsalted goat butter ultimately comes down to personal taste. Salted goat butter provides a savory and slightly salty flavor that complements many dishes. On the other hand, unsalted goat butter allows the natural flavors of the ingredients to shine through, giving you a purer taste.
Ultimately, the choice between salted or unsalted goat butter comes down to personal preference and dietary needs. Experiment with both options to find the perfect balance of flavor and health benefits for your dishes.
Adding Herbs or Spices?
If you want to add extra flavor to your goat butter, consider mixing in herbs or spices. Adding dried herbs can give your butter a subtle and savory taste, while experimenting with different spices can add a unique and bold flavor profile. Here is a table showcasing some popular herbs and spices that pair well with goat butter:
| Herbs | Spices |
|---|---|
| Basil | Cumin |
| Rosemary | Paprika |
| Thyme | Turmeric |
| Parsley | Garlic powder |
| Dill | Onion powder |
When incorporating herbs or spices into your goat butter, start with small amounts and gradually increase until you achieve the desired taste. Mix the herbs or spices thoroughly into the softened goat butter and refrigerate for a few hours to allow the flavors to meld. Whether you prefer a hint of basil or a kick of cumin, adding herbs and spices can elevate your goat butter to new culinary heights. So go ahead, get creative, and enjoy the delicious results!
Storing and Preserving the Goat Butter
To keep your goat butter fresh for longer, you should store it in an airtight container in the refrigerator. This will help preserve its flavor and extend its shelf life.
Here are three key storing techniques for goat butter:
-
Use an airtight container: Ensure that the container you choose is completely airtight to prevent any air or moisture from getting in and spoiling the butter.
-
Keep it away from strong odors: Goat butter tends to absorb strong odors, so it’s important to store it away from foods with strong smells, such as onions or garlic.
-
Consider freezing: If you have excess goat butter, freezing it is a great way to prolong its freshness. Simply wrap it tightly in plastic wrap or place it in a freezer-safe container.
Storing goat butter properly will not only keep it fresh, but it will also maintain its creamy texture and delicious taste.
Now, let’s move on to some tips and tricks for making the perfect goat butter.
Tips and Tricks for Perfect Goat Butter
After learning how to store and preserve goat butter, let’s dive into some tips and tricks for perfecting the art of making goat butter.
Whether you’re a seasoned butter maker or just starting out, these suggestions will help you achieve creamy and delicious results.
Firstly, experimenting with different goat butter recipes can be a fun way to explore new flavors. Try adding herbs, spices, or even honey to enhance the taste.
Additionally, troubleshooting any issues that may arise during the butter-making process is crucial. If your butter is too soft, try increasing the chilling time before churning. On the other hand, if your butter is too hard, consider increasing the churning time or incorporating more cream.
Frequently Asked Questions
How Long Does It Take to Separate the Cream From the Goat Milk?
Separating cream from goat milk typically takes around 12-24 hours. During this time, the cream will rise to the top, making it easier to skim off. The exact time may vary depending on the temperature and freshness of the milk.
Can I Use Store-Bought Goat Milk Instead of Fresh Goat Milk?
Yes, you can use store-bought goat milk instead of fresh goat milk to make goat butter. The advantages are convenience and availability, but the disadvantages include the possibility of additives and a potential difference in taste.
What Is the Shelf Life of Homemade Goat Butter?
The shelf life of homemade goat butter can vary depending on the preservation methods used. It is important to store it in an airtight container in the refrigerator to extend its freshness.
Can I Use a Blender Instead of a Butter Churn to Make Goat Butter?
Using a blender instead of a butter churn to make goat butter? While a blender can work, a butter churn offers advantages like better control over the churning process and a traditional, hands-on experience.
Are There Any Alternative Methods for Pasteurizing Goat Milk if I Don’t Have a Pasteurizer?
If you don’t have a pasteurizer, there are alternative methods for pasteurizing goat milk. It’s important to pasteurize milk to eliminate harmful bacteria. However, using raw goat milk for making goat butter can have its benefits.
Conclusion
In conclusion, making goat butter is a labor of love that yields delicious results. By following the steps outlined in this article, you can create the perfect batch of creamy, flavorful butter from goat milk.
Remember to select high-quality milk, gather the necessary equipment, and follow the proper techniques of pasteurizing, separating, churning, washing, kneading, salting, and storing the butter.
With a little practice and patience, you’ll be able to enjoy the rich taste and unique qualities of homemade goat butter. So go ahead, give it a try and let your taste buds revel in this delightful culinary adventure.
Bon appétit!