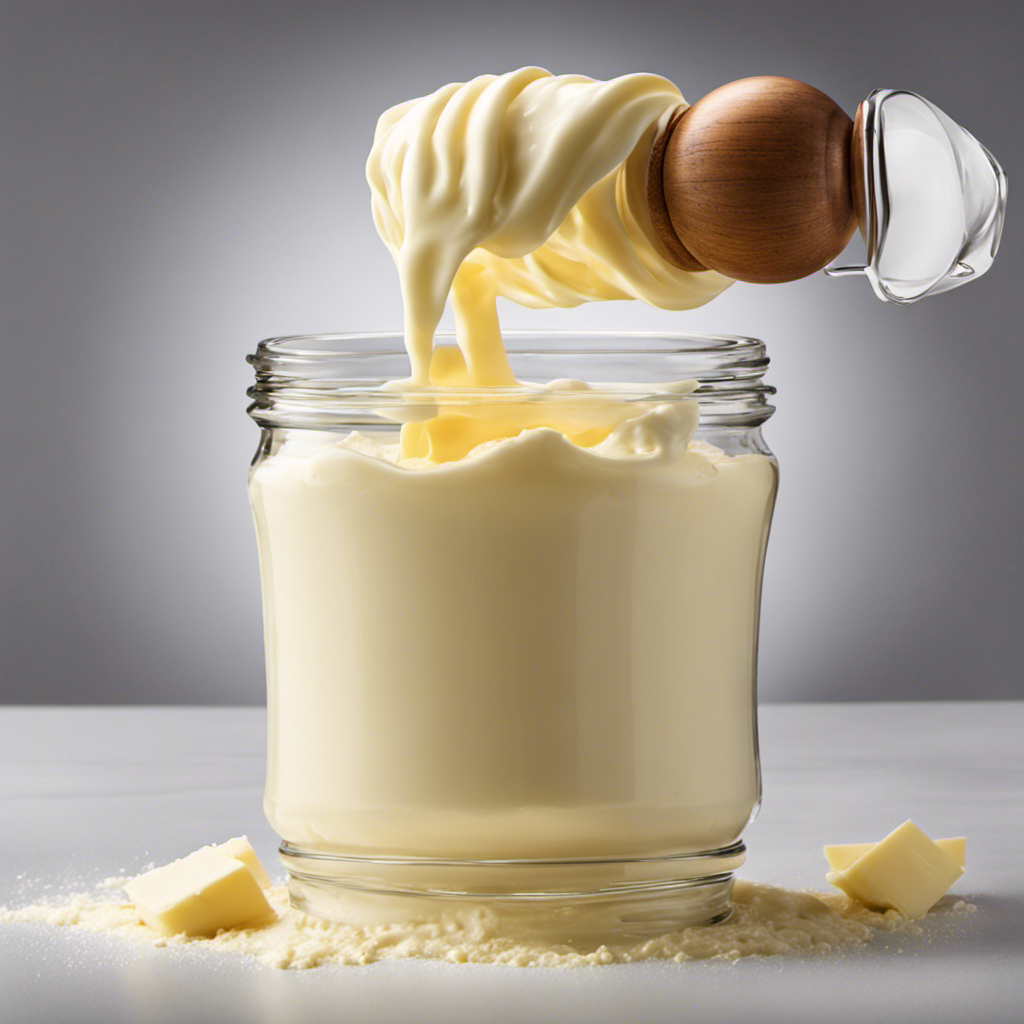

I am here to demonstrate how to create butter using heavy whipping cream.
It’s a piece of cake – or should I say, a pat of butter? In just a few simple steps, you’ll be able to whip up your very own homemade butter.
From gathering the necessary ingredients to storing and using your creation, I’ll guide you through the process with clear and concise instructions.
So, let’s get churning!
Key Takeaways
- Use heavy whipping cream with at least 35% fat content for best results
- Experiment with different churning techniques to find your preferred method
- Rinse the butter with cold water to remove buttermilk and achieve a smooth texture
- Store the homemade butter in the refrigerator in an airtight container for up to two weeks

Vitamix Ascent X3 Blender with Three Blending Programs, Self-Cleaning Program, Professional-Grade Blender for Smoothies, Soups and More, Stainless-Steel Blades, 48 Oz Container, Shadow Black
Included: Ascent X3 blender motor base, 48-ounce container, S2 low-profile tamper, tamper holder, and digital recipe book; this...
As an affiliate, we earn on qualifying purchases.
Gather the Necessary Ingredients
First, gather all the necessary ingredients for making butter with heavy whipping cream. To make flavored butter, you can experiment with various ingredients like herbs, spices, and even fruits. For the basic homemade butter, you will need one cup of heavy whipping cream, a pinch of salt, and a jar with a tight-fitting lid.
If you want to make herb butter, gather fresh herbs such as parsley, thyme, or rosemary. For a spicy twist, gather chili flakes or paprika. To make fruity butter, gather your favorite fruits like strawberries, blueberries, or oranges. Remember to adjust the quantities based on your taste preferences.
Once you have gathered all the necessary ingredients, you are ready to move on to the next steps of making your own delicious flavored butter.

Cosori 9-in-1 TurboBlaze Air Fryer 6 Qt, Smart Control, 90°–450°F, Shake Reminders, Precise Heating for Even Results, Air Fry, Roast, Bake, Broil, Dry, Frozen, Proof, Reheat, Keep Warm, 120V, Cream
𝘼𝙞𝙧 𝙁𝙧𝙮𝙚𝙧 𝙐𝙥𝙜𝙧𝙖𝙙𝙚: Innovative TurboBlaze Technology delivers a powerful 3600 rpm fan speed and temperatures up to 450℉,...
As an affiliate, we earn on qualifying purchases.
Churning the Whipping Cream
When it comes to churning butter, there are a few key techniques that can make all the difference.
I’ll be discussing these techniques, as well as the necessary equipment you’ll need to get started.
Additionally, I’ll be sharing some tips on how to achieve smooth, creamy butter every time.
Churning Techniques for Butter
To make butter with heavy whipping cream, it’s important to employ different churning techniques. There are several methods you can try to achieve that creamy spread we all love. Here are a few techniques I’ve found to be effective:
-
Hand Churning:
-
This traditional method involves using a butter churn or jar with a tight lid.
-
Simply shake or roll the jar back and forth until the cream separates into butter and buttermilk.
-
Stand Mixer:
-
Attach the whisk attachment to your stand mixer.
-
Whip the cream on medium-high speed until the butterfat separates.
These techniques offer alternatives to traditional butter churns while still yielding delicious results. Whether you choose to hand churn or use a stand mixer, experimenting with different methods can make the butter-making process even more enjoyable.
Necessary Equipment for Churning
Using a butter churn or a stand mixer with a whisk attachment is essential for achieving the desired consistency when churning.
When it comes to whipping cream sources, it is important to use heavy whipping cream that has a high fat content of at least 35%. This ensures that the cream will separate into butter and buttermilk more easily. I recommend using organic or locally sourced cream for the best results.
However, if you don’t have access to a butter churn or a stand mixer, there are alternative churning methods you can try. One option is using a mason jar with a tight-fitting lid. Simply pour the cream into the jar, secure the lid, and shake vigorously until the butter separates.
Another method is using a food processor or blender. Just be careful not to over-process the cream, as it can turn into whipped cream instead of butter.
Tips for Achieving Smooth Butter
For achieving smooth butter, ensure that you are using high-fat content cream and avoid over-processing it. When making butter, it’s important to pay attention to the consistency to achieve that creamy texture we all love. Here are some tips to help you achieve the perfect texture and prevent your butter from becoming too soft:
-
Use heavy whipping cream with a high fat content, preferably around 35% or higher. This will ensure that your butter has a rich and creamy consistency.
-
Avoid over-processing the cream. Overchurning can cause the butter to become too soft and lose its texture. Stop churning once you see the butterfat separating from the buttermilk.
-
Once the butter is formed, rinse it with cold water to remove any remaining buttermilk. This will help preserve the texture and prevent it from becoming too soft.
-
Store your butter in the refrigerator to maintain its firmness. Keeping it at a cool temperature will prevent it from melting and becoming too soft.

KitchenAid Artisan Series 5 Quart Tilt Head Stand Mixer with Pouring Shield KSM150PS, Milkshake
Built to take it all on with the durable and built-to-last metal construction, and 59 touchpoints around the...
As an affiliate, we earn on qualifying purchases.
Separating the Butter From the Buttermilk
After churning the heavy whipping cream, you’ll be left with two distinct components: butter and buttermilk.
Buttermilk has a variety of uses in cooking and baking, such as making pancakes, biscuits, or even adding tanginess to dressings and marinades. It can also be enjoyed as a refreshing drink on its own.
Now, let’s focus on the butter. Depending on the cream you use, the flavor of the butter can vary. For example, butter made from cream sourced from grass-fed cows will have a richer and more flavorful taste compared to butter made from conventionally raised cows. Additionally, you can infuse the butter with different flavors by incorporating herbs, spices, or even garlic. By understanding these differences, you can tailor your butter to suit your taste preferences.
Now that we have separated the butter from the buttermilk, let’s move on to the next step: washing the butter.

Instant Pot 4QT RIO Mini 7-in-1 Multi-Cooker, Pressure Cooker, Slow cook, Sauté, Steam, Rice Maker, Yogurt, & Warmer, Black, 4 Quarts
7 Cooking Functions: Pressure cook, slow cook, sauté, steam, cook rice, make yogurt, or keep your meals warm,...
As an affiliate, we earn on qualifying purchases.
Washing the Butter
To wash the butter, you’ll need to place it in a bowl of cold water and gently knead it to remove any remaining buttermilk. This step is crucial to ensure that your butter is clean and free from any excess liquid.
Here are some discussion ideas about different methods for washing the butter:
-
Adding salt to the water: Some people prefer to add a pinch of salt to the cold water before placing the butter in it. This not only helps to enhance the flavor of the butter but also acts as a natural preservative.
-
Using flavored water: Another interesting approach is to use flavored water for washing the butter. You can infuse the water with herbs, spices, or even citrus zest to give your butter a unique taste. This method allows you to experiment with different flavors and create personalized butter variations.
Adding Salt (Optional
Now that we’ve finished washing the butter, it’s time to add some salt, if you prefer. Adding salt to homemade butter not only enhances the flavor, but it also acts as a natural preservative. However, this step is entirely optional, and you can skip it if you prefer unsalted butter.
Before adding the salt, make sure your butter is at room temperature. This will make it easier to mix in the salt evenly. Start with a pinch of salt and gradually add more to taste. You can use regular table salt or experiment with different varieties like sea salt or flavored salts for unique flavors.
Once you’ve added the salt, mix it thoroughly into the butter using a spatula or a wooden spoon. Now, your homemade butter is ready to be stored and used in various delicious recipes.
Storing and Using Your Homemade Butter
Once your homemade butter has thoroughly mixed with the salt, you can store it in an airtight container in the refrigerator for up to two weeks. It’s important to properly store your butter to maintain its freshness and flavor.
Here are some storing techniques and flavor variations to consider:
-
Storing Techniques:
-
Use an airtight container: This will prevent the butter from absorbing odors and flavors from other foods in the fridge.
-
Keep it chilled: Butter should always be stored in the refrigerator to maintain its texture and prevent spoilage.
-
Flavor Variations:
-
Herb-infused butter: Add chopped herbs like parsley, rosemary, or thyme to your butter for a fragrant and flavorful twist.
-
Sweet flavored butter: Mix in honey, cinnamon, or maple syrup to create a delicious spread for toast or pancakes.
Troubleshooting Tips and Tricks
If your homemade butter is not thickening, it could be due to using cream that has a low fat content. To troubleshoot this issue, make sure you are using heavy whipping cream, which typically has a fat content of 36-40%. Using a lower fat content cream will result in a thinner consistency and may prevent the butter from forming properly. Additionally, be sure to chill the cream before whipping it, as this helps to stabilize the fat and encourage the butter to separate from the buttermilk. Lastly, make sure you are properly draining and rinsing the butter to remove any excess buttermilk, as this can also affect the thickness and texture. By keeping these common mistakes in mind and following these troubleshooting techniques, you should be able to achieve that perfect, thick homemade butter every time.
| Common Mistakes | Troubleshooting Techniques |
|---|---|
| Using low fat cream | Use heavy whipping cream |
| Not chilling the cream | Chill the cream before whipping |
| Improper draining | Thoroughly drain and rinse |
Frequently Asked Questions
How Long Does It Take to Make Butter From Heavy Whipping Cream?
It usually takes about 10-15 minutes to make butter from heavy whipping cream. You can flavor it with herbs, spices, or even honey. To achieve the perfect texture, make sure to whip the cream until it separates into butter and buttermilk.
Can I Use a Blender or Food Processor Instead of a Hand Mixer to Churn the Whipping Cream?
Sure, you could use a blender or food processor to churn the whipping cream, but where’s the fun in that? Using a hand mixer gives you the satisfaction of putting in some elbow grease and feeling like a butter-making pro.
Can I Use Low-Fat or Non-Dairy Alternatives to Heavy Whipping Cream to Make Butter?
Yes, you can use low-fat alternatives or non-dairy alternatives to heavy whipping cream to make butter. However, keep in mind that the texture and taste may differ from traditional butter made with heavy whipping cream.
What Can I Do With the Leftover Buttermilk After Separating the Butter?
After separating the butter, I often use the leftover buttermilk to make pancakes or biscuits. It adds a tangy flavor and makes them extra fluffy. You can also use it in dressings or marinades for added richness.
How Long Can Homemade Butter Be Stored and What Is the Best Way to Store It?
Homemade butter can be stored for up to two weeks in the refrigerator. To ensure freshness, store it in an airtight container or wrap it tightly in wax paper.
Conclusion
In conclusion, making butter with heavy whipping cream is a simple and rewarding process. By churning the cream and separating the butter from the buttermilk, you can create delicious homemade butter.
Don’t forget to wash the butter to remove any excess buttermilk, and consider adding salt for added flavor. Store your homemade butter properly and use it in a variety of dishes for a rich and creamy taste.
Remember, ‘practice makes perfect,’ so don’t be discouraged if it doesn’t turn out perfectly the first time. Keep trying and enjoy the process!