Connect with us

Recipes & Culinary Uses

Make Butter Using a Butter Maker: 3 Simple Steps

Published

on

An image that showcases the step-by-step process of making butter using a butter maker

I’ve always enjoyed the smooth, creamy flavor of homemade butter. There’s a sense of satisfaction in knowing exactly what ingredients are used.

If you’re like me and want to experience the joy of making your own butter, then you’re in luck. In this article, I’ll guide you through the process of making butter using a butter maker.

From choosing the right equipment to adding delicious flavors, I’ll provide detailed and precise instructions every step of the way.

So, let’s get started and churn up some butter!

Key Takeaways

  • Consider the size and capacity of the butter maker
  • Use high-quality cream for best results
  • Optional addition of salt for flavor
  • Proper storage extends shelf life
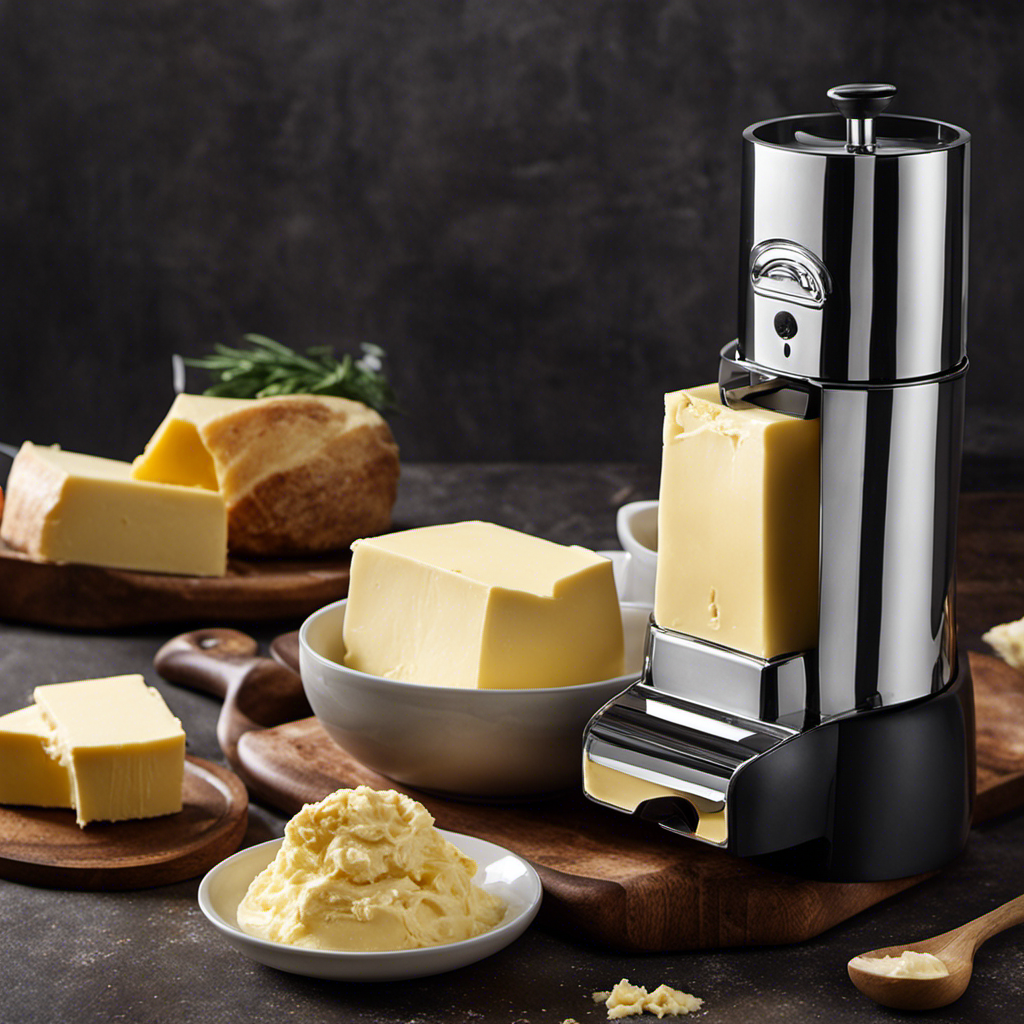
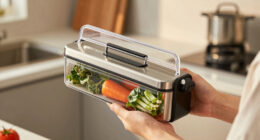
Choosing the Right Butter Maker

Advertisement

When choosing the right butter maker, it’s important to consider the size and capacity that will best suit your needs.

A butter maker is a wonderful tool that allows you to create fresh and delicious butter in the comfort of your own home.

One of the key benefits of a butter maker is the control it gives you over the ingredients used. You can choose to make your butter with organic or grass-fed cream, ensuring a higher quality product.

Additionally, a butter maker makes the process of churning butter much easier and faster compared to traditional methods.

As for maintenance, most butter makers are dishwasher safe, making cleanup a breeze. It’s also important to regularly check and clean the churn and paddle to ensure optimal performance.

Advertisement

Gathering the Ingredients and Equipment

When it comes to making butter, gathering the right ingredients and equipment is essential.

For the ingredients, you will need heavy cream, salt (optional), and ice water.

As for the equipment, you will need a stand mixer or a food processor, a fine-mesh strainer or cheesecloth, and airtight containers for storing the butter.

To prepare, you will need to churn the cream until it separates into butter and buttermilk, strain the mixture, and then rinse and shape the butter before refrigerating it.

Ingredients Needed

To make butter using a butter maker, you’ll need a few ingredients.

Advertisement

First, you’ll need heavy cream. Make sure to choose a high-quality, fresh cream for the best results.

Next, you’ll need salt, which is optional but adds flavor to the butter. You can use either fine sea salt or kosher salt, depending on your preference.

Finally, you’ll need cold water. This will be used to wash the butter and remove any excess buttermilk.

As for the equipment, it’s important to choose a reliable and efficient butter maker. Look for one that is easy to use, has a good capacity, and is made of durable materials.

Gathering these necessary ingredients and selecting the right equipment will ensure a successful butter-making process.

Advertisement

Equipment Required

You’ll need a reliable and efficient butter maker that’s easy to use and made of durable materials. When choosing the right equipment for making butter, here are four important factors to consider:

  1. Capacity: Look for a butter maker that can handle the amount of butter you plan to make. Consider the size of your household and how often you’ll be making butter.

  2. Design: Opt for a butter maker with a simple and user-friendly design. It should have clear instructions and be easy to assemble and clean.

  3. Material: Ensure that the butter maker is made of high-quality and food-grade materials. Stainless steel is a popular choice as it is durable and easy to sanitize.

  4. Features: Some butter makers come with additional features like built-in timers or temperature controls. Consider your preferences and needs when selecting a butter maker.

Preparation Steps Involved

After gathering the necessary ingredients and equipment, it’s time to start preparing the butter.

The first step in making butter is to ensure that the cream is at the right temperature. It should be around 55-60°F, as this allows for better separation of the butterfat from the buttermilk.

Next, pour the cream into the butter maker and secure the lid tightly. Turn on the butter maker and let it run for about 10-15 minutes. During this time, the cream will undergo churning and separate into butter and buttermilk.

Keep an eye on the process and occasionally check the consistency of the butter. If the butter is not forming properly, try adjusting the temperature or the speed of the butter maker. Troubleshooting tips can include adding a small amount of ice water to the cream or stopping the process and letting the cream rest for a few minutes before restarting.

Advertisement

Once the butter has formed, carefully drain the buttermilk and remove the butter from the butter maker. Finally, rinse the butter with cold water to remove any remaining buttermilk and shape it into a block or roll.

With the butter now prepared, it’s time to move on to the next step of preparing the cream for churning.

Preparing the Cream for Churning

When it comes to preparing the cream for churning butter, there are several key factors to consider: the temperature of the cream, the churning time, and the technique used.

The temperature of the cream plays a crucial role in achieving the desired consistency and texture of the butter.

Churning time and technique, on the other hand, determine how well the butter is formed and how smooth and creamy it will be.

Advertisement

Cream Temperature for Churning

To achieve the perfect consistency, make sure the cream is at the right temperature before churning. Here’s what you need to know:

  1. Cream Storage: Store the cream in the refrigerator for at least 24 hours before churning. This helps to stabilize the fat content and improve the texture of the butter.

  2. Churning Speed: Set your butter maker to a medium speed for optimal results. Churning too fast can lead to uneven texture and separation of the butterfat.

  3. Ideal Temperature: The cream should be around 50°F (10°C) when you begin churning. This ensures that the butter forms properly and doesn’t become too soft or too firm.

  4. Testing the Temperature: Use a kitchen thermometer to check the cream’s temperature. If it’s too cold, allow it to sit at room temperature for a while. If it’s too warm, place it in the refrigerator for a few minutes.

Churning Time and Technique

For optimal results, you’ll want to churn the cream at a medium speed and pay attention to the texture and consistency. The churning speed can greatly affect the outcome of your butter. If you churn too fast, the butter may not form properly and you’ll end up with a watery consistency. On the other hand, if you churn too slowly, it may take longer for the butter to separate from the buttermilk.

There are different churning techniques you can try to achieve the desired results. One technique is the continuous churn method, where you churn the cream steadily without stopping. This method is great for achieving a smooth and creamy butter. Another technique is the intermittent churn method, where you churn the cream in short bursts with breaks in between. This method can produce a slightly firmer butter with a more pronounced flavor.

Here is a table to summarize the different churning speeds and techniques:

Churning Speed Churning Technique
Slow Intermittent churn
Medium Continuous churn
Fast N/A

Experiment with different churning speeds and techniques to find the one that works best for you and your butter maker. Happy churning!

Advertisement

Using the Butter Maker: Step-by-Step Instructions

First, you’ll need to assemble the butter maker by following the manufacturer’s instructions. Once you have it set up, you can start making your own butter at home. Here’s a step-by-step guide to help you get started:

  1. Prepare the cream: Make sure the cream is at room temperature before pouring it into the butter maker. This will help the butter churn more easily and evenly.

  2. Start churning: Secure the lid of the butter maker and begin turning the handle in a steady, circular motion. The churning technique is crucial here – you want to create a consistent rhythm and speed to encourage the cream to separate into butter and buttermilk.

  3. Monitor the progress: As you churn, keep an eye on the butter maker. You will start to see the cream thicken and clump together. Continue churning until you have a solid mass of butter surrounded by liquid buttermilk.

  4. Drain and store: Once the butter has formed, carefully drain the buttermilk from the butter maker. Rinse the butter with cold water to remove any remaining buttermilk. Pat the butter dry and store it in an airtight container in the refrigerator.

Understanding the Churning Process

Once you’ve assembled and prepared the cream, you’ll want to focus on maintaining a consistent rhythm and speed while churning. Churning techniques are crucial in achieving the perfect butter consistency.

Firstly, make sure you have a sturdy churn with a well-fitting lid to prevent any leaks or spills.

Begin churning in a smooth, circular motion, using your whole arm to generate momentum. Keep the churn at a constant speed, neither too fast nor too slow, to ensure even distribution of fat globules.

If you notice the cream sticking to the sides and not forming butter, try increasing the speed slightly. On the other hand, if the cream is not thickening at all, decrease the speed to prevent over-churning.

Advertisement

Troubleshooting common butter making problems involves adjusting the churning technique until you achieve the desired result.

Separating the Butter From Buttermilk

After understanding the churning process, the next step is separating the butter from the buttermilk. This step is crucial in ensuring you have pure, creamy butter. Here’s how to do it:

  1. Stop the churning process: Once the butter starts to form solid clumps and separate from the liquid, turn off the butter maker.

  2. Drain the buttermilk: Place a cheesecloth-lined strainer over a bowl and carefully pour the contents of the butter maker into it. The buttermilk will drain through the cheesecloth, leaving the butter behind.

  3. Collect the butter: Gather the edges of the cheesecloth and gently squeeze out any remaining buttermilk. This will help remove excess moisture from the butter.

  4. Rinse and shape the butter: Rinse the butter under cold water to remove any remaining buttermilk. Then, shape it into a block or roll it into a log using parchment paper.

By following these steps, you’ll successfully separate the butter from the buttermilk, resulting in delicious homemade butter.

If you’re experiencing difficulties with the churning process or separating the butter, refer to the troubleshooting section for helpful tips.

Washing and Working the Butter

To work the butter properly, you’ll want to place it in a bowl of ice water and knead it with your hands until the water turns cloudy.

Advertisement

Working the butter is an important step in the butter-making process, as it helps remove any residual buttermilk and impurities. By kneading the butter in the ice water, you are essentially washing it, which helps improve its texture and taste.

If the water is not turning cloudy, it could mean that there is still buttermilk trapped in the butter. In this case, you may need to continue kneading for a bit longer to ensure that all the buttermilk is removed.

Troubleshooting tip: If the butter starts to soften too much during the process, you can always place it back in the refrigerator for a few minutes to firm it up again.

Once you have properly worked the butter, you can move on to the next step of adding flavor and seasonings (optional).

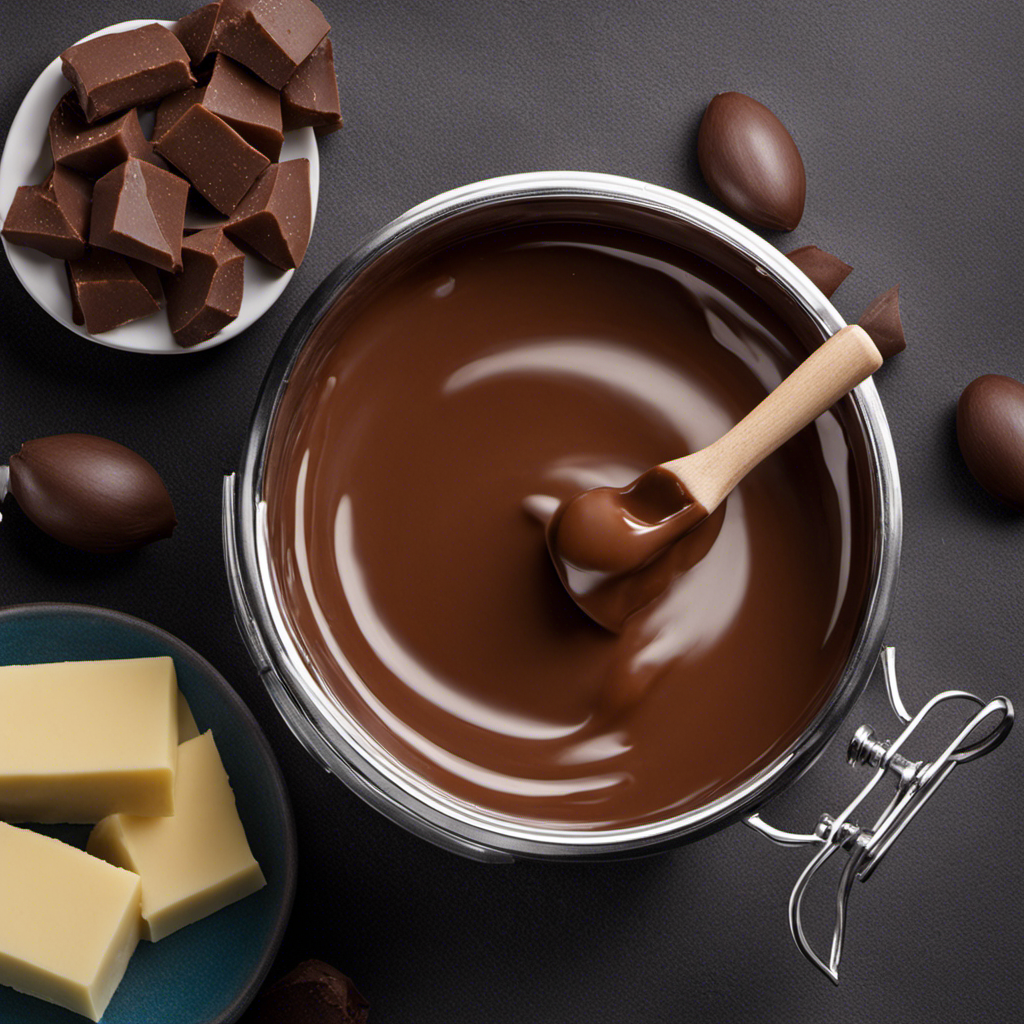
Adding Flavor and Seasonings (Optional

You can enhance the taste of your butter by incorporating various flavors and seasonings of your choice. Here are some flavored butter ideas to try:

Advertisement
  1. Garlic and Herb Butter: Mix minced garlic, chopped fresh herbs like parsley and thyme, salt, and pepper into softened butter. Spread it on bread or melt it over grilled steak for a burst of flavor.

  2. Honey Cinnamon Butter: Combine softened butter, honey, and ground cinnamon for a sweet and spicy spread. It’s perfect on pancakes, toast, or even baked sweet potatoes.

  3. Lemon Dill Butter: Zest a lemon and mix it with finely chopped dill, salt, and pepper in softened butter. This tangy and refreshing combination is great on fish or steamed vegetables.

  4. Chili Lime Butter: Add a kick to your butter by mixing in lime zest, lime juice, chili powder, and a pinch of salt. It’s fantastic on grilled corn or roasted chicken.

The benefits of adding seasonings to your butter are endless. It adds depth and complexity to the flavor, making your dishes more exciting. Plus, it allows you to customize your butter to match your personal preferences.

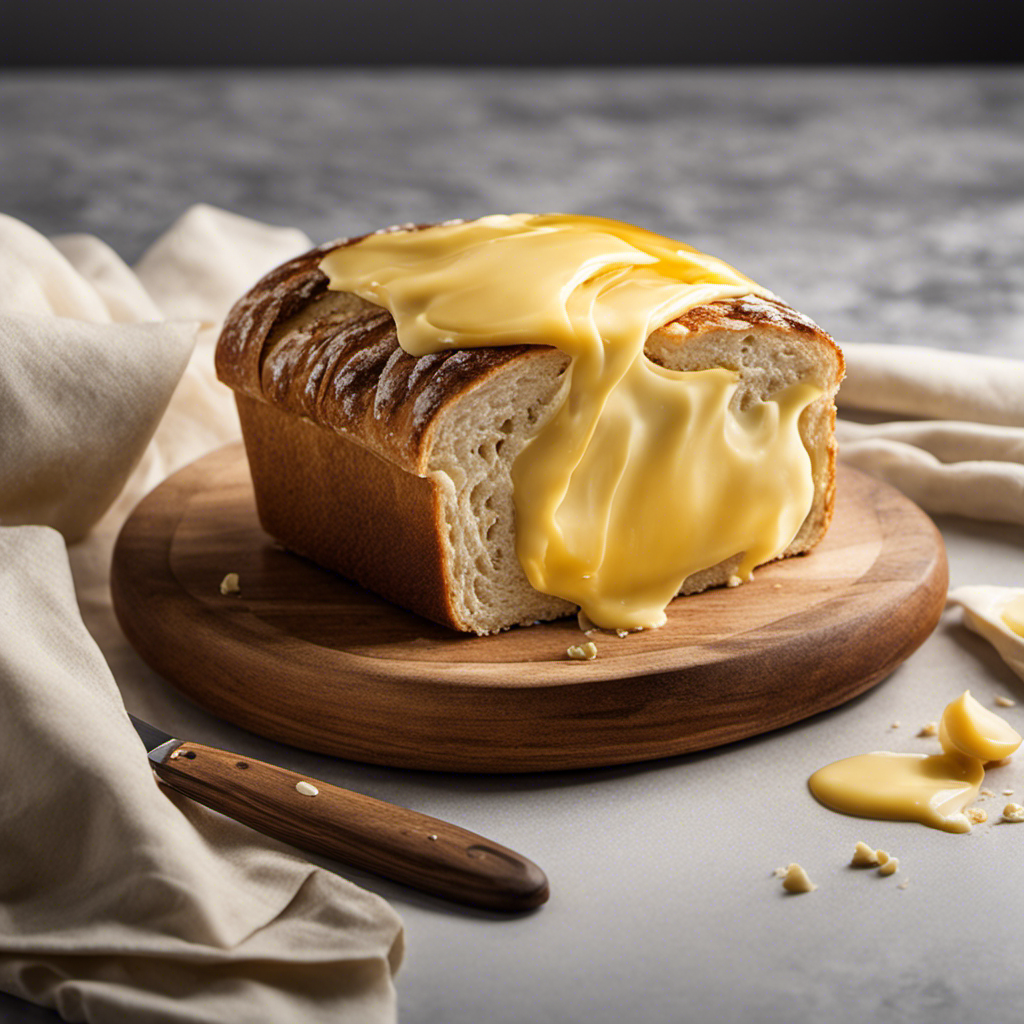
Storing and Enjoying Your Homemade Butter

When storing your homemade butter, be sure to keep it in an airtight container in the refrigerator to maintain its freshness. This will help prevent the butter from absorbing any unwanted odors or flavors from other foods in the fridge. Additionally, storing butter in the fridge helps to extend its shelf life.

To ensure the best storing techniques, you can also consider wrapping the butter in wax paper or parchment paper before placing it in the container. This will provide an extra layer of protection and help maintain its shape.

If you have made different variations of butter, such as herb-infused or flavored butter, it’s important to label the containers accordingly. This will help you easily identify the different flavors and prevent any mix-ups.

Conclusion

In conclusion, making butter using a butter maker is not only a fun and rewarding experience, but it also allows you to create a delicious and personalized product right in your own kitchen.

Advertisement

With the right butter maker and a few simple steps, you can transform cream into creamy and flavorful butter.

Remember, Rome wasn’t built in a day, and neither is homemade butter. So, take the time to gather the ingredients, follow the instructions carefully, and soon you’ll be enjoying the fruits of your labor.

Happy churning!

Continue Reading
Advertisement

Recipes & Culinary Uses

Creamy Delight: Best Butter Pecan Ice Cream Recipe for Summer!

Yearning for a creamy summer treat that will leave you craving more?

Published

on

By

butter pecan ice cream

Savor a delicious summer treat with our Butter Pecan Ice Cream recipe. Mix butter, brown sugar, cream, and pecans for a creamy delight. Melt butter, cook pecans, whisk eggs, and blend for a rich flavor. Add pecans, cream, and vanilla, then freeze to perfection. Master this easy-to-follow recipe for a tasty dessert to beat the heat.

Key Takeaways

  • Rich and creamy blend of butter, brown sugar, and heavy cream
  • Toasted pecans for a nutty crunch and flavor
  • Easy-to-follow steps for homemade ice cream perfection
  • Customization options with variations like bourbon or chocolate
  • Perfect summer treat with a decadent, refreshing taste

Recipe Ingredients for Butter Pecan Ice Cream

To create a delectable batch of butter pecan ice cream, gather the essential ingredients listed in the recipe.

You'll need:

  • Butter
  • Brown sugar
  • Heavy cream
  • Pecans

These ingredients combine to bring out the rich and nutty flavors of this classic dessert.

The brown sugar adds a caramel-like sweetness, while the heavy cream contributes to a creamy texture that's essential for a decadent treat.

Pecans, when toasted in butter, provide a delightful crunch and enhance the overall flavor profile of the ice cream.

Cooking Instructions for Homemade Ice Cream

making ice cream at home

Start by melting butter in a skillet to infuse the pecans with a rich, nutty flavor for your homemade butter pecan ice cream.

Here's a quick guide to help you make this creamy delight:

Advertisement
  • Melt butter and cook pecans for flavor.
  • Whisk eggs and combine with half-and-half and brown sugar for a creamy base.
  • Cook until thickened, then mix with eggs in a bowl.
  • Add cream, pecans, and vanilla extract.
  • Freeze the mixture in an ice cream maker.

Following these steps will guarantee your homemade butter pecan ice cream turns out rich and delicious.

Remember to carefully adhere to the manufacturer's instructions for your ice cream maker to achieve the perfect consistency.

Enjoy the process of creating this delightful treat that will surely be a hit during the summer months.

Ice Cream Preparation Steps

ice cream recipe instructions

Mix half and half with brown sugar over medium heat in a large bowl to prepare the ice cream base.

Next, whisk beaten eggs and temper them with the warm milk mixture to create a smooth custard.

Once done, thicken the mixture on low heat, then cool it over an ice bath to achieve ideal texture.

After that, stir in heavy cream, vanilla extract, maple extract, and a pinch of salt for rich flavor.

Advertisement

Remember to refrigerate the mixture for 1 1/2 – 2 hours before churning it into creamy butter pecan ice cream.

This process ensures that the flavors meld together beautifully and the ice cream attains the perfect consistency for scooping and savoring.

Nutritional Information and Tips

healthy eating guidance provided

Considering the rich and creamy nature of homemade butter pecan ice cream, it's important to be mindful of its nutritional content and serving size. When indulging in this delectable dessert, remember these essential tips:

  • Portion Control: Enjoy in moderation to savor the flavors without overindulging.
  • Brown Sugar Sweetness: Opt for a moderate amount of brown sugar to balance sweetness without overwhelming the palate.
  • Room Temperature Ingredients: Confirm ingredients like butter and heavy cream are at room temperature for a smoother texture.
  • Nutritional Awareness: Be mindful that homemade butter pecan ice cream can vary in nutritional content, so adjust ingredients accordingly.
  • Consultation: Seek advice from a nutritionist or healthcare provider for personalized guidance on incorporating this treat into a balanced diet.

Homemade Butter Pecan Ice Cream Variations

delicious homemade ice cream

Explore creative twists on traditional butter pecan ice cream by incorporating different nuts, spirits, sauces, chocolates, and dairy-free alternatives.

For a unique flavor, try substituting pecans with walnuts or almonds in the full recipe. Toast the nuts in a separate bowl until browned and fragrant, then chop them finely enough to coat in the ice cream mixture.

To add a boozy kick, mix in a splash of bourbon or rum to the base as you churn the ice cream. For an extra indulgent touch, swirl in caramel sauce or fudge ripple throughout the mixture.

Incorporate chunks of chocolate or chocolate-covered nuts for a delightful contrast in texture, giving each bite a sweet surprise.

Advertisement

If you prefer a lighter, dairy-free option, consider using coconut milk or almond milk as a substitute for traditional dairy products. These alternatives provide a creamy base while catering to plant-based diets.

Experiment with these variations to create a personalized butter pecan ice cream that suits your taste preferences.

Frequently Asked Questions

What Is the Secret to Making Ice Cream Very Creamy?

To make ice cream very creamy, you use a rich base of ingredients like heavy cream, eggs, and sugar. Chilling the base before churning is crucial for a smoother texture. Adding vanilla extract enhances creaminess, and slow churning prevents a dense outcome.

What Flavor Is the Ice Cream in Butter Pecan?

The ice cream in butter pecan is a delightful blend of buttery richness, vanilla sweetness, and maple undertones, perfectly paired with toasted pecans for a nutty crunch. This flavor combination creates a harmonious and indulgent treat.

What's the Difference Between Butter Pecan Ice Cream and Praline Pecan Ice Cream?

In butter pecan ice cream, you'll savor the buttery richness of pecans blended with a creamy base. On the other hand, praline pecan ice cream highlights caramelized sweetness with a swirl of praline sauce for a delightful flavor contrast.

Advertisement

What Age Group Eats Butter Pecan Ice Cream?

You'll find that adults and older individuals, typically in the 30-60 age group, enjoy butter pecan ice cream. It's a favorite among those with a more refined palate, drawn to its rich and nutty flavor.

Conclusion

So there you have it, folks! Whip up this buttery, nutty delight for a taste of summer in every scoop.

Don't cry over spilled milk – grab a cone and enjoy this creamy treat that's sure to satisfy your sweet tooth.

Get churning and indulge in the best butter pecan ice cream you've ever tasted!

Advertisement
Continue Reading

Recipes & Culinary Uses

Festive Favorites: Best Peanut Butter Blossoms Recipe for Holidays!

Unleash the ultimate holiday baking magic with the best Peanut Butter Blossoms recipe – an irresistible treat that will elevate your festive celebrations!

Published

on

By

holiday baking with flair

Elevate your holiday baking with the ultimate Peanut Butter Blossoms recipe. Cream together peanut butter, butter, sugars, and salt, then add egg and vanilla. Roll dough into balls, coat in brown sugar, bake until golden, then press a Hershey's kiss on top. Adjust baking time as needed. Explore ingredient swaps for a personalized touch. Enjoy with hot cocoa or pair with savory dishes. For more tips, ideas, and customization options, the recipe holds more festive surprises.

Key Takeaways

  • Cream together peanut butter, butter, sugars for rich flavor.
  • Bake at 375°F for 8-10 minutes for soft, chewy cookies.
  • Customize with ingredient swaps like almond butter or maple syrup.
  • Pair with savory dishes or hot cocoa for holiday enjoyment.
  • Press Hershey kisses onto warm cookies for a classic finish.

Ingredients for Peanut Butter Blossoms

For the classic Peanut Butter Blossoms recipe, gather peanut butter, butter, sugar, an egg, and Hershey's kisses as your essential ingredients.

Peanut butter is the star, offering a rich flavor that blends perfectly with the sweetness of the cookies.

Butter plays a pivotal role by adding moisture and richness to the dough, ensuring a soft and chewy texture.

The sugar not only sweetens the cookies but also contributes to their festive appeal, making them a perfect treat for any occasion.

Finally, the Hershey's kisses on top provide a delightful chocolatey finish that elevates these cookies to a whole new level of deliciousness.

Advertisement

Together, these ingredients create a harmonious blend of flavors and textures that make Peanut Butter Blossoms a beloved classic for holiday baking or any time you crave a sweet and satisfying treat.

Recipe Steps for Peanut Butter Blossoms

bake peanut butter cookies

To make Peanut Butter Blossoms, start by creaming together peanut butter, butter, sugars, and salt until light and fluffy.

Next, add in the egg and vanilla extract, making sure to mix well to combine all the ingredients thoroughly.

Then, gradually incorporate the dry ingredients into the wet mixture until a smooth dough forms.

Once the dough is ready, roll it into balls and coat each ball generously in brown sugar.

Place the sugar-coated dough balls on a baking sheet, making sure to leave enough space between them for spreading during baking.

Advertisement

Bake the cookies in a preheated oven until they turn a beautiful golden brown.

As soon as the cookies are out of the oven, press a Hershey's kiss into the center of each cookie gently.

The heat from the freshly baked cookies will melt the chocolate just enough to adhere it to the cookie.

These Peanut Butter Blossoms are a delightful treat perfect for Christmas celebrations!

Pro Tips for Making Peanut Butter Blossoms

baking perfect peanut blossoms

To enhance your peanut butter blossom baking experience, consider adjusting the baking time based on your oven's performance for best results.

Additionally, explore ingredient substitutions to cater to dietary preferences or allergies without compromising the flavor or texture of the cookies.

Advertisement

These pro tips can help you customize your peanut butter blossoms while ensuring delicious outcomes.

Baking Time Recommendations

Achieving the ideal texture for your peanut butter blossoms involves baking them at 375°F for 8-10 minutes. This baking duration guarantees that the cookies have a soft and chewy consistency while allowing the Hershey kisses on top to be softened but not completely melted.

Once out of the oven, remember to press the Hershey kisses onto the cookies immediately to secure them in place for that classic appearance.

For the best outcomes, chill the cookie dough for about 30 minutes before baking. This step helps the cookies maintain their shape and prevents excessive spreading during baking, ensuring your peanut butter blossom cookies are perfectly formed and ready to impress during your holiday baking.

Shortening or extending the baking time can alter the texture of the cookies. A quick bake of 6-8 minutes produces softer and chewier cookies, while longer baking times yield a slightly crispier consistency. Stick to the recommended 8-10 minutes for the best soft and chewy peanut butter blossoms.

Advertisement

Ingredient Substitutions

Consider incorporating different ingredients to elevate the flavor and nutritional profile of your peanut butter blossoms. For a healthier option, swap out shortening with unsalted butter to achieve a unique texture and taste in your cookies.

Try using natural peanut butter instead of creamy to add a wholesome twist to the classic recipe. If you're looking to reduce the glycemic impact, substitute brown sugar with coconut sugar in your baking. For a natural sweetener alternative, replace regular granulated sugar with maple syrup in the cookie dough mixture.

Additionally, for a distinct flavor experience, experiment with almond butter as a substitute for peanut butter in your blossoms. These ingredient substitutions can bring a new dimension to your peanut butter blossoms, making them not only delicious but also tailored to your dietary preferences.

Upgrade your baking game this holiday season with these creative twists on a beloved recipe!

Serving Suggestions for Peanut Butter Blossoms

peanut butter cookie recipe

Enhance the enjoyment of your peanut butter blossoms by pairing them with savory dishes like lasagna tortellini soup for a satisfying meal. These classic cookies also complement family-friendly dinners such as easy ground beef shepherd's pie and creamy broccoli cheddar soup, making for a delightful combination. The holiday season calls for cozy treats, and the sweet nuttiness of peanut butter blossoms pairs perfectly with a warm cup of hot cocoa. Whether you're participating in a cookie exchange or looking for a festive touch to your holiday dessert spread, consider rolling the cookies in red, green, and white sugar sprinkles to add a pop of color and fun.

Serving Suggestions Pairing Ideas
Lasagna Tortellini Soup Comforting and hearty meal alongside the cookies
Easy Ground Beef Shepherd's Pie Delicious combination for a family dinner
Creamy Broccoli Cheddar Soup Perfect accompaniment to the nutty cookie flavors

12 Days of Christmas Cookies Recipes

baking traditions for the holidays

Indulge in a variety of delightful Christmas cookie recipes each day during the holiday season. One standout choice is the classic Peanut Butter Blossoms. These holiday cookies feature a peanut butter base topped with a Hershey's kiss, making them a beloved treat for cookie exchanges and festive gatherings.

The process of making these cookies is simple yet rewarding. Start by rolling the dough balls in sugar before baking to add a sweet crunch to each bite. The combination of rich peanut butter flavor and the chocolatey goodness of the Hershey's kiss creates a perfect balance of sweetness.

Advertisement

When enjoying these Christmas cookies, consider pairing them with a glass of milk for a classic and satisfying treat.

Whether you're baking them for your family, a cookie exchange, or a holiday party, Peanut Butter Blossoms are sure to be a hit. Make each day of the holiday season a little sweeter with these delicious cookies.

User Engagement Features

user interaction enhancements

Let's talk about how user interaction features and personalization options enhance your experience with the Peanut Butter Blossoms recipe.

You can engage with others by leaving comments and sharing your results, creating a sense of community around this holiday treat.

Personalization options like name and email entry fields help tailor the experience to your preferences, making it more engaging and enjoyable.

User Interaction Features

Utilizing user engagement features on the website allows for increased participation and feedback from visitors. The comment section enables users to interact with each other and provide valuable feedback on the Peanut Butter Blossoms recipe or share their experiences with Hershey's kisses. By incorporating a reply option, users can engage in conversations, fostering a sense of community around baking these delightful peanut butter cookies.

Advertisement

Moreover, the inclusion of name and email fields not only allows for personalization but also facilitates communication between the website and its visitors. This data storage feature guarantees that users can conveniently access their information for future visits, enhancing their overall user experience.

These user engagement features play an essential role in creating an interactive platform where users can engage, provide feedback, and communicate effectively. Such interaction not only enriches the user experience but also encourages visitors to actively participate in the community surrounding the Peanut Butter Blossoms recipe.

Personalization Options

Enhance your website's user engagement by incorporating personalized options such as commenting, replying, and sharing feedback on the Peanut Butter Blossoms recipe. This level of user interaction not only fosters a sense of community building but also encourages customization and feedback. By allowing users to share their thoughts, results, and experiences with the festive favorites, you create a more engaging and interactive user experience. Additionally, providing users with the option to save their data for future visits and encouraging them to tag @preppykitchen and use #preppykitchen when trying the recipe further enhances their engagement.

Personalization Options Description Benefits
Commenting Users can leave comments on the Peanut Butter Blossoms recipe, sharing their thoughts and experiences. Fosters community building and user engagement.
Replying Users can reply to comments and engage in discussions with other users about the recipe. Encourages active participation and interaction.
Feedback Sharing Users can share feedback on the recipe, providing valuable insights for improvement. Enhances user experience and customization.

Additional Information

clarifying specific details provided

You may find it interesting to know more about the history of the Peanut Butter Blossoms recipe and its cultural significance during the holidays.

  • The Peanut Butter Blossoms recipe's popularity is backed by IRI MULO data, making it a sought-after choice for holiday baking.
  • Copyright for this beloved recipe belongs to The J.M. Smucker Company, a reputable name in the food industry known for quality products.
  • These delightful cookies aren't only perfect for serving at holiday parties but also make excellent gifts due to their festive appeal.

Frequently Asked Questions

Why Are My Peanut Butter Blossoms Dry?

If your peanut butter blossoms are dry, it could be due to using too much flour, overbaking, using natural peanut butter that requires stirring, or not enough butter/shortening. Guarantee precise measurements and follow the recipe closely to maintain moisture.

Why Did My Peanut Butter Blossoms Go Flat?

When making peanut butter blossoms, going flat happens due to overmixing, too much flour, insufficient chilling, or low oven temperature. Remember to avoid these pitfalls. Preheat the oven properly and follow the recipe for perfect blossoms!

What Is America's Favorite Christmas Cookie?

America's favorite Christmas cookie is Peanut Butter Blossoms. Loved for their peanut butter-chocolate combo and nostalgic Hershey's Kiss center, these easy-to-make treats are a holiday staple at parties and gatherings. They're a must-have during the festive season.

Advertisement

What Is Baskin Robbins Peanut Butter Blossom?

You asked about Baskin Robbins Peanut Butter Blossom. It's a delectable seasonal ice cream flavor featuring creamy peanut butter ice cream with a ribbon of more peanut butter and chocolate cookie pieces. Indulge in this festive treat!

Conclusion

Indulge in the warm, gooey goodness of these peanut butter blossoms this holiday season. With the perfect blend of creamy peanut butter and rich chocolate, these cookies are sure to bring joy to your festivities.

Picture yourself surrounded by loved ones, sharing laughter and memories as you enjoy these delicious treats. Let the aroma of freshly baked cookies fill your home and create a cozy, festive atmosphere.

Happy baking and happy holidays!

Advertisement
Continue Reading

Recipes & Culinary Uses

Bite-Sized Treats: Best Peanut Butter Ball Recipe You'll Love!

Adore these heavenly peanut butter balls with a delectable mix of smooth peanut butter, powdered sugar, and vanilla—perfect for indulging in bite-sized bliss!

Published

on

By

delicious peanut butter balls

You'll adore these easy and heavenly peanut butter balls. Mix smooth peanut butter, powdered sugar, and vanilla extract for a delectable dough. Roll into small balls and chill. Dip in melted chocolate, then refrigerate to set. Enhance the flavor with rum extract, nuts, or crushed pretzels. Get creative with colorful sprinkles and different chocolate coatings. Use quality chocolate coating and adjust mix consistency. Store them in the fridge or freezer. Enjoy these mouthwatering treats alone or at gatherings. More tips and delightful variations await!

Key Takeaways

  • Creamy peanut butter, powdered sugar, and vanilla create a smooth dough.
  • Incorporate nuts, rum extract, or pretzels for flavor and texture variety.
  • Use quality chocolate coating like candy melts for best results.
  • Chill peanut butter balls before dipping for easier handling.
  • Store in the fridge or freezer for convenient snacking and serving.

Ingredients and Preparation

To create irresistible peanut butter balls, gather creamy peanut butter, powdered sugar, and vanilla extract as your key ingredients.

Begin by mixing the peanut butter, butter, sugar, and vanilla until you have a smooth dough. Roll this mixture into small balls and chill them before dipping them in melted chocolate.

The type of chocolate you use, such as dark or milk chocolate, will enhance the flavor of your peanut butter balls. After dipping, make sure to refrigerate the balls until the chocolate sets for a perfect finish.

This process guarantees that each bite-sized treat isn't only visually appealing but also bursting with delicious peanut butter and chocolate flavors.

Variations and Enhancements

creative modifications and improvements

You can elevate the flavor of your peanut butter balls by incorporating unique ingredients like chopped nuts or rum extract.

Experiment with different chocolate coatings such as white almond bark or dark chocolate candy melts for a varied taste experience.

Advertisement

Get creative by adding finishing touches like colorful sprinkles to make your peanut butter balls visually appealing.

Flavorful Ingredient Additions

Enhance the flavor of your peanut butter balls by incorporating unique ingredient variations and enhancements. While the classic combination of peanut butter, powdered sugar, and butter creates a delicious dough for your treats, you can take it up a notch by adding flavorful ingredient additions.

Consider mixing in crushed pretzels for a salty crunch that complements the sweetness of the peanut butter. Chopped nuts like almonds or pecans can also add a delightful texture and nutty taste to your chocolate-covered peanut butter balls.

For a burst of fruity flavor, try incorporating dried cranberries or raisins into the dough. These additions not only provide a contrast in texture but also introduce a hint of sweetness that pairs well with the creamy peanut butter.

Another option is to include a sprinkle of cinnamon or a dash of vanilla extract to elevate the overall taste profile of your peanut butter balls. Experiment with these flavorful ingredient additions to create a unique and delectable twist on the classic treat.

Advertisement

Chocolate Coating Options

Experiment with different types of chocolate coatings – dark, white, or milk chocolate – to suit your preferences and elevate the flavor of your peanut butter balls.

When considering the chocolate coating for your crunchy peanut butter treats, here are some options to enhance your culinary creation:

  1. Choose Candy Melts or Almond Bark: Opt for candy melts or almond bark for a smooth and firm chocolate coating that sets well on your peanut butter balls.
  2. Avoid Chocolate Chips: Steer clear of using chocolate chips for coating, as they may contain stabilizers that hinder smooth melting, affecting the overall texture.
  3. Add Colored Sprinkles: For a festive touch, sprinkle colored sprinkles on top of the chocolate coating before it sets to add a pop of color and extra crunch to your peanut butter balls.

Experimenting with different chocolate coatings and techniques can take your peanut butter balls to the next level, ensuring a delightful and indulgent treat for any occasion.

Creative Finishing Touches

To elevate the flavor profile of your peanut butter balls, consider incorporating creative finishing touches through various enhancements and unique variations.

You can enhance the texture by adding chopped nuts or crispy rice cereal to the peanut butter mixture, providing a delightful crunch with every bite.

Experiment with different flavors by using almond extract or rum extract instead of vanilla for a twist on the traditional taste.

Advertisement

For a festive touch, roll the balls in crushed graham crackers, sprinkles, or a sprinkle of sea salt to add a pop of flavor.

Drizzle white chocolate over the dark, semi-sweet, or milk chocolate coating for a visually appealing contrast that will impress your guests.

If you enjoy a crunchy element, try coating the balls in crushed pretzels or toasted coconut before the chocolate sets.

These creative enhancements will take your peanut butter balls to the next level, making them a standout treat at any gathering.

Tools and Tips

crafting with precision

Consider using a 1 tablespoon cookie scoop for consistent sizing when preparing your peanut butter balls. This tool will help guarantee all your treats are uniform in size, making for a neat presentation and even cooking.

Here are some additional tools and tips to enhance your peanut butter ball-making experience:

Advertisement
  1. Invest in Quality Chocolate Coating: Opt for candy melts or almond bark for a smooth and firm chocolate coating on your peanut butter balls. These coatings melt easily and provide a professional finish to your treats.
  2. Adjust Peanut Butter Mixture Consistency: If your peanut butter mixture is too sticky or too dry, adjust the consistency by adding more peanut butter or powdered sugar. This will help you achieve the perfect texture for shaping your balls.
  3. Refrigerate Before Dipping: Prior to dipping your peanut butter balls in chocolate, chill them in the refrigerator. This step will make the balls firmer, making them easier to handle and coat without falling apart.

Storage and Serving Suggestions

great suggestion for storage

For best freshness and presentation of your peanut butter balls, follow these storage and serving suggestions.

To keep your peanut butter balls tasting delicious, store them properly. You can store them in an airtight container in the fridge for up to 1 week or in the freezer for up to 2 months. When freezing, remember to thaw the frozen peanut butter balls before serving by bringing them to room temperature. To prevent them from sticking together, separate the layers of peanut butter balls with wax paper.

Here is a helpful table summarizing the storage and serving suggestions:

Storage Serving Frozen
Airtight container Display on festive tray Thaw before serving
Fridge – 1 week Pair with hot cocoa Bring to room temp
Freezer – 2 months Enjoy at holiday gatherings
Separate with wax paper

Additional Peanut Butter Desserts

peanut butter dessert recipes

Explore a variety of delectable peanut butter desserts to satisfy your sweet cravings.

  1. Peanut Butter Blossom Cookies: Indulge in the classic combination of peanut butter cookies topped with a chocolate kiss for a delightful treat.
  2. Peanut Butter Chocolate Mug Cake: Whip up this easy-to-make single-serving dessert that combines the rich flavors of peanut butter and chocolate in a mug for a quick fix.
  3. Peanut Butter Overload Cookies: For those who can't get enough peanut butter, these cookies are loaded with peanut butter chips, chocolate chips, and chopped peanuts for an explosion of flavor in every bite.

These additional peanut butter desserts offer a diverse selection to cater to your cravings.

Whether you're in the mood for a classic treat like Peanut Butter Blossom Cookies, a quick fix with Peanut Butter Chocolate Mug Cake, or a flavor-packed experience with Peanut Butter Overload Cookies, there's something for every peanut butter lover.

Enjoy these easy-to-make delights whenever you need a sweet pick-me-up!

Recipe Instructions and Nutritional Information

cooking guidance and facts

To create these delectable Peanut Butter Balls, start by blending peanut butter, butter, sugar, and vanilla to form a dough. Roll the mixture into small balls and place them on a baking sheet lined with parchment paper. Chill the peanut butter balls in the refrigerator for about 30 minutes until firm.

Once chilled, melt chocolate in a heatproof bowl over simmering water or in the microwave. Dip each chilled peanut butter ball into the melted chocolate, ensuring they're evenly coated. Place the coated balls back on the parchment paper and let the chocolate set.

Advertisement

Each serving of these delightful treats contains approximately 114 calories.

Store the finished peanut butter balls in the fridge for up to 2 weeks or freeze them for up to 3 months.

Enjoy these decadent bite-sized snacks whenever you crave a sweet and nutty indulgence.

Frequently Asked Questions

Can I Use Chunky Peanut Butter Instead of Creamy for This Recipe?

Yes, you can use chunky peanut butter instead of creamy for this recipe. It will add a delightful texture and extra crunch to your peanut butter balls. Enjoy experimenting with different variations!

How Long Do Chocolate Covered Peanut Butter Balls Stay Fresh?

Like a sweet memory, chocolate-covered peanut butter balls stay fresh for up to two weeks when stored in an airtight container in the fridge. Indulge in these delectable treats within that time frame for best taste.

Advertisement

Can I Freeze the Peanut Butter Balls for Later Enjoyment?

Yes, you can freeze the peanut butter balls for later enjoyment. Simply place them in an airtight container or freezer bag. When ready to indulge, let them thaw in the fridge for a few hours.

What Type of Chocolate Is Best for Coating the Peanut Butter Balls?

For coating the peanut butter balls, semi-sweet or milk chocolate works best. They provide a delicious contrast to the creamy peanut butter filling. Simply melt the chocolate, dip the balls, and enjoy the sweet treat!

Can I Add Chopped Nuts or Sprinkles to the Peanut Butter Balls for Extra Flavor?

You can definitely add chopped nuts or sprinkles to the peanut butter balls for extra flavor. It's a great way to customize your treats and add a delightful crunch or colorful touch to each bite.

Conclusion

Indulge in these irresistible peanut butter balls that are sure to satisfy your sweet tooth cravings.

With just a few simple ingredients and easy-to-follow instructions, you can enjoy these bite-sized treats in no time.

Advertisement

So go ahead, treat yourself to a little taste of heaven and experience the perfect combination of creamy peanut butter and rich chocolate.

You won't be able to resist coming back for more!

Continue Reading

Trending