Connect with us

Recipes & Culinary Uses

Elevate Your Butter Noodles: Make Them Better

Published

on

An image showcasing a steaming plate of buttery noodles, artfully garnished with vibrant green herbs, crushed red pepper flakes, and a sprinkle of grated Parmesan cheese, inviting readers to discover inventive ways to elevate this classic dish

As a self-proclaimed pasta aficionado, I’ve always believed that butter noodles have the potential to be more than just a simple, ordinary dish. They can be transformed into a culinary masterpiece that will have your taste buds singing with delight.

In this article, I will share with you my tried and true methods for taking butter noodles to the next level. Get ready to elevate your pasta game and indulge in a bowl of heavenly, flavor-packed goodness.

Key Takeaways

  • Consider using smooth and long pasta, like spaghetti or fettuccine, for butter noodles to allow the butter to coat the noodles evenly and capture the butter sauce.
  • Experiment with alternative butter options like flavored butters or ghee to add complexity to your butter noodles.
  • Elevate the butter flavor by adding herbs to the butter or toasting the butter for a rich, nutty flavor.
  • Use flavored butter, such as garlic or lemon butter, to enhance the taste of your butter noodles and create a gourmet experience.

Choosing the Right Noodle

When choosing the right noodle for butter noodles, it’s important to consider the texture and shape.

Personally, I believe that a smooth and long pasta, like spaghetti or fettuccine, works best for butter noodles. The smooth texture allows the butter to coat the noodles evenly, creating a luxurious and velvety mouthfeel.

Advertisement

The long shape also helps to capture and hold the butter sauce, ensuring that every bite is bursting with flavor.

Of course, there are alternative butter options to consider as well. While traditional butter is always a classic choice, you can also experiment with flavored butters or even try using ghee for a nuttier taste.

With the right pasta and butter combination, you can truly elevate the buttery flavor in your noodles.

Elevating the Butter Flavor

When it comes to elevating the flavor of butter, there are a few key techniques I swear by.

First, adding herbs to the butter can infuse it with a burst of fresh, aromatic flavors that will take your dish to the next level. I love using herbs like rosemary, thyme, or basil, depending on the dish.

Advertisement

Second, toasting the butter before using it adds a rich, nutty flavor that enhances the overall taste of the dish.

Lastly, using flavored butter, like garlic or lemon butter, can instantly add a punch of flavor and complexity to any recipe. Trust me, these simple tricks will make your buttery dishes stand out and leave everyone craving for more.

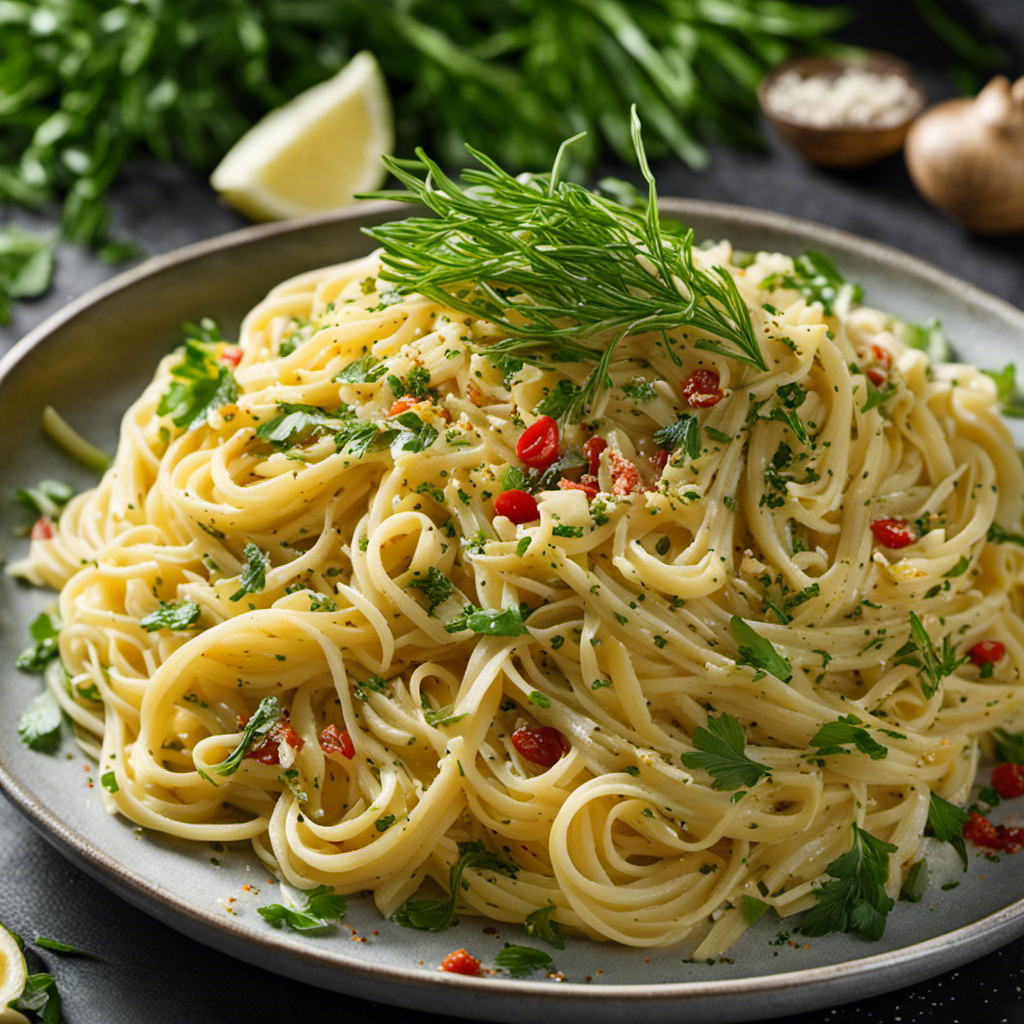
Adding Herbs for Flavor

Adding herbs to your butter noodles can enhance their flavor and make them more delicious. When it comes to herb pairing, there are a few combinations that work exceptionally well.

One of my personal favorites is basil and parsley. These two herbs complement each other perfectly, adding a fresh and aromatic touch to the buttery noodles. To infuse the butter with herbs, simply melt it in a pan and add finely chopped basil and parsley. Allow the herbs to simmer in the butter for a few minutes, allowing their flavors to mingle and infuse the butter.

The result is a rich, herb-infused butter that coats the noodles beautifully. The combination of the buttery richness and the fragrant herbs creates a burst of flavor with every bite, taking your simple butter noodles to the next level.

Advertisement

Toasting the Butter

To enhance the flavor of your noodles, try toasting the butter before adding the herbs. Toasting butter is a simple technique that can elevate the taste of your dish to a whole new level. Here are the benefits and techniques of toasting butter:

  • Adds a rich, nutty flavor: Toasting butter gives it a deeper, more complex taste that adds a delightful nuttiness to your butter noodles.

  • Enhances aroma: The process of toasting butter releases aromatic compounds, filling your kitchen with a mouthwatering scent.

  • Improves texture: Toasting butter creates a slightly crispy texture, adding a pleasant crunch to your noodles.

To toast butter, simply melt it in a pan over medium heat and cook until it turns golden brown, being careful not to burn it. The nutty aroma and flavor will instantly take your butter noodles to the next level.

Now, let’s explore how to use flavored butter to enhance your dish even further.

Using Flavored Butter

Using flavored butter is a creative way to infuse your dish with unique and delicious flavors. It adds that extra burst of taste that elevates a simple butter noodles dish into a gourmet experience. There are various flavored butter alternatives that you can use to enhance your butter noodles recipes. From herb-infused butters like garlic and rosemary to savory options like truffle and bacon, the possibilities are endless. These flavored butters not only bring a depth of flavor, but also add a beautiful aroma to your dish. To give you an idea of the flavor combinations you can create, here is a table showcasing three mouthwatering butter noodle recipes:

Flavored Butter Alternative Butter Noodle Recipe
Garlic and Herb Butter Lemon Garlic Butter Noodles
Truffle Butter Truffle Parmesan Butter Noodles
Bacon Butter Creamy Bacon Alfredo Noodles

With these creative butter noodle recipes, you can easily impress your family and friends with a simple yet flavorful dish. So go ahead and experiment with different flavored butters to take your butter noodles to the next level of deliciousness.

Advertisement

Adding a Touch of Herbs

Sprinkle some dried herbs to give your butter noodles a burst of flavor. Herbs are a great way to elevate the taste of a simple dish like butter noodles. Whether you prefer fresh or dried herbs, they can add a punch of freshness and aroma to your pasta.

Here are three herb pairings that work wonders with specific types of noodles:

  • Basil: This classic herb pairs wonderfully with spaghetti or linguine. Its sweet and slightly peppery flavor adds a touch of sophistication to your butter noodles.

  • Rosemary: This robust herb is perfect for pairing with thicker noodles like fettuccine or pappardelle. Its pine-like aroma and earthy flavor create a hearty and comforting dish.

  • Parsley: For a light and refreshing twist, sprinkle some parsley on angel hair or capellini noodles. Its mild and slightly tangy taste adds a pop of color and freshness to your buttery creation.

Incorporating Savory Ingredients

When it comes to elevating a dish, adding the right spices can make all the difference. A dash of cayenne pepper or a sprinkle of paprika can bring a burst of flavor that takes a meal from ordinary to extraordinary.

And let’s not forget about cheese – its creamy texture and rich taste can turn a simple dish into a decadent delight.

Finally, herbs are like a breath of fresh air in a recipe, adding a vibrant and fragrant touch that invigorates the senses.

Advertisement

Spices for Added Flavor

To enhance the taste of your butter noodles, try adding a pinch of garlic powder or a dash of black pepper. These simple spices can take your plain noodles to a whole new level of flavor.

But why stop there? Spices are a creative way to elevate any dish, including butter noodles. Here are three seasoning blends that you can try to add a burst of flavor to your noodles:

  • Italian seasoning: This blend of herbs like oregano, basil, and thyme adds a savory and aromatic touch to your butter noodles.

  • Cajun seasoning: If you like a bit of heat, sprinkle some Cajun seasoning on your noodles. The blend of spices like paprika, cayenne pepper, and garlic powder will give your dish a spicy kick.

  • Lemon pepper seasoning: For a zesty and tangy twist, try adding some lemon pepper seasoning to your butter noodles. The combination of citrusy lemon and spicy black pepper will tantalize your taste buds.

Experimenting with different seasoning blends can transform your butter noodles into a flavorful masterpiece. So don’t be afraid to get creative in the kitchen!

Cheese for Creaminess

If you’re looking to add a creamy element to your buttery noodles, try melting some shredded cheese into the mix. It’s a simple yet effective way to elevate the flavors and texture of your dish.

I love experimenting with different cheeses to find the perfect one for my butter noodles. Gouda adds a smoky richness, while Parmesan brings a salty, nutty taste.

Advertisement

To enhance the flavors even more, I like to sauté some garlic and onion in the butter before adding the cheese. This adds a delicious depth of flavor that complements the creaminess of the cheese.

Now, let’s move on to the next step and talk about how to use herbs for freshness in your buttery noodles.

Herbs for Freshness

You can add a pop of freshness to your dish by sprinkling some chopped herbs, such as parsley or basil, on top of your buttery noodles.
Herbs are a fantastic way to elevate the flavors in your pasta dishes and add a burst of freshness. When it comes to butter-based sauces, incorporating herbs can take your dish to a whole new level.

Here are three ways to use herbs for freshness in other pasta dishes and incorporate them into butter-based sauces:

  • Mix chopped herbs into melted butter and drizzle it over your noodles for a simple yet flavorful sauce.
  • Toss cooked pasta with a mixture of melted butter, garlic, and freshly chopped herbs for a fragrant and delicious dish.
  • Make a compound butter by blending softened butter with finely chopped herbs, then use it to coat your cooked noodles for a burst of herbaceous flavor.

Using herbs in your buttery pasta dishes will add a vibrant and refreshing touch that will impress your taste buds.

Experimenting With Different Cheeses

Try using different cheeses to add variety and flavor to your butter noodles. Experimenting with different toppings and pairing them with different proteins can elevate your simple dish to a whole new level.

Advertisement

When it comes to cheeses, the possibilities are endless. Personally, I love using Parmesan for a rich and nutty flavor, or a sharp cheddar for a creamy and tangy bite. Mozzarella adds a gooey and melty texture, while Gruyere brings a savory and slightly sweet taste. Don’t be afraid to mix and match cheeses to create your own unique combination.

For a twist, try using blue cheese for a bold and pungent kick, or feta for a salty and crumbly contrast. The key is to experiment and find the cheese that perfectly complements your butter noodles and enhances your overall dining experience.

Enhancing With Garlic and Onion

After experimenting with different cheeses to make my butter noodles better, I decided to explore alternative seasoning options to enhance the flavor even more. While garlic and onion are commonly used to add depth and complexity to dishes, some people may not be able to tolerate them due to allergies or digestive issues. Thankfully, there are plenty of alternatives available that can provide a similar taste profile without the drawbacks.

Here are three alternative seasoning options that can elevate your butter noodles to new heights:

  • Shallots: These mild-flavored bulbs are a close cousin to onions and garlic, offering a subtle yet distinct taste.

  • Scallions: Also known as green onions, they add a fresh, slightly pungent flavor that complements buttery noodles beautifully.

  • Leeks: With their delicate and sweet flavor, leeks provide a milder alternative to onions, making them a perfect choice for those looking to avoid strong flavors.

Garnishing for a Beautiful Presentation

To enhance the presentation of your butter noodles, consider garnishing them with a sprinkle of fresh herbs or a drizzle of flavored oil. These simple garnishing techniques can elevate a basic dish to a whole new level of sophistication.

Advertisement

Picture a steaming plate of perfectly cooked noodles, coated in a rich and velvety butter sauce. Now imagine the vibrant green of freshly chopped parsley delicately scattered on top, adding a pop of color and a burst of freshness.

Or perhaps you prefer the earthy aroma of rosemary-infused olive oil, gently drizzled over the noodles, imparting a subtle hint of flavor.

These plating techniques not only make your dish visually appealing, but they also enhance the overall dining experience by adding layers of complexity and freshness.

Frequently Asked Questions

Can I Use Any Type of Noodle for Butter Noodles?

Yes, you can use any type of noodle for butter noodles. However, using rice instead of noodles for butter noodles may not give you the same texture and taste. To add a spicy kick, try adding red pepper flakes or hot sauce.

How Can I Make the Butter Flavor More Intense?

To make the butter flavor in noodles more intense, I suggest infusing them with garlic and herbs. This adds depth and richness. Additionally, adding a touch of spice, like red pepper flakes, can elevate the flavor profile even further.

Advertisement

What Are Some Herbs That Pair Well With Butter Noodles?

Some common seasonings for butter noodles include garlic powder, dried parsley, and black pepper. If you want to add a touch of sweetness, a sprinkle of brown sugar or a drizzle of honey works well.

Are There Any Unique Savory Ingredients That I Can Add to Butter Noodles?

Adding unique savory ingredients to butter noodles can elevate their flavor profile. With creative twists like garlic-infused oil, crispy bacon crumbles, or a sprinkle of Parmesan cheese, you can transform simple butter noodles into a delicious and satisfying dish.

Can I Use Any Type of Cheese to Enhance My Butter Noodles?

Yes, you can definitely use different types of cheese to enhance your butter noodles. Adding a creamy cheese like Parmesan or a sharp cheddar can take your dish to the next level.

Conclusion

In conclusion, making butter noodles better is all about taking simple ingredients and transforming them into a delicious and satisfying dish. By choosing the right noodle and elevating the butter flavor, you can create a base that is rich and flavorful.

Adding herbs, savory ingredients, and experimenting with different cheeses can take your butter noodles to the next level. And let’s not forget about the power of garlic and onion to enhance the overall taste.

Advertisement

Finally, garnishing your creation for a beautiful presentation will make it even more enticing.

Did you know that noodles have been a staple in Chinese cuisine for over 4,000 years? This long-standing tradition shows the enduring appeal and versatility of this simple yet satisfying dish.

Continue Reading
Advertisement

Recipes & Culinary Uses

10 Steps to Use a Butter Mold for Beautiful Creations

Published

on

By

An image showcasing the step-by-step process of using a butter mold: a hand pressing softened butter into the intricately carved mold, gently removing the mold to reveal a beautifully shaped butter creation

I really love butter and find it fascinating to use a butter mold to turn a basic block of butter into a beautiful work of art.

The smooth curves and intricate designs not only make your butter look stunning, but also add an extra touch of elegance to your table.

In this article, I’ll guide you through the process of using a butter mold, from choosing the right mold to storing and caring for it.

Get ready to elevate your butter game and impress your guests with this delightful technique.

Key Takeaways

  • Consider the size, design, and material of the mold
  • Soften the butter at room temperature for a smooth texture
  • Press the butter firmly into the mold using a gentle rocking motion
  • Run a butter knife along the edges of the mold to loosen the butter for easy removal

Choosing the Right Butter Mold

Advertisement

To choose the right butter mold, you’ll want to consider the size and design that best suits your needs.

When it comes to decorating options, there are a variety of choices available. Some molds have intricate patterns that can create beautifully detailed butter shapes, while others have simple and elegant designs. It all depends on your personal preference and the style you want to achieve.

Additionally, you may also want to consider alternative materials for your butter mold. While traditional molds are made of wood or ceramic, there are now molds available in silicone and plastic. These materials are durable, easy to clean, and offer more flexibility when it comes to releasing the butter from the mold.

Ultimately, the choice is yours, but taking these factors into consideration will ensure you find the perfect butter mold for your needs.

Preparing the Butter for Molding

When it comes to preparing the butter for molding, there are a few key points to keep in mind.

Advertisement

First and foremost, softening the butter is crucial for achieving a smooth and even texture. To do this, I recommend leaving the butter at room temperature for about 30 minutes before starting the molding process.

Secondly, choosing the right mold is essential for creating beautiful and intricate designs. Look for molds that are made of high-quality materials, such as silicone or stainless steel, and have intricate patterns that will transfer onto the butter.

Lastly, properly filling the mold is important to ensure that the design is clear and defined. Make sure to press the softened butter firmly into all the nooks and crannies of the mold, using a spatula or the back of a spoon.

Softening the Butter

Start by letting the butter sit at room temperature to soften it before using the butter mold. Softening the butter is an essential step to ensure a smooth and easy molding process.

When the butter is at room temperature, it becomes pliable and malleable, making it easier to press into the mold and achieve the desired shape. Trying to mold cold or hard butter can be frustrating and may result in uneven shapes or difficult release from the mold.

Advertisement

To soften the butter, simply remove it from the refrigerator and let it sit at room temperature for about 30 minutes to an hour, depending on the temperature of your kitchen.

Once the butter has softened, it will be ready to be molded into beautiful and decorative shapes using your butter mold.

Choosing the Mold

To choose the perfect mold, you’ll want to consider the size, design, and material that best suits your butter molding needs. When it comes to butter mold materials, there are a few options to choose from. Here are some popular choices:

  1. Silicone: This material is flexible and easy to clean, making it a great option for intricate designs and easy release of the butter.

  2. Stainless Steel: Known for its durability, stainless steel molds are perfect for creating uniform shapes and designs.

  3. Wood: If you prefer a more traditional look, wooden molds are a great choice. They add a rustic charm to your butter and are often handcrafted.

  4. Ceramic: Ceramic molds are not only functional but also decorative. They come in a variety of colors and designs, adding a touch of elegance to your butter.

Consider the design and material that aligns with your style and needs, and soon you’ll be creating beautifully shaped butter masterpieces.

Properly Filling the Mold

As I’m filling the mold, I make sure to press the butter firmly to eliminate any air bubbles. This is an important step in properly using a butter mold.

Advertisement

Filling the mold is where you can get creative with different techniques and designs. One popular technique is layering different colored butters to create a marbled effect. Another technique is adding herbs or spices to the butter for a flavorful twist.

When filling the mold, it’s important to work quickly to prevent the butter from melting. If the butter is too soft, it won’t hold its shape in the mold. If this happens, simply refrigerate the butter until it firms up and try again.

With these filling techniques and troubleshooting tips, you’ll be able to create beautifully shaped butter every time.

Filling the Butter Mold

First, make sure you have softened the butter before filling the mold. Softened butter is easier to work with and will result in a smoother and more even mold. Once you have your softened butter ready, here are some tips for filling the butter mold:

  1. Fill the mold slowly and carefully to avoid any air pockets or uneven distribution.
  2. Use a small spatula or butter knife to press the butter into all the nooks and crannies of the mold.
  3. Smooth the surface of the butter with the back of the spatula or knife for a neat and clean finish.
  4. If you want to add a creative touch, consider adding herbs, spices, or even edible flowers to the butter before filling the mold for a unique and flavorful design.

By following these steps, you will be able to create beautifully shaped and delicious butter creations with your mold.

Don’t forget to clean and maintain your butter mold regularly to ensure its longevity and functionality. With the right maintenance and some creative butter mold designs, your butter will be the talk of the table.

Advertisement

Pressing the Butter Into Shape

Shaping the perfect mold is essential for creating visually appealing and evenly distributed butter. To achieve this, I will discuss various techniques for achieving evenness in the butter mold.

These techniques will not only ensure a beautiful end result, but also allow for easy removal of the butter from the mold.

Shaping the Perfect Mold

To create the perfect mold, you’ll need to press the softened butter firmly into the mold and smooth it out. This step is crucial for achieving a well-defined shape and ensuring that your butter mold turns out beautifully.

Here are some shaping techniques and troubleshooting tips to help you along the way:

  1. Use a gentle rocking motion while pressing the butter into the mold to ensure even distribution.
  2. If the butter sticks to the mold, try dusting it lightly with powdered sugar or flour.
  3. For intricate designs, use a small spatula or butter knife to carefully push the butter into every nook and cranny.
  4. If the butter cracks or breaks while unmolding, refrigerate it for a few minutes to firm it up before trying again.

By following these shaping techniques and troubleshooting tips, you’ll be well on your way to creating stunning butter molds.

Now, let’s explore some techniques for achieving evenness in your molds.

Advertisement

Techniques for Evenness

For achieving evenness in your molds, it’s important to evenly distribute the softened butter and ensure a smooth texture. Balancing butter is key to achieving uniformity, and there are a few techniques that can help you achieve this.

First, make sure your butter is at the right temperature. It should be softened but not melted. This will make it easier to spread evenly in the mold.

Next, use a spatula or a butter knife to evenly distribute the butter in the mold. Start from the center and work your way outwards, spreading the butter in a smooth, even layer. Take your time and be gentle to avoid any air bubbles or uneven spots.

Finally, give the mold a gentle shake or tap on the counter to settle the butter and ensure it fills all the nooks and crannies.

With these techniques, you’ll be able to achieve perfectly balanced and uniform butter molds every time.

Advertisement

Removing the Butter From the Mold

Once the butter has solidified in the mold, you can gently press on the sides to release it. However, there may be instances when you encounter issues with removing the butter from the mold. Don’t worry, troubleshooting butter mold issues is a common challenge that can be easily overcome. Here are some tips to help you out:

  1. Use a butter knife: Run a butter knife along the edges of the mold to loosen the butter. This will make it easier to release.

  2. Warm the mold: If the butter is not coming out easily, try warming the mold slightly by placing it in warm water for a few seconds. This will help soften the butter and facilitate its release.

  3. Chill the mold: On the other hand, if the butter is too soft and sticky, chilling the mold in the refrigerator for a few minutes can firm it up and make it easier to remove.

  4. Use non-stick molds: Investing in non-stick butter molds can make the process of removing the butter effortless, as the non-stick coating ensures smooth release every time.

In addition to using butter molds for their intended purpose, they can also be repurposed for other creative uses. Some alternative uses for butter molds include shaping homemade chocolates, molding bath bombs, or creating decorative soap bars. So, don’t limit yourself to just butter-making, let your imagination run wild!

Storing and Caring for the Butter Mold

Now that you’ve successfully removed the butter from the mold, it’s important to properly store and care for it. Storing butter molds requires a little extra attention to ensure they remain in good condition and ready for future use.

One of the most important steps in caring for butter molds is cleaning them after each use. This helps to prevent any residue or odors from transferring to the next batch of butter. To clean the mold, simply wash it with warm water and mild soap, making sure to remove any butter remnants. Avoid using harsh scrub brushes or abrasive cleaners, as these can damage the delicate designs on the mold.

Once the mold is clean and dry, it’s time to store it. I find it helpful to store butter molds in a cool, dry place away from direct sunlight. This helps to prevent any warping or discoloration. Additionally, you can wrap the mold in a clean cloth or place it in a protective container to further protect it from dust and potential damage.

Advertisement

Overall, with proper cleaning and storage, your butter molds will continue to bring beauty and elegance to your homemade butter creations for years to come.

Using Butter Molds for Special Occasions

To add an elegant touch to your special occasions, simply press softened butter into the intricately designed molds. Butter molds come in a variety of beautiful designs, allowing you to create unique and eye-catching butter shapes that will impress your guests.

Here are some creative butter mold ideas to inspire you:

  1. Floral designs: Use molds with intricate flower patterns to create delicate and beautiful butter flowers that will brighten up your table.

  2. Seasonal shapes: From snowflakes to pumpkins, choose butter mold designs that reflect the current season or holiday for a festive touch.

  3. Animal motifs: Butter molds in the shape of animals can be a fun and whimsical addition to your special occasion. Think butterflies, birds, or even farm animals.

  4. Monograms and initials: Personalize your butter with molds that feature monograms or initials, adding a sophisticated touch to your table setting.

By using these creative butter mold ideas, you can elevate your special occasions and delight your guests with the artistic and delicious addition of shaped butter.

Now, let’s move on to troubleshooting common issues with butter molds.

Advertisement

Troubleshooting Common Issues With Butter Molds

If you’re having trouble with your butter molds, here are some tips to help you troubleshoot common issues.

One common mistake is not properly greasing the mold before use. This can result in the butter sticking and not releasing cleanly. To avoid this, make sure to thoroughly grease the mold with melted butter or non-stick cooking spray.

Another common issue is using butter that is too soft or melted. This can cause the butter to lose its shape and not hold the intricate design of the mold. To prevent this, chill the butter in the refrigerator until it is firm but still pliable.

Lastly, make sure to press the butter firmly into the mold to ensure all the details are captured.

With these troubleshooting tips in mind, you’ll be able to create beautifully molded butter every time.

Advertisement

Frequently Asked Questions

How Do I Clean a Butter Mold After Use?

After using a butter mold, cleaning it is essential. To keep it sanitized, I wash it with warm soapy water and use a soft brush to remove any residue. Then, I let it air dry before storing it.

Can I Use a Butter Mold for Other Types of Spreads Besides Butter?

Oh, let me tell you, using a butter mold for spreads is a game changer! Not only can you shape other spreads like cream cheese or nut butter, but it also adds a touch of elegance to your presentation.

Can I Use a Silicone Mold for Shaping Butter?

Yes, you can use a silicone mold instead of a butter mold for shaping butter. The benefits of using a butter mold include easy removal and precise shapes. Silicone molds offer alternatives for shaping butter in unique and creative ways.

How Long Does It Take for the Butter to Set in the Mold?

It usually takes about 1-2 hours for butter to set in a mold. To speed up the process, you can place the mold in the refrigerator. If you’re having issues with the butter not setting, try using colder butter or adjusting the temperature.

Can I Freeze the Butter in the Mold?

Sure, you can definitely freeze butter in a mold! It’s a great way to keep it fresh and ready for future use. Plus, butter molds can also be used for shaping other ingredients like ice cream or chocolate.

Advertisement

Conclusion

After mastering the art of using a butter mold, I feel like a sculptor crafting a masterpiece. The process of choosing the perfect mold, preparing the butter, and pressing it into shape is akin to molding clay into a beautiful sculpture.

The satisfaction of removing the butter from the mold, perfectly formed and ready to be enjoyed, is like unveiling a work of art. With proper care and storage, your butter mold will become a cherished tool in your kitchen arsenal.

So go forth, embrace the artistry, and create buttery masterpieces for all occasions!

Continue Reading

Recipes & Culinary Uses

How to Tell if Butter Is Rancid: A Simple Guide

Published

on

By

An image showcasing a close-up shot of a stick of butter with its pale yellow color transformed into a dull, grayish hue

Were you aware that 20% of households are unknowingly using rancid butter? This article will demonstrate a simple way to check if your butter has spoiled.

By examining its physical appearance, checking for mold or discoloration, assessing the texture and consistency, and conducting a taste test, you can ensure you’re using fresh and safe butter in your cooking.

Additionally, I’ll provide insights on shelf life and expiration dates to further guide you in maintaining butter quality.

Key Takeaways

  • Rancid butter can be identified by its distinct yellow or brown color and greasy or oily texture.
  • The sour smell of rancid butter indicates spoilage and consuming it can have negative effects on health.
  • Mold or discoloration, ranging from yellow to brown, is a clear sign of rancidity in butter.
  • Checking the expiration date and properly storing butter are crucial in preventing spoilage and maintaining its freshness and quality.

Physical Appearance and Smell

I can quickly tell if butter is rancid by examining its physical appearance and smelling it. Rancid butter has a distinct yellow or brown color instead of the usual pale yellow. It may also have a greasy or oily texture and a sour smell.

Advertisement

It’s important to identify rancid butter because consuming it can have negative effects on health. Rancidity occurs when the fat molecules in butter break down, producing harmful substances that can cause digestive issues and even food poisoning.

To prevent butter from going rancid, proper storage techniques should be followed. Butter should be stored in an airtight container in the refrigerator, away from strong odors. It’s also recommended to use butter within the expiration date for optimal freshness and taste.

Check for Mold or Discoloration

Inspect the butter for any visible signs of mold or discoloration. Mold can appear as fuzzy spots or patches, while discoloration can range from yellow to brown. These are indicators that the butter may be rancid and should not be consumed. Proper storage conditions play a crucial role in preventing butter from going bad. Butter should be kept in a cool, dry place away from direct sunlight and heat sources. Additionally, the packaging of butter can affect its shelf life. Butter that is packaged in airtight containers or wrapped tightly in foil or parchment paper helps to maintain its freshness. It is important to check the butter for any signs of mold or discoloration before using it to ensure its quality and safety.

Storage Conditions Butter Packaging
Cool and dry place Airtight container
Away from sunlight and heat sources Tightly wrapped in foil or parchment paper
Properly sealed packaging

Butter Texture and Consistency

Advertisement

When I touch the butter, I can feel its texture and consistency. Butter is typically solid at room temperature, but it softens and becomes spreadable when warmed. This is due to its melting point, which is around 32 to 35 degrees Celsius (90 to 95 degrees Fahrenheit).

The texture of butter should be smooth and creamy, without any lumps or graininess. It should also be easy to spread and have a pleasant, rich flavor.

To maintain the texture and freshness of butter, it’s important to store it properly. Keep butter in an airtight container or wrap it tightly in wax paper or foil to prevent it from absorbing odors from other foods in the refrigerator. Additionally, store butter away from strong-smelling foods, as it can easily pick up their flavors.

Taste Test

After unwrapping the butter, I take a small bite to assess its flavor and freshness. The taste of butter can provide important clues about its quality and possible spoilage. If the butter tastes off or has a sour or rancid flavor, it is a clear sign that it has gone bad. Other signs of spoilage include a strong or unpleasant odor and a discolored or moldy appearance. Proper butter storage is crucial to prevent spoilage. It is recommended to store butter in the refrigerator, preferably in an airtight container to prevent absorption of odors. It is also important to check the expiration date and discard any butter that is past its prime. By conducting a simple taste test and being aware of the signs of spoilage, you can ensure that your butter is fresh and safe to consume.

Signs of Spoilage
Off flavor Sour or rancid taste Strong or unpleasant odor Discolored or moldy appearance

Shelf Life and Expiration Date

Advertisement

I can easily determine the shelf life and expiration date of my butter by checking the label on the packaging. This information is crucial in ensuring that the butter I use is fresh and safe to consume.

Here are some key points to keep in mind regarding the shelf life and storage recommendations of butter:

  • Butter typically has a shelf life of about 4-6 months from the date of production.
  • It’s important to store butter in a cool and dry place, away from direct sunlight and heat sources.
  • Keeping butter refrigerated can help extend its shelf life, especially during warmer months.
  • If the butter starts to develop an off smell or taste, or if there are any signs of mold or discoloration, it’s best to discard it.

Frequently Asked Questions

Can You Still Use Butter if It Has a Slightly Sour Smell?

If butter has a slightly sour smell, it could be an indication of spoilage. When discussing whether butter can still be used, it’s important to consider other spoilage indicators as well. These include a change in color or texture, the presence of mold, or a rancid taste.

If only the smell is slightly sour, it might be safe to use, but it’s recommended to rely on other indicators as well to ensure the butter is still fresh.

Is It Safe to Consume Butter With a Slight Change in Color?

It’s important to consider if it’s safe to consume butter with a slight change in color.

Advertisement

The color of butter can vary depending on factors like the cow’s diet or the butter-making process.

However, if the change in color is accompanied by a strong, unpleasant odor or a sour taste, it could be a sign of rancidity.

It’s always best to err on the side of caution and discard butter that shows signs of being rancid.

What Should I Do if My Butter Has a Grainy or Clumpy Texture?

If my butter has a grainy or clumpy texture, I first check if it’s still safe to consume. However, without the context of how to tell if butter is rancid, it can be difficult to determine the cause.

It’s important to store butter properly to prevent texture changes.

Advertisement

If the butter is still safe, I can use it for alternative purposes like cooking or baking where the texture won’t matter as much.

Can Butter Taste Different Without Being Rancid?

Butter flavor can vary without the butter being rancid. Different factors like the cow’s diet, processing methods, and storage conditions can all affect the taste of butter.

However, if there are signs of rancidity, such as a sour or off smell, a yellow or brown color, or a bitter taste, then it’s likely that the butter has gone bad.

It’s always best to trust your senses and discard any butter that appears to be rancid.

How Can I Extend the Shelf Life of Butter Past Its Expiration Date?

To extend the shelf life of butter and preserve its freshness past its expiration date, there are a few things I’ve found helpful.

Advertisement

First, make sure to store it in an airtight container in the refrigerator. This will help prevent exposure to air and moisture, which can accelerate spoilage.

Additionally, you can also freeze butter to extend its shelf life even further. Just make sure to wrap it tightly in freezer-safe packaging.

These methods have helped me keep my butter fresh for longer periods of time.

Conclusion

In conclusion, determining whether butter is rancid can be quite a task. By relying on our senses and conducting various tests, we can gauge its freshness.

Remember, it’s always better to be safe than sorry when it comes to consuming questionable butter. So next time you’re unsure, trust your instincts and give it a thorough inspection. After all, who doesn’t love a little adventure in their dairy aisle?

Advertisement
Continue Reading

Recipes & Culinary Uses

Easy French Bread Toasted in Oven with Butter

Published

on

By

An image capturing the golden-brown French bread slices emerging from the oven

I really enjoy treating myself to warm, buttery toast, especially when it’s made with perfectly toasted French bread.

In this article, I’ll guide you through the simple steps of toasting French bread in the oven with a luscious butter mixture.

From selecting the ideal loaf to achieving that golden, crispy perfection, you’ll have a delicious treat in no time.

So, grab your apron and let’s get started on this mouthwatering journey!

Key Takeaways

  • Choose fresh French bread with a golden brown, crispy crust and a soft, airy inside
  • Soften butter and mix with herbs and spices to create flavorful spreads
  • Use a serrated bread knife to cut the bread into even slices and store them properly
  • Preheat the oven to 375 degrees Fahrenheit, spread the butter mixture generously, and toast the bread for about 10-12 minutes for a golden, crispy crust and a soft center.

Selecting the Perfect French Bread

Advertisement

When selecting the perfect French bread, make sure it’s fresh and has a nice crust. Choosing the right ingredients is crucial for a delicious outcome.

Start by finding the best bakery in your area that specializes in French bread. Look for a bakery that uses high-quality ingredients and traditional baking methods. A good French bread should have a golden brown crust that is crispy and slightly chewy. The inside should be soft and airy, with a subtle tangy flavor. Avoid bread that feels too hard or dense, as it may not toast properly.

Now that you’ve found the perfect French bread, it’s time to move on to preparing the butter mixture for that extra burst of flavor.

Preparing the Butter Mixture

To make the butter mixture, simply soften the butter and mix it with your desired herbs and spices. It’s important to use softened butter as it will be easier to incorporate the herbs and spices evenly. Once the butter is soft, I like to add a pinch of salt and a sprinkle of freshly chopped parsley for a burst of flavor.

Here are a couple of ideas for alternative spreads you can make by adding herbs to your butter mixture:

Advertisement
  • Garlic and Herb Butter:
    Mix softened butter with minced garlic, chopped fresh thyme, and a squeeze of lemon juice. Spread it on the toasted French bread for a savory and aromatic taste.

  • Spicy Herb Butter:
    Combine softened butter with chopped fresh cilantro, minced jalapeno, and a dash of cayenne pepper. Spread it on the toasted French bread for a kick of heat and a burst of herbaceousness.

These alternative spreads will elevate your toast and make it even more delicious and flavorful.

Slicing the French Bread

Start by making sure the knife is sharp and then use it to cut the loaf of bread into evenly-sized slices. Choosing the right knife for the job is important. There are different types of bread knives, each designed to make slicing bread easier.

A serrated bread knife with a long, narrow blade is ideal for cutting through crusty bread without squishing it. Once you have your bread sliced, you may be wondering how to store the leftovers.

Advertisement

To keep your sliced bread fresh for longer, you can store it in a resealable plastic bag or wrap it tightly in plastic wrap. It’s best to keep the bread at room temperature or in a bread box to maintain its texture and prevent it from drying out.

With the right knife and storage method, you can enjoy freshly sliced bread whenever you want.

Preheating the Oven

When it comes to baking, getting the oven temperature just right is crucial for achieving the perfect results. In this discussion, we’ll explore the optimal oven temperature for different dishes, whether it’s a gooey chocolate chip cookie or a savory roasted chicken.

Additionally, we’ll delve into the age-old debate of whether to use butter or oil in our baking recipes, examining the flavor, texture, and health implications of each choice.

Optimal Oven Temperature

For the optimal oven temperature, preheat it to 375 degrees Fahrenheit. This is the perfect temperature to achieve a golden, crispy crust while maintaining a soft, fluffy center when toasting French bread with butter.

Advertisement

To make your toasting experience even more enjoyable, here are some helpful tips:

  • Best Butter Brands:

  • Kerrygold: Known for its rich and creamy texture, Kerrygold butter adds a delicious flavor to the bread.

  • Plugrá: With a higher butterfat content, Plugrá butter provides a luxurious and velvety touch to the French bread.

  • Alternative Oven Methods:

  • Broil Setting: If you’re looking for a quicker toasting option, switch the oven to the broil setting for a few minutes, but keep a close eye to prevent burning.

  • Toaster Oven: If you don’t have a regular oven, a toaster oven can be a great alternative. Adjust the temperature and time accordingly.

Experiment with different butter brands and alternative oven methods to find the perfect combination that suits your taste and preference. Enjoy the delightful experience of toasting French bread with butter!

Butter or Oil?

To achieve a different flavor profile, you may want to consider using oil instead of butter when toasting your bread. While butter is a classic choice, using oil can add a unique twist to your french bread.

But before you make your decision, let’s consider the butter vs margarine debate. While margarine is often touted as a healthier alternative, it is actually higher in trans fats and artificial ingredients. On the other hand, butter, when consumed in moderation, can provide several health benefits. It contains essential vitamins and minerals, including vitamin A, vitamin D, and iodine.

Additionally, butter is a good source of healthy saturated fats, which can help improve cholesterol levels and support brain function. So, if you’re looking for a delicious and nutritious option, consider using butter when toasting your bread.

Advertisement

Applying the Butter Mixture

Spread the butter mixture generously onto the sliced French bread. As I pick up the knife, the scent of warm, melted butter fills the air, making my mouth water in anticipation. The butter is soft, easily spreading onto the bread, creating a smooth and even coating. The key here is to ensure that every inch of the bread is covered, allowing for an indulgent and flavorful bite.

As the butter meets the bread, it begins to melt, seeping into the crevices and adding richness to each slice. The buttery aroma intensifies, promising a delightful toasting experience. I can’t help but imagine the golden crust forming in the oven, the butter enhancing the bread’s flavor and creating a heavenly combination.

✨ The benefits of applying an even coating of melted butter:

  • It helps to prevent the bread from drying out during toasting
  • It adds a rich, buttery flavor that complements the crispy texture

✨ Tips for melting the butter:

  • Use room temperature butter for easier spreading
  • Alternatively, melt the butter gently in the microwave before spreading for a more consistent coating

Now that the butter mixture is applied, it’s time to move on to the next step: toasting the French bread to perfection.

Toasting the French Bread

As I place the prepared slices onto the baking sheet, I can already imagine the satisfying crunch that awaits when they come out of the oven.

The browning process is crucial to achieving that perfect texture and flavor.

Advertisement

I preheat the oven to 375 degrees Fahrenheit and let the bread toast for about 10-12 minutes.

The edges turn a beautiful golden brown, while the center remains soft and pillowy.

The aroma of warm bread fills the kitchen, making my mouth water in anticipation.

Once the bread is toasted to perfection, I take it out of the oven and let it cool slightly before adding any toppings.

While butter is a classic choice, there are also alternative toppings such as garlic butter, olive tapenade, or melted cheese that can take this simple French bread to the next level of deliciousness.

Advertisement

Checking for Golden Perfection

Once the timer goes off, I quickly check the slices of bread for that perfect golden brown color. The anticipation builds as I carefully open the oven door, revealing the aromatic toasted French bread.

The sight of the bread, perfectly toasted and buttered, makes my mouth water in anticipation of the delicious flavors to come. As I inspect each slice, I ensure that the browning is even across the entire surface, a sign of a well-toasted bread.

The warmth of the oven has brought out the natural flavors of the bread, creating a crisp and crunchy exterior that contrasts beautifully with the soft and fluffy interior. And to add a burst of garlic flavor, I sprinkle a hint of garlic powder on top, enhancing the overall taste experience.

As I take a bite, the combination of the golden brown crust, the rich buttery spread, and the subtle garlic undertones create a truly irresistible treat.

Serving and Enjoying the Toasted French Bread

When you’re ready to enjoy, grab a plate and savor the deliciously crisp and garlicky slices of your perfectly toasted creation.

Advertisement

Now that your French bread is toasted to golden perfection, it’s time to explore the endless possibilities of pairing options and creative toppings.

For a classic option, spread a generous layer of creamy butter over the warm bread. The combination of the crispy exterior and the smooth buttery goodness is simply divine.

If you’re feeling adventurous, try topping your toast with fresh avocado slices and a sprinkle of sea salt for a creamy and savory twist.

Or, for a sweet variation, spread some Nutella and sliced strawberries on top, creating a delightful blend of rich chocolate and juicy fruit.

The possibilities are endless, so go ahead and experiment with your favorite flavors and textures. Toasted French bread is the perfect canvas for culinary creativity.

Advertisement

Frequently Asked Questions

How Do I Store French Bread to Keep It Fresh Before Toasting?

To keep French bread fresh before toasting, I store it in a paper bag at room temperature. This helps maintain its crustiness while preventing it from drying out. It’s important not to store it in plastic as it can make the bread soggy.

Can I Use a Different Type of Bread Instead of French Bread for This Recipe?

Using a different bread type can add variety to your toast. However, French bread’s crusty texture and buttery flavor make it the ideal choice. Feel free to experiment with alternative toppings for extra deliciousness.

Is It Necessary to Preheat the Oven for Toasting French Bread?

Preheating the oven for toasting French bread is necessary. It allows the bread to cook evenly and helps to achieve that perfect crispy texture. The benefits of preheating extend to baking as well, ensuring consistent results.

Can I Use Margarine or Oil Instead of Butter for the Butter Mixture?

Sure, you can use margarine or oil instead of butter for the butter mixture when toasting French bread. For example, I once used olive oil and it gave the bread a nice, savory flavor.

What Are Some Toppings or Spreads That Pair Well With Toasted French Bread?

When it comes to creative toast toppings, the possibilities are endless. Whether you prefer sweet or savory, you can’t go wrong with options like avocado and tomato, Nutella and banana, or ricotta and honey. As for cheese pairings, try creamy brie or tangy goat cheese.

Advertisement

Conclusion

As I take a bite of the golden, buttery French bread fresh out of the oven, I am transported to a quaint boulangerie on the streets of Paris. The crispy exterior gives way to a soft, pillowy center, and the rich, creamy butter melts in my mouth.

The aroma of toasted bread fills the air, enticing everyone around me. With each bite, I savor the simple yet exquisite pleasure of this delicious treat.

Toasting French bread in the oven with butter has elevated my culinary experience to new heights, and it can do the same for you. Bon appétit!

Continue Reading
Advertisement

Affiliate disclaimer

As an affiliate, we may earn a commission from qualifying purchases. We get commissions for purchases made through links on this website from Amazon and other third parties.

Advertisement

Trending