Connect with us

Recipes & Culinary Uses

How to Make Butter From Whipping Cream

Published

on

An image showcasing the process of making butter from whipping cream: a glass jar filled with creamy liquid, a hand vigorously shaking it, and then separating the solid butter and liquid buttermilk

I know what you’re thinking – making butter from whipping cream sounds like a complicated and time-consuming process. But let me assure you, it’s easier than you might think!

In just a few simple steps, you can transform that carton of whipping cream in your fridge into a delicious, homemade butter. So grab your materials, chill that cream, and get ready to whip up some buttery goodness.

Trust me, once you taste the creamy, rich flavor of your homemade butter, you’ll never go back to store-bought again.

Key Takeaways

  • Select the right whipping cream with the desired fat content for the desired outcome in recipes.
  • Use a chilled bowl and whisk, and start at a low speed to gradually incorporate air while whipping.
  • Avoid overwhipping to prevent grainy butter and separation.
  • Separate and wash the butter properly to remove excess buttermilk and improve its shelf life.

Gathering the Materials

Before we begin, make sure you’ve gathered all the necessary materials. For making homemade butter, you will need some key items.

Firstly, you will need fresh whipping cream. Look for a high-quality cream with a high fat content for the best results.

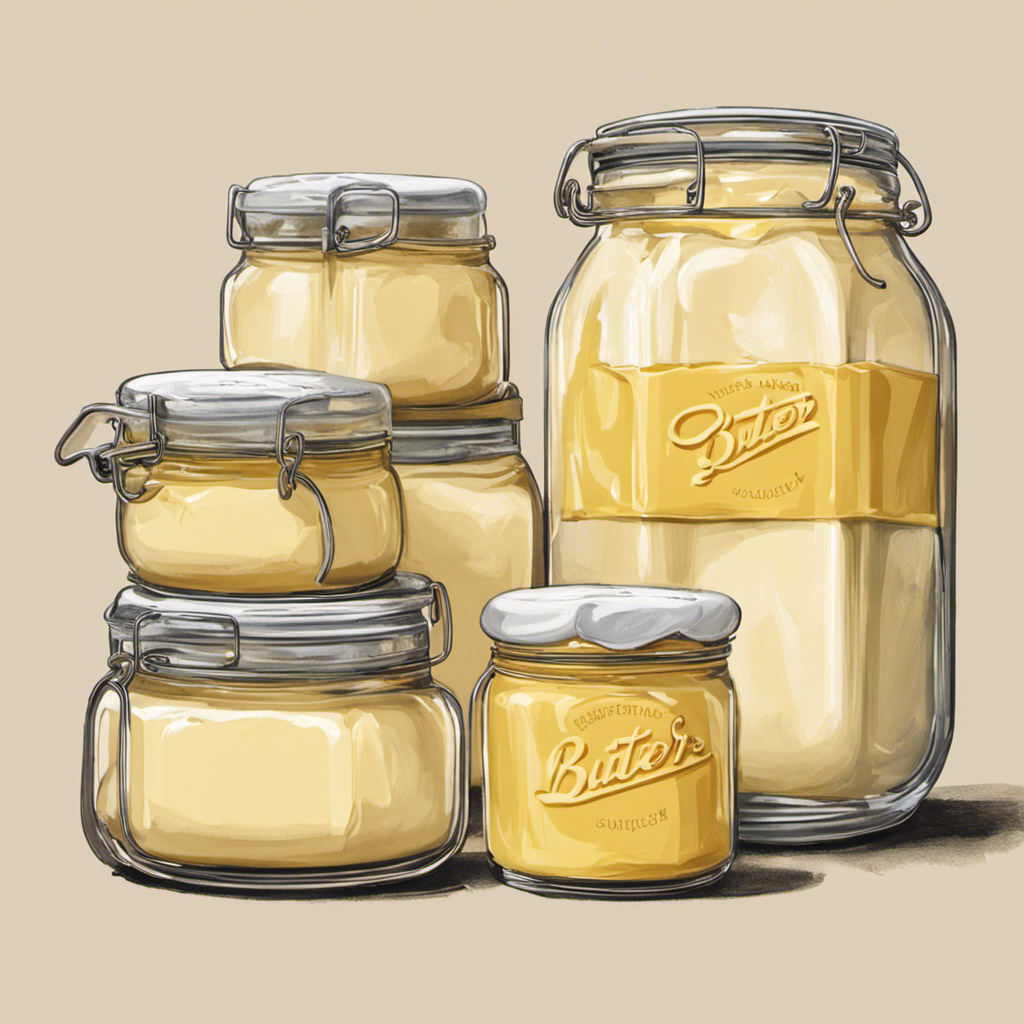
Next, you will need a container to store your homemade butter. There are various options available, such as glass jars, plastic containers, or butter keepers. Choose one that suits your preference and ensures the butter stays fresh.

Moving on to flavors, there are plenty of ways to add a delicious twist to your homemade butter. You can experiment with herbs like garlic, thyme, or rosemary. Alternatively, you can try sweet flavors like honey or cinnamon. The possibilities are endless, so get creative and have fun exploring different flavors for your homemade butter.

Selecting the Right Whipping Cream

When choosing the right whipping cream, it’s important to consider the fat content. The fat content determines the richness and thickness of the cream, which can greatly affect the outcome of your recipes.

There are different types of cream available, each with varying fat content. Heavy cream, also known as heavy whipping cream, is the richest with a fat content of around 36%. It’s perfect for making whipped cream and adding richness to sauces and soups.

Light cream has a fat content of around 20% and is best for adding a touch of creaminess to coffee or tea.

Half-and-half is a mixture of milk and cream, with a fat content of around 10-12%. It’s commonly used in coffee and as a lighter alternative to heavy cream.

When it comes to salt alternatives, you can opt for unsalted butter or low-sodium cream if you’re watching your sodium intake.

Chilling the Whipping Cream

To achieve the best results, it’s crucial to chill the whipping cream before using it in your recipes. This helps the cream to whip up faster and hold its shape better. The chilling time and temperature of the cream are important factors to consider.

Discussion Point 1: Chilling Time
It is recommended to chill the whipping cream for at least 30 minutes before using it. This allows the fat in the cream to solidify slightly, which makes it easier to whip. If the cream is not chilled enough, it may take longer to reach the desired consistency and may not hold its shape as well.

Discussion Point 2: Temperature of the Cream
The whipping cream should be cold but not frozen. Ideally, it should be around 40°F (4°C). If the cream is too warm, it will not whip properly and may become runny. On the other hand, if it is too cold, it may be difficult to incorporate air into the cream and achieve the desired volume.

Table: Chilling Time Temperature of the Cream
At least 30 minutes Around 40°F (4°C)

Whipping the Cream

When it comes to whipping cream, there are a few key points to keep in mind.

First, mastering the whipping technique is crucial for achieving the perfect consistency. I’ll be sharing some helpful tips to ensure your cream whips up beautifully.

Second, having the right tools for the job makes a world of difference. I’ll be discussing the best tools to use for whipping cream, so you can achieve the best results.

Lastly, over-whipping can lead to some consequences that can ruin your whipped cream. I’ll be covering what those consequences are and how to avoid them.

Whipping Technique Tips

One important tip for whipping cream into butter is to ensure you’re using cold cream straight from the fridge. This is because cold cream has a higher fat content and will whip up more easily.

When it comes to whipping technique, there are a few key tips to keep in mind:

  • Use a chilled bowl and whisk: This helps to maintain the cold temperature of the cream and promotes better whipping.
  • Start at a low speed: Beginning at a low speed allows the cream to incorporate air gradually, preventing splattering.
  • Avoid overwhipping: Be careful not to overwhip the cream, as this can lead to grainy butter and separation of the milk solids.

Best Tools for Whipping

Using a chilled bowl and whisk will help you maintain the cold temperature of your ingredients and achieve better results.

However, if you don’t have access to these tools, there are alternatives for whipping cream. An electric mixer with a whisk attachment can be a great option, as it saves time and effort. Another alternative is a hand mixer, which is more portable and convenient for smaller batches.

Now, let’s address some common whipping issues. If your cream is not thickening, make sure it is cold and that you’re using the correct fat percentage. If the cream starts to curdle, stop whipping immediately, as this means you have over-whipped it.

Speaking of over-whipping, let’s discuss the consequences in the next section.

Over-Whipping Consequences

If you over-whip the cream, it will become grainy and lose its smooth texture. Over-whipping introduces too much air into the cream, causing it to thicken excessively and break down. As a result, the fat globules in the cream clump together, creating a grainy consistency. This is not ideal when using the cream for toppings or fillings.

Consequences of over-whipping:

  • Grainy texture
  • Loss of smoothness

While over-whipped cream may not be suitable for its original purpose, there are alternative uses for it:

Alternative uses for over-whipped cream:

  • Incorporate it into a cake batter for added moisture and richness.
  • Use it as a base for homemade butter, by continuing to whip until the fat separates from the liquid.

Adding Salt (Optional

I love adding salt to my dishes because it enhances the flavor and brings out the best in every ingredient.

But I know there’s an ongoing debate about whether to use salt or not, with some people advocating for a salt-free diet.

In this discussion, we’ll explore the benefits of adding salt and how it can transform a dish from ordinary to extraordinary.

Salt Enhances Flavor

Adding salt to the whipped cream enhances its flavor. Salt has the ability to bring out the natural sweetness and richness of the cream, creating a more balanced and enjoyable taste. But the benefits of adding salt to whipped cream go beyond flavor enhancement.

Firstly, consuming salt in moderation can have several health benefits. It helps to regulate fluid balance in the body, supports proper muscle function, and aids in nerve transmission.

Secondly, if you prefer to explore alternative flavor enhancements, there are various options to consider. You can add a splash of vanilla extract for a subtle sweetness, a drizzle of chocolate syrup for a decadent twist, or a sprinkle of cinnamon for a warm and spicy flavor. These alternatives offer unique tastes that can elevate your whipped cream to new heights.

Salt or No Salt

In my previous subtopic, I discussed how salt enhances the flavor of butter. Now, let’s tackle the age-old debate: salted or unsalted butter? It’s a discussion point that has divided many home cooks and chefs alike.

Some argue that salted butter adds an extra depth of flavor to dishes, while others prefer the versatility of unsalted butter. When it comes to health benefits, both options have their merits. Salted butter contains trace amounts of iodine, which is essential for thyroid function. On the other hand, unsalted butter allows you to control the sodium intake in your meals.

For those looking for alternative seasonings, there are plenty of options to explore. Herbs like rosemary, thyme, or garlic can add a burst of flavor to your butter. You can even experiment with spices like paprika or cayenne pepper for a little kick.

Ultimately, the choice between salted and unsalted butter and alternative seasonings comes down to personal preference and the specific dish you’re preparing.

Benefits of Adding Salt

When using salt, you’ll notice that it helps to enhance the flavors in your dishes. It’s a staple in most kitchens and adds that extra kick to your meals.

But did you know that there are alternatives to salt that can provide the same flavor enhancement? Some popular salt alternatives include herbs and spices like garlic powder, onion powder, and black pepper. These alternatives not only bring out the flavors in your food but also offer additional health benefits.

For example, garlic powder is known for its antioxidant properties and can boost your immune system. Onion powder is rich in vitamins and minerals, while black pepper aids digestion.

Continuing to Whip

Once the cream starts to thicken, you can keep whipping it to achieve the desired consistency for butter. Continuous whipping has its benefits.

Firstly, it helps to break down the fat globules in the cream, allowing them to stick together and form butter. This continuous agitation also helps to release excess moisture, resulting in a creamier and more spreadable butter.

Secondly, different whipping techniques can be employed to achieve different results. For a light and fluffy butter, whip the cream at a high speed until it forms soft peaks. If you prefer a denser and more solid butter, continue whipping until the cream becomes stiff and separates into butter and buttermilk.

Separating the Butterfat

To separate the butterfat, you’ll want to continue agitating the cream until it separates into butter and buttermilk. The butterfat content of different types of cream can vary, with heavy cream having a higher percentage compared to light cream. This difference in butterfat content affects the flavor and texture of the resulting butter.

When it comes to the history of butter making techniques, it dates back thousands of years. Ancient civilizations discovered that agitating cream could separate the butterfat from the liquid. They used various methods, such as shaking the cream in animal skin bags or churning it in wooden barrels. Over time, these techniques evolved, and today we have modern tools like stand mixers and butter churns to make the process easier.

Now, let’s move on to the next step: draining the buttermilk.

Draining the Buttermilk

Now, you can strain the mixture through a fine mesh sieve or cheesecloth to separate the buttermilk from the butter. Straining is an essential step in the butter-making process as it helps remove any remaining liquid from the solid butter.

As the mixture passes through the sieve or cheesecloth, the golden buttermilk will slowly drip down, leaving behind the creamy, velvety butter. Buttermilk, despite its name, is not actually made from butter. It is the liquid left over after churning butter from cream.

Besides being a delicious ingredient in pancakes and baked goods, buttermilk also offers several health benefits. It is rich in probiotics, calcium, and vitamins, making it good for digestion and bone health. In addition to its culinary uses, buttermilk has been historically used as a natural beauty remedy, helping to cleanse and exfoliate the skin.

Washing the Butter

When it comes to making homemade butter, there’s an important step that often gets overlooked – washing the butter.

In this discussion, we’ll explore the reasons why washing butter is necessary and the benefits it brings to the final product.

Additionally, we’ll delve into the proper techniques for washing butter to ensure the best results and achieve that smooth, creamy texture we all love.

Discussion Point 1: Why Wash Butter

Why wash butter? It helps remove excess buttermilk and improves the shelf life of your homemade butter. When making butter, it’s important to properly wash it to ensure the final product is of high quality.

Here are some key reasons why butter washing is essential:

  • Proper butter washing techniques:

  • Rinse the butter under cold water to remove any remaining buttermilk.

  • Knead the butter to remove excess moisture.

  • Benefits of adding salt:

  • Salt acts as a preservative, extending the shelf life of the butter.

  • Salt enhances the flavor and adds a subtle depth to the butter.

By following these proper butter washing techniques and adding a pinch of salt, you can achieve a creamy, flavorful, and longer-lasting homemade butter.

Now, let’s move on to discussing proper butter washing techniques in more detail.

Discussion Point 2: Proper Butter Washing Techniques

To achieve a creamy and longer-lasting homemade butter, it’s important to properly wash the butter and remove excess moisture. When it comes to butter washing techniques, there are a few variations you can try.

One method is using cold water. After churning the butter, you can place it in a bowl of cold water and gently knead it. The water will help remove any remaining buttermilk, which can cause the butter to spoil faster.

Another technique involves using ice water. This method is particularly effective in removing even more buttermilk and excess moisture, resulting in a smoother and firmer butter.

Whichever technique you choose, the benefits of proper butter washing are undeniable. Not only does it improve the taste and texture, but it also helps to extend the shelf life of your homemade butter.

Shaping the Butter

First, take the lump of butter and shape it into a round ball. Shaping the butter is an important step in creating a visually appealing final product. Here are some shaping techniques to consider:

  • Press and roll: Use the palm of your hand to press the butter into a flat shape, then gently roll it into a cylinder.
  • Knife sculpting: With a sharp knife, carefully carve the butter into intricate shapes or patterns.

Now, let’s talk about butter molds. Butter molds are a fun and creative way to shape your homemade butter. They come in various designs, such as flowers, animals, or even holiday-themed shapes. Simply press the softened butter into the mold, then gently tap it out to reveal the beautiful shape.

By shaping your butter with different techniques or using molds, you can add a personal touch to your homemade butter.

Now, let’s move on to the next step: storing and enjoying your creation.

Storing and Enjoying Your Homemade Butter

Now let’s talk about how to store and enjoy your homemade butter.

Homemade butter is better because it contains no preservatives or additives, giving you a pure and natural flavor.

To store your butter, wrap it tightly in wax paper or plastic wrap and keep it in the refrigerator. This will help it stay fresh for up to two weeks.

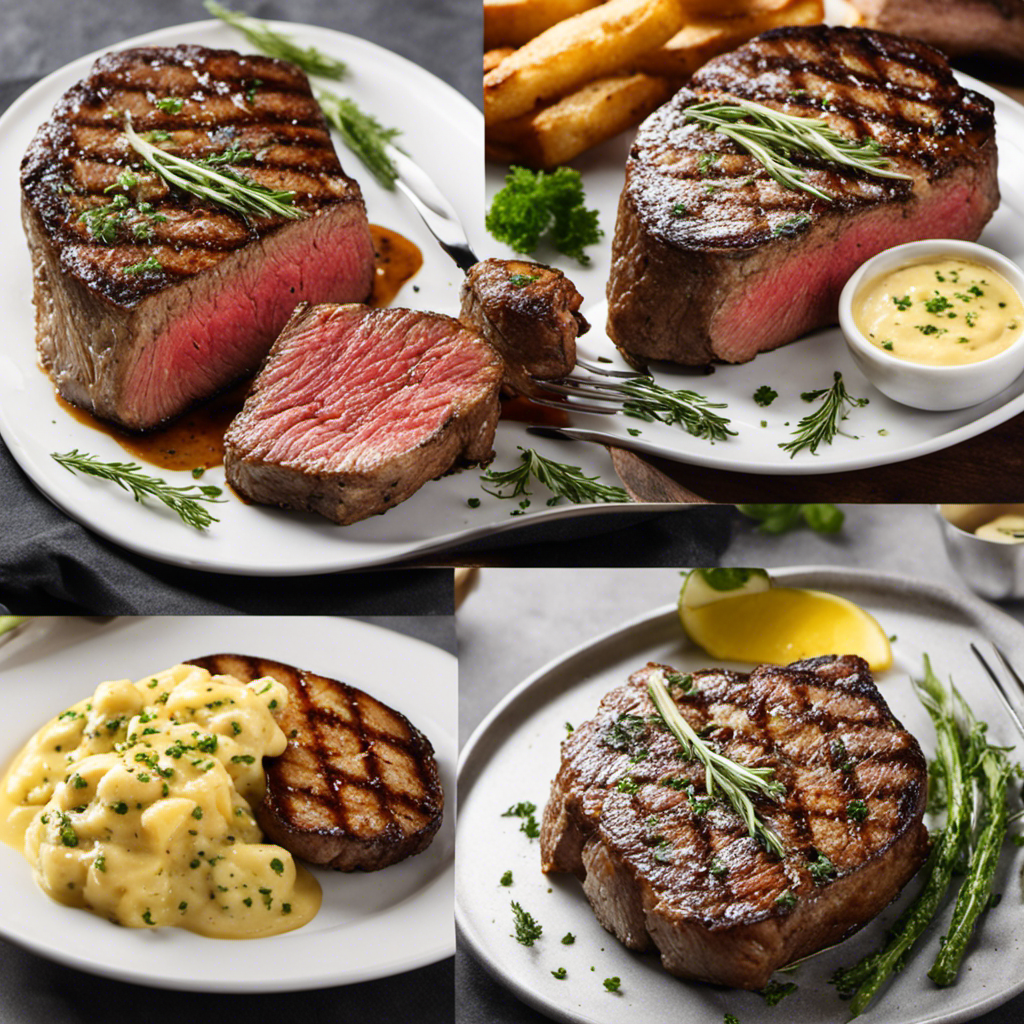
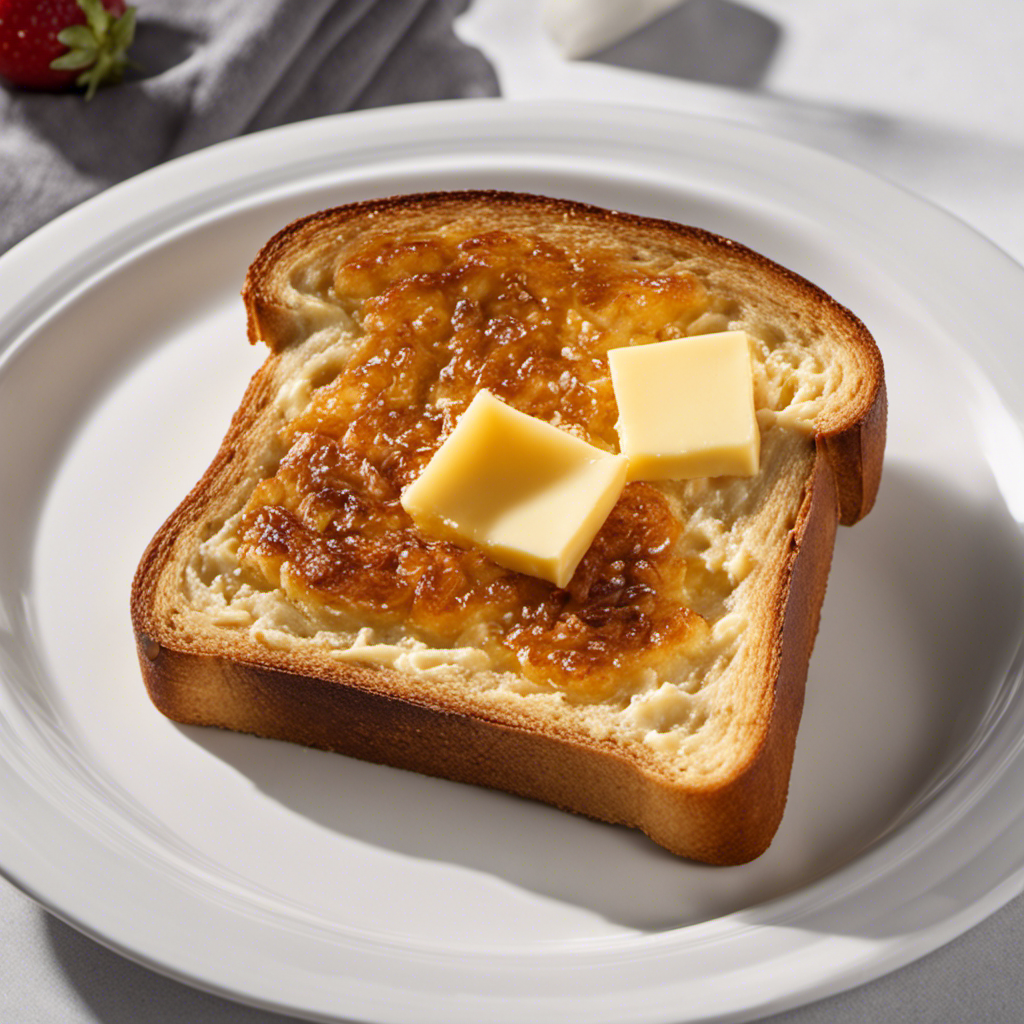
When it comes to enjoying your homemade butter, the possibilities are endless. Spread it on warm toast or freshly baked bread for a simple and satisfying treat. Use it to sauté vegetables or melt it over grilled steak for added richness and flavor. And don’t forget about baking! Homemade butter is perfect for making flaky pie crusts and delicious cookies.

Frequently Asked Questions

How Long Does It Take to Make Butter From Whipping Cream?

It doesn’t take long to make butter from whipping cream. Once the cream is whipped, it separates into butter and buttermilk. After that, you can store the homemade butter properly and even flavor it to your liking.

Can I Use Any Type of Salt When Adding It to the Butter?

Yes, you can use different types of salt when adding it to homemade butter. It’s a great way to add flavors and enhance the taste. I personally enjoy using sea salt or Himalayan pink salt for a unique twist.

Can I Use an Electric Mixer Instead of a Hand Whisk to Whip the Cream?

Yes, you can definitely use an electric mixer instead of a hand whisk to whip the cream. It’s quicker and more efficient. Plus, you’ll get that perfect fluffy texture for your homemade butter.

Can I Use Heavy Cream Instead of Whipping Cream to Make Butter?

Yes, heavy cream can be used as an alternative ingredient for making butter from cream. It contains a higher fat content than whipping cream, which helps in the butter-making process.

How Long Can I Store Homemade Butter in the Refrigerator Before It Goes Bad?

I’ll share some storage tips for homemade butter and signs of spoiled butter. It’s important to know how long we can keep it in the refrigerator before it goes bad.

Conclusion

In conclusion, making butter from whipping cream is a simple and rewarding process. By following the steps outlined in this article, you can create your own delicious homemade butter.

So why not give it a whirl? With a little patience and effort, you’ll be churning out creamy, flavorful butter that will have you saying, ‘It’s like butter wouldn’t melt in my mouth!’

So go ahead and embark on this butter-making adventure, and indulge in the rich and wholesome taste of your very own creation.

Continue Reading

Recipes & Culinary Uses

How to Make Butter Potatoes

Published

on

By

An image showcasing golden, crispy potatoes freshly coated in creamy butter

I’ve got a foolproof recipe for the most divine butter potatoes you’ll ever taste. Trust me, this dish will have your taste buds dancing with delight.

In this article, I’ll walk you through the steps to create these delectable spuds from scratch. We’ll start by selecting the perfect potatoes and then move on to preparing and boiling them to perfection.

Then, we’ll whip up a luscious butter sauce that will take these potatoes to the next level.

So, let’s get started and elevate our potato game to new heights!

Key Takeaways

  • Choose the right type of potato for the desired texture and taste of the dish.
  • Boil the potatoes until they are easily pierced with a fork for soft and creamy butter potatoes.
  • Experiment with different herbs and ingredients to create a flavorful butter sauce.
  • Enhance the dining experience with toppings like sour cream, cheese, and fresh herbs, as well as table linens, candles, and fresh flowers.

Choosing the Right Potatoes

When making butter potatoes, it’s important to choose the right potatoes. The type of potato you select can greatly affect the taste and texture of your dish.

There are various potato cooking techniques that are suited for different types of potato dishes. For example, if you’re making mashed potatoes, you’ll want to choose a starchy potato like a Russet or Yukon Gold. These potatoes have a high starch content, which makes them perfect for creating a smooth and creamy texture when mashed.

On the other hand, if you’re making roasted potatoes, you may opt for a waxy potato like a red or fingerling potato. These potatoes hold their shape well during cooking and develop a crispy exterior.

Preparing the Potatoes

To prepare the potatoes, first, you’ll need to wash and peel them. Here’s how I like to do it:

  1. Start by rinsing the potatoes under cold water to remove any dirt or debris. Use a brush if necessary to scrub the surface clean.

  2. Next, grab a vegetable peeler and carefully remove the skin from each potato. Make sure to remove any blemishes or eyes as well.

  3. Once the potatoes are peeled, you can choose how to cook them based on your desired creaminess level. Boiling is a popular method that results in a soft, creamy texture. Baking in the oven can give you a crispy exterior with a fluffy interior. And if you’re short on time, microwaving is a quick option that still yields a delicious dish.

Boiling the Potatoes

For a soft and creamy texture, you’ll want to boil the peeled potatoes. This is an essential step in making butter potatoes.

To start, fill a large pot with enough water to cover the potatoes. Add a pinch of salt to enhance the flavor. Place the pot over high heat and bring the water to a rolling boil.

Once the water is boiling, carefully add the peeled potatoes. Reduce the heat to medium-low and let the potatoes simmer gently. The cooking time will vary depending on the size of the potatoes, but it usually takes around 15-20 minutes.

To check if they’re done, pierce a potato with a fork. If it easily slides through, they’re ready. Drain the potatoes and proceed with the recipe.

Making the Butter Sauce

Once the potatoes are boiled, it’s time to whip up a smooth and flavorful butter sauce. This sauce is the perfect accompaniment to the tender and creamy potatoes, adding richness and a burst of flavor. Here are three variations on the traditional butter sauce that you can try:

  1. Garlic Butter Sauce: Melt butter in a saucepan and add minced garlic. Cook until fragrant. This adds a delicious savory flavor to the sauce.

  2. Herb Butter Sauce: Mix softened butter with chopped fresh herbs like parsley, thyme, and chives. This adds a refreshing and aromatic element to the sauce.

  3. Lemon Butter Sauce: Combine melted butter with freshly squeezed lemon juice and zest. The tangy citrus flavor enhances the overall taste of the dish.

These alternative ingredients and variations on the butter sauce will take your butter potatoes to the next level.

Now, let’s move on to the next step of mashing the potatoes.

Mashing the Potatoes

When it comes to mashed potatoes, there are a few key points to consider: whether you prefer them creamy or chunky, which potato variety is the best, and if there are any alternatives to using butter.

Personally, I like my mashed potatoes to be creamy and smooth, but some people prefer a chunkier texture with bits of potato still intact.

As for the best potato variety, many chefs recommend using starchy potatoes like Russets for their fluffy texture, while others swear by waxy potatoes like Yukon Golds for their buttery flavor.

Lastly, if you’re looking for a butter alternative, you can try using olive oil, sour cream, or even Greek yogurt to add a different flavor profile to your mashed potatoes.

Creamy or Chunky

To achieve your desired texture, you can decide whether you want your butter potatoes to be creamy or chunky. Both options have their own unique qualities and can be enjoyed based on personal preference.

Here are three factors to consider when choosing between creamy and chunky butter potatoes:

  1. Creaminess: If you prefer a smooth and velvety texture, opt for creamy butter potatoes. This style is achieved by thoroughly mashing the potatoes until they are free of lumps. The result is a silky consistency that melts in your mouth.

  2. Chunkiness: On the other hand, if you enjoy a more rustic and textured dish, go for chunky butter potatoes. This involves mashing the potatoes just enough to break them down, leaving small chunks and bits of potato intact. The result is a more substantial and hearty side dish.

  3. Buttery Flavor: Regardless of the texture you choose, both creamy and chunky butter potatoes offer a rich and buttery flavor. The addition of butter adds a luxurious taste that enhances the overall experience of the dish.

Ultimately, the decision between creamy and chunky butter potatoes comes down to personal preference. Whether you enjoy the smoothness of creamy potatoes or the texture of chunky potatoes, both options are sure to delight your taste buds with their buttery goodness.

Best Potato Variety

The best potato variety for creamy or chunky butter potatoes depends on personal preference. There are several potato varieties that work well for making butter potatoes, each with their own unique texture and flavor. Here is a comparison table of three popular potato varieties:

Potato Variety Texture Flavor
Yukon Gold Creamy Buttery
Russet Fluffy Mild
Red potatoes Firm Earthy

Yukon Gold potatoes are known for their creamy texture and buttery flavor, making them a popular choice for creamy butter potatoes. Russet potatoes have a fluffy texture that works well for both creamy and chunky butter potatoes. Red potatoes have a firmer texture and earthy flavor, making them a great choice for chunky butter potatoes. Whichever variety you choose, cooking techniques such as boiling or roasting can enhance the flavor and texture of the potatoes. Using butter in your butter potatoes adds richness and a smooth mouthfeel. Now, let’s explore some butter alternatives.

Butter Alternatives?

One option for adding richness and a smooth mouthfeel to your creamy or chunky potatoes is to use butter alternatives. These alternatives not only provide a healthier option but also offer a wide range of flavor options.

Here are three butter alternatives that can elevate your potato dishes:

  1. Olive oil: This heart-healthy option adds a subtle fruity flavor to your potatoes. It is rich in monounsaturated fats, which can help lower bad cholesterol levels and reduce the risk of heart disease.

  2. Coconut oil: Known for its tropical aroma and flavor, coconut oil adds a unique twist to your potatoes. It contains medium-chain fatty acids that are metabolized differently by the body and can provide a quick source of energy.

  3. Avocado: Mashed avocado adds a creamy texture and a mild, buttery taste to your potatoes. It is packed with healthy fats, fiber, and various nutrients, making it a nutritious choice.

Adding the Butter Sauce

Mixing the melted butter and herbs together until well combined is the key step to achieving a delicious butter sauce consistency for your potatoes. By ensuring that the butter and herbs are thoroughly mixed, you guarantee that the flavors are evenly distributed throughout the sauce. This step is crucial in creating a smooth and creamy texture that will coat the potatoes perfectly.

When it comes to flavor variations, there are countless options to explore. You can experiment with different herbs such as rosemary, thyme, or dill to add a unique twist to your butter sauce. Additionally, you can incorporate other ingredients like garlic, lemon zest, or Parmesan cheese for an extra burst of flavor. The possibilities are endless, and it’s up to your taste preferences to determine the perfect combination.

Serving and Enjoying

When it comes to enjoying a delicious dish, the way it is presented and served plays a crucial role.

In this discussion, I will be exploring some tasty serving suggestions that can elevate your dining experience.

Additionally, we will delve into the age-old debate of butter versus other toppings, weighing the pros and cons of each option.

Lastly, we will explore how small touches and enhancements can truly enhance the overall dining experience, making it a memorable and enjoyable occasion.

Tasty Serving Suggestions

To enhance the flavor of your butter potatoes, you can try topping them with sour cream and crispy bacon. Trust me, it takes them to a whole new level of deliciousness.

Here are three tasty side dish ideas that will make your butter potatoes the star of the meal:

  1. Cheesy goodness: Sprinkle some shredded cheddar cheese over your butter potatoes and let it melt into gooey perfection. The combination of the creamy potatoes and the melted cheese is simply irresistible.

  2. Herb-infused: Add a sprinkle of fresh herbs like chives or parsley to your butter potatoes for a burst of freshness. Not only does it add a pop of color, but the herbs also add a subtle complexity to the dish.

  3. Garlic and Parmesan: For a bold and savory twist, drizzle some garlic-infused olive oil over your butter potatoes and sprinkle grated Parmesan cheese on top. The garlic and Parmesan complement the creamy potatoes perfectly, creating a mouthwatering combination.

Butter Vs Other Toppings

If you’re looking for alternative toppings, have you ever tried sprinkling some crispy breadcrumbs over your potatoes?

While butter is a classic and delicious choice for topping your butter potatoes, there are other options that can add a whole new level of flavor. One popular alternative is sour cream. Its tangy and creamy texture pairs perfectly with the buttery potatoes, creating a rich and indulgent combination.

On the other hand, if you’re a cheese lover, you can opt for grated cheese as a topping. The melted cheese adds a savory element and a gooey texture to the dish.

Whether you choose butter, sour cream, or cheese, these toppings will elevate your butter potatoes and make them even more enjoyable.

Now that we’ve explored the different toppings for butter potatoes, let’s move on to enhancing the dining experience.

Enhancing the Dining Experience

Enhancing the dining experience can be accomplished by trying out different seasonings and spices. Here are three ways to set the table and create a cozy ambiance:

  1. Use table linens: Adding a tablecloth, placemats, and cloth napkins can instantly elevate the dining experience. Choose colors and patterns that complement your decor and create a warm and inviting atmosphere.

  2. Utilize candles and dim lighting: Lighting plays a crucial role in setting the mood. Use candles or soft lighting to create a cozy ambiance. It not only adds warmth but also creates a romantic and intimate setting for your meal.

  3. Incorporate fresh flowers or greenery: Adding a centerpiece of fresh flowers or some greenery can bring life to your table. It adds a touch of elegance and freshness, making the dining experience more enjoyable.

Frequently Asked Questions

How Many Types of Potatoes Are There to Choose From?

There are many types of potatoes to choose from, each with different cooking methods. When it comes to frying, the best varieties are Russet and Yukon Gold potatoes. They both have a high starch content, resulting in crispy and delicious fried potatoes.

Can I Use Any Type of Potato for This Recipe?

Can I use sweet potatoes instead? Are there any alternative methods for cooking the potatoes? Yes, you can use sweet potatoes for this recipe. As for alternative cooking methods, you could try roasting or mashing them.

How Long Should I Boil the Potatoes For?

I usually boil the potatoes for about 15-20 minutes until they’re fork-tender. However, if you’re looking for alternative cooking methods, you can also try roasting or microwaving them for a different texture and flavor.

Can I Substitute the Butter Sauce With a Different Sauce?

Yes, you can substitute the butter sauce with a different sauce. However, using butter sauce adds richness and flavor to the potatoes. Different sauce options include garlic aioli, sour cream, or even a tangy vinaigrette.

Can I Add Any Additional Ingredients to the Mashed Potatoes?

Sure, you can definitely add cheese to mashed potatoes for an extra creamy and flavorful twist. And if you prefer, you can use olive oil instead of butter for a healthier alternative.

Conclusion

Well, there you have it folks! Making butter potatoes may seem like a simple task, but it requires careful consideration and attention to detail.

From choosing the right potatoes to mashing them to perfection, every step is crucial in creating a delightful dish.

And let’s not forget the pièce de résistance – the butter sauce! This creamy concoction takes the potatoes to a whole new level of deliciousness.

So next time you’re in the mood for some comfort food, don’t settle for anything less than the best butter potatoes. Trust me, your taste buds will thank you.

Continue Reading

Recipes & Culinary Uses

How to Make Butter Powder

Published

on

By

An image depicting the step-by-step process of making butter powder: a churner filled with creamy butter, transforming into fine powder particles, captured in a container, ready to be sprinkled on delicacies

I never thought I could transform butter into a fine, powdery form – until I discovered the secret technique.

Making butter powder opens up a world of culinary possibilities. With just a few simple ingredients and a step-by-step guide, you’ll be able to create this versatile ingredient right in your own kitchen.

So, grab your apron and get ready to embark on a scientific journey that will revolutionize your cooking game. Trust me, you won’t want to miss out on this buttery adventure.

Key Takeaways

  • Butter powder is lower in calories and fat compared to regular butter, making it a healthier alternative.
  • It contains essential vitamins and minerals like vitamin A and calcium, adding nutritional value to dishes.
  • Butter powder has a longer shelf life, making it practical for storage and travel.
  • It can easily be measured and incorporated into recipes without the need to soften or melt butter.

Benefits of Butter Powder

Butter powder is a convenient option for you if you’re looking for a long-lasting and easy-to-use alternative to traditional butter. It offers several nutritional advantages compared to regular butter.

First, butter powder is lower in calories and fat, making it a healthier choice for those watching their weight or cholesterol intake. Additionally, it contains essential vitamins and minerals, such as vitamin A and calcium, which are beneficial for overall health.

When compared to regular butter, butter powder also has a longer shelf life, making it a practical option for storage and travel. Its powdered form allows for easy measurement and incorporation into recipes, eliminating the need to soften or melt butter.

In the subsequent section, we will discuss the ingredients needed for making butter powder.

Ingredients Needed for Making Butter Powder

To create this powdered version, you’ll need a few key ingredients. Here are the ingredients you’ll need for making butter powder:

  • Unsalted butter: The main ingredient for making butter powder is unsalted butter. Make sure to use high-quality butter for the best results.

  • Nonfat milk powder: Nonfat milk powder is used to help dry out the butter and turn it into a powder form.

  • Flavorings: You can add flavor variations to your butter powder by incorporating herbs, spices, or even cheese powder for a savory twist.

  • Storage containers: Once your butter powder is ready, you’ll need proper storage options to keep it fresh. Airtight containers or vacuum-sealed bags are ideal for preserving the flavor and texture of the powder.

Now that you know the necessary ingredients, let’s move on to the step-by-step guide to making butter powder.

Step-by-Step Guide to Making Butter Powder

Now that you have all the necessary ingredients, let’s start by melting the unsalted butter. This step is crucial to create a smooth and creamy texture for the butter powder. Once the butter is melted, we will proceed with the next steps to make the butter powder. But before we dive into the process, let’s take a moment to explore the different types of butter powder available and the health benefits of using it in cooking.

Types of Butter Powder Health Benefits
Salted Butter Powder High in sodium, adds flavor to dishes
Unsalted Butter Powder Low in sodium, suitable for low-salt diets
Organic Butter Powder Made from organic dairy, free from pesticides and antibiotics

Using butter powder in cooking offers numerous health benefits. Firstly, it provides the rich flavor of butter without the need for refrigeration or worrying about spoilage. Secondly, it is a convenient option for those who are lactose intolerant or following a vegan diet. Lastly, butter powder is a good source of healthy fats, vitamins A, D, E, and K, and essential fatty acids. Incorporating butter powder into your cooking can enhance the taste of your dishes while also providing nutritional value.

Tips and Tricks for Perfect Butter Powder

For the perfect butter powder, you’ll want to ensure that you use high-quality ingredients and store it in an airtight container to maintain its freshness. Here are some tips and tricks to help you achieve the best results:

  • Storage options for butter powder:
  • Airtight container: Use a container with a tight-fitting lid to keep moisture and air out, which can cause the powder to clump and lose its flavor.
  • Cool, dark place: Store the container in a cool and dark pantry or cupboard to avoid exposure to light and heat, which can degrade the quality of the powder.
  • Refrigeration: If you live in a hot and humid climate, consider storing your butter powder in the refrigerator to prolong its shelf life.

Comparing homemade butter powder to store-bought options:

  • Quality control: Making your own butter powder allows you to have full control over the ingredients and ensures that you are using high-quality butter.
  • Customization: Homemade butter powder allows you to add your own flavors and spices, giving you a unique and personalized product.
  • Cost-effectiveness: Making your own butter powder can be a more economical option compared to buying pre-packaged versions.

Creative Ways to Use Butter Powder in Recipes

When incorporating butter powder into your recipes, you’ll discover a multitude of creative ways to enhance the flavors and textures of your dishes.

Butter powder is a versatile ingredient that can be used in various unique flavor combinations. For savory dishes, try adding butter powder to mashed potatoes, soups, or roasted vegetables to give them a rich and creamy taste.

In sweet recipes, incorporate butter powder into your cookie or cake batter for a buttery and indulgent flavor.

Additionally, butter powder can also be used in homemade beauty products. Mix it with other ingredients such as shea butter and essential oils to create a nourishing body butter or lip balm.

The possibilities are endless when it comes to incorporating butter powder into your culinary and beauty endeavors.

Frequently Asked Questions

How Long Does Butter Powder Last Once It Is Made?

Butter powder’s shelf life once made depends on storage recommendations. It can last for several months when stored in an airtight container in a cool, dry place. Proper storage is crucial for maintaining its quality and freshness.

Can I Use Margarine Instead of Butter to Make Butter Powder?

Using margarine as a substitute for butter in making butter powder may affect the flavor and texture. Butter powder offers the benefits of long shelf life and convenience, making it a versatile ingredient in various recipes.

Can I Add Flavorings or Seasonings to the Butter Powder?

Yes, you can add flavorings or seasonings to butter powder. It’s a great way to enhance the taste of your recipes. Some ideas include garlic powder, onion powder, or even herbs like thyme or rosemary. Experiment and find what works best for you.

How Does the Taste of Butter Powder Compare to Real Butter?

Butter powder has a similar taste to real butter, but it may lack some of the richness and depth. However, it still provides the convenience and versatility of real butter, making it a great option for various uses.

Can Butter Powder Be Used in Baking Recipes as a Substitute for Real Butter?

Yes, butter powder can be used in baking recipes as a substitute for real butter. It offers the benefits of convenience, extended shelf life, and easy measurement. Baking with butter powder yields similar results to using real butter.

Conclusion

In conclusion, making butter powder is a simple and convenient way to enjoy the delicious taste and benefits of butter in a powdered form. By following the step-by-step guide and using the right ingredients, anyone can create their own butter powder at home.

With its long shelf life and versatility in recipes, butter powder can be a valuable addition to any kitchen. So why not give it a try and experience the wonders of butter in a whole new way?

Can you imagine the endless possibilities of adding butter powder to your favorite dishes?

Continue Reading

Recipes & Culinary Uses

How to Make Butter Pecans

Published

on

By

-up shot of a golden-brown pecan sitting atop a dollop of creamy butter, surrounded by a scattering of crushed pecans and a drizzle of sticky caramel sauce

I’ve always loved the rich and indulgent taste of butter pecans, and now I want to share with you my foolproof recipe for making them at home.

Did you know that over 70% of people prefer homemade butter pecans over store-bought?

In this article, I’ll guide you through the step-by-step process of making butter pecans.

First, we’ll start by gathering the ingredients.

Next, we’ll move on to preparing the pecans.

Then, we’ll make the butter mixture.

After that, we’ll coat and bake the pecans.

Finally, we’ll add those final touches that will make your butter pecans absolutely irresistible.

Let’s get started!

Key Takeaways

  • Gather all necessary ingredients, including roasted or raw pecans, based on desired flavor.
  • Toast the pecans in a skillet until golden brown to enhance flavor and add crunch.
  • Create a butter mixture with softened butter and seasonings to bring all the flavors together.
  • Coat the pecans evenly with a mixture of melted butter and sugar for perfect butter pecans every time.

Gathering the Ingredients

Now that you’ve got all the ingredients, let’s start making some delicious butter pecans!

When it comes to butter pecans, there are a few key decisions to make. The first is whether you prefer them to be sweet or salty. If you have a sweet tooth, you may want to add a bit more sugar to the recipe. On the other hand, if you enjoy a savory snack, you can add a touch of salt to enhance the flavor.

Another decision to make is whether you want to use roasted or raw pecans. Roasted pecans have a deeper, nutty flavor, while raw pecans offer a lighter, more natural taste. Whichever option you choose, both will result in a delicious batch of butter pecans.

Preparing the Pecans

First, toast your pecans in a skillet until they are golden brown. This step is crucial as it enhances the nutty flavor and adds a delightful crunch to the butter pecans. Once toasted, the pecans can be seasoned in a variety of ways to suit your taste preferences. Here are some seasoning options for other nuts that you can try:

Seasoning Description Recommended Nuts
Cinnamon Sugar Sweet and aromatic Almonds
Smoky Paprika Spicy and smoky Cashews
Garlic Parmesan Savory and cheesy Walnuts

Now, let’s explore the different ways to use butter pecans. These delectable treats can be enjoyed on their own as a snack or used as a topping for desserts like ice cream, yogurt, or even salads for a delightful crunch. The possibilities are endless!

Next, we’ll move on to making the butter mixture and bringing all the flavors together.

Making the Butter Mixture

To bring all the flavors together, you’ll need to mix the softened butter with the chosen seasonings and herbs. The butter mixture is essential for adding that rich, savory taste to the butter pecans.

If you’re looking for alternatives to the traditional butter mixture, you can try using coconut oil or olive oil instead. These alternatives will give a unique twist to your butter pecans and can be a healthier option.

When troubleshooting common issues with the butter mixture, make sure that the butter is softened but not melted. If the butter is too soft, the mixture may become too runny, and if it’s too cold, the mixture may not blend properly.

Once you’ve got your butter mixture ready, it’s time to move on to coating the pecans.

Coating the Pecans

When it comes to coating pecans, there are a few key points to consider.

Firstly, the best coating method can vary depending on personal preference and the desired outcome.

Secondly, the choice between a sweet or savory coating can greatly impact the flavor profile of the pecans.

Lastly, deciding whether to roast or leave the pecans raw before coating can affect the texture and taste of the final product.

Considering these factors will help ensure the perfect coating for your butter pecans.

Best Coating Method

For the best coating method, you should gently toss the pecans in the melted butter and sugar mixture until they are evenly coated. This method ensures that every pecan is covered in the delicious sweetness of the butter and sugar.

However, if you’re feeling adventurous, you can try experimenting with different coating options to add a unique twist to your butter pecans. Some popular alternatives include using honey instead of sugar, adding cinnamon or cocoa powder for extra flavor, or even sprinkling a touch of sea salt for a sweet and salty combination.

Don’t be afraid to get creative and try different flavors to find your favorite combination. Just remember to coat the pecans evenly and thoroughly to achieve the perfect butter pecans every time.

Sweet or Savory

If you’re unsure whether to go for a sweet or savory twist, why not try a batch of both and see which one you prefer? Butter pecans can be made with different flavor profiles to suit your taste preferences. Here are four delicious options to consider:

  1. Sweet and Salty: Combine the richness of butter with the sweetness of brown sugar and the saltiness of sea salt. This classic combination is a crowd-pleaser.

  2. Spicy and Sweet: Add a kick to your butter pecans by incorporating cayenne pepper or chili powder. The heat will balance out the sweetness for a unique flavor experience.

  3. Herb-infused: Experiment with herbs like rosemary or thyme to give your butter pecans an earthy and aromatic twist. The herbs will add depth and complexity to the flavor.

  4. Citrus Burst: Enhance the sweetness of the pecans by adding a hint of citrus zest, such as orange or lemon. The bright and tangy flavor will make your butter pecans truly refreshing.

Roasted or Raw?

To determine your preference, try experimenting with roasted and raw pecans to see which one you enjoy more.

Roasted pecans have a rich, nutty flavor and a slightly crunchy texture. They are often seasoned with spices like cinnamon or salt for added taste.

On the other hand, raw pecans have a milder flavor and a softer texture. They can be used in a variety of recipes such as salads, granolas, or baked goods.

In terms of health benefits, both roasted and raw pecans are packed with nutrients like healthy fats, fiber, and antioxidants. However, roasting pecans may slightly reduce their nutritional content.

Ultimately, the choice between roasted and raw pecans depends on personal preference and the specific recipe you’re making.

Now, let’s move on to the next step of baking the pecans.

Baking the Pecans

When it comes to roasting pecans, the time and temperature are crucial factors to consider. The right roasting time and temperature can bring out the perfect balance of flavors and textures in the pecans.

Additionally, there are various seasoning options available to enhance the taste of roasted pecans. Some popular choices include cinnamon, sugar, or even savory spices like garlic powder or cayenne pepper.

Roasting Time and Temperature

The butter pecans should be roasted at a temperature of 350 degrees Fahrenheit for 10-12 minutes. This is the perfect roasting technique to achieve a crispy and flavorful nut. Here are four reasons why roasting at this temperature and time is essential for the best results:

  1. Even Roasting: The moderate temperature ensures that the pecans are evenly roasted, preventing any burnt or undercooked spots.

  2. Flavor Infusion: Roasting at 350 degrees Fahrenheit allows the natural oils in the pecans to be released, resulting in a rich and nutty flavor.

  3. Perfect Texture: The 10-12 minute roasting time gives the pecans a delightful crunch while still maintaining a slightly soft center.

  4. Time Efficiency: This temperature and time combination ensures that the pecans are roasted quickly, making it a convenient option for a quick snack or a last-minute addition to a recipe.

Now that the pecans are perfectly roasted, let’s move on to exploring the various seasoning options to elevate their flavor even further.

Seasoning Options for Pecans

Now that you’ve roasted your pecans to perfection, let’s explore the various seasoning options to elevate their flavor even further.

There are countless ways to add a burst of taste to your butter pecans, and the possibilities are truly endless. From sweet to savory, the choice is yours.

You can go for classic options like cinnamon and sugar, or get creative with cayenne pepper for a spicy kick. For a more indulgent treat, try drizzling melted chocolate over your pecans or sprinkling them with a hint of sea salt.

Not only do these different flavorings enhance the taste, but they also come with their own health benefits. Cinnamon, for example, is known to help regulate blood sugar levels, while cayenne pepper can boost metabolism.

Adding the Final Touches

To finish off your butter pecans, all you need to do is sprinkle a pinch of salt and a drizzle of melted butter over the top. This will add a burst of flavor and enhance the overall taste of the pecans.

However, if you want to get creative and explore different ways to add flavor to your butter pecans, here are a few suggestions:

  1. Spices: Try adding a sprinkle of cinnamon, nutmeg, or even a dash of cayenne pepper for a spicy kick.

  2. Sweeteners: Add a drizzle of honey or maple syrup to give your butter pecans a touch of sweetness.

  3. Extracts: Experiment with different extracts like vanilla, almond, or coconut to infuse your pecans with unique flavors.

  4. Savory options: Consider adding herbs like rosemary or thyme, or even a sprinkle of garlic powder for a savory twist.

To prevent your pecans from getting soggy when coating them, make sure they are completely dry before adding any toppings or seasonings. This will ensure that the butter and salt adhere properly to the pecans, creating a delightful crunch with every bite.

Storing and Serving

For optimal freshness, store your butter pecans in an airtight container in a cool, dry place. This will help extend their shelf life and maintain their delicious flavor. When it comes to serving suggestions, butter pecans are incredibly versatile. They can be enjoyed on their own as a tasty snack, added to desserts like ice cream or cookies, or even used as a topping for salads or roasted vegetables. Their rich, buttery taste and crunchy texture make them a delightful addition to any dish. To give you some inspiration, here are a few serving suggestions for butter pecans:

Serving Suggestion Description
Ice Cream Topping Sprinkle a handful of butter pecans over your favorite ice cream flavors for an indulgent treat.
Salad Add-On Add a handful of butter pecans to your salad for a crunchy texture and nutty flavor.
Baking Ingredient Incorporate butter pecans into your favorite baking recipes, such as cookies or brownies, for an extra layer of richness and crunch.

No matter how you choose to enjoy them, make sure to store your butter pecans properly to maximize their shelf life and savor their deliciousness for as long as possible.

Variations and Additions

When adding variations and additions to your dishes, don’t be afraid to get creative and experiment with different flavors and textures. Here are four ways you can elevate your dishes using the versatile and nutritious pecans:

  1. Roasted Pecans: Toss pecans with a drizzle of olive oil, sprinkle with salt and your favorite spices, then roast in the oven until golden brown. These crunchy and savory pecans make a great topping for salads or a delicious snack on their own.

  2. Candied Pecans: Coat pecans in a mixture of sugar, cinnamon, and a pinch of salt, then bake until caramelized. These sweet and crunchy pecans are perfect for adding a touch of sweetness to desserts or as a topping for ice cream.

  3. Pecan Butter: Blend roasted pecans in a food processor until smooth and creamy. Pecan butter is a healthier alternative to traditional butter and can be used as a spread on toast or as a base for sauces and dressings.

  4. Pecan Crumble: Combine chopped pecans with oats, brown sugar, and butter, then sprinkle over fruit crisps or pies. The nutty and crunchy pecan crumble adds a delightful texture and flavor to your baked goods.

In addition to their delicious taste, pecans also offer several health benefits. They’re packed with heart-healthy fats, fiber, and antioxidants that can help reduce inflammation and improve digestion. So go ahead and explore the many varieties of pecans and enjoy their wonderful taste and nutritional benefits in your dishes.

Tips and Tricks

Experimenting with different flavors and textures can elevate your dishes and make them more exciting.

When it comes to butter pecan recipes, there are endless flavor combinations that can take your creations to the next level.

One tip is to experiment with different spices and seasonings. For a savory twist, try adding a pinch of smoked paprika or cayenne pepper to your butter pecans. If you prefer a sweet and spicy flavor, sprinkle some cinnamon and nutmeg on top.

Another idea is to incorporate different nuts into your recipe. Mixing in some almonds or walnuts can add a delightful crunch and enhance the overall flavor profile.

Additionally, don’t be afraid to play around with different sweeteners. Brown sugar, maple syrup, or even a drizzle of honey can bring a new dimension to your butter pecan dishes.

Frequently Asked Questions

How Many Calories Are in a Serving of Butter Pecans?

A serving of butter pecans contains approximately 150 calories. It is important to be mindful of the calories per serving when considering the nutritional value of this delicious treat.

Can I Substitute the Pecans With Another Type of Nut?

Sure, you can substitute the pecans with another type of nut. However, it’s important to consider any nut allergies. Almonds or walnuts would be great alternatives, as they have similar flavors and textures.

Can I Use Margarine Instead of Butter in the Recipe?

Using margarine instead of butter in recipes has pros and cons. Margarine is a common substitute due to its lower saturated fat content. However, it may affect the flavor and texture of the dish.

How Long Do the Butter Pecans Stay Fresh?

Butter pecans can stay fresh for up to two weeks if stored properly. To maintain their shelf life, it’s important to store them in an airtight container in a cool, dry place.

Can I Freeze the Butter Pecans for Later Use?

Yes, you can freeze butter pecans for later use. I have some freezing tips and storing methods that will keep them fresh and delicious. Let me share them with you.

Conclusion

In conclusion, making butter pecans is a delightful and rewarding process.

As I carefully coated the pecans with the butter mixture and watched them bake to perfection, I couldn’t help but be reminded of how life can transform us through different experiences.

Just like the pecans, we go through trials and challenges, but with the right ingredients and a little heat, we can come out even more delicious and resilient.

So next time you’re in the mood for a sweet treat, give this recipe a try and savor the delicious metaphor of growth and transformation.

Continue Reading

Trending