Connect with us

Recipes & Culinary Uses

Make Delicious Butter Flavored Shortening at Home

Published

on

An image showcasing the process of making butter-flavored shortening: a mixing bowl filled with creamy shortening, a stick of butter being melted, the melted butter being slowly poured into the bowl, and the ingredients being blended together until smooth

I didn’t realize I could replicate the luxurious, creamy flavor of butter using homemade shortening until I found this brilliant recipe.

In just a few simple steps, you can learn how to make butter flavored shortening that will elevate your baking to a whole new level.

By carefully selecting the right ingredients, measuring and mixing with precision, and adding a touch of buttery goodness, you’ll achieve the perfect consistency and flavor.

Get ready to impress with this versatile and delectable ingredient in your culinary arsenal.

Key Takeaways

  • Start with high-quality shortening and consider experimenting with different flavor combinations
  • Proper measuring techniques and mixing time and speed are crucial for texture and consistency
  • Pay attention to the consistency of the mixture and adjust proportions or mix thoroughly if needed
  • Explore various options like high-quality butter extract, butter flavoring oils, or homemade butter extract to enhance the flavor of butter flavored shortening.

Choosing the Right Ingredients

Advertisement

To make butter flavored shortening, you’ll want to start by choosing the right ingredients. Measuring accuracy is crucial in achieving the perfect balance of flavors.

Begin by selecting high-quality shortening, preferably vegetable-based, as the base ingredient. Opt for a brand that is known for its consistent texture and flavor.

Next, choose a butter extract or flavoring that suits your taste preferences. There are various flavor variations available, such as salted or unsalted butter, which can affect the final taste of your shortening. Consider experimenting with different combinations to find the perfect balance.

Remember to follow the recommended measurements for both the shortening and butter flavoring to ensure accurate results.

Precise ingredient selection and measuring accuracy are key in creating a delicious butter flavored shortening.

Advertisement

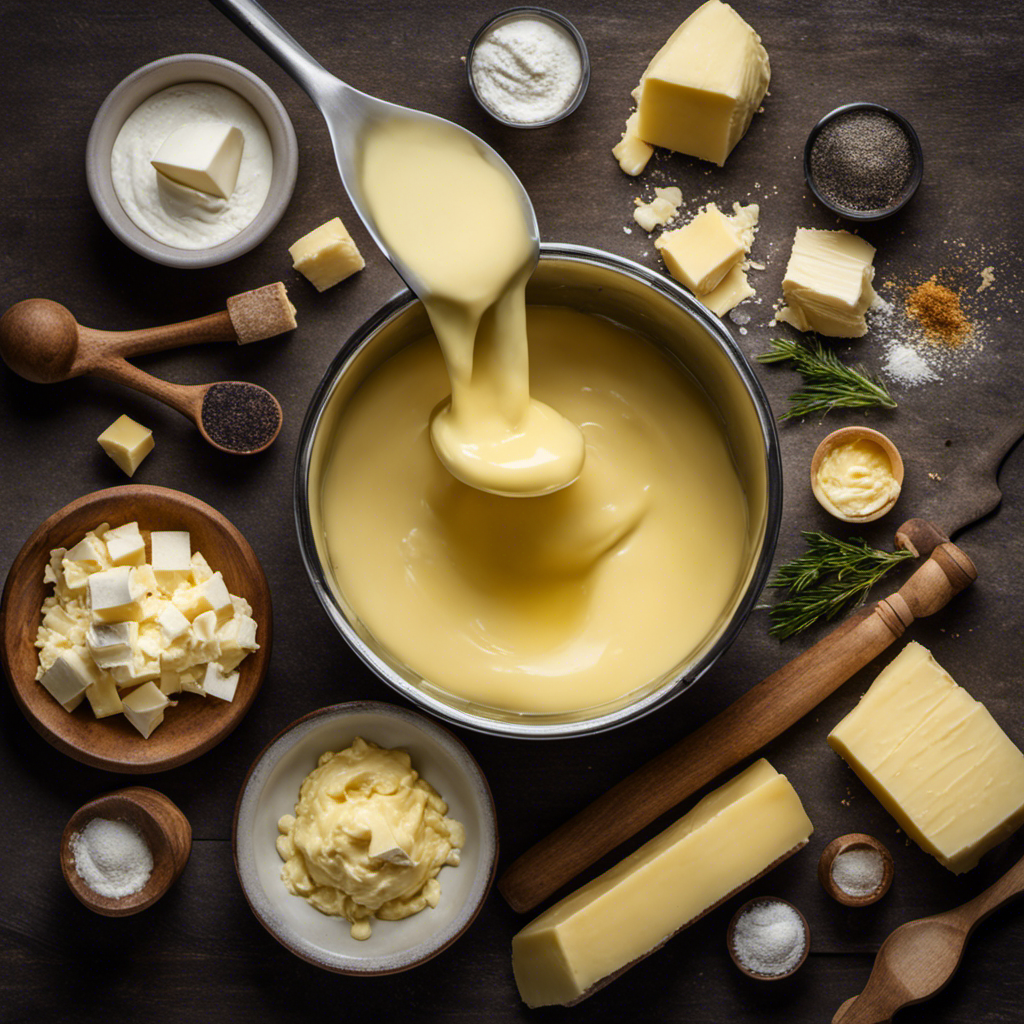
Measuring and Mixing

When it comes to achieving the perfect mixture, there are several key factors to consider. Proper measuring techniques are crucial in ensuring accurate proportions of ingredients.

Mixing time and speed play a significant role in achieving the desired texture and consistency, while maintaining the integrity of the mixture.

Consistency of the mixture is essential for the overall success of the recipe, as it affects the final product’s taste, appearance, and texture.

Proper Measuring Techniques

Using proper measuring techniques is essential when making butter flavored shortening. Measuring accuracy ensures that the right proportions of ingredients are added, resulting in a consistent and delicious product.

To achieve precise measurements, I always use a digital scale for both solid and liquid ingredients. This ensures accuracy to the nearest gram or milliliter. When measuring solid fats, such as butter or margarine, I use a knife to level off the required amount.

Advertisement

It is also important to note that alternative flavorings, such as butter extracts or artificial flavorings, should be measured with the same accuracy as the other ingredients. This guarantees a balanced and authentic butter flavor in the shortening.

Accurate measuring techniques are the foundation for creating a high-quality butter flavored shortening every time.

Mixing Time and Speed

The mixing time and speed are crucial factors in achieving the perfect consistency for the shortening. When it comes to mixing techniques, here are three important things to keep in mind:

  1. Optimal Time: It is important to mix the shortening for the recommended duration. Undermixing can result in an uneven distribution of flavors, while overmixing can lead to a greasy texture.

  2. Proper Speed: The speed at which you mix the shortening is equally important. Mixing at a high speed can introduce excessive air into the mixture, resulting in a lighter texture. However, mixing at a low speed may not fully incorporate the flavor and may lead to a dense consistency.

  3. Troubleshooting Problems: Pay attention to the texture and appearance of the mixture while mixing. If the shortening looks grainy or curdled, it may indicate that it has been mixed for too long or at too high of a speed.

By mastering these mixing techniques and troubleshooting problems, you can ensure that your butter flavored shortening turns out perfectly.

Now, let’s move on to discussing the next section about the consistency of the mixture.

Advertisement

Consistency of Mixture

To achieve the perfect consistency, you’ll want to pay close attention to the texture and appearance of the mixture while mixing. Measuring accuracy is crucial in ensuring the desired results. Make sure to use a reliable scale or measuring cups to accurately measure the ingredients. Troubleshooting tips can come in handy if the consistency is not as desired. Here are some common issues and their solutions:

Problem Potential Cause Solution
Mixture is too runny Excess liquid or insufficient fat Add more shortening or reduce the liquid
Mixture is too stiff Too much fat or insufficient liquid Add more liquid or reduce the shortening
Mixture has lumps Inadequate mixing or clumps in ingredients Mix thoroughly or sift ingredients before mixing

Adding the Butter Flavor

When it comes to adding butter flavor to my recipes, I always consider the various options for butter extract available.

I find that using a high-quality butter extract can greatly enhance the flavor of my baked goods, giving them that rich and creamy taste.

However, it’s important to note that there is a difference between butter and margarine, both in terms of taste and composition, so I take into account the specific needs of my recipe when deciding which to use.

Butter Extract Options

For a variety of butter extract options, you can find them at your local grocery store or online.

Advertisement

Here are three alternatives to consider if you want to avoid using store-bought butter extract:

  1. Homemade Butter Extract: Making your own butter extract is a great option. Simply melt unsalted butter and strain out any solids. The resulting liquid can be used as a substitute for butter extract in recipes.

  2. Butter Flavoring Oils: These oils are concentrated extracts that provide a strong buttery flavor. They are often used by professional bakers and can be found in specialty stores or online. Be sure to use them in small amounts as they can be quite potent.

  3. Butter Powder: Butter powder is made by removing the moisture from butter and grinding it into a fine powder. It can be rehydrated and used in recipes, or sprinkled on popcorn for a buttery flavor. Look for butter powder in the baking aisle of your grocery store or online.

These alternatives offer a range of options for adding butter flavor to your dishes without using traditional butter extract.

Enhancing the Flavor

One way to enhance the flavor of your dishes is by using alternative ingredients like butter flavoring oils or homemade butter extract. These flavor alternatives can significantly improve the taste of your recipes, giving them a rich and buttery flavor without actually using real butter.

Butter flavoring oils are concentrated extracts that capture the essence of butter, allowing you to add a burst of flavor to your dishes. Homemade butter extract, on the other hand, is made by infusing butter into a neutral oil, creating a flavorful extract that can be used in various recipes.

By incorporating these flavor alternatives, you can elevate the taste of your dishes and create a delightful culinary experience.

Advertisement

Now, let’s delve into the debate of butter versus margarine to further explore the world of buttery flavors.

Butter Vs Margarine

When it comes to choosing between butter and margarine, there are several factors to consider. Here’s what you need to know:

  1. Taste: Butter has a rich, creamy flavor that many people prefer. It adds a distinct buttery taste to baked goods and spreads. On the other hand, margarine often has a milder flavor that may not be as appealing to some.

  2. Texture: Butter is solid at room temperature and melts when heated. This gives baked goods a light and flaky texture. Margarine, on the other hand, is softer and more spreadable, which can be advantageous in certain recipes.

  3. Health concerns: Butter is high in saturated fat, which is linked to heart disease. Margarine, on the other hand, is often made with vegetable oils and can be lower in saturated fat. However, some margarines contain trans fats, which are also unhealthy.

Ultimately, the choice between butter and margarine depends on personal preference and dietary considerations. It’s important to choose moderation and balance in your overall diet to maintain a healthy lifestyle.

Achieving the Perfect Consistency

To achieve the perfect consistency, you’ll want to make sure you mix the butter flavored shortening thoroughly until smooth. This is essential in order to ensure that all the ingredients are evenly distributed and blended together. One of the key aspects of achieving the perfect consistency is using the right butter flavoring substitutes. These substitutes can help to enhance the taste and texture of the shortening, giving it that rich and creamy buttery flavor. However, it’s important to note that different substitutes may have different effects on the consistency of the shortening. To help troubleshoot any consistency issues, I have provided a helpful table below that outlines some common butter flavoring substitutes and their impact on the final product’s consistency.

Butter Flavoring Substitute Consistency Impact
Margarine Slightly softer
Coconut oil Firmer
Olive oil Softer

Storing and Preserving Your Butter Flavored Shortening

To ensure the longevity of your buttery shortening, it’s important to store it in an airtight container in a cool and dry place. Proper storage will not only maintain the flavor and texture of your butter flavored shortening, but also extend its shelf life.

Advertisement

Here are some essential tips for storing and preserving your butter flavored shortening:

  1. Keep it airtight: Store your butter flavored shortening in an airtight container to prevent exposure to air, which can lead to oxidation and rancidity.

  2. Choose a cool and dry place: Heat and moisture can degrade the quality of your shortening. Therefore, store it in a cool and dry place, away from direct sunlight, heat sources, and high humidity areas.

  3. Check the expiration date: It’s crucial to check the expiration date before using your butter flavored shortening. Using it beyond the recommended timeframe can lead to a decline in flavor and quality.

By following these storing tips, you can enjoy the buttery goodness of your shortening for an extended period.

Now, let’s explore some creative uses for butter flavored shortening.

Creative Uses for Butter Flavored Shortening

One way you can get creative with your buttery shortening is by using it to make flaky pie crusts. Butter flavored shortening adds a rich and indulgent taste to your crusts while also enhancing their texture.

To make a butter flavored shortening pie crust, combine all-purpose flour, salt, and chilled butter flavored shortening in a bowl. Cut the shortening into the flour using a pastry cutter until the mixture resembles coarse crumbs. Slowly add ice water and mix until the dough forms a ball. Roll out the dough and place it in a pie dish.

Advertisement

The benefits of using butter flavored shortening in your pie crusts include a buttery flavor, a tender and flaky texture, and improved browning. Experiment with different butter flavored shortening recipes to create delicious and unique pies.

Frequently Asked Questions

Can I Use Margarine Instead of Butter to Achieve a Buttery Flavor in My Shortening?

Yes, you can use margarine instead of butter to achieve a buttery flavor in your shortening. Margarine is a common alternative to butter in baking and can provide a similar taste when used in the right proportions.

Is It Possible to Make a Vegan Version of Butter Flavored Shortening?

Yes, it is possible to make a vegan version of butter flavored shortening. Vegan butter alternatives, such as plant-based margarine or coconut oil, can be used instead. Shortening offers benefits like improved texture and extended shelf life.

Will Adding Butter Flavoring Alter the Texture or Consistency of My Baked Goods?

Adding butter flavoring may potentially alter the texture and consistency of baked goods. It is crucial to carefully balance the amount of flavoring used to achieve a buttery taste without compromising the desired texture and consistency.

How Long Can I Store Butter Flavored Shortening Before It Goes Bad?

The shelf life of butter flavored shortening depends on the specific product and storage conditions. Generally, shortening can be stored for up to a year in a cool, dry place. Always check the expiration date and follow any storage instructions provided.

Advertisement

Can I Use Butter Flavored Shortening in Savory Dishes, or Is It Mainly for Baking Purposes?

I have found that using butter flavored shortening in savory dishes can add a rich and buttery taste. It’s not just for baking! I enjoy experimenting with different flavors in shortening to create unique and delicious dishes.

Conclusion

In conclusion, creating butter flavored shortening is a simple yet precise process that requires the right ingredients and careful measurements. By adding butter flavoring, the shortening takes on a delightful taste and aroma, adding complexity to your baked goods.

The consistency of the shortening is crucial, as it affects the outcome of your recipes. Proper storage and preservation techniques will ensure the longevity of your butter flavored shortening.

So, go ahead and experiment with this versatile ingredient, and uncover the truth of its potential to enhance your culinary creations.

Advertisement
Continue Reading
Advertisement

Recipes & Culinary Uses

Creamy Delight: Best Butter Pecan Ice Cream Recipe for Summer!

Yearning for a creamy summer treat that will leave you craving more?

Published

on

By

butter pecan ice cream

Savor a delicious summer treat with our Butter Pecan Ice Cream recipe. Mix butter, brown sugar, cream, and pecans for a creamy delight. Melt butter, cook pecans, whisk eggs, and blend for a rich flavor. Add pecans, cream, and vanilla, then freeze to perfection. Master this easy-to-follow recipe for a tasty dessert to beat the heat.

Key Takeaways

  • Rich and creamy blend of butter, brown sugar, and heavy cream
  • Toasted pecans for a nutty crunch and flavor
  • Easy-to-follow steps for homemade ice cream perfection
  • Customization options with variations like bourbon or chocolate
  • Perfect summer treat with a decadent, refreshing taste

Recipe Ingredients for Butter Pecan Ice Cream

To create a delectable batch of butter pecan ice cream, gather the essential ingredients listed in the recipe.

You'll need:

  • Butter
  • Brown sugar
  • Heavy cream
  • Pecans

These ingredients combine to bring out the rich and nutty flavors of this classic dessert.

The brown sugar adds a caramel-like sweetness, while the heavy cream contributes to a creamy texture that's essential for a decadent treat.

Pecans, when toasted in butter, provide a delightful crunch and enhance the overall flavor profile of the ice cream.

Cooking Instructions for Homemade Ice Cream

making ice cream at home

Start by melting butter in a skillet to infuse the pecans with a rich, nutty flavor for your homemade butter pecan ice cream.

Here's a quick guide to help you make this creamy delight:

Advertisement
  • Melt butter and cook pecans for flavor.
  • Whisk eggs and combine with half-and-half and brown sugar for a creamy base.
  • Cook until thickened, then mix with eggs in a bowl.
  • Add cream, pecans, and vanilla extract.
  • Freeze the mixture in an ice cream maker.

Following these steps will guarantee your homemade butter pecan ice cream turns out rich and delicious.

Remember to carefully adhere to the manufacturer's instructions for your ice cream maker to achieve the perfect consistency.

Enjoy the process of creating this delightful treat that will surely be a hit during the summer months.

Ice Cream Preparation Steps

ice cream recipe instructions

Mix half and half with brown sugar over medium heat in a large bowl to prepare the ice cream base.

Next, whisk beaten eggs and temper them with the warm milk mixture to create a smooth custard.

Once done, thicken the mixture on low heat, then cool it over an ice bath to achieve ideal texture.

After that, stir in heavy cream, vanilla extract, maple extract, and a pinch of salt for rich flavor.

Advertisement

Remember to refrigerate the mixture for 1 1/2 – 2 hours before churning it into creamy butter pecan ice cream.

This process ensures that the flavors meld together beautifully and the ice cream attains the perfect consistency for scooping and savoring.

Nutritional Information and Tips

healthy eating guidance provided

Considering the rich and creamy nature of homemade butter pecan ice cream, it's important to be mindful of its nutritional content and serving size. When indulging in this delectable dessert, remember these essential tips:

  • Portion Control: Enjoy in moderation to savor the flavors without overindulging.
  • Brown Sugar Sweetness: Opt for a moderate amount of brown sugar to balance sweetness without overwhelming the palate.
  • Room Temperature Ingredients: Confirm ingredients like butter and heavy cream are at room temperature for a smoother texture.
  • Nutritional Awareness: Be mindful that homemade butter pecan ice cream can vary in nutritional content, so adjust ingredients accordingly.
  • Consultation: Seek advice from a nutritionist or healthcare provider for personalized guidance on incorporating this treat into a balanced diet.

Homemade Butter Pecan Ice Cream Variations

delicious homemade ice cream

Explore creative twists on traditional butter pecan ice cream by incorporating different nuts, spirits, sauces, chocolates, and dairy-free alternatives.

For a unique flavor, try substituting pecans with walnuts or almonds in the full recipe. Toast the nuts in a separate bowl until browned and fragrant, then chop them finely enough to coat in the ice cream mixture.

To add a boozy kick, mix in a splash of bourbon or rum to the base as you churn the ice cream. For an extra indulgent touch, swirl in caramel sauce or fudge ripple throughout the mixture.

Incorporate chunks of chocolate or chocolate-covered nuts for a delightful contrast in texture, giving each bite a sweet surprise.

Advertisement

If you prefer a lighter, dairy-free option, consider using coconut milk or almond milk as a substitute for traditional dairy products. These alternatives provide a creamy base while catering to plant-based diets.

Experiment with these variations to create a personalized butter pecan ice cream that suits your taste preferences.

Frequently Asked Questions

What Is the Secret to Making Ice Cream Very Creamy?

To make ice cream very creamy, you use a rich base of ingredients like heavy cream, eggs, and sugar. Chilling the base before churning is crucial for a smoother texture. Adding vanilla extract enhances creaminess, and slow churning prevents a dense outcome.

What Flavor Is the Ice Cream in Butter Pecan?

The ice cream in butter pecan is a delightful blend of buttery richness, vanilla sweetness, and maple undertones, perfectly paired with toasted pecans for a nutty crunch. This flavor combination creates a harmonious and indulgent treat.

What's the Difference Between Butter Pecan Ice Cream and Praline Pecan Ice Cream?

In butter pecan ice cream, you'll savor the buttery richness of pecans blended with a creamy base. On the other hand, praline pecan ice cream highlights caramelized sweetness with a swirl of praline sauce for a delightful flavor contrast.

Advertisement

What Age Group Eats Butter Pecan Ice Cream?

You'll find that adults and older individuals, typically in the 30-60 age group, enjoy butter pecan ice cream. It's a favorite among those with a more refined palate, drawn to its rich and nutty flavor.

Conclusion

So there you have it, folks! Whip up this buttery, nutty delight for a taste of summer in every scoop.

Don't cry over spilled milk – grab a cone and enjoy this creamy treat that's sure to satisfy your sweet tooth.

Get churning and indulge in the best butter pecan ice cream you've ever tasted!

Advertisement
Continue Reading

Recipes & Culinary Uses

Festive Favorites: Best Peanut Butter Blossoms Recipe for Holidays!

Unleash the ultimate holiday baking magic with the best Peanut Butter Blossoms recipe – an irresistible treat that will elevate your festive celebrations!

Published

on

By

holiday baking with flair

Elevate your holiday baking with the ultimate Peanut Butter Blossoms recipe. Cream together peanut butter, butter, sugars, and salt, then add egg and vanilla. Roll dough into balls, coat in brown sugar, bake until golden, then press a Hershey's kiss on top. Adjust baking time as needed. Explore ingredient swaps for a personalized touch. Enjoy with hot cocoa or pair with savory dishes. For more tips, ideas, and customization options, the recipe holds more festive surprises.

Key Takeaways

  • Cream together peanut butter, butter, sugars for rich flavor.
  • Bake at 375°F for 8-10 minutes for soft, chewy cookies.
  • Customize with ingredient swaps like almond butter or maple syrup.
  • Pair with savory dishes or hot cocoa for holiday enjoyment.
  • Press Hershey kisses onto warm cookies for a classic finish.

Ingredients for Peanut Butter Blossoms

For the classic Peanut Butter Blossoms recipe, gather peanut butter, butter, sugar, an egg, and Hershey's kisses as your essential ingredients.

Peanut butter is the star, offering a rich flavor that blends perfectly with the sweetness of the cookies.

Butter plays a pivotal role by adding moisture and richness to the dough, ensuring a soft and chewy texture.

The sugar not only sweetens the cookies but also contributes to their festive appeal, making them a perfect treat for any occasion.

Finally, the Hershey's kisses on top provide a delightful chocolatey finish that elevates these cookies to a whole new level of deliciousness.

Advertisement

Together, these ingredients create a harmonious blend of flavors and textures that make Peanut Butter Blossoms a beloved classic for holiday baking or any time you crave a sweet and satisfying treat.

Recipe Steps for Peanut Butter Blossoms

bake peanut butter cookies

To make Peanut Butter Blossoms, start by creaming together peanut butter, butter, sugars, and salt until light and fluffy.

Next, add in the egg and vanilla extract, making sure to mix well to combine all the ingredients thoroughly.

Then, gradually incorporate the dry ingredients into the wet mixture until a smooth dough forms.

Once the dough is ready, roll it into balls and coat each ball generously in brown sugar.

Place the sugar-coated dough balls on a baking sheet, making sure to leave enough space between them for spreading during baking.

Advertisement

Bake the cookies in a preheated oven until they turn a beautiful golden brown.

As soon as the cookies are out of the oven, press a Hershey's kiss into the center of each cookie gently.

The heat from the freshly baked cookies will melt the chocolate just enough to adhere it to the cookie.

These Peanut Butter Blossoms are a delightful treat perfect for Christmas celebrations!

Pro Tips for Making Peanut Butter Blossoms

baking perfect peanut blossoms

To enhance your peanut butter blossom baking experience, consider adjusting the baking time based on your oven's performance for best results.

Additionally, explore ingredient substitutions to cater to dietary preferences or allergies without compromising the flavor or texture of the cookies.

Advertisement

These pro tips can help you customize your peanut butter blossoms while ensuring delicious outcomes.

Baking Time Recommendations

Achieving the ideal texture for your peanut butter blossoms involves baking them at 375°F for 8-10 minutes. This baking duration guarantees that the cookies have a soft and chewy consistency while allowing the Hershey kisses on top to be softened but not completely melted.

Once out of the oven, remember to press the Hershey kisses onto the cookies immediately to secure them in place for that classic appearance.

For the best outcomes, chill the cookie dough for about 30 minutes before baking. This step helps the cookies maintain their shape and prevents excessive spreading during baking, ensuring your peanut butter blossom cookies are perfectly formed and ready to impress during your holiday baking.

Shortening or extending the baking time can alter the texture of the cookies. A quick bake of 6-8 minutes produces softer and chewier cookies, while longer baking times yield a slightly crispier consistency. Stick to the recommended 8-10 minutes for the best soft and chewy peanut butter blossoms.

Advertisement

Ingredient Substitutions

Consider incorporating different ingredients to elevate the flavor and nutritional profile of your peanut butter blossoms. For a healthier option, swap out shortening with unsalted butter to achieve a unique texture and taste in your cookies.

Try using natural peanut butter instead of creamy to add a wholesome twist to the classic recipe. If you're looking to reduce the glycemic impact, substitute brown sugar with coconut sugar in your baking. For a natural sweetener alternative, replace regular granulated sugar with maple syrup in the cookie dough mixture.

Additionally, for a distinct flavor experience, experiment with almond butter as a substitute for peanut butter in your blossoms. These ingredient substitutions can bring a new dimension to your peanut butter blossoms, making them not only delicious but also tailored to your dietary preferences.

Upgrade your baking game this holiday season with these creative twists on a beloved recipe!

Serving Suggestions for Peanut Butter Blossoms

peanut butter cookie recipe

Enhance the enjoyment of your peanut butter blossoms by pairing them with savory dishes like lasagna tortellini soup for a satisfying meal. These classic cookies also complement family-friendly dinners such as easy ground beef shepherd's pie and creamy broccoli cheddar soup, making for a delightful combination. The holiday season calls for cozy treats, and the sweet nuttiness of peanut butter blossoms pairs perfectly with a warm cup of hot cocoa. Whether you're participating in a cookie exchange or looking for a festive touch to your holiday dessert spread, consider rolling the cookies in red, green, and white sugar sprinkles to add a pop of color and fun.

Serving Suggestions Pairing Ideas
Lasagna Tortellini Soup Comforting and hearty meal alongside the cookies
Easy Ground Beef Shepherd's Pie Delicious combination for a family dinner
Creamy Broccoli Cheddar Soup Perfect accompaniment to the nutty cookie flavors

12 Days of Christmas Cookies Recipes

baking traditions for the holidays

Indulge in a variety of delightful Christmas cookie recipes each day during the holiday season. One standout choice is the classic Peanut Butter Blossoms. These holiday cookies feature a peanut butter base topped with a Hershey's kiss, making them a beloved treat for cookie exchanges and festive gatherings.

The process of making these cookies is simple yet rewarding. Start by rolling the dough balls in sugar before baking to add a sweet crunch to each bite. The combination of rich peanut butter flavor and the chocolatey goodness of the Hershey's kiss creates a perfect balance of sweetness.

Advertisement

When enjoying these Christmas cookies, consider pairing them with a glass of milk for a classic and satisfying treat.

Whether you're baking them for your family, a cookie exchange, or a holiday party, Peanut Butter Blossoms are sure to be a hit. Make each day of the holiday season a little sweeter with these delicious cookies.

User Engagement Features

user interaction enhancements

Let's talk about how user interaction features and personalization options enhance your experience with the Peanut Butter Blossoms recipe.

You can engage with others by leaving comments and sharing your results, creating a sense of community around this holiday treat.

Personalization options like name and email entry fields help tailor the experience to your preferences, making it more engaging and enjoyable.

User Interaction Features

Utilizing user engagement features on the website allows for increased participation and feedback from visitors. The comment section enables users to interact with each other and provide valuable feedback on the Peanut Butter Blossoms recipe or share their experiences with Hershey's kisses. By incorporating a reply option, users can engage in conversations, fostering a sense of community around baking these delightful peanut butter cookies.

Advertisement

Moreover, the inclusion of name and email fields not only allows for personalization but also facilitates communication between the website and its visitors. This data storage feature guarantees that users can conveniently access their information for future visits, enhancing their overall user experience.

These user engagement features play an essential role in creating an interactive platform where users can engage, provide feedback, and communicate effectively. Such interaction not only enriches the user experience but also encourages visitors to actively participate in the community surrounding the Peanut Butter Blossoms recipe.

Personalization Options

Enhance your website's user engagement by incorporating personalized options such as commenting, replying, and sharing feedback on the Peanut Butter Blossoms recipe. This level of user interaction not only fosters a sense of community building but also encourages customization and feedback. By allowing users to share their thoughts, results, and experiences with the festive favorites, you create a more engaging and interactive user experience. Additionally, providing users with the option to save their data for future visits and encouraging them to tag @preppykitchen and use #preppykitchen when trying the recipe further enhances their engagement.

Personalization Options Description Benefits
Commenting Users can leave comments on the Peanut Butter Blossoms recipe, sharing their thoughts and experiences. Fosters community building and user engagement.
Replying Users can reply to comments and engage in discussions with other users about the recipe. Encourages active participation and interaction.
Feedback Sharing Users can share feedback on the recipe, providing valuable insights for improvement. Enhances user experience and customization.

Additional Information

clarifying specific details provided

You may find it interesting to know more about the history of the Peanut Butter Blossoms recipe and its cultural significance during the holidays.

  • The Peanut Butter Blossoms recipe's popularity is backed by IRI MULO data, making it a sought-after choice for holiday baking.
  • Copyright for this beloved recipe belongs to The J.M. Smucker Company, a reputable name in the food industry known for quality products.
  • These delightful cookies aren't only perfect for serving at holiday parties but also make excellent gifts due to their festive appeal.

Frequently Asked Questions

Why Are My Peanut Butter Blossoms Dry?

If your peanut butter blossoms are dry, it could be due to using too much flour, overbaking, using natural peanut butter that requires stirring, or not enough butter/shortening. Guarantee precise measurements and follow the recipe closely to maintain moisture.

Why Did My Peanut Butter Blossoms Go Flat?

When making peanut butter blossoms, going flat happens due to overmixing, too much flour, insufficient chilling, or low oven temperature. Remember to avoid these pitfalls. Preheat the oven properly and follow the recipe for perfect blossoms!

What Is America's Favorite Christmas Cookie?

America's favorite Christmas cookie is Peanut Butter Blossoms. Loved for their peanut butter-chocolate combo and nostalgic Hershey's Kiss center, these easy-to-make treats are a holiday staple at parties and gatherings. They're a must-have during the festive season.

Advertisement

What Is Baskin Robbins Peanut Butter Blossom?

You asked about Baskin Robbins Peanut Butter Blossom. It's a delectable seasonal ice cream flavor featuring creamy peanut butter ice cream with a ribbon of more peanut butter and chocolate cookie pieces. Indulge in this festive treat!

Conclusion

Indulge in the warm, gooey goodness of these peanut butter blossoms this holiday season. With the perfect blend of creamy peanut butter and rich chocolate, these cookies are sure to bring joy to your festivities.

Picture yourself surrounded by loved ones, sharing laughter and memories as you enjoy these delicious treats. Let the aroma of freshly baked cookies fill your home and create a cozy, festive atmosphere.

Happy baking and happy holidays!

Advertisement
Continue Reading

Recipes & Culinary Uses

Bite-Sized Treats: Best Peanut Butter Ball Recipe You'll Love!

Adore these heavenly peanut butter balls with a delectable mix of smooth peanut butter, powdered sugar, and vanilla—perfect for indulging in bite-sized bliss!

Published

on

By

delicious peanut butter balls

You'll adore these easy and heavenly peanut butter balls. Mix smooth peanut butter, powdered sugar, and vanilla extract for a delectable dough. Roll into small balls and chill. Dip in melted chocolate, then refrigerate to set. Enhance the flavor with rum extract, nuts, or crushed pretzels. Get creative with colorful sprinkles and different chocolate coatings. Use quality chocolate coating and adjust mix consistency. Store them in the fridge or freezer. Enjoy these mouthwatering treats alone or at gatherings. More tips and delightful variations await!

Key Takeaways

  • Creamy peanut butter, powdered sugar, and vanilla create a smooth dough.
  • Incorporate nuts, rum extract, or pretzels for flavor and texture variety.
  • Use quality chocolate coating like candy melts for best results.
  • Chill peanut butter balls before dipping for easier handling.
  • Store in the fridge or freezer for convenient snacking and serving.

Ingredients and Preparation

To create irresistible peanut butter balls, gather creamy peanut butter, powdered sugar, and vanilla extract as your key ingredients.

Begin by mixing the peanut butter, butter, sugar, and vanilla until you have a smooth dough. Roll this mixture into small balls and chill them before dipping them in melted chocolate.

The type of chocolate you use, such as dark or milk chocolate, will enhance the flavor of your peanut butter balls. After dipping, make sure to refrigerate the balls until the chocolate sets for a perfect finish.

This process guarantees that each bite-sized treat isn't only visually appealing but also bursting with delicious peanut butter and chocolate flavors.

Variations and Enhancements

creative modifications and improvements

You can elevate the flavor of your peanut butter balls by incorporating unique ingredients like chopped nuts or rum extract.

Experiment with different chocolate coatings such as white almond bark or dark chocolate candy melts for a varied taste experience.

Advertisement

Get creative by adding finishing touches like colorful sprinkles to make your peanut butter balls visually appealing.

Flavorful Ingredient Additions

Enhance the flavor of your peanut butter balls by incorporating unique ingredient variations and enhancements. While the classic combination of peanut butter, powdered sugar, and butter creates a delicious dough for your treats, you can take it up a notch by adding flavorful ingredient additions.

Consider mixing in crushed pretzels for a salty crunch that complements the sweetness of the peanut butter. Chopped nuts like almonds or pecans can also add a delightful texture and nutty taste to your chocolate-covered peanut butter balls.

For a burst of fruity flavor, try incorporating dried cranberries or raisins into the dough. These additions not only provide a contrast in texture but also introduce a hint of sweetness that pairs well with the creamy peanut butter.

Another option is to include a sprinkle of cinnamon or a dash of vanilla extract to elevate the overall taste profile of your peanut butter balls. Experiment with these flavorful ingredient additions to create a unique and delectable twist on the classic treat.

Advertisement

Chocolate Coating Options

Experiment with different types of chocolate coatings – dark, white, or milk chocolate – to suit your preferences and elevate the flavor of your peanut butter balls.

When considering the chocolate coating for your crunchy peanut butter treats, here are some options to enhance your culinary creation:

  1. Choose Candy Melts or Almond Bark: Opt for candy melts or almond bark for a smooth and firm chocolate coating that sets well on your peanut butter balls.
  2. Avoid Chocolate Chips: Steer clear of using chocolate chips for coating, as they may contain stabilizers that hinder smooth melting, affecting the overall texture.
  3. Add Colored Sprinkles: For a festive touch, sprinkle colored sprinkles on top of the chocolate coating before it sets to add a pop of color and extra crunch to your peanut butter balls.

Experimenting with different chocolate coatings and techniques can take your peanut butter balls to the next level, ensuring a delightful and indulgent treat for any occasion.

Creative Finishing Touches

To elevate the flavor profile of your peanut butter balls, consider incorporating creative finishing touches through various enhancements and unique variations.

You can enhance the texture by adding chopped nuts or crispy rice cereal to the peanut butter mixture, providing a delightful crunch with every bite.

Experiment with different flavors by using almond extract or rum extract instead of vanilla for a twist on the traditional taste.

Advertisement

For a festive touch, roll the balls in crushed graham crackers, sprinkles, or a sprinkle of sea salt to add a pop of flavor.

Drizzle white chocolate over the dark, semi-sweet, or milk chocolate coating for a visually appealing contrast that will impress your guests.

If you enjoy a crunchy element, try coating the balls in crushed pretzels or toasted coconut before the chocolate sets.

These creative enhancements will take your peanut butter balls to the next level, making them a standout treat at any gathering.

Tools and Tips

crafting with precision

Consider using a 1 tablespoon cookie scoop for consistent sizing when preparing your peanut butter balls. This tool will help guarantee all your treats are uniform in size, making for a neat presentation and even cooking.

Here are some additional tools and tips to enhance your peanut butter ball-making experience:

Advertisement
  1. Invest in Quality Chocolate Coating: Opt for candy melts or almond bark for a smooth and firm chocolate coating on your peanut butter balls. These coatings melt easily and provide a professional finish to your treats.
  2. Adjust Peanut Butter Mixture Consistency: If your peanut butter mixture is too sticky or too dry, adjust the consistency by adding more peanut butter or powdered sugar. This will help you achieve the perfect texture for shaping your balls.
  3. Refrigerate Before Dipping: Prior to dipping your peanut butter balls in chocolate, chill them in the refrigerator. This step will make the balls firmer, making them easier to handle and coat without falling apart.

Storage and Serving Suggestions

great suggestion for storage

For best freshness and presentation of your peanut butter balls, follow these storage and serving suggestions.

To keep your peanut butter balls tasting delicious, store them properly. You can store them in an airtight container in the fridge for up to 1 week or in the freezer for up to 2 months. When freezing, remember to thaw the frozen peanut butter balls before serving by bringing them to room temperature. To prevent them from sticking together, separate the layers of peanut butter balls with wax paper.

Here is a helpful table summarizing the storage and serving suggestions:

Storage Serving Frozen
Airtight container Display on festive tray Thaw before serving
Fridge – 1 week Pair with hot cocoa Bring to room temp
Freezer – 2 months Enjoy at holiday gatherings
Separate with wax paper

Additional Peanut Butter Desserts

peanut butter dessert recipes

Explore a variety of delectable peanut butter desserts to satisfy your sweet cravings.

  1. Peanut Butter Blossom Cookies: Indulge in the classic combination of peanut butter cookies topped with a chocolate kiss for a delightful treat.
  2. Peanut Butter Chocolate Mug Cake: Whip up this easy-to-make single-serving dessert that combines the rich flavors of peanut butter and chocolate in a mug for a quick fix.
  3. Peanut Butter Overload Cookies: For those who can't get enough peanut butter, these cookies are loaded with peanut butter chips, chocolate chips, and chopped peanuts for an explosion of flavor in every bite.

These additional peanut butter desserts offer a diverse selection to cater to your cravings.

Whether you're in the mood for a classic treat like Peanut Butter Blossom Cookies, a quick fix with Peanut Butter Chocolate Mug Cake, or a flavor-packed experience with Peanut Butter Overload Cookies, there's something for every peanut butter lover.

Enjoy these easy-to-make delights whenever you need a sweet pick-me-up!

Recipe Instructions and Nutritional Information

cooking guidance and facts

To create these delectable Peanut Butter Balls, start by blending peanut butter, butter, sugar, and vanilla to form a dough. Roll the mixture into small balls and place them on a baking sheet lined with parchment paper. Chill the peanut butter balls in the refrigerator for about 30 minutes until firm.

Once chilled, melt chocolate in a heatproof bowl over simmering water or in the microwave. Dip each chilled peanut butter ball into the melted chocolate, ensuring they're evenly coated. Place the coated balls back on the parchment paper and let the chocolate set.

Advertisement

Each serving of these delightful treats contains approximately 114 calories.

Store the finished peanut butter balls in the fridge for up to 2 weeks or freeze them for up to 3 months.

Enjoy these decadent bite-sized snacks whenever you crave a sweet and nutty indulgence.

Frequently Asked Questions

Can I Use Chunky Peanut Butter Instead of Creamy for This Recipe?

Yes, you can use chunky peanut butter instead of creamy for this recipe. It will add a delightful texture and extra crunch to your peanut butter balls. Enjoy experimenting with different variations!

How Long Do Chocolate Covered Peanut Butter Balls Stay Fresh?

Like a sweet memory, chocolate-covered peanut butter balls stay fresh for up to two weeks when stored in an airtight container in the fridge. Indulge in these delectable treats within that time frame for best taste.

Advertisement

Can I Freeze the Peanut Butter Balls for Later Enjoyment?

Yes, you can freeze the peanut butter balls for later enjoyment. Simply place them in an airtight container or freezer bag. When ready to indulge, let them thaw in the fridge for a few hours.

What Type of Chocolate Is Best for Coating the Peanut Butter Balls?

For coating the peanut butter balls, semi-sweet or milk chocolate works best. They provide a delicious contrast to the creamy peanut butter filling. Simply melt the chocolate, dip the balls, and enjoy the sweet treat!

Can I Add Chopped Nuts or Sprinkles to the Peanut Butter Balls for Extra Flavor?

You can definitely add chopped nuts or sprinkles to the peanut butter balls for extra flavor. It's a great way to customize your treats and add a delightful crunch or colorful touch to each bite.

Conclusion

Indulge in these irresistible peanut butter balls that are sure to satisfy your sweet tooth cravings.

With just a few simple ingredients and easy-to-follow instructions, you can enjoy these bite-sized treats in no time.

Advertisement

So go ahead, treat yourself to a little taste of heaven and experience the perfect combination of creamy peanut butter and rich chocolate.

You won't be able to resist coming back for more!

Continue Reading

Trending