Connect with us

Recipes & Culinary Uses

Make Rich Bone Marrow Butter in 7 Easy Steps

Published

on

An image showcasing the step-by-step process of crafting luxurious bone marrow butter: a close-up shot of a rich, golden bone marrow being slowly melted over low heat, infused with aromatic herbs and spices, and elegantly poured into a glass jar

I have found a tasty method to enhance the taste of any meal: bone marrow butter.

Did you know that bone marrow is not only rich in nutrients but also adds a luxurious creaminess to butter?

In just a few simple steps, I’ll show you how to create this indulgent condiment that will take your cooking to the next level.

Gather the ingredients, prepare the bone marrow, mix in the butter, and season it to your liking.

Get ready to savor the delectable goodness of homemade bone marrow butter.

Advertisement

Key Takeaways

  • Gathering and preparing bone marrow involves finding fresh bones with a good amount of marrow, roasting them in the oven, and scooping out the gelatinous marrow.
  • Mixing the extracted marrow with softened butter creates a smooth and creamy bone marrow butter.
  • Seasoning and flavoring the bone marrow butter can be done with ingredients like garlic, herbs, chipotle peppers, and citrus zest to enhance the taste.
  • Storing bone marrow butter in the refrigerator allows it to be used for up to two weeks, and incorporating it into cooking can provide health benefits and add depth of flavor to dishes.
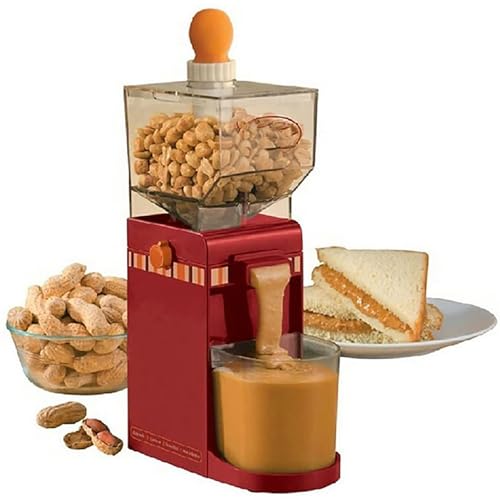
Gathering the Ingredients

First, gather all of the necessary ingredients for making bone marrow butter. Shopping for ingredients is an important part of the process. Head to your local butcher or grocery store and look for fresh bone marrow. It’s usually found in the meat section, near the beef cuts. Make sure to choose bones with a good amount of marrow inside.

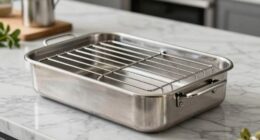
Once you have your bone marrow, it’s time to prepare it. Start by preheating your oven to 450°F (232°C). Place the bones on a baking sheet and roast them for about 20 minutes, until the marrow becomes soft and creamy. Let them cool slightly before scooping out the marrow.

Now you’re ready to move on to the next step and start making your delicious bone marrow butter.
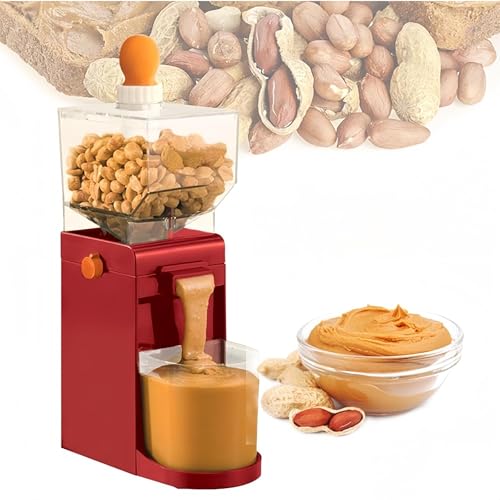
Preparing the Bone Marrow

Once you’ve got the bone marrow ready, you can start preparing it for the next step.

Advertisement

Bone marrow butter is a delicious and nutritious addition to any meal. Here’s how to prepare the bone marrow:

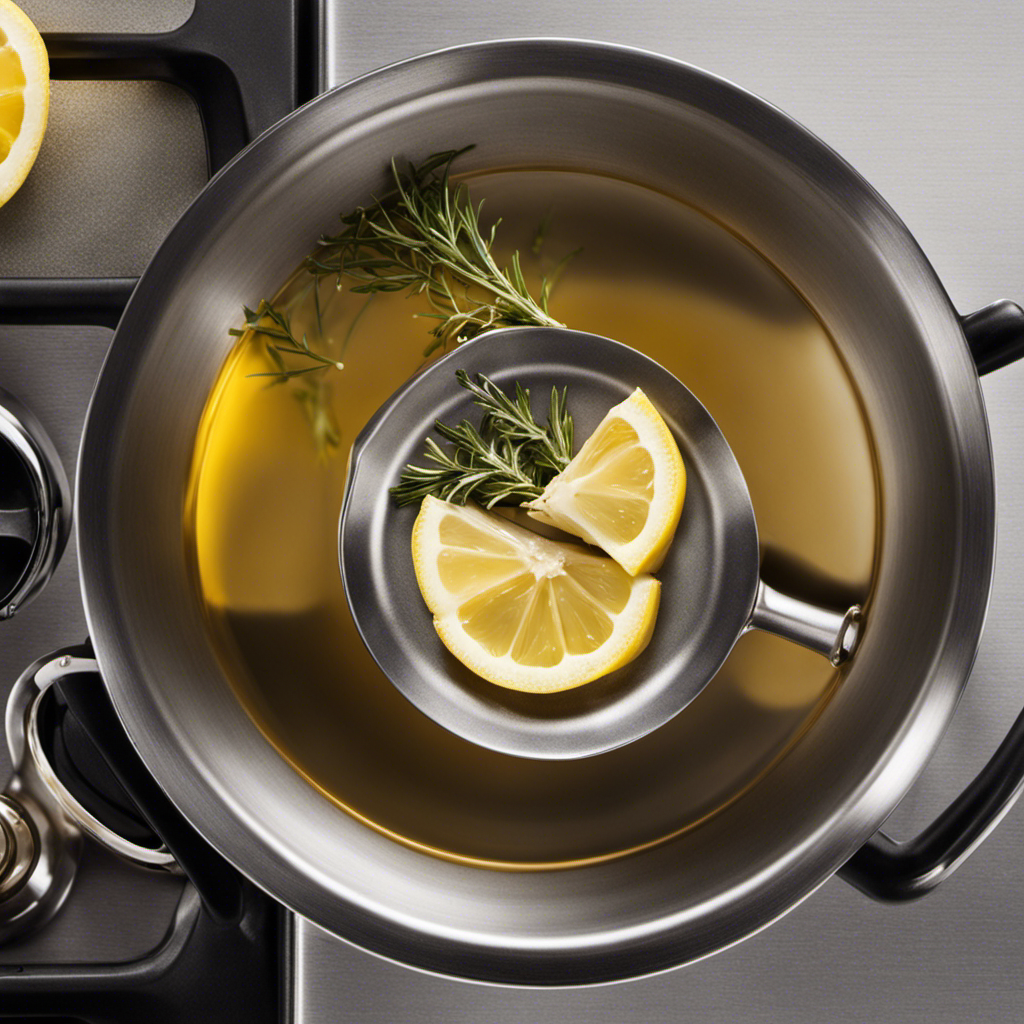
  1. Roasting: Preheat your oven to 450°F (230°C). Place the bone marrow bones on a baking sheet and roast them for about 15-20 minutes, until the marrow is soft and begins to melt. This step helps to enhance the flavor and texture of the marrow.

  2. Extraction: Once the bones are roasted, carefully scoop out the soft, gelatinous marrow using a spoon or knife. Be gentle to avoid breaking the bone and ensure you retrieve all the marrow.

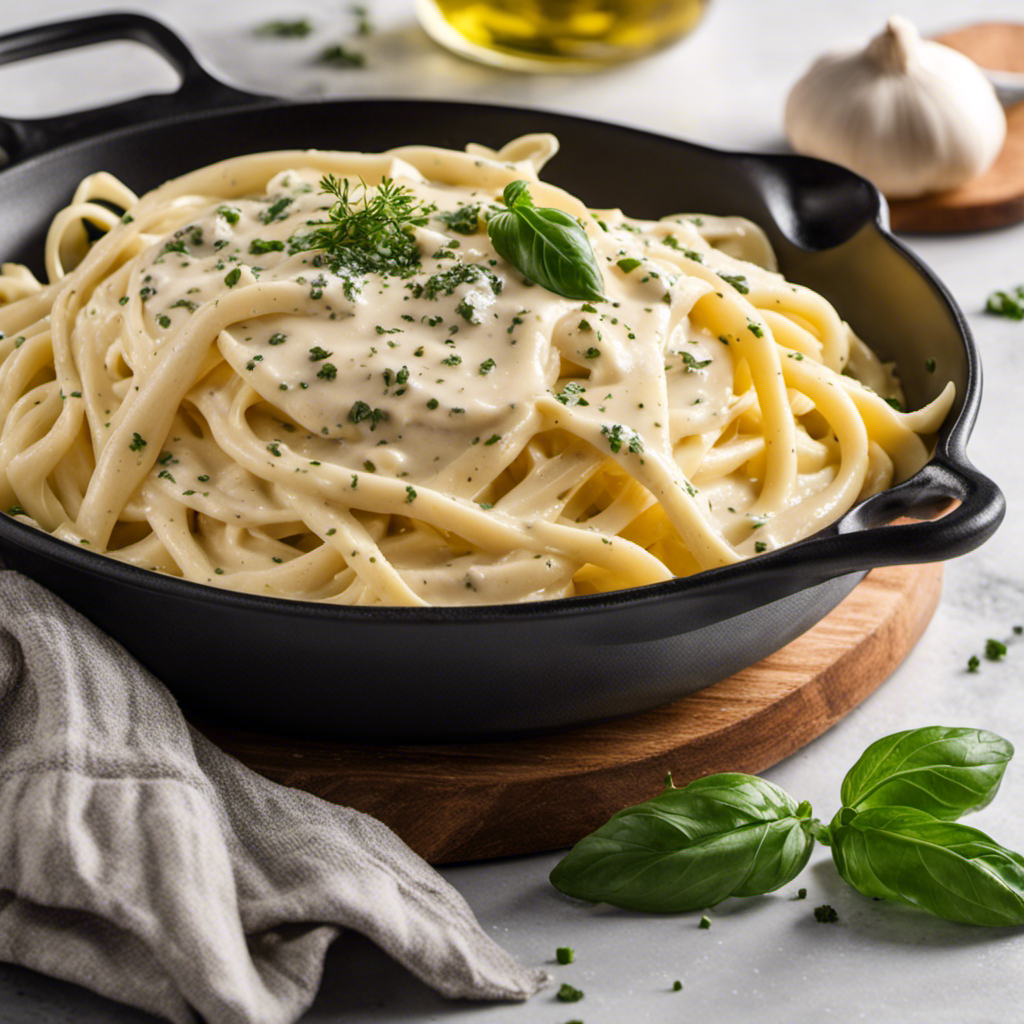
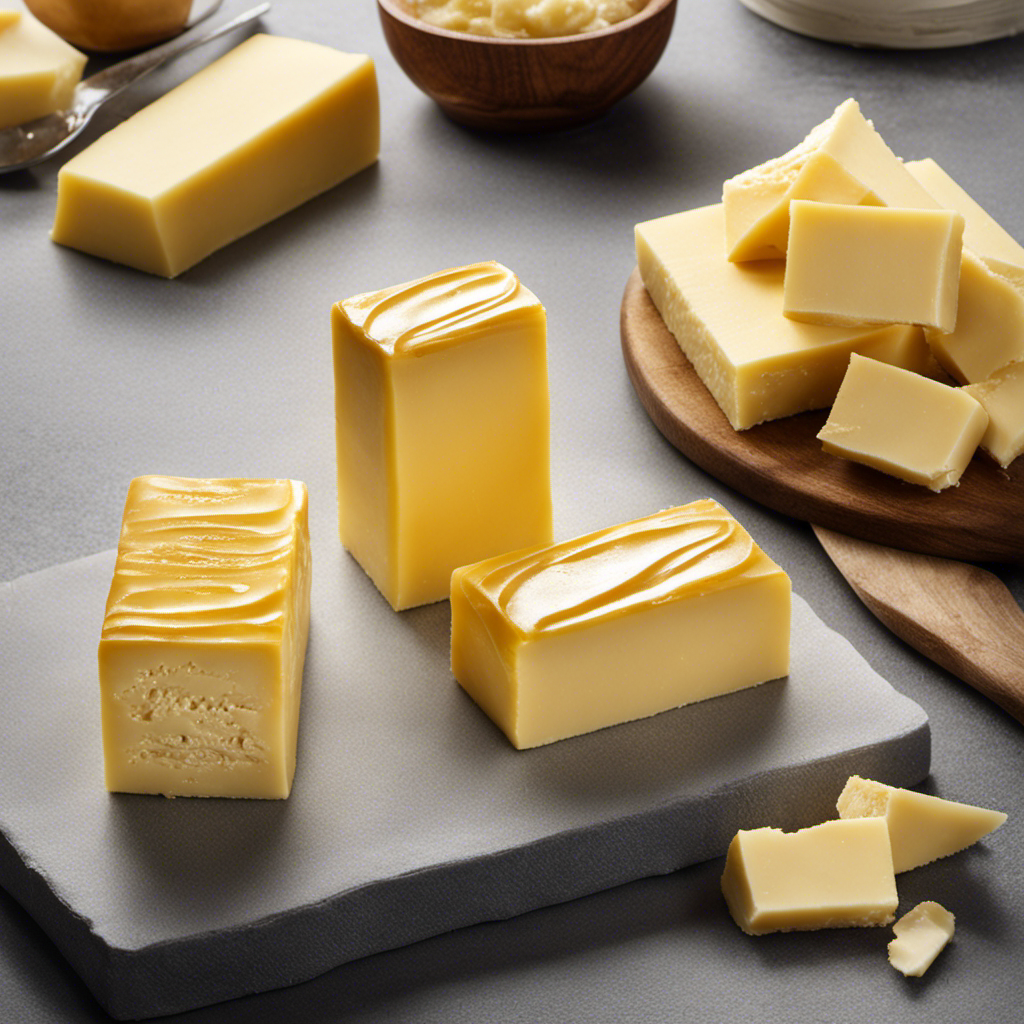
  3. Mixing: In a mixing bowl, combine the extracted marrow with softened butter. Use a fork or whisk to blend them together until you achieve a smooth and creamy consistency. This rich, velvety bone marrow butter can be used as a spread or added to dishes for a burst of flavor.

Cooking techniques like roasting bring out the natural flavors of bone marrow while providing health benefits. Bone marrow is a nutrient-rich food that is packed with vitamins, minerals, and healthy fats. It is known to support immune function, promote healthy bones, and aid in digestion.

Mixing in the Butter

Next, you’ll want to blend the softened butter with the extracted marrow until you achieve a smooth and creamy consistency. This step is crucial in creating a delectable bone marrow butter that will elevate any dish.

Advertisement

The butter adds richness and a velvety texture to the already flavorful marrow. As the butter melts, it beautifully coats the marrow, resulting in a spread that is incredibly versatile.

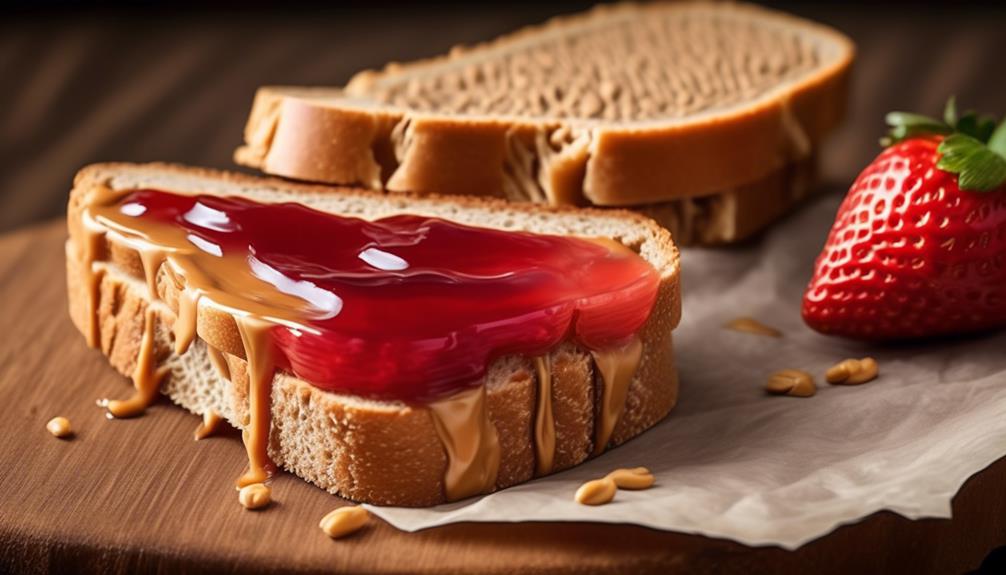
Whether you spread it on warm crusty bread, melt it over a perfectly grilled steak, or use it to sauté vegetables, the uses for bone marrow butter are endless.

To achieve the perfect consistency, make sure the butter is at room temperature and soft enough to easily blend with the marrow. This will ensure a smooth and creamy texture that is easy to spread and melts beautifully.

Now, let’s move on to the next step of seasoning and flavoring.

Seasoning and Flavoring

To enhance the flavor of your spread, you can add a variety of seasonings and spices. When it comes to bone marrow butter, the possibilities are endless. Here are three different variations of flavored bone marrow butter that will take your dishes to the next level:

Advertisement
  1. Garlic and Herb: Infuse your bone marrow butter with the aromatic flavors of fresh garlic and a blend of your favorite herbs, such as thyme, rosemary, and parsley. This combination adds a savory and earthy taste to your dishes.

  2. Smoky Chipotle: For a spicy kick, mix in some chipotle peppers in adobo sauce to your bone marrow butter. The smoky flavor of the chipotle pairs perfectly with the rich and creamy butter, adding a hint of heat to your recipes.

  3. Citrus Zest: Brighten up your bone marrow butter with the zest of citrus fruits like lemon, lime, or orange. The citrusy notes add a refreshing and tangy element, balancing out the richness of the butter.

Whether you’re spreading it on bread or using it to cook, these flavored variations of bone marrow butter will elevate your culinary creations and leave your taste buds craving more.

Storing and Using Bone Marrow Butter

You can store bone marrow butter in an airtight container in the refrigerator for up to two weeks. This rich and flavorful ingredient not only adds a depth of flavor to your dishes, but it also has numerous health benefits.

Bone marrow is packed with nutrients like vitamins A, D, and K, as well as omega-3 fatty acids. Incorporating bone marrow butter in your cooking can help boost your immune system, improve bone health, and support brain function.

Advertisement

To get creative with bone marrow butter, try spreading it on warm crusty bread for a decadent twist on traditional butter. You can also melt it over grilled vegetables or steaks for a luxurious and savory finish. The possibilities are endless when it comes to using bone marrow butter in your recipes.

Whether you’re making soups, sauces, or even baked goods, this rich and flavorful ingredient will take your dishes to the next level. So go ahead, experiment and discover the wonders of bone marrow butter in your cooking.

Frequently Asked Questions

Can Bone Marrow Butter Be Made With Other Types of Fat Instead of Butter?

Yes, bone marrow butter can be made with other types of fat. However, using alternative fats may alter the taste. Experimenting with different fats like duck fat or bacon grease can provide a unique and flavorful twist to the traditional butter.

How Long Does Bone Marrow Butter Typically Stay Fresh in the Refrigerator?

In my experience, bone marrow butter typically stays fresh in the refrigerator for about 1-2 weeks. To maximize its shelf life, it’s important to store it in an airtight container and keep it at a consistent temperature.

Can Bone Marrow Butter Be Frozen for Long-Term Storage?

Yes, bone marrow butter can be frozen for long-term storage. It’s a great option if you have extra or want to preserve it for later. Additionally, you can use it in various recipes, like spreading it on toast or melting it over grilled steak.

Advertisement

Can Bone Marrow Butter Be Used to Cook or Sauté Vegetables?

When it comes to cooking vegetables, bone marrow butter adds a rich and decadent flavor that elevates any dish. Its silky texture and savory taste create a perfect harmony of flavors.

Can Bone Marrow Butter Be Used as a Spread on Bread or Toast?

Yes, bone marrow butter can be used as a spread on bread or toast. It adds a rich and savory flavor that pairs well with the crispy texture. It can also be flavored with herbs and spices, enhancing the taste even more. Additionally, bone marrow butter makes a delicious topping for steak.

Conclusion

Well, there you have it, folks! We’ve reached the end of our bone marrow butter journey. I hope you’ve enjoyed this adventurous culinary ride as much as I have.

Now, armed with the knowledge of how to make this indulgent spread, you can elevate your cooking game to new heights. So go forth, my friends, and spread that bone marrow butter on your toast with reckless abandon.

Remember, life is too short for boring butter. Live a little, and let the marrow-infused magic take you to buttery bliss!

Advertisement
Continue Reading
Advertisement

Recipes & Culinary Uses

Crafting Homemade Butter Extract in 7 Simple Steps

Published

on

By

An image showcasing the process of making butter extract: depict a mason jar filled with creamy butter, surrounded by fresh, golden buttercups

I have always believed that the secret to excellent cooking is paying attention to the little details. And when it comes to enhancing the flavor of your dishes, nothing compares to the richness of homemade butter extract.

In this article, I’ll guide you through the simple yet rewarding process of making your own butter extract. From choosing the right type of butter to preserving its delightful taste, I’ll share with you the tips and tricks to elevate your culinary creations.

So let’s dive in and unlock the secret to a truly buttery experience.

Key Takeaways

  • Making homemade butter extract allows control over the quality and purity of ingredients.
  • Choosing the right butter, such as unsalted, high-fat butter, is essential for a rich and creamy flavor.
  • The step-by-step process involves melting the butter, infusing it in a sealed jar, straining it, and storing it in a clean jar for up to six months.
  • Troubleshooting tips include adjusting the heat, infusion time, and proper straining to avoid burnt taste, weak flavor, and impurities.

Ingredients Needed for Making Butter Extract

You’ll need three simple ingredients for making butter extract. Butter extract is a concentrated flavoring agent that is commonly used in baking and cooking recipes.

Advertisement

The recipe for making butter extract is quite straightforward. The main ingredients needed are unsalted butter, high-proof vodka, and vanilla extract. The unsalted butter provides the rich and creamy flavor, while the high-proof vodka acts as a solvent to extract the butter flavor. Vanilla extract is added to enhance the overall taste.

Making butter extract at home has several benefits. Firstly, it allows you to control the quality and purity of the ingredients used. Secondly, it can save you money compared to buying pre-made butter extract. Lastly, homemade butter extract imparts a more authentic and intense butter flavor to your dishes.

Choosing the Right Type of Butter for Extract

When choosing the right type of butter for your extract, it’s important to consider the fat content. The fat content in butter affects the flavor and texture of the extract, so selecting the appropriate butter is crucial to achieving the desired result.

Here are some common mistakes to avoid when making butter extract:

  • Using low-fat or light butter: These types of butter have a lower fat content, which can result in a weaker flavor and a thinner consistency for your extract.
  • Using margarine or spreads: Margarine and spreads often contain additives and oils that can alter the taste and texture of the extract.
  • Using salted butter: Salted butter may introduce an unwanted salty flavor to your extract.

To ensure the best outcome, it’s recommended to use unsalted, high-fat butter for making butter extract. This will provide a rich, creamy flavor and a smooth consistency.

Now that we’ve selected the right butter, let’s move on to the step-by-step process of making butter extract.

Advertisement

Step-By-Step Process of Making Butter Extract

Now that we’ve got the right butter, let’s dive into the step-by-step process of creating our delicious butter extract. To begin, gather the necessary equipment: a saucepan, a fine-mesh strainer, cheesecloth, and a glass jar with a tight-fitting lid.

  1. Melt the butter: Place the desired amount of butter in the saucepan and heat it over low heat until completely melted. Be careful not to let it burn or brown.

  2. Infuse the butter: Add the melted butter to the glass jar and tightly seal it. Allow the butter to infuse for at least 24 hours, but preferably up to 48 hours, in a cool, dark place.

  3. Strain the extract: After the infusion period, strain the butter extract through the fine-mesh strainer lined with cheesecloth. This will remove any solid particles or impurities.

  4. Store and use: Transfer the strained extract to a clean glass jar with a tight-fitting lid. Store it in a cool, dark place for up to six months. Use it in your favorite recipes to add a rich buttery flavor.

By following these steps and using the right equipment, you can create a high-quality butter extract that will enhance the taste of your dishes.

However, it’s important to be aware of common issues that may arise during the process. Here are some troubleshooting tips:

Advertisement
  • Issue: Extract has a burnt or unpleasant taste.

  • Troubleshooting: Ensure that the butter is melted over low heat and not allowed to brown or burn. Adjust the heat accordingly.

  • Issue: Extract has a weak or faint butter flavor.

  • Troubleshooting: Increase the infusion time to allow for a stronger flavor to develop. You can also try using a higher ratio of butter to extract.

  • Issue: Extract has particles or impurities.

  • Troubleshooting: Make sure to strain the extract properly using a fine-mesh strainer lined with cheesecloth. This will help remove any solids or impurities.

By understanding and addressing these common issues, you can troubleshoot any problems that may arise and ensure that your butter extract turns out perfect every time.

Happy extracting!

Tips and Tricks for Enhancing the Flavor of Butter Extract

To enhance the flavor of your butter extract, try incorporating different herbs and spices that complement the rich and buttery taste. Experimenting with various flavor combinations can create unique and delicious variations of butter extract. Here are three ideas to get you started:

  • Vanilla and Cinnamon: Add a touch of warmth and sweetness to your butter extract by infusing it with vanilla beans and a sprinkle of cinnamon. This combination pairs well with both sweet and savory dishes.

  • Lemon and Thyme: For a bright and refreshing twist, infuse your butter extract with lemon zest and fresh thyme. This flavor combination works wonderfully in seafood dishes or drizzled over roasted vegetables.

  • Garlic and Rosemary: Create a savory and aromatic butter extract by infusing it with minced garlic and crushed rosemary. This flavor variation is perfect for adding depth to sauces, marinades, or simply spread on warm bread.

Storing and Preserving Homemade Butter Extract

Advertisement

Storing homemade butter extract is simple and convenient, allowing you to enjoy its rich flavors whenever you need a burst of buttery goodness. To ensure its long-lasting quality, it is crucial to employ proper preserving techniques. One effective method is to store the extract in a cool, dark place, such as a pantry or refrigerator. This helps to prevent oxidation and maintain the extract’s freshness. Another option is to freeze the extract in small portions, using ice cube trays, for extended storage. By doing so, you can easily thaw and use the extract as needed without compromising its flavor. Furthermore, homemade butter extract offers endless variations, such as adding vanilla or almond extract for a unique twist. Experimenting with different flavors is a great way to customize your extract and elevate your culinary creations.

Preserving Techniques Homemade Extract Variations
Store in cool, dark place Add vanilla extract
Freeze in small portions Mix with almond extract
Use ice cube trays for easy access Experiment with different flavors

Creative Uses for Butter Extract in Cooking and Baking

When using homemade butter extract in cooking and baking, it adds a delightful hint of buttery flavor to your favorite recipes. But did you know that butter extract can also be used in creative ways beyond the traditional kitchen?

Here are three exciting ways to incorporate butter extract into your culinary adventures:

  • Creative uses for butter extract in cocktails: Add a few drops of butter extract to your favorite cocktail recipes to give them a unique twist. From buttery rum drinks to creamy whiskey concoctions, the possibilities are endless.

  • Incorporating butter extract into homemade ice cream: Take your homemade ice cream to the next level by adding a touch of butter extract. It will impart a rich and creamy flavor that will leave your taste buds wanting more.

  • Experimenting with butter extract in baked goods: Try adding a teaspoon of butter extract to your cookie or cake batter for an extra burst of buttery goodness. It can elevate your baked goods to a whole new level of deliciousness.

Frequently Asked Questions About Making Butter Extract

When it comes to butter extract, there are several alternatives available for those who want to avoid using the traditional version. These alternatives can include plant-based options like coconut or almond extract, which can provide a similar flavor profile.

In terms of shelf life and storage, butter extract should be stored in a cool, dry place to maximize its longevity, typically lasting for about 1-2 years.

Advertisement

As for its uses, butter extract can be utilized in a variety of recipes, including baked goods, frostings, and even savory dishes, to add a rich and buttery flavor.

Butter Extract Alternatives

If you don’t have butter extract on hand, you can try using margarine or clarified butter as alternatives. While these substitutes may not exactly replicate the unique flavor of butter extract, they can provide a similar richness and depth to your recipes. It’s important to note that margarine and clarified butter have their own distinct flavors, so the end result may vary slightly.

Here are three alternatives to consider:

  • Margarine: This butter substitute is made from vegetable oils and has a creamy texture. It can be a suitable replacement for butter extract in recipes that call for a buttery flavor.

  • Clarified Butter: Also known as ghee, clarified butter is made by melting butter and separating the milk solids. It has a nutty and rich flavor that can add depth to your dishes.

  • Homemade Butter Extract: If you have time, you can make your own butter extract by infusing butter with vanilla beans. This homemade version can offer a more authentic and customizable flavor compared to store-bought butter extract.

While these alternatives can be used in a pinch, it’s important to keep in mind that they may not provide an exact replication of the unique flavor of butter extract. Experimentation and adjustments may be needed to achieve the desired taste in your recipes.

Shelf Life and Storage

To maintain the quality and flavor of your alternatives, store them in a cool, dry place away from direct sunlight. Proper storage is essential in extending the shelf life of butter extract alternatives.

Advertisement

The shelf life of these alternatives can vary depending on the preserving methods used. If stored correctly, most commercially available butter extract alternatives can last for up to two years. However, homemade alternatives may have a shorter shelf life, typically around six months.

To maximize the longevity of your alternatives, ensure they are tightly sealed in airtight containers and kept in a consistently cool environment.

Now that we’ve discussed the importance of proper storage, let’s explore the various uses of butter extract in culinary applications.

Butter Extract Uses

Butter extract alternatives can be used in a variety of culinary applications to enhance the flavor of baked goods and desserts. These alternatives provide the same rich and creamy taste as butter extract, but without the actual butter.

Here are three benefits of using butter extract alternatives:

Advertisement
  • Lower fat content: Butter extract alternatives often have a lower fat content compared to real butter, making them a healthier option for those watching their fat intake.

  • Longer shelf life: Homemade butter extract recipes can spoil quickly, but butter extract alternatives have a longer shelf life, allowing you to use them for an extended period without worry.

  • Vegan-friendly: Butter extract alternatives are often plant-based, making them suitable for those following a vegan or dairy-free lifestyle.

Frequently Asked Questions

Can I Use Margarine Instead of Butter to Make Butter Extract?

Yes, margarine can be used as a substitute for butter in making butter extract. However, it may affect the overall taste and texture of the extract due to the different fat composition.

How Long Does Homemade Butter Extract Last?

The shelf life of homemade butter extract varies depending on the storage methods used. It is recommended to store it in a cool, dark place to extend its freshness.

Can I Use Salted Butter to Make Butter Extract?

Using salted butter to make butter extract will result in a different flavor compared to unsalted butter. The addition of salt may alter the overall taste. There are alternative methods to make butter extract without using salted butter.

Can I Use Clarified Butter to Make Butter Extract?

Yes, clarified butter can be used to make butter extract. Clarified butter is often preferred in baking due to its higher smoke point and longer shelf life compared to regular butter. It imparts a rich, buttery flavor to other recipes.

Can I Substitute Butter Extract With Vanilla Extract in a Recipe?

In baking, using vanilla extract instead of butter extract can alter the flavors in a recipe. Butter extract adds a rich, creamy taste, while vanilla extract provides a more subtle sweetness.

Advertisement

Conclusion

In conclusion, making butter extract is like crafting a delicate masterpiece. It requires patience, precision, and the right ingredients to achieve a rich and flavorful result.

Just like a skilled artist, you must choose the perfect butter and follow each step carefully to bring out the essence of its taste.

With proper storage and preservation, your homemade butter extract will continue to captivate your senses for months to come.

So go ahead, embrace your inner culinary artist and let the magic of butter extract elevate your cooking and baking creations to new heights.

Advertisement
Continue Reading

Recipes & Culinary Uses

How to Make White Butter Cream Icing in 7 Easy Steps

Published

on

By

An image capturing a pristine white buttercream icing masterpiece

I’ve always been mesmerized by the pristine, snowy white appearance of buttercream frosting. There is something irresistibly appealing about a flawlessly white, smooth finish on a cake or cupcake.

In this article, I’ll share my tried and true method for achieving that pristine white color every time. We’ll dive into the key ingredients, step-by-step mixing instructions, and even explore some tips and tricks for making your icing even whiter.

Get ready to elevate your baking game and create stunning, white butter cream icing that will leave everyone in awe.

Key Takeaways

  • Start with a pure white base recipe using unsalted butter or neutral vegetable shortening.
  • Gradually add white food coloring, evaluating the color after each addition.
  • Experiment with alternative natural ingredients like lemon juice, yogurt, sour cream, coconut milk, or almond milk to achieve a whiter shade.
  • Avoid artificial additives.

Ingredients for White Butter Cream Icing

To make white butter cream icing, you’ll need a few key ingredients. The traditional recipe calls for butter, powdered sugar, vanilla extract, and milk. However, there are alternative recipes that use shortening instead of butter for a whiter appearance.

Advertisement

Troubleshooting tips come in handy when trying to achieve the perfect white icing. One common issue is the icing turning out yellowish instead of white. This can be caused by using regular butter instead of unsalted butter, which has a higher water content.

Another tip is to use clear vanilla extract instead of the regular one, as it won’t affect the color of the icing. Finally, sifting the powdered sugar before adding it to the mixture helps to avoid any lumps and ensures a smooth and white butter cream icing.

Step-by-Step Mixing Instructions

When it comes to achieving a pure white buttercream icing, there are a few key points to consider.

First, using the right ingredients is crucial for achieving that pristine white color. However, if you find yourself without some of the necessary ingredients, there are also substitutions you can use to maintain the whiteness of your icing.

Lastly, there are common mistakes that can easily be avoided, such as overmixing or using ingredients that are not at room temperature.

Advertisement

Achieving Pure White

You can achieve a pure white butter cream icing by using clear vanilla extract instead of the regular one. Here are four ways to naturally whiten your butter cream icing:

  1. Use coconut milk: Substitute regular milk with coconut milk in your icing recipe. It adds a creamy texture and helps to maintain the whiteness of the icing.

  2. Lemon juice: Add a few drops of fresh lemon juice to your icing mixture. The acidity in the lemon juice helps to brighten the color and remove any yellow tones.

  3. Cornstarch: Mix a small amount of cornstarch with powdered sugar before adding it to your icing. The cornstarch acts as a whitening agent and helps to achieve a pure white color.

  4. Almond extract: Replace a portion of the vanilla extract with almond extract. Almond extract has a clear color and adds a pleasant flavor to the icing.

By using these natural alternatives, you can create a perfectly white butter cream icing for your cakes and desserts.

Now, let’s explore some ingredient substitutions for whiteness.

Ingredient Substitutions for Whiteness

Using alternative ingredients can help achieve a brighter and lighter color for your frosting. When it comes to making buttercream icing whiter, there are several ingredient alternatives and natural whitening methods that can be used. Here are some options to consider:

Ingredient Alternatives Natural Whitening Methods
Coconut milk Lemon juice
Almond milk Vinegar
Soy milk Cream of tartar
Powdered sugar Cornstarch

These alternative ingredients can not only help whiten your frosting, but they also provide unique flavors and textures. So, don’t be afraid to experiment and find the perfect combination for your desired outcome. By incorporating these ingredient alternatives and natural whitening methods, you can achieve a beautifully white buttercream icing. Now, let’s move on to the next section and discuss some common mistakes to avoid when making buttercream icing.

Advertisement

Common Mistakes to Avoid

One of the most common mistakes to avoid when preparing frosting is overmixing the ingredients. Overmixing can cause the butter to become too warm and the icing to become too soft, resulting in a less stable and less white frosting.

To achieve a pure white buttercream icing, it is important to pay attention to the following:

  1. Avoid overmixing: Gently mix the ingredients until just combined, being careful not to overmix and create excess air bubbles.

  2. Use room temperature ingredients: Allow the butter and other ingredients to come to room temperature before mixing to ensure a smooth and creamy texture.

  3. Gradually add powdered sugar: Add the powdered sugar in small increments, mixing well after each addition, to prevent clumping and maintain a smooth consistency.

  4. Use clear vanilla extract: Clear vanilla extract will help maintain the whiteness of the frosting, while regular vanilla extract may add a slight yellow tint.

Tips for Achieving a Whiter Shade

When it comes to achieving a whiter shade of icing, there are two key factors to consider: the ingredients used and the techniques employed.

First and foremost, using pure white ingredients such as clear vanilla extract and shortening can greatly enhance the whiteness of your icing.

Additionally, techniques such as sifting your powdered sugar and properly whipping your buttercream can help you achieve a brighter color overall.

Advertisement

Ingredients for Whiter Icing

To achieve whiter icing, it’s important to choose the right ingredients. Here are four ingredient alternatives that can help you achieve a brighter shade and some troubleshooting tips:

  1. Use clear vanilla extract: Regular vanilla extract can add a slight yellow tint to the icing. Clear vanilla extract, on the other hand, will help maintain a white color.

  2. Opt for shortening: Butter can give a yellowish hue to the icing. Using shortening instead of butter can help achieve a whiter shade.

  3. Try powdered sugar: Using powdered sugar instead of granulated sugar can contribute to a whiter icing. The finer texture of powdered sugar blends better and creates a smoother appearance.

  4. Add a touch of white food coloring: If you’ve tried all the above alternatives and your icing is still not white enough, a small amount of white food coloring can help achieve the desired shade.

By choosing these ingredients and following these troubleshooting tips, you’ll be on your way to achieving a whiter icing.

Now let’s move on to techniques for brighter color.

Techniques for Brighter Color

If you’re looking for a way to enhance the color of your frosting, consider using gel food coloring. Gel food coloring is a concentrated form of food coloring that can give your icing a vibrant and intense hue. Unlike liquid food coloring, gel food coloring doesn’t add excess moisture to your icing, which can affect its consistency.

When using gel food coloring, start with a small amount and gradually add more until you achieve the desired color. If you find that your frosting is too runny after adding the gel food coloring, you can thicken it by adding powdered sugar. Remember to mix the icing thoroughly to ensure that the gel food coloring is evenly distributed.

Advertisement

Now, let’s explore another technique for achieving a white icing using white food coloring.

Using White Food Coloring

Adding white food coloring can help make the buttercream icing white. Here are some tips to achieve the perfect white color using natural ingredients and troubleshoot common issues:

  1. Choose a high-quality white food coloring made from natural ingredients. Look for one labeled as ‘natural’ or ‘organic’ to avoid artificial additives.

  2. Start with a pure white base recipe for your buttercream icing. Use unsalted butter or a neutral vegetable shortening to ensure a clean canvas for the coloring.

  3. Gradually add the white food coloring to the icing, a few drops at a time. Mix well after each addition and evaluate the color before adding more. This will help you achieve the desired shade of white without overdoing it.

  4. If the icing appears too yellow or off-white, try adding a small amount of lemon juice or a pinch of cream of tartar. These natural acidic ingredients can help neutralize any unwanted color and brighten the icing.

Alternative Methods to Whiten Icing

Using alternative methods, you can achieve a brighter shade for your frosting without resorting to artificial means. There are several natural ingredients you can use to whiten your icing. Here are some alternative methods for coloring icing and natural ingredients for whitening icing:

Alternative Method Natural Ingredient
Lemon Juice Coconut Milk
Yogurt Almond Milk
Sour Cream Rice Milk
Greek Yogurt Oat Milk
Buttermilk Soy Milk

Lemon juice is a great option for whitening icing as it contains citric acid which acts as a natural bleaching agent. Simply add a small amount of lemon juice to your icing and mix well. Yogurt and sour cream can also be used to achieve a whiter shade. These dairy products contain lactic acid which helps to lighten the color of the icing. Coconut milk, almond milk, rice milk, oat milk, and soy milk are non-dairy alternatives that can be used to achieve a brighter shade without altering the taste of your frosting. Experiment with these natural ingredients to find the perfect method for whitening your icing.

Storing and Preserving White Butter Cream Icing

Storing and preserving white buttercream icing is essential to maintain its freshness and quality. Here are some techniques and methods I recommend for keeping your icing in perfect condition:

Advertisement
  1. Refrigerate: Place the icing in an airtight container and store it in the refrigerator. This will help keep it cool and prevent it from spoiling.

  2. Freezing: If you have leftover icing, you can freeze it. Wrap it tightly in plastic wrap or place it in a freezer bag to prevent freezer burn.

  3. Avoid direct sunlight: Keep the icing away from direct sunlight as exposure to light can cause the color to fade and the texture to change.

  4. Use within a week: Buttercream icing is best when used fresh. Try to use it within a week of making it to ensure the best taste and texture.

By following these storing techniques and preserving methods, you can ensure that your white buttercream icing stays fresh and delicious.

Now, let’s move on to some exciting decorating ideas for white buttercream icing.

Decorating Ideas for White Butter Cream Icing

Now, let’s explore some creative ways to jazz up your white buttercream icing! Decorating techniques are crucial in making your cakes and cupcakes stand out. By using different piping designs, you can add a touch of elegance and uniqueness to your creations. Here are some ideas to inspire your creativity:

Designs Description Tools Required
Rosettes Beautiful swirls of icing Piping bag
Ruffles Delicate frills Petal tip
Basketweave Woven pattern Basketweave tip
Polka Dots Playful dots Round tip

These techniques can be used individually or combined to create stunning designs. Experiment with different piping tips, colors, and textures to achieve the desired effect. Remember to practice and have fun with it. Happy decorating!

Frequently Asked Questions

Can I Use Regular Butter Instead of Unsalted Butter for the Buttercream Icing?

Yes, you can use regular butter instead of unsalted butter for the buttercream icing. However, keep in mind that regular butter contains salt, so you may need to adjust the amount of salt in your recipe accordingly. Alternatively, you can try using alternative options for unsalted butter in buttercream icing.

Advertisement

How Long Can I Store the White Buttercream Icing in the Refrigerator?

I store white buttercream icing in the refrigerator for up to one week. To prevent it from turning yellow, make sure to use pure white shortening instead of butter and avoid exposing it to sunlight.

Can I Use Powdered Sugar Instead of Granulated Sugar for the Icing?

Using powdered sugar instead of granulated sugar in buttercream icing can yield different results. It may make the icing lighter in color, but won’t necessarily make it white. Consider using alternatives to white food coloring for a whiter icing.

Is It Possible to Achieve a Whiter Shade Without Using White Food Coloring?

There are several techniques to enhance the whiteness of buttercream icing without using white food coloring. Natural alternatives like using clear vanilla extract or adding a touch of lemon juice can help achieve a brighter shade.

Can I Use a Hand Mixer Instead of a Stand Mixer to Mix the Ingredients for the Buttercream Icing?

Using a hand mixer instead of a stand mixer for buttercream icing can work, but it may take longer to achieve a smooth texture. To save time and effort, I recommend using a stand mixer.

Conclusion

In conclusion, achieving a beautifully white buttercream icing is not only possible but also incredibly rewarding.

Advertisement

By following the step-by-step instructions and incorporating the tips shared, you can create a pristine canvas for your cake creations.

The addition of white food coloring or alternative methods can further enhance the whiteness, allowing your icing to truly shine.

With proper storage and preservation, your white buttercream icing will remain fresh and ready for all your decorating endeavors.

Let your imagination run wild as you adorn your cakes with this luscious, snowy-white delight.

Advertisement
Continue Reading

Recipes & Culinary Uses

10 Steps to Make Delicious Butter Bread at Home

Published

on

By

An image showcasing the step-by-step process of making butter bread: a pair of hands kneading dough, a golden loaf rising in a warm kitchen, and finally, a slice of freshly baked bread slathered in creamy butter

I absolutely adore the scent of freshly baked bread filling my kitchen. Today, I am excited to share with you my fail-proof recipe for creating mouthwatering butter bread from scratch.

With just a few simple ingredients and easy-to-follow steps, you’ll be able to create a loaf of bread that is soft, fluffy, and infused with the rich flavor of butter.

So, let’s roll up our sleeves and get ready to bake some mouthwatering butter bread that will have everyone begging for seconds.

Key Takeaways

  • The type of bread flour affects texture and taste
  • Proper mixing and kneading techniques ensure perfect texture
  • Proof dough in a warm, draft-free area until doubled in size
  • Shape dough into desired form and bake until golden brown and hollow when tapped

Choosing the Right Ingredients

When making butter bread, it’s important to choose the right ingredients. The type of bread flour you use can greatly affect the texture and taste of your bread. There are different types of bread flour available, such as all-purpose flour, whole wheat flour, and bread flour specifically made for bread-making.

Advertisement

Bread flour has a higher protein content, which helps to create a more elastic and chewy texture in the bread. Another crucial ingredient is unsalted butter. Using unsalted butter allows you to control the amount of salt in your bread, ensuring that it doesn’t become too salty. Additionally, unsalted butter adds a rich and creamy flavor to the bread.

Now that we have our ingredients ready, let’s move on to the next step of mixing the dough.

Mixing the Dough

When it comes to making the perfect dough, achieving the proper consistency is key. In this discussion, I will explain the different mixing techniques that will help you achieve the ideal dough consistency for your bread.

Proper Dough Consistency

To ensure your dough has the proper consistency, you’ll want to add just enough flour to prevent it from sticking to your hands. Achieving the desired texture is crucial for making butter bread. Here are some dough troubleshooting tips to help you get it right:

  • Start with the recommended amount of flour in your recipe and add more gradually if needed.
  • Knead the dough for the specified time to develop gluten and create elasticity.
  • If the dough is too sticky, lightly dust your hands and work surface with flour while kneading.
  • If the dough is too dry, gradually add small amounts of water or milk until it reaches the desired consistency.

By following these tips, you’ll be able to achieve the perfect dough consistency for your butter bread.

Now, let’s move on to the next section where I will explain the different mixing techniques in detail.

Advertisement

Mixing Techniques Explained

Once you understand the different mixing techniques, you’ll be able to achieve the perfect texture for your dough. Proper dough hydration and yeast activation are crucial in creating a delicious butter bread.

When it comes to mixing, there are two main techniques: the traditional hand-kneading method and the modern stand mixer method. Hand-kneading involves combining the ingredients and using your hands to fold, press, and stretch the dough until it becomes smooth and elastic. This technique allows you to feel the dough’s texture and judge its hydration level.

On the other hand, using a stand mixer with a dough hook attachment can save time and effort. It helps activate the yeast by combining the ingredients and mixing them at a low speed until the dough forms.

Whichever method you choose, remember to adjust the dough’s hydration level by adding more water or flour as needed.

Kneading and Proofing the Dough

Advertisement

First, make sure you knead the dough until it becomes smooth and elastic. This step is crucial in developing the gluten network, which gives the bread its structure and texture. Here are some key techniques for kneading:

  • Use the heel of your hand to push the dough away from you, then fold it back towards you.
  • Rotate the dough a quarter turn after each fold to ensure even kneading.
  • Add flour sparingly if the dough is too sticky, but avoid adding too much as it can make the bread tough.

For proofing the dough, follow these tips:

  • Place the dough in a warm, draft-free area to rise.
  • Cover it with a damp cloth or plastic wrap to prevent it from drying out.
  • Let the dough rise until it has doubled in size, which usually takes about 1 to 2 hours.

Shaping the Bread

After kneading and proofing the dough, it’s time to shape it into the desired form for baking. Bread shaping techniques are crucial in creating beautiful and delicious butter bread. To achieve a perfectly golden crust, here are some tips to keep in mind:

  1. Use gentle handling: When shaping the dough, be gentle to avoid deflating it. This helps maintain air bubbles, resulting in a lighter texture.

  2. Proper folding: Folding the dough creates layers, which contribute to a flaky and crispy crust. Fold the dough in thirds, like a letter, and repeat the process a few times.

  3. Final shaping: Depending on the desired loaf shape, you can shape the dough into a round, oval, or batard shape. Properly tuck the edges underneath to create tension on the surface.

Baking and Adding Butter

To achieve a perfectly golden crust, you’ll want to preheat your oven to the recommended temperature. Once your bread is shaped and ready to bake, here are the steps to follow:

  • Place the bread on a baking sheet or in a loaf pan.
  • Brush the top of the bread with melted butter for an extra touch of richness and flavor.
  • If you prefer a softer crust, cover the bread loosely with aluminum foil during the first part of baking.
  • Bake the bread in the preheated oven for the specified time, or until it is golden brown and sounds hollow when tapped on the bottom.
  • Remove the bread from the oven and let it cool on a wire rack before slicing and serving.

Butter melting techniques can vary depending on your preference and the recipe you’re using. Some options include melting butter on the stovetop, in the microwave, or in the oven. Experiment with different techniques to find the one that works best for you.

As for butter bread variations, there are endless possibilities. You can add herbs like rosemary or thyme to the dough for an aromatic twist. Or, you can mix in ingredients like garlic, cheese, or even chocolate chips to create unique flavors. The key is to be creative and have fun with your butter bread recipes.

Enjoying Your Homemade Butter Bread

Once you’ve baked your homemade butter bread, it’s time to savor each delicious bite. To enhance your enjoyment, here are some helpful bread slicing techniques and ideas for pairing your butter bread with different spreads.

Advertisement

When it comes to slicing your bread, it’s important to use a sharp serrated knife. This will help you achieve clean, even slices without squishing the bread. Start by cutting off the crusts, if desired, and then slice the bread to your desired thickness. If you prefer thin slices for sandwiches, aim for about 1/4 inch thickness. For toast or dipping in spreads, slightly thicker slices of around 1/2 inch work well.

Now let’s talk about the wonderful spreads you can pair with your butter bread. The table below provides some delicious options:

Spread Description
Fruit preserves The sweet and tangy flavors of fruit preserves complement the rich buttery taste of the bread. Try strawberry, raspberry, or apricot for a burst of fruity goodness.
Honey Drizzle some honey on your butter bread for a touch of natural sweetness. The combination of butter and honey creates a delightful blend of flavors that will satisfy your taste buds.
Garlic butter If you love garlic, spread some garlic butter on your bread. The savory garlic flavor pairs perfectly with the buttery bread, making it an excellent choice for garlic bread or as a base for bruschetta.

Frequently Asked Questions

How Long Does It Take to Proof the Dough?

Proofing time for dough varies depending on the recipe, but typically it takes around 1-2 hours. However, using alternative fats like butter can speed up the process. It’s important to follow the recipe instructions for best results.

Can I Use Margarine Instead of Butter?

Using margarine as a substitute for butter in bread making can alter the taste and texture. Margarine tends to have a softer texture and a milder flavor compared to butter, which may affect the overall outcome of the bread.

Can I Add Other Ingredients Like Herbs or Cheese to the Bread Dough?

Adding herbs or cheese to the bread dough enhances the flavor and creates a savory twist. It’s a simple way to elevate the classic butter bread recipe and make it even more delicious.

Advertisement

What Type of Flour Should I Use for Making Butter Bread?

For making butter bread, the type of flour to use is bread flour. It has a higher protein content which helps create a chewy texture. As for alternatives to butter, you can try using margarine or vegetable oil.

How Long Does It Take for the Bread to Cool Down After Baking?

After baking, it’s important to let the bread cool down for about 30 minutes. This allows it to set properly and avoids it becoming soggy. The best temperature for bread cooling is room temperature.

Conclusion

Well, who would’ve thought that making butter bread would be such a breeze? I mean, who needs store-bought bread when you can whip up a fresh loaf at home?

It’s as simple as choosing the right ingredients, mixing the dough, kneading and proofing it, shaping it into a beautiful loaf, and finally baking it to perfection.

And let’s not forget the best part – slathering that warm bread with butter and savoring every bite.

Advertisement

So go ahead, give it a try and become the master of your own bread domain!

Continue Reading

Trending