Connect with us

Recipes & Culinary Uses

Make Benihana Garlic Butter in 3 Easy Steps

Published

on

An image featuring a close-up shot of a stainless steel bowl filled with creamy, golden garlic butter

As someone who enjoys rich and flavorful dishes, I am constantly seeking ways to enhance my culinary creations.

And what better way to do that than with the irresistible taste of Benihana Garlic Butter? In this article, I will guide you through the process of making this delectable condiment from scratch.

With the perfect combination of fresh garlic and creamy butter, you’ll be able to add a burst of flavor to your favorite dishes.

So let’s get started and unlock the secret to making Benihana Garlic Butter!

Key Takeaways

  • Fresh garlic adds the best flavor to Benihana garlic butter.
  • Salted butter enhances the taste of garlic and other ingredients.
  • Clarified butter offers a smoother texture and is ideal for high-heat cooking methods.
  • Storing garlic butter in an airtight container in the coldest part of the refrigerator helps maintain freshness.
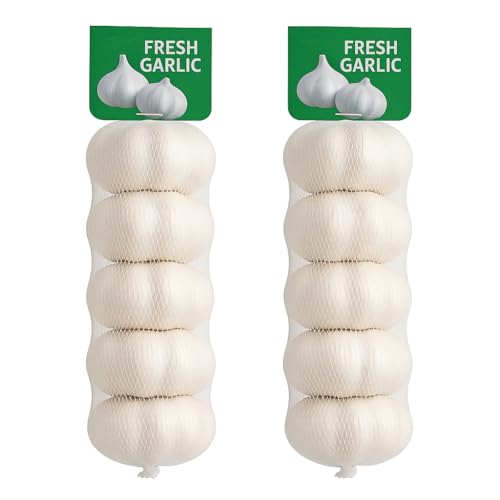
The Importance of Fresh Garlic

Advertisement

You should always use fresh garlic when making benihana garlic butter because it adds the best flavor. The importance of using fresh ingredients cannot be overstated, especially when it comes to garlic.

Fresh garlic has a vibrant and pungent flavor that enhances the taste of any dish it is added to. When used in benihana garlic butter, it brings out the natural richness of the other ingredients and creates a deliciously aromatic spread.

In addition to its flavor, fresh garlic also offers numerous health benefits. It is known for its immune-boosting properties, as well as its potential to reduce blood pressure and cholesterol levels. So not only does fresh garlic elevate the taste of the butter, but it also contributes to your overall well-being.

Now, let’s move on to the next step of choosing the right butter for the recipe.

Choosing the Right Butter for the Recipe

When it comes to choosing the right butter for a recipe, there are a couple of factors to consider.

Advertisement

One of the main considerations is whether to use salted or unsalted butter. Salted butter can add a subtle flavor and enhance the overall taste of the dish, while unsalted butter allows for more control over the salt content.

Additionally, another option to explore is clarified butter, which offers several benefits such as a higher smoke point and a longer shelf life.

Salted Vs. Unsalted Butter

Salted butter is often preferred over unsalted butter for making Benihana garlic butter due to its added flavor. The salt in the butter enhances the taste of the garlic and other ingredients, creating a more robust and savory flavor profile. Additionally, using salted butter eliminates the need to add extra salt to the recipe, simplifying the process.

However, if you prefer to use unsalted butter or have dietary restrictions, there are alternatives. One option is to add a pinch of salt to the recipe when using unsalted butter to mimic the flavor of salted butter. Another alternative is to use clarified butter, which is butter that has been melted and separated from its milk solids. Clarified butter has a rich, nutty flavor and can be a suitable substitute for salted butter in the Benihana garlic butter recipe.

Transitioning to the benefits of clarified butter, it offers a smoother texture and a higher smoke point, making it ideal for cooking at high temperatures.

Advertisement

Clarified Butter Benefits

Using clarified butter in recipes offers a smoother texture and a higher smoke point, making it a versatile option for various cooking techniques. Here are four reasons why clarified butter is a beneficial ingredient in your kitchen:

  1. Enhanced Flavor: When butter is clarified, the milk solids are removed, resulting in a pure, nutty flavor that enhances the taste of any dish.

  2. Increased Shelf Life: Clarified butter has a longer shelf life compared to regular butter, as the removal of milk solids prevents spoilage.

  3. High Smoke Point: The removal of milk solids also increases the smoke point of clarified butter, allowing for high-heat cooking methods such as sautéing and searing without burning.

  4. Health Benefits: Clarified butter is a rich source of vitamins A, D, E, and K, as well as butyric acid, which has anti-inflammatory properties. It also contains conjugated linoleic acid (CLA), which has been linked to potential health benefits such as weight loss and improved heart health.

Incorporating clarified butter into your recipes not only enhances the flavors but also provides additional health benefits.

Essential Ingredients for Benihana Garlic Butter

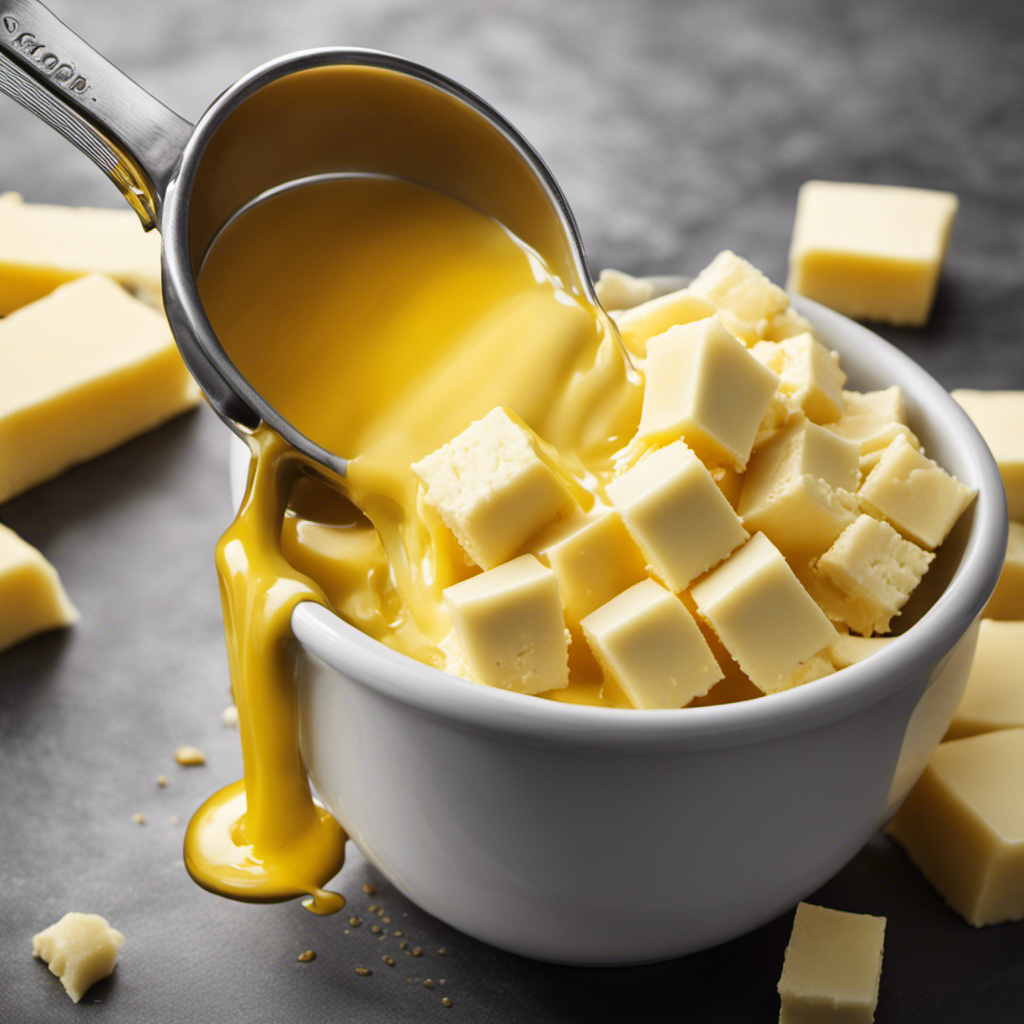
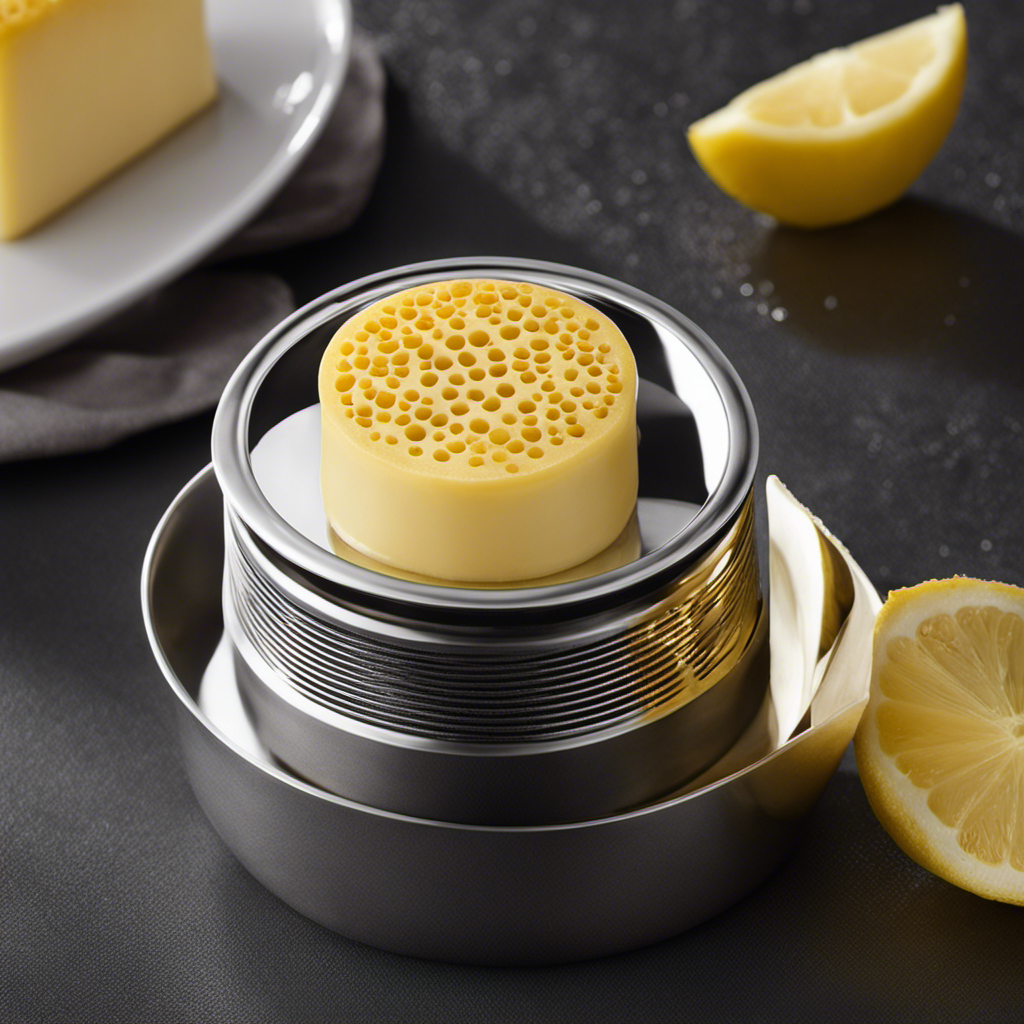
One of the essential ingredients for Benihana garlic butter is butter. This rich and creamy ingredient forms the base of the flavorful sauce that accompanies many of Benihana’s dishes.

Advertisement

But it’s not just any butter that will do. The key to achieving the perfect garlic butter consistency lies in using fresh garlic. Freshly minced garlic adds a robust and pungent flavor that enhances the overall taste of the butter.

To achieve the perfect consistency, it is important to ensure that the butter is softened but not melted. This can be achieved by leaving the butter at room temperature for a short while.

With these tips in mind, you can now move on to the step-by-step instructions for making Benihana garlic butter.

Step-by-Step Instructions for Making Benihana Garlic Butter

Now that we have covered the essential ingredients for Benihana garlic butter, let’s dive into the step-by-step instructions for making this delicious condiment.

  1. Start by melting the unsalted butter in a saucepan over low heat. Be careful not to let it brown or burn.

  2. Once the butter has melted, add in the minced garlic and cook it for a few minutes until fragrant. This will infuse the butter with a rich garlic flavor.

  3. Next, remove the saucepan from the heat and let it cool slightly. This is an important step because it allows the butter to emulsify properly.

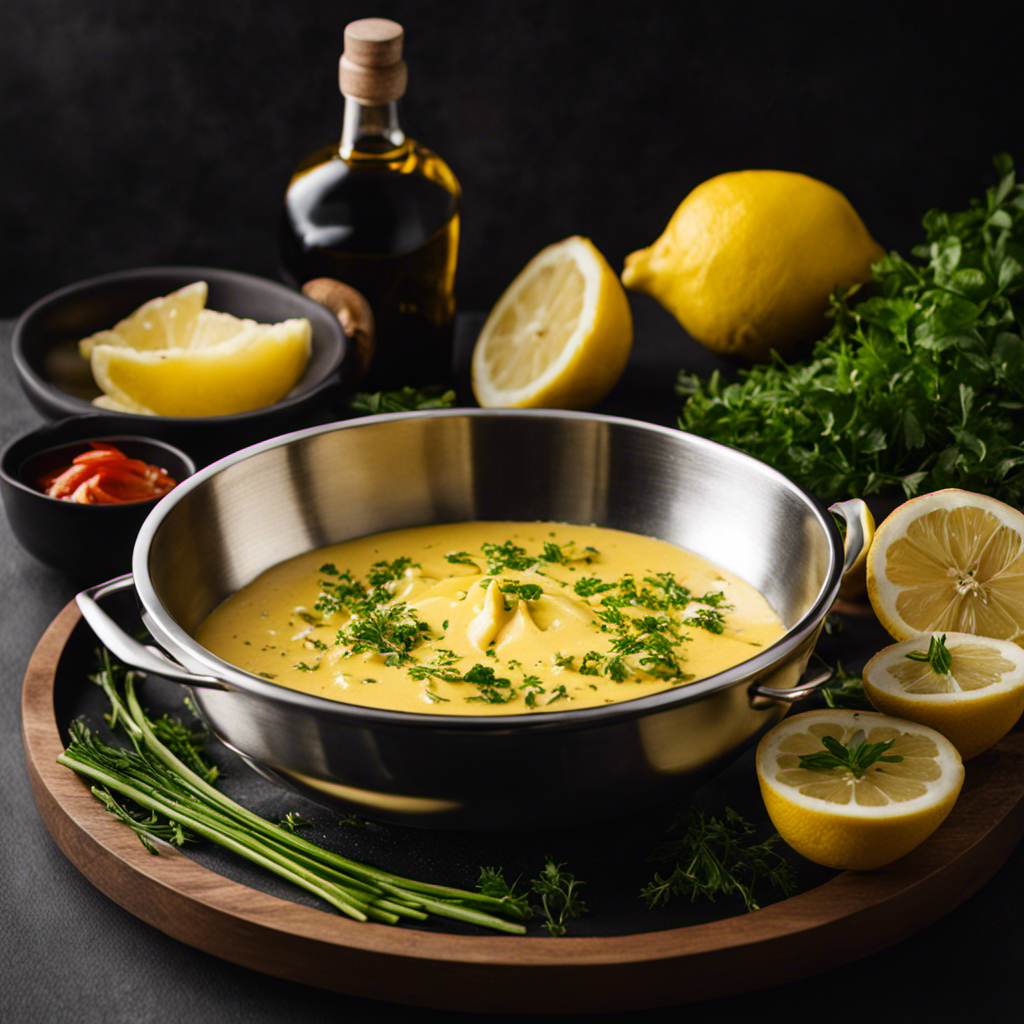
  4. Finally, transfer the mixture to a food processor or blender and blend until smooth and creamy. This will ensure a consistent texture and help incorporate all the flavors.

The science behind emulsification is what gives garlic butter its smooth and creamy texture. Emulsification is the process of combining two or more ingredients that don’t naturally mix, such as oil and water. In the case of garlic butter, the emulsification occurs between the melted butter and the minced garlic.

Advertisement

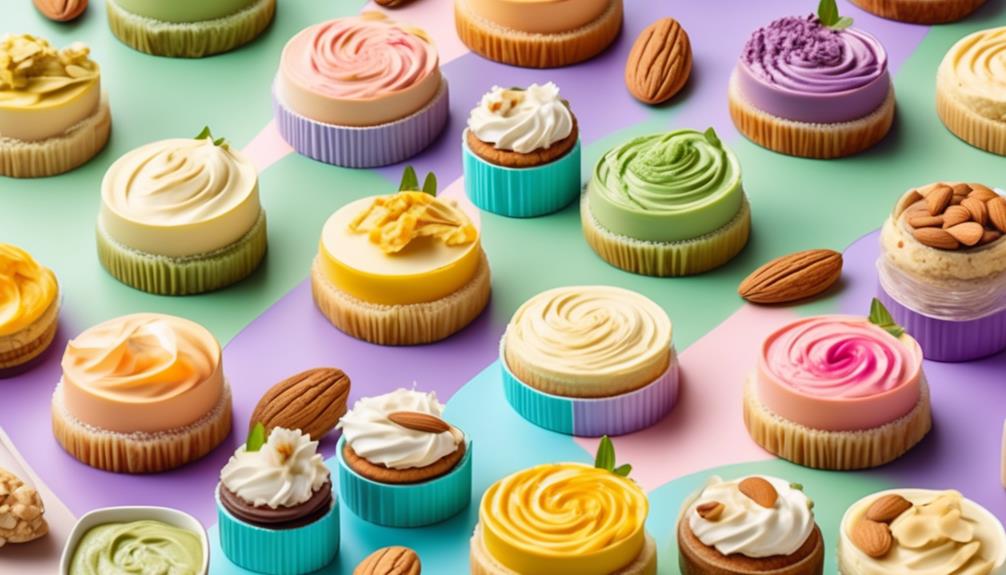
There are also variations of garlic butter flavors you can experiment with. Some popular options include adding herbs like parsley or chives, a squeeze of lemon juice for a tangy twist, or even a pinch of cayenne pepper for a hint of heat. Feel free to get creative and customize your garlic butter to suit your taste preferences.

Tips for Achieving the Perfect Garlic Butter Consistency

When it comes to garlic butter, there are two key factors that can greatly impact its consistency: creamy vs. chunky and butter temperature.

As someone who has experimented with various recipes and techniques, I have found that achieving the perfect consistency is crucial for enhancing the flavor and texture of dishes.

In this discussion, I will delve into the importance of choosing between creamy and chunky garlic butter, as well as the role that butter temperature plays in achieving the desired result.

Creamy Vs. Chunky

To achieve the perfect texture for your garlic butter, you’ll want to decide whether you prefer it creamy or chunky. Both options have their merits, so let me break it down for you:

Advertisement
  1. Creamy Texture: This type of garlic butter is smooth and velvety, perfect for spreading on bread or drizzling over vegetables. To achieve a creamy texture, you’ll need to blend or whip the softened butter with minced garlic until it becomes light and fluffy.

  2. Chunky Texture: If you prefer a more rustic and textured garlic butter, then chunky is the way to go. This version includes small chunks of minced garlic, adding a burst of flavor and visual appeal to your dishes.

  3. Creamy with a Hint of Chunk: For those who can’t decide between the two, you can achieve a balance by mixing creamy garlic butter with a small amount of minced garlic for a subtle chunky texture.

  4. Chunky with a Touch of Creaminess: Conversely, if you prefer a primarily chunky texture, but still want a hint of creaminess, you can add a small amount of softened butter to the minced garlic.

When deciding between creamy and chunky garlic butter, consider your personal preference and the intended use. Now that you’ve chosen your texture, let’s move on to the next step: why butter temperature matters.

Butter Temperature Matters

Once you’ve decided on the desired texture of your garlic butter, you’ll want to pay attention to the temperature of the butter. The temperature plays a crucial role in achieving the perfect consistency and flavor. When the butter is too cold, it won’t melt properly, resulting in a chunky and uneven texture. On the other hand, if the butter is too hot, it can burn the garlic and overpower its delicate flavor. To ensure the butter melts evenly and infuses the garlic flavor, it is best to let the butter sit at room temperature for about 30 minutes before using. This allows the butter to soften without compromising its integrity. By maintaining the right temperature, you can create a smooth and flavorful garlic butter that will elevate any dish.

Temperature Texture Flavor
Too cold Chunky Weak
Room temp Smooth Balanced
Too hot Runny Overpowering

Creative Uses for Benihana Garlic Butter

One creative way to use Benihana garlic butter is by spreading it on grilled vegetables for a delicious and flavorful side dish.

Here are some other ways you can incorporate Benihana garlic butter into your meals:

  1. Baked Potatoes: Top your baked potatoes with a dollop of Benihana garlic butter for a rich and savory twist.

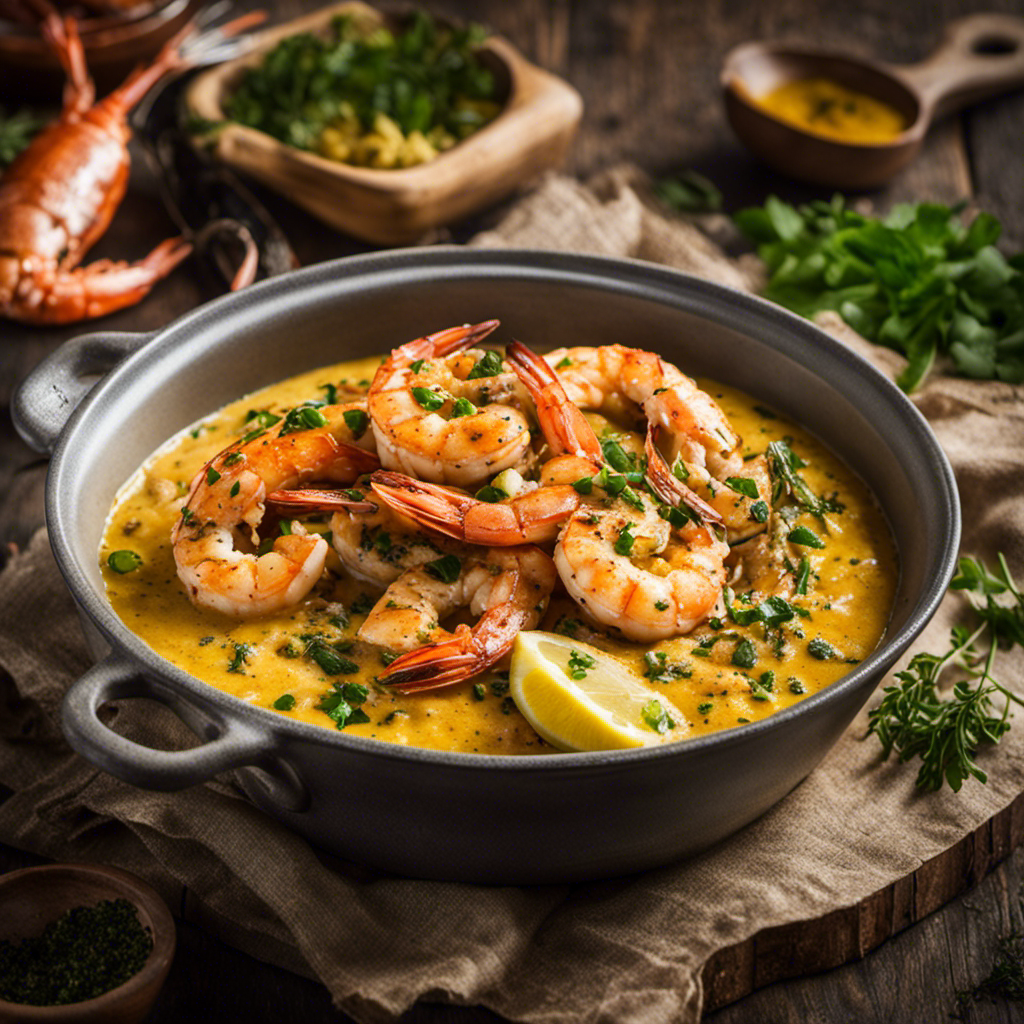
  2. Grilled Shrimp: Brush Benihana garlic butter onto grilled shrimp for a burst of garlic flavor that pairs perfectly with the sweet and succulent shrimp.

  3. Garlic Bread: Spread Benihana garlic butter onto slices of bread and toast them for a crispy and aromatic garlic bread.

  4. Pasta: Toss cooked pasta with Benihana garlic butter for a simple yet flavorful pasta dish.

With its creamy texture and robust garlic flavor, Benihana garlic butter can enhance the taste of various dishes and add a touch of indulgence to your meals.

Advertisement

Get creative and explore different flavor variations by pairing Benihana garlic butter with your favorite dishes.

Storing and Preserving Benihana Garlic Butter

When storing and preserving your Benihana garlic butter, it’s important to keep it refrigerated to maintain its freshness and prevent spoilage. Proper storage techniques are crucial to ensure that the flavor of the garlic butter remains intact.

To begin, transfer the garlic butter into an airtight container, making sure to remove any air bubbles to prevent oxidation. Label the container with the date of preparation to keep track of its freshness.

Place the container in the coldest part of the refrigerator, away from strong-smelling foods to avoid flavor contamination. Additionally, consider freezing the garlic butter if you don’t plan on using it within a week. Freezing will extend its shelf life while preserving its flavor.

Frequently Asked Questions

Can I Use Pre-Minced Garlic Instead of Fresh Garlic?

Yes, you can use pre-minced garlic instead of fresh garlic in the recipe. However, the taste of pre-minced garlic may differ slightly from fresh garlic in the garlic butter recipe.

Advertisement

What Type of Butter Should I Use for This Recipe?

I prefer using unsalted butter for this recipe as it allows me to control the saltiness. To infuse the butter with garlic, I melt it and add minced garlic, stirring until fragrant.

Are There Any Substitutions for the Essential Ingredients in the Recipe?

There are a few recommended alternatives that can be used as substitutions for the essential ingredients in the recipe. It’s important to choose ingredients that have a similar flavor and consistency to achieve the desired taste and texture.

Can I Use a Blender or Food Processor to Make the Garlic Butter Instead of a Whisk?

Sure, you can use a blender or food processor to make the garlic butter instead of a whisk. However, using a whisk gives it a smoother texture. Plus, using fresh garlic adds more flavor compared to pre-minced garlic.

How Long Can I Store the Garlic Butter in the Refrigerator?

The shelf life of garlic butter depends on how it is stored. To ensure its freshness, it is best to store it in an airtight container in the refrigerator. Use within a week for optimal flavor.

Conclusion

In conclusion, creating homemade Benihana garlic butter is a culinary journey that brings warmth and flavor to any dish.

Advertisement

Like the garlic that infuses the butter, this recipe symbolizes the power of simplicity and the beauty of fresh ingredients.

By following the step-by-step instructions and choosing the right butter, you can achieve a creamy and flavorful garlic butter that will elevate your meals to new heights.

So go forth and embrace the art of making Benihana garlic butter, and let its rich aroma and taste transport you to a world of culinary delight.

Continue Reading
Advertisement

Recipes & Culinary Uses

Southern Comfort: Best Butter Bean Recipe for Hearty Meals!

Craving a taste of Southern comfort?

Published

on

By

delicious southern butter beans

Indulge in the rich, buttery flavors of Southern comfort with the best butter bean recipe that promises hearty satisfaction in every bite. Enhance the creamy texture with bacon, onions, and garlic for a mouthwatering dish. Incorporate ingredients like ham hock for a smoky twist. Don't forget to season with salt, cracked pepper, and brown sugar for a perfect balance. Pair with cornbread or cheddar cheese quick bread to elevate the experience. Experiment with flavors to create the ultimate Southern comfort cuisine. Get ready to elevate your culinary skills and taste buds to the next level with this delicious butter bean recipe!

Key Takeaways

  • Butter beans offer a creamy, buttery flavor ideal for Southern comfort cuisine.
  • Enhance dishes with ingredients like bacon, onions, and garlic for rich flavors.
  • Experiment with flavor combinations like smoky bacon and sweet brown sugar.
  • Pair butter beans with cornbread, rice, or cheddar cheese quick bread for a satisfying meal.
  • Store leftovers in the fridge for up to five days or freeze for later use.

Butter Bean Vs. Lima Bean

legume showdown butter versus lima

When comparing butter beans to lima beans, you'll notice that butter beans are the larger variety, while lima beans are smaller. Both types are creamy beans with a mild, buttery flavor that make them popular in various dishes.

Originating from Lima, Peru over 9000 years ago, these legumes have become a staple in cuisines worldwide. Large lima beans are commonly found at local grocery stores, perfect for incorporating into your favorite recipes.

In terms of size, butter beans offer a heartier bite compared to the smaller lima beans. The creamy texture of both beans is ideal for dishes that require a smooth consistency, such as soups, stews, and casseroles.

Whether you choose butter beans or lima beans for your next meal, you can expect a deliciously rich and buttery undertone that complements a wide range of ingredients. So, next time you're at the store, consider picking up some large lima beans to elevate your culinary creations.

Flavor Profile and Taste

exploring food sensory experience

You'll find that butter beans offer a mild, buttery flavor that adapts well to a variety of dishes. Their creamy texture and delicate taste make them a versatile addition to Southern comfort cuisine.

When exploring the flavor profile of butter beans, consider their culinary appeal in classic dishes and how they complement savory ingredients like bacon and onions.

Advertisement

Taste and Texture

Enhancing the flavor profile of butter beans is essential for creating delicious and satisfying dishes. When you make butter beans, whether using large dried beans or canned ones, you'll notice their creamy texture and mild, buttery taste. These characteristics make butter beans versatile for different recipes.

The rich protein and fiber content in butter beans not only provide long-lasting satisfaction but also offer essential nutrients.

Incorporating ingredients like bacon, ham hock, onions, and garlic can elevate the flavor of butter beans, adding depth and complexity to your dishes. These additions complement the beans' mild taste, creating a harmonious blend of flavors.

Whether you're preparing a hearty soup, a comforting stew, a flavorful casserole, a creamy dip, or a revitalizing salad, butter beans can be the star ingredient that brings everything together.

The smooth texture of butter beans contributes to the overall enjoyment of the dish, making each bite a delightful experience. Their versatility and ability to absorb flavors make them a staple in Southern comfort food recipes.

Advertisement

Flavor Combinations

Creating delicious dishes with butter beans involves combining their mild, buttery flavor with savory ingredients like bacon, ham, and onions for a rich and satisfying taste experience.

When preparing butter beans, consider these flavor combinations to elevate your dish:

  • Smoky Flavors: Incorporating cooked bacon or ham hock adds a delightful smokiness that enhances the overall taste profile of the butter beans.
  • Sweet Elements: Adding a touch of brown sugar complements the natural buttery taste of the beans, creating a harmonious balance of flavors.
  • Seasoning: Enhance the taste of butter beans by seasoning them with salt and cracked pepper, which adds depth and a hint of spice to the dish.
  • Versatility: The creamy texture of butter beans allows them to pair well with various ingredients, making them versatile for both hearty and light dishes.

Experimenting with these flavor combinations will help you create mouthwatering butter bean dishes that are sure to impress your taste buds.

Culinary Appeal

Butter beans' culinary appeal lies in their mild, buttery flavor that effortlessly complements a variety of seasonings and ingredients. These beans, also known as baby lima beans, offer a creamy texture and are a staple in Southern comfort dishes. Originating over 9000 years ago in Lima, Peru, butter beans have a rich history in cuisines worldwide. Young lima beans are tender and mild, ideal for quick cooking methods that preserve their delicate flavor. The versatile nature of butter beans allows them to be used in soups, stews, casseroles, dips, and salads, adding depth and heartiness to meals.

Flavor Texture Versatility
Mild, buttery Creamy Soups, stews, casseroles
Complements seasonings Tender Dips, salads
Rich history Versatile Southern comfort dishes

Home-Style Recipe Ingredients

home cooking ingredient list

You're about to discover the key ingredients that make up a classic home-style butter bean recipe.

Bacon, onion, brown sugar, butter, salt, and cracked pepper all play crucial roles in creating a flavorful and hearty dish.

These essential ingredients work together to enhance the taste profile of the butter beans, ensuring a delicious and satisfying meal.

Advertisement

Recipe Ingredients Breakdown

To make the home-style butter beans recipe, gather bacon, onion, brown sugar, frozen butterbeans, butter, salt, and cracked pepper. When preparing this hearty dish, each ingredient plays an essential role in enhancing the flavors and textures of the butter beans.

Here's a breakdown of the key components:

  • Bacon: Adds a savory smokiness to the dish, infusing it with rich flavors.
  • Brown Sugar: Provides a touch of sweetness that balances out the savory notes in the butter beans.
  • Frozen Butterbeans: Convenient and quick to cook, these big lima beans are perfect for this comforting recipe.
  • Butter, Salt, and Cracked Pepper: Together, these ingredients work harmoniously to elevate the overall taste of the dish, creating a deliciously rich and well-rounded flavor profile.

Key Flavor Enhancements

Enhancing the flavors of the home-style butter beans recipe is essential for creating a delicious and satisfying dish that balances savory and sweet notes. The key to achieving this balance lies in the combination of cooked beans, salt, and pepper.

When seasoning the dish, a pinch of salt and a generous crack of pepper are vital to enhance the natural flavors of the beans and create a well-rounded taste profile.

Cooked beans serve as the hearty base of the dish, providing a robust texture and earthy flavor that pairs perfectly with the other ingredients. Seasoning with salt not only brings out the inherent tastes of the beans but also helps to marry the flavors of the dish together.

Additionally, cracked pepper adds a subtle heat and depth to the butter beans, elevating the overall taste experience. By incorporating these key flavor enhancements into your home-style butter beans recipe, you can enjoy a satisfying and flavorful meal that will leave you craving more.

Advertisement

Cooking Method Details

detailed cooking method explanation

For achieving peak tenderness and flavor infusion, simmering butter beans in a seasoned broth is a fundamental cooking method detail. This process allows the beans to absorb the flavors of the broth while softening to the perfect texture.

To enhance the cooking method further, consider the following tips:

  • Stir well: Regularly stirring the butter beans while simmering helps distribute the flavors evenly and prevents them from sticking to the bottom of the pot.
  • Bring to a boil: Start the cooking process by bringing the seasoned broth and butter beans to a boil, then reduce the heat to a simmer to gently cook the beans.
  • Add complementary ingredients: Incorporating vegetables, meats like ham hocks, or herbs and spices can elevate the flavors of the butter beans during the cooking process.
  • Utilize different cooking techniques: Experiment with stovetop cooking or using a slow cooker to find the method that best suits your preferences and time constraints.

Storage and Reheating Tips

food storage and reheating

Properly storing and reheating your cooked butter beans is essential for maintaining their quality and flavor. After cooking a delicious batch of butter beans, make sure to refrigerate any leftovers promptly in an airtight container. This will help keep them fresh for up to five days. For longer storage, you can freeze the butter beans for up to three months. When you're ready to enjoy them again, simply thaw the frozen beans in the refrigerator before reheating.

To reheat your butter beans, you have the option of using the stovetop or microwave. Reheating on the stovetop is a great way to ensure even heating and prevent the beans from becoming mushy. Heat them until they are hot and ready to serve. Once reheated, you can enjoy your butter beans as a hearty side dish or incorporate them into various recipes for added flavor and texture.

Storage Tips Reheating Tips Freezing Tips
Refrigerate in airtight Reheat on stovetop or Freeze leftovers for up
container for up to five microwave until hot to three months
days
Thaw frozen beans in
the refrigerator before
reheating

Side Dish Pairings

dinner party menu ideas

To create a satisfying and well-rounded meal with butter beans, consider pairing them with traditional Southern sides like cornbread, white rice, and cheddar cheese quick bread. These side dishes perfectly complement the creamy texture and mild, buttery flavor of butter beans, enhancing the overall dining experience.

In addition to these classics, you can also enjoy butter beans with bread and butter or Texas Toast to elevate the Southern comfort food experience.

  • Butter beans are a classic side dish that pairs well with a variety of Southern staples.
  • Traditional accompaniments like cornbread and white rice enhance the rich flavors of butter beans.
  • Cheddar cheese quick bread offers a savory twist to the meal, adding depth to the dish.
  • Experimenting with different side dishes allows for a personalized touch to your butter bean meal, catering to diverse tastes and preferences.

Southern Comfort Classics

comforting southern cuisine favorites

You're about to discover timeless Southern recipes that bring hearty comfort to your table.

These classic dishes embody the warmth and tradition of Southern cooking, offering a taste of nostalgia with every bite.

Get ready to savor the rich flavors and comforting goodness of Southern comfort classics.

Advertisement

Timeless Southern Recipes

When exploring Southern comfort classics, you'll find that butter bean recipes are a beloved staple dish known for their hearty and satisfying nature. These timeless Southern recipes make the most of ingredients like butter beans, which offer a creamy texture and mild, buttery flavor that perfectly complements traditional Southern cooking.

To create an authentic Southern butter bean dish, consider the following:

  • Use High-Quality Ingredients: Opt for fresh or dried butter beans, and don't skimp on flavorful additions like bacon or ham hocks.
  • Slow Cooking Techniques: Embrace slow cooking methods to allow the flavors to meld together and create a rich, comforting dish.
  • Season Thoughtfully: Onions, garlic, and a touch of seasoning can elevate the humble butter bean to new heights of deliciousness.
  • Serve with Cornbread: A classic accompaniment to Southern dishes, cornbread pairs perfectly with butter beans for a complete and satisfying meal.

These Southern comfort dishes are sure to become a favorite at family gatherings, offering a taste of tradition and warmth in every bite.

Hearty Comfort Dishes

For those seeking ultimate comfort in their meals, Southern classics offer a range of hearty dishes that bring warmth and satisfaction with every bite. When it comes to preparing these comforting meals, a Dutch oven can be your best friend. Set it over medium heat, and you're ready to create delicious Southern comfort dishes that will surely become family favorites.

The versatility of butter beans shines in traditional Southern recipes like stews, casseroles, and soups, adding a creamy texture and mild, buttery flavor to every dish. With a rich history deeply rooted in Southern cuisine, butter beans have stood the test of time, proving to be a beloved ingredient for generations.

Incorporating butter beans into your cooking repertoire not only pays homage to Southern culinary traditions but also brings a taste of comfort to your table. So, why not whip up a hearty butter bean stew or casserole in your Dutch oven today? Your taste buds will thank you for the cozy Southern goodness that awaits.

Advertisement

Meat Additions and Enhancements

enhancing meat with additions

Enhance the flavor and richness of your butter bean recipe by incorporating bacon or ham into the dish. These meat additions not only add depth but also infuse the beans with a savory and smoky essence that elevates the overall taste of the dish.

To make the most of these meat additions, consider the following:

  • Bacon: Fry the bacon until crispy, then crumble it into the beans for a burst of salty goodness.
  • Ham: Boil the ham hocks alongside the beans to infuse the broth with a rich, meaty flavor.
  • Leftover Ham: Utilize any leftover ham by adding it towards the end of cooking to retain its tenderness and taste.
  • Butter: If you want to enhance the richness further, reduce the amount of butter needed to add a velvety finish to the beans.

Butter and Oil Options

mixing butter with oil

Consider incorporating butter or oil into your butter bean recipe to enhance its flavor and creaminess.

While adding butter isn't a strict requirement, it can greatly improve the overall taste and texture of your dish. If you prefer a dairy-free option or just want to experiment, using oil as a substitute can also achieve that desired creaminess in your beans.

To make this recipe even more indulgent, you may need to add a tablespoon or two of fat per pound of beans during the cooking process. This addition can infuse a rich flavor into the beans, especially when incorporated midway through cooking.

Don't be afraid to try different types of fats to see which one complements your butter beans the best. By choosing the right butter or oil for your recipe, you can elevate the flavors and create a truly satisfying dish.

Leftover Handling and Reheating

efficiently manage leftovers at home

Store your cooked butter beans in an airtight container in the refrigerator for 3-4 days. When dealing with leftovers, proper handling and reheating techniques can help maintain the delicious taste and texture of your butter beans.

Here are some essential tips to make the most of your leftovers:

Advertisement
  • Freezing Options: You can freeze cooked butter beans for up to 3 months for future use.
  • Thawing Process: Thaw frozen butter beans in the refrigerator before reheating to preserve texture.
  • Reheating Methods: Reheat butter beans in the microwave or on the stovetop until thoroughly heated.
  • Assessing Consistency: Avoid adding water immediately when reheating butter beans; assess consistency as they heat up.

Frequently Asked Questions

Should I Soak Butter Beans Before Cooking?

You don't have to soak butter beans before cooking, but a quick 30-minute soak can help. It's optional, depending on your preference. Soaking may reduce cooking time and improve texture in some recipes, ensuring even tenderness.

Are Butter Beans Good for Your Heart?

Butter beans are like tiny heart superheroes in a pod. They're packed with fiber, potassium, folate, and magnesium—all working together to support your heart health and keep it ticking strong.

Is There a Difference Between Butter Beans and Lima Beans?

Yes, there isn't a difference between butter beans and lima beans. They're the same type of bean, just with varying names based on size. Enjoy their creamy texture and buttery taste in a variety of dishes!

What Is the American Version of Butter Beans?

In the US, butter beans are the American version of lima beans. These creamy legumes, often used in Southern cooking, offer a mild, buttery taste. So, when looking for butter beans, know you're getting a true Southern favorite!

Conclusion

To sum up, whether you choose butter beans or lima beans, the hearty and comforting flavors in this recipe will satisfy your cravings.

From the rich and creamy texture to the savory seasonings, each bite will transport you to a Southern kitchen.

Advertisement

So go ahead, whip up a batch of this classic dish and enjoy the warmth and nostalgia it brings to your table. It's a simple yet delicious way to experience true Southern comfort.

Continue Reading

Recipes & Culinary Uses

Playtime Fun: Best Butter Slime Recipe for Kids!

Are you ready to create the best butter slime for your kids?

Published

on

By

butter slime kids love

Ready to create the best butter slime for your kids? Mix white glue and shaving cream, then add Crayola Model Magic clay for texture. Knead the ingredients until smooth and adjust with more clay if needed. This slime is perfect for sensory play, boosting fine motor skills, and offering stress relief. Get creative by hiding treasures in the slime or making a slime volcano. Enhance tactile exploration and cognitive development with this fun activity. Discover the endless playtime possibilities and benefits of butter slime that will keep your kids entertained and engaged for hours!

Key Takeaways

  • Use white glue, shaving cream, and Model Magic clay for fluffy and buttery texture.
  • Follow 1/2 cup glue, 1/2 cup shaving cream, then slowly add clay.
  • Knead until smooth consistency, adjust with more clay if needed.
  • Store in an airtight container to maintain texture and prevent drying out.
  • Enjoy sensory play, creativity, and stress relief with safe and entertaining butter slime.

Butter Slime Ingredients

slippery recipe for slime

You'll need specific ingredients to create the perfect batch of butter slime for your kids. Start by gathering a cup of white school glue, a cup of Elmer's glue, baking soda, shaving cream, Crayola Model Magic clay, food coloring, lotion, and an airtight container for storage.

The white school glue, also known as PVA glue, forms the base of the slime. Shaving cream adds fluffiness and volume, while the Model Magic clay is essential for achieving that signature buttery texture. Food coloring allows for customization, and lotion can be added for extra stretchiness and softness.

Properly storing your butter slime in an airtight container will help maintain its texture and prevent it from drying out. These specific ingredients, when combined in the right proportions, will result in a delightful batch of butter slime that your kids will love playing with for hours.

How to Make Butter Slime

creating butter slime tutorial

To create butter slime, begin by mixing together the glue and shaving cream in a bowl. Then, add the desired amount of clay to enhance the texture and stretchiness of the slime. Here's a simple guide to help you make your own butter slime:

Ingredients Amount
White Glue 1/2 Cup
Shaving Cream 1/2 Cup
Model Magic Clay As needed

First, pour the white glue and shaving cream into a mixing bowl. Mix them thoroughly until well combined. Next, slowly incorporate the Model Magic clay into the mixture. Knead the slime with your hands until you achieve a smooth and spreadable consistency. If the slime is too sticky, you can add a bit more clay. Once you've reached the desired texture, your butter slime is ready for playtime fun with the kids! Enjoy the process of making and playing with this delightful sensory material.

Benefits of Butter Slime

Butter slime offers children a sensory-rich and therapeutic play experience, promoting creativity and fine motor skill development. Engaging in sensory play with butter slime can help children explore different textures, colors, and scents, stimulating their senses and fostering creativity.

Advertisement

The squishy and stretchy nature of butter slime provides stress relief for children, offering a therapeutic outlet for them to relax and unwind. Manipulating butter slime also helps enhance fine motor skills as kids pinch, squeeze, and mold the slime, improving their hand-eye coordination and dexterity.

Moreover, butter slime is a safe activity suitable for kids of all ages, providing hours of entertainment and learning. By storing butter slime properly in an airtight container, you can guarantee its longevity for continued play over several days.

Playtime Ideas With Butter Slime

fun with butter slime

For an engaging and creative playtime experience with butter slime, consider trying out these fun and educational activities with your child. Using butter slime in play can be a great way to have fun and learn simultaneously. Check out the table below for some exciting ideas to explore with your child:

Playtime Ideas Benefits Keywords
Hide treasures in slime Encourages sensory play and imaginative exploration play,fun,sensory play,imagination
Spell out names with slime Enhances fine motor skills and promotes letter recognition using,butter slime recipe,fine motor skills
Create a slime volcano Hands-on science experiment teaching about chemical reactions creative,science experiment
Slime garden activity Fosters creativity and imagination with the addition of plants and figurines fun,kids activities,imagination
Self-portrait with slime Develops perceptual awareness in children through a sensory play activity sensory play,creative

These activities not only provide entertainment but also offer a chance for your child to learn and grow through play.

Sensory Activities With Butter Slime

butter slime tactile play

Engage your child in sensory activities with butter slime to enhance their tactile exploration and foster creativity. Kids love the smooth and spreadable texture of butter slime, making it perfect for sensory play. This type of slime offers a unique sensory experience, encouraging children to touch and manipulate it, stimulating their fine motor skills development.

By incorporating butter slime into playtime, you can create a calming and engaging sensory play session that promotes hands-on learning and cognitive development. These sensory activities not only provide a fun and interactive way for kids to play but also help in boosting their cognitive skills through sensory exploration.

Let your child immerse themselves in the world of sensory play with butter slime, where they can explore, create, and learn in a tactile and exciting manner. Make playtime fun and educational with sensory activities that spark imagination and creativity.

Advertisement

Frequently Asked Questions

How to Make Butter Slime for Kids?

To make butter slime for kids, you'll need white school glue, shaving cream, cornstarch, lotion, and Model Magic clay for stretchiness. Customize with colors, glitter, or sequins. Encourage fine motor skills and creativity through fun sensory play.

How to Make Butter Slime With 3 Ingredients?

To make butter slime with 3 ingredients, grab white glue, shaving cream, and cornstarch. Mix them together for a smooth, cloud-like texture. Remember, simplicity is key – less is more when it comes to creating this fun sensory play material!

What Is the Best Activator for Butter Slime?

To make the best butter slime, experiment with Borax, saline solution, or liquid starch as activators. Find what works for you, whether it's Borax for effectiveness, saline for gentleness, or liquid starch for good results.

How to Make Butter Slime With 2 Ingredients?

Mix hair conditioner and cornstarch in a bowl. Knead the soft dough until smooth. Add sparkles for extra flair. Immerse yourself in this easy, no-cook activity with your kids for a sensory delight that's bound to be a hit!

Conclusion

Now that you've got your butter slime ready, get ready for hours of squishy, stretchy fun!

Advertisement

Let your imagination run wild as you mold and shape this creamy concoction.

Remember, the possibilities are as endless as the buttery swirls in your slime.

So go ahead, immerse yourself and let your creativity flow like a river of melted butter!

Continue Reading

Recipes & Culinary Uses

Cookie Mastery: Best Recipe for Peanut Butter Cookies!

Fulfill your cookie cravings with the ultimate peanut butter cookies recipe that promises a decadent symphony of flavors – you won't want to miss out!

Published

on

By

peanut butter cookie perfection

Get ready for the ultimate peanut butter cookies! Combine peanut butter, brown sugar, egg, and baking soda. Mix in chocolate chips and bake at 350°F. Enjoy a soft, chewy treat with a golden brown color. The robust peanut butter taste, sweet brown sugar, and rich chocolate chips create a decadent symphony of flavors. Each cookie provides 245 calories, with a balance of carbohydrates, protein, and fat. Pair with milk or coffee for an enhanced experience. Stay tuned for more serving suggestions and detailed reviews to keep your cookie cravings satisfied.

Key Takeaways

  • Soft and chewy texture with golden brown color for irresistible appeal.
  • Robust peanut butter taste complemented by sweet brown sugar.
  • Decadent chocolate chips offer bursts of rich flavor.
  • Thick cookies with crisp edges and soft centers for a delightful mouthfeel.
  • Easy to make, perfect for parties, and pairs well with milk or coffee.

Recipe Ingredients and Preparation

cooking instructions and ingredients

To make these delicious peanut butter cookies, gather creamy peanut butter, brown sugar, a large egg, baking soda, and chocolate chips.

Start by mixing the peanut butter, brown sugar, egg, and baking soda until well combined.

Then, gently fold in the chocolate chips to ensure uniform distribution of the sweet morsels throughout the dough.

Roll the dough into balls and place them on a baking sheet lined with parchment paper.

Bake the cookies at 350°F for 10-12 minutes until they're soft, thick, and golden brown.

Advertisement

As they bake, the aroma of peanut butter and chocolate will fill your kitchen, making it hard to resist peeking into the oven.

Once done, allow the cookies to cool slightly before indulging in their rich peanut butter taste, sweetness from the brown sugar, and bursts of flavor from the chocolate chips.

These peanut butter cookies are the perfect treat for any occasion, offering a satisfying blend of flavors in every bite.

Texture and Appearance Details

textural and visual characteristics

The soft and chewy texture of these peanut butter cookies, coupled with their golden brown color and delightful chocolate chip accents, make them a visually appealing and irresistible treat. As you bite into these cookies, you'll experience a satisfying thickness that offers a substantial chewiness, creating a delightful mouthfeel. The golden brown hue of the cookies, with crisp edges and a soft center, invites you to indulge in their homemade goodness. Chocolate chips scattered throughout each cookie not only enhance the flavor but also provide a pop of visual interest, adding to the overall allure of these treats. Additionally, the aroma that fills your kitchen as these cookies bake is simply irresistible, with the rich scent of peanut butter enveloping your senses. Below is a table summarizing the key texture and appearance details of these peanut butter cookies:

Texture Appearance Additions
Soft Golden brown Chocolate chips
Chewy Crisp edges
Substantial Soft center

Flavor Profile Description

tasting notes and analysis

Peanut butter takes center stage in every decadent bite of these cookies, enchanting your taste buds with its rich and nutty essence. The flavor profile of these peanut butter cookies is a delightful symphony of tastes that will leave you craving more.

Here's why:

  1. Peanut Butter Taste: The unmistakable flavor of creamy peanut butter is the star of these cookies, providing a robust and nutty undertone that lingers with each bite.
  2. Brown Sugar Sweetness: The addition of brown sugar adds a perfect touch of sweetness that complements the peanut butter taste, creating a well-balanced and indulgent flavor profile.
  3. Chocolate Chips: The chocolate chips scattered throughout the cookie dough offer bursts of rich and decadent flavor, contrasting beautifully with the nuttiness of the peanut butter and adding an extra layer of deliciousness to each cookie.

Together, these elements harmonize to create a flavor profile that's both comforting and irresistible, making these peanut butter cookies a favorite treat for any occasion.

Nutrition Information Breakdown

nutrition facts analysis breakdown

Shifting from the flavor profile description, let's now take a closer look at the nutrition information breakdown of these delectable peanut butter cookies. Each serving of these cookies contains 245 calories, making them a reasonable treat for your sweet cravings.

The 27g of carbohydrates offer a delightful sweetness, while the 4g of protein in a single cookie contributes to a balanced snack option. With 13g of fat per cookie, these treats provide a rich and flavorful experience that has garnered rave reviews.

Advertisement

To bake these scrumptious cookies, make sure you use a cookie sheet lined with parchment paper to prevent sticking. The recipe calls for unsalted butter to control the sodium content, which amounts to 152mg per serving.

It's important to enjoy these cookies in moderation due to their calorie and fat content. However, their protein and carbohydrate balance makes them a satisfying indulgence for any cookie lover.

Serving Suggestions and Reviews

creative culinary ideas shared

Enhance your cookie-eating experience by pairing these delightful peanut butter cookies with a glass of milk or a cup of coffee. Reviewers have expressed positive feedback on the cookies' taste and texture, with many delighted by the recipe's success. Taking the time to bake these cookies will be well worth it based on the glowing reviews and high ratings they've received.

Here are some things reviewers liked about this recipe:

  1. The cookies' soft and thick texture that makes them perfect for parties or gatherings.
  2. The cookies' ability to pair exceptionally well with a glass of milk or a cup of coffee, enhancing the overall flavor experience.
  3. The ease of storing the cookies for a few days without compromising on freshness, allowing for continued enjoyment over time.

Frequently Asked Questions

Is It Better to Use Butter or Shortening in Peanut Butter Cookies?

For peanut butter cookies, use butter for flavor and richness, or shortening to maintain shape. Butter yields softer texture, while shortening gives a firmer bite. The choice depends on your preference for taste and texture.

Why Are My Peanut Butter Cookies Always Hard?

Overbaking leads to hard cookies. Guarantee precise baking time. Too much flour or insufficient fat causes dry dough and hardness. Cream butter and sugar moderately to prevent crumbliness. Excessive mix-ins make cookies dense. Improper storage dries out cookies, making them hard.

Why Are My Peanut Butter Cookies Crumbling and Falling Apart?

Your peanut butter cookies may be crumbling due to overbaking, excess flour, insufficient fat, too much leavening agent, or inadequate mixing. Adjust baking time, ingredients, and mixing technique to achieve cookies that hold together perfectly.

Advertisement

What Are the Basic Ingredients for Peanut Butter Cookies?

You need creamy peanut butter, brown sugar, egg, and baking soda for peanut butter cookies. They taste nutty and sweet, with a soft, chewy texture. Add chocolate chips for extra flavor. Just mix, bake, and enjoy these delicious treats!

Conclusion

You've mastered the art of baking with this peanut butter cookie recipe!

Did you know that Americans consume over 7 billion cookies a year?

So next time you whip up a batch of these delicious treats, know that you're contributing to that sweet statistic.

Keep baking and enjoy every bite of these irresistible peanut butter cookies!

Advertisement
Continue Reading
Advertisement

Affiliate disclaimer

As an affiliate, we may earn a commission from qualifying purchases. We get commissions for purchases made through links on this website from Amazon and other third parties.

Vetted

Vetted2 months ago

Infusion Buds Butter Infuser & Decarboxylator – 2024 Review

I recently got to try out the Infusion Buds Butter Infuser & Decarboxylator Machine Combo, and I am excited to...

Vetted2 months ago

LEVO Lux – Premium Herbal Oil Infusion Machine – Review [2024]

I recently got to try out the LEVO Lux – Premium Herbal Oil Infusion Machine – Botanical Extractor – Herb...

Vetted2 months ago

STX Infuzium & Decarboxylator Bundle Review [2024]

Today, I am thrilled to share my thoughts on the PREMIUM PACK • STX Infuzium Butter-Oil-Tincture Infuser & STX Activation...

Vetted2 months ago

Review: ONGROK Small Butter Infuser [2024]

Introduction: I am thrilled to share my experience with the ONGROK Small Butter Infuser in this post. This device has...

Vetted2 months ago

Herbal Infuser Hi – Innovative Botanical Butter Maker [2024]

Today, I am thrilled to share with you my experiences with the Herbal Infuser Hi Countertop Botanical Butter Maker, Tincture...

Vetted2 months ago

Ardent FX Decarboxylator Review: Quick & Effortless! [2024]

I recently had the opportunity to try out the Ardent FX Decarboxylator 110V With Bluetooth Connectivity, and I must say,...

Vetted2 months ago

Infusion Buds Butter Infuser – Review & Accessories [2024]

Thank you for joining me as we explore a review of the Infusion Buds Butter Infuser & Decarboxylator Machine Combo....

Vetted2 months ago

Decarboxylator Machine Review: Easy & Odorless Herb Activation [2024]

I recently had the opportunity to try out the Decarboxylator Machine for Herbs, and I have to admit, it really...

Vetted2 months ago

Decarb Mini System Review: All-in-One Herbal Processing Solution [2024]

Today, I will be giving my thoughts on the Decarb Mini System. As someone who enjoys herbal infusions and tinctures,...

elevate steak with butter elevate steak with butter
Vetted2 months ago

12 Best Compound Butter Recipes for Elevating Your Steak Game

Kick your steak game up a notch with these 12 mouthwatering compound butter recipes that will take your taste buds...

mouthwatering butter cookie taste mouthwatering butter cookie taste
Vetted2 months ago

15 Best Butter Cookies That Will Melt In Your Mouth – Taste Test Results

Tantalize your taste buds with the top 15 butter cookies that promise a melt-in-your-mouth experience - a delightful journey awaits!

peanut butter ice cream peanut butter ice cream
Vetted2 months ago

15 Best Peanut Butter Ice Cream Flavors You Need to Try This Summer

Craving a creamy and decadent summer treat?

Advertisement

Trending