Connect with us

Recipes & Culinary Uses

DIY: Make Your Own Beard Butter at Home

Published

on

An image showcasing the step-by-step process of making beard butter: a close-up of melting shea butter, a blending of essential oils, and a final jar filled with silky, nourishing butter

I have always thought that a well-maintained beard is a sign of confidence and uniqueness. Just like a sculptor working with clay, achieving the ideal beard requires the correct tools and products.

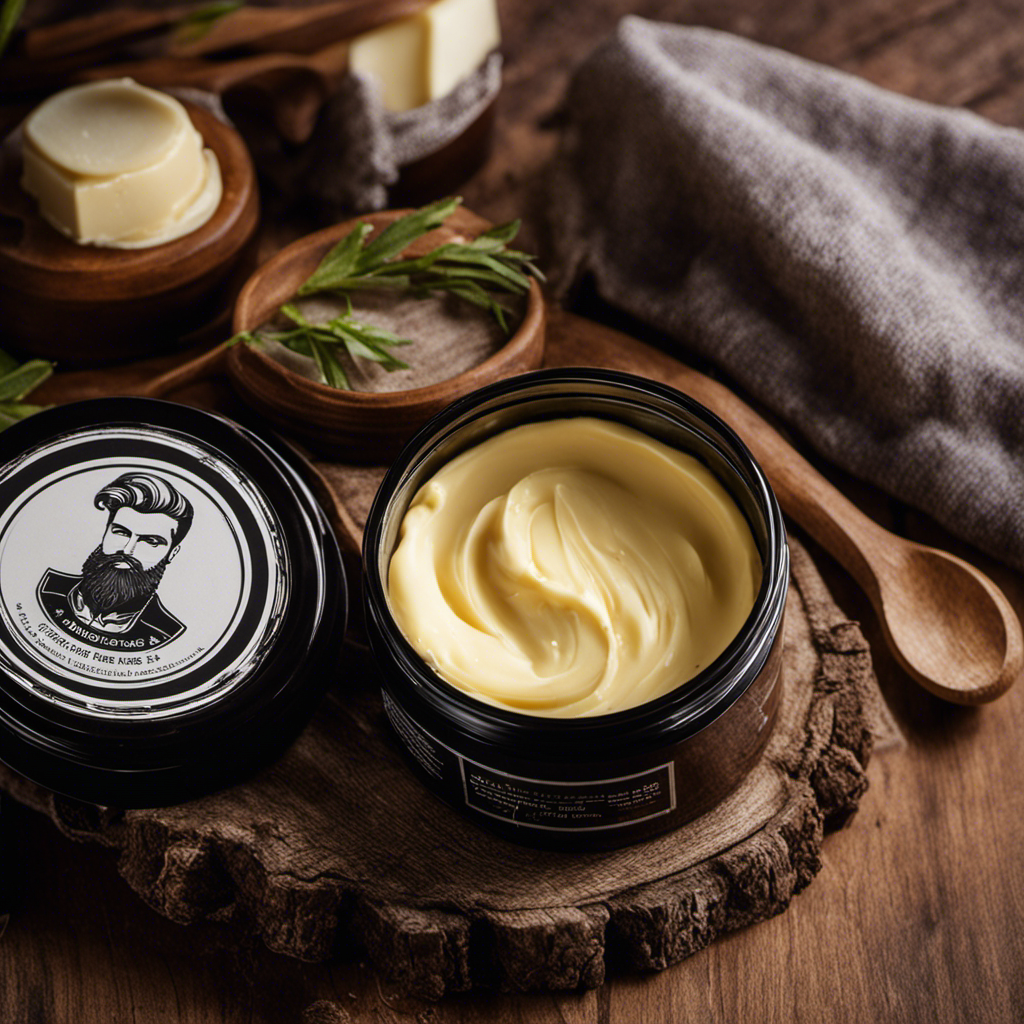
In this article, I’ll guide you through the process of making your very own beard butter. From selecting the finest ingredients to pouring and cooling the final product, I’ll share all the steps and tips you need to craft a beard butter that will leave your facial hair soft, healthy, and irresistibly touchable.

Key Takeaways

  • High-quality oils and butters, such as jojoba oil, argan oil, shea butter, and cocoa butter, are essential for making beard butter.
  • Natural ingredients are preferred over harsh chemicals and additives for a gentle and nourishing beard butter.
  • Accurate measurements of ingredients are crucial for achieving a well-balanced and effective beard butter.
  • Experimenting with different oils and essential oils allows for customization of scent and added benefits in the beard butter.

Choosing the Right Ingredients

When choosing the right ingredients for your beard butter, you’ll want to ensure you’re using high-quality oils and butters. The benefits of natural ingredients cannot be overstated.

Natural oils like jojoba oil and argan oil are fantastic choices for beard butter because they are lightweight and easily absorbed by the skin and hair. These oils provide nourishment, hydration, and promote hair growth.

Advertisement

Shea butter and cocoa butter are excellent options for adding moisture and softness to your beard. They also help to reduce itchiness and dryness.

Natural ingredients are free from harsh chemicals and additives, which means they are gentle on your skin and beard.

Essential Tools for Making Beard Butter

To create your own beard butter, you’ll need a few essential tools. First, you’ll need a double boiler or a heat-resistant bowl and a saucepan. This will be used to melt and combine the ingredients.

Next, you’ll need a whisk or a hand mixer to ensure a smooth and creamy consistency. A small spatula or spoon will come in handy for scraping out the final product.

Additionally, you’ll need small jars or containers for proper storage. Choosing the right oils is crucial for a high-quality beard butter. Look for oils like jojoba, argan, and almond oil, as they provide moisturizing and nourishing properties.

Advertisement

Proper storage methods include keeping the beard butter in a cool, dry place away from direct sunlight to preserve its shelf life.

Now that you have the essential tools and knowledge about oils and storage, we can move on to preparing and measuring the ingredients.

Preparing and Measuring the Ingredients

When it comes to preparing and measuring ingredients for a recipe, understanding ingredient quantities is essential.

Advertisement

In this discussion, I will explain how ingredient quantities are determined and why they are important in achieving the desired outcome of a dish.

Additionally, I will cover the various measuring tools and techniques that can be used to ensure accurate measurements, as precision is key in cooking and baking.

Ingredient Quantities Explained

You’ll need to carefully measure and adjust the quantities of each ingredient to ensure the perfect consistency and nourishing qualities for your beard butter. Understanding ingredient ratios is key to creating a high-quality product. The table below will help you understand the ideal ratios for different ingredients:

Ingredient Ratio Purpose
Carrier oil 70% Provides moisture and shine
Shea butter 15% Adds texture and softness
Beeswax 10% Provides hold and structure
Essential oil 5% Adds fragrance

By customizing the scent, you can create a beard butter that suits your personal preferences. Experiment with different essential oils to find your perfect blend. Some popular choices include cedarwood, sandalwood, and peppermint. Don’t be afraid to mix and match to create a unique scent that is truly yours.

Now that you understand the ingredient ratios and have some ideas for customizing the scent, let’s move on to the next section about measuring tools and techniques.

Advertisement

Measuring Tools and Techniques

Using the right measuring tools and techniques is essential for achieving accurate ingredient quantities in your homemade beard product.

When it comes to measuring techniques, precision is key. Invest in a good set of measuring spoons and cups to ensure accurate measurements.

When measuring dry ingredients, use a straight edge to level off the excess. For liquids, make sure you are eye-level with the measurement lines to avoid any errors.

One common measurement mistake to avoid is guessing or eyeballing the quantities. This can lead to imprecise results and affect the overall quality of your beard product.

Another mistake is using the wrong measuring tools, such as using a tablespoon instead of a teaspoon.

Advertisement

Importance of Accurate Measurements

To ensure the best results for your homemade beard product, it’s important to invest in a good set of measuring tools and techniques. Accurate measurements are crucial when making beard butter, as they determine the final consistency and effectiveness of the product. Using precise measurements ensures that the right amount of each ingredient is used, resulting in a well-balanced and nourishing beard butter. Here are some benefits of using beard butter and different variations of beard butter recipes:

Benefits of using beard butter Different variations of beard butter recipes
Hydrates and softens the beard Classic beard butter with shea butter, coconut oil, and essential oils
Helps to tame and shape the beard Citrus-infused beard butter with jojoba oil, beeswax, and orange essential oil
Reduces beard itch and dandruff Woodsy beard butter with cedarwood oil, argan oil, and sandalwood essential oil
Promotes healthy beard growth Minty-fresh beard butter with peppermint oil, almond oil, and eucalyptus essential oil
Adds a natural shine to the beard Spicy beard butter with cinnamon oil, avocado oil, and clove essential oil

Experiment with different variations to find the beard butter recipe that suits your preferences and needs. Happy bearding!

Melting and Mixing the Base Ingredients

Once the base ingredients are melted and mixed, the beard butter will have a smooth and creamy consistency. This step is crucial in creating a high-quality product that will nourish and hydrate your beard. To achieve the best results, it’s important to use proper mixing techniques and consider alternative ingredients.

Here are three key points to keep in mind:

  • Thoroughly mix the melted base ingredients to ensure a uniform texture throughout the beard butter. This will prevent any clumps or separation when applied to your beard.

  • Experiment with different oils and butters to find the perfect combination for your beard. Some popular alternatives include argan oil, shea butter, and jojoba oil, which offer additional benefits such as increased shine and moisture.

  • Don’t be afraid to get creative with essential oils to add a pleasing scent to your beard butter. Lavender, cedarwood, and peppermint are just a few examples that can provide a refreshing and invigorating aroma.

Adding Fragrance and Essential Oils

When adding fragrance and essential oils, you’ll have the opportunity to customize the scent of your beard product to your liking. Fragrance selection is an important step in creating a unique and appealing beard butter.

Advertisement

There are a plethora of scents to choose from, ranging from citrusy and fresh to woody and spicy. Consider the desired effect you want your beard butter to have on your senses and select a fragrance that complements your personal style.

Mixing techniques are crucial to ensure that the fragrance is evenly distributed throughout the product. One effective technique is to add the fragrance oil to the melted base ingredients and stir thoroughly. Another option is to add the fragrance oil after the butter has cooled slightly, allowing it to incorporate more evenly.

Experiment with different mixing techniques to find the one that works best for you and creates a well-balanced scent in your beard butter.

Pouring and Cooling the Beard Butter

When it comes to pouring and cooling beard butter, there are a couple of key points to keep in mind.

First, the optimal cooling time is crucial to ensure that the butter sets properly and achieves the desired consistency.

Advertisement

Secondly, it is important to follow pouring temperature recommendations to avoid any issues such as separation or graininess in the final product.

In this discussion, I will delve into these two aspects in detail, providing you with all the necessary information to successfully pour and cool your beard butter.

Optimal Cooling Time

After the beard butter has been mixed thoroughly, it’s important to let it cool for the optimal amount of time. This ensures that the butter solidifies properly and maintains its desired texture. The ideal temperature for cooling the beard butter is around 60 to 70 degrees Fahrenheit. Cooling it at this temperature allows the ingredients to blend together perfectly, resulting in a smooth and creamy consistency.

However, if you find that the butter is not setting properly or is too soft, here are some troubleshooting tips:

  • Place the container in the refrigerator for a longer period of time.
  • Adjust the room temperature by turning on a fan or air conditioning.
  • Add a small amount of beeswax to the mixture to help with solidification.

By following these tips, you can troubleshoot any issues and achieve the perfect beard butter consistency.

Now, let’s move on to the next section about pouring temperature recommendations.

Advertisement

Pouring Temperature Recommendations

To achieve the best results, it’s recommended that you pour the mixture into the containers when it reaches a temperature between 120 and 130 degrees Fahrenheit. Proper pouring techniques and temperature control are crucial when making beard butter.

When the mixture is at the ideal temperature, it will have a smooth and creamy consistency, ensuring even distribution of the ingredients. To maintain this temperature range, use a kitchen thermometer to monitor the temperature throughout the process.

Once the mixture reaches the desired temperature, pour it slowly into the containers, making sure to fill them evenly. Be careful not to pour too quickly, as this can cause air bubbles to form. The controlled pouring technique will result in a well-blended and high-quality beard butter that is easy to apply and provides optimal nourishment for your facial hair.

Packaging and Storing the Finished Product

Make sure you store your finished beard butter in a dark, cool place to maintain its freshness and effectiveness. Proper packaging and storage are crucial to preserving the quality and extending the shelf life of your homemade beard butter.

Here are some options and tips to consider:

Advertisement
  • Glass jars: Glass containers are ideal for storing beard butter as they are non-reactive, preventing any chemical leaching or alteration of the product.

  • Tin containers: Tin containers are lightweight and durable, making them a convenient option for travel or on-the-go use.

  • Plastic containers: While plastic containers are affordable and readily available, they may not be the best choice as they can be prone to chemical leaching and may affect the quality of the beard butter over time.

Remember to label your containers with the date of production to keep track of the freshness of your beard butter.

Stored properly, your homemade beard butter can maintain its effectiveness for up to 6 months.

Tips and Tricks for Using Beard Butter

Remember that applying a small amount of beard butter to your facial hair will go a long way in keeping it moisturized and manageable. Beard butter application is a simple yet effective way to improve the health and appearance of your beard.

When applying, ensure that your beard is clean and dry. Scoop a small amount of butter onto your fingertips and rub it between your palms to warm it up. Then, gently massage the butter into your beard, starting from the roots and working your way down to the ends. Make sure to cover the entire beard to evenly distribute the product.

The benefits of using beard butter are numerous. It moisturizes the hair, preventing dryness and itchiness. It also softens the beard, making it easier to style and reducing frizz. In addition, beard butter helps to nourish and strengthen the hair follicles, promoting healthier growth and reducing breakage.

Advertisement

Frequently Asked Questions

How Long Does Homemade Beard Butter Typically Last Before It Expires?

Homemade beard butter typically lasts for about 6-12 months before it expires. To prolong its shelf life, store it in a cool, dry place away from direct sunlight. Avoid introducing water or contaminants to prevent spoilage.

Can I Use Any Type of Fragrance or Essential Oil in My Beard Butter?

Sure, you can use any fragrance or essential oil in your beard butter. Just remember to choose options that are safe for use on the skin. Experiment with different scents to create a personalized experience for your beard.

Is It Necessary to Use Specific Packaging Materials for Storing the Beard Butter?

Using specific packaging materials for storing beard butter is important. It helps maintain the product’s quality and extends its shelf life. Suitable options include amber glass jars or tin containers, which provide protection from light and air, preserving the butter’s properties.

Can I Use a Microwave to Melt the Base Ingredients Instead of a Double Boiler?

Yes, you can use a microwave to melt the base ingredients for beard butter. It’s quicker but can be riskier due to potential overheating. A double boiler provides more control and prevents burning.

Are There Any Ingredients That Should Be Avoided When Making Beard Butter?

When making beard butter, it’s important to avoid certain ingredients that can irritate the skin or damage the beard. Additionally, choosing the right carrier oils is crucial for achieving a nourishing and moisturizing effect.

Advertisement

Conclusion

Well, there you have it, folks! You’re now equipped with all the knowledge to create your very own beard butter. Whether you’re a bearded gentleman looking to tame your unruly facial hair or you’re just curious about the art of beard grooming, this guide has got you covered.

From choosing the right ingredients to packaging and storing the finished product, we’ve covered it all. So go forth, my friends, and let your beards bask in the glory of homemade buttery goodness.

Trust me, your beard will thank you.

Continue Reading
Advertisement

Recipes & Culinary Uses

Creamy Delight: Best Butter Pecan Ice Cream Recipe for Summer!

Yearning for a creamy summer treat that will leave you craving more?

Published

on

By

butter pecan ice cream

Savor a delicious summer treat with our Butter Pecan Ice Cream recipe. Mix butter, brown sugar, cream, and pecans for a creamy delight. Melt butter, cook pecans, whisk eggs, and blend for a rich flavor. Add pecans, cream, and vanilla, then freeze to perfection. Master this easy-to-follow recipe for a tasty dessert to beat the heat.

Key Takeaways

  • Rich and creamy blend of butter, brown sugar, and heavy cream
  • Toasted pecans for a nutty crunch and flavor
  • Easy-to-follow steps for homemade ice cream perfection
  • Customization options with variations like bourbon or chocolate
  • Perfect summer treat with a decadent, refreshing taste

Recipe Ingredients for Butter Pecan Ice Cream

To create a delectable batch of butter pecan ice cream, gather the essential ingredients listed in the recipe.

You'll need:

  • Butter
  • Brown sugar
  • Heavy cream
  • Pecans

These ingredients combine to bring out the rich and nutty flavors of this classic dessert.

The brown sugar adds a caramel-like sweetness, while the heavy cream contributes to a creamy texture that's essential for a decadent treat.

Pecans, when toasted in butter, provide a delightful crunch and enhance the overall flavor profile of the ice cream.

Cooking Instructions for Homemade Ice Cream

making ice cream at home

Start by melting butter in a skillet to infuse the pecans with a rich, nutty flavor for your homemade butter pecan ice cream.

Here's a quick guide to help you make this creamy delight:

Advertisement
  • Melt butter and cook pecans for flavor.
  • Whisk eggs and combine with half-and-half and brown sugar for a creamy base.
  • Cook until thickened, then mix with eggs in a bowl.
  • Add cream, pecans, and vanilla extract.
  • Freeze the mixture in an ice cream maker.

Following these steps will guarantee your homemade butter pecan ice cream turns out rich and delicious.

Remember to carefully adhere to the manufacturer's instructions for your ice cream maker to achieve the perfect consistency.

Enjoy the process of creating this delightful treat that will surely be a hit during the summer months.

Ice Cream Preparation Steps

ice cream recipe instructions

Mix half and half with brown sugar over medium heat in a large bowl to prepare the ice cream base.

Next, whisk beaten eggs and temper them with the warm milk mixture to create a smooth custard.

Once done, thicken the mixture on low heat, then cool it over an ice bath to achieve ideal texture.

After that, stir in heavy cream, vanilla extract, maple extract, and a pinch of salt for rich flavor.

Advertisement

Remember to refrigerate the mixture for 1 1/2 – 2 hours before churning it into creamy butter pecan ice cream.

This process ensures that the flavors meld together beautifully and the ice cream attains the perfect consistency for scooping and savoring.

Nutritional Information and Tips

healthy eating guidance provided

Considering the rich and creamy nature of homemade butter pecan ice cream, it's important to be mindful of its nutritional content and serving size. When indulging in this delectable dessert, remember these essential tips:

  • Portion Control: Enjoy in moderation to savor the flavors without overindulging.
  • Brown Sugar Sweetness: Opt for a moderate amount of brown sugar to balance sweetness without overwhelming the palate.
  • Room Temperature Ingredients: Confirm ingredients like butter and heavy cream are at room temperature for a smoother texture.
  • Nutritional Awareness: Be mindful that homemade butter pecan ice cream can vary in nutritional content, so adjust ingredients accordingly.
  • Consultation: Seek advice from a nutritionist or healthcare provider for personalized guidance on incorporating this treat into a balanced diet.

Homemade Butter Pecan Ice Cream Variations

delicious homemade ice cream

Explore creative twists on traditional butter pecan ice cream by incorporating different nuts, spirits, sauces, chocolates, and dairy-free alternatives.

For a unique flavor, try substituting pecans with walnuts or almonds in the full recipe. Toast the nuts in a separate bowl until browned and fragrant, then chop them finely enough to coat in the ice cream mixture.

To add a boozy kick, mix in a splash of bourbon or rum to the base as you churn the ice cream. For an extra indulgent touch, swirl in caramel sauce or fudge ripple throughout the mixture.

Incorporate chunks of chocolate or chocolate-covered nuts for a delightful contrast in texture, giving each bite a sweet surprise.

Advertisement

If you prefer a lighter, dairy-free option, consider using coconut milk or almond milk as a substitute for traditional dairy products. These alternatives provide a creamy base while catering to plant-based diets.

Experiment with these variations to create a personalized butter pecan ice cream that suits your taste preferences.

Frequently Asked Questions

What Is the Secret to Making Ice Cream Very Creamy?

To make ice cream very creamy, you use a rich base of ingredients like heavy cream, eggs, and sugar. Chilling the base before churning is crucial for a smoother texture. Adding vanilla extract enhances creaminess, and slow churning prevents a dense outcome.

What Flavor Is the Ice Cream in Butter Pecan?

The ice cream in butter pecan is a delightful blend of buttery richness, vanilla sweetness, and maple undertones, perfectly paired with toasted pecans for a nutty crunch. This flavor combination creates a harmonious and indulgent treat.

What's the Difference Between Butter Pecan Ice Cream and Praline Pecan Ice Cream?

In butter pecan ice cream, you'll savor the buttery richness of pecans blended with a creamy base. On the other hand, praline pecan ice cream highlights caramelized sweetness with a swirl of praline sauce for a delightful flavor contrast.

Advertisement

What Age Group Eats Butter Pecan Ice Cream?

You'll find that adults and older individuals, typically in the 30-60 age group, enjoy butter pecan ice cream. It's a favorite among those with a more refined palate, drawn to its rich and nutty flavor.

Conclusion

So there you have it, folks! Whip up this buttery, nutty delight for a taste of summer in every scoop.

Don't cry over spilled milk – grab a cone and enjoy this creamy treat that's sure to satisfy your sweet tooth.

Get churning and indulge in the best butter pecan ice cream you've ever tasted!

Advertisement
Continue Reading

Recipes & Culinary Uses

Festive Favorites: Best Peanut Butter Blossoms Recipe for Holidays!

Unleash the ultimate holiday baking magic with the best Peanut Butter Blossoms recipe – an irresistible treat that will elevate your festive celebrations!

Published

on

By

holiday baking with flair

Elevate your holiday baking with the ultimate Peanut Butter Blossoms recipe. Cream together peanut butter, butter, sugars, and salt, then add egg and vanilla. Roll dough into balls, coat in brown sugar, bake until golden, then press a Hershey's kiss on top. Adjust baking time as needed. Explore ingredient swaps for a personalized touch. Enjoy with hot cocoa or pair with savory dishes. For more tips, ideas, and customization options, the recipe holds more festive surprises.

Key Takeaways

  • Cream together peanut butter, butter, sugars for rich flavor.
  • Bake at 375°F for 8-10 minutes for soft, chewy cookies.
  • Customize with ingredient swaps like almond butter or maple syrup.
  • Pair with savory dishes or hot cocoa for holiday enjoyment.
  • Press Hershey kisses onto warm cookies for a classic finish.

Ingredients for Peanut Butter Blossoms

For the classic Peanut Butter Blossoms recipe, gather peanut butter, butter, sugar, an egg, and Hershey's kisses as your essential ingredients.

Peanut butter is the star, offering a rich flavor that blends perfectly with the sweetness of the cookies.

Butter plays a pivotal role by adding moisture and richness to the dough, ensuring a soft and chewy texture.

The sugar not only sweetens the cookies but also contributes to their festive appeal, making them a perfect treat for any occasion.

Finally, the Hershey's kisses on top provide a delightful chocolatey finish that elevates these cookies to a whole new level of deliciousness.

Advertisement

Together, these ingredients create a harmonious blend of flavors and textures that make Peanut Butter Blossoms a beloved classic for holiday baking or any time you crave a sweet and satisfying treat.

Recipe Steps for Peanut Butter Blossoms

bake peanut butter cookies

To make Peanut Butter Blossoms, start by creaming together peanut butter, butter, sugars, and salt until light and fluffy.

Next, add in the egg and vanilla extract, making sure to mix well to combine all the ingredients thoroughly.

Then, gradually incorporate the dry ingredients into the wet mixture until a smooth dough forms.

Once the dough is ready, roll it into balls and coat each ball generously in brown sugar.

Place the sugar-coated dough balls on a baking sheet, making sure to leave enough space between them for spreading during baking.

Advertisement

Bake the cookies in a preheated oven until they turn a beautiful golden brown.

As soon as the cookies are out of the oven, press a Hershey's kiss into the center of each cookie gently.

The heat from the freshly baked cookies will melt the chocolate just enough to adhere it to the cookie.

These Peanut Butter Blossoms are a delightful treat perfect for Christmas celebrations!

Pro Tips for Making Peanut Butter Blossoms

baking perfect peanut blossoms

To enhance your peanut butter blossom baking experience, consider adjusting the baking time based on your oven's performance for best results.

Additionally, explore ingredient substitutions to cater to dietary preferences or allergies without compromising the flavor or texture of the cookies.

Advertisement

These pro tips can help you customize your peanut butter blossoms while ensuring delicious outcomes.

Baking Time Recommendations

Achieving the ideal texture for your peanut butter blossoms involves baking them at 375°F for 8-10 minutes. This baking duration guarantees that the cookies have a soft and chewy consistency while allowing the Hershey kisses on top to be softened but not completely melted.

Once out of the oven, remember to press the Hershey kisses onto the cookies immediately to secure them in place for that classic appearance.

For the best outcomes, chill the cookie dough for about 30 minutes before baking. This step helps the cookies maintain their shape and prevents excessive spreading during baking, ensuring your peanut butter blossom cookies are perfectly formed and ready to impress during your holiday baking.

Shortening or extending the baking time can alter the texture of the cookies. A quick bake of 6-8 minutes produces softer and chewier cookies, while longer baking times yield a slightly crispier consistency. Stick to the recommended 8-10 minutes for the best soft and chewy peanut butter blossoms.

Advertisement

Ingredient Substitutions

Consider incorporating different ingredients to elevate the flavor and nutritional profile of your peanut butter blossoms. For a healthier option, swap out shortening with unsalted butter to achieve a unique texture and taste in your cookies.

Try using natural peanut butter instead of creamy to add a wholesome twist to the classic recipe. If you're looking to reduce the glycemic impact, substitute brown sugar with coconut sugar in your baking. For a natural sweetener alternative, replace regular granulated sugar with maple syrup in the cookie dough mixture.

Additionally, for a distinct flavor experience, experiment with almond butter as a substitute for peanut butter in your blossoms. These ingredient substitutions can bring a new dimension to your peanut butter blossoms, making them not only delicious but also tailored to your dietary preferences.

Upgrade your baking game this holiday season with these creative twists on a beloved recipe!

Serving Suggestions for Peanut Butter Blossoms

peanut butter cookie recipe

Enhance the enjoyment of your peanut butter blossoms by pairing them with savory dishes like lasagna tortellini soup for a satisfying meal. These classic cookies also complement family-friendly dinners such as easy ground beef shepherd's pie and creamy broccoli cheddar soup, making for a delightful combination. The holiday season calls for cozy treats, and the sweet nuttiness of peanut butter blossoms pairs perfectly with a warm cup of hot cocoa. Whether you're participating in a cookie exchange or looking for a festive touch to your holiday dessert spread, consider rolling the cookies in red, green, and white sugar sprinkles to add a pop of color and fun.

Serving Suggestions Pairing Ideas
Lasagna Tortellini Soup Comforting and hearty meal alongside the cookies
Easy Ground Beef Shepherd's Pie Delicious combination for a family dinner
Creamy Broccoli Cheddar Soup Perfect accompaniment to the nutty cookie flavors

12 Days of Christmas Cookies Recipes

baking traditions for the holidays

Indulge in a variety of delightful Christmas cookie recipes each day during the holiday season. One standout choice is the classic Peanut Butter Blossoms. These holiday cookies feature a peanut butter base topped with a Hershey's kiss, making them a beloved treat for cookie exchanges and festive gatherings.

The process of making these cookies is simple yet rewarding. Start by rolling the dough balls in sugar before baking to add a sweet crunch to each bite. The combination of rich peanut butter flavor and the chocolatey goodness of the Hershey's kiss creates a perfect balance of sweetness.

Advertisement

When enjoying these Christmas cookies, consider pairing them with a glass of milk for a classic and satisfying treat.

Whether you're baking them for your family, a cookie exchange, or a holiday party, Peanut Butter Blossoms are sure to be a hit. Make each day of the holiday season a little sweeter with these delicious cookies.

User Engagement Features

user interaction enhancements

Let's talk about how user interaction features and personalization options enhance your experience with the Peanut Butter Blossoms recipe.

You can engage with others by leaving comments and sharing your results, creating a sense of community around this holiday treat.

Personalization options like name and email entry fields help tailor the experience to your preferences, making it more engaging and enjoyable.

User Interaction Features

Utilizing user engagement features on the website allows for increased participation and feedback from visitors. The comment section enables users to interact with each other and provide valuable feedback on the Peanut Butter Blossoms recipe or share their experiences with Hershey's kisses. By incorporating a reply option, users can engage in conversations, fostering a sense of community around baking these delightful peanut butter cookies.

Advertisement

Moreover, the inclusion of name and email fields not only allows for personalization but also facilitates communication between the website and its visitors. This data storage feature guarantees that users can conveniently access their information for future visits, enhancing their overall user experience.

These user engagement features play an essential role in creating an interactive platform where users can engage, provide feedback, and communicate effectively. Such interaction not only enriches the user experience but also encourages visitors to actively participate in the community surrounding the Peanut Butter Blossoms recipe.

Personalization Options

Enhance your website's user engagement by incorporating personalized options such as commenting, replying, and sharing feedback on the Peanut Butter Blossoms recipe. This level of user interaction not only fosters a sense of community building but also encourages customization and feedback. By allowing users to share their thoughts, results, and experiences with the festive favorites, you create a more engaging and interactive user experience. Additionally, providing users with the option to save their data for future visits and encouraging them to tag @preppykitchen and use #preppykitchen when trying the recipe further enhances their engagement.

Personalization Options Description Benefits
Commenting Users can leave comments on the Peanut Butter Blossoms recipe, sharing their thoughts and experiences. Fosters community building and user engagement.
Replying Users can reply to comments and engage in discussions with other users about the recipe. Encourages active participation and interaction.
Feedback Sharing Users can share feedback on the recipe, providing valuable insights for improvement. Enhances user experience and customization.

Additional Information

clarifying specific details provided

You may find it interesting to know more about the history of the Peanut Butter Blossoms recipe and its cultural significance during the holidays.

  • The Peanut Butter Blossoms recipe's popularity is backed by IRI MULO data, making it a sought-after choice for holiday baking.
  • Copyright for this beloved recipe belongs to The J.M. Smucker Company, a reputable name in the food industry known for quality products.
  • These delightful cookies aren't only perfect for serving at holiday parties but also make excellent gifts due to their festive appeal.

Frequently Asked Questions

Why Are My Peanut Butter Blossoms Dry?

If your peanut butter blossoms are dry, it could be due to using too much flour, overbaking, using natural peanut butter that requires stirring, or not enough butter/shortening. Guarantee precise measurements and follow the recipe closely to maintain moisture.

Why Did My Peanut Butter Blossoms Go Flat?

When making peanut butter blossoms, going flat happens due to overmixing, too much flour, insufficient chilling, or low oven temperature. Remember to avoid these pitfalls. Preheat the oven properly and follow the recipe for perfect blossoms!

What Is America's Favorite Christmas Cookie?

America's favorite Christmas cookie is Peanut Butter Blossoms. Loved for their peanut butter-chocolate combo and nostalgic Hershey's Kiss center, these easy-to-make treats are a holiday staple at parties and gatherings. They're a must-have during the festive season.

Advertisement

What Is Baskin Robbins Peanut Butter Blossom?

You asked about Baskin Robbins Peanut Butter Blossom. It's a delectable seasonal ice cream flavor featuring creamy peanut butter ice cream with a ribbon of more peanut butter and chocolate cookie pieces. Indulge in this festive treat!

Conclusion

Indulge in the warm, gooey goodness of these peanut butter blossoms this holiday season. With the perfect blend of creamy peanut butter and rich chocolate, these cookies are sure to bring joy to your festivities.

Picture yourself surrounded by loved ones, sharing laughter and memories as you enjoy these delicious treats. Let the aroma of freshly baked cookies fill your home and create a cozy, festive atmosphere.

Happy baking and happy holidays!

Advertisement
Continue Reading

Recipes & Culinary Uses

Bite-Sized Treats: Best Peanut Butter Ball Recipe You'll Love!

Adore these heavenly peanut butter balls with a delectable mix of smooth peanut butter, powdered sugar, and vanilla—perfect for indulging in bite-sized bliss!

Published

on

By

delicious peanut butter balls

You'll adore these easy and heavenly peanut butter balls. Mix smooth peanut butter, powdered sugar, and vanilla extract for a delectable dough. Roll into small balls and chill. Dip in melted chocolate, then refrigerate to set. Enhance the flavor with rum extract, nuts, or crushed pretzels. Get creative with colorful sprinkles and different chocolate coatings. Use quality chocolate coating and adjust mix consistency. Store them in the fridge or freezer. Enjoy these mouthwatering treats alone or at gatherings. More tips and delightful variations await!

Key Takeaways

  • Creamy peanut butter, powdered sugar, and vanilla create a smooth dough.
  • Incorporate nuts, rum extract, or pretzels for flavor and texture variety.
  • Use quality chocolate coating like candy melts for best results.
  • Chill peanut butter balls before dipping for easier handling.
  • Store in the fridge or freezer for convenient snacking and serving.

Ingredients and Preparation

To create irresistible peanut butter balls, gather creamy peanut butter, powdered sugar, and vanilla extract as your key ingredients.

Begin by mixing the peanut butter, butter, sugar, and vanilla until you have a smooth dough. Roll this mixture into small balls and chill them before dipping them in melted chocolate.

The type of chocolate you use, such as dark or milk chocolate, will enhance the flavor of your peanut butter balls. After dipping, make sure to refrigerate the balls until the chocolate sets for a perfect finish.

This process guarantees that each bite-sized treat isn't only visually appealing but also bursting with delicious peanut butter and chocolate flavors.

Variations and Enhancements

creative modifications and improvements

You can elevate the flavor of your peanut butter balls by incorporating unique ingredients like chopped nuts or rum extract.

Experiment with different chocolate coatings such as white almond bark or dark chocolate candy melts for a varied taste experience.

Advertisement

Get creative by adding finishing touches like colorful sprinkles to make your peanut butter balls visually appealing.

Flavorful Ingredient Additions

Enhance the flavor of your peanut butter balls by incorporating unique ingredient variations and enhancements. While the classic combination of peanut butter, powdered sugar, and butter creates a delicious dough for your treats, you can take it up a notch by adding flavorful ingredient additions.

Consider mixing in crushed pretzels for a salty crunch that complements the sweetness of the peanut butter. Chopped nuts like almonds or pecans can also add a delightful texture and nutty taste to your chocolate-covered peanut butter balls.

For a burst of fruity flavor, try incorporating dried cranberries or raisins into the dough. These additions not only provide a contrast in texture but also introduce a hint of sweetness that pairs well with the creamy peanut butter.

Another option is to include a sprinkle of cinnamon or a dash of vanilla extract to elevate the overall taste profile of your peanut butter balls. Experiment with these flavorful ingredient additions to create a unique and delectable twist on the classic treat.

Advertisement

Chocolate Coating Options

Experiment with different types of chocolate coatings – dark, white, or milk chocolate – to suit your preferences and elevate the flavor of your peanut butter balls.

When considering the chocolate coating for your crunchy peanut butter treats, here are some options to enhance your culinary creation:

  1. Choose Candy Melts or Almond Bark: Opt for candy melts or almond bark for a smooth and firm chocolate coating that sets well on your peanut butter balls.
  2. Avoid Chocolate Chips: Steer clear of using chocolate chips for coating, as they may contain stabilizers that hinder smooth melting, affecting the overall texture.
  3. Add Colored Sprinkles: For a festive touch, sprinkle colored sprinkles on top of the chocolate coating before it sets to add a pop of color and extra crunch to your peanut butter balls.

Experimenting with different chocolate coatings and techniques can take your peanut butter balls to the next level, ensuring a delightful and indulgent treat for any occasion.

Creative Finishing Touches

To elevate the flavor profile of your peanut butter balls, consider incorporating creative finishing touches through various enhancements and unique variations.

You can enhance the texture by adding chopped nuts or crispy rice cereal to the peanut butter mixture, providing a delightful crunch with every bite.

Experiment with different flavors by using almond extract or rum extract instead of vanilla for a twist on the traditional taste.

Advertisement

For a festive touch, roll the balls in crushed graham crackers, sprinkles, or a sprinkle of sea salt to add a pop of flavor.

Drizzle white chocolate over the dark, semi-sweet, or milk chocolate coating for a visually appealing contrast that will impress your guests.

If you enjoy a crunchy element, try coating the balls in crushed pretzels or toasted coconut before the chocolate sets.

These creative enhancements will take your peanut butter balls to the next level, making them a standout treat at any gathering.

Tools and Tips

crafting with precision

Consider using a 1 tablespoon cookie scoop for consistent sizing when preparing your peanut butter balls. This tool will help guarantee all your treats are uniform in size, making for a neat presentation and even cooking.

Here are some additional tools and tips to enhance your peanut butter ball-making experience:

Advertisement
  1. Invest in Quality Chocolate Coating: Opt for candy melts or almond bark for a smooth and firm chocolate coating on your peanut butter balls. These coatings melt easily and provide a professional finish to your treats.
  2. Adjust Peanut Butter Mixture Consistency: If your peanut butter mixture is too sticky or too dry, adjust the consistency by adding more peanut butter or powdered sugar. This will help you achieve the perfect texture for shaping your balls.
  3. Refrigerate Before Dipping: Prior to dipping your peanut butter balls in chocolate, chill them in the refrigerator. This step will make the balls firmer, making them easier to handle and coat without falling apart.

Storage and Serving Suggestions

great suggestion for storage

For best freshness and presentation of your peanut butter balls, follow these storage and serving suggestions.

To keep your peanut butter balls tasting delicious, store them properly. You can store them in an airtight container in the fridge for up to 1 week or in the freezer for up to 2 months. When freezing, remember to thaw the frozen peanut butter balls before serving by bringing them to room temperature. To prevent them from sticking together, separate the layers of peanut butter balls with wax paper.

Here is a helpful table summarizing the storage and serving suggestions:

Storage Serving Frozen
Airtight container Display on festive tray Thaw before serving
Fridge – 1 week Pair with hot cocoa Bring to room temp
Freezer – 2 months Enjoy at holiday gatherings
Separate with wax paper

Additional Peanut Butter Desserts

peanut butter dessert recipes

Explore a variety of delectable peanut butter desserts to satisfy your sweet cravings.

  1. Peanut Butter Blossom Cookies: Indulge in the classic combination of peanut butter cookies topped with a chocolate kiss for a delightful treat.
  2. Peanut Butter Chocolate Mug Cake: Whip up this easy-to-make single-serving dessert that combines the rich flavors of peanut butter and chocolate in a mug for a quick fix.
  3. Peanut Butter Overload Cookies: For those who can't get enough peanut butter, these cookies are loaded with peanut butter chips, chocolate chips, and chopped peanuts for an explosion of flavor in every bite.

These additional peanut butter desserts offer a diverse selection to cater to your cravings.

Whether you're in the mood for a classic treat like Peanut Butter Blossom Cookies, a quick fix with Peanut Butter Chocolate Mug Cake, or a flavor-packed experience with Peanut Butter Overload Cookies, there's something for every peanut butter lover.

Enjoy these easy-to-make delights whenever you need a sweet pick-me-up!

Recipe Instructions and Nutritional Information

cooking guidance and facts

To create these delectable Peanut Butter Balls, start by blending peanut butter, butter, sugar, and vanilla to form a dough. Roll the mixture into small balls and place them on a baking sheet lined with parchment paper. Chill the peanut butter balls in the refrigerator for about 30 minutes until firm.

Once chilled, melt chocolate in a heatproof bowl over simmering water or in the microwave. Dip each chilled peanut butter ball into the melted chocolate, ensuring they're evenly coated. Place the coated balls back on the parchment paper and let the chocolate set.

Advertisement

Each serving of these delightful treats contains approximately 114 calories.

Store the finished peanut butter balls in the fridge for up to 2 weeks or freeze them for up to 3 months.

Enjoy these decadent bite-sized snacks whenever you crave a sweet and nutty indulgence.

Frequently Asked Questions

Can I Use Chunky Peanut Butter Instead of Creamy for This Recipe?

Yes, you can use chunky peanut butter instead of creamy for this recipe. It will add a delightful texture and extra crunch to your peanut butter balls. Enjoy experimenting with different variations!

How Long Do Chocolate Covered Peanut Butter Balls Stay Fresh?

Like a sweet memory, chocolate-covered peanut butter balls stay fresh for up to two weeks when stored in an airtight container in the fridge. Indulge in these delectable treats within that time frame for best taste.

Advertisement

Can I Freeze the Peanut Butter Balls for Later Enjoyment?

Yes, you can freeze the peanut butter balls for later enjoyment. Simply place them in an airtight container or freezer bag. When ready to indulge, let them thaw in the fridge for a few hours.

What Type of Chocolate Is Best for Coating the Peanut Butter Balls?

For coating the peanut butter balls, semi-sweet or milk chocolate works best. They provide a delicious contrast to the creamy peanut butter filling. Simply melt the chocolate, dip the balls, and enjoy the sweet treat!

Can I Add Chopped Nuts or Sprinkles to the Peanut Butter Balls for Extra Flavor?

You can definitely add chopped nuts or sprinkles to the peanut butter balls for extra flavor. It's a great way to customize your treats and add a delightful crunch or colorful touch to each bite.

Conclusion

Indulge in these irresistible peanut butter balls that are sure to satisfy your sweet tooth cravings.

With just a few simple ingredients and easy-to-follow instructions, you can enjoy these bite-sized treats in no time.

Advertisement

So go ahead, treat yourself to a little taste of heaven and experience the perfect combination of creamy peanut butter and rich chocolate.

You won't be able to resist coming back for more!

Continue Reading

Trending