Connect with us

Recipes & Culinary Uses

Creamy Alfredo Sauce Recipe Without Butter

Published

on

An image showcasing a luscious, creamy Alfredo sauce simmering in a skillet, rich with the flavors of Parmesan cheese, garlic, and freshly ground black pepper, all without a trace of butter

I’ve always loved the rich and creamy taste of Alfredo sauce, but I wanted to find a healthier alternative without sacrificing flavor.

After experimenting in the kitchen, I discovered a game-changing recipe for Alfredo sauce without butter. This velvety sauce is made with simple ingredients and packs a punch of flavor.

Get ready to indulge guilt-free as I share my step-by-step instructions, tips, and variations to customize your very own butter-less Alfredo sauce. Trust me, you won’t even miss the butter!

Key Takeaways

  • Alfredo sauce without butter can be made using alternative ingredients such as cashews or cauliflower for a creamy texture and nutritional yeast for a dairy-free cheese substitute.
  • The sauce can be customized by adding different herbs, spices, and flavorings like garlic and lemon juice.
  • The thickness of the sauce can be adjusted by adding more or less flour.
  • Leftover sauce should be stored in an airtight container in the refrigerator and reheated gently on the stovetop for best results.

Ingredients for Alfredo Sauce Without Butter

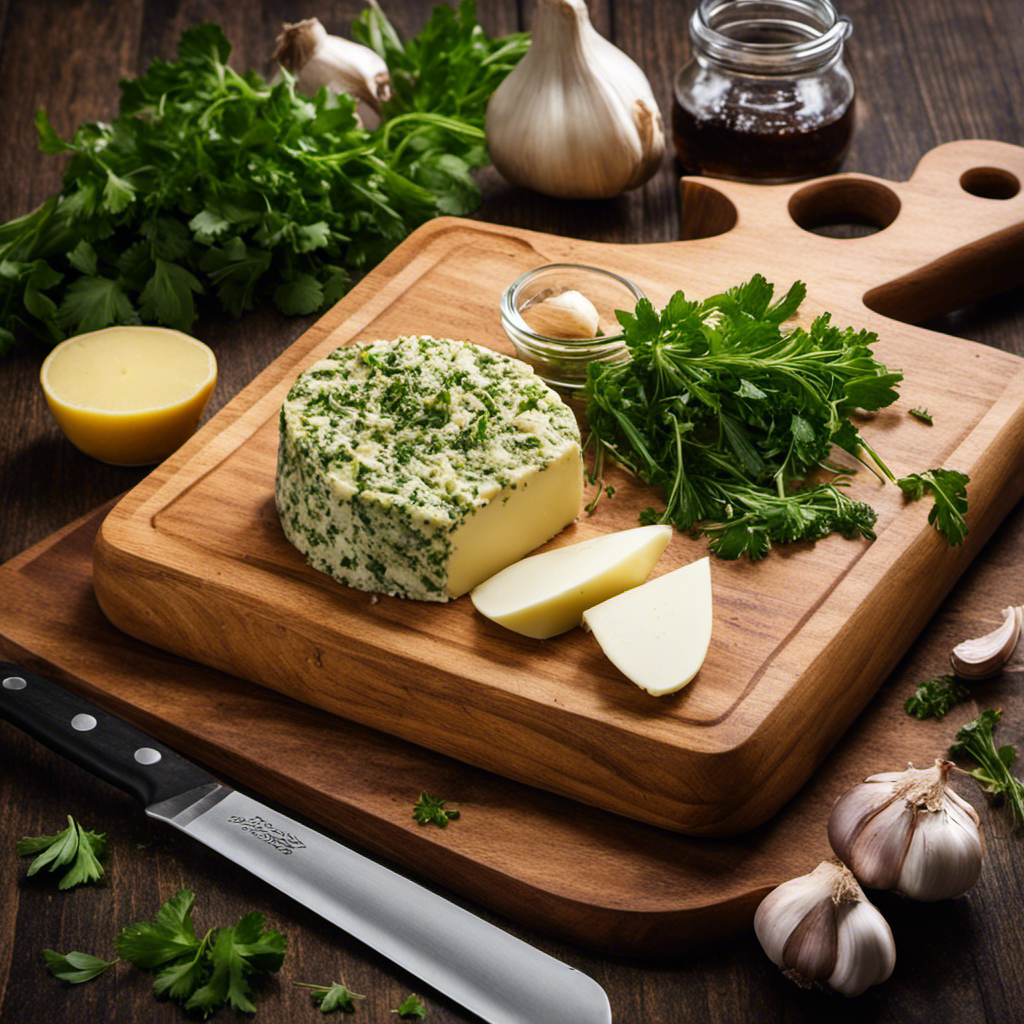
I’ll need some olive oil, garlic, flour, milk, and grated Parmesan cheese for the Alfredo sauce without butter.

Advertisement

When it comes to making Alfredo sauce without butter, there are plenty of alternatives to consider. For those who follow a vegan diet or are lactose intolerant, there are vegan Alfredo sauce options available. Instead of using butter, you can use olive oil as a healthier alternative. It adds a rich flavor and smooth texture to the sauce.

To add a garlic-infused taste, finely mince some fresh garlic and sauté it in the olive oil before adding the flour. The flour will help thicken the sauce, and you can use any type of flour, depending on your dietary preferences.

For a vegan option, you can use almond or soy milk instead of regular milk. Lastly, grated Parmesan cheese adds a creamy and tangy flavor to the sauce, making it a perfect finishing touch.

Step-by-Step Instructions for Making Alfredo Sauce Without Butter

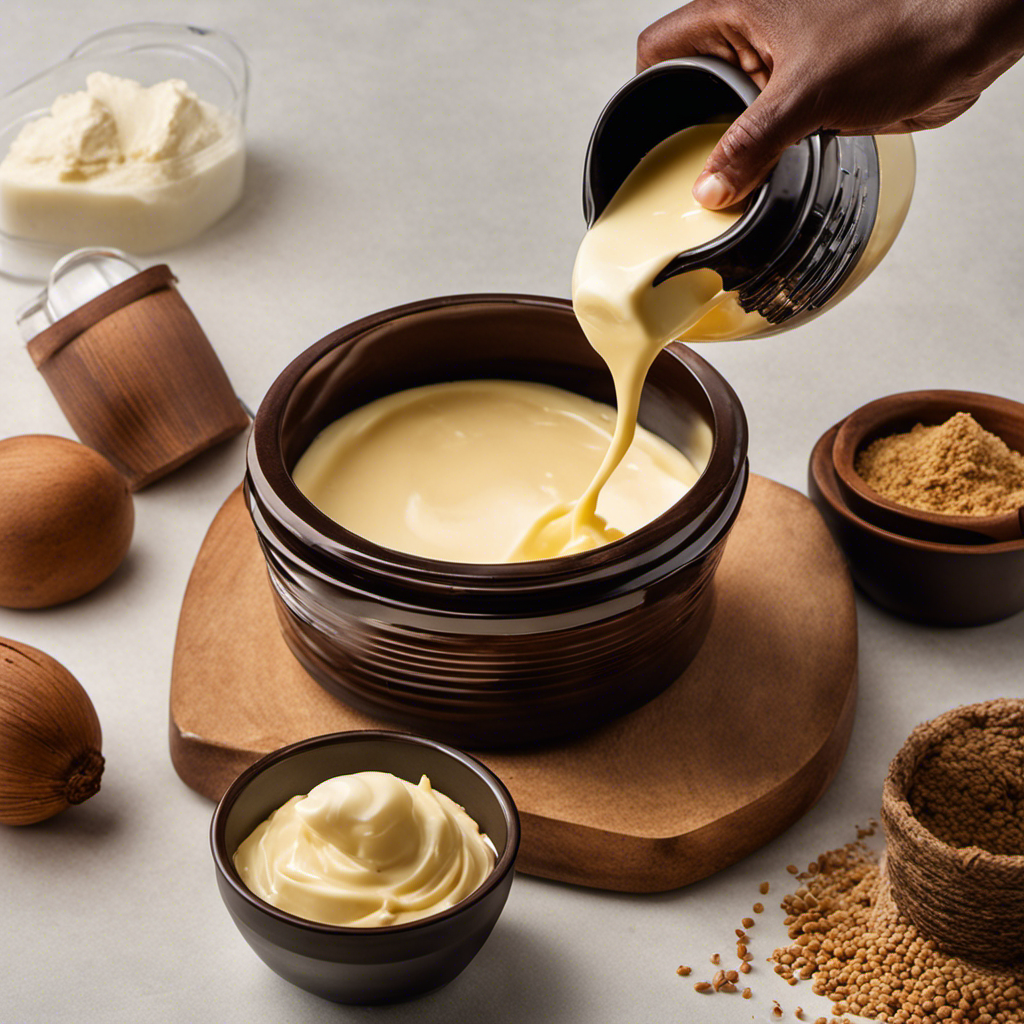
To start, I’ll heat some olive oil in a saucepan over medium heat. Making a vegan alfredo sauce without butter is not only possible, but it can also be incredibly delicious and healthy. By using alternative ingredients, you can create a creamy and flavorful sauce that rivals the traditional version. One option is to use cashews as a base, which adds a rich and creamy texture. Another alternative is using cauliflower, which gives the sauce a silky smooth consistency. By substituting ingredients like nutritional yeast for cheese and plant-based milk for dairy, you can create a vegan alfredo sauce that is just as satisfying as the original. Not only are these alternatives cruelty-free, but they also offer health benefits like being lower in saturated fat and cholesterol. So, next time you’re craving a comforting plate of alfredo pasta, try these vegan alternatives and enjoy a guilt-free and delicious meal.

Vegan Alternatives Health Benefits
Cashews Creamy texture
Cauliflower Silky consistency
Nutritional yeast No dairy or cheese
Plant-based milk Lower in fat
and cholesterol

Tips and Tricks for Perfecting Alfredo Sauce Without Butter

Advertisement

Using alternative ingredients and techniques, I can create a vegan alfredo sauce that’s just as creamy and flavorful as the traditional version. By replacing the butter with plant-based alternatives like cashews or silken tofu, I can still achieve that rich and velvety texture.

To add depth and flavor, I incorporate nutritional yeast, garlic, and lemon juice. These ingredients not only enhance the taste but also provide additional health benefits. Nutritional yeast is a great source of B vitamins and adds a cheesy flavor to the sauce. Garlic has antimicrobial properties and is known for its immune-boosting benefits. Lemon juice adds a tangy freshness and is packed with vitamin C.

With these vegan alternatives and the added health benefits, you can enjoy a guilt-free and delicious alfredo sauce.

Variations and Additions to Customize Your Alfredo Sauce Without Butter

By adding different herbs and spices, such as basil and red pepper flakes, I can customize my vegan alfredo sauce to have a unique and delicious flavor profile. Not only is this sauce dairy-free, but it’s also low in fat, making it a healthier alternative to traditional alfredo sauce.

Advertisement

Here are some variations and additions I love to incorporate into my vegan alfredo sauce:

  • Nutritional yeast: This ingredient adds a cheesy flavor to the sauce without any actual cheese.
  • Garlic: Adding minced garlic enhances the savory taste of the sauce.
  • Lemon juice: A squeeze of fresh lemon juice brightens up the flavors and adds a hint of acidity.

These additions, along with the creamy base made from cashews or cauliflower, create a velvety and flavorful vegan alfredo sauce that’s perfect for pasta dishes and more.

Serving and Storing Alfredo Sauce Without Butter

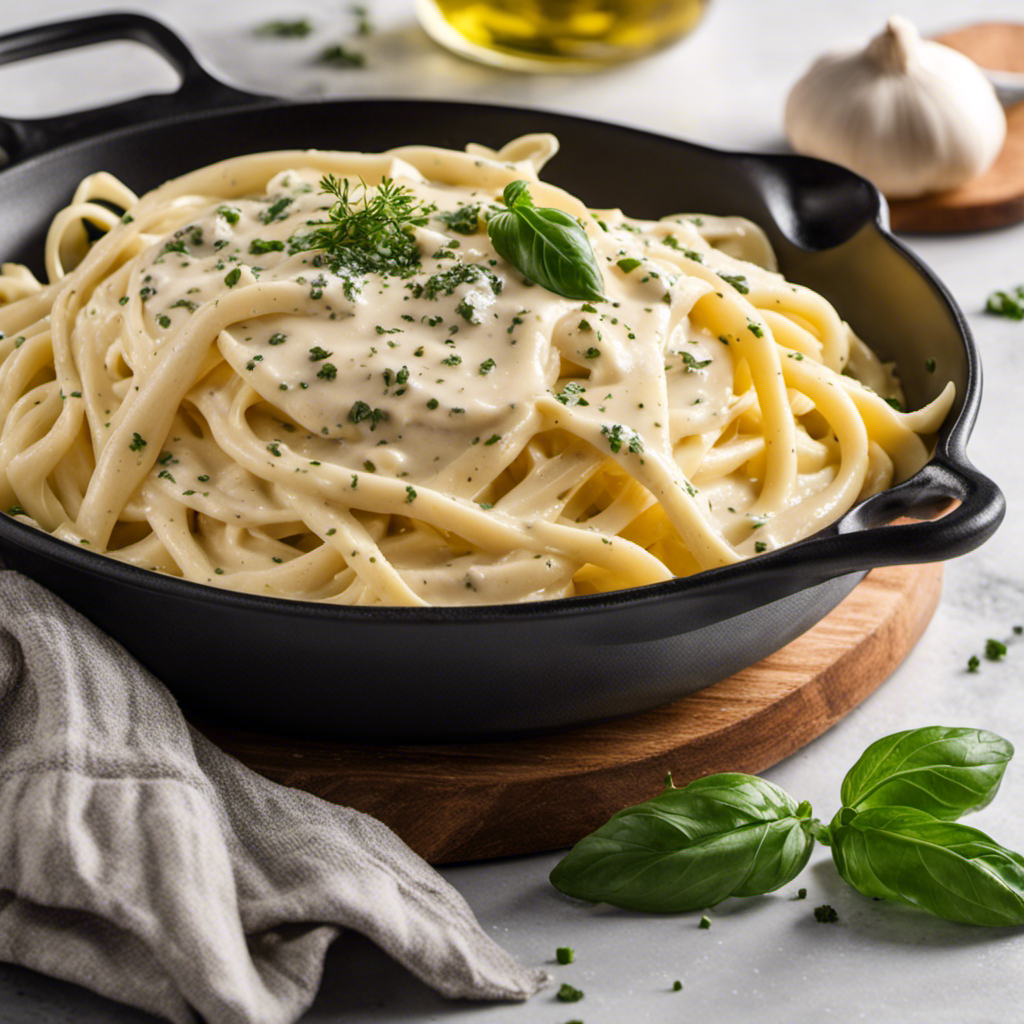
When I serve my vegan alfredo sauce, I like to drizzle it over a bed of fettuccine noodles and garnish it with fresh parsley for added freshness.

Serving alfredo sauce without butter doesn’t mean sacrificing flavor and creaminess. Instead of butter, I use alternative ingredients like cashews or cauliflower to create a rich and velvety texture. The cashews add a creamy and nutty taste, while the cauliflower provides a light and healthy twist.

Advertisement

To enhance the flavors, I also season the sauce with garlic, nutritional yeast, and a splash of lemon juice. The result is a deliciously satisfying dish that’s both dairy-free and full of flavor.

Whether you’re vegan or simply looking for a healthier alternative, serving alfredo sauce without butter is a delightful way to enjoy this classic Italian dish.

Frequently Asked Questions

Can I Use a Different Type of Pasta With This Alfredo Sauce Recipe Without Butter?

Sure, you can definitely use a different type of pasta with this alfredo sauce recipe without butter. There are plenty of options to choose from, such as penne, fettuccine, or even spaghetti. The key is to select a pasta shape that can hold the creamy sauce well.

As for alternative ingredients for a dairy-free alfredo sauce, you can try using cashews, nutritional yeast, or coconut milk to achieve that rich and creamy texture.

Can I Substitute the Milk With a Non-Dairy Alternative in This Alfredo Sauce Recipe Without Butter?

Sure, you can definitely substitute the milk with a non-dairy alternative in this Alfredo sauce recipe without butter. There are plenty of options out there, like almond milk, soy milk, or coconut milk.

Advertisement

Just make sure to choose one that you enjoy the taste of, as it will greatly affect the final flavor of the sauce.

Experiment and find the perfect alternative to butter in your Alfredo sauce, and you’ll be amazed at the results!

Can I Add Vegetables or Protein to This Alfredo Sauce Recipe Without Butter?

Yes, you can definitely add vegetables or protein to your Alfredo sauce without using butter.

By incorporating fresh vegetables like spinach, mushrooms, or roasted red peppers, you can enhance the flavor and nutritional value of your sauce.

To add protein, you can include cooked chicken, shrimp, or even tofu for a vegetarian option.

Advertisement

These additions will provide a delightful twist to your Alfredo sauce, making it even more delicious and satisfying.

Can I Make This Alfredo Sauce Recipe Without Butter Ahead of Time and Reheat It Later?

Sure!

Making alfredo sauce ahead of time and reheating it later is totally doable. I’ve tried it myself and it turned out great. Just store the sauce in an airtight container in the fridge for up to 3 days.

When you’re ready to reheat, simply warm it up in a saucepan over low heat, stirring occasionally until it’s smooth and creamy again.

It’s a convenient way to have a delicious homemade alfredo sauce ready to go whenever you need it!

Advertisement

Can I Freeze the Leftover Alfredo Sauce Without Butter for Future Use?

Yes, you can freeze leftover Alfredo sauce without butter for future use.

Instead of butter, you can use oil to make a creamy Alfredo sauce. To do this, heat the oil in a pan and add minced garlic. Then, whisk in flour and slowly pour in milk, stirring constantly until thickened.

Add Parmesan cheese, salt, and pepper for flavor.

Once the sauce has cooled, transfer it to a freezer-safe container and freeze for up to 3 months.

Thaw in the refrigerator before reheating.

Advertisement

Conclusion

In sumptuous conclusion, this creamy and velvety Alfredo sauce without butter is a delectable delight for those seeking a healthier alternative.

By simply substituting the butter with olive oil and using a combination of milk and Parmesan cheese, you can still achieve a luscious sauce that will tantalize your taste buds.

So go forth and savor the savory goodness of this guilt-free Alfredo sauce, sure to leave you craving for more!

Continue Reading
Advertisement

Recipes & Culinary Uses

7 Easy Steps to Make Delicious Dairy-Free Butter at Home

Published

on

By

An image showcasing the step-by-step process of making dairy-free butter: a blender filled with creamy coconut milk and melted coconut oil, slowly emulsifying into a smooth, luscious spread

I have always had a fondness for butter, however, I am unable to consume dairy. This led me to experiment and create my own dairy-free butter.

In this article, I’ll share with you my tried and tested recipe for making delicious dairy-free butter right in your own kitchen. With the right ingredients and a step-by-step process, you’ll be able to enjoy the creamy goodness of butter without any dairy.

So, let’s get started and discover the wonders of dairy-free butter together!

Key Takeaways

  • Dairy-free butter is a suitable substitute for those who are lactose intolerant or follow a vegan diet.
  • Dairy-free butter is made from plant-based oils like coconut or avocado, providing a rich and creamy texture.
  • Plant-based oils in dairy-free butter are packed with healthy fats, like monounsaturated and polyunsaturated fats.
  • Dairy-free butter is often fortified with essential nutrients like vitamin E and omega-3 fatty acids.

The Benefits of Dairy Free Butter

You’ll love the benefits of dairy-free butter. You can enjoy a creamy spread without any lactose or cholesterol. Dairy-free butter is a fantastic substitute for those who are lactose intolerant or following a vegan diet. It is made from plant-based oils, such as coconut or avocado, which provide a rich and creamy texture. These oils are also packed with healthy fats, like monounsaturated and polyunsaturated fats, which are beneficial for heart health.

Advertisement

Additionally, dairy-free butter is often fortified with vitamins and minerals. It provides essential nutrients like vitamin E and omega-3 fatty acids. It can be used in baking, cooking, or simply spread on toast. With its numerous benefits and delicious taste, dairy-free butter is a great option for those looking for a dairy-free alternative.

Choosing the Right Ingredients for Dairy Free Butter

When choosing ingredients for dairy-free butter, it’s important to consider the alternatives to traditional dairy products. Here are some key ingredient sources to keep in mind:

  • Plant-based oils: Options like coconut oil, avocado oil, and olive oil can provide a creamy texture and rich flavor to your dairy-free butter. These oils are also packed with healthy fats, which can be beneficial for your overall health.

  • Nut butters: Adding a scoop of almond butter or cashew butter can enhance the taste and add a nutty undertone to your dairy-free butter.

  • Emulsifiers: Ingredients like lecithin, found in soy or sunflower, can help stabilize the butter and prevent separation.

When troubleshooting common issues, such as grainy texture or lack of spreadability, consider adjusting the ratios of the ingredients or experimenting with different brands. It may take some trial and error to find the perfect combination for your dairy-free butter, but with patience and persistence, you can create a delicious and satisfying alternative to traditional butter.

Step-by-Step Process for Making Dairy Free Butter

Advertisement

To start, gather all the necessary ingredients for your homemade alternative to traditional butter. Here is a step-by-step process for making dairy-free butter that you can enjoy guilt-free.

Firstly, you’ll need a base ingredient like coconut oil or vegan margarine. These options provide a creamy texture and a buttery taste. Next, add a liquid such as almond milk or soy milk to give your dairy-free butter a smooth consistency. To enhance the flavor, you can include a pinch of salt and a squeeze of lemon juice. Lastly, you can customize your butter by adding herbs, spices, or even nutritional yeast for a cheesy flavor.

Ingredients Measurements
Base Ingredient 1 cup
Liquid 1/4 cup
Salt 1/2 teaspoon
Lemon Juice 1 teaspoon
Optional as desired

Once you have gathered all the ingredients, follow the instructions provided in the subsequent section to perfect your dairy-free butter recipe.

Tips and Tricks for Perfecting Your Dairy Free Butter Recipe

When it comes to making dairy-free butter, there are a few key factors to consider for a successful recipe.

First, finding suitable ingredient substitutions for dairy is crucial. Whether it’s using plant-based milks or alternative fats, these substitutions can greatly affect the taste and texture of your butter.

Advertisement

Additionally, achieving a creamy texture is essential for a butter-like consistency. Exploring different techniques and ingredients, such as coconut oil or avocado, can help you achieve that desired creamy texture.

Lastly, flavor enhancements and variations can take your dairy-free butter to the next level. Experimenting with herbs, spices, or even adding a touch of sweetness can create a unique and flavorful butter substitute.

Ingredient Substitutions for Dairy

You can easily substitute dairy products with plant-based alternatives in your recipe for dairy-free butter. When it comes to vegan baking or plant-based cooking, there are plenty of options to choose from. Here are some ingredient substitutions to help you create a delicious and creamy dairy-free butter:

  • Base Ingredients:

  • Coconut oil: adds richness and a smooth texture to your dairy-free butter.

  • Nut or seed butter: provides a creamy consistency and adds a nutty flavor.

  • Flavor Enhancers:

  • Nutritional yeast: adds a cheesy flavor to your dairy-free butter.

  • Lemon juice or apple cider vinegar: adds a tangy taste to mimic the flavor of dairy.

Achieving a Creamy Texture

If you want a creamy texture in your plant-based alternative, try using coconut oil or nut/seed butter as the base ingredients. These ingredients are rich in fats, which helps in achieving a smooth consistency. However, there are some common texture issues that can arise when making dairy-free butter. To troubleshoot these issues, it’s important to consider factors such as temperature, blending time, and the type of blender or food processor used. Below is a table that provides a visual representation of these troubleshooting tips:

Texture Issue Possible Solution
Grainy texture Increase blending time or add a liquid such as plant-based milk
Separation Use an emulsifier such as lecithin or soy protein isolate
Too stiff Add more liquid or soften the butter before use
Watery Reduce the amount of liquid or add more solid ingredients

Flavor Enhancements and Variations

Adding different herbs and spices can help enhance the flavor and create unique variations in your plant-based alternative. When it comes to flavor pairings, there are endless possibilities to explore in dairy-free butter recipes.

Advertisement

Here are some ideas to get you started:

  • Sweet and Savory:

  • Cinnamon and nutmeg for a warm and comforting taste.

  • Rosemary and thyme for a savory and earthy profile.

  • Zesty and Tangy:

  • Lemon zest and dill for a refreshing and citrusy kick.

  • Garlic and paprika for a bold and tangy combination.

By experimenting with different herbs and spices, you can customize your dairy-free butter to suit your taste preferences. Remember to start with small amounts and gradually add more until you achieve your desired flavor.

Creative Ways to Use Dairy Free Butter in Your Cooking

When it comes to dairy-free alternatives, there are plenty of options available that can still provide flavor and texture to your dishes.

In this discussion, we will explore the world of flavorful vegan spreads, which can be used as a delicious substitute for traditional dairy spreads.

Additionally, we will delve into the art of baking without dairy, sharing tips and tricks to help you achieve the same tasty results.

Advertisement

Lastly, we will explore healthier dairy-free alternatives that can be incorporated into your diet, providing both nutrition and satisfaction.

Flavorful Vegan Spreads

There’s nothing quite like the taste of flavorful vegan spreads when it comes to making dairy-free butter. These delicious alternatives to traditional dairy spreads offer a wide range of flavors and textures that can elevate any dish.

When I think of vegan butter alternatives, two sub-lists come to mind:

  1. Creamy and smooth spreads:

    • Cashew-based spreads: These spreads have a rich and velvety texture that mimics traditional butter perfectly. They are made from soaked cashews blended with water and a touch of salt.
    • Coconut oil spreads: Coconut oil, when solidified, can be used as a butter substitute. It adds a hint of coconut flavor and creates a smooth and creamy consistency.
  2. Flavorful and tangy spreads:

    • Nutritional yeast spreads: Nutritional yeast adds a cheesy and tangy flavor to spreads, making them a great choice for those looking for a savory option.
    • Olive oil spreads: Olive oil can be whipped into a spreadable consistency, providing a delicious and slightly fruity taste.

These vegan butter alternatives and dairy-free spreads are not only tasty but also provide a healthier option for those following a plant-based diet or dealing with lactose intolerance.

Now, let’s explore how to use these flavorful spreads in baking without dairy.

Baking Without Dairy

Now that we have explored flavorful vegan spreads, let’s dive into the world of baking without dairy.

Advertisement

Baking can be a challenge when you’re trying to avoid dairy products, but with the right techniques and recipes, you can still enjoy delicious treats.

One important aspect of dairy-free baking is finding suitable substitutes for butter, milk, and cream. There are many dairy-free alternatives available, such as plant-based margarine or coconut oil for butter, almond milk or soy milk for milk, and coconut cream or cashew cream for heavy cream.

When it comes to baking, it’s important to follow the recipe closely and make any necessary adjustments for the dairy-free substitutes. Some recipes may require additional moisture or binding agents, so be sure to read the instructions carefully.

Fortunately, there are countless dairy-free recipes available online and in cookbooks that are specifically designed for those with dietary restrictions. These recipes have been tested and perfected to ensure that you can still enjoy the same delicious baked goods without compromising on taste or texture.

Healthier Dairy-Free Alternatives

Finding suitable substitutes for butter is essential when exploring healthier dairy-free alternatives. Plant-based margarine and coconut oil are two popular options.

Advertisement

Plant-based margarine is made from oils like canola, olive, or sunflower. It provides a creamy texture and a rich flavor. Compared to butter, it contains no cholesterol and is lower in saturated fat.

Coconut oil, on the other hand, is extracted from the meat of coconuts. It has a smooth consistency and a subtle coconut flavor. It contains medium-chain triglycerides, which are easily metabolized by the body and may provide various health benefits.

Storing and Shelf Life of Dairy Free Butter

When properly stored, dairy-free butter can maintain its quality and freshness for an extended period of time. Here are some storing tips to help you extend the shelf life of your dairy-free butter.

Firstly, it is important to keep the butter in an airtight container or wrap it tightly in aluminum foil or plastic wrap to prevent air exposure. This will help to prevent oxidation and maintain the flavor and texture.

Secondly, store the butter in the refrigerator at a temperature between 32-40°F (0-4°C). This will slow down the growth of bacteria and maintain its freshness.

Advertisement

Lastly, avoid storing the butter near strong-smelling foods as they can transfer odors.

Frequently Asked Questions

Can I Use Any Type of Oil to Make Dairy Free Butter?

Yes, you can use different types of oil to make dairy free butter. Each oil has its own pros and cons, such as taste and texture. It’s important to choose an oil that suits your preferences and dietary needs.

How Long Does It Take to Make Dairy Free Butter From Start to Finish?

Making dairy free butter is a simple process. With the right ingredients, it can be whipped up in no time. But, the exact duration depends on various factors such as the recipe and preparation method.

Can I Use Dairy Free Butter as a Substitute in All Baking Recipes?

Yes, dairy-free butter can be used as a substitute in most baking recipes. However, it’s important to consider the texture and taste differences. Experimenting with different dairy-free butter alternatives and following baking with dairy-free butter tips can help achieve the desired results.

Can I Use Dairy Free Butter for Frying or Sautéing?

Yes, you can use dairy free butter for frying or sautéing. It offers a great alternative for individuals with lactose intolerance or dairy allergies. It provides a similar taste and texture while being free from dairy.

Advertisement

Can I Freeze Dairy Free Butter for Later Use?

Yes, you can freeze dairy free butter for later use. It’s a convenient way to store it and ensure its freshness. Simply wrap it tightly in freezer-safe packaging and thaw when needed.

Conclusion

In conclusion, making dairy-free butter is a simple and rewarding process. It allows individuals with lactose intolerance or dietary preferences to enjoy the benefits of butter without the negative effects of dairy.

By carefully selecting the right ingredients and following the step-by-step process, you can create a delicious and versatile alternative. Whether you spread it on toast, use it in baking, or sauté with it, dairy-free butter adds a rich and creamy touch to your dishes.

So why not give it a try and ‘butter up’ your culinary adventures with this homemade delight?

Advertisement
Continue Reading

Recipes & Culinary Uses

Create Canna Tincture with Magical Butter Maker

Published

on

By

An image showcasing the step-by-step process of making Canna Tincture in the Magical Butter Maker

As someone who loves cannabis, I have always been intrigued by the art of making homemade tinctures. Today, I am excited to share my reliable method for creating cannabis tincture using the Magical Butter Maker.

This incredible device not only simplifies the process, but also ensures a consistent and potent tincture every time. So, if you’re ready to embark on a magical journey of creating your own canna tincture, let’s dive in and explore the art of infusing cannabis into butter.

Key Takeaways

  • Understanding the importance of choosing the right strain of cannabis for desired cannabinoid levels
  • Knowing the decarboxylation process to activate the cannabinoids in the tincture
  • Properly preparing and cleaning the Magical Butter Maker before use
  • Straining and storing the canna tincture in a dark, airtight container for longevity and potency preservation

Choosing the Right Ingredients

When making canna tincture in the magical butter maker, it’s important to choose the right ingredients. One of the key factors to consider is choosing the right strain of cannabis. Different strains have varying levels of cannabinoids, such as THC and CBD, which can affect the potency and medicinal properties of the tincture.

Understanding the decarboxylation process is also crucial. This process involves heating the cannabis to activate the cannabinoids and make them more bioavailable. By decarboxylating the cannabis before infusing it in the tincture, you ensure that the active compounds are fully activated and ready to provide their therapeutic benefits.

Advertisement

It’s important to follow specific guidelines for decarboxylation to maximize the potency of your tincture. By carefully choosing the right strain and understanding the decarboxylation process, you can create a high-quality canna tincture with desired effects.

Preparing the Magical Butter Maker

First, you’ll need to gather all the necessary ingredients and equipment for preparing the infusion in the Magical Butter Maker. Here are the four essential steps to get started:

  1. Clean the Magical Butter Maker: Before using, make sure to clean it thoroughly to remove any residue from previous use. You can do this by disassembling the machine and washing the parts with warm, soapy water. Rinse well and air-dry before reassembling.

  2. Troubleshoot common issues: If you encounter any problems with the Magical Butter Maker, such as it not turning on or not blending properly, check the power cord and ensure it is securely connected. If the issue persists, consult the troubleshooting guide provided with the machine or contact customer support for assistance.

  3. Assemble the machine: Once the Magical Butter Maker is clean and in working order, reassemble it according to the manufacturer’s instructions. Ensure all parts are properly aligned and securely fastened.

  4. Test the machine: Before proceeding with the infusion process, it’s a good idea to run a test cycle using water or a non-cannabis ingredient. This will help you familiarize yourself with the machine’s functions and ensure everything is working correctly.

Now that the Magical Butter Maker is clean, functioning properly, and ready for use, we can move on to the exciting part of infusing the butter with cannabis.

Infusing the Butter With Cannabis

Advertisement

Now that everything is set up and ready to go, it’s time to infuse the butter with cannabis.

Using cannabis infused butter in cooking offers numerous benefits. Firstly, it allows for a discreet and convenient way to consume cannabis, especially for those who prefer not to smoke or vape. Additionally, infusing butter with cannabis provides a consistent and accurately dosed product, making it easier to control the potency of your edibles.

There are different methods to infuse cannabis into butter, each with its own advantages. One popular method is the stovetop infusion, where cannabis is decarboxylated and then simmered with butter. Another method is using a specialized machine like the Magical Butter Maker, which simplifies the process by automating the infusion and ensuring a precise extraction of cannabinoids.

Whichever method you choose, the end result will be a versatile and flavorful cannabis-infused butter that can be used in a variety of delicious recipes.

Straining and Storing the Canna Tincture

After infusing the butter with cannabis, strain and store the canna tincture in an airtight container to preserve its potency and flavor. Storing the canna tincture properly is crucial to ensure its longevity and effectiveness.

Advertisement

Here are four essential methods for storing your canna tincture:

  1. Choose the right container: Opt for a dark glass container to protect the tincture from light and heat, which can degrade its potency. Amber or cobalt glass bottles are ideal.

  2. Keep it airtight: Make sure the container has a tight-fitting lid to prevent air from entering and oxidizing the tincture. This will help maintain its flavor and potency.

  3. Store in a cool, dark place: Heat and light can accelerate the breakdown of cannabinoids in the tincture. Find a cool, dark spot in your pantry or fridge to extend its shelf life.

  4. Regularly assess shelf life: Keep track of the date when you made the tincture and conduct regular assessments to determine its potency. Over time, cannabinoids can degrade, and the tincture may lose its effectiveness.

Dosage and Usage Recommendations

To ensure optimal results, it’s important to carefully follow dosage and usage recommendations when consuming the canna tincture. Calculating the correct dosage is crucial to avoid any unpleasant experiences or potential side effects. The dosage will vary depending on factors such as body weight, tolerance, and desired effects. A general guideline is to start with a low dosage and gradually increase if needed. Here’s a table to help you calculate the correct dosage:

Body Weight (lbs) Low Dosage (mg) Medium Dosage (mg) High Dosage (mg)
100-150 5-10 10-20 20-30
150-200 10-15 15-25 25-35
200-250 15-20 20-30 30-40
250-300 20-25 25-35 35-45
300+ 25+ 35+ 45+

Once you have determined the correct dosage, there are various ways to incorporate canna tincture into recipes. You can add it to beverages such as tea or smoothies, use it as an ingredient in baked goods, or even mix it with salad dressings. The possibilities are endless, but remember to adjust the dosage accordingly to ensure a consistent experience.

Advertisement

Conclusion

In conclusion, making canna tincture with the Magical Butter Maker is a simple and efficient process. By following the steps outlined in this article, you can create a potent tincture that can be used for various purposes.

Whether you want to alleviate pain, reduce anxiety, or simply enjoy a relaxing experience, this homemade tincture is a great option.

One example of its effectiveness is Sarah, a busy professional who struggled with chronic insomnia. After trying various remedies, she decided to make her own canna tincture with the Magical Butter Maker.

Not only did it help her sleep better, but it also reduced her anxiety levels during the day. With this easy and effective method, you too can experience the benefits of canna tincture.

Advertisement
Continue Reading

Recipes & Culinary Uses

How to Make Tincture-Infused Canna-Butter in 3 Simple Steps

Published

on

By

An image showcasing the process of making canna-butter with tincture

I have always enjoyed trying out new things in the kitchen, especially when it involves incorporating cannabis into my go-to recipes. The mixture of tincture and butter results in a powerful and adaptable ingredient called canna-butter.

In this article, I’ll guide you through the process of making canna-butter with tincture, step by step. Get ready to unlock a whole new world of culinary possibilities and elevate your dishes to a higher level.

Let’s dive in and discover the art of infusing cannabis into butter.

Key Takeaways

  • Different tincture extraction methods include alcohol and oil extraction
  • Alcohol extraction produces a stronger tincture, while oil extraction provides a milder flavor
  • Strain the tincture to remove any plant matter using a fine mesh strainer or cheesecloth
  • Choose the right method for infusing the tincture into butter, such as the traditional, slow cooker, or sous vide method

Choosing the Right Tincture for Canna-Butter

When making canna-butter, it’s important to choose the right tincture. There are different tincture extraction methods that can be used to create the perfect tincture for your canna-butter.

Advertisement

One method is the alcohol extraction method, which involves soaking the cannabis in high-proof alcohol to extract the cannabinoids and terpenes.

Another method is the oil extraction method, where the cannabis is infused in a carrier oil such as olive oil or coconut oil. Each method has its own advantages and disadvantages, so it’s important to consider your preferences and needs.

The alcohol extraction method tends to produce a stronger and more potent tincture, while the oil extraction method provides a milder flavor.

Once you have chosen the right tincture, you can move on to preparing it for infusion into the butter.

Preparing the Tincture for Infusion

To prepare the tincture for infusion, you’ll need to strain out any remaining plant matter. This step is crucial in ensuring a smooth and potent canna butter. Start by obtaining a fine mesh strainer or cheesecloth. Place it over a clean bowl or container.

Advertisement

Slowly pour the tincture through the strainer, allowing it to flow into the container while catching any plant matter. Gently press the plant matter with a spoon to extract any residual liquid.

Now, let’s talk about the type of alcohol you should use for tincture extraction. Different types of alcohol, such as high-proof grain alcohol or vodka, can be used. These alcohols have a high alcohol content, which helps in extracting the cannabinoids effectively.

Infusing the Tincture Into Butter

Once you’ve strained out any remaining plant matter, it’s time to infuse the tincture into the butter. This step is crucial in creating a potent and flavorful canna-butter. Here are three infusing techniques you can try:

Advertisement
  1. The Traditional Method: In a double boiler or a heatproof bowl set over a pot of simmering water, melt the desired amount of butter. Once melted, add the tincture and stir continuously for about 30 minutes. This method ensures a thorough and even infusion.

  2. The Slow Cooker Method: Place the butter and tincture in a slow cooker on low heat. Let it simmer for 2-3 hours, stirring occasionally. This method is convenient and allows for hands-off infusing.

  3. The Sous Vide Method: In a vacuum-sealed bag, combine the butter and tincture. Place the bag in a preheated water bath set to 185°F (85°C) and let it infuse for 1-2 hours. This method preserves the flavors and nutrients of the ingredients.

Once the infusion is done, it’s time to move on to straining and storing your canna-butter.

Straining and Storing Your Canna-Butter

After infusing the tincture into the butter, strain out any remaining plant matter and store your potent canna-butter in an airtight container. Straining is an essential step to ensure a smooth and pure final product.

There are a few straining techniques you can use. One popular method is to use a cheesecloth or fine mesh strainer to separate the liquid from the solid plant material. Gently pour the mixture through the strainer, allowing the liquid to flow into a separate container while trapping the plant matter. Press down on the solids to extract every last drop of canna-butter.

Once strained, transfer the canna-butter into an airtight container for long term storage. It is important to choose the right container to maintain freshness and potency. Glass jars or plastic containers with tight-fitting lids work well. Remember to label the container and store it in a cool, dark place to preserve the canna-butter’s quality.

Tips and Tricks for Using Canna-Butter in Recipes

Advertisement

Using canna-butter in recipes adds a delicious and potent twist to your favorite dishes. Here are some tips and tricks for incorporating canna-butter into your cooking:

  1. Start with small doses: When cooking with canna-butter, it’s important to start with a low dose and gradually increase if needed. This will help you find the right balance and avoid overwhelming effects.

  2. Opt for low heat cooking techniques: High heat can degrade the potency of canna-butter, so it’s best to use low heat cooking methods like baking or sautéing. This will help preserve the THC content and ensure a consistent dosage.

  3. Experiment with flavors: Canna-butter can have a distinct herbal taste, so it’s a good idea to experiment with flavors to enhance the overall taste of your dishes. Add herbs, spices, or even citrus zest to complement the earthy flavors of canna-butter.

Frequently Asked Questions

Can I Use Any Type of Tincture for Making Canna-Butter?

Yes, you can use different types of tinctures for making canna-butter. The benefits of using specific tincture strains for canna-butter include enhanced flavor and potency. It’s important to choose a tincture that complements the desired flavor profile of your canna-butter.

What Is the Shelf Life of the Prepared Tincture for Infusion?

The shelf life of prepared tincture for infusion varies depending on the method and storage conditions. Properly stored, it can retain its potency for up to two years, ensuring long-lasting effects for your homemade canna-butter.

Can I Reuse the Strained Plant Material After Making Canna-Butter?

After making canna-butter, I can reuse the strained plant material for alternative uses. It can be used to make infused oils, teas, or even added to baked goods for an extra kick. Waste not, want not!

Advertisement

Can I Substitute Canna-Butter With Regular Butter in Recipes?

Substituting regular butter with canna-butter in recipes is possible, but it will have an impact on the taste and effects. The substitution options depend on personal preference and the desired outcome of the recipe.

How Long Can I Store My Canna-Butter in the Refrigerator?

In the refrigerator, canna-butter can be stored for a long time if you use proper storage methods. It’s important to keep it in an airtight container to maintain its potency and freshness.

Conclusion

In conclusion, making canna-butter with tincture is a simple and effective way to infuse your favorite recipes with the benefits of cannabis.

While some may argue that using tincture can be expensive, the truth is that a little goes a long way.

By carefully choosing the right tincture and following the steps outlined in this article, you can create potent and delicious canna-butter that will enhance your culinary creations.

Advertisement

So don’t let cost deter you, give it a try and elevate your cooking to a whole new level!

Continue Reading
Advertisement

Affiliate disclaimer

As an affiliate, we may earn a commission from qualifying purchases. We get commissions for purchases made through links on this website from Amazon and other third parties.

Advertisement

Trending