Connect with us

Recipes & Culinary Uses

10 Ways to Make Grilled Cheese Without Butter

Published

on

An image that showcases a golden, crispy grilled cheese sandwich oozing with melted cheese, perfectly charred bread, and a hint of smokiness, all achieved without a single drop of butter

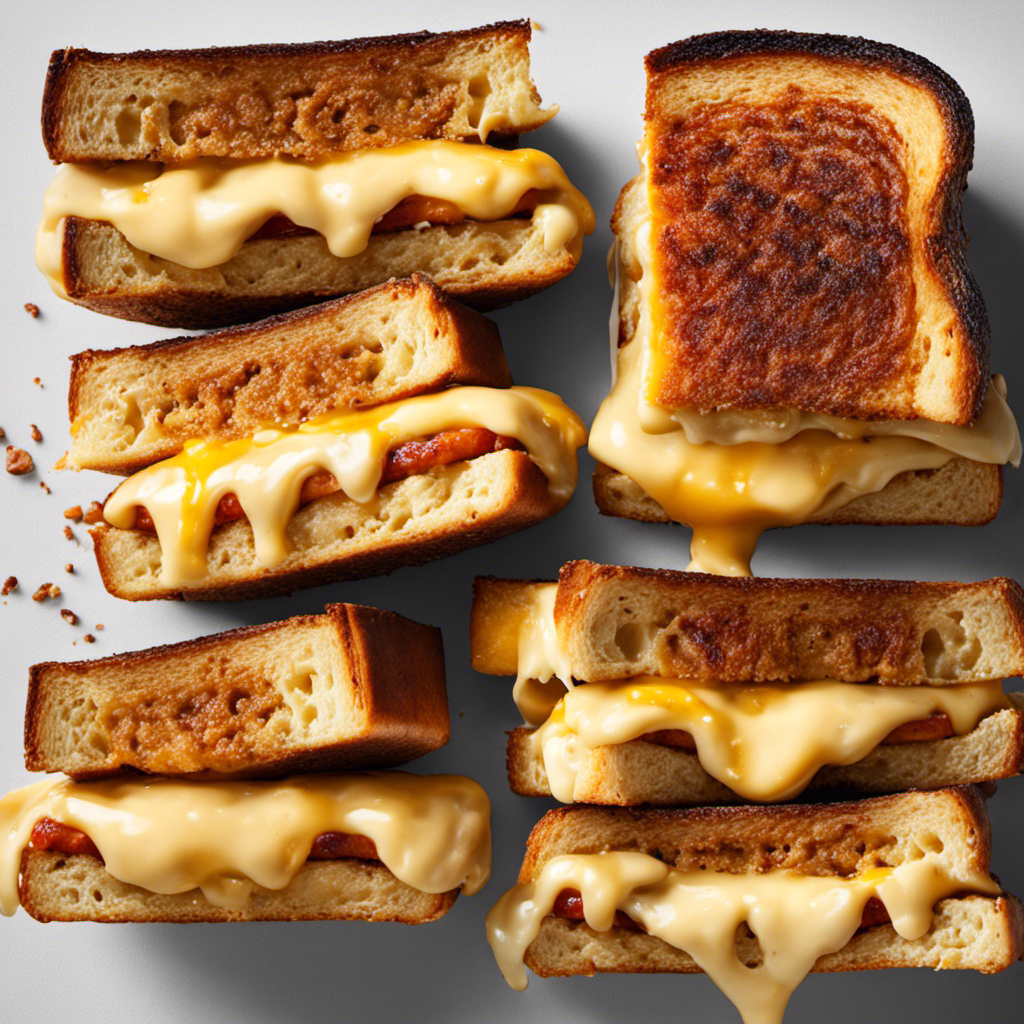
I enjoy a tasty grilled cheese sandwich, but there are times when I run out of butter. That’s when I learned how to make a yummy grilled cheese without butter. Believe me, it’s doable and just as satisfying.

In this article, I’ll share with you my secrets for choosing the right cheese, exploring alternative spreads, and achieving that perfect golden brown crust. Get ready to elevate your grilled cheese game without a single pat of butter.

Key Takeaways

  • Use alternative spreads like avocado, pesto, hummus, or tomato for added flavor and creaminess.
  • Experiment with different cheese types and combinations to create unique and delicious grilled cheese sandwiches.
  • Enhance the flavor of the bread by using mayonnaise or olive oil instead of butter and adding spices like smoked paprika, garlic powder, or dried herbs.
  • Try butterless cheese melting techniques such as using mayonnaise, olive oil, mashed avocado, cream cheese, or pesto to achieve a crispy texture and burst of flavor.

The Importance of Choosing the Right Cheese

When making a grilled cheese without butter, it’s crucial to choose the right cheese for maximum flavor. As a cheese enthusiast, I understand the importance of selecting the perfect cheese substitute.

There are numerous options available, allowing you to experiment and find the one that suits your taste buds. For a creamy and melty texture, I recommend using mozzarella or Monterey Jack. These cheeses have a mild flavor that complements the crispy bread perfectly.

Advertisement

If you prefer a stronger taste, try using cheddar or Gouda. These cheeses add a bold and tangy flavor to your grilled cheese sandwich. Don’t be afraid to get creative and mix different cheese types to find your ultimate combination.

Exploring Alternative Spreads for Grilled Cheese

Instead of using butter, you can try using alternative spreads for your grilled cheese. These spreads not only add a unique flavor to your sandwich, but they also provide a healthier option. Here are some creative ingredient combinations that you can use as spreads for your grilled cheese:

Spread Flavor Ingredient Combinations
Avocado Spread Creamy and rich Avocado, lime juice, salt
Pesto Spread Herbaceous Basil, pine nuts, garlic
Hummus Spread Savory and tangy Chickpeas, tahini, lemon juice
Tomato Spread Tangy and refreshing Tomatoes, garlic, olive oil

These alternative spreads can be easily spread on your bread slices before grilling your cheese. They not only enhance the taste but also provide additional nutrients. So, get creative with your grilled cheese by trying out these alternative spreads and enjoy a delicious and healthier sandwich.

Preparing the Bread for the Perfect Grilled Cheese

Advertisement

When it comes to making a grilled cheese sandwich without butter, there are plenty of alternative options for the bread that can enhance both the flavor and texture.

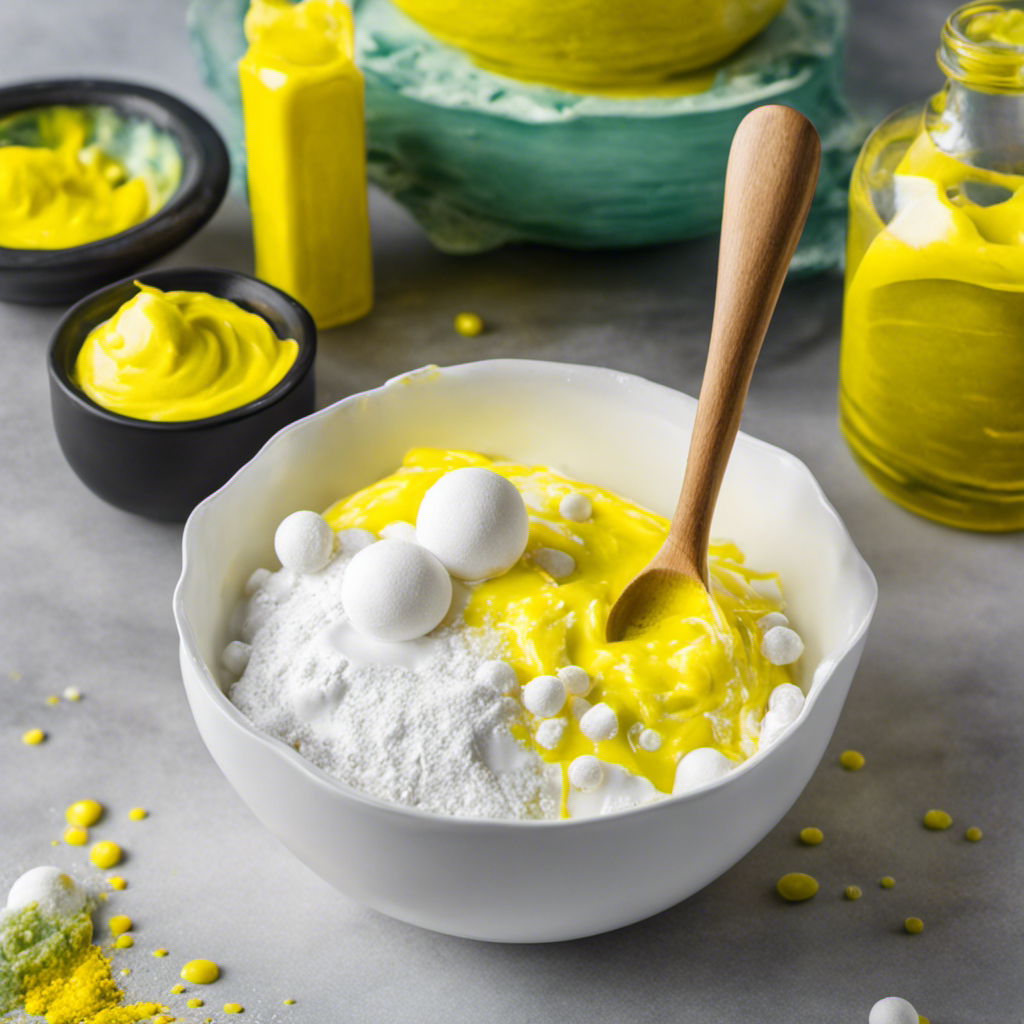
One option is to use mayonnaise instead of butter to achieve that crispy and golden-brown exterior.

Another alternative is to brush the bread with olive oil, which adds a delicious richness to the sandwich.

Additionally, using a non-stick cooking spray can also help in achieving that desired crunch without the need for butter.

Butterless Bread Alternatives

You can use mayonnaise as a butterless alternative for spreading on the bread. Mayonnaise may seem like an unconventional choice, but it works wonders when it comes to grilling the perfect cheese sandwich.

Advertisement

Simply spread a thin layer of mayonnaise on the outer sides of the bread slices before placing them in the pan. The mayonnaise creates a crispy and golden crust, just like butter would.

Another option is using olive oil as a butterless spread. Brush a little olive oil on both sides of the bread for a deliciously crispy texture.

Additionally, you can try using avocado as a bread alternative. Mash a ripe avocado and spread it on the bread, adding a creamy and healthy twist to your grilled cheese sandwich.

Enhancing Flavor and Texture

To enhance the flavor and texture of your sandwich, try adding different spices and seasonings to the filling. This will not only elevate the taste but also make your sandwich more exciting and enjoyable. Here are some flavorful seasonings that you can experiment with:

  • Smoked paprika: adds a subtle smoky flavor that complements the cheese perfectly.
  • Garlic powder: gives a savory kick and enhances the overall taste.
  • Dried herbs (such as basil, oregano, or thyme): adds freshness and complexity.
  • Red pepper flakes: adds a touch of heat for those who like a little spice.
  • Onion powder: adds a hint of sweetness and depth of flavor.

In addition to the seasonings, don’t forget to focus on achieving a crispy crust. Toasting your sandwich in a hot skillet or using a panini press will help create that perfect crunch.

The Art of Melting Cheese Without Butter

When it comes to making a grilled cheese sandwich without butter, there are a few techniques that can help achieve that perfectly melted cheese.

Advertisement

One option is to use mayonnaise instead of butter to spread on the bread before grilling.

Another alternative is to use olive oil or cooking spray to lightly coat the bread and prevent it from sticking to the pan.

Exploring these butterless cheese melting techniques opens up a world of possibilities for creating delicious grilled cheese sandwiches in a healthier and more creative way.

Butterless Cheese Melting Techniques

There’s a trick to melt the cheese without using butter in your grilled cheese sandwich. As someone who loves experimenting with different cooking methods, I’ve discovered alternative cheese options and techniques that still give you that gooey, melty goodness.

Here are some of my favorite ways to achieve the perfect butterless cheese melt:

Advertisement
  • Use mayonnaise: Spread a thin layer of mayo on the outside of your bread before grilling. It adds a tangy flavor and helps achieve a crispy golden crust.

  • Try olive oil: Brushing olive oil on the bread instead of butter creates a deliciously crispy texture and adds a subtle hint of flavor.

  • Use avocado: Mash up some avocado and spread it on the bread. It not only provides a creamy texture but also adds a healthy twist.

  • Use cream cheese: Spread a thin layer of cream cheese on the inside of the bread. It melts beautifully and adds a creamy richness to the sandwich.

  • Use pesto: Spread a thin layer of pesto on the inside of the bread for a burst of flavor and a unique twist on the classic grilled cheese.

With these alternative options, you can enjoy a deliciously melty grilled cheese sandwich without using butter. So go ahead, get creative and explore new ways to satisfy your cheesy cravings!

Alternative Grilled Cheese Methods

One option for achieving a gooey, melty grilled cheese sandwich without butter is by using alternative cheese melting techniques.

When it comes to alternative grilling methods, there are plenty of options that can create a delicious vegan grilled cheese.

One popular method is using a non-stick pan and cooking spray to prevent sticking and create a crispy exterior.

Another option is grilling the sandwich on a panini press, which provides even heat distribution and creates those coveted grill marks.

Advertisement

Additionally, using a grill pan or a cast iron skillet can also give the sandwich a nice charred flavor.

These alternative grilling methods not only offer a healthier option but also cater to those following a vegan diet.

Now, let’s explore how to enhance the flavor with seasonings and herbs.

Enhancing the Flavor With Seasonings and Herbs

To enhance the flavor of your grilled cheese without butter, try adding a pinch of garlic powder and a sprinkle of dried oregano. These seasoning options can take your sandwich to the next level and add a burst of aromatic flavors.

Here are some herb combinations you can experiment with to create a delicious twist on your grilled cheese:

Advertisement
  • Fresh basil and sliced tomatoes for a Caprese-inspired sandwich
  • Rosemary and thyme for a savory and earthy flavor
  • Dill and lemon zest for a tangy and refreshing taste
  • Smoked paprika and cayenne pepper for a spicy kick
  • Cilantro and lime juice for a zesty and vibrant twist

By incorporating these herbs and spices, you can elevate the taste of your grilled cheese without relying on butter.

Now, let’s move on to adding extra crunch to your sandwich.

Adding Extra Crunch to Your Grilled Cheese

For an added crunch in your grilled cheese, try using a different type of bread like sourdough or ciabatta. These breads have a sturdy texture and crust that enhances the crunchiness of your sandwich. When choosing a bread, make sure it’s thickly sliced to provide a satisfying bite.

Another way to enhance the crunchiness is by experimenting with toppings. One option is to sprinkle some grated Parmesan cheese on the outside of the bread before grilling it. The cheese will melt and crisp up, creating a delicious crust. You can also try adding crushed potato chips or panko breadcrumbs to the cheese filling for an extra crunch.

These toppings not only add texture but also bring unique flavors to your grilled cheese. So, don’t be afraid to get creative and elevate your grilled cheese game with some satisfying crunchiness.

Mastering the Flip: Tips for a Perfectly Cooked Sandwich

When it comes to cooking the perfect sandwich, two key factors to consider are flip timing for doneness and achieving even browning.

Advertisement

Knowing when to flip your sandwich is crucial for ensuring that it is cooked to perfection, with a crispy exterior and a gooey, melted interior.

Additionally, achieving even browning is important for both the visual appeal and the taste of your sandwich, as it adds a delicious caramelized flavor.

In this discussion, I will share some expert tips on how to master the flip and achieve that perfectly cooked, evenly browned sandwich.

Flip Timing for Doneness

The key to achieving the perfect doneness for your grilled cheese is knowing when to flip it. Timing is everything when it comes to achieving that golden, crispy exterior and gooey, melted interior.

Here are a few tips to help you master the flip timing and achieve even browning:

Advertisement
  • Pay attention to the color and texture of the bread. Once it turns a deep golden brown and feels crispy to the touch, it’s time to flip.

  • Use a spatula to gently lift one corner of the sandwich to check the browning. If it’s not quite there yet, give it a little more time.

  • Listen for the sizzling sound. As the cheese starts to melt and bubble, it’s a good indication that the sandwich is ready to be flipped.

  • Watch for any oozing cheese. If you notice the cheese starting to melt out of the sides, it’s a sign that the sandwich is ready to be flipped.

  • Trust your instincts. With practice, you’ll develop a feel for when the sandwich is perfectly cooked on one side and ready to be flipped.

Achieving Even Browning

Achieving even browning on your grilled cheese sandwich is all about paying attention to the color and texture of the bread. The key is to achieve a beautiful golden brown crust without burning the bread.

One way to achieve this is by using alternative browning methods. For example, you can try using a non-stick pan and cooking your sandwich over medium heat. This will allow the bread to slowly toast and develop a nice, even color.

Another option is experimenting with different cheeses. Some cheeses, like cheddar or Gruyere, tend to brown better than others. By trying out different types of cheeses, you can find the perfect combination that results in an evenly browned sandwich.

Now, let’s explore how to achieve a golden brown crust without butter.

Achieving a Golden Brown Crust Without Butter

To achieve a golden brown crust without butter, you can use mayonnaise instead. Mayonnaise contains oil, which helps to create a crispy and flavorful crust on your grilled cheese sandwich. Here are some tips to achieve the perfect golden brown crust without butter:

Advertisement
  • Spread a thin layer of mayonnaise on the outside of the bread slices before grilling.
  • Use a non-stick pan or griddle to prevent the sandwich from sticking.
  • Cook the sandwich over medium-low heat to ensure even browning.
  • Flip the sandwich halfway through cooking to brown both sides evenly.
  • Press the sandwich down gently with a spatula to create a crispy texture.

In addition to mayonnaise, you can also try using alternative cooking oils like olive oil or avocado oil to achieve a golden brown crust. For vegan options, there are plenty of delicious vegan cheese alternatives available that melt well and provide a creamy texture. Experiment with different combinations to find your perfect grilled cheese without butter.

Creative Ingredient Combinations for Unique Grilled Cheese

For a unique twist on your grilled cheese, try experimenting with different ingredient combinations to create a one-of-a-kind flavor experience. When exploring unconventional cheeses, think beyond the classic cheddar or American and consider brie, goat cheese, or even blue cheese for a tangy kick. These cheeses can add a new dimension to your grilled cheese and elevate it to a gourmet level.

Additionally, don’t be afraid to step outside the box when it comes to bread. Instead of the usual white or wheat, try using sourdough, rye, or even croissants for a buttery, flaky texture. The possibilities are endless when it comes to creating a unique grilled cheese masterpiece.

Now, let’s move on to serving and pairing suggestions for your grilled cheese.

Serving and Pairing Suggestions for Your Grilled Cheese

Now that you have your unique grilled cheese masterpiece, let’s talk about how to serve and pair it for the ultimate flavor experience. Here are some serving suggestions and cheese pairing ideas to take your grilled cheese to the next level:

  • Serve your grilled cheese with a side of tomato soup for a classic and comforting combination.
  • Add some sliced avocado and bacon to your grilled cheese for a delicious twist.
  • Pair your grilled cheese with a crisp and refreshing salad for a light and balanced meal.
  • Serve your grilled cheese with a side of pickles or pickled vegetables for a tangy and crunchy contrast.
  • Pair your grilled cheese with a glass of red wine or a hoppy beer to complement the rich, cheesy flavors.

Troubleshooting Common Issues With Butter-Free Grilled Cheese

If your butter-free grilled cheese is turning out dry, try using a different type of cheese or adding a spread for moisture. Troubleshooting sandwich consistency is important to achieve the perfect grilled cheese sandwich. One common issue with butter-free grilled cheese is that it can turn out dry. To combat this, try using a cheese that melts well, such as mozzarella or cheddar. These cheeses have a higher moisture content and will help keep your sandwich moist. Another option is to add a spread to the bread, such as mayonnaise or olive oil, before grilling. This will give the sandwich a nice, crispy exterior while maintaining moisture on the inside. Additionally, consider alternatives to traditional bread, like using whole wheat or sourdough bread, which can add more flavor and texture to your grilled cheese.

To further assist you in troubleshooting sandwich consistency, below is a helpful table that outlines some common issues and their solutions:

Advertisement
Problem Possible Solution
Dry sandwich Use a cheese with higher moisture content, such as mozzarella or cheddar. Add a spread to the bread before grilling, such as mayonnaise or olive oil.
Cheese not melting properly Use a cheese that melts well, such as mozzarella or cheddar. Ensure that the heat is evenly distributed throughout the pan or griddle.
Burnt bread Adjust the heat to medium-low and keep a close eye on the sandwich to prevent burning. Use a non-stick pan or griddle to avoid sticking.
Sandwich not crispy Use a spread with a high smoke point, such as clarified butter or vegetable oil. Ensure that the heat is evenly distributed throughout the pan or griddle.
Limp sandwich Cook the sandwich for a longer period of time, ensuring that both sides are evenly browned and crispy. Use a cheese with a higher melting point, such as Swiss or Gruyere.

Frequently Asked Questions

Can I Use Any Type of Cheese for a Butter-Free Grilled Cheese Sandwich?

Yes, you can use vegan cheese for a butter-free grilled cheese sandwich. Some healthy alternatives to butter for a grilled cheese include avocado, olive oil, or mayonnaise. They provide a tasty and nutritious twist to your sandwich.

What Are Some Alternative Spreads That Can Be Used Instead of Butter for a Grilled Cheese?

When making a grilled cheese without butter, there are several alternative spreads you can use. Some options include mayo, olive oil, or avocado. These spreads can add flavor and help achieve a crispy bread texture.

How Can I Make the Bread Crispy Without Using Butter?

To make the bread crispy without using butter, I would recommend using mayonnaise as an alternative spread. Simply spread a thin layer on the bread before grilling for a delicious and crispy grilled cheese sandwich.

Are There Any Specific Seasonings or Herbs That Work Best for Enhancing the Flavor of a Butter-Free Grilled Cheese?

There are several seasonings and herbs that can enhance the flavor of a butter-free grilled cheese. Some of the best cheese alternatives and techniques for achieving a golden crust are worth exploring.

What Are Some Creative Ingredient Combinations That Can Be Used to Make Unique Grilled Cheese Sandwiches Without Butter?

Can I use oil as an alternative to butter for a grilled cheese sandwich? Absolutely! And when it comes to creative ingredient combinations for unique grilled cheese sandwiches without butter, the possibilities are endless. Let me share some of my favorites.

Advertisement

Conclusion

As I take my final bite of this delicious butter-free grilled cheese, I can’t help but feel a sense of accomplishment.

Who knew that a simple sandwich could be so satisfying without the traditional butter?

By exploring alternative spreads, melting cheese just right, and adding the perfect seasonings, I have unlocked a whole new world of grilled cheese possibilities.

So, my fellow cheese enthusiasts, don’t be afraid to experiment and think outside the butter box.

Your taste buds will thank you for it.

Advertisement

Now, go forth and grill!

Continue Reading
Advertisement

Recipes & Culinary Uses

Creamy Delight: Best Butter Pecan Ice Cream Recipe for Summer!

Yearning for a creamy summer treat that will leave you craving more?

Published

on

By

butter pecan ice cream

Savor a delicious summer treat with our Butter Pecan Ice Cream recipe. Mix butter, brown sugar, cream, and pecans for a creamy delight. Melt butter, cook pecans, whisk eggs, and blend for a rich flavor. Add pecans, cream, and vanilla, then freeze to perfection. Master this easy-to-follow recipe for a tasty dessert to beat the heat.

Key Takeaways

  • Rich and creamy blend of butter, brown sugar, and heavy cream
  • Toasted pecans for a nutty crunch and flavor
  • Easy-to-follow steps for homemade ice cream perfection
  • Customization options with variations like bourbon or chocolate
  • Perfect summer treat with a decadent, refreshing taste

Recipe Ingredients for Butter Pecan Ice Cream

To create a delectable batch of butter pecan ice cream, gather the essential ingredients listed in the recipe.

You'll need:

  • Butter
  • Brown sugar
  • Heavy cream
  • Pecans

These ingredients combine to bring out the rich and nutty flavors of this classic dessert.

The brown sugar adds a caramel-like sweetness, while the heavy cream contributes to a creamy texture that's essential for a decadent treat.

Pecans, when toasted in butter, provide a delightful crunch and enhance the overall flavor profile of the ice cream.

Cooking Instructions for Homemade Ice Cream

making ice cream at home

Start by melting butter in a skillet to infuse the pecans with a rich, nutty flavor for your homemade butter pecan ice cream.

Here's a quick guide to help you make this creamy delight:

Advertisement
  • Melt butter and cook pecans for flavor.
  • Whisk eggs and combine with half-and-half and brown sugar for a creamy base.
  • Cook until thickened, then mix with eggs in a bowl.
  • Add cream, pecans, and vanilla extract.
  • Freeze the mixture in an ice cream maker.

Following these steps will guarantee your homemade butter pecan ice cream turns out rich and delicious.

Remember to carefully adhere to the manufacturer's instructions for your ice cream maker to achieve the perfect consistency.

Enjoy the process of creating this delightful treat that will surely be a hit during the summer months.

Ice Cream Preparation Steps

ice cream recipe instructions

Mix half and half with brown sugar over medium heat in a large bowl to prepare the ice cream base.

Next, whisk beaten eggs and temper them with the warm milk mixture to create a smooth custard.

Once done, thicken the mixture on low heat, then cool it over an ice bath to achieve ideal texture.

After that, stir in heavy cream, vanilla extract, maple extract, and a pinch of salt for rich flavor.

Advertisement

Remember to refrigerate the mixture for 1 1/2 – 2 hours before churning it into creamy butter pecan ice cream.

This process ensures that the flavors meld together beautifully and the ice cream attains the perfect consistency for scooping and savoring.

Nutritional Information and Tips

healthy eating guidance provided

Considering the rich and creamy nature of homemade butter pecan ice cream, it's important to be mindful of its nutritional content and serving size. When indulging in this delectable dessert, remember these essential tips:

  • Portion Control: Enjoy in moderation to savor the flavors without overindulging.
  • Brown Sugar Sweetness: Opt for a moderate amount of brown sugar to balance sweetness without overwhelming the palate.
  • Room Temperature Ingredients: Confirm ingredients like butter and heavy cream are at room temperature for a smoother texture.
  • Nutritional Awareness: Be mindful that homemade butter pecan ice cream can vary in nutritional content, so adjust ingredients accordingly.
  • Consultation: Seek advice from a nutritionist or healthcare provider for personalized guidance on incorporating this treat into a balanced diet.

Homemade Butter Pecan Ice Cream Variations

delicious homemade ice cream

Explore creative twists on traditional butter pecan ice cream by incorporating different nuts, spirits, sauces, chocolates, and dairy-free alternatives.

For a unique flavor, try substituting pecans with walnuts or almonds in the full recipe. Toast the nuts in a separate bowl until browned and fragrant, then chop them finely enough to coat in the ice cream mixture.

To add a boozy kick, mix in a splash of bourbon or rum to the base as you churn the ice cream. For an extra indulgent touch, swirl in caramel sauce or fudge ripple throughout the mixture.

Incorporate chunks of chocolate or chocolate-covered nuts for a delightful contrast in texture, giving each bite a sweet surprise.

Advertisement

If you prefer a lighter, dairy-free option, consider using coconut milk or almond milk as a substitute for traditional dairy products. These alternatives provide a creamy base while catering to plant-based diets.

Experiment with these variations to create a personalized butter pecan ice cream that suits your taste preferences.

Frequently Asked Questions

What Is the Secret to Making Ice Cream Very Creamy?

To make ice cream very creamy, you use a rich base of ingredients like heavy cream, eggs, and sugar. Chilling the base before churning is crucial for a smoother texture. Adding vanilla extract enhances creaminess, and slow churning prevents a dense outcome.

What Flavor Is the Ice Cream in Butter Pecan?

The ice cream in butter pecan is a delightful blend of buttery richness, vanilla sweetness, and maple undertones, perfectly paired with toasted pecans for a nutty crunch. This flavor combination creates a harmonious and indulgent treat.

What's the Difference Between Butter Pecan Ice Cream and Praline Pecan Ice Cream?

In butter pecan ice cream, you'll savor the buttery richness of pecans blended with a creamy base. On the other hand, praline pecan ice cream highlights caramelized sweetness with a swirl of praline sauce for a delightful flavor contrast.

Advertisement

What Age Group Eats Butter Pecan Ice Cream?

You'll find that adults and older individuals, typically in the 30-60 age group, enjoy butter pecan ice cream. It's a favorite among those with a more refined palate, drawn to its rich and nutty flavor.

Conclusion

So there you have it, folks! Whip up this buttery, nutty delight for a taste of summer in every scoop.

Don't cry over spilled milk – grab a cone and enjoy this creamy treat that's sure to satisfy your sweet tooth.

Get churning and indulge in the best butter pecan ice cream you've ever tasted!

Advertisement
Continue Reading

Recipes & Culinary Uses

Festive Favorites: Best Peanut Butter Blossoms Recipe for Holidays!

Unleash the ultimate holiday baking magic with the best Peanut Butter Blossoms recipe – an irresistible treat that will elevate your festive celebrations!

Published

on

By

holiday baking with flair

Elevate your holiday baking with the ultimate Peanut Butter Blossoms recipe. Cream together peanut butter, butter, sugars, and salt, then add egg and vanilla. Roll dough into balls, coat in brown sugar, bake until golden, then press a Hershey's kiss on top. Adjust baking time as needed. Explore ingredient swaps for a personalized touch. Enjoy with hot cocoa or pair with savory dishes. For more tips, ideas, and customization options, the recipe holds more festive surprises.

Key Takeaways

  • Cream together peanut butter, butter, sugars for rich flavor.
  • Bake at 375°F for 8-10 minutes for soft, chewy cookies.
  • Customize with ingredient swaps like almond butter or maple syrup.
  • Pair with savory dishes or hot cocoa for holiday enjoyment.
  • Press Hershey kisses onto warm cookies for a classic finish.

Ingredients for Peanut Butter Blossoms

For the classic Peanut Butter Blossoms recipe, gather peanut butter, butter, sugar, an egg, and Hershey's kisses as your essential ingredients.

Peanut butter is the star, offering a rich flavor that blends perfectly with the sweetness of the cookies.

Butter plays a pivotal role by adding moisture and richness to the dough, ensuring a soft and chewy texture.

The sugar not only sweetens the cookies but also contributes to their festive appeal, making them a perfect treat for any occasion.

Finally, the Hershey's kisses on top provide a delightful chocolatey finish that elevates these cookies to a whole new level of deliciousness.

Advertisement

Together, these ingredients create a harmonious blend of flavors and textures that make Peanut Butter Blossoms a beloved classic for holiday baking or any time you crave a sweet and satisfying treat.

Recipe Steps for Peanut Butter Blossoms

bake peanut butter cookies

To make Peanut Butter Blossoms, start by creaming together peanut butter, butter, sugars, and salt until light and fluffy.

Next, add in the egg and vanilla extract, making sure to mix well to combine all the ingredients thoroughly.

Then, gradually incorporate the dry ingredients into the wet mixture until a smooth dough forms.

Once the dough is ready, roll it into balls and coat each ball generously in brown sugar.

Place the sugar-coated dough balls on a baking sheet, making sure to leave enough space between them for spreading during baking.

Advertisement

Bake the cookies in a preheated oven until they turn a beautiful golden brown.

As soon as the cookies are out of the oven, press a Hershey's kiss into the center of each cookie gently.

The heat from the freshly baked cookies will melt the chocolate just enough to adhere it to the cookie.

These Peanut Butter Blossoms are a delightful treat perfect for Christmas celebrations!

Pro Tips for Making Peanut Butter Blossoms

baking perfect peanut blossoms

To enhance your peanut butter blossom baking experience, consider adjusting the baking time based on your oven's performance for best results.

Additionally, explore ingredient substitutions to cater to dietary preferences or allergies without compromising the flavor or texture of the cookies.

Advertisement

These pro tips can help you customize your peanut butter blossoms while ensuring delicious outcomes.

Baking Time Recommendations

Achieving the ideal texture for your peanut butter blossoms involves baking them at 375°F for 8-10 minutes. This baking duration guarantees that the cookies have a soft and chewy consistency while allowing the Hershey kisses on top to be softened but not completely melted.

Once out of the oven, remember to press the Hershey kisses onto the cookies immediately to secure them in place for that classic appearance.

For the best outcomes, chill the cookie dough for about 30 minutes before baking. This step helps the cookies maintain their shape and prevents excessive spreading during baking, ensuring your peanut butter blossom cookies are perfectly formed and ready to impress during your holiday baking.

Shortening or extending the baking time can alter the texture of the cookies. A quick bake of 6-8 minutes produces softer and chewier cookies, while longer baking times yield a slightly crispier consistency. Stick to the recommended 8-10 minutes for the best soft and chewy peanut butter blossoms.

Advertisement

Ingredient Substitutions

Consider incorporating different ingredients to elevate the flavor and nutritional profile of your peanut butter blossoms. For a healthier option, swap out shortening with unsalted butter to achieve a unique texture and taste in your cookies.

Try using natural peanut butter instead of creamy to add a wholesome twist to the classic recipe. If you're looking to reduce the glycemic impact, substitute brown sugar with coconut sugar in your baking. For a natural sweetener alternative, replace regular granulated sugar with maple syrup in the cookie dough mixture.

Additionally, for a distinct flavor experience, experiment with almond butter as a substitute for peanut butter in your blossoms. These ingredient substitutions can bring a new dimension to your peanut butter blossoms, making them not only delicious but also tailored to your dietary preferences.

Upgrade your baking game this holiday season with these creative twists on a beloved recipe!

Serving Suggestions for Peanut Butter Blossoms

peanut butter cookie recipe

Enhance the enjoyment of your peanut butter blossoms by pairing them with savory dishes like lasagna tortellini soup for a satisfying meal. These classic cookies also complement family-friendly dinners such as easy ground beef shepherd's pie and creamy broccoli cheddar soup, making for a delightful combination. The holiday season calls for cozy treats, and the sweet nuttiness of peanut butter blossoms pairs perfectly with a warm cup of hot cocoa. Whether you're participating in a cookie exchange or looking for a festive touch to your holiday dessert spread, consider rolling the cookies in red, green, and white sugar sprinkles to add a pop of color and fun.

Serving Suggestions Pairing Ideas
Lasagna Tortellini Soup Comforting and hearty meal alongside the cookies
Easy Ground Beef Shepherd's Pie Delicious combination for a family dinner
Creamy Broccoli Cheddar Soup Perfect accompaniment to the nutty cookie flavors

12 Days of Christmas Cookies Recipes

baking traditions for the holidays

Indulge in a variety of delightful Christmas cookie recipes each day during the holiday season. One standout choice is the classic Peanut Butter Blossoms. These holiday cookies feature a peanut butter base topped with a Hershey's kiss, making them a beloved treat for cookie exchanges and festive gatherings.

The process of making these cookies is simple yet rewarding. Start by rolling the dough balls in sugar before baking to add a sweet crunch to each bite. The combination of rich peanut butter flavor and the chocolatey goodness of the Hershey's kiss creates a perfect balance of sweetness.

Advertisement

When enjoying these Christmas cookies, consider pairing them with a glass of milk for a classic and satisfying treat.

Whether you're baking them for your family, a cookie exchange, or a holiday party, Peanut Butter Blossoms are sure to be a hit. Make each day of the holiday season a little sweeter with these delicious cookies.

User Engagement Features

user interaction enhancements

Let's talk about how user interaction features and personalization options enhance your experience with the Peanut Butter Blossoms recipe.

You can engage with others by leaving comments and sharing your results, creating a sense of community around this holiday treat.

Personalization options like name and email entry fields help tailor the experience to your preferences, making it more engaging and enjoyable.

User Interaction Features

Utilizing user engagement features on the website allows for increased participation and feedback from visitors. The comment section enables users to interact with each other and provide valuable feedback on the Peanut Butter Blossoms recipe or share their experiences with Hershey's kisses. By incorporating a reply option, users can engage in conversations, fostering a sense of community around baking these delightful peanut butter cookies.

Advertisement

Moreover, the inclusion of name and email fields not only allows for personalization but also facilitates communication between the website and its visitors. This data storage feature guarantees that users can conveniently access their information for future visits, enhancing their overall user experience.

These user engagement features play an essential role in creating an interactive platform where users can engage, provide feedback, and communicate effectively. Such interaction not only enriches the user experience but also encourages visitors to actively participate in the community surrounding the Peanut Butter Blossoms recipe.

Personalization Options

Enhance your website's user engagement by incorporating personalized options such as commenting, replying, and sharing feedback on the Peanut Butter Blossoms recipe. This level of user interaction not only fosters a sense of community building but also encourages customization and feedback. By allowing users to share their thoughts, results, and experiences with the festive favorites, you create a more engaging and interactive user experience. Additionally, providing users with the option to save their data for future visits and encouraging them to tag @preppykitchen and use #preppykitchen when trying the recipe further enhances their engagement.

Personalization Options Description Benefits
Commenting Users can leave comments on the Peanut Butter Blossoms recipe, sharing their thoughts and experiences. Fosters community building and user engagement.
Replying Users can reply to comments and engage in discussions with other users about the recipe. Encourages active participation and interaction.
Feedback Sharing Users can share feedback on the recipe, providing valuable insights for improvement. Enhances user experience and customization.

Additional Information

clarifying specific details provided

You may find it interesting to know more about the history of the Peanut Butter Blossoms recipe and its cultural significance during the holidays.

  • The Peanut Butter Blossoms recipe's popularity is backed by IRI MULO data, making it a sought-after choice for holiday baking.
  • Copyright for this beloved recipe belongs to The J.M. Smucker Company, a reputable name in the food industry known for quality products.
  • These delightful cookies aren't only perfect for serving at holiday parties but also make excellent gifts due to their festive appeal.

Frequently Asked Questions

Why Are My Peanut Butter Blossoms Dry?

If your peanut butter blossoms are dry, it could be due to using too much flour, overbaking, using natural peanut butter that requires stirring, or not enough butter/shortening. Guarantee precise measurements and follow the recipe closely to maintain moisture.

Why Did My Peanut Butter Blossoms Go Flat?

When making peanut butter blossoms, going flat happens due to overmixing, too much flour, insufficient chilling, or low oven temperature. Remember to avoid these pitfalls. Preheat the oven properly and follow the recipe for perfect blossoms!

What Is America's Favorite Christmas Cookie?

America's favorite Christmas cookie is Peanut Butter Blossoms. Loved for their peanut butter-chocolate combo and nostalgic Hershey's Kiss center, these easy-to-make treats are a holiday staple at parties and gatherings. They're a must-have during the festive season.

Advertisement

What Is Baskin Robbins Peanut Butter Blossom?

You asked about Baskin Robbins Peanut Butter Blossom. It's a delectable seasonal ice cream flavor featuring creamy peanut butter ice cream with a ribbon of more peanut butter and chocolate cookie pieces. Indulge in this festive treat!

Conclusion

Indulge in the warm, gooey goodness of these peanut butter blossoms this holiday season. With the perfect blend of creamy peanut butter and rich chocolate, these cookies are sure to bring joy to your festivities.

Picture yourself surrounded by loved ones, sharing laughter and memories as you enjoy these delicious treats. Let the aroma of freshly baked cookies fill your home and create a cozy, festive atmosphere.

Happy baking and happy holidays!

Advertisement
Continue Reading

Recipes & Culinary Uses

Bite-Sized Treats: Best Peanut Butter Ball Recipe You'll Love!

Adore these heavenly peanut butter balls with a delectable mix of smooth peanut butter, powdered sugar, and vanilla—perfect for indulging in bite-sized bliss!

Published

on

By

delicious peanut butter balls

You'll adore these easy and heavenly peanut butter balls. Mix smooth peanut butter, powdered sugar, and vanilla extract for a delectable dough. Roll into small balls and chill. Dip in melted chocolate, then refrigerate to set. Enhance the flavor with rum extract, nuts, or crushed pretzels. Get creative with colorful sprinkles and different chocolate coatings. Use quality chocolate coating and adjust mix consistency. Store them in the fridge or freezer. Enjoy these mouthwatering treats alone or at gatherings. More tips and delightful variations await!

Key Takeaways

  • Creamy peanut butter, powdered sugar, and vanilla create a smooth dough.
  • Incorporate nuts, rum extract, or pretzels for flavor and texture variety.
  • Use quality chocolate coating like candy melts for best results.
  • Chill peanut butter balls before dipping for easier handling.
  • Store in the fridge or freezer for convenient snacking and serving.

Ingredients and Preparation

To create irresistible peanut butter balls, gather creamy peanut butter, powdered sugar, and vanilla extract as your key ingredients.

Begin by mixing the peanut butter, butter, sugar, and vanilla until you have a smooth dough. Roll this mixture into small balls and chill them before dipping them in melted chocolate.

The type of chocolate you use, such as dark or milk chocolate, will enhance the flavor of your peanut butter balls. After dipping, make sure to refrigerate the balls until the chocolate sets for a perfect finish.

This process guarantees that each bite-sized treat isn't only visually appealing but also bursting with delicious peanut butter and chocolate flavors.

Variations and Enhancements

creative modifications and improvements

You can elevate the flavor of your peanut butter balls by incorporating unique ingredients like chopped nuts or rum extract.

Experiment with different chocolate coatings such as white almond bark or dark chocolate candy melts for a varied taste experience.

Advertisement

Get creative by adding finishing touches like colorful sprinkles to make your peanut butter balls visually appealing.

Flavorful Ingredient Additions

Enhance the flavor of your peanut butter balls by incorporating unique ingredient variations and enhancements. While the classic combination of peanut butter, powdered sugar, and butter creates a delicious dough for your treats, you can take it up a notch by adding flavorful ingredient additions.

Consider mixing in crushed pretzels for a salty crunch that complements the sweetness of the peanut butter. Chopped nuts like almonds or pecans can also add a delightful texture and nutty taste to your chocolate-covered peanut butter balls.

For a burst of fruity flavor, try incorporating dried cranberries or raisins into the dough. These additions not only provide a contrast in texture but also introduce a hint of sweetness that pairs well with the creamy peanut butter.

Another option is to include a sprinkle of cinnamon or a dash of vanilla extract to elevate the overall taste profile of your peanut butter balls. Experiment with these flavorful ingredient additions to create a unique and delectable twist on the classic treat.

Advertisement

Chocolate Coating Options

Experiment with different types of chocolate coatings – dark, white, or milk chocolate – to suit your preferences and elevate the flavor of your peanut butter balls.

When considering the chocolate coating for your crunchy peanut butter treats, here are some options to enhance your culinary creation:

  1. Choose Candy Melts or Almond Bark: Opt for candy melts or almond bark for a smooth and firm chocolate coating that sets well on your peanut butter balls.
  2. Avoid Chocolate Chips: Steer clear of using chocolate chips for coating, as they may contain stabilizers that hinder smooth melting, affecting the overall texture.
  3. Add Colored Sprinkles: For a festive touch, sprinkle colored sprinkles on top of the chocolate coating before it sets to add a pop of color and extra crunch to your peanut butter balls.

Experimenting with different chocolate coatings and techniques can take your peanut butter balls to the next level, ensuring a delightful and indulgent treat for any occasion.

Creative Finishing Touches

To elevate the flavor profile of your peanut butter balls, consider incorporating creative finishing touches through various enhancements and unique variations.

You can enhance the texture by adding chopped nuts or crispy rice cereal to the peanut butter mixture, providing a delightful crunch with every bite.

Experiment with different flavors by using almond extract or rum extract instead of vanilla for a twist on the traditional taste.

Advertisement

For a festive touch, roll the balls in crushed graham crackers, sprinkles, or a sprinkle of sea salt to add a pop of flavor.

Drizzle white chocolate over the dark, semi-sweet, or milk chocolate coating for a visually appealing contrast that will impress your guests.

If you enjoy a crunchy element, try coating the balls in crushed pretzels or toasted coconut before the chocolate sets.

These creative enhancements will take your peanut butter balls to the next level, making them a standout treat at any gathering.

Tools and Tips

crafting with precision

Consider using a 1 tablespoon cookie scoop for consistent sizing when preparing your peanut butter balls. This tool will help guarantee all your treats are uniform in size, making for a neat presentation and even cooking.

Here are some additional tools and tips to enhance your peanut butter ball-making experience:

Advertisement
  1. Invest in Quality Chocolate Coating: Opt for candy melts or almond bark for a smooth and firm chocolate coating on your peanut butter balls. These coatings melt easily and provide a professional finish to your treats.
  2. Adjust Peanut Butter Mixture Consistency: If your peanut butter mixture is too sticky or too dry, adjust the consistency by adding more peanut butter or powdered sugar. This will help you achieve the perfect texture for shaping your balls.
  3. Refrigerate Before Dipping: Prior to dipping your peanut butter balls in chocolate, chill them in the refrigerator. This step will make the balls firmer, making them easier to handle and coat without falling apart.

Storage and Serving Suggestions

great suggestion for storage

For best freshness and presentation of your peanut butter balls, follow these storage and serving suggestions.

To keep your peanut butter balls tasting delicious, store them properly. You can store them in an airtight container in the fridge for up to 1 week or in the freezer for up to 2 months. When freezing, remember to thaw the frozen peanut butter balls before serving by bringing them to room temperature. To prevent them from sticking together, separate the layers of peanut butter balls with wax paper.

Here is a helpful table summarizing the storage and serving suggestions:

Storage Serving Frozen
Airtight container Display on festive tray Thaw before serving
Fridge – 1 week Pair with hot cocoa Bring to room temp
Freezer – 2 months Enjoy at holiday gatherings
Separate with wax paper

Additional Peanut Butter Desserts

peanut butter dessert recipes

Explore a variety of delectable peanut butter desserts to satisfy your sweet cravings.

  1. Peanut Butter Blossom Cookies: Indulge in the classic combination of peanut butter cookies topped with a chocolate kiss for a delightful treat.
  2. Peanut Butter Chocolate Mug Cake: Whip up this easy-to-make single-serving dessert that combines the rich flavors of peanut butter and chocolate in a mug for a quick fix.
  3. Peanut Butter Overload Cookies: For those who can't get enough peanut butter, these cookies are loaded with peanut butter chips, chocolate chips, and chopped peanuts for an explosion of flavor in every bite.

These additional peanut butter desserts offer a diverse selection to cater to your cravings.

Whether you're in the mood for a classic treat like Peanut Butter Blossom Cookies, a quick fix with Peanut Butter Chocolate Mug Cake, or a flavor-packed experience with Peanut Butter Overload Cookies, there's something for every peanut butter lover.

Enjoy these easy-to-make delights whenever you need a sweet pick-me-up!

Recipe Instructions and Nutritional Information

cooking guidance and facts

To create these delectable Peanut Butter Balls, start by blending peanut butter, butter, sugar, and vanilla to form a dough. Roll the mixture into small balls and place them on a baking sheet lined with parchment paper. Chill the peanut butter balls in the refrigerator for about 30 minutes until firm.

Once chilled, melt chocolate in a heatproof bowl over simmering water or in the microwave. Dip each chilled peanut butter ball into the melted chocolate, ensuring they're evenly coated. Place the coated balls back on the parchment paper and let the chocolate set.

Advertisement

Each serving of these delightful treats contains approximately 114 calories.

Store the finished peanut butter balls in the fridge for up to 2 weeks or freeze them for up to 3 months.

Enjoy these decadent bite-sized snacks whenever you crave a sweet and nutty indulgence.

Frequently Asked Questions

Can I Use Chunky Peanut Butter Instead of Creamy for This Recipe?

Yes, you can use chunky peanut butter instead of creamy for this recipe. It will add a delightful texture and extra crunch to your peanut butter balls. Enjoy experimenting with different variations!

How Long Do Chocolate Covered Peanut Butter Balls Stay Fresh?

Like a sweet memory, chocolate-covered peanut butter balls stay fresh for up to two weeks when stored in an airtight container in the fridge. Indulge in these delectable treats within that time frame for best taste.

Advertisement

Can I Freeze the Peanut Butter Balls for Later Enjoyment?

Yes, you can freeze the peanut butter balls for later enjoyment. Simply place them in an airtight container or freezer bag. When ready to indulge, let them thaw in the fridge for a few hours.

What Type of Chocolate Is Best for Coating the Peanut Butter Balls?

For coating the peanut butter balls, semi-sweet or milk chocolate works best. They provide a delicious contrast to the creamy peanut butter filling. Simply melt the chocolate, dip the balls, and enjoy the sweet treat!

Can I Add Chopped Nuts or Sprinkles to the Peanut Butter Balls for Extra Flavor?

You can definitely add chopped nuts or sprinkles to the peanut butter balls for extra flavor. It's a great way to customize your treats and add a delightful crunch or colorful touch to each bite.

Conclusion

Indulge in these irresistible peanut butter balls that are sure to satisfy your sweet tooth cravings.

With just a few simple ingredients and easy-to-follow instructions, you can enjoy these bite-sized treats in no time.

Advertisement

So go ahead, treat yourself to a little taste of heaven and experience the perfect combination of creamy peanut butter and rich chocolate.

You won't be able to resist coming back for more!

Continue Reading

Trending