Connect with us

Butter Basics

7 Easy Steps to Get Melted Butter Out of Clothes

Published

on

An image showcasing a vibrant, buttery stain spreading across a crisp white shirt

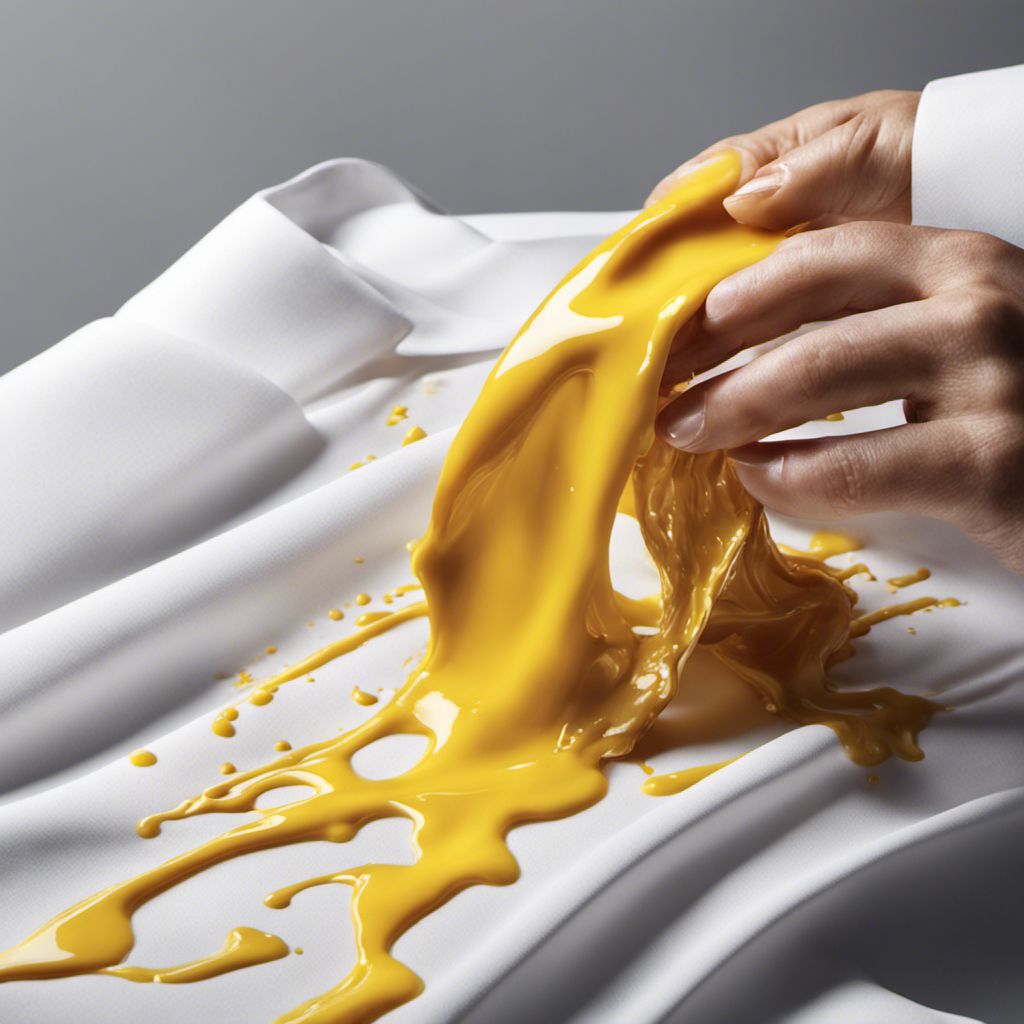
Did you know that every year, thousands of people accidentally end up getting melted butter on their clothes?

It can be a frustrating and stubborn stain to remove, but fear not, for I have the solution for you.

In this article, I will guide you through a step-by-step process to effectively get melted butter out of your garments.

With a few simple techniques and some common household items, you’ll be able to tackle this pesky stain and save your favorite clothes from being ruined.

Let’s get started!

Advertisement

Key Takeaways

  • Assess the fabric type and severity of the stain before attempting any removal method
  • Gently scrape off excess butter using a blunt knife or spoon
  • Apply dishwashing liquid or liquid detergent directly onto the stain and let it sit before rinsing
  • Consider using baking soda or white vinegar as alternative stain removal methods if the stain persists

Assess the Stain

Now, take a moment to assess the stain on your clothes. Butter stains can be quite stubborn, but with the right techniques, they can be removed effectively.

When assessing the stain, it is important to consider the fabric of the garment and the severity of the stain. For delicate fabrics, such as silk or wool, it is best to take the garment to a professional cleaner. However, for most fabrics, you can start by gently scraping off any excess butter using a blunt knife or spoon.

Then, apply a small amount of dishwashing liquid directly onto the stain and gently rub it in. Let it sit for a few minutes before rinsing with warm water. Repeat this process until the stain is completely gone.

To prevent butter stains on clothes, it is advisable to be cautious while eating and avoid spilling butter as much as possible.

Advertisement

Scrape Off Excess Butter

First, you’ll want to gently scrape off any excess butter from the fabric. Use a butter knife or spoon to carefully lift away as much of the melted butter as possible. Be cautious not to spread the stain further or rub it into the fabric.

Here are some tips to help you remove butter stains and prevent them in the future:

  • Blot the stain with a clean cloth or paper towel to absorb any remaining grease.
  • Pretreat the stain by applying a small amount of liquid detergent or dish soap directly to the affected area.
  • Gently rub the detergent into the stain using your fingertips or a soft brush.
  • Let the detergent sit on the stain for about 10 minutes to penetrate the fabric.
  • Rinse the stained area with cold water and repeat the process if necessary.

Blot the Stain

When it comes to removing greasy stains from fabric, it’s important to act quickly and effectively. Heat can actually damage the fabric further, so it’s crucial to avoid using hot water or applying heat to the stain.

If traditional stain removal methods aren’t working, there are alternative options to consider. One option is using dish soap to tackle the grease. Dish soap is designed to cut through grease and can be effective in removing greasy stains from fabric. Simply apply a small amount of dish soap to the stain, gently rub it in, and then rinse with cool water.

Advertisement

Another option is using baking soda. Baking soda is known for its ability to absorb odors and can also help absorb grease from fabric. To use baking soda, sprinkle a generous amount onto the greasy stain and let it sit for a few hours. Then, brush off the baking soda and launder the fabric as usual.

Removing Greasy Stains

To remove greasy stains from clothes, you can try using dish soap and warm water. This method is effective in breaking down the grease and lifting it from the fabric.

Simply mix a small amount of dish soap with warm water and apply it directly to the stain. Gently rub the fabric together to work the soap into the stain, then let it sit for a few minutes. Afterward, rinse the garment thoroughly with warm water.

If the stain persists, you can also try using baking soda or white vinegar as alternative methods. These household items can help to break down the grease and remove the stain.

To prevent future stains, consider applying a stain repellent spray to your clothes, especially on areas prone to greasy spills. Additionally, try to avoid placing greasy items directly on your clothing and promptly address any spills or stains that occur.

Advertisement

Heat Damages Fabric

Heat can cause damage to fabric if it is exposed for long periods of time. It is important to take preventive measures to protect our clothing from heat damage. Here are some fabric care tips to keep your clothes safe:

Heat Damage Prevention Fabric Care Tips
Avoid high heat settings when ironing Use a lower heat setting or steam
Do not leave clothes in direct sunlight Hang clothes in a shaded area
Avoid drying clothes on high heat Opt for air drying or low heat settings
Keep clothes away from hot surfaces Store them in a cool, dry place
Use heat-resistant fabrics for high-heat activities Look for materials like cotton or linen

Alternative Stain Removal

Using a mixture of vinegar and baking soda can be an effective alternative for removing stains from your clothes. I have personally found this method to be quite successful in tackling various types of stains, including grease, food, and even ink. Here are five reasons why you should consider using this natural stain remover:

  • It is environmentally friendly: Unlike harsh chemical cleaners, vinegar and baking soda are safe for the environment and do not release harmful toxins into the air or water.

  • It is cost-effective: Both vinegar and baking soda are inexpensive household items that can be easily found in your pantry, making this alternative cleaning method budget-friendly.

  • It is gentle on fabrics: Unlike some commercial stain removers, vinegar and baking soda are unlikely to damage or fade your clothes, making them a suitable option for delicate fabrics.

  • It is versatile: This stain removal method can be used on a wide range of fabrics, from cotton to silk, and is effective on both fresh and set-in stains.

  • It is easy to use: Simply mix equal parts vinegar and baking soda to form a paste, apply it to the stain, and let it sit for a few minutes before washing as usual.

Pretreat With Dish Soap

First, you’ll want to grab some dish soap and apply it directly to the melted butter stain on your clothes. Dish soap is known for its effectiveness in removing greasy stains, and it can work wonders on butter stains as well. The key is to choose a dish soap brand that is specifically designed to cut through grease and oil.

While there are many alternative dish soap brands available, some popular options include Dawn, Palmolive, and Seventh Generation. These brands are known for their powerful cleaning agents and ability to remove tough stains.

When applying the dish soap, make sure to gently rub it into the stain using a soft cloth or sponge. Allow it to sit for a few minutes before rinsing with cold water. Repeat the process if necessary until the butter stain is completely gone.

Advertisement

Use a Stain Remover Spray

To effectively remove a stain, you can try using a stain remover spray. It is a convenient and effective way to tackle tough stains on clothes. Here are some reasons why using a stain remover spray can be beneficial:

  • Quick and easy: Stain remover sprays are designed to be fast-acting and easy to use. Simply spray the stain, wait for a few minutes, and then wash the garment as usual.

  • Versatile: Stain remover sprays can be used on a variety of fabrics and stains, making them a versatile solution for different types of stains.

  • Targeted action: The spray nozzle allows for precise application, ensuring that the stain remover reaches the affected area directly.

  • Heat vs chemicals: Stain remover sprays often use a combination of heat and chemicals to break down and remove stains effectively.

  • DIY stain removers: Stain remover sprays can be easily made at home using ingredients like vinegar, hydrogen peroxide, or dish soap, providing a natural and cost-effective alternative.

Soak in Cold Water

When it comes to removing tough stains from clothing, there are a few key points to keep in mind.

First, pre-treating the stain with detergent can help break down the oils and proteins that cause the stain to set.

Next, using a stain remover specifically designed for the type of stain you’re dealing with can provide targeted cleaning power.

Finally, washing the garment with hot water can help to further dissolve and remove the stain, leaving your clothes looking fresh and clean.

Advertisement

Pre-Treat With Detergent

Before you start, make sure you have a detergent on hand to pre-treat the melted butter stain on your clothes. Pre-treating the stain is crucial in ensuring that it doesn’t set into the fabric and become more difficult to remove. Here are some alternatives to consider and common mistakes to avoid when pre-treating a melted butter stain:

  • Use a liquid laundry detergent: This type of detergent is effective in breaking down the oils in the butter stain.
  • Apply the detergent directly to the stain: Gently rub the detergent into the fabric to ensure maximum coverage.
  • Let it sit: Allow the detergent to penetrate the stain for at least 10-15 minutes before washing.
  • Avoid hot water: Hot water can cause the butter stain to set, so always use cold water when pre-treating.
  • Test for colorfastness: Before applying the detergent, test a small, hidden area of the fabric to make sure it doesn’t cause any color fading or damage.

Use Stain Remover

Using a stain remover is an effective way to treat the butter stain on your clothes. When butter melts and gets onto your clothes, it can leave a greasy and stubborn stain. The heat from melted butter can cause the stain to set in, making it even more difficult to remove.

That’s where a stain remover comes in handy. Stain removers contain powerful enzymes and surfactants that break down and lift the grease from the fabric fibers. To use a stain remover, simply apply it directly to the butter stain and gently rub it in. Let it sit for a few minutes to allow the product to penetrate the stain. Then, wash the garment as usual.

If you prefer alternative methods, you can try using dish soap or a mixture of baking soda and water to treat the stain. However, be mindful that these methods might not be as effective in removing the grease completely and may require additional steps.

Wash With Hot Water

Washing your clothes with hot water can help to remove stubborn grease stains. The heat from the water helps to break down the grease, making it easier to remove from the fabric. When dealing with melted butter stains, using hot water can be particularly effective.

Here are five reasons why hot water is better than cold water for removing grease stains:

Advertisement
  • Hot water helps to dissolve the grease, allowing it to be washed away more easily.
  • The heat from the water can help to loosen the grease from the fabric fibers.
  • Hot water can penetrate the fabric more effectively, reaching deep into the fibers to remove the grease.
  • The warmth of the water can also help to break down any residual oils or fats in the stain.
  • Using hot water in combination with a grease-fighting detergent can provide even better results in removing stubborn grease stains.

Apply a Laundry Detergent Paste

To remove melted butter from your clothes, you’ll need to apply a paste made from laundry detergent. This method is effective because the detergent helps to break down the grease and oil in the butter, allowing it to be easily removed from the fabric. When dealing with melted butter stains, it’s important to consider the temperature of the treatment. Heat can actually set the stain, making it more difficult to remove. Therefore, it is recommended to use cold water when treating butter stains. Additionally, dish soap can also be effective in removing butter stains. Its grease-fighting properties help to break down the butter and lift it from the fabric. However, it’s important to ensure that the dish soap is fully rinsed out to avoid any residue on the clothes.

Heat Treatment Cold Treatment
Can set the stain Helps to prevent the stain from setting
Makes it more difficult to remove Makes it easier to remove
Not recommended for butter stains Recommended for butter stains

Use a Stain Removal Stick

When treating stains, a stain removal stick can be a helpful tool to have on hand. It’s a portable and convenient way to tackle stubborn stains, including melted butter.

Here are five reasons why a stain removal stick is a must-have:

  • Easy application: Simply apply the stick directly to the stain and rub gently.

  • Targeted treatment: The stick’s formula is designed to penetrate the fabric and break down the stain.

  • Quick action: Stain removal sticks work fast, allowing you to treat the stain immediately.

  • Versatility: Stain removal sticks can be used on a variety of fabrics, including delicate ones.

  • Convenient for travel: The compact size of the stick makes it perfect for on-the-go stain emergencies.

Using a stain removal stick is a safe and effective method to remove melted butter stains from clothes without causing heat or fabric damage. It’s a reliable alternative to traditional stain removal methods.

Try a Vinegar Solution

When it comes to tackling stubborn stains like butter, two common household remedies often come to mind: vinegar and butter.

In this discussion, I will be comparing the effectiveness of vinegar in removing butter stains from clothes. Vinegar has long been praised for its versatile cleaning properties, and many people swear by it as a natural stain remover.

Advertisement

But does it really work in the battle against butter stains? Let’s dive into the details and find out.

Vinegar Vs. Butter Stains

If you’re dealing with butter stains on your clothes, vinegar can be a great alternative to remove them. Vinegar has many benefits when it comes to being a butter stain remover.

Here are some reasons why vinegar is an effective solution:

  • Vinegar is a natural and non-toxic cleaning agent.
  • It helps break down the grease and oils in butter stains.
  • Vinegar is readily available and affordable.
  • It can be used on a variety of fabrics without causing damage.
  • Vinegar also helps to neutralize any odors left behind by the butter stain.

To use vinegar as a butter stain remover, simply mix equal parts vinegar and water, then apply the solution to the stained area. Gently blot the stain with a clean cloth until it lifts. Repeat if necessary and then wash the garment as usual.

Vinegar is a versatile and reliable option for tackling those stubborn butter stains on your clothes.

Effectiveness of Vinegar

Vinegar is an effective solution for removing butter stains due to its ability to break down grease and oils. When butter stains your favorite shirt, time is of the essence. Acting quickly is crucial to prevent the stain from setting.

Advertisement

Blotting up any excess butter with a paper towel is the first step. Then, pour a small amount of vinegar directly onto the stain and gently rub it in with a clean cloth. Let it sit for a few minutes to allow the vinegar to penetrate the fabric and break down the oils.

Afterward, wash the garment as usual, and the butter stain should be gone. If you don’t have vinegar on hand, lemon juice or dish soap can be used as alternatives. However, vinegar is the preferred choice due to its various benefits, such as being natural, cost-effective, and readily available in most households.

Wash in the Hottest Water Safe for the Fabric

To remove melted butter from your clothes, simply wash them in the hottest water that is safe for the fabric. Heat is essential in breaking down the grease and oil molecules present in the butter, allowing them to be easily washed away.

Cold water may not be as effective, as it does not have the same ability to dissolve and remove the butter stains. Additionally, using dish soap can greatly enhance the cleaning process. The dish soap contains surfactants that help break down the butter and lift it from the fabric fibers.

When washing the clothes, make sure to pretreat the stains by applying a small amount of dish soap directly to the affected area and gently rubbing it in. Then, add more dish soap to the washing machine to boost its cleaning power.

Advertisement

Air Dry and Check for Residual Stain

After washing, you should air dry your clothes and then check for any residual stains. Air drying has many benefits when it comes to preserving the quality and longevity of your garments. Not only does it save energy and money, but it also helps prevent shrinkage and color fading. By allowing your clothes to naturally dry, you avoid subjecting them to the harsh heat of a dryer, which can be damaging to delicate fabrics. Additionally, air drying reduces the risk of residual stains setting in. When you air dry, you have the opportunity to closely inspect your clothes for any remaining stains that may not have been completely removed during the washing process. This allows you to treat the stains promptly before they become more difficult to remove.

Benefits of Air Drying Residual Stain Prevention
Saves energy and money Allows for closer inspection
Prevents shrinkage and color fading Promotes prompt stain treatment
Gentle on delicate fabrics Avoids setting in of residual stains

Frequently Asked Questions

Can I Use Hot Water Instead of Cold Water to Soak the Stained Clothes?

Yes, you can use hot water to soak stained clothes, but it may set the butter stain. It’s best to use cold water first to remove excess butter, then treat the stain with alternative methods like dish soap or a stain remover.

What Types of Fabrics Are Safe to Use a Stain Remover Spray On?

When it comes to stain remover sprays, it’s important to consider the fabric type. Different fabrics have different sensitivities, so check the label and opt for sprays that are safe for your garment.

How Long Should I Let the Dish Soap Pretreatment Sit Before Washing the Clothes?

I usually let the dish soap pre treatment sit for about 30 minutes before washing the clothes. It’s important to give it enough time to penetrate the stain and loosen the butter. If you’re looking for alternative pre treatment methods, vinegar or baking soda can also be effective.

Will Using a Stain Removal Stick on Delicate Fabrics Cause Damage?

Using stain removal sticks on different types of stains, such as butter, can be effective. However, it’s important to be cautious when using them on delicate fabrics as they may cause damage. Alternatively, vinegar can be an effective alternative to stain remover sticks.

Advertisement

Can I Use a Hairdryer to Speed up the Drying Process After Removing the Stain?

Using a hairdryer can be effective in speeding up the drying process after removing a stain. However, there are alternative methods like air drying or using a fan that can also be used.

Conclusion

So there you have it – a step-by-step guide on how to get melted butter out of clothes. By following these methods, you can effectively remove the stain and restore your clothing to its former glory.

Now, you might be thinking, ‘But what if these methods don’t work?’ Well, it’s important to remember that not all stains are the same, and some may require more than one attempt to fully eliminate. Don’t get discouraged if the stain persists, just keep trying different techniques until you find the one that works for you.

With a little patience and persistence, you’ll be able to conquer any butter stain that comes your way.

Advertisement
Continue Reading
Advertisement

Butter Basics

What if You Buttered Up Your Life with “Butter”?

Published

on

By

An image of a slice of toast with melted butter, oozing with richness and flavor

Have you thought about the idea of making your own delicious and nutritious butter at home? Imagine being able to create that rich, creamy delicacy right in your own kitchen!

In this article, we will delve into the world of butter, exploring its various types and culinary uses. We will also uncover the science behind making perfect butter at home and dive into the fascinating history of this beloved ingredient.

Get ready to embark on a buttery adventure that will leave you craving for more.

Key Takeaways

  • Grass-fed butter is rich in essential vitamins and fatty acids, promoting healthy skin, bones, and immune system.
  • Homemade butter allows for control over ingredients, avoiding unhealthy additives or preservatives.
  • Flavored butter options and vegan alternatives offer diverse culinary exploration and cater to different dietary preferences.
  • Proper temperature during the butter-making process is crucial for achieving the desired consistency and yield.

The Health Benefits of Homemade Butter

If you make your own butter, you’ll enjoy the health benefits that come with it. One of the main benefits of grass-fed butter is its high nutrient content. Grass-fed cows produce milk that is rich in vitamins A, D, E, and K. These vitamins are essential for maintaining healthy skin, strong bones, and a properly functioning immune system.

Advertisement

Grass-fed butter also contains a healthy balance of omega-3 and omega-6 fatty acids, which are important for brain health and reducing inflammation in the body.

Additionally, making your own butter at home allows you to control the ingredients, giving you the freedom to create flavored butter using herbs, spices, or even fruits. This allows you to add extra flavor and nutrients to your dishes without relying on store-bought options that may contain unhealthy additives or preservatives.

Exploring Different Types of Butter

There are various types of butter available for exploration. When it comes to flavored butter, the options are endless. From savory garlic butter to sweet cinnamon butter, these variations add a burst of flavor to any dish.

Additionally, for those following a vegan lifestyle, there are plenty of vegan butter alternatives to choose from. Made from plant-based oils like coconut or olive, these spreads provide a similar creamy texture and taste. They are perfect for baking or spreading on toast.

Exploring different types of butter can be a fun and delicious journey, allowing you to elevate your meals and cater to different dietary preferences. So go ahead and indulge in the world of flavored butter and vegan alternatives to discover new and exciting flavors.

Advertisement

Butter as a Culinary Ingredient: Tips and Tricks

To enhance your culinary skills, try incorporating butter into your recipes using these helpful tips and tricks.

Butter is not only a rich and creamy ingredient, but it can also be used as a vegan alternative. For those who follow a plant-based diet, there are several substitutes available such as vegan butter or margarine made from plant oils. These alternatives can be used in baking, cooking, or spreading on toast.

Additionally, using flavored butter can elevate your dishes to a whole new level. Get creative with flavor combinations like garlic and herb butter for roasted vegetables or lemon and dill butter for grilled fish. The possibilities are endless, and flavored butter can add depth and complexity to your favorite recipes.

Advertisement

The Science Behind Making Perfect Butter at Home

Creating homemade butter is a fascinating process that involves churning cream until it separates into butter and buttermilk. The chemistry of churning butter is a delicate balance of fat and water molecules. Temperature plays a crucial role in butter making.

Here are some key points to consider:

  • Cream should be at a slightly warmer temperature, around 50-55°F, to ensure proper separation.
  • Churning at too low a temperature can result in a longer process and less yield.
  • Conversely, churning at too high a temperature can cause the butter to become greasy and not hold its shape well.
  • The ideal temperature range allows for the fat globules to coalesce and form a solid mass.
  • The process can be accelerated by using colder cream or a colder churning environment.

Understanding the chemistry and temperature requirements of butter making ensures a successful outcome.

Now, let’s uncover the history of butter: from ancient times to today.

Uncovering the History of Butter: From Ancient Times to Today

Advertisement

Let’s delve into the fascinating history of butter, from ancient times to today.

Butter has played a significant role in the cultural traditions of various regions around the world. In Europe, for example, butter has been a staple in cooking and baking for centuries, symbolizing richness and indulgence.

In India, ghee, a form of clarified butter, holds great cultural and religious significance and is used in traditional ceremonies and rituals.

The environmental impact of butter production, however, is a growing concern. The dairy industry contributes to greenhouse gas emissions and deforestation, as well as water pollution from runoff.

Sustainable practices, such as organic farming and reducing food waste, are being implemented to mitigate these effects.

Advertisement

It is crucial to balance the cultural importance of butter with sustainable production methods for a better future.

Frequently Asked Questions

How Many Calories Are in a Serving of Homemade Butter?

A serving of homemade butter typically contains around 100-120 calories. It is important to note that butter is high in saturated fat and should be consumed in moderation. However, it does provide some nutritional benefits, such as being a good source of vitamin A.

What Is the Shelf Life of Homemade Butter?

The shelf life of homemade butter varies depending on storage methods. It can last up to two weeks in the refrigerator and up to six months in the freezer. Proper storage is crucial to maintain its freshness.

Can Homemade Butter Be Used as a Substitute for Margarine in Baking Recipes?

If I were to use homemade butter as a substitute for margarine in baking, I would ensure it’s properly chilled and the moisture content is controlled. This way, the butter can provide a richer flavor and better texture to the baked goods.

Are There Any Potential Allergens in Homemade Butter?

There are potential health risks associated with homemade butter, including the possibility of allergens. It’s important to consider the source of ingredients and proper hygiene practices. Store-bought butter may offer more safety assurances.

Advertisement

Can Homemade Butter Be Frozen for Long-Term Storage?

Yes, you can freeze homemade butter for long-term storage. It’s important to wrap it tightly to prevent freezer burn. There are many homemade butter recipes available online that can guide you through the process.

Conclusion

As I churned the cream, a sense of satisfaction washed over me. The process of making homemade butter had not only given me a delicious spread for my toast, but also a deeper understanding of its health benefits and culinary versatility.

Each rich, golden pat symbolized the nourishment and creativity that butter brings to our lives. Delving into its history, I saw how this humble ingredient has stood the test of time, evolving with us.

So, next time you see a stick of butter, remember the power it holds and the possibilities it offers.

Advertisement
Continue Reading

Butter Basics

What Happens if You Use Expired Shea Butter on Your Skin?

Published

on

By

An image of a cracked, discolored jar of expired shea butter, oozing with a rancid odor

As someone who is passionate about taking care of my skin, I have learned the importance of using high-quality products. But what happens if we accidentally use expired shea butter? Let me tell you, the results are not good.

Signs of expired shea butter include changes in texture, loss of nutritional benefits, and potential skin irritation. Plus, there’s a risk of mold or bacteria growth.

In this article, I’ll delve into the potential dangers and safety concerns of using expired shea butter, so you can make informed decisions for your skincare routine.

Key Takeaways

  • Using expired shea butter can lead to reduced skin softness and decreased skin elasticity.
  • Expired shea butter may cause dry and rough skin, as well as a lack of natural glow.
  • There is a potential risk of mold or bacteria growth on expired shea butter, which can result in skin irritations, infections, and allergic reactions.
  • To ensure safety and effectiveness, it is important to check the expiration date, store shea butter properly, and avoid using expired products to prevent bacterial or fungal contamination.

Signs of Expired Shea Butter

If you’re wondering how to tell if your shea butter has expired, you can look for changes in texture and smell. Shea butter typically has a shelf life of about two years, but it can start to deteriorate over time.

Advertisement

When shea butter expires, it may become grainy or lumpy instead of smooth and creamy. The texture can be a clear indicator that the shea butter is past its prime. Additionally, the smell of expired shea butter can change, becoming rancid or unpleasant.

It’s important to note that using expired shea butter may not be harmful to your skin, but it may not provide the same beneficial effects as fresh shea butter.

Now, let’s dive into the changes in texture and consistency that can occur when shea butter expires.

Changes in Texture and Consistency

To change the texture and consistency of your expired shea butter, simply store it in a warm environment. When shea butter expires, it can become dry, hard, or grainy. However, by subjecting it to heat, you can bring it back to its original smoothness.

Here are some changes you may notice in the appearance of expired shea butter:

Advertisement
  • Loss of its creamy consistency
  • Formation of lumps or clumps
  • Development of a rancid smell

It’s important to note that expired shea butter may not be as effective as fresh shea butter in providing the same nourishing benefits for your skin. Additionally, the shelf life of shea butter can vary depending on how it is stored. Properly stored shea butter can last up to two years, but exposure to air, heat, and light can shorten its lifespan.

Loss of Nutritional Benefits

When shea butter expires, it loses its nutritional benefits and may not provide the same nourishing effects for your skin. As the expiration date approaches, the effectiveness of shea butter decreases, leading to weakened nourishing properties. The natural vitamins and fatty acids that make shea butter so beneficial gradually break down over time, resulting in a diminished ability to moisturize and protect the skin.

The expiration process causes the shea butter to become less potent, reducing its ability to soothe dryness, heal damaged skin, and improve elasticity. Using expired shea butter may not only be less effective but could also potentially cause skin irritations or allergic reactions.

To ensure maximum benefits, it’s essential to check the expiration date and replace your shea butter when needed.

Advertisement

Potential Skin Irritation

Allergic reactions are possible when using expired shea butter, as the quality and potency of the ingredients may have degraded over time. It is important to note that everyone’s skin reacts differently, so what may cause an allergic reaction in one person may not affect another.

Additionally, expired shea butter can also lead to increased bacterial growth, which can further irritate the skin and potentially cause infections.

Allergic Reactions Possible

Using expired shea butter can potentially cause allergic reactions. It is important to be aware of the potential side effects that can occur when using expired skincare products.

Here are some key points to consider:

  • Skin irritation: Expired shea butter may contain harmful bacteria or mold, which can irritate the skin and cause redness, itching, or rashes.

  • Decreased effectiveness: Over time, shea butter can lose its beneficial properties, such as its moisturizing and healing abilities. Using expired shea butter may not provide the desired results.

  • Risk of infection: Expired shea butter can harbor increased bacterial growth, which can lead to skin infections or other complications.

Therefore, it is crucial to always check the expiration dates on skincare products and avoid using expired shea butter to prevent potential allergic reactions and other negative effects on the skin.

Advertisement

Increased Bacterial Growth

The risk of infection can significantly increase due to the increased bacterial growth in expired shea butter. When shea butter expires, it becomes more susceptible to increased microbial contamination. Bacteria can thrive in expired shea butter, leading to a higher chance of contamination when it is applied to the skin. This increased bacterial growth can pose a serious risk to our health.

Additionally, expired shea butter may also have diminished efficacy. Over time, the beneficial properties of shea butter, such as its moisturizing and healing abilities, can deteriorate, making it less effective in providing the desired results.

It is important to check the expiration date of shea butter before using it to ensure its safety and efficacy.

Decreased Effectiveness for Moisturizing

When shea butter expires, its hydration properties become weakened, resulting in a decreased effectiveness for moisturizing the skin.

Additionally, the nourishing benefits of expired shea butter diminish, causing a loss in its ability to provide essential nutrients to the skin.

Advertisement

As a result, the skin may experience reduced softness and a lack of moisture retention, leading to potential dryness and discomfort.

Weakened Hydration Properties

Expired shea butter may not have its full hydration properties intact. When shea butter expires, it can lead to weakened hydration properties, resulting in decreased moisturizing effectiveness. This means that using expired shea butter on your skin may not provide the same level of hydration and moisture as fresh shea butter.

Here are some emotional responses that may arise from using expired shea butter:

  • Frustration: Feeling disappointed that the shea butter you were counting on for hydration is not as effective as expected.
  • Discomfort: Experiencing dryness and roughness on your skin due to the weakened hydration properties.
  • Wasted effort: Realizing that you have been using expired shea butter and the time and money spent on it have gone to waste.

Using expired shea butter not only results in weakened hydration properties but also leads to a loss of nourishing benefits for your skin.

Loss of Nourishing Benefits

Using expired shea butter can result in a loss of the nourishing benefits it provides to your skin. Shea butter is known for its moisturizing and healing properties, but these qualities diminish over time. The expiration date on the packaging indicates the period during which the shea butter is at its best.

Once it has expired, the butter may start to oxidize and degrade, leading to a decrease in its effectiveness. The nourishing vitamins and fatty acids present in shea butter may become less potent, making it less beneficial for your skin. It’s important to check the expiration date and use fresh shea butter to ensure you are receiving all the nourishing benefits it has to offer.

Advertisement

Reduced Skin Softness

When shea butter expires, not only does it lose its nourishing benefits, but it can also lead to reduced skin softness. Expired shea butter may not provide the same level of hydration and moisture to the skin as fresh shea butter does. This can result in several negative effects on the skin, including reduced skin elasticity and decreased moisturization.

Using expired shea butter can leave your skin feeling dry, rough, and lacking the natural glow it once had. The decreased moisturization can also lead to the development of fine lines and wrinkles, making you appear older than you actually are. To ensure optimal skin softness and health, it is important to use fresh shea butter that hasn’t expired.

Potential Mold or Bacteria Growth

If shea butter is expired, there’s a chance that mold or bacteria could grow on it. Using expired shea butter can pose potential health risks as these microorganisms can cause skin irritations, infections, or allergic reactions. It is crucial to properly store shea butter to maintain its freshness and extend its shelf life. Here are some recommended storage methods to prevent the growth of mold or bacteria:

Storage Method Description
Keep it sealed Ensure the shea butter container is tightly sealed after each use to prevent air and moisture from entering, creating an environment conducive to bacterial growth.
Store in a cool place Shea butter should be stored in a cool, dry place away from direct sunlight and heat sources. Elevated temperatures can accelerate the growth of bacteria and mold.
Avoid contamination Do not touch the shea butter directly with your fingers. Instead, use a clean, dry spoon or spatula to scoop out the desired amount to minimize the risk of introducing bacteria.

Safety Concerns and Allergic Reactions

To avoid potential health risks and allergic reactions, it’s important to check the expiration date of your shea butter and store it properly. Expired shea butter can lead to various skin reactions, such as rashes, itching, and redness. The shelf life of shea butter can vary depending on the processing and storage conditions.

Here are a few key points to keep in mind:

Advertisement
  • Expired shea butter may lose its effectiveness and may not provide the desired benefits for your skin.
  • Using expired shea butter can increase the risk of bacterial or fungal contamination, which can lead to infections.
  • Allergic reactions can occur when using expired shea butter, especially if you have sensitive skin or existing allergies.

To ensure your safety and get the most out of your shea butter, always check the expiration date and store it in a cool, dry place away from direct sunlight.

Frequently Asked Questions

Can Expired Shea Butter Be Harmful if Used on the Skin?

Expired shea butter can be harmful if used on the skin. It may lose its effectiveness for hair care and can cause potential side effects on sensitive skin. It’s important to check the expiration date and avoid using expired products.

How Long Does Shea Butter Usually Last Before It Expires?

Shea butter typically lasts up to two years before it expires. To ensure its longevity, store it in a cool, dry place away from direct sunlight. Signs of expiration include a rancid smell and a change in texture.

Can Using Expired Shea Butter Cause Skin Allergies or Irritation?

Using expired shea butter can potentially cause skin allergies or irritation. It’s important to note that expired skincare products may lose their effectiveness and could harbor harmful bacteria, posing risks to skin health.

Can Expired Shea Butter Still Be Effective for Treating Dry Skin?

Using expired shea butter on hair may not provide the same benefits as fresh shea butter. However, it can still be effective for treating dry skin, including eczema.

Is It Safe to Use Shea Butter That Has Mold or Bacteria Growth on It?

Using shea butter with mold or bacteria growth can pose potential health risks. To prevent this, store shea butter in a clean, airtight container in a cool, dry place. Always check for expiration dates to ensure safety.

Advertisement

Conclusion

In conclusion, using expired shea butter can have negative effects on your skin and overall health. The signs of expired shea butter include changes in texture and consistency, as well as a loss of nutritional benefits. It may also cause potential skin irritation and decrease its effectiveness for moisturizing.

Furthermore, there is a risk of mold or bacteria growth, which can be harmful to your skin. To ensure safety and avoid allergic reactions, it’s important to check the expiration date and use fresh shea butter.

So remember, don’t let your skin suffer, and always use fresh shea butter to keep it nourished and healthy.

Continue Reading

Butter Basics

What Does Indian Butter Chicken Taste Like: A Flavorful Experience

Published

on

By

An image that showcases the rich, creamy texture of Indian Butter Chicken, with tender chunks of marinated chicken, immersed in a vibrant orange sauce, infused with a medley of aromatic spices

Curious about trying Indian butter chicken? Get ready for a burst of delicious flavors!

This mouthwatering dish is a symphony of traditional Indian flavors, packed with a creamy and rich sauce that will make your taste buds dance with delight.

The combination of aromatic spices creates a perfect balance of sweet and savory, while the tender and juicy chicken takes it to a whole new level.

Get ready to be transported to a world of delectable aromas and flavors that will leave you craving more.

Key Takeaways

  • Indian butter chicken embodies the essence of Indian cuisine, combining spices and ingredients from diverse regional variations.
  • The creamy and rich sauce in Indian butter chicken creates a symphony of flavors that complement the chicken, leaving you completely satisfied.
  • The flavorful spice blend in Indian butter chicken, including spices like cumin, coriander, turmeric, and garam masala, creates a harmonious balance of heat, sweetness, and creaminess.
  • The succulent and tender chicken in Indian butter chicken is infused with flavor through the marinade and cooking techniques, enhancing the overall taste of the dish.

Traditional Indian Flavors

Advertisement

If you’re craving traditional Indian flavors, you’ll love the rich and aromatic taste of Indian butter chicken. This dish perfectly embodies the essence of Indian cuisine with its unique blend of spices and ingredients.

Indian butter chicken has been influenced by the diverse regional variations found across India, resulting in a dish that is both familiar and distinct. From the fiery flavors of North Indian cuisine to the subtle and delicate tastes of South Indian cuisine, every bite of butter chicken is a journey through the diverse culinary landscape of India.

The combination of tender chicken, marinated in a flavorful blend of spices and cooked in a creamy and rich sauce, creates a harmonious balance of flavors that will leave you craving for more.

Creamy and Rich Sauce

Get ready to indulge in a culinary experience like no other with this discussion on the flavorful spice blend and succulent chicken pieces that make up this mouthwatering dish.

The aroma of the spices will instantly transport you to the bustling streets of India, while the tender chicken pieces will melt in your mouth, leaving you craving for more.

Advertisement

Each bite is a symphony of flavors, with the spices perfectly complementing the juicy chicken, creating a harmonious blend that will leave you completely satisfied.

Flavorful Spice Blend

You’ll love the flavorful spice blend in Indian butter chicken. This popular Indian dish is known for its aromatic and rich taste, thanks to the spice-infused marinade.

The combination of spices like cumin, coriander, turmeric, and garam masala creates a symphony of flavors that will tantalize your taste buds. The marinade not only adds depth to the chicken but also helps to tenderize it, resulting in succulent and juicy pieces of meat.

As the chicken cooks in the creamy and buttery tomato sauce, the flavors meld together, creating a harmonious balance of heat, sweetness, and creaminess. The spices add a subtle kick that is not overpowering but still provides a delightful warmth.

Get ready to savor the explosion of flavors in every bite as the succulent chicken pieces are coated in the fragrant and spiced sauce.

Advertisement

Succulent Chicken Pieces

The succulent chicken pieces become incredibly tender as they cook in the creamy tomato sauce. The juicy marinade penetrates the meat, infusing it with a burst of flavor. The chicken takes on a rich, savory taste that is enhanced by the spices and herbs in the marinade.

The cooking techniques used in Indian butter chicken are essential in achieving the perfect texture and taste. The chicken is first marinated in a mixture of yogurt, lemon juice, and various spices for several hours. This allows the flavors to develop and tenderize the meat.

Then, the chicken is cooked in a buttery tomato sauce, allowing it to absorb the creamy goodness. The result is a dish that is succulent and full of flavor, with the chicken practically melting in your mouth.

Mouthwatering Spices

Advertisement

Experience the explosion of flavors in each bite as the mouthwatering spices in Indian butter chicken tantalize your taste buds. Indian butter chicken is known for its sensational flavor combination and tantalizing aroma that will leave you craving for more. The rich and creamy tomato-based sauce is infused with a blend of aromatic spices, creating a harmonious balance of heat and tanginess. The use of spices like cumin, coriander, turmeric, and garam masala adds depth and complexity to the dish. The tender chicken pieces are marinated in a yogurt-based marinade, which helps to tenderize the meat and enhance the flavors. Each bite is a burst of flavors, with the spices dancing on your palate and leaving a lingering warmth. It is a culinary experience that is truly unforgettable.

Flavor Description
Spicy The spices in Indian butter chicken add a kick of heat, creating a satisfying spicy flavor.
Tangy The tomato-based sauce provides a tangy and slightly acidic taste that balances out the spices.
Creamy The richness of the creamy sauce adds a smooth and velvety texture to the dish.

Perfect Balance of Sweet and Savory

Now that we’ve explored the mouthwatering spices that make up Indian butter chicken, let’s dive into its perfect balance of sweet and savory flavors. When you take that first bite, you’ll be greeted with a symphony of tastes that will leave you craving for more.

The sweet and tangy notes dance on your tongue, creating a delightful explosion of flavors. The complex flavor profile of Indian butter chicken is a result of the carefully selected spices, such as garam masala, fenugreek leaves, and yogurt, which all come together to create a harmonious blend.

The sweetness comes from the caramelized onions and the richness of the cream, while the tanginess is provided by the tomato-based gravy. This combination creates a dish that is both comforting and exciting, making Indian butter chicken a true culinary masterpiece.

Tender and Juicy Chicken

When you take that first bite, you’ll be amazed by how tender and juicy the chicken in Indian butter chicken is. The succulent pieces of chicken are perfectly cooked, with a melt-in-your-mouth texture that is truly satisfying.

Advertisement

The flavors seep into every crevice of the meat, creating a taste explosion in your mouth. The chicken is marinated in a blend of aromatic spices, yogurt, and lemon juice, which not only tenderizes the meat but also infuses it with a myriad of delicious flavors.

As you chew, you can taste the subtle hints of cumin, coriander, and garam masala, along with the rich creaminess of the buttery tomato sauce. The combination of tender chicken and juicy flavors is what makes Indian butter chicken a true culinary delight.

Aromatic and Fragrant Dish

When it comes to Indian butter chicken, you’re in for a flavor explosion. The bold flavors and spices used in this dish will tantalize your taste buds and leave you craving for more.

The creamy tomato-based sauce adds a luscious and rich element to the dish, perfectly complementing the succulent and tender chicken.

Trust me, once you try this dish, you won’t be able to get enough of its delectable combination of flavors and textures.

Advertisement

Bold Flavors and Spices

Bold flavors and spices are what give Indian butter chicken its distinct taste. This classic dish is known for its explosion of flavors that will tantalize your taste buds. The combination of traditional spices like cumin, coriander, and garam masala creates a rich and aromatic profile that is truly unforgettable. The use of these bold flavors elevates the dish to a whole new level, making it a favorite among Indian food enthusiasts. The table below highlights some of the key spices used in Indian butter chicken:

Spice Flavor Profile
Cumin Earthy and nutty
Coriander Citrusy and floral
Garam Masala Warm and pungent

These spices work harmoniously together, creating a symphony of flavors that will make your taste buds dance. As you indulge in the bold flavors of Indian butter chicken, you’ll soon discover why it has become a beloved dish worldwide. And while the spices play a crucial role in its taste, it’s the creamy tomato-based sauce that takes this dish to the next level. [Transition to subsequent section: ‘creamy tomato-based sauce’]

Creamy Tomato-Based Sauce

The creamy tomato-based sauce in Indian butter chicken is what adds a luscious and velvety texture to the dish. This sauce is made by simmering tomatoes, onions, garlic, ginger, and a blend of aromatic spices such as cumin, coriander, and turmeric. The result is a rich and flavorful sauce that coats the tender pieces of chicken, infusing them with a burst of Indian spices.

The creaminess comes from the addition of butter and cream, which adds a luxurious and indulgent touch to the dish. The combination of the tangy tomatoes, aromatic spices, and creamy texture creates a harmonious balance of flavors.

Indian butter chicken is a beloved dish in Indian cuisine, known for its rich, comforting, and satisfying taste.

Advertisement

Succulent, Tender Chicken

The succulent, tender chicken in this dish is cooked to perfection, resulting in a melt-in-your-mouth texture that is incredibly satisfying.

The marinated chicken is packed with flavor, infusing every bite with a burst of aromatic spices.

The juicy meat is so tender that it practically falls off the bone, making it a delight to eat.

The marinade adds an extra layer of richness, ensuring that each piece of chicken is well-seasoned and packed with deliciousness.

The cooking process seals in the moisture, resulting in a juicy and succulent texture that is hard to resist.

Advertisement

Whether you’re a fan of chicken or not, this dish will captivate your taste buds and leave you craving for more.

Conclusion

So, now you know what Indian butter chicken tastes like! It’s a culinary delight that combines the traditional flavors of India with a creamy and rich sauce. The mouthwatering spices create a perfect balance of sweet and savory, making every bite a treat for your taste buds.

The tender and juicy chicken adds a satisfying texture to the dish. And let’s not forget about the aromatic and fragrant aroma that fills the air when this dish is being prepared. In fact, did you know that butter chicken is one of the most popular Indian dishes worldwide? It’s no surprise considering its irresistible flavors and delightful combination of ingredients.

So why not give it a try and experience the magic of Indian butter chicken for yourself?

Advertisement
Continue Reading

Trending