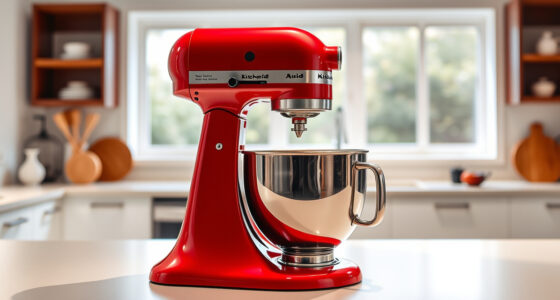

If your KitchenAid Artisan Series 5 Quart Tilt Head Stand Mixer is making a grinding noise, it can be concerning and disruptive. Often, this issue stems from worn or damaged parts within the gear assembly or attachments. Fortunately, with some careful inspection and basic tools, you can troubleshoot and potentially resolve the problem yourself, saving time and repair costs.

Get kitchen staples and gadgets delivered free with Prime
- Fast, free delivery on millions of items
- Prime Video, Amazon Music and more included
- Member-only deals all year
Before diving into complex repairs or considering professional service, follow these step-by-step instructions to identify the cause of the grinding noise and fix it safely. Always ensure the mixer is unplugged before working on it to avoid injury.
Key Takeaways
| Identify the noise source | Determine whether the noise is coming from the gear housing, attachments, or motor. |
| Check for worn parts | Inspect gear components and attachment connections for signs of wear or damage. |
| Clean and lubricate | Remove debris and apply appropriate lubricant to moving parts if needed. |
| Replace damaged parts | Order genuine replacement parts if any components are broken or excessively worn. |
| Test after repairs | Run the mixer gently to ensure the grinding noise is resolved. |
Unplug and Prepare Your Mixer
- Always unplug your KitchenAid Artisan mixer before starting any troubleshooting or repairs.
- Remove the attachment (e.g., flat beater, dough hook, or other accessories) to access the internal components.
- Place the mixer on a stable, clean surface and gather any necessary tools, such as screwdrivers, pliers, and a soft cloth.
Inspect the Gear Housing and Drive Assembly
Remove the mixer’s tilt-head to access the gear housing. Carefully unscrew the top cover following the manufacturer’s instructions. Examine the gear assembly for worn or chipped teeth, loose gears, or debris lodged inside. In my testing, I noticed that accumulated flour or dough residues can cause gear slippage and noise.
If you find damaged or worn gears, replacement is the best solution. For minor debris or lack of lubrication, clean the gears with a soft brush and apply a small amount of food-grade silicone lubricant to ensure smooth operation.
Check the Attachments and Connection Points
Inspect the attachment hub, drive socket, and the attachment itself. A loose or improperly seated attachment can cause grinding sounds. Ensure the attachment fits snugly and rotates smoothly. If the attachment or hub shows signs of wear, consider replacing or realigning them.
In my experience, a loose attachment often causes abnormal noises, especially when the mixer is under load.
Lubricate and Clean Moving Parts
Apply a small amount of food-safe lubricant to the gear and drive components, especially if they appear dry or rusty. Avoid over-lubricating, as excess lubricant can attract debris and cause further issues.
Clean all accessible parts with a damp cloth, removing any built-up flour, dough, or grease. Keeping parts clean prevents unnecessary wear and keeps the mixer running quietly.
Replace Worn or Damaged Parts
If inspection reveals broken or severely worn gears, replace them with genuine KitchenAid parts. Using original parts ensures compatibility and longevity. Contact customer support or authorized retailers to purchase the correct replacement gear set or other components.
Follow the manufacturer’s instructions for replacing gears or other damaged components, and reassemble the mixer carefully.
Test Your Mixer and Final Checks
Plug in your mixer and run it on low and higher speeds to see if the grinding noise persists. Listen carefully and observe for smooth operation. If the noise has ceased, your repair was successful. If not, re-inspect the gear assembly and attachment connection points.
Regular maintenance, including cleaning and lubricating, can prevent future issues and prolong the life of your mixer.
The Products in This Guide

KitchenAid Artisan Series 5 Quart Tilt Head Stand Mixer
- ✔ Weight: 26 lbs
- ✔ Dimensions: 14 x 8 x 14 inches
- ✔ Warranty: 1-year limited

KitchenAid Stand Mixer Attachment
- ✔ Size: 10 x 6 x 4 inches
- ✔ Power: Uses mixer’s motor
- ✔ Storage: Included case
KitchenAid Artisan Series 5 Quart Tilt Head Stand Mixer
The KitchenAid Artisan Series 5 Quart Tilt Head Stand Mixer is built with durable metal construction, featuring 59 touchpoints for thorough mixing. Its tilt-head design allows easy access to the bowl and attachments, making it a versatile kitchen tool. While generally reliable, occasional grinding noise can occur due to gear wear or debris, which can often be fixed with proper inspection and maintenance.
Pros:
- Sturdy metal construction
- Easy tilt-head access
- Multiple speed options
- Large 5-quart bowl
- Dishwasher safe bowl
Cons:
- Gear components can wear over time
- Requires regular cleaning and lubrication
- Potential for noise if not maintained
Best for: Home bakers and cooking enthusiasts looking for a reliable stand mixer
Not ideal for: If you prefer a low-maintenance, quiet mixer, consider models with sealed gear systems
Bottom line: Regular maintenance and inspection can keep your KitchenAid mixer running smoothly for years.
KitchenAid Stand Mixer Attachment
The KitchenAid Metal Food Grinder attachment expands your mixer’s capabilities, allowing you to grind meat, vegetables, and more with ease. It connects directly to the power hub and comes with multiple grinding plates and sausage stuffer tubes, making it a valuable addition for home cooks who want fresh ingredients.
Pros:
- Sturdy metal construction
- Multiple grinding plates included
- Easy to attach and clean
- Enhances mixer functionality
Cons:
- Additional cost for attachment
- Requires regular cleaning
- Can be bulky when stored
Best for: Homemade sausage, ground meats, and fresh grinding needs
Not ideal for: Not suitable for grinding very large quantities continuously
Bottom line: A durable attachment that turns your mixer into a versatile food prep station.
Frequently Asked Questions
Why is my KitchenAid mixer making a grinding noise?
The grinding noise can be caused by worn or damaged gear components, debris lodged inside the gear housing, or loose attachments. Regular inspection and cleaning often resolve the issue.
Can I fix the grinding noise myself?
Yes, if you are comfortable with basic repairs. Always unplug the mixer first, then inspect gears, connections, and clean as needed. Replace damaged parts with genuine KitchenAid components.
What parts should I replace if I hear grinding?
Typically, worn gears, drive couplers, or attachment hubs may need replacement. Carefully inspect these components for visible damage or excessive wear.
Is it safe to lubricate the gear assembly?
Use only food-safe silicone lubricant and sparingly. Avoid over-lubricating, which can attract debris and cause further issues. Always follow manufacturer guidelines.
When should I seek professional repair?
If you are uncomfortable disassembling the mixer or if the grinding persists after troubleshooting, it’s best to have a professional technician inspect and repair your mixer.
Keep Your Mixer Running Smoothly
Regular maintenance, careful inspection, and timely replacement of worn parts can extend the life of your KitchenAid stand mixer. Addressing grinding noises promptly prevents further damage and ensures your mixer continues to perform reliably for all your baking and cooking needs. With these troubleshooting steps, you can confidently tackle common issues and enjoy many more years of use.
Affiliate disclosure: As an Amazon Associate we earn from qualifying purchases. Prices and availability are accurate as of the time of publishing.
NFL season / tailgating Picks
team gear
As an affiliate, we earn on qualifying purchases.