Connect with us

Butter Tips and Tricks

7 Steps to Clean Your New Age Living Air Purifier

Published

on

An image showcasing the step-by-step cleaning process of the New Age Living Air Purifier

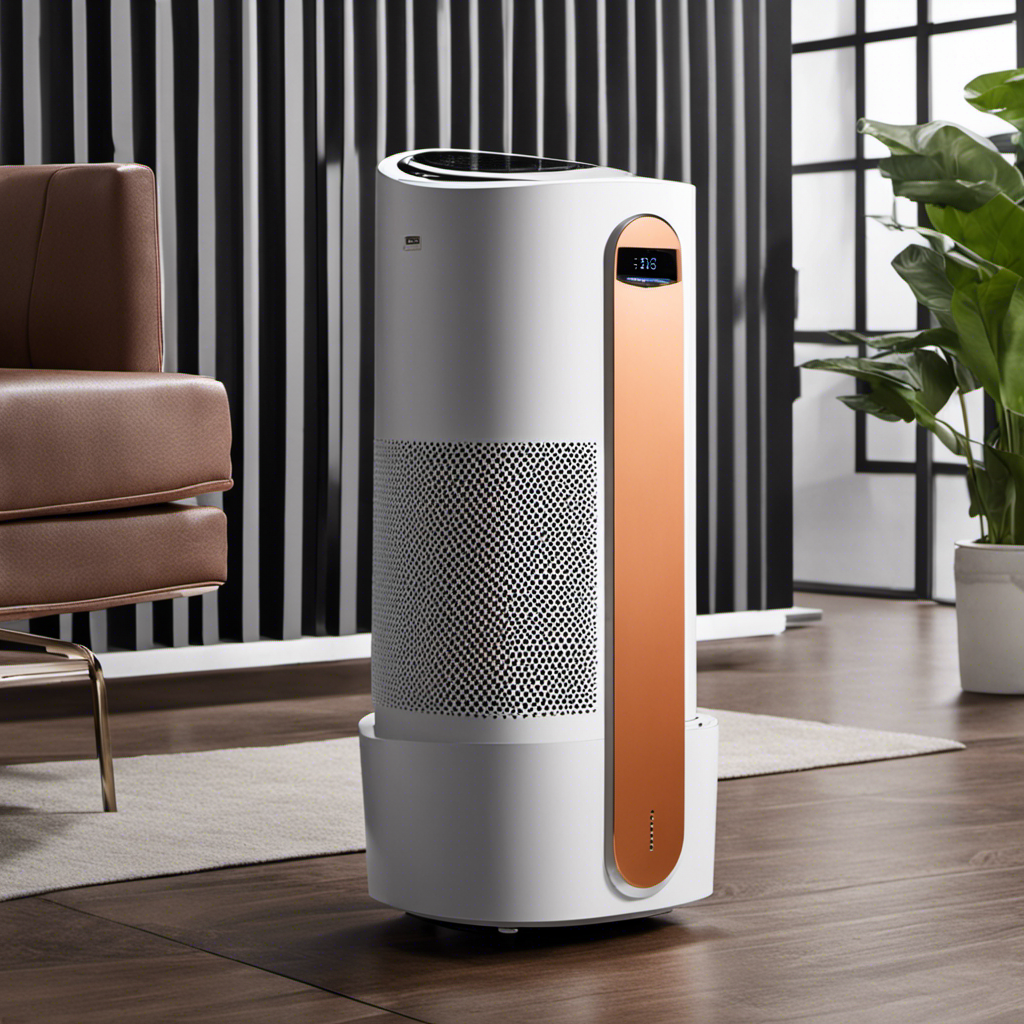
I have some excellent advice for you on the best ways to clean your New Age Living Air Purifier.

Keeping your air purifier clean is essential for maintaining its optimal performance and ensuring that it continues to provide you with fresh, clean air.

In this article, I’ll walk you through the step-by-step process of cleaning each component of your air purifier, from the pre-filter to the UV-C lamp.

With these detailed instructions, you’ll be able to easily maintain your air purifier and enjoy the benefits of pure, healthy air in your home.

Key Takeaways

  • Cleaning the filters regularly improves air quality and increases the efficiency of the air purifier.
  • Regular cleaning extends the lifespan of the air purifier and enhances its performance.
  • Determining the cleaning frequency depends on usage, air quality, dirt buildup, and following manufacturer’s recommendations.
  • Cleaning various components such as ionizer plates, exterior, air intake vents, control panel, UV-C lamp (if applicable), and fan blades is necessary for optimal performance.

Cleaning the Pre-Filter

Advertisement

To clean the pre-filter, you’ll need to remove it from the air purifier. The pre-filter is an important component of the air purifier as it traps larger particles like dust, pet hair, and lint.

Regular cleaning of the pre-filter ensures optimal performance of your air purifier. Start by turning off the air purifier and unplugging it from the power source. Locate the pre-filter compartment, which is usually at the front or back of the unit.

Gently remove the pre-filter and shake off any loose debris. Use a vacuum cleaner or a soft brush to remove any stubborn dirt or dust. If the pre-filter is washable, rinse it under running water and allow it to air dry completely before reinstalling.

Cleaning the pre-filter every 2-3 months is recommended for proper maintenance of your air purifier.

Removing and Cleaning the HEPA Filter

Removing and cleaning the HEPA filter is essential for maintaining the effectiveness of your air purifier. As an expert in air purifiers, I can assure you that regular maintenance of the HEPA filter is crucial for optimal performance. Here are some key steps to follow when cleaning your HEPA filter:

Advertisement
  • Turn off and unplug the air purifier to ensure safety.
  • Locate the HEPA filter compartment and carefully remove the filter.
  • Use a soft brush or vacuum attachment to gently remove dust particles from the filter.
  • If the filter is washable, rinse it with water and let it air dry completely before reinstalling.
  • If the filter is not washable, replace it with a new one according to the manufacturer’s instructions.

Cleaning the Activated Carbon Filter

When it comes to cleaning the activated carbon filter, there are a few key points to keep in mind.

Firstly, the cleaning frequency will depend on the usage and the level of air pollution in your environment.

Secondly, it’s important to follow proper cleaning techniques to ensure the filter is effectively cleaned without causing any damage.

Lastly, regular cleaning of the activated carbon filter offers several benefits. It helps maintain its efficiency in trapping odors and chemicals, prolongs its lifespan, and ensures optimal performance of your air purifier.

Advertisement

Cleaning Frequency for Carbon Filter

Make sure you regularly check and replace the carbon filter in your new age living air purifier to maintain its effectiveness. The carbon filter plays a crucial role in capturing and eliminating odors, chemicals, and volatile organic compounds from the air.

To ensure optimal performance, follow these cleaning schedule and maintenance tips:

  • Check the carbon filter every month and replace it as needed.
  • Vacuum the outer surface of the filter gently to remove dust and debris.
  • Rinse the filter with lukewarm water to remove trapped particles.
  • Allow the filter to air dry completely before reinstalling it.
  • Keep a record of the filter replacement dates to ensure timely replacements.

By following these simple steps, you can ensure that your air purifier continues to provide clean and fresh air for you and your family.

Regular maintenance is key to maximizing the lifespan and efficiency of your carbon filter.

Proper Cleaning Techniques

To ensure the longevity of your carbon filter, it’s important to familiarize yourself with the proper cleaning techniques. Cleaning your carbon filter regularly not only helps maintain its efficiency but also extends its lifespan.

The first step in cleaning your carbon filter is to remove it from the air purifier. Gently tap the filter to remove any loose dust or debris. Next, rinse the filter under warm water to remove any remaining particles. Avoid using harsh chemicals or detergents as they can damage the filter. Once rinsed, allow the filter to air dry completely before reinstalling it in the air purifier.

Advertisement

Following these cleaning techniques will ensure that your carbon filter continues to effectively remove pollutants from the air.

Now, let’s explore the benefits of regular cleaning.

Benefits of Regular Cleaning

Regularly cleaning your carbon filter not only improves its efficiency but also helps extend its lifespan. Cleaning maintenance is vital for the proper functioning of an air purifier and ensuring it continues to provide clean and fresh air.

Here are some important tips for extending the lifespan of your air purifier:

  • Regularly clean the pre-filter to remove larger particles and debris.
  • Vacuum the exterior of the air purifier to remove dust and dirt buildup.
  • Clean the HEPA filter according to the manufacturer’s instructions to maintain its effectiveness.
  • Use a damp cloth to wipe down the exterior of the air purifier to remove fingerprints and smudges.
  • Consider using an air purifier cover to protect it from dust and other contaminants.

By following these maintenance tips, you can ensure that your air purifier remains in excellent condition and continues to provide you with clean air.

Now let’s move on to the next section about cleaning the ionizer plates.

Advertisement

Cleaning the Ionizer Plates

You should first unplug the air purifier before cleaning the ionizer plates. Cleaning the ionizer plates is an important step in maintaining your New Age Living air purifier.

To clean the ionizer plates, you will need a soft cloth or sponge, warm soapy water, and a clean, dry cloth. Gently remove the ionizer plates from the air purifier, taking care not to damage them.

Dip the cloth or sponge in the warm soapy water and wipe down the plates, removing any dirt or debris. Rinse the plates with clean water and dry them thoroughly with the clean, dry cloth.

Once the plates are clean, carefully reinsert them back into the air purifier. Remember to also clean the fan blades and power cord regularly to ensure optimal performance of your air purifier.

Cleaning the Exterior of the Air Purifier

When it comes to cleaning the exterior of your air purifier, there are a few key points to keep in mind.

Advertisement

First, gather the necessary cleaning materials, such as a microfiber cloth, mild detergent, and water.

Next, use proper cleaning techniques, such as gently wiping the surface of the air purifier with the damp cloth and avoiding harsh chemicals that could damage the unit.

Cleaning Materials Needed

To clean the new age living air purifier, you’ll need a microfiber cloth, mild soap, and warm water. Here are the step-by-step instructions on how to properly clean your air purifier:

  • Gently remove the front cover of the air purifier.
  • Dampen the microfiber cloth with warm water.
  • Add a small amount of mild soap to the cloth and gently wipe the front cover to remove any dirt or dust.
  • Rinse the cloth with clean water and wring out any excess moisture.
  • Use the damp cloth to wipe the rest of the air purifier, including the sides and back.

Cleaning your air purifier regularly will ensure that it continues to function effectively and provide you with clean and fresh air.

Now that you have the necessary cleaning supplies, let’s move on to the proper cleaning techniques.

Proper Cleaning Techniques

Using a microfiber cloth and mild soap, gently wipe the front cover of your air purifier to remove any dirt or dust. Proper cleaning techniques are essential to maintain the efficiency and longevity of your air purifier. Regular cleaning not only ensures that the device functions optimally but also improves the air quality in your space. Here are some benefits of regular cleaning:

Advertisement
Benefits of Proper Cleaning Techniques
1. Improved Air Quality Regularly cleaning your air purifier removes dust, allergens, and pollutants, resulting in cleaner air for you to breathe.
2. Increased Efficiency Removing dirt and dust buildup from the front cover and filters allows the air purifier to circulate air more effectively, maximizing its performance.
3. Prolonged Lifespan Regular maintenance and cleaning of your air purifier help prevent damage and extend its lifespan, saving you money in the long run.

Frequency of Cleaning

Regularly cleaning your air purifier can significantly improve its performance and lifespan. Maintaining a clean air purifier is essential to ensure that it operates efficiently and effectively. Here are some maintenance tips to help you determine the cleaning frequency for your air purifier:

  • Consider the usage: If you use your air purifier on a daily basis, it’s recommended to clean it at least once every two weeks.

  • Check the air quality: If you live in a highly polluted area or have pets, you may need to clean your air purifier more frequently.

  • Look for signs of dirt buildup: If you notice dust or debris accumulating on the filters, it’s a good indicator that it’s time for a cleaning.

  • Follow the manufacturer’s recommendations: Each air purifier model may have specific cleaning instructions, so be sure to consult the manual.

  • Listen to your senses: If you detect any unusual smells or a decrease in airflow, it’s a sign that your air purifier needs cleaning.

Cleaning the air intake vents is an essential part of the maintenance process.

Cleaning the Air Intake Vents

Cleaning the air intake vents is essential for maintaining the efficiency of your new age living air purifier. Over time, dust, pet dander, and other airborne particles can accumulate on the vents, reducing the airflow and the purifier’s effectiveness. To clean the vents, follow these simple steps:

  1. Turn off and unplug the air purifier.
  2. Locate the air intake vents on your purifier.
  3. Use a soft brush or a vacuum cleaner with a brush attachment to gently remove the dust and debris from the vents.
  4. Wipe the vents with a damp cloth to remove any remaining dirt.
  5. Allow the vents to dry completely before plugging in and turning on the air purifier.

Regularly cleaning the air intake vents will ensure that your purifier functions optimally and continues to provide clean and fresh air in your living space.

It is also important to clean the air filter regularly to maintain the performance of your purifier. If you encounter any issues with your air purifier, such as strange noises or reduced airflow, refer to the troubleshooting guide provided by the manufacturer.

Cleaning the Control Panel

Before starting, make sure to turn off and unplug the air purifier to clean the control panel. Cleaning the control panel of your New Age Living air purifier is essential for its optimal performance. Here are some tips to help you through the process:

Advertisement
  • Gently wipe the control panel with a soft, damp cloth to remove any dust or dirt.
  • Use a mild detergent or cleaning solution to tackle stubborn stains or spills.
  • Avoid using abrasive cleaners or harsh chemicals that may damage the control panel.
  • Pay extra attention to the buttons and knobs, ensuring they are thoroughly cleaned and free from debris.
  • If you encounter any issues with the control panel, such as unresponsiveness or erratic behavior, consult the user manual for troubleshooting steps.

With the control panel cleaned, let’s now move on to cleaning the UV-C lamp (if applicable) to maintain the overall efficiency of your air purifier.

Cleaning the UV-C Lamp (If Applicable

Once you’ve ensured the control panel is clean and free from debris, it’s time to take a look at the UV-C lamp (if applicable) and give it a thorough cleaning to maintain the efficiency of your air purifier.

The UV-C lamp is an important component of your air purifier as it helps to kill bacteria and viruses in the air. To clean the UV-C lamp, first, make sure the air purifier is turned off and unplugged. Gently remove the lamp from its housing and use a soft cloth or sponge to wipe away any dust or dirt. If there are stubborn stains, you can use a mild detergent diluted with water. Be sure to rinse the lamp thoroughly and let it dry completely before reinstalling it.

Cleaning the fan blades is also crucial for maintaining optimal performance. Using a soft brush or cloth, gently remove any dust or debris from the blades. This will prevent the build-up of pollutants and ensure that the air purifier can effectively circulate clean air.

Regularly disinfecting your air purifier is essential for keeping the air in your home clean and healthy.

Reassembling and Maintaining the Air Purifier

To keep your air purifier running smoothly, make sure to regularly check and replace the filters as needed. This is an essential part of maintaining the air purifier and ensuring its optimal performance.

Advertisement

Cleaning techniques can vary depending on the type of filter, but here are some general tips to help you keep your air purifier in top shape:

  • Gently vacuum the surface of the pre-filter to remove larger particles and debris.
  • Use a soft brush or cloth to clean the HEPA filter, being careful not to damage the delicate fibers.
  • If your air purifier has a carbon filter, replace it according to the manufacturer’s instructions.
  • Wipe down the exterior of the air purifier with a damp cloth to remove dust and dirt.
  • Regularly check the air purifier’s fan and vents for any obstructions or buildup that may hinder airflow.

Frequently Asked Questions

How Often Should I Clean the Pre-Filter of My New Age Living Air Purifier?

I clean the pre-filter of my air purifier regularly to maintain its performance. It’s important to follow the manufacturer’s instructions on how to clean it properly and keep the air purifier functioning efficiently.

Can I Wash the HEPA Filter of My New Age Living Air Purifier?

Sure, you can wash the HEPA filter of your New Age Living Air Purifier. It’s important to follow proper cleaning methods and maintenance tips to ensure its effectiveness. Let me explain how.

How Frequently Should I Clean the Activated Carbon Filter?

To clean the fan of my New Age Living Air Purifier, simply remove the front panel and gently wipe the fan blades with a damp cloth. For the control panel, use a soft, dry cloth to remove any dust or debris.

Do I Need to Clean the Ionizer Plates of My Air Purifier Regularly?

Do I need to clean the ionizer plates regularly? Cleaning tips and maintenance guide include regular cleaning of ionizer plates to ensure optimal performance and efficiency of the air purifier.

Is It Necessary to Clean the UV-C Lamp of My New Age Living Air Purifier?

Yes, it is necessary to clean the UV-C lamp of my New Age Living air purifier regularly. Using an air purifier with a dirty UV-C lamp is not safe. Proper maintenance includes following the manufacturer’s instructions for cleaning and replacing the lamp.

Advertisement

Conclusion

In conclusion, keeping your new age living air purifier clean is absolutely crucial for a healthy and purified living space.

By following these thorough cleaning steps, you can ensure that your air purifier is functioning at its optimum level, providing you with the cleanest air possible.

Don’t underestimate the power of a clean air purifier – it’s like having a superhero protecting your respiratory system from harmful pollutants.

So, take the time to regularly clean and maintain your air purifier, and breathe in the fresh, purified air you deserve.

Advertisement
Continue Reading
Advertisement

Butter Tips and Tricks

How Many Sticks of Butter Are in 1/3 Cup?

Published

on

By

An image showcasing three sticks of butter, each represented by a traditional wooden butter mold

While in my kitchen getting ready to bake a tasty batch of cookies, I came across a familiar issue: how much butter should I use for a 1/3 cup? It’s a common question that numerous home bakers have wondered about.

Thankfully, with a little bit of knowledge and a quick conversion, this mystery can be easily solved. In this article, let’s unravel the secret behind the perfect butter-to-stick ratio and simplify the process of measuring butter in sticks.

Get ready to bake with confidence!

Key Takeaways

  • 1/3 cup of butter is equivalent to 5 and 1/3 tablespoons or 2 and 2/3 sticks of butter.
  • Butter is typically sold in 1/2 cup sticks, which equals 8 tablespoons or 1/4 pound.
  • To convert 1/3 cup of butter to stick equivalents, divide 1/3 by 1/2, resulting in 2/3. Therefore, 1/3 cup of butter is equivalent to 2/3 of a stick.
  • Understanding the butter-to-stick ratio is crucial in baking. One stick of butter equals 1/2 cup or 8 tablespoons. Knowing the butter-to-stick ratio helps achieve the desired texture and flavor in baked goods.

Understanding the Measurement: 1/3 Cup of Butter

To understand how many sticks 1/3 cup of butter is, you’ll need to know that it is equivalent to 5 and 1/3 tablespoons or 2 and 2/3 sticks of butter.

Advertisement

When it comes to stick to cup conversion and converting butter measurements, it’s important to be precise. Butter is typically sold in 1/2 cup sticks, which equals 8 tablespoons or 1/4 pound.

So, if you have a recipe that calls for 1/3 cup of butter, you can simply take 2 and 2/3 sticks of butter, which is about 11 and 1/3 tablespoons.

It’s always helpful to have these conversions in mind when working in the kitchen, as it ensures accurate measurements and delicious results.

Converting Cups to Sticks: The Basics

When it comes to baking, understanding the equivalency between butter sticks and cup measurements is essential. Converting cup measurements to sticks of butter can be a bit confusing at first, but with a few practical tips, you’ll be able to navigate this aspect of baking with ease.

In this discussion, I will explain the butter stick equivalents. I will provide a simple guide to converting cup measurements and share some practical tips to help you in your baking endeavors.

Advertisement

Butter Stick Equivalents

The equivalent of 1/3 cup of butter is approximately 5 and 1/3 sticks. When converting cup measurements to stick equivalents for butter, it’s important to know that one stick of butter typically equals 1/2 cup or 8 tablespoons. Therefore, to determine the number of sticks in 1/3 cup of butter, we divide 1/3 by 1/2. This gives us a quotient of 2/3.

Since there are three sticks in a whole cup of butter, we multiply the quotient by three to get the final answer. Therefore, 2/3 multiplied by 3 equals 2. Hence, 1/3 cup of butter is approximately 5 and 1/3 sticks.

This conversion is useful when following recipes that call for butter in stick measurements rather than cups.

Converting Cup Measurements

Converting measurements can be helpful in following recipes that use stick equivalents instead of cups. When it comes to converting butter measurements, it’s important to know that one stick of butter is equal to 1/2 cup.

So, if a recipe calls for 1/3 cup of butter, you would need to convert it to stick equivalents. To do this, you divide 1/3 by 1/2, which equals 2/3. Therefore, 1/3 cup of butter is equivalent to 2/3 of a stick.

Advertisement

This conversion can be useful when you have a recipe that lists measurements in cups and you prefer to use sticks of butter instead.

Now that we’ve covered the basics of converting measurements, let’s move on to practical tips for baking.

Practical Tips for Baking

Baking can be easier if you follow these practical tips.

  1. Use a kitchen scale: Measuring ingredients by weight ensures accuracy and consistency in your baking.

  2. Spoon and level: When measuring dry ingredients, use a spoon to fill your measuring cup, then level it off with a straight edge for precise measurements.

  3. Butter alternatives: If you don’t have a stick of butter, you can use alternative measurements such as tablespoons or grams. Just make sure to convert the amount accurately.

  4. Use the right tools: Invest in good quality measuring cups and spoons to ensure accurate measurements every time.

By following these tips, you can improve the accuracy of your measurements and achieve better results in your baking.

Now, let’s dive into the secret behind the butter-to-stick ratio.

Advertisement

The Butter-to-Stick Ratio: Unveiling the Secret

When it comes to butter-to-stick ratio in baking, it’s important to know how many sticks are needed for a certain amount of butter. Understanding the butter stick ratios is essential for accurate measurements and achieving the desired texture and flavor in your baked goods.

One stick of butter typically equals 1/2 cup or 8 tablespoons. However, if you don’t have sticks of butter on hand, there are butter stick substitutes available. Some common substitutes include margarine, shortening, or coconut oil. These substitutes can be used in the same amount as the required sticks of butter.

Now that we’ve covered the basics of butter stick ratios and substitutes, let’s move on to the quick and easy conversion of 1/3 cup into sticks.

Quick and Easy Conversion: 1/3 Cup Into Sticks

When it comes to baking, accurate measurements are key. Understanding the conversion between sticks of butter and cups can make a difference in the outcome of your recipe.

In this discussion, we will delve into the topic of sticks in butter conversion and explore the importance of butter measurement conversion in ensuring the perfect balance of ingredients.

Advertisement

Sticks in Butter Conversion

To convert 1/3 cup of butter to sticks, you would use 5 and 1/3 sticks. It may seem like a strange way to measure butter, but it’s actually quite common in recipes. As a home cook, I’ve come across this measurement many times and have learned a few things along the way.

Here’s what you need to know about converting measurements and finding butter substitutes:

  1. Precision: Converting measurements requires accuracy. It’s important to follow the recipe closely to maintain the intended flavors and textures.

  2. Informative: Knowing the equivalent measurements helps in adjusting recipes according to personal preferences or dietary restrictions.

  3. Detailed: Understanding butter substitutes allows for flexibility in recipes. For example, coconut oil can be used as a vegan alternative.

  4. Emotion: Experimenting with different ingredients and measurements can spark creativity in the kitchen and bring joy to cooking.

Butter Measurement Conversion

Understanding the equivalent measurements of butter can be helpful in adjusting recipes to personal preferences or dietary restrictions.

When it comes to converting butter measurements, it’s important to know the alternative measurements for butter. One common measurement is the stick of butter, which is equivalent to 1/2 cup or 8 tablespoons. This is useful to know because many recipes call for butter in terms of sticks.

However, if you don’t have sticks of butter on hand, you can also measure it in cups. One cup of butter is equal to 2 sticks or 16 tablespoons.

Advertisement

Additionally, if you prefer to use weight measurements, 1 stick of butter weighs approximately 1/4 pound or 113 grams.

Simplifying Baking Measurements: Butter in Stick Form

The equivalent of 1/3 cup of butter in stick form is approximately 5 tablespoons. When it comes to baking with butter, precise measurements are crucial for successful results. Here are some alternative butter measurements that can simplify your baking experience:

  1. 1 stick of butter: This is equal to 1/2 cup or 8 tablespoons. It’s the most commonly used measurement in recipes.

  2. 1/4 cup of butter: This is half a stick or 4 tablespoons. It’s a convenient measurement for smaller batches of baked goods.

  3. 1/2 cup of butter: This is 1 stick or 8 tablespoons. It’s commonly used in recipes that require a richer buttery flavor.

  4. 1 cup of butter: This is 2 sticks or 16 tablespoons. It’s typically used in larger recipes or when doubling the original amount.

Finding the Perfect Balance: Stick Measurement for 1/3 Cup of Butter

Finding the perfect balance for 1/3 cup of butter can be achieved by using approximately 5 tablespoons in stick form. Converting butter measurements can sometimes be confusing, but using sticks simplifies the process.

One stick of butter is equal to 1/2 cup or 8 tablespoons. So, for 1/3 cup, we can estimate that it would be around 5 tablespoons. This alternative measurement allows for easy portioning and ensures accuracy in your recipe.

Using butter in stick form also eliminates the need for measuring cups, making it convenient and less messy. Expert tips and tricks for measuring butter in sticks can further enhance your baking experience.

Advertisement

Now, let’s dive into some helpful techniques to master the art of measuring butter in sticks.

Expert Tips and Tricks for Measuring Butter in Sticks

To enhance your baking experience, you can easily master the art of measuring butter in stick form with these expert tips and tricks. Here are some alternative butter measurement methods that you can try:

  1. Kitchen Scale: Invest in a good kitchen scale that can accurately measure butter in grams or ounces. This will give you precise measurements every time.

  2. Measuring Cups: Use measuring cups to measure out the required amount of butter. Most measuring cups have markings for tablespoons, so you can easily measure out the needed quantity.

  3. Tablespoon Conversion: If you don’t have measuring cups, you can use tablespoons as a substitute. One stick of butter is equal to 8 tablespoons, so you can measure out the required amount using tablespoons.

  4. Butter Wrappers: Many butter wrappers have markings that indicate tablespoon measurements. Use these markings as a guide to measure out the desired amount of butter.

With these alternative methods, you can confidently measure butter without sticks and achieve perfect results in your baking endeavors.

Frequently Asked Questions

Can I Use Margarine Instead of Butter in Stick Form When Measuring 1/3 Cup?

Yes, you can use margarine as a substitute for butter in stick form when measuring 1/3 cup. However, keep in mind that the texture and flavor may be slightly different, so it’s important to consider how it will affect your recipe.

Can I Substitute Oil for Butter in Stick Form When Measuring 1/3 Cup?

Sure, you can substitute oil for butter in stick form when measuring 1/3 cup. However, keep in mind that the texture and taste may be slightly different. It’s best to use a neutral-flavored oil for a more versatile result.

Advertisement

How Do I Measure 1/3 Cup of Butter if I Don’t Have the Appropriate Measuring Tools?

If I don’t have the right measuring tools, I can use measuring alternatives like eyeballing or using a tablespoon to estimate 1/3 cup of butter. Converting butter measurements can be tricky, but with practice, it becomes easier.

What Is the Weight of 1/3 Cup of Butter in Grams or Ounces?

Converting the weight of 1/3 cup of butter to grams or ounces depends on the density of the butter. If substituting, remember that 1/3 cup of butter equals about 5 1/3 tablespoons or 2 2/3 ounces.

Can I Use Whipped Butter Instead of Solid Butter in Stick Form When Measuring 1/3 Cup?

Using whipped butter instead of solid butter in stick form can affect the measurement when measuring 1/3 cup. It is important to note the difference in consistency and adjust accordingly for accurate results.

Conclusion

After delving into the world of butter measurements, I’ve discovered the secret behind converting 1/3 cup of butter into sticks.

It turns out that 1/3 cup of butter is equivalent to 5 and 1/3 tablespoons, or approximately 2 and 2/3 sticks.

Advertisement

This knowledge will simplify baking measurements and ensure the perfect balance in your recipes.

So, next time you’re in the kitchen, remember the symbolism of butter in stick form and embrace the ease and precision it brings to your culinary adventures.

Continue Reading

Butter Tips and Tricks

How Many Sticks of Butter in 1 Cup: A Step-by-Step Guide

Published

on

By

An image showing a neatly arranged stack of 10 tablespoons of butter, each tablespoon represented by a smooth, rectangular slab with rounded edges, resembling traditional stick-shaped butter

Ever wondered how many sticks of butter are in one cup? Well, I have the answer for you!

Picture this: you’re in the middle of baking your favorite recipe and suddenly realize you’re out of butter. Panic sets in as you scramble to figure out the conversion from cups to sticks. But fear not!

In this article, I’ll break it down for you, providing all the information you need to know about the butter-to-cup ratio and how to make your baking adventures a breeze.

Key Takeaways

  • 1 cup of butter is equal to 2 sticks or 16 tablespoons.
  • Converting butter measurements from cups to sticks or vice versa is crucial for accurate recipe adjustments.
  • Different brands may have varying measurements for butter, so it’s important to be aware of equivalents.
  • Using the measurement markings on the butter wrapper allows for precise cutting of fractional amounts.
[bulkimporter_image id=’2′]

Understanding the Butter-to-Cup Ratio

1 cup of butter is equal to 2 sticks. When it comes to converting butter measurements, it’s important to understand the ratios.

If a recipe calls for tablespoons of butter, 1 stick is equivalent to 8 tablespoons. So, if you need 1 cup of butter, you’ll need 16 tablespoons or 2 sticks.

Advertisement

It’s also important to note the difference between salted and unsalted butter. Salted butter contains added salt, while unsalted butter does not. This can affect the taste and overall flavor of your dish.

When a recipe calls for unsalted butter, it’s best to stick to that recommendation to have better control over the amount of salt in the recipe. However, if you only have salted butter on hand, you can reduce the amount of added salt in the recipe.

[bulkimporter_image id=’3′]

Converting Butter Measurements: Cups to Sticks

When it comes to baking, understanding the butter cup to stick ratio is crucial. Knowing how many sticks of butter make up one cup can make or break a recipe.

In addition to the ratio, having an accurate conversion method from cups to sticks is essential for precise measurements.

Lastly, it’s important to familiarize oneself with common butter measurements to ensure successful baking endeavors.

Advertisement

Butter Cup to Stick Ratio

To determine the ratio of sticks of butter to cups, we can use this conversion chart. Understanding butter measurements is essential for baking and cooking. Converting butter ratios is a common task in the kitchen.

The standard stick of butter in the United States weighs 1/2 cup or 8 tablespoons. Therefore, if a recipe calls for 1 cup of butter, you will need 2 sticks. If the recipe calls for 1/2 cup of butter, you will need 1 stick.

It’s important to note that butter measurements can vary by country, so always consult a reliable conversion chart if you’re working with international recipes. By knowing the butter cup to stick ratio, you can confidently adapt recipes to suit your needs.

Accurate Conversion Method

The most accurate way to convert measurements is by consulting a reliable conversion chart. When it comes to measuring butter, it can be tricky since it often comes in sticks or cups. Here are some tips to help you accurately measure butter:

  1. Use a conversion chart: This will give you the exact measurement equivalents for butter, whether it’s in sticks or cups.
  2. Soften the butter: If a recipe calls for melted butter, measure it in its solid form and then melt it. This ensures accurate measurements.
  3. Use a kitchen scale: Weighing the butter can give you precise measurements, especially when dealing with small amounts.
  4. Know the standard measurements: One stick of butter is equal to 1/2 cup or 8 tablespoons. A cup of butter, on the other hand, is equal to 2 sticks or 16 tablespoons.

Common Butter Measurements?

Knowing the equivalents for different measurements of butter, such as tablespoons and sticks, can be helpful when following recipes. It ensures that you are adding the right amount of butter, which can greatly impact the outcome of your dish. Here are some common butter measurement equivalents to keep in mind:

Measurement Equivalent
1 stick 1/2 cup (8 tablespoons)
1/2 stick 1/4 cup (4 tablespoons)
1/4 stick 1/8 cup (2 tablespoons)
1 tablespoon 1/16 cup (1/2 stick)

When measuring butter, it’s important to be accurate. Use a kitchen scale for precise measurements, especially if the recipe calls for weight measurements. If you don’t have a scale, use a butter dish with marked measurements. Softened butter should be leveled off with a knife. When using tablespoons, make sure to fill them completely and level off the excess with a straight edge. These tips will help you measure butter accurately and achieve the best results in your recipes.

Advertisement
[bulkimporter_image id=’4′]

The Standard Size of a Stick of Butter

A stick of butter is typically equal to 1/2 cup. Understanding butter packaging and different butter measurements in other countries can be confusing.

Here are some key points to help you navigate the world of butter measurements:

  1. In the United States, butter is commonly sold in sticks, with each stick weighing 1/4 pound or 1/2 cup. This makes it easy to measure and use in recipes.
  2. In some European countries, butter is sold in blocks or tubs, with measurements listed in grams or kilograms. It’s important to convert these measurements to cups or ounces for American recipes.
  3. In Australia, butter is usually sold in 250g or 500g blocks, which can be converted to cups or ounces using conversion charts.
  4. When traveling or using international recipes, it’s helpful to familiarize yourself with the local butter measurements to ensure accurate results.
[bulkimporter_image id=’5′]

How Much Butter Is in 1 Cup

When it comes to baking, understanding the butter to cup ratio is crucial. Knowing how much butter is in 1 cup can help ensure that your recipes turn out perfectly.

Additionally, learning how to convert butter measurements can be helpful when using recipes from different countries or regions.

Lastly, if you’re looking for butter substitutes in baking, there are several options available that can still provide the moisture and richness that butter brings to baked goods.

Butter to Cup Ratio

To measure the butter to cup ratio, you can easily convert sticks of butter to cups. Understanding butter density is key to accurately converting butter measurements from tablespoons to cups. Here’s a step-by-step guide:

Advertisement
  1. Start by knowing that one stick of butter is equal to 1/2 cup. This is a common measurement used in many recipes.
  2. If your recipe calls for a different amount of butter in cups, you can use this conversion: 1 cup of butter is equivalent to 2 sticks or 16 tablespoons.
  3. To convert tablespoons to cups, divide the number of tablespoons by 16. For example, if you have 8 tablespoons of butter, it would be equal to 1/2 cup.
  4. Remember, when measuring butter, it’s important to consider its density. Softened or melted butter may take up less space compared to cold or solid butter.

Converting Butter Measurements

Understanding the conversion of butter measurements can help me confidently adjust my recipe. When it comes to baking or cooking, accuracy is key. Knowing the equivalents of butter can save me time and ensure the perfect outcome.

One cup of butter is equal to two sticks or 16 tablespoons. This information is crucial when a recipe calls for a specific amount of butter in cups, but I only have sticks. Conversely, if a recipe specifies butter in sticks, I can easily convert it to cups by dividing the number of sticks by two.

To measure butter accurately, I can use a kitchen scale or the markings on the butter wrapper. Softened butter should be packed into measuring cups, while solid butter should be cut according to the desired quantity.

With these tips, I can confidently use the correct amount of butter in my recipes.

Butter Substitutes in Baking

If you’re looking to substitute butter in your baking, there are various options available that can still yield delicious results. Here are four butter alternatives that not only provide a healthier option but also offer unique flavors and health benefits:

  1. Coconut oil: This versatile alternative adds a subtle tropical taste to your baked goods and is rich in healthy fats, promoting heart health.
  2. Avocado: Creamy and nutrient-dense, mashed avocado can replace butter in certain recipes, providing a boost of vitamins and minerals.
  3. Greek yogurt: With its tangy flavor and creamy texture, Greek yogurt adds moisture and protein to your baked treats while reducing the fat content.
  4. Applesauce: A natural sweetener and fat substitute, applesauce adds moisture and tenderness to your baked goods, making them lighter and healthier.
[bulkimporter_image id=’6′]

Butter Conversion: Cups to Sticks Simplified

You can easily convert 1 cup of butter to sticks by knowing that it equals 2 sticks.

When it comes to butter storage, it is important to consider the packaging. Butter is typically sold in wrapped blocks or sticks. The packaging not only protects the butter from external factors like air and light but also keeps it fresh for longer periods.

Advertisement

The most common packaging for butter is a waxed paper or foil wrapper. This type of packaging helps to maintain the butter’s quality and prevent it from spoiling. It is recommended to store butter in its original packaging or transfer it to an airtight container to maintain its freshness.

Proper butter storage ensures that it remains usable for a longer time and retains its flavor and texture.

[bulkimporter_image id=’7′]

Calculating Sticks of Butter for Your Recipe

To calculate the number of sticks needed for your recipe, it’s helpful to divide the total amount of butter by the conversion factor of 2. This will give you the accurate measurement in sticks.

Here are some tips for understanding butter measurements and achieving accurate conversions:

  1. Always use the conversion factor of 2 when converting cups to sticks of butter.
  2. Make sure to measure butter in its solid form for precise results.
  3. If your recipe calls for a fraction of a stick, you can easily cut it using the measurement markings on the wrapper.
  4. Remember that butter is sold in different sizes, so check the weight or volume on the packaging to ensure accuracy.

Now that you understand how to calculate the number of sticks needed for your recipe, let’s move on to some tips for measuring butter in cups.

[bulkimporter_image id=’8′]

Tips for Measuring Butter in Cups

When measuring butter in cups, it’s important to remember that different brands may have different measurements on their packaging. To ensure accuracy in your recipes, it’s helpful to be aware of butter measurement equivalents.

Advertisement

One cup of butter is equal to 2 sticks or 16 tablespoons. However, some brands of butter may label their packaging differently, so it’s always a good idea to double-check.

If you don’t have measuring cups or sticks of butter, there are alternative methods for measuring butter. One option is to use a kitchen scale to measure the desired amount in grams or ounces. Another option is to use the markings on the butter wrapper itself. Most butter sticks have measurements marked on the packaging, allowing you to easily cut off the desired amount.

[bulkimporter_image id=’9′]

Butter Conversions Made Easy: Cups to Sticks

When it comes to baking or cooking with butter, it’s important to have a clear understanding of the measurement equivalents. Knowing how many sticks of butter are in a cup can save time and ensure accurate results.

In this discussion, we will explore simple conversion techniques for butter measurements, providing you with the knowledge and confidence to easily adapt recipes to your preferred measurements.

Butter Measurement Equivalents

You can easily convert 1 cup of butter into sticks by dividing it into 2 sticks. This is a common measurement used in baking and cooking.

Advertisement

When it comes to understanding butter ratios and ensuring accurate measuring, here are some tips to keep in mind:

  1. Use a liquid measuring cup: Butter is a solid, but using a liquid measuring cup allows for more precise measurements.
  2. Soften the butter: To accurately measure butter, it should be softened to room temperature. This ensures that it is easily spreadable and can be measured accurately.
  3. Use a knife or bench scraper: When measuring butter, use a knife or bench scraper to level off the top. This will provide a consistent and accurate measurement.
  4. Pack it tightly: If a recipe calls for packed butter, make sure to tightly pack the butter into the measuring cup. This will give you the correct amount needed for the recipe.

Simple Conversion Techniques

To simplify conversions, try using a kitchen scale for more precise measurements. When it comes to baking, accurate measurements are crucial for the success of your recipe. Butter measurement equivalents in recipes can sometimes be confusing, especially when converting between different units.

Converting butter measurements for baking can be made easier by using a kitchen scale. By weighing the butter, you can accurately determine the amount needed for your recipe. For example, if a recipe calls for 1 cup of butter, you can weigh it on the scale to get the precise measurement in grams or ounces. This eliminates any guesswork and ensures that your baked goods turn out just right.

Now, let’s move on to how to substitute sticks of butter for cups.

[bulkimporter_image id=’10’]

How to Substitute Sticks of Butter for Cups

If you’re substituting sticks of butter for cups, it’s important to know that one stick of butter is equivalent to 1/2 cup. This knowledge is crucial for measuring accuracy in recipes.

Here are four key points to keep in mind when substituting sticks of butter for cups:

Advertisement
  1. Butter substitutes: In case you don’t have sticks of butter on hand, you can use other ingredients as substitutes. Options include margarine, shortening, coconut oil, or even applesauce for a healthier alternative.
  2. Measuring accuracy: When measuring butter in stick form, it’s essential to accurately cut the stick to the correct length. Each stick is typically 8 tablespoons or 1/2 cup, so make sure to measure it precisely.
  3. Conversions: If a recipe calls for a specific amount of cups, you may need to convert it to sticks of butter. Remember that two sticks of butter are equal to 1 cup, so adjust accordingly.
  4. Recipe adjustments: When substituting sticks of butter for cups, consider the impact on your recipe. Butter provides moisture and flavor, so using different substitutes may affect the final texture and taste.
[bulkimporter_image id=’11’]

Common Butter Measurements: Cups Vs Sticks

When baking, it’s helpful to know the difference between measuring butter in cups versus sticks. Understanding butter measurements and being able to convert between cups and sticks can make a big difference in the outcome of your baked goods. Here’s a simple table to help you understand the conversion:

Cups Sticks Grams
1 0.5 113
2 1 227
3 1.5 340

For example, if a recipe calls for 1 cup of butter, you can use 2 sticks or 227 grams. Similarly, if a recipe calls for 3 sticks of butter, you can use 1.5 cups or 340 grams. Having this understanding and being able to convert between cups and sticks will ensure that your baked goods turn out perfectly every time.

Frequently Asked Questions

Can I Use Margarine Instead of Butter When Measuring in Cups or Sticks?

Sure, you can use margarine instead of butter when measuring in cups or sticks. However, keep in mind that margarine has a different texture and flavor, so it may affect the outcome of your recipe. The butter vs margarine debate is a matter of personal preference.

How Much Does a Stick of Butter Weigh in Ounces?

A stick of butter weighs 4 ounces. Converting butter measurements can be tricky, but knowing that a stick of butter is 1/2 cup or 8 tablespoons helps in cooking and baking.

Can I Use Salted Butter Instead of Unsalted Butter in a Recipe That Calls for Measuring in Cups?

Yes, you can use salted butter instead of unsalted butter in a recipe that calls for measuring in cups. Just remember to adjust the amount of salt in the recipe accordingly.

Are There Any Special Considerations When Measuring Butter in High-Altitude Baking?

When baking at high altitudes, there are special considerations for measuring butter. The altitude affects the air pressure, which can impact the texture and rising of baked goods. Adjustments may be needed to ensure successful results.

Advertisement

Is There a Difference in Measurement if the Butter Is Cold or at Room Temperature When Using Cups or Sticks?

When measuring butter, it’s important to note that the accuracy may vary depending on whether the butter is cold or at room temperature. This applies to both measuring cups and sticks.

Conclusion

In conclusion, understanding the butter-to-cup ratio is crucial when it comes to baking. Converting measurements from cups to sticks can be simplified by knowing that one cup of butter is equal to two sticks.

It is important to note that a standard stick of butter typically measures 1/2 cup or 8 tablespoons. When measuring butter in cups, it is recommended to use precise measuring tools to ensure accurate results.

Remember, as the saying goes, “Measure twice, bake once!”

Advertisement
Continue Reading

Butter Tips and Tricks

How Many Cups of Butter Equal a Stick: A Simple Guide

Published

on

By

An image showing a neatly arranged cup filled with liquid butter, surrounded by a stack of butter sticks, one by one, gradually being poured into the cup until it reaches the brim

Ever thought about how many cups of butter are in one stick? Well, I have the answer for you! Deciphering butter measurements can be tricky, but don’t worry, I’m here to make it easier for you.

In this article, we’ll explore the standard stick of butter and how to convert it to cups. We’ll also delve into equivalents and measurements, as well as provide a handy butter conversion chart.

So, let’s dive in and demystify the world of butter measurements together!

Key Takeaways

  • One stick of butter is equal to 1/2 cup or 8 tablespoons.
  • Butter can be measured in grams or ounces for more precise measurements.
  • Conversion charts and kitchen scales are useful tools for accurate measurement conversion.
  • Knowing the equivalents (e.g., 1 stick = 1/2 cup, 2 sticks = 1 cup) helps measure butter accurately in recipes.

[bulkimporter_image id=’2′]

Understanding Butter Measurements

Advertisement

There’s no need to worry about how many cups of butter are in a stick because it’s a common measurement used in recipes. When it comes to accurately measuring butter, it’s important to understand the conversion from sticks to cups.

One stick of butter is equal to 1/2 cup or 8 tablespoons. This measurement is widely accepted and used in baking and cooking. However, it’s good to know that butter can also be measured in grams or ounces for more precise measurements.

To convert butter measurements for recipes, you can use a kitchen scale or refer to conversion charts that provide the equivalent measurements. Understanding these conversions ensures that you can accurately measure and use butter in your favorite recipes.

Now, let’s dive into the details of the standard stick of butter.

Advertisement

[bulkimporter_image id=’3′]

The Standard Stick of Butter

To determine the amount of butter in a standard stick, you’ll need to understand the conversion ratio. Understanding butter packaging and different butter measurements is crucial to accurately measuring ingredients in recipes. Here are some key points to keep in mind:

  • A standard stick of butter in the United States weighs 1/2 cup or 8 tablespoons.
  • The measurements on butter packaging are typically marked in tablespoons and cups.
  • European butter is often sold in 250-gram blocks, which is approximately 1 cup or 2 sticks of butter.
  • Some recipes may call for butter in ounces or grams, so it’s important to have a kitchen scale for precise measurements.
  • It’s also helpful to know that butter comes in different fat percentages, such as salted and unsalted.

[bulkimporter_image id=’4′]

Converting Sticks to Cups

Advertisement

When it comes to converting sticks to cups, it is important to understand the stick to cup ratio for accurate measurement conversion.

The stick to cup ratio is 1 stick of butter equals 1/2 cup. This means that if a recipe calls for 1 cup of butter, you will need 2 sticks.

Stick to Cup Ratio

The stick to cup ratio for butter is approximately 1/2 cup per stick. This ratio is important to know when it comes to baking and following recipes accurately.

Here are a few key points to keep in mind when it comes to butter measurements and baking conversions:

Advertisement
  • 1 stick of butter is equal to 1/2 cup or 8 tablespoons.
  • If a recipe calls for 1 cup of butter, you will need 2 sticks.
  • To convert tablespoons to cups, divide the number of tablespoons by 16.
  • It’s important to note that butter measurements can vary depending on the brand or type of butter you are using, so always check the packaging for accurate measurements.
  • When in doubt, it’s always a good idea to weigh your butter using a kitchen scale for precise measurements.

Knowing the stick to cup ratio and understanding butter measurements is essential for successful baking and achieving the desired results in your recipes.

Accurate Measurement Conversion

Remember, accurately converting measurements is crucial for achieving the desired results in your baking recipes.

When it comes to understanding butter measurements, it’s important to measure accurately to ensure your baked goods turn out just right.

Butter is often measured in sticks, and it’s helpful to know that one stick of butter is equal to 1/2 cup or 8 tablespoons.

This knowledge is especially handy when a recipe calls for a certain amount of cups and you only have sticks of butter on hand.

By measuring butter accurately, you can ensure that your recipes turn out perfectly every time.

Advertisement

Now that we understand how to measure butter correctly, let’s explore the equivalents and measurements for other common baking ingredients.

[bulkimporter_image id=’5′]

Equivalents and Measurements

You’ll need to know how many cups of butter are in a stick for accurate measurements. When it comes to butter measurement equivalents, it’s important to have the right conversions. Here are a few key measurements to keep in mind:

  • 1 stick of butter is equal to 1/2 cup
  • 1/2 stick of butter is equal to 1/4 cup
  • 2 sticks of butter is equal to 1 cup
  • 4 sticks of butter is equal to 2 cups
  • 8 sticks of butter is equal to 4 cups

Knowing these equivalents will help you measure butter accurately in your recipes.

Now that you have a good understanding of how many cups are in a stick of butter, let’s move on to the next section about how much butter is in a cup.

Advertisement

[bulkimporter_image id=’6′]

How Much Butter Is in a Cup

When it comes to baking or cooking, understanding the butter-to-cup ratio is crucial. Knowing how much butter is in a cup can make a huge difference in the outcome of your recipe.

In this discussion, we will explore the conversion of butter measurements and how to accurately measure the right amount of butter for your culinary endeavors.

Butter-To-Cup Ratio

To figure out the butter-to-cup ratio, divide the number of cups by the number of sticks. This ratio is essential when converting butter measurements or finding butter equivalents. Here are some important points to consider:

Advertisement
  • 1 stick of butter is equal to 1/2 cup.
  • 2 sticks of butter make 1 cup.
  • If a recipe calls for 1 cup of butter, you will need 2 sticks.
  • For 1/4 cup of butter, use half a stick.
  • To measure 1/3 cup of butter, you’ll need 5 and 1/3 tablespoons.

Understanding the butter-to-cup ratio allows for accurate measurements in recipes. Whether you’re baking cookies or making a savory dish, having the correct amount of butter is crucial for achieving the desired taste and texture.

Converting Butter Measurements?

Understanding how to convert butter measurements is essential for accurate recipe preparation. When it comes to converting butter measurements, there are a few common mistakes that people often make.

One of the most common mistakes is not knowing the correct conversion ratio. In the United States, butter is typically sold in sticks, with each stick weighing 1/2 cup or 8 tablespoons. However, in some recipes, butter may be measured in grams or ounces.

Another mistake people make is not properly measuring the butter. It is important to use a kitchen scale or measuring cups to ensure precise measurements.

Additionally, some recipes may call for melted butter, which can be measured differently than solid butter.

Understanding these conversions and avoiding these common mistakes will help ensure that your recipes turn out perfectly every time.

Advertisement

[bulkimporter_image id=’7′]

Measuring Butter for Baking

There’s no need to guess how many cups of butter are in a stick when measuring for baking. As someone who loves to bake, I have found that using the right tools for measuring butter is crucial for accurate results. Here are the best tools for measuring butter:

  • Measuring cups: These are the most common tools used for measuring butter. Make sure to use a dry measuring cup and pack the butter firmly for accurate measurements.

  • Kitchen scale: For precise measurements, a kitchen scale is the way to go. It allows you to measure the exact amount of butter required for your recipe.

  • Butter dish with markings: Some butter dishes come with markings that indicate the measurements. This makes it convenient to measure the required amount of butter directly from the dish.

  • Butter cutter: A butter cutter is a handy tool that helps you measure the butter by slicing it into tablespoons or teaspoons.

  • Butter wrappers: Butter wrappers often have measurements marked on them, making it easy to cut the butter into the desired amount.

By using these tools, you can ensure that your butter is measured accurately for your recipes.

Now, let’s move on to the next section where we will discuss a butter conversion chart.

Advertisement

[bulkimporter_image id=’8′]

Butter Conversion Chart

Now that we know how to measure butter for baking, let’s talk about butter conversion chart and how to convert butter for recipes.

It’s common to come across recipes that call for butter in different measurements, such as cups, tablespoons, or grams. To make things easier, there are some standard butter measurement equivalents that can be used for conversion.

For example, one stick of butter is equal to half a cup or 8 tablespoons. So if a recipe calls for 1 cup of butter, you would need 2 sticks or 16 tablespoons. It’s important to have these conversions handy to ensure you’re using the correct amount of butter in your recipes.

Advertisement

Now that we understand the butter conversion chart, let’s move on to some tips for measuring butter accurately.

[bulkimporter_image id=’9′]

Tips for Measuring Butter

To accurately measure butter, it’s helpful to soften it beforehand. Softening butter makes it easier to measure and ensures accurate results in your cooking. Here are some tips for measuring butter for cooking:

  • Take the butter out of the refrigerator and let it sit at room temperature for about 30 minutes before measuring.
  • Use a sharp knife to cut the butter into tablespoon-sized portions.
  • Fill a measuring cup with water and place the cut butter into the cup, submerging it completely.
  • Remove the butter from the water and drain any excess water.
  • Measure the butter in tablespoons or cups, depending on your recipe’s requirements.

[bulkimporter_image id=’10’]

Advertisement

Common Butter Measurement Mistakes

A common mistake when measuring butter is not using a sharp knife to cut it into proper portions. Accurately measuring butter is crucial in baking to achieve the desired results.

When butter is too soft or melted, it can throw off the texture and consistency of your baked goods. To measure butter accurately, start by using a sharp knife to cut the stick into tablespoon-sized portions. Then, use a measuring spoon to scoop out the desired amount.

It’s important to level off the butter with the back of a knife to ensure precise measurements. Another common mistake is eyeballing the amount of butter, which can lead to inconsistent results.

Frequently Asked Questions

Can I Use Margarine Instead of Butter in Baking Recipes?

I prefer using butter over margarine in baking recipes because it adds more flavor and richness. Margarine can affect the texture of baked goods, often making them softer and less tender. So, while margarine can be used as a substitute for butter in some recipes, it’s important to consider the impact on taste and texture.

How Can I Accurately Measure Butter Without Using a Scale?

When it comes to accurately measuring butter without a scale, it can be a bit tricky. But fear not! I’ve got you covered. Let me walk you through the process of converting butter measurements like a pro.

Advertisement

Can I Substitute Oil for Butter in a Recipe?

Substituting butter with oil in a recipe can have pros and cons. Oil can add moisture and make baked goods lighter, but it may also affect the taste and texture. The best oil substitutes for baking are vegetable oil, coconut oil, and olive oil.

How Much Butter Should I Use if the Recipe Calls for a Certain Number of Sticks?

When converting butter measurements, accurately measuring the amount of butter needed is crucial. If a recipe calls for a certain number of sticks, I can help you determine how much butter to use.

Can I Use Unsalted Butter Instead of Salted Butter in Baking Recipes?

Using unsalted butter for baking has its pros and cons. Pros include having more control over the saltiness of the recipe, while cons include potentially missing out on the flavor that salted butter provides.

Conclusion

In conclusion, understanding butter measurements is essential for successful baking. While a standard stick of butter is equivalent to 1/2 cup or 8 tablespoons, it’s important to note that this can vary depending on the brand or region.

To convert sticks to cups, simply divide the number of sticks by 2. Additionally, knowing that 1 cup of butter is equivalent to 2 sticks can help when following recipes.

Advertisement

By following a butter conversion chart and being mindful of common measurement mistakes, bakers can ensure accurate and delicious results.

Continue Reading

Trending