To clarify butter, start by cutting 1 pound of unsalted butter into small pieces and melting it in a heavy-bottomed saucepan over low heat. Stir gently until it completely melts and the foam rises to the top. Skim off the foam and let the denser milk solids settle at the bottom. Carefully pour the golden butterfat into a heat-resistant container, avoiding the solids. Strain it through a fine mesh strainer or cheesecloth for a smooth finish. Store your clarified butter in airtight containers in a cool, dark place or the fridge. There's so much more you can do with this delicious ingredient!
Key Takeaways
- Cut unsalted butter into small pieces and melt it slowly in a heavy-bottomed saucepan over low heat to prevent burning.
- Skim the white foam off the surface once the butter is fully melted, leaving the milk solids at the bottom undisturbed.
- Pour the clarified butter into a separate container, using a funnel to avoid spills and discarding the milk solids.
- Strain the poured butter through a fine mesh strainer or cheesecloth to remove any remaining impurities for a smooth texture.
- Store clarified butter in airtight containers in a cool, dark place or refrigerate for longer freshness; label with the date.
heavy-bottomed saucepan for melting butter
As an affiliate, we earn on qualifying purchases.
As an affiliate, we earn on qualifying purchases.
Gather Your Ingredients
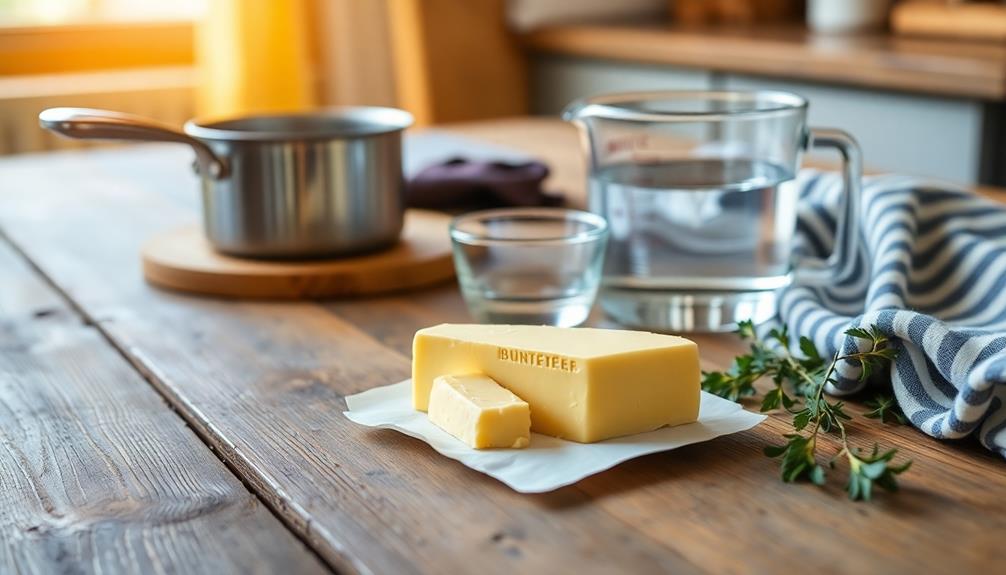
Gathering your ingredients is essential for a smooth clarifying process. Start with unsalted butter, as it allows you to control the flavor and salt content in your final product. Aim for around a pound, which usually yields about 1.5 cups of clarified butter.
You'll also want a sturdy, heat-resistant container to hold your clarified butter once it's done. A glass jar or a small bowl works perfectly. Make sure it's clean and dry before you use it.
Additionally, prepare a fine mesh strainer or cheesecloth. This will help you separate the milk solids from the liquid gold you're after. Having a spatula on hand can be helpful for scraping any remaining solids from the strainer.
Choose the Right Equipment
Choosing the right equipment is essential for successfully clarifying butter. First, you'll need a heavy-bottomed saucepan or pot. This type of cookware distributes heat evenly, preventing the butter from burning as it melts. A smaller pot is ideal if you're working with a limited amount of butter.
When preparing to clarify butter, consider how butter enhances flavor in various culinary applications, as this process will allow you to utilize it more effectively.
Next, grab a heatproof spatula or wooden spoon. You'll use this to stir the butter gently, ensuring it melts uniformly while separating the solids from the liquid. A fine-mesh strainer or cheesecloth is another vital tool. This is what you'll rely on to filter out the milk solids once the butter has melted and clarified.
Additionally, have a heat-safe container ready for the clarified butter. Glass jars or containers with tight-fitting lids work well, as they can be stored in the refrigerator after you finish. It's also helpful to have a ladle or small measuring cup on hand to pour the clarified butter without making a mess.
Lastly, keep a thermometer nearby if you want to monitor the temperature, though it's not strictly necessary. With the right equipment, you're all set to start the butter clarification process.
Melt the Butter
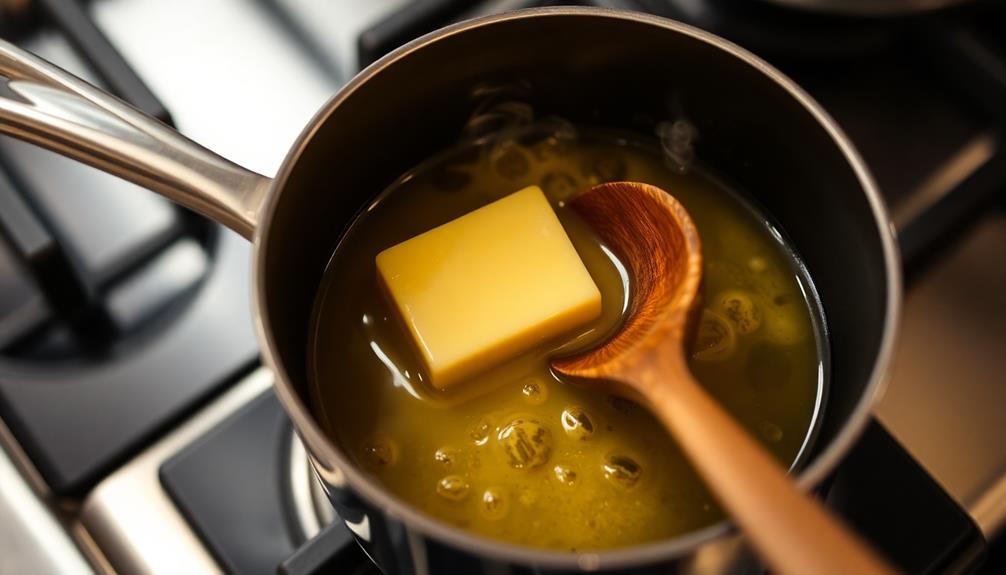
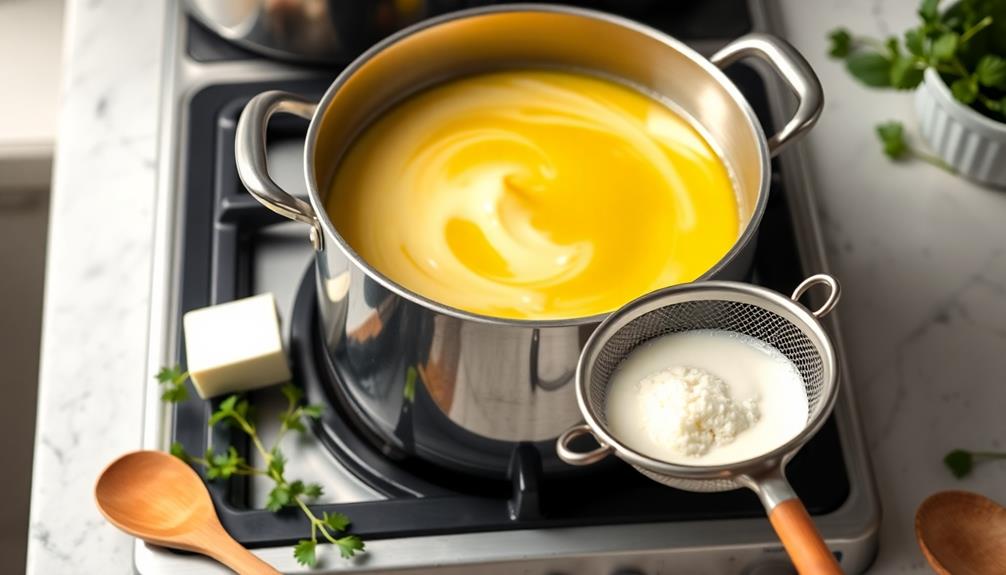
With your equipment in place, it's time to melt the butter. Start by cutting the butter into small, even pieces. This helps it melt evenly and prevents scorching.
Place the butter in your saucepan or double boiler, whichever you prefer. If you're using a saucepan, keep the heat low to avoid burning.
Turn the stove on to a low setting. As the butter begins to melt, stir it gently with a wooden spoon or silicone spatula. This not only guarantees even melting but also helps you keep an eye on the temperature. You want the butter to melt gradually without bubbling or browning; this is essential for clarifying it properly.
If you notice any foam forming on the surface, don't worry just yet. Your goal is to melt and separate the butterfat from the water and milk solids.
Continue to stir until all the butter is completely melted. Once it's fully melted, remove it from the heat, allowing it to cool slightly before moving on to the next step.
You're one step closer to enjoying beautifully clarified butter!
Separate the Layers
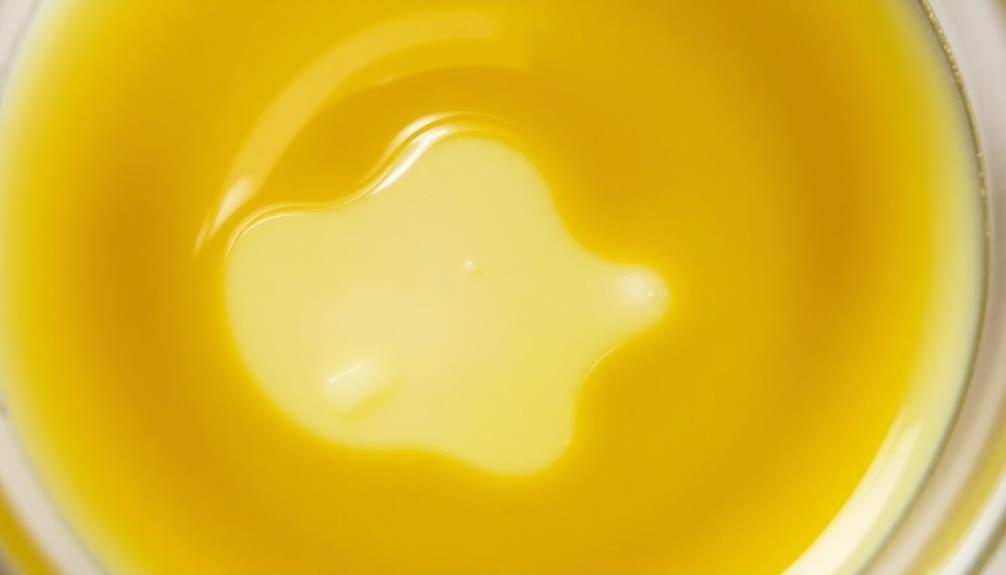
Once the butter has melted and cooled slightly, you can begin separating the layers. You'll notice three distinct layers: the top foam, the clarified butter in the middle, and the milk solids at the bottom. Your goal is to keep the clarified butter while discarding the other two layers.
Here's how to do it effectively:
- Skim the Foam: Use a spoon to carefully skim off the white foam from the top. This foam consists of water and some proteins that you don't want in your clarified butter.
- Leave the Milk Solids: As you scoop out the foam, be cautious not to disturb the layer of milk solids at the bottom. These solids are denser and will settle there as the butter cools.
- Transfer the Clarified Butter: Once you've removed the foam, gently pour the middle layer into another container, leaving the milk solids behind.
- Use a Funnel: If you're worried about spilling, use a funnel to help guide the butter into your storage jar without mixing in the solids.
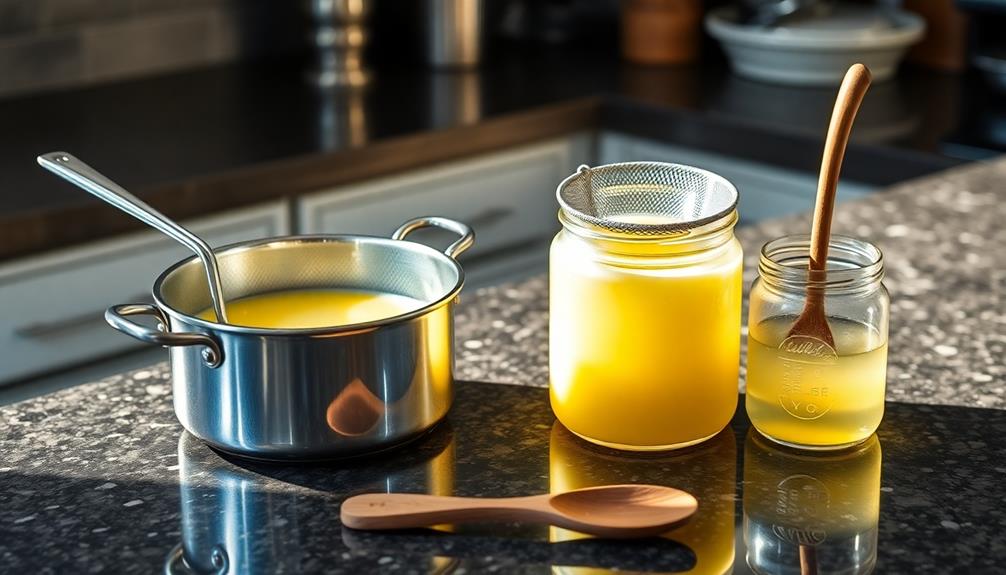
Strain the Clarified Butter
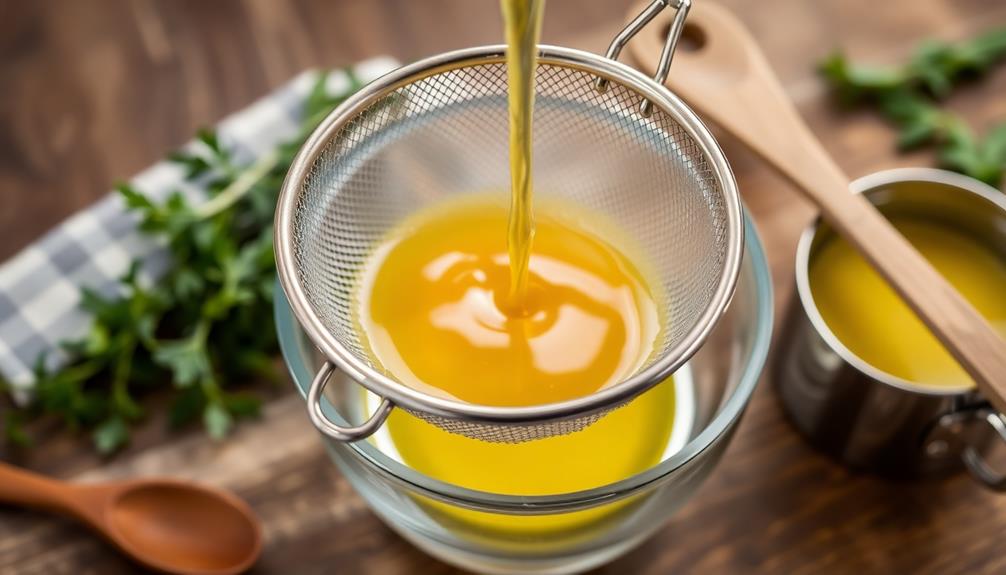
After transferring the clarified butter into another container, you'll want to strain it to remove any remaining impurities and guarantee a smooth texture. This step is vital to achieve the high quality of clarified butter, which has a long shelf life and is suitable for those with lactose intolerance.
Start by grabbing a fine mesh strainer or cheesecloth. Place the strainer over a clean bowl or jar, making sure it's stable and won't tip over during the pouring process.
Next, slowly pour the clarified butter into the strainer. This step is important, as it allows any milk solids or impurities to be caught while the liquid butter passes through. If you're using cheesecloth, you might want to fold it several times to create a finer filter.
If you notice any solids clinging to the strainer, gently scrape them away to make sure you're getting all the good stuff out. For best results, consider the proper storage techniques to maintain the freshness of your clarified butter.
Take your time with this process; rushing can lead to bits of solids slipping through. Once you've poured all the liquid butter, you can give the strainer a gentle shake to encourage any last drops to fall.
Discard the solids left in the strainer. Now, you're left with beautifully clarified butter, ready to enhance your cooking and baking!
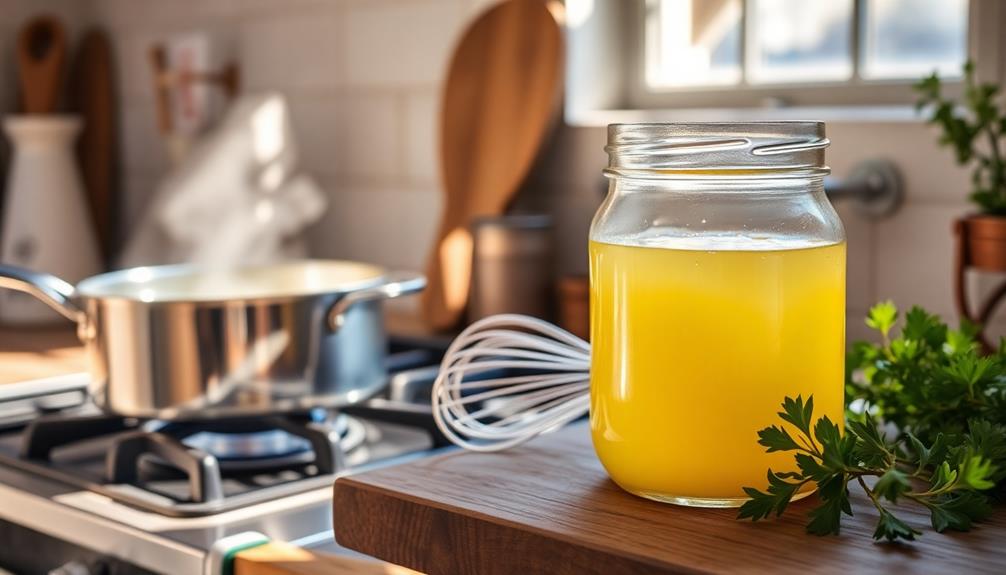
Store Your Clarified Butter

Once you've strained your clarified butter, it's important to store it properly to maintain its quality.
Consider using one of the many specialized butter tools available for ideal storage. You can choose from a variety of storage containers, but make sure they're airtight to prevent oxidation.
Keep your clarified butter in a cool, dark place for the best results.
Storage Containers Options
When it comes to storing your clarified butter, choosing the right container is crucial for maintaining its quality and freshness.
You'll want a container that's airtight, durable, and suitable for refrigeration or room temperature, depending on how you plan to use it. Here are some great options to take into account:
- Glass jars: These are ideal for both short- and long-term storage. They're non-reactive and easy to clean, plus you can see how much butter you have left.
- Plastic containers: Lightweight and often designed with airtight seals, plastic containers are portable and convenient, but make sure they're BPA-free.
- Silicone molds: If you're looking to store smaller portions, silicone molds allow you to freeze clarified butter in individual servings, making it easy to use just what you need.
- Tupperware: A classic choice, Tupperware offers various sizes and shapes, making it flexible for your storage needs. Just verify it's tightly sealed to keep out air and moisture.
No matter what container you choose, verify it's clean and dry before filling it with your delicious clarified butter!
Ideal Storage Conditions
Storing your clarified butter in the right conditions can greatly extend its shelf life and maintain its flavor.
First, keep it in an airtight container. This prevents moisture and air from entering, which can cause rancidity. Glass jars or food-safe plastic containers work well.
Next, choose a cool, dark place for storage. A pantry or cupboard away from direct sunlight is ideal. If you prefer, you can also store clarified butter in the refrigerator. While refrigeration can prolong its freshness, it may solidify, making it harder to scoop out. Just let it sit at room temperature for a few minutes before using.
If you opt for longer storage, consider freezing your clarified butter. Portion it into small containers or ice cube trays, then transfer the frozen cubes to a freezer-safe bag. This way, you can easily grab a small amount as needed.
Remember to label your containers with the date so you can track freshness. Properly stored, clarified butter can last up to three months in the fridge and even longer in the freezer.
Use in Recipes
Incorporating clarified butter into your recipes can elevate your dishes to a whole new level. This golden ingredient boasts a high smoke point, making it perfect for sautéing, frying, or baking.
You'll find that it enhances flavors while providing a rich, nutty aroma that regular butter can't match.
Here are some delicious ways to use clarified butter in your cooking:
- Sautéing vegetables: Use clarified butter to sauté your favorite vegetables for a savory side dish.
- Roasting meats: Brush clarified butter over meats before roasting for a crispy, golden exterior.
- Making sauces: Combine it with herbs and spices for a quick sauce that adds depth to your meals.
- Baking pastries: Replace regular butter in pastry recipes for a flaky texture and enhanced flavor.
Frequently Asked Questions
Can I Use Salted Butter for Clarification?
You can use salted butter for clarification, but it might alter the flavor of your final dish. Unsalted butter is generally preferred, as it allows for better control over the seasoning in your recipes.
How Long Does Clarified Butter Last in the Fridge?
Clarified butter can last in the fridge for up to six months if stored properly. You'll enjoy its rich flavor, appreciate its versatility, and savor its longer shelf life compared to regular butter.
Can I Clarify Butter in the Microwave?
Yes, you can clarify butter in the microwave! Just melt it gently, allowing the milk solids to settle. Carefully skim off the top layer, and you'll have clarified butter ready for your recipes. Enjoy!
What Is the Smoke Point of Clarified Butter?
You'd think clarified butter would smoke like a kitchen fire, but it actually has a higher smoke point around 450°F. You can cook at higher temperatures without worrying about burnt flavor ruining your dish.
Is Clarified Butter Healthier Than Regular Butter?
Clarified butter's often considered healthier since it contains less lactose and casein, making it easier to digest for some. Plus, its higher smoke point allows for better cooking without burning, enhancing your culinary experience.
Conclusion
Now that you've crafted your own golden elixir, you're ready to elevate your culinary creations! Like a chef's secret weapon, clarified butter adds a rich, nutty depth to any dish, transforming the ordinary into the extraordinary. Whether you drizzle it over vegetables or use it for sautéing, your meals will shimmer with flavor. So go ahead, indulge in the simple pleasure of your homemade clarified butter, and let your taste buds dance with delight!