Connect with us

Butter Basics

3 Simple Steps to Apply Beard Butter Effectively

Published

on

An image showcasing a man's hands gently massaging a dollop of rich, creamy beard butter into his well-groomed, lustrous beard

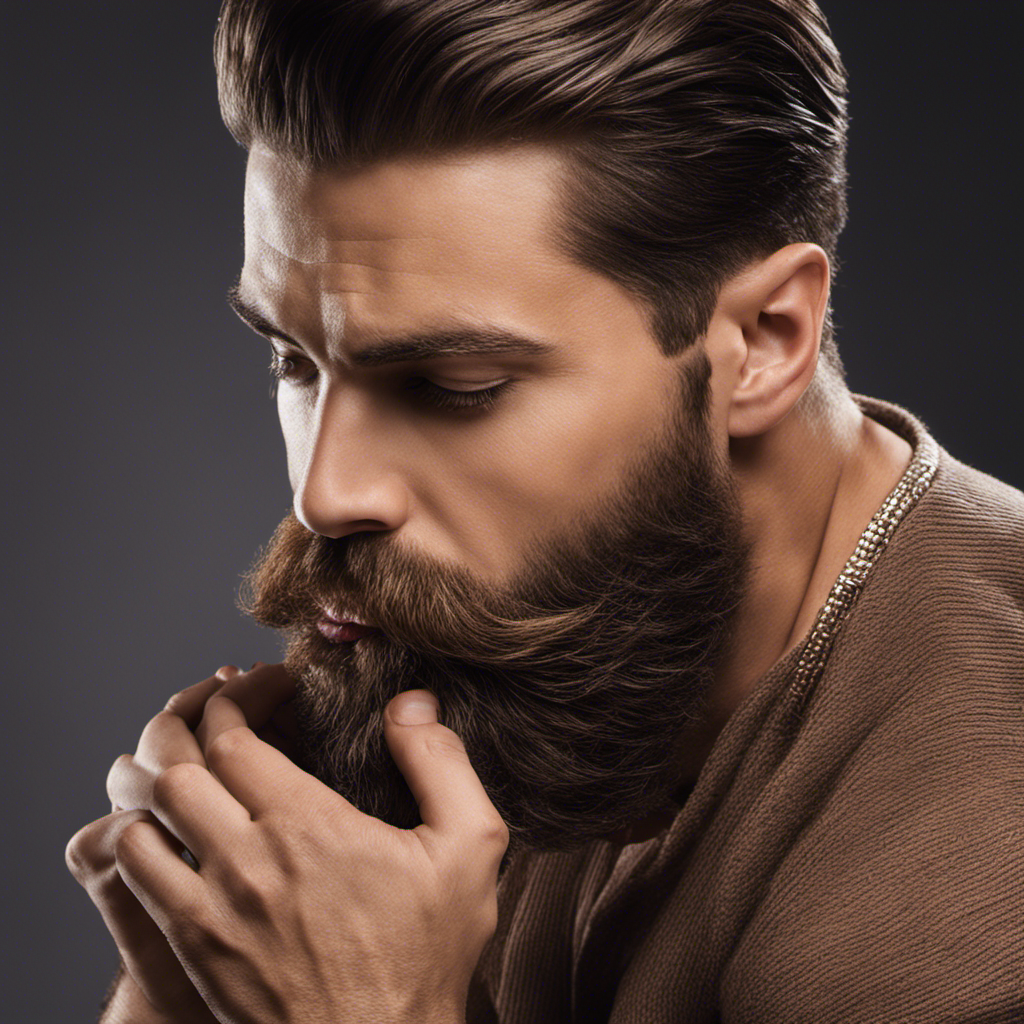
As a man sporting a beard, I have come to understand that keeping a well-groomed beard is a skillful craft. It requires attention, care, and the right tools.

One such tool that has become essential in my beard care routine is beard butter. This magical concoction not only softens and nourishes my facial hair, but also helps to keep it looking sharp and stylish.

In this article, I will guide you through the process of applying beard butter, step-by-step, so you can achieve the suave and sophisticated look you desire.

Key Takeaways

  • Beard butter achieves a softer and more manageable beard.
  • Proper preparation techniques set the stage for successful application.
  • Choosing the right beard butter for your needs is important.
  • Techniques for properly distributing beard butter ensure an even and nourished beard.
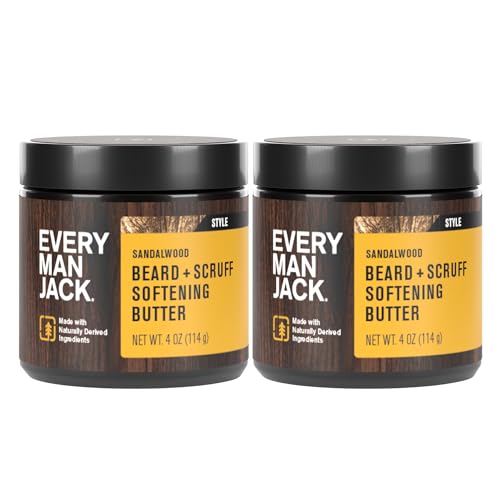
Benefits of Using Beard Butter

Using beard butter will help you achieve a softer and more manageable beard. The benefits of using beard butter are numerous.

Advertisement

Firstly, it deeply moisturizes your facial hair and the skin underneath, preventing dryness and itchiness. This is particularly important during the colder months when the skin tends to become drier.

Secondly, beard butter nourishes and strengthens the hair follicles, promoting healthier and thicker growth. It also helps to tame frizz and flyaways, making your beard look neater and more polished.

Furthermore, beard butter often contains natural ingredients such as shea butter and essential oils, which provide additional benefits like promoting a healthy beard growth and soothing the skin.

To apply beard butter correctly, warm a small amount between your palms and massage it into your beard, making sure to reach the roots.

Now, let’s move on to preparing your beard for application by following a few simple steps.

Advertisement

Preparing Your Beard for Application

Before starting, make sure your beard is clean and dry. Proper preparation techniques are essential for a successful beard care routine. To ensure your beard is ready for the application of beard butter, follow these steps:

  1. Wash your beard: Use a mild beard shampoo to cleanse your beard thoroughly. This will remove any dirt, debris, or excess oils that could hinder the absorption of the beard butter.

  2. Dry your beard: Gently pat your beard dry with a towel. Avoid rubbing vigorously, as this can cause frizz and damage the hair follicles.

  3. Comb your beard: Use a wide-toothed comb or a beard brush to detangle your beard. This will help distribute the beard butter evenly and prevent any clumps or uneven application.

By following these preparation techniques, you are setting the stage for a successful beard butter application.

Now, let’s move on to choosing the right beard butter for your needs.

Choosing the Right Beard Butter for Your Needs

Advertisement

To find the perfect beard butter for you, start by considering your specific grooming needs and preferences. Here are three important factors to keep in mind:

  1. Scent: Choosing the right scent for your beard butter is crucial. Whether you prefer a refreshing citrus aroma or a subtle woodsy fragrance, there are plenty of options to suit your personal taste. Experiment with different scents to find the one that complements your style and personality.

  2. Ingredients: Look for beard butters made with natural and nourishing ingredients like shea butter, jojoba oil, and argan oil. These ingredients will not only moisturize and soften your beard but also promote healthy hair growth.

  3. Storage: Properly storing your beard butter is essential to maintain its quality. Keep it in a cool, dry place away from direct sunlight. Avoid exposing it to extreme temperatures, as this can alter its consistency and effectiveness.

Step-by-Step Guide to Applying Beard Butter

Start by warming a small amount of the product in your palms before rubbing it into your beard for optimal coverage and absorption.

Choosing the right product for your beard is crucial in maintaining its health and appearance.

When applying beard butter, there are a few tips to ensure an even distribution.

First, make sure your beard is clean and dry. This will help the product penetrate the hair follicles more effectively.

Advertisement

Next, start by applying the butter to the areas that need the most attention, such as the chin and mustache.

Use your fingertips to massage the product into your beard, working from the roots to the ends.

Finally, use a beard comb or brush to evenly distribute the butter and style your beard as desired.

How Much Beard Butter to Use

Advertisement

When determining how much beard butter to use, it’s important to consider the length and thickness of your facial hair. Here are some guidelines to help you determine the right amount:

  1. Short and thin beard: Start with a small amount, about the size of a pea. You can always add more if needed.

  2. Medium length and average thickness: Use a dime-sized amount to ensure even coverage and nourishment.

  3. Long and thick beard: You may need a quarter-sized amount or more to thoroughly moisturize and condition your beard.

Remember, these are just general guidelines, and you can adjust the amount based on your personal preference and the specific brand of beard butter you’re using.

Speaking of brands, some of the best beard butter brands available include Honest Amish, Beard Bolt XL, and Wild Willies.

Now that you know how much beard butter to use, let’s move on to the next section where we’ll discuss techniques for properly distributing it throughout your beard.

Techniques for Properly Distributing Beard Butter

When it comes to distributing beard butter, there are two main techniques to consider: using your fingers or a comb. Both methods have their advantages and it ultimately comes down to personal preference.

Advertisement

If you prefer a more controlled and precise application, using your fingers allows you to target specific areas and work the butter into your beard.

On the other hand, using a comb can help to evenly distribute the butter throughout your beard, ensuring that every strand is coated.

The amount of beard butter to apply will depend on the length and thickness of your beard. Start with a small amount and gradually increase if needed, making sure to evenly distribute it from root to tip.

This will help to keep your beard moisturized, nourished, and looking its best.

Finger Vs. Comb

Using your fingers allows for better control and distribution of the beard butter compared to using a comb. When it comes to applying beard butter, the method you choose can make a significant difference in the overall outcome. Here are three reasons why using your fingers is the superior choice:

Advertisement
  1. Precision: Your fingers give you the ability to target specific areas of your beard, ensuring that every strand receives an adequate amount of butter. This level of precision is hard to achieve with a comb, which may not reach all the nooks and crannies.

  2. Even Distribution: By using your fingers, you can evenly distribute the beard butter throughout your facial hair. This ensures that every part of your beard receives the nourishing benefits of the butter, resulting in a healthier, more lustrous beard.

  3. Massage and Styling: Your fingers allow you to massage the butter into your beard, stimulating blood flow and promoting healthy growth. Additionally, you can use your fingers to shape and style your beard, giving it the desired look and texture.

Amount to Apply

To achieve optimal results, it’s crucial to find the right amount of beard product for your facial hair.

When it comes to beard care and grooming techniques, using the right amount of beard butter is essential. Applying too little may not provide enough nourishment, while applying too much can leave your beard feeling greasy and weighed down.

The key is to start with a small amount, about the size of a dime, and then gradually increase if needed. Rub the butter between your palms until it melts, then distribute it evenly throughout your beard, making sure to reach the roots.

Use your fingers or a comb to style your beard as desired. Remember, finding the perfect amount may require some trial and error, but with time and practice, you’ll discover what works best for your facial hair.

Massage Techniques for Better Absorption

For better absorption, gently massage the beard butter into your facial hair using small, circular motions. This massage technique helps to evenly distribute the product and allow it to penetrate deeply into the hair and skin.

Advertisement

Here are some tips to enhance the effectiveness of your beard butter application:

  1. Start from the roots: Begin massaging the butter into your beard starting from the roots. This ensures that the product reaches the base of the hair follicles and nourishes the hair from within.

  2. Use your fingertips: Use the pads of your fingers to massage the butter into your beard. This allows for better control and ensures that the product is evenly distributed.

  3. Don’t forget the skin: While massaging the beard butter, make sure to also massage it into the skin beneath your facial hair. This helps to moisturize and nourish the skin, promoting healthy beard growth.

Product recommendations: When it comes to beard butter, I highly recommend trying out brands like Honest Amish, Beardbrand, and Zeus. These brands offer high-quality products that are specifically formulated to nourish and condition your beard, leaving it soft, manageable, and healthy.

Styling Your Beard After Applying Beard Butter

When it comes to styling your beard after applying beard butter, there are a few key points to consider.

First, you want to ensure that your beard has the right shape and definition. This can be achieved by using a comb or brush to shape the beard in the desired direction.

Additionally, beard butter provides a long-lasting hold, keeping your beard in place throughout the day.

Advertisement

Shape and Definition

Using beard butter regularly can help achieve a well-defined and shaped beard. Beard grooming is an essential part of maintaining a healthy and attractive beard. By incorporating beard care techniques into your routine, you can ensure that your beard is always looking its best.

Here are three key tips for shaping and defining your beard:

  1. Start with clean, dry hair: Before applying beard butter, make sure your beard is clean and dry. This will allow the product to penetrate the hair follicles more effectively, resulting in a more defined look.

  2. Use the right amount of product: A little goes a long way when it comes to beard butter. Start with a small amount and gradually add more if needed. This will prevent your beard from looking greasy or weighed down.

  3. Comb or brush in the desired shape: Once you have applied the beard butter, use a comb or brush to shape and define your beard. Start from the roots and work your way down to the ends, ensuring that the product is evenly distributed.

Long-Lasting Hold

To achieve a long-lasting hold, it is crucial to evenly distribute the product throughout your beard. This step ensures that every hair strand is coated with the nourishing ingredients in the beard butter.

Nourishing ingredients like shea butter, argan oil, and jojoba oil penetrate deep into the hair follicles, providing hydration and strengthening the hair from within. This not only keeps your beard soft and manageable but also helps to prevent breakage and split ends.

As you massage the beard butter into your beard, take your time to work the product in. Make sure that every hair is coated to create a long-lasting hold. This will keep your beard looking its best throughout the day.

Advertisement

Natural, Polished Look

For a natural, polished look, simply work the nourishing ingredients into your beard, ensuring that every strand is coated evenly. Beard butter is a versatile grooming product that not only conditions your facial hair but also helps you achieve the desired style effortlessly.

Here are three steps to style your beard using beard butter:

  1. Start with a clean, dry beard: Before applying beard butter, make sure your beard is clean and dry. This allows the butter to penetrate the hair follicles effectively.

  2. Take a small amount of beard butter: Scoop out a small amount of beard butter onto your fingertips. Remember, a little goes a long way, so start with a small quantity and add more if needed.

  3. Work it into your beard: Rub the butter between your palms to warm it up, then massage it into your beard, starting from the roots and working your way down to the tips. Use your fingers or a beard brush to distribute the butter evenly.

By following these steps, you can achieve a natural, polished look with beard butter.

Now, let’s move on to some tips for maintaining a healthy beard with beard butter.

Tips for Maintaining a Healthy Beard With Beard Butter

Maintaining a healthy beard is easier when you regularly apply beard butter. Not only does beard butter help to moisturize and nourish your facial hair, but it also keeps your skin underneath healthy and hydrated. As someone who is passionate about beard grooming, I have discovered some tips and tricks that have made a significant difference in the appearance and health of my beard. Here are a few beard care tips that I highly recommend:

Advertisement
Beard Care Tips
1. Wash your beard regularly with a beard-specific shampoo.
2. Apply beard oil before applying beard butter for added moisture.
3. Use a beard brush or comb to distribute the butter evenly.
4. Trim your beard regularly to maintain its shape and prevent split ends.

Frequently Asked Questions

Can Beard Butter Be Used on a Mustache as Well?

Yes, beard butter can be used on a mustache as well. It provides many benefits for mustache grooming, such as moisturizing the hair, reducing frizz, and adding shine. Applying it is simple and effective.

How Often Should I Apply Beard Butter?

I apply beard butter daily to keep my beard moisturized and promote healthy growth. It takes a few weeks of consistent use to see noticeable results. So, if you’re wondering how often to apply, daily is the way to go.

Can Beard Butter Help With Beard Dandruff?

Yes, beard butter can help with beard dandruff. The ingredients in beard butter, such as nourishing oils and butters, moisturize the skin underneath, reducing dryness and flakiness. Regular use of beard butter has numerous benefits for a healthy, dandruff-free beard.

Is Beard Butter Suitable for All Types of Hair Textures?

Beard butter is suitable for all hair textures. It helps moisturize and nourish the beard, reducing dryness and frizz. Some of the best beard butter brands include Honest Amish and Beardbrand.

Can I Use Beard Butter if I Have Sensitive Skin?

Yes, you can use beard butter even if you have sensitive skin. It has numerous benefits for sensitive skin, such as moisturizing and soothing properties. It helps to reduce irritation and keeps your beard and skin healthy.

Advertisement

Conclusion

In conclusion, applying beard butter is crucial for maintaining a healthy and well-groomed beard. By using the right amount and distributing it properly, you can experience the benefits of beard butter such as softness, shine, and hydration.

Don’t forget to choose the right beard butter for your specific needs. Take the time to massage it into your beard for better absorption. These techniques will allow you to style your beard with ease and keep it looking its best.

So, go ahead and give your beard the love it deserves with beard butter!

Continue Reading
Advertisement

Butter Basics

What if You Buttered Up Your Life with “Butter”?

Published

on

By

An image of a slice of toast with melted butter, oozing with richness and flavor

Have you thought about the idea of making your own delicious and nutritious butter at home? Imagine being able to create that rich, creamy delicacy right in your own kitchen!

In this article, we will delve into the world of butter, exploring its various types and culinary uses. We will also uncover the science behind making perfect butter at home and dive into the fascinating history of this beloved ingredient.

Get ready to embark on a buttery adventure that will leave you craving for more.

Key Takeaways

  • Grass-fed butter is rich in essential vitamins and fatty acids, promoting healthy skin, bones, and immune system.
  • Homemade butter allows for control over ingredients, avoiding unhealthy additives or preservatives.
  • Flavored butter options and vegan alternatives offer diverse culinary exploration and cater to different dietary preferences.
  • Proper temperature during the butter-making process is crucial for achieving the desired consistency and yield.

The Health Benefits of Homemade Butter

If you make your own butter, you’ll enjoy the health benefits that come with it. One of the main benefits of grass-fed butter is its high nutrient content. Grass-fed cows produce milk that is rich in vitamins A, D, E, and K. These vitamins are essential for maintaining healthy skin, strong bones, and a properly functioning immune system.

Advertisement

Grass-fed butter also contains a healthy balance of omega-3 and omega-6 fatty acids, which are important for brain health and reducing inflammation in the body.

Additionally, making your own butter at home allows you to control the ingredients, giving you the freedom to create flavored butter using herbs, spices, or even fruits. This allows you to add extra flavor and nutrients to your dishes without relying on store-bought options that may contain unhealthy additives or preservatives.

Exploring Different Types of Butter

There are various types of butter available for exploration. When it comes to flavored butter, the options are endless. From savory garlic butter to sweet cinnamon butter, these variations add a burst of flavor to any dish.

Additionally, for those following a vegan lifestyle, there are plenty of vegan butter alternatives to choose from. Made from plant-based oils like coconut or olive, these spreads provide a similar creamy texture and taste. They are perfect for baking or spreading on toast.

Exploring different types of butter can be a fun and delicious journey, allowing you to elevate your meals and cater to different dietary preferences. So go ahead and indulge in the world of flavored butter and vegan alternatives to discover new and exciting flavors.

Advertisement

Butter as a Culinary Ingredient: Tips and Tricks

To enhance your culinary skills, try incorporating butter into your recipes using these helpful tips and tricks.

Butter is not only a rich and creamy ingredient, but it can also be used as a vegan alternative. For those who follow a plant-based diet, there are several substitutes available such as vegan butter or margarine made from plant oils. These alternatives can be used in baking, cooking, or spreading on toast.

Additionally, using flavored butter can elevate your dishes to a whole new level. Get creative with flavor combinations like garlic and herb butter for roasted vegetables or lemon and dill butter for grilled fish. The possibilities are endless, and flavored butter can add depth and complexity to your favorite recipes.

Advertisement

The Science Behind Making Perfect Butter at Home

Creating homemade butter is a fascinating process that involves churning cream until it separates into butter and buttermilk. The chemistry of churning butter is a delicate balance of fat and water molecules. Temperature plays a crucial role in butter making.

Here are some key points to consider:

  • Cream should be at a slightly warmer temperature, around 50-55°F, to ensure proper separation.
  • Churning at too low a temperature can result in a longer process and less yield.
  • Conversely, churning at too high a temperature can cause the butter to become greasy and not hold its shape well.
  • The ideal temperature range allows for the fat globules to coalesce and form a solid mass.
  • The process can be accelerated by using colder cream or a colder churning environment.

Understanding the chemistry and temperature requirements of butter making ensures a successful outcome.

Now, let’s uncover the history of butter: from ancient times to today.

Uncovering the History of Butter: From Ancient Times to Today

Advertisement

Let’s delve into the fascinating history of butter, from ancient times to today.

Butter has played a significant role in the cultural traditions of various regions around the world. In Europe, for example, butter has been a staple in cooking and baking for centuries, symbolizing richness and indulgence.

In India, ghee, a form of clarified butter, holds great cultural and religious significance and is used in traditional ceremonies and rituals.

The environmental impact of butter production, however, is a growing concern. The dairy industry contributes to greenhouse gas emissions and deforestation, as well as water pollution from runoff.

Sustainable practices, such as organic farming and reducing food waste, are being implemented to mitigate these effects.

Advertisement

It is crucial to balance the cultural importance of butter with sustainable production methods for a better future.

Frequently Asked Questions

How Many Calories Are in a Serving of Homemade Butter?

A serving of homemade butter typically contains around 100-120 calories. It is important to note that butter is high in saturated fat and should be consumed in moderation. However, it does provide some nutritional benefits, such as being a good source of vitamin A.

What Is the Shelf Life of Homemade Butter?

The shelf life of homemade butter varies depending on storage methods. It can last up to two weeks in the refrigerator and up to six months in the freezer. Proper storage is crucial to maintain its freshness.

Can Homemade Butter Be Used as a Substitute for Margarine in Baking Recipes?

If I were to use homemade butter as a substitute for margarine in baking, I would ensure it’s properly chilled and the moisture content is controlled. This way, the butter can provide a richer flavor and better texture to the baked goods.

Are There Any Potential Allergens in Homemade Butter?

There are potential health risks associated with homemade butter, including the possibility of allergens. It’s important to consider the source of ingredients and proper hygiene practices. Store-bought butter may offer more safety assurances.

Advertisement

Can Homemade Butter Be Frozen for Long-Term Storage?

Yes, you can freeze homemade butter for long-term storage. It’s important to wrap it tightly to prevent freezer burn. There are many homemade butter recipes available online that can guide you through the process.

Conclusion

As I churned the cream, a sense of satisfaction washed over me. The process of making homemade butter had not only given me a delicious spread for my toast, but also a deeper understanding of its health benefits and culinary versatility.

Each rich, golden pat symbolized the nourishment and creativity that butter brings to our lives. Delving into its history, I saw how this humble ingredient has stood the test of time, evolving with us.

So, next time you see a stick of butter, remember the power it holds and the possibilities it offers.

Advertisement
Continue Reading

Butter Basics

What Happens if You Use Expired Shea Butter on Your Skin?

Published

on

By

An image of a cracked, discolored jar of expired shea butter, oozing with a rancid odor

As someone who is passionate about taking care of my skin, I have learned the importance of using high-quality products. But what happens if we accidentally use expired shea butter? Let me tell you, the results are not good.

Signs of expired shea butter include changes in texture, loss of nutritional benefits, and potential skin irritation. Plus, there’s a risk of mold or bacteria growth.

In this article, I’ll delve into the potential dangers and safety concerns of using expired shea butter, so you can make informed decisions for your skincare routine.

Key Takeaways

  • Using expired shea butter can lead to reduced skin softness and decreased skin elasticity.
  • Expired shea butter may cause dry and rough skin, as well as a lack of natural glow.
  • There is a potential risk of mold or bacteria growth on expired shea butter, which can result in skin irritations, infections, and allergic reactions.
  • To ensure safety and effectiveness, it is important to check the expiration date, store shea butter properly, and avoid using expired products to prevent bacterial or fungal contamination.

Signs of Expired Shea Butter

If you’re wondering how to tell if your shea butter has expired, you can look for changes in texture and smell. Shea butter typically has a shelf life of about two years, but it can start to deteriorate over time.

Advertisement

When shea butter expires, it may become grainy or lumpy instead of smooth and creamy. The texture can be a clear indicator that the shea butter is past its prime. Additionally, the smell of expired shea butter can change, becoming rancid or unpleasant.

It’s important to note that using expired shea butter may not be harmful to your skin, but it may not provide the same beneficial effects as fresh shea butter.

Now, let’s dive into the changes in texture and consistency that can occur when shea butter expires.

Changes in Texture and Consistency

To change the texture and consistency of your expired shea butter, simply store it in a warm environment. When shea butter expires, it can become dry, hard, or grainy. However, by subjecting it to heat, you can bring it back to its original smoothness.

Here are some changes you may notice in the appearance of expired shea butter:

Advertisement
  • Loss of its creamy consistency
  • Formation of lumps or clumps
  • Development of a rancid smell

It’s important to note that expired shea butter may not be as effective as fresh shea butter in providing the same nourishing benefits for your skin. Additionally, the shelf life of shea butter can vary depending on how it is stored. Properly stored shea butter can last up to two years, but exposure to air, heat, and light can shorten its lifespan.

Loss of Nutritional Benefits

When shea butter expires, it loses its nutritional benefits and may not provide the same nourishing effects for your skin. As the expiration date approaches, the effectiveness of shea butter decreases, leading to weakened nourishing properties. The natural vitamins and fatty acids that make shea butter so beneficial gradually break down over time, resulting in a diminished ability to moisturize and protect the skin.

The expiration process causes the shea butter to become less potent, reducing its ability to soothe dryness, heal damaged skin, and improve elasticity. Using expired shea butter may not only be less effective but could also potentially cause skin irritations or allergic reactions.

To ensure maximum benefits, it’s essential to check the expiration date and replace your shea butter when needed.

Advertisement

Potential Skin Irritation

Allergic reactions are possible when using expired shea butter, as the quality and potency of the ingredients may have degraded over time. It is important to note that everyone’s skin reacts differently, so what may cause an allergic reaction in one person may not affect another.

Additionally, expired shea butter can also lead to increased bacterial growth, which can further irritate the skin and potentially cause infections.

Allergic Reactions Possible

Using expired shea butter can potentially cause allergic reactions. It is important to be aware of the potential side effects that can occur when using expired skincare products.

Here are some key points to consider:

  • Skin irritation: Expired shea butter may contain harmful bacteria or mold, which can irritate the skin and cause redness, itching, or rashes.

  • Decreased effectiveness: Over time, shea butter can lose its beneficial properties, such as its moisturizing and healing abilities. Using expired shea butter may not provide the desired results.

  • Risk of infection: Expired shea butter can harbor increased bacterial growth, which can lead to skin infections or other complications.

Therefore, it is crucial to always check the expiration dates on skincare products and avoid using expired shea butter to prevent potential allergic reactions and other negative effects on the skin.

Advertisement

Increased Bacterial Growth

The risk of infection can significantly increase due to the increased bacterial growth in expired shea butter. When shea butter expires, it becomes more susceptible to increased microbial contamination. Bacteria can thrive in expired shea butter, leading to a higher chance of contamination when it is applied to the skin. This increased bacterial growth can pose a serious risk to our health.

Additionally, expired shea butter may also have diminished efficacy. Over time, the beneficial properties of shea butter, such as its moisturizing and healing abilities, can deteriorate, making it less effective in providing the desired results.

It is important to check the expiration date of shea butter before using it to ensure its safety and efficacy.

Decreased Effectiveness for Moisturizing

When shea butter expires, its hydration properties become weakened, resulting in a decreased effectiveness for moisturizing the skin.

Additionally, the nourishing benefits of expired shea butter diminish, causing a loss in its ability to provide essential nutrients to the skin.

Advertisement

As a result, the skin may experience reduced softness and a lack of moisture retention, leading to potential dryness and discomfort.

Weakened Hydration Properties

Expired shea butter may not have its full hydration properties intact. When shea butter expires, it can lead to weakened hydration properties, resulting in decreased moisturizing effectiveness. This means that using expired shea butter on your skin may not provide the same level of hydration and moisture as fresh shea butter.

Here are some emotional responses that may arise from using expired shea butter:

  • Frustration: Feeling disappointed that the shea butter you were counting on for hydration is not as effective as expected.
  • Discomfort: Experiencing dryness and roughness on your skin due to the weakened hydration properties.
  • Wasted effort: Realizing that you have been using expired shea butter and the time and money spent on it have gone to waste.

Using expired shea butter not only results in weakened hydration properties but also leads to a loss of nourishing benefits for your skin.

Loss of Nourishing Benefits

Using expired shea butter can result in a loss of the nourishing benefits it provides to your skin. Shea butter is known for its moisturizing and healing properties, but these qualities diminish over time. The expiration date on the packaging indicates the period during which the shea butter is at its best.

Once it has expired, the butter may start to oxidize and degrade, leading to a decrease in its effectiveness. The nourishing vitamins and fatty acids present in shea butter may become less potent, making it less beneficial for your skin. It’s important to check the expiration date and use fresh shea butter to ensure you are receiving all the nourishing benefits it has to offer.

Advertisement

Reduced Skin Softness

When shea butter expires, not only does it lose its nourishing benefits, but it can also lead to reduced skin softness. Expired shea butter may not provide the same level of hydration and moisture to the skin as fresh shea butter does. This can result in several negative effects on the skin, including reduced skin elasticity and decreased moisturization.

Using expired shea butter can leave your skin feeling dry, rough, and lacking the natural glow it once had. The decreased moisturization can also lead to the development of fine lines and wrinkles, making you appear older than you actually are. To ensure optimal skin softness and health, it is important to use fresh shea butter that hasn’t expired.

Potential Mold or Bacteria Growth

If shea butter is expired, there’s a chance that mold or bacteria could grow on it. Using expired shea butter can pose potential health risks as these microorganisms can cause skin irritations, infections, or allergic reactions. It is crucial to properly store shea butter to maintain its freshness and extend its shelf life. Here are some recommended storage methods to prevent the growth of mold or bacteria:

Storage Method Description
Keep it sealed Ensure the shea butter container is tightly sealed after each use to prevent air and moisture from entering, creating an environment conducive to bacterial growth.
Store in a cool place Shea butter should be stored in a cool, dry place away from direct sunlight and heat sources. Elevated temperatures can accelerate the growth of bacteria and mold.
Avoid contamination Do not touch the shea butter directly with your fingers. Instead, use a clean, dry spoon or spatula to scoop out the desired amount to minimize the risk of introducing bacteria.

Safety Concerns and Allergic Reactions

To avoid potential health risks and allergic reactions, it’s important to check the expiration date of your shea butter and store it properly. Expired shea butter can lead to various skin reactions, such as rashes, itching, and redness. The shelf life of shea butter can vary depending on the processing and storage conditions.

Here are a few key points to keep in mind:

Advertisement
  • Expired shea butter may lose its effectiveness and may not provide the desired benefits for your skin.
  • Using expired shea butter can increase the risk of bacterial or fungal contamination, which can lead to infections.
  • Allergic reactions can occur when using expired shea butter, especially if you have sensitive skin or existing allergies.

To ensure your safety and get the most out of your shea butter, always check the expiration date and store it in a cool, dry place away from direct sunlight.

Frequently Asked Questions

Can Expired Shea Butter Be Harmful if Used on the Skin?

Expired shea butter can be harmful if used on the skin. It may lose its effectiveness for hair care and can cause potential side effects on sensitive skin. It’s important to check the expiration date and avoid using expired products.

How Long Does Shea Butter Usually Last Before It Expires?

Shea butter typically lasts up to two years before it expires. To ensure its longevity, store it in a cool, dry place away from direct sunlight. Signs of expiration include a rancid smell and a change in texture.

Can Using Expired Shea Butter Cause Skin Allergies or Irritation?

Using expired shea butter can potentially cause skin allergies or irritation. It’s important to note that expired skincare products may lose their effectiveness and could harbor harmful bacteria, posing risks to skin health.

Can Expired Shea Butter Still Be Effective for Treating Dry Skin?

Using expired shea butter on hair may not provide the same benefits as fresh shea butter. However, it can still be effective for treating dry skin, including eczema.

Is It Safe to Use Shea Butter That Has Mold or Bacteria Growth on It?

Using shea butter with mold or bacteria growth can pose potential health risks. To prevent this, store shea butter in a clean, airtight container in a cool, dry place. Always check for expiration dates to ensure safety.

Advertisement

Conclusion

In conclusion, using expired shea butter can have negative effects on your skin and overall health. The signs of expired shea butter include changes in texture and consistency, as well as a loss of nutritional benefits. It may also cause potential skin irritation and decrease its effectiveness for moisturizing.

Furthermore, there is a risk of mold or bacteria growth, which can be harmful to your skin. To ensure safety and avoid allergic reactions, it’s important to check the expiration date and use fresh shea butter.

So remember, don’t let your skin suffer, and always use fresh shea butter to keep it nourished and healthy.

Continue Reading

Butter Basics

What Does Indian Butter Chicken Taste Like: A Flavorful Experience

Published

on

By

An image that showcases the rich, creamy texture of Indian Butter Chicken, with tender chunks of marinated chicken, immersed in a vibrant orange sauce, infused with a medley of aromatic spices

Curious about trying Indian butter chicken? Get ready for a burst of delicious flavors!

This mouthwatering dish is a symphony of traditional Indian flavors, packed with a creamy and rich sauce that will make your taste buds dance with delight.

The combination of aromatic spices creates a perfect balance of sweet and savory, while the tender and juicy chicken takes it to a whole new level.

Get ready to be transported to a world of delectable aromas and flavors that will leave you craving more.

Key Takeaways

  • Indian butter chicken embodies the essence of Indian cuisine, combining spices and ingredients from diverse regional variations.
  • The creamy and rich sauce in Indian butter chicken creates a symphony of flavors that complement the chicken, leaving you completely satisfied.
  • The flavorful spice blend in Indian butter chicken, including spices like cumin, coriander, turmeric, and garam masala, creates a harmonious balance of heat, sweetness, and creaminess.
  • The succulent and tender chicken in Indian butter chicken is infused with flavor through the marinade and cooking techniques, enhancing the overall taste of the dish.

Traditional Indian Flavors

Advertisement

If you’re craving traditional Indian flavors, you’ll love the rich and aromatic taste of Indian butter chicken. This dish perfectly embodies the essence of Indian cuisine with its unique blend of spices and ingredients.

Indian butter chicken has been influenced by the diverse regional variations found across India, resulting in a dish that is both familiar and distinct. From the fiery flavors of North Indian cuisine to the subtle and delicate tastes of South Indian cuisine, every bite of butter chicken is a journey through the diverse culinary landscape of India.

The combination of tender chicken, marinated in a flavorful blend of spices and cooked in a creamy and rich sauce, creates a harmonious balance of flavors that will leave you craving for more.

Creamy and Rich Sauce

Get ready to indulge in a culinary experience like no other with this discussion on the flavorful spice blend and succulent chicken pieces that make up this mouthwatering dish.

The aroma of the spices will instantly transport you to the bustling streets of India, while the tender chicken pieces will melt in your mouth, leaving you craving for more.

Advertisement

Each bite is a symphony of flavors, with the spices perfectly complementing the juicy chicken, creating a harmonious blend that will leave you completely satisfied.

Flavorful Spice Blend

You’ll love the flavorful spice blend in Indian butter chicken. This popular Indian dish is known for its aromatic and rich taste, thanks to the spice-infused marinade.

The combination of spices like cumin, coriander, turmeric, and garam masala creates a symphony of flavors that will tantalize your taste buds. The marinade not only adds depth to the chicken but also helps to tenderize it, resulting in succulent and juicy pieces of meat.

As the chicken cooks in the creamy and buttery tomato sauce, the flavors meld together, creating a harmonious balance of heat, sweetness, and creaminess. The spices add a subtle kick that is not overpowering but still provides a delightful warmth.

Get ready to savor the explosion of flavors in every bite as the succulent chicken pieces are coated in the fragrant and spiced sauce.

Advertisement

Succulent Chicken Pieces

The succulent chicken pieces become incredibly tender as they cook in the creamy tomato sauce. The juicy marinade penetrates the meat, infusing it with a burst of flavor. The chicken takes on a rich, savory taste that is enhanced by the spices and herbs in the marinade.

The cooking techniques used in Indian butter chicken are essential in achieving the perfect texture and taste. The chicken is first marinated in a mixture of yogurt, lemon juice, and various spices for several hours. This allows the flavors to develop and tenderize the meat.

Then, the chicken is cooked in a buttery tomato sauce, allowing it to absorb the creamy goodness. The result is a dish that is succulent and full of flavor, with the chicken practically melting in your mouth.

Mouthwatering Spices

Advertisement

Experience the explosion of flavors in each bite as the mouthwatering spices in Indian butter chicken tantalize your taste buds. Indian butter chicken is known for its sensational flavor combination and tantalizing aroma that will leave you craving for more. The rich and creamy tomato-based sauce is infused with a blend of aromatic spices, creating a harmonious balance of heat and tanginess. The use of spices like cumin, coriander, turmeric, and garam masala adds depth and complexity to the dish. The tender chicken pieces are marinated in a yogurt-based marinade, which helps to tenderize the meat and enhance the flavors. Each bite is a burst of flavors, with the spices dancing on your palate and leaving a lingering warmth. It is a culinary experience that is truly unforgettable.

Flavor Description
Spicy The spices in Indian butter chicken add a kick of heat, creating a satisfying spicy flavor.
Tangy The tomato-based sauce provides a tangy and slightly acidic taste that balances out the spices.
Creamy The richness of the creamy sauce adds a smooth and velvety texture to the dish.

Perfect Balance of Sweet and Savory

Now that we’ve explored the mouthwatering spices that make up Indian butter chicken, let’s dive into its perfect balance of sweet and savory flavors. When you take that first bite, you’ll be greeted with a symphony of tastes that will leave you craving for more.

The sweet and tangy notes dance on your tongue, creating a delightful explosion of flavors. The complex flavor profile of Indian butter chicken is a result of the carefully selected spices, such as garam masala, fenugreek leaves, and yogurt, which all come together to create a harmonious blend.

The sweetness comes from the caramelized onions and the richness of the cream, while the tanginess is provided by the tomato-based gravy. This combination creates a dish that is both comforting and exciting, making Indian butter chicken a true culinary masterpiece.

Tender and Juicy Chicken

When you take that first bite, you’ll be amazed by how tender and juicy the chicken in Indian butter chicken is. The succulent pieces of chicken are perfectly cooked, with a melt-in-your-mouth texture that is truly satisfying.

Advertisement

The flavors seep into every crevice of the meat, creating a taste explosion in your mouth. The chicken is marinated in a blend of aromatic spices, yogurt, and lemon juice, which not only tenderizes the meat but also infuses it with a myriad of delicious flavors.

As you chew, you can taste the subtle hints of cumin, coriander, and garam masala, along with the rich creaminess of the buttery tomato sauce. The combination of tender chicken and juicy flavors is what makes Indian butter chicken a true culinary delight.

Aromatic and Fragrant Dish

When it comes to Indian butter chicken, you’re in for a flavor explosion. The bold flavors and spices used in this dish will tantalize your taste buds and leave you craving for more.

The creamy tomato-based sauce adds a luscious and rich element to the dish, perfectly complementing the succulent and tender chicken.

Trust me, once you try this dish, you won’t be able to get enough of its delectable combination of flavors and textures.

Advertisement

Bold Flavors and Spices

Bold flavors and spices are what give Indian butter chicken its distinct taste. This classic dish is known for its explosion of flavors that will tantalize your taste buds. The combination of traditional spices like cumin, coriander, and garam masala creates a rich and aromatic profile that is truly unforgettable. The use of these bold flavors elevates the dish to a whole new level, making it a favorite among Indian food enthusiasts. The table below highlights some of the key spices used in Indian butter chicken:

Spice Flavor Profile
Cumin Earthy and nutty
Coriander Citrusy and floral
Garam Masala Warm and pungent

These spices work harmoniously together, creating a symphony of flavors that will make your taste buds dance. As you indulge in the bold flavors of Indian butter chicken, you’ll soon discover why it has become a beloved dish worldwide. And while the spices play a crucial role in its taste, it’s the creamy tomato-based sauce that takes this dish to the next level. [Transition to subsequent section: ‘creamy tomato-based sauce’]

Creamy Tomato-Based Sauce

The creamy tomato-based sauce in Indian butter chicken is what adds a luscious and velvety texture to the dish. This sauce is made by simmering tomatoes, onions, garlic, ginger, and a blend of aromatic spices such as cumin, coriander, and turmeric. The result is a rich and flavorful sauce that coats the tender pieces of chicken, infusing them with a burst of Indian spices.

The creaminess comes from the addition of butter and cream, which adds a luxurious and indulgent touch to the dish. The combination of the tangy tomatoes, aromatic spices, and creamy texture creates a harmonious balance of flavors.

Indian butter chicken is a beloved dish in Indian cuisine, known for its rich, comforting, and satisfying taste.

Advertisement

Succulent, Tender Chicken

The succulent, tender chicken in this dish is cooked to perfection, resulting in a melt-in-your-mouth texture that is incredibly satisfying.

The marinated chicken is packed with flavor, infusing every bite with a burst of aromatic spices.

The juicy meat is so tender that it practically falls off the bone, making it a delight to eat.

The marinade adds an extra layer of richness, ensuring that each piece of chicken is well-seasoned and packed with deliciousness.

The cooking process seals in the moisture, resulting in a juicy and succulent texture that is hard to resist.

Advertisement

Whether you’re a fan of chicken or not, this dish will captivate your taste buds and leave you craving for more.

Conclusion

So, now you know what Indian butter chicken tastes like! It’s a culinary delight that combines the traditional flavors of India with a creamy and rich sauce. The mouthwatering spices create a perfect balance of sweet and savory, making every bite a treat for your taste buds.

The tender and juicy chicken adds a satisfying texture to the dish. And let’s not forget about the aromatic and fragrant aroma that fills the air when this dish is being prepared. In fact, did you know that butter chicken is one of the most popular Indian dishes worldwide? It’s no surprise considering its irresistible flavors and delightful combination of ingredients.

So why not give it a try and experience the magic of Indian butter chicken for yourself?

Advertisement
Continue Reading

Trending