Connect with us

Butter Tips and Tricks

How Many Tablespoons of Butter in a Pound: A Simple Guide

Published

on

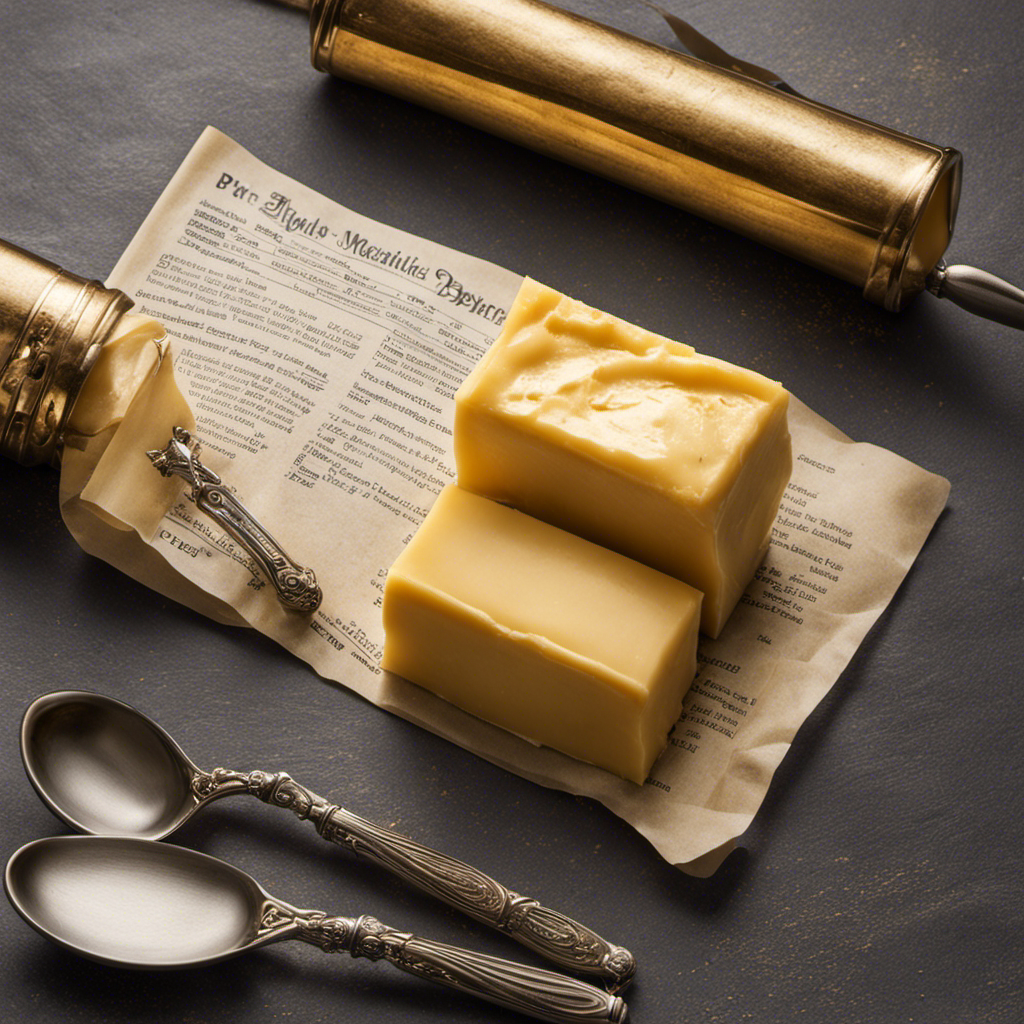
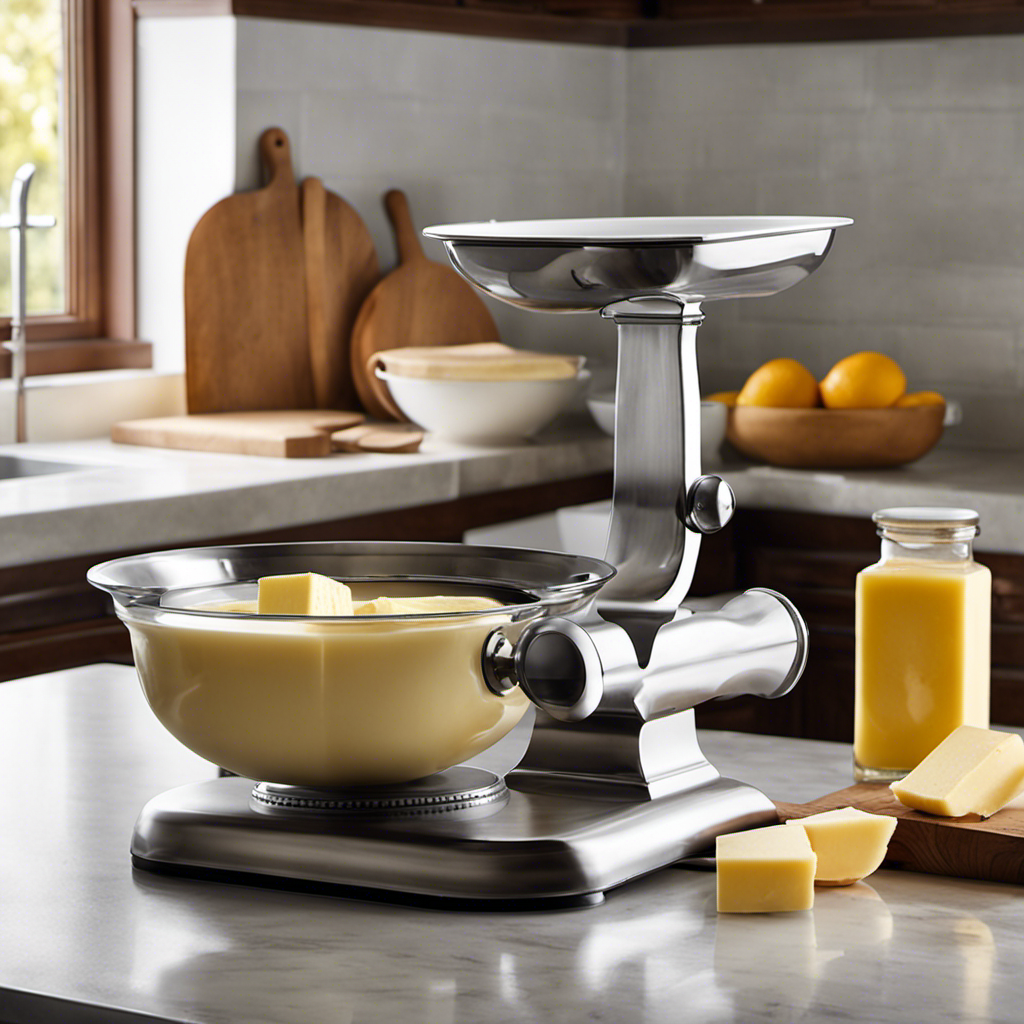
An image that showcases a large, vintage-style kitchen scale with a pound of butter perfectly balanced on one side, while a collection of precisely measured tablespoons fills the other side

Were you aware that around 32 tablespoons are equivalent to a pound of butter?

Understanding butter measurements is essential in cooking and baking, as it can greatly affect the outcome of your recipe.

In this article, I will guide you through the process of converting pounds to tablespoons, discuss factors that can affect butter measurements, and provide tips for measuring butter accurately.

So let’s dive in and unravel the mystery behind butter measurements!

Key Takeaways

  • One pound of butter is equal to 16 ounces or 454 grams.
  • One pound of butter is equal to 32 tablespoons.
  • Each ounce of butter is equal to 2 tablespoons.
  • Measuring butter accurately is crucial for recipe outcomes.

Understanding Butter Measurements

Advertisement

There’s a lot to understand about butter measurements. When it comes to butter, it can be confusing to know exactly how much you’re getting. Understanding butter packaging and its measurement equivalents is crucial.

Most butter packages in the United States come in the standard size of one pound, which is equivalent to 16 ounces or 454 grams. This information is important when following recipes that require specific amounts of butter.

To convert pounds of butter to tablespoons, it’s essential to know that one pound is equal to 32 tablespoons. This conversion is useful for accurately measuring butter when a recipe calls for tablespoons instead of ounces or grams.

Now that we have covered the basics of butter measurements, let’s dive into converting pounds to tablespoons.

Converting Pounds to Tablespoons

Converting a pound of butter to tablespoons is a straightforward process. To determine the number of tablespoons in a pound of butter, you need to know the butter measurement equivalents.

Advertisement

One pound of butter is equal to 32 tablespoons. This conversion is based on the standard measurement of 1 pound, which is equivalent to 16 ounces, and each ounce of butter is equal to 2 tablespoons. Therefore, by multiplying 16 ounces by 2 tablespoons, you get the total of 32 tablespoons in a pound of butter.

This conversion is crucial when following recipes that require precise measurements. It ensures that you use the correct amount of butter and helps in achieving the desired taste and texture in your culinary creations.

Butter Packaging and Measurements

When it comes to butter, it’s important to have a good understanding of packaging sizes, measuring accurately, and converting tablespoons to pounds.

Advertisement

Butter is typically sold in various packaging sizes, such as sticks or blocks, and it’s crucial to know how much butter is in each package.

Measuring butter accurately is also essential for recipes, as even a small difference can greatly affect the outcome.

Moreover, understanding how to convert tablespoons to pounds is useful when scaling up or down a recipe that calls for a specific amount of butter.

Butter Packaging Sizes

To determine the amount of tablespoons in a pound of butter, you can check the packaging sizes available. Different butter packaging options offer varying measurements, so it’s essential to choose the one that suits your needs best. Here is a table showcasing the common butter packaging sizes and their respective tablespoon measurements:

Packaging Size Weight (lbs) Tablespoons
Stick 0.25 8
Half Stick 0.125 4
Tub 1 32
Block 1 32

As you can see, a pound of butter can be found in tub or block form, both containing 32 tablespoons. This information is crucial when measuring butter accurately for your recipes. Now, let’s delve into the next section about measuring butter precisely.

Advertisement

Measuring Butter Accurately

If you want to measure butter accurately, it’s important to have the right tools and techniques. Here are some tips for precise measuring:

  • Use a kitchen scale to measure the weight of the butter. This will give you the most accurate measurement.
  • Make sure the scale is properly calibrated before measuring.
  • Place a container on the scale and zero it out before adding the butter.
  • Add the desired amount of butter until the scale displays the correct weight.

If you don’t have a kitchen scale, you can use measuring spoons as a substitute.

  • One tablespoon of butter is equal to 1/8 of a stick or 14 grams.
  • Use a knife or spatula to level off the top of the spoon for an accurate measurement.

Softened butter can be difficult to measure accurately. To make it easier, use the displacement method.

  • Fill a measuring cup with water and note the water level.
  • Add the softened butter to the cup and measure the new water level.
  • The difference between the two water levels will give you the accurate measurement of the butter.

Converting Tablespoons to Pounds

Now that we understand how to measure butter accurately using tablespoons, let’s explore how to convert those measurements into pounds.

Converting butter weight from tablespoons to pounds requires a basic understanding of tablespoon measurements and the weight of butter per tablespoon. To convert, we need to know that one tablespoon of butter weighs approximately 0.5 ounces or 0.028 pounds.

Therefore, to convert tablespoons to pounds, we can divide the number of tablespoons by 32 (since there are 16 ounces in a pound, and each tablespoon is 0.5 ounces). For example, if we have 64 tablespoons of butter, we can calculate that it is equivalent to 2 pounds.

Understanding this conversion is essential when working with different recipes and quantities of butter.

Now, let’s delve into the factors that can affect butter measurements.

Advertisement

Factors Affecting Butter Measurements

One of the factors that affects butter measurements is the temperature at which the butter is stored. When butter is stored at different temperatures, it can become either harder or softer, resulting in variations in its quantity.

Here are some butter measurement tips to consider:

  • Temperature: Butter should be measured at room temperature, around 70°F (21°C), for accurate results.
  • Consistency: Softened butter should be used for measuring tablespoons, while cold butter is better for measuring by weight.
  • Packaging: Different brands of butter may have varying water content, affecting the weight and volume measurements.

Factors affecting butter quantity:

  • Chilling: Butter firms up when chilled, resulting in a denser and smaller volume.
  • Softening: Softened butter expands and becomes airier, leading to a larger volume.
  • Melting: Melted butter loses some of its volume due to evaporation.

Considering these factors will ensure precise and consistent butter measurements for your recipes.

Converting Grams to Tablespoons

When it comes to converting grams to tablespoons, understanding the conversion ratio is crucial. The grams-to-tablespoons conversion ratio varies depending on the ingredient’s density and texture.

However, there are some common conversions for ingredients that can serve as a general guide in the kitchen.

Grams-To-Tablespoons Conversion Ratio

There’s a ratio of grams to tablespoons that can be used to convert the weight of butter. When converting grams to ounces, the ratio is 28.35 grams per ounce.

Advertisement

To determine the measurement equivalents for butter, the following conversions can be used:

  • 1 tablespoon of butter is equivalent to approximately 14.18 grams.
  • 1 ounce of butter is equivalent to approximately 2 tablespoons.
  • 1 pound of butter is equivalent to about 32 tablespoons or 454 grams.

Converting grams to tablespoons helps in accurately measuring the weight of butter for various recipes. It is essential to have precise measurements to ensure the desired taste and texture in baked goods or other dishes that require butter.

Common Conversions for Ingredients

To accurately measure ingredients for your favorite recipes, it’s important to be familiar with common conversions. Understanding measurements and converting kitchen staples can make a big difference in the outcome of your dishes.

When it comes to converting ingredients, there are a few key conversions to keep in mind. For example, one pound of butter is equal to 32 tablespoons. This is important to know because many recipes call for butter in tablespoons rather than pounds.

Butter Equivalents and Substitutions

You can substitute margarine for butter in recipes if you run out. However, it is important to note that the taste and texture of the final product may be slightly different.

Here are some helpful butter conversion equivalents and butter substitutions for baking:

Advertisement
  • Butter Conversion Equivalents:

  • 1 pound of butter = 4 sticks of butter = 2 cups = 32 tablespoons

  • 1 stick of butter = 1/2 cup = 8 tablespoons = 4 ounces

  • Butter Substitutions for Baking:

  • Margarine: Use an equal amount of margarine as a substitute for butter. Make sure it is in stick form and has a similar fat content.

  • Coconut Oil: Replace butter with an equal amount of melted coconut oil. This works well in recipes that have a strong flavor, like banana bread.

  • Greek Yogurt: For a healthier alternative, substitute half the amount of butter with Greek yogurt. This will add moisture and reduce the fat content.

When using a kitchen scale for accurate measurements, you can ensure precision in your baking.

Using a Kitchen Scale for Accurate Measurements

When it comes to measuring ingredients accurately in the kitchen, using a kitchen scale is essential. Converting ounces to grams is a common task that allows for precise measurements.

While measuring ingredients by volume, such as using cups or tablespoons, can be convenient, it is not always the most accurate method. Weight measurements, on the other hand, provide more precise results because they account for variations in ingredient density.

By using a kitchen scale, you can easily convert ounces to grams and measure ingredients by weight. This ensures consistency and accuracy in your recipes.

Measuring Butter With Tablespoons

Measuring butter accurately can be achieved by using tablespoons as a quick and convenient method. Understanding tablespoon measurements is essential when it comes to measuring butter for cooking. Here are some key points to consider:

Advertisement
  • A standard stick of butter is equivalent to 8 tablespoons or 1/2 cup.
  • If a recipe calls for a specific amount of butter in tablespoons, you can easily measure it by using a tablespoon and scooping out the required amount.
  • If the recipe requires melted butter, you can measure it by melting the butter first and then pouring it into a tablespoon to get an accurate measurement.

By using tablespoons, you can easily measure the amount of butter needed for your recipes. Now let’s explore common recipes and their corresponding butter measurements.

In common recipes, butter is often measured in tablespoons, and understanding how to accurately measure it can make a significant difference in the outcome of your dish.

Common Recipes and Butter Measurements

Now that we understand how to measure butter with tablespoons, let’s dive into some tips for measuring butter accurately.

When it comes to butter measurements, it’s important to be precise in order to achieve the desired results in your recipes. Here are a few useful tips to help you measure butter accurately.

Firstly, make sure the butter is at room temperature before measuring. This ensures that it is soft and easier to measure accurately.

Secondly, always use a sharp knife to cut the butter into the desired measurements. A precise cut will give you the exact amount needed.

Advertisement

Additionally, it’s helpful to use measuring spoons or a kitchen scale to ensure accuracy.

Butter Measurements for Baking

When it comes to baking, precision is key. Understanding butter conversion ratios is crucial in ensuring accurate measurements for your recipes.

In this discussion, we will explore the importance of baking with exact measurements and provide tips on substituting butter in recipes to achieve the desired results.

Butter Conversion Ratios

There’s a simple way to convert pounds of butter into tablespoons. When it comes to butter measurement conversions, it’s important to have accurate information. Here are the key conversion ratios to keep in mind:

  • 1 pound of butter is equal to 32 tablespoons. This means that for every pound of butter, you’ll have 32 tablespoons at your disposal.

  • 1 tablespoon of butter is equal to 0.03125 pounds. So if you only have tablespoons of butter and need to know the equivalent weight, simply multiply the number of tablespoons by 0.03125.

  • 1 pound of butter is also equal to 453.592 grams. If you prefer using grams for your measurements, this conversion will come in handy.

Baking With Exact Measurements

To achieve precise results in your baking, it’s crucial to use accurate measurements. When it comes to understanding butter measurements, it’s important to know how to measure butter accurately.

Advertisement

Butter is typically sold in sticks or blocks, and each has its own measurement equivalent. One stick of butter is equal to 8 tablespoons or 1/2 cup. Therefore, if a recipe calls for 1/4 cup of butter, you would need 4 tablespoons or half a stick.

When measuring butter, it’s essential to use a kitchen scale or a measuring spoon to ensure accuracy. Eyeballing the amount can lead to inconsistent results in your baked goods.

Substituting Butter in Recipes

Substituting butter in recipes can be done by using alternatives like margarine or vegetable oil. Here are some options to consider:

  • Margarine: This is a common butter substitute made from vegetable oils. It has a similar texture to butter and can be used in a 1:1 ratio in most recipes.

  • Vegetable oil: Another alternative is to use vegetable oil, such as canola or sunflower oil. In recipes that call for melted butter, you can substitute it with an equal amount of oil.

  • Vegan butter options: If you’re looking for a plant-based alternative, there are several vegan butter options available. These are usually made from a combination of vegetable oils and non-dairy milk. Look for brands like Earth Balance or Miyoko’s Kitchen.

Remember that each alternative may affect the taste and texture of your dish, so it’s important to consider the specific recipe and your personal preferences when making substitutions.

Tips for Measuring Butter Accurately

Measuring butter accurately can be tricky, but here are some tips to help you out.

Advertisement

First, ensure that your butter is at room temperature for an accurate measurement. Cold butter can be difficult to measure precisely due to its hardness.

Next, use a kitchen scale for the most precise measurement. This will allow you to measure the exact amount of butter needed for your recipe.

If you don’t have a scale, you can use the markings on the butter wrapper. Most butter sticks are marked with tablespoon measurements, making it easy to slice off the required amount.

Finally, if your recipe calls for melted butter, measure it in liquid form using a liquid measuring cup.

Following these tips will ensure precision when measuring butter for your recipes.

Advertisement

Frequently Asked Questions

How Can I Accurately Measure Butter Without Using Tablespoons?

When accurately measuring butter without tablespoons, alternative measurement methods can be used. These techniques ensure precise measurements and eliminate the need for tablespoons.

Can I Substitute Margarine for Butter in Recipes That Call for Tablespoons of Butter?

Yes, you can substitute margarine for butter in recipes that call for tablespoons of butter. However, keep in mind that margarine might have a different texture and taste compared to butter. Consider using butter flavor alternatives if needed.

Are There Any Tips for Measuring Butter Accurately When It Is in Stick Form?

When measuring butter in stick form, it’s important to know the tricks for accuracy. Start by using a sharp knife to cut the stick into tablespoon-sized pieces. This way, you can easily convert stick measurements to tablespoons.

Are There Any Common Recipes That Use Butter Measurements Other Than Tablespoons?

In recipes, there are common alternative measurements for butter besides tablespoons. Some creative ways to incorporate butter into dishes include browning it for a nutty flavor or using it in a compound butter.

Are There Any Factors That Can Affect the Accuracy of Butter Measurements When Using Tablespoons?

Factors such as temperature, density, and moisture content can impact the accuracy of butter measurements when using tablespoons. It’s important to consider these factors to ensure precise and consistent measurement accuracy.

Advertisement

Conclusion

In conclusion, understanding butter measurements is crucial for accurate cooking and baking. Converting pounds to tablespoons can be helpful when following recipes or adapting them to personal preferences.

However, it is important to consider factors like butter packaging and temperature, as they can affect measurements. By converting grams to tablespoons, one can easily measure butter using common kitchen utensils.

Remember, precise measurements are essential for achieving the desired results in your culinary endeavors, just like a well-orchestrated symphony relies on each instrument playing its part perfectly.
Continue Reading
Advertisement

Butter Tips and Tricks

Japanese Butter Roll Bread: The Fluffy, Cloud-Like Bread You’ll Want Every Morning

Capture the essence of a Japanese bakery with the heavenly aroma and fluffy, cloud-like texture of the Japanese Butter Roll Bread, a morning treat you’ll crave.

Published

on

By

fluffy japanese butter rolls

Wake up to the heavenly aroma of freshly baked Japanese Butter Roll Bread – a soft, cloud-like delight that melts in your mouth and transports you to a cozy Tokyo bakery. This beloved bread features a lightly golden exterior that gives way to a fluffy, feathery interior, infused with a rich, buttery flavor. The labor-intensive process of kneading, proofing, and brushing with butter creates an irresistible texture and taste. Enjoy this versatile treat on its own or pair it with your favorite spreads for a moment of pure indulgence. Learn more about how to capture the essence of Japanese baking in your own home.

Key Takeaways

  • Japanese Butter Roll Bread is a soft, fluffy, and buttery bread that has become a beloved staple in Japan and globally.
  • The recipe features a simple yeast dough rolled with generous butter, creating a swirled effect and rich flavor.
  • Proper kneading, proofing, and baking techniques are crucial for achieving the desired airy texture and golden-brown crust.
  • Brushing the tops with melted butter before baking enhances the bread's color, softness, and buttery taste.
  • Allowing the bread to cool completely is essential for maintaining the perfect tender exterior and fluffy interior.

History

historical events and contexts

These heavenly rolls quickly gained popularity across Japan, with bakeries and cafes proudly showcasing their own signature versions.

The butter-infused dough results in a cloud-like interior that's incredibly light and airy, yet still rich and indulgent. The exterior is lightly golden and delicately crisp, providing a satisfying contrast to the feathery soft center.

Whether enjoyed for breakfast, as an afternoon snack, or as a decadent dessert, the Japanese butter roll has become a beloved staple, capturing the hearts and taste buds of baked goods enthusiasts everywhere.

Recipe

cooking instructions and ingredients

Japanese Butter Roll Bread

Japanese Butter Roll Bread is a soft and fluffy bread that's beloved in Japan. This bread is made with a simple yeast dough that's then rolled with a generous amount of butter, creating a swirled effect when sliced. The result is a delightful pastry-like bread that's perfect for breakfast, snacking, or as a side to soups and stews.

The secret to the perfect Japanese Butter Roll Bread lies in the high-quality butter used and the gentle handling of the dough. By treating the dough with care, you can achieve the signature soft and pillowy texture that makes this bread so irresistible.

Advertisement
  • Bread flour
  • Granulated sugar
  • Salt
  • Yeast
  • Milk
  • Unsalted butter, softened
  • Egg
  • Butter, for brushing

To make the Japanese Butter Roll Bread, first, prepare the dough by mixing the bread flour, sugar, salt, and yeast in a large bowl.

Heat the milk until warm, then add it to the dry ingredients along with the egg. Knead the dough until it becomes smooth and elastic. Cover the dough and let it rise until doubled in size.

Punch down the dough to release any air bubbles, then roll it out into a large rectangle. Spread the softened butter over the surface of the dough, leaving a small border around the edges.

Tightly roll the dough from the short side, creating a log shape. Cut the log into slices and place them in a greased baking pan, cut-side up. Cover and let the rolls rise again until puffed up.

Bake the rolls in a preheated oven until golden brown. Brush the tops with melted butter while they're still hot.

Serve the Japanese Butter Roll Bread warm, and enjoy the delightful combination of soft, fluffy bread and rich, buttery goodness.

Advertisement

Cooking Steps

step by step cooking instructions

Knead the dough thoroughly, kneading and folding it until it's smooth and elastic.

Then, let the dough rise in a warm spot for an hour, allowing it to double in size.

Once it's proofed, bake the rolls at 350°F for 25 minutes, brushing them with melted butter before popping them in the oven.

Step 1. Knead the Dough Thoroughly

knead dough until smooth

Thoroughly kneading the dough is crucial to achieving the desired texture and rise in your Japanese butter roll bread. This step develops the gluten, creating the soft, airy interior you crave.

Begin by placing the dough on a clean, lightly floured surface. Using the heels of your hands, push the dough away from you, then fold it back toward you. Rotate the dough a quarter turn and repeat.

Continue this process, kneading vigorously for 5-7 minutes. You'll know the dough is ready when it becomes smooth, elastic, and slightly tacky to the touch.

Resist the urge to add too much extra flour, as this can dry out the dough. Instead, lightly dust your work surface as needed.

Advertisement

Kneading may seem tedious, but this manual labor is essential for transforming a shaggy mass into a supple, well-developed dough. Embrace the process – your efforts will be rewarded with pillowy, buttery goodness.

Step 2. Proof the Dough for 1 Hour

proof dough for one hour

After thoroughly kneading the dough, allow it to proof for a full hour. This resting period is crucial, as it gives the yeast time to work its magic and transform the dough into a light, airy masterpiece.

As the dough proofs, you'll notice it steadily expanding, doubling in size as the yeast produces carbon dioxide bubbles that get trapped within the gluten network.

Resist the urge to peek! Keeping the dough covered will maintain the warm, humid environment essential for proper proofing.

The perfect proof will yield a pillowy, soft dough that's ready to be shaped into those mouthwatering Japanese butter rolls. Set a timer and let the dough do its thing – in an hour, you'll have a beautifully risen base for the next steps.

Patience is key, as this brief yet important resting period lays the foundation for the fluffy, cloud-like texture you're after. Soon, the fun part begins as you shape the dough into rolls and bake them to golden perfection.

Advertisement

Step 3. Bake at 350°F for 25 Minutes

bake at 350 f 25 minutes

With the dough now perfectly proofed, it's time to transform it into those irresistible Japanese butter rolls. Preheat your oven to a toasty 350°F and lightly grease a baking sheet.

Gently punch down the dough to release any air bubbles, then divide it into 12 equal pieces. Roll each piece into a smooth ball and place them on the prepared baking sheet, spacing them about 2 inches apart. While you're preparing the dough, you might also be inspired to try making Dirt Cups for a fun dessert option that requires no baking.

As the rolls bake, your kitchen will fill with the tantalizing aroma of freshly-baked bread. Keep a close eye on them, as they'll only need about 25 minutes to achieve that perfect golden-brown color.

When the timer goes off, resist the urge to open the oven door too often, as this can cause the rolls to deflate. Instead, use the oven light to check on their progress.

Once those fluffy, cloud-like rolls are ready, remove them from the oven and let them cool for a few minutes before serving. Slather them with butter, jam, or your favorite toppings, and enjoy this taste of Japanese baking heaven.

Step 4. Brush With Melted Butter Before Baking

brush with melted butter

Before placing the rolls in the oven, brush the tops lightly with melted butter. This simple step will give your Japanese Butter Roll Bread a beautiful, golden-brown sheen and a delightful, buttery flavor.

The melted butter will also help create a soft, pillowy texture, sealing in moisture and preventing the rolls from drying out during baking.

Advertisement

Using a clean pastry brush, gently sweep the butter across the top of each roll, being careful not to deflate the dough. The butter should be just warm enough to flow easily, not hot enough to cook the dough.

Work quickly, as the butter will cool and become difficult to spread. Once the rolls are fully coated, pop them in the oven and let the magic happen.

The butter will caramelize and create a crisp, shiny crust, while the interior remains light and airy. This simple trick elevates your homemade bread to bakery-worthy perfection.

Enjoy the incredible aroma and flavor of these irresistible Japanese-inspired rolls.

Step 5. Allow to Cool Completely

cool completely before serving

Once the Japanese Butter Roll Bread has finished baking, let the rolls cool completely on a wire rack. This step is crucial to ensure the perfect texture and flavor.

As the rolls sit, the steam will gradually escape, leaving you with a soft, airy crumb that practically melts in your mouth. You'll notice the crust turning a lovely golden brown as it cools.

Advertisement

Resist the temptation to slice into the rolls right away, as they need time to set. Patience is key here – allow at least 30 minutes for the rolls to cool completely. This will give the interior a chance to firm up, while the exterior maintains a delicate, tender bite.

Once cooled, the rolls are ready to be enjoyed. Their cloud-like texture and rich, buttery taste will make it well worth the wait. Savor every bite and revel in the comforting goodness of these Japanese-inspired treats.

Final Thoughts

concluding reflections and insights

The Japanese butter roll bread, with its pillowy soft texture and rich, buttery flavor, stands as a true testament to the artistry and care that goes into traditional Japanese baking.

As you've discovered through this recipe, creating these delectable treats is a labor of love, requiring patience and a keen eye for detail. But the end result is well worth the effort, as each bite transports you to the charming bakeries of Japan, where the aroma of freshly baked bread fills the air.

Looking back on the process, you can't help but feel a sense of accomplishment. From the precise kneading to the perfectly timed proofing, every step played a crucial role in shaping the light, fluffy texture that makes these rolls so irresistible.

And the final touch of melted butter, glistening on the golden crust, elevates the experience to a new level of indulgence.

Advertisement

As you savor the last morsel, you find yourself already craving your next Japanese butter roll. This recipe has become a new staple in your baking repertoire, a delightful way to start the day and share the flavors of Japan with loved ones.

Frequently Asked Questions

Is Japanese Butter Roll Bread Gluten-Free?

No, Japanese butter roll bread is not gluten-free. This type of bread typically contains wheat flour, which means it's not suitable for individuals following a gluten-free diet. You'll need to seek out alternative gluten-free bread options if that's a dietary requirement for you.

How Long Does Japanese Butter Roll Bread Stay Fresh?

Japanese butter roll bread typically stays fresh for 2-3 days when stored at room temperature. To maintain its soft, fluffy texture, you'll want to consume it within a few days of purchasing or baking.

Can Japanese Butter Roll Bread Be Frozen?

Yes, the bread can be frozen. Simply wrap it tightly in plastic wrap or aluminum foil and store it in the freezer for up to 2 months. When ready to enjoy, thaw it at room temperature before serving.

What Is the Nutritional Value of Japanese Butter Roll Bread?

The nutritional value of this bread can vary, but it's typically high in carbohydrates and fat from the butter and sugar used in its preparation. It's not the healthiest breakfast option, but it can be enjoyed as an occasional treat.

Advertisement

Can Japanese Butter Roll Bread Be Made With Vegan Ingredients?

You can certainly make a vegan version of Japanese butter roll bread. Use plant-based milk and butter substitutes to create a similarly soft, fluffy texture without any animal products. With the right ingredients, you'll enjoy a delicious dairy-free treat.

Continue Reading

Butter Tips and Tricks

Butter Roll Biscuits: Soft, Fluffy, and Buttery Goodness in Every Bite

Incredible homemade biscuits with a unique rolling technique that delivers unbeatable buttery flavor in every flaky, soft bite. Discover the delicious origins and simple steps to making these beloved Southern treats.

Published

on

By

soft fluffy butter biscuits

Butter roll biscuits are a Southern classic that will delight your taste buds! These soft, fluffy biscuits get their irresistible buttery goodness from the unique technique of rolling the dough with cold butter. Originating in the 19th century, these biscuits were a special treat for many families. Today, they're still a beloved comfort food, pairing perfectly with savory gravies or sweet jams. To enjoy the flaky layers and rich flavor, you'll need just a few simple ingredients. And with a quick prep and bake, you'll be savoring the warm, homemade goodness in no time. There's more to discover about these timeless biscuits…

Key Takeaways

  • Butter roll biscuits are a classic Southern treat characterized by a flaky, tender, and buttery texture that makes them a beloved comfort food.
  • The recipe's simplicity and emphasis on quality ingredients, such as cold butter and milk, are the keys to achieving the delicate layers and rich flavor.
  • Proper technique, like minimizing dough handling and using a sharp cutter, is crucial for maintaining the biscuits' soft and fluffy interior and golden-brown exterior.
  • Serving the biscuits warm, with additional butter or jam, enhances the overall indulgence and satisfaction of this comforting delicacy.
  • The butter roll biscuit recipe reflects the South's culinary heritage and encourages appreciation for homemade treats that evoke feelings of comfort and delight.

History

historical events and narratives

Believed to have originated in the American South during the 19th century, butter roll biscuits were a staple in the diets of many families.

These pillowy soft, golden-brown biscuits were often served alongside hearty meals, sopping up delicious sauces and gravies. The name "butter roll" comes from the traditional method of rolling the dough with generous amounts of butter, creating layers of flaky goodness.

Back then, butter was a precious commodity, so the indulgence of these buttery biscuits was a true treat. As the South's culinary traditions spread across the nation, butter roll biscuits gained popularity, becoming a beloved comfort food enjoyed by people of all backgrounds.

Today, these biscuits continue to evoke fond memories and satisfy cravings for a taste of the South's rich food heritage.

Whether served for breakfast, lunch, or dinner, butter roll biscuits remain a timeless classic, steeped in the warm and comforting flavors of the past.

Advertisement

Recipe

culinary instructions and ingredients

Butter Roll Biscuits are a classic Southern treat that are both buttery and flaky. These biscuits are perfect for breakfast, brunch, or as a side to any meal. The key to achieving the perfect butter roll biscuit is to work the dough as little as possible, which helps create those signature tender layers.

The dough for these biscuits comes together quickly, making them an easy option when you're short on time. The addition of cold butter and milk creates a rich, tender crumb that melts in your mouth. Serve these biscuits warm, with a pat of butter or your favorite jam, and enjoy the comforting flavors of a classic Southern staple.

Ingredients:

  • 2 cups all-purpose flour
  • 1 tablespoon baking powder
  • 1 teaspoon salt
  • 6 tablespoons cold unsalted butter, cubed
  • 3/4 cup cold milk

Instructions:

Preheat your oven to 450°F (230°C) and line a baking sheet with parchment paper. In a large mixing bowl, whisk together the flour, baking powder, and salt.

Cut in the cold butter using a pastry cutter or two forks until the mixture resembles coarse crumbs. Gradually stir in the cold milk just until the dough comes together. Don't overmix.

Turn the dough out onto a lightly floured surface and gently knead it 2-3 times. Roll the dough out to a 1/2-inch thickness and cut out biscuits using a 2-inch biscuit cutter.

Advertisement

Place the biscuits on the prepared baking sheet, spacing them about 1 inch apart. Bake for 12-15 minutes, or until the biscuits are golden brown on top. Serve warm.

For best results, make sure all your ingredients are cold, and handle the dough as little as possible to preserve those delicate layers. Enjoy your homemade Butter Roll Biscuits!

Cooking Steps

step by step cooking instructions

Preheat your oven to 450°F and get ready to bake up some delicious butter roll biscuits!

The creamy texture of butter, influenced by the emulsification process during churning, is essential for achieving that soft and fluffy consistency in your biscuits.

Gently roll out the dough on a lightly floured surface, then brush the tops with melted butter for a golden-brown finish.

Once they're baked to perfection, don't forget to serve these warm biscuits with an extra pat of butter on the side, enhancing the flavor and moisture just like in many pastry recipes butter enhances flavor.

Advertisement

Step 1. Preheat Oven to 450°F

preheat oven to 450 f

Preheat your oven to 450°F. This high temperature is crucial for ensuring your biscuits rise tall and develop that golden-brown, perfectly crisp exterior.

As the oven preheats, you'll want to make sure the racks are positioned in the center of the oven, allowing enough space for your biscuits to grow without crowding.

While you wait, take a moment to visualize those buttery, fluffy biscuits fresh from the oven. Can't you just smell the enticing aroma? The anticipation is building!

Once the oven reaches temperature, carefully slide in your baking sheet, making sure to avoid any hot spots that could cause uneven baking.

Set a timer for 12-15 minutes, keeping a close eye on your biscuits as they transform into pillowy perfection. The sound of the timer will signal it's time to pull those beauties out, ready to be served warm and enjoyed to the fullest.

Step 2. Gently Roll Out the Dough

gently roll out dough

With the oven ready, it's time to turn your attention to the dough. On a lightly floured surface, gently roll out the dough into a rectangle about 1/2-inch thick. Be careful not to overwork it – you want to keep the dough light and tender.

Use your hands to shape the dough if needed, but avoid pressing down too hard.

Advertisement

Once the dough is rolled out, take a moment to admire its smooth, even surface. Visualize the layers of buttery goodness that will soon be revealed.

With a sharp knife or a pizza cutter, cut the dough into 8 equal rectangles. Try to make clean, decisive cuts to ensure your biscuits have neat, uniform edges.

Arrange the biscuit rectangles on the prepared baking sheet, spacing them apart slightly. This will allow the dough to rise and spread out, creating those irresistible soft, fluffy biscuits you crave.

Now you're ready for the next step – baking these beauties to buttery perfection!

Step 3. Brush Tops With Melted Butter

brush tops with butter

How about we start brushing that dough with some melted butter? This simple step will take your homemade biscuits to the next level of buttery goodness, especially if you choose a rich variety like European butter known for its superior flavor.

Grab a small bowl and melt a few tablespoons of butter until it's nice and smooth. Using a pastry brush, gently brush the tops of your rolled-out biscuits with the melted butter. Make sure to cover every inch so each biscuit is evenly coated.

Advertisement

The butter will give the biscuits a beautiful golden-brown color as they bake, plus an irresistible flavor and tender texture. Don't be shy – keep brushing until you've covered the whole tray. You'll love how the butter melts into the dough, creating pockets of buttery flavor in every bite.

Now pop those biscuits in the oven and get ready for the heavenly aroma to fill your kitchen. Mmm, can you almost taste them already?

Step 4. Bake Until Golden Brown

bake until golden brown

Once the biscuits have been brushed with butter, the real magic happens in the oven. Preheat that baby to a toasty 450°F (230°C) and get ready to watch these beauties transform.

While you're waiting, consider how your kitchen appliances, like a modern smart toilet can enhance your home experience.

Slide the tray of buttery biscuits onto the middle rack and let the oven work its delicious wonder. As they bake, the dough will puff up into light, airy pillows, and the tops will turn a gorgeous golden brown.

You'll know they're ready when you can gently tap the tops, and they sound hollow – about 12 to 15 minutes. Pull them out and inhale that heavenly buttery aroma.

Advertisement

Be careful, though – those biscuits are hot! Let them cool for a couple of minutes before diving in.

Once you take that first bite, you'll be rewarded with layers of flaky, tender goodness that practically melts in your mouth. Mmm, nothing beats homemade butter roll biscuits straight from the oven.

Step 5. Serve Warm With Additional Butter

serve warm with butter

Now that those piping hot biscuits have had a chance to cool slightly, it's time to really take them to the next level. Grab a generous pat of creamy, golden butter and place it on top of each freshly baked biscuit.

As the butter melts, it'll create a rich, decadent layer that seeps into every nook and cranny. The contrast of the warm, soft biscuit and the cool, melty butter is simply divine. Go ahead, take a bite and let that buttery goodness envelop your taste buds.

You can even add a sprinkle of flaky sea salt to heighten the flavors. Serve these biscuits warm, straight from the oven, and watch as your family and friends' faces light up with delight.

The combination of fluffy texture and irresistible butter flavor is sure to have everyone reaching for seconds. Enjoy these biscuits with a smile, knowing you've created a true taste of comfort.

Advertisement

Final Thoughts

reflective closing remarks

Reflecting on the recipe, you'll find that the butter roll biscuits are a delightful treat that can elevate any meal. The soft, fluffy texture and rich, buttery flavor make these biscuits a true delight. Whether you enjoy them with a hearty breakfast, a savory dinner, or as a snack on their own, they're sure to satisfy your cravings.

One of the best things about this recipe is its versatility. You can serve the biscuits warm, straight from the oven, for a comforting and indulgent experience.

Or, you can let them cool slightly and enjoy them with a pat of cool, creamy butter on top. The contrast of the warm, flaky biscuit and the cool, melting butter is simply heavenly.

As you savor each bite, you'll be reminded of the care and attention that went into crafting these delectable biscuits. The recipe's simplicity belies the depth of flavor and the love that can be found in every morsel.

Truly, these butter roll biscuits are a testament to the power of quality ingredients and skilled preparation.

Frequently Asked Questions

How Should I Store Leftover Butter Roll Biscuits?

To store leftover biscuits, keep them in an airtight container at room temperature for up to 3 days. If you won't eat them within that time, freeze them for longer storage, up to 3 months.

Advertisement

Can I Use a Different Type of Flour for This Recipe?

You can use a different type of flour for this recipe, but the texture and flavor may vary. All-purpose flour is typically the best choice, but you could experiment with whole wheat or bread flour if you prefer.

What Is the Ideal Temperature for Baking Butter Roll Biscuits?

The ideal temperature for baking butter roll biscuits is 425°F. This high heat ensures the outside cooks thoroughly while the inside remains soft and fluffy. Be sure to keep a close eye, as baking time can vary.

Can I Freeze the Dough for Later Use?

Sure, you can freeze the dough for later use. Just wrap it tightly and freeze it for up to 2 months. When ready to use, thaw it in the fridge overnight and bake as usual. This makes for a convenient and delicious homemade treat.

Is It Possible to Make These Biscuits Without a Rolling Pin?

You can absolutely make biscuits without a rolling pin. Simply pat the dough into a round shape with your hands, then cut out the biscuits using a cookie cutter or the rim of a glass.

Advertisement
Continue Reading

Butter Tips and Tricks

Swedish Butter Cookies: How to Make the Perfect Light and Buttery Treat

Perfectly crafted Swedish butter cookies, with their irresistible aroma and melt-in-your-mouth texture, are a cherished tradition that you won’t want to miss out on.

Published

on

By

perfect light buttery cookies

Craving the irresistible aroma and melt-in-your-mouth texture of classic Swedish butter cookies? You're in luck! These beloved treats date back to 18th-century Sweden, where they've become a cherished tradition. To bake the perfect batch, use high-quality European-style butter, sugar, and flour, then cream the ingredients until light and fluffy. Gently shape the dough into uniform balls, arrange them on a baking sheet, and let the oven work its magic. Soon, you'll be enjoying the rich, buttery flavor and delicate, crumbly texture that makes these cookies a symbol of Swedish hospitality. Ready to dive deeper into this cozy culinary tradition?

Key Takeaways

  • Use high-quality, softened European-style butter and all-purpose flour to achieve the rich, buttery flavor and delicate, crumbly texture of traditional Swedish butter cookies.
  • Cream the butter and sugar until light and fluffy, then gradually incorporate the flour to form a smooth, uniform dough.
  • Roll the dough into uniform balls and place them on a parchment-lined baking sheet, ensuring even baking and a consistent shape.
  • Bake the cookies at 350°F until the edges are lightly golden, rotating the baking sheet halfway through for even browning.
  • Store the cooled cookies in an airtight container to maintain their freshness and enjoy the nostalgic, festive flavors of this beloved Swedish treat.

History

historical events and narratives

The origins of Swedish butter cookies can be traced back to the 18th century, when they were first introduced as a delicacy among the Swedish nobility.

These buttery, crumbly treats quickly gained popularity throughout the country, becoming a beloved tradition passed down through generations.

As the Swedish economy flourished, the availability of high-quality butter and refined sugar allowed for the mass production of these delightful cookies.

Bakers experimented with different shapes, sizes, and decorative techniques, leading to the iconic round, fork-pressed design we recognize today.

The simple yet elegant appearance of Swedish butter cookies made them a staple at festive gatherings, holiday celebrations, and everyday tea-time rituals.

Advertisement

Over time, the recipe evolved, with some families adding vanilla, almond, or cardamom for additional flavor.

The enduring popularity of Swedish butter cookies can be attributed to their buttery richness, delicate texture, and timeless appeal.

Today, they remain a cherished part of Swedish culinary heritage, enjoyed by people around the world.

Recipe

culinary instructions and ingredients

Swedish butter cookies are a classic and beloved treat, known for their delicate, buttery flavor and crumbly texture. These cookies are a staple during the holiday season, but they can be enjoyed year-round as a simple, yet elegant dessert.

The key to making the perfect Swedish butter cookies lies in the quality of the ingredients and the attention to detail during the baking process. Using high-quality European-style butter is essential, as it provides the rich, creamy flavor that sets these cookies apart from their counterparts.

Ingredients:

Advertisement
  • 2 cups (4 sticks) unsalted European-style butter, softened
  • 1 cup granulated sugar
  • 1 egg yolk
  • 1 teaspoon vanilla extract
  • 1/4 teaspoon salt
  • 3 cups all-purpose flour

Directions:

Preheat the oven to 350°F (175°C). In a large mixing bowl, beat the softened butter and sugar together until light and fluffy, about 3-5 minutes.

Beat in the egg yolk and vanilla extract until well combined. Gradually add the flour and salt, mixing just until the dough comes together.

Shape the dough into 1-inch balls and place them about 2 inches apart on ungreased baking sheets.

Tips:

For a festive touch, you can roll the dough balls in chopped nuts, such as almonds or walnuts, before baking.

Advertisement

Additionally, these cookies can be made ahead of time and frozen for up to 3 months, making them a convenient option for holiday entertaining.

Cooking Steps

recipe preparation instructions

First, you'll want to preheat your oven to 350°F.

Then, cream the butter and sugar together until they're light and fluffy.

Finally, add the flour and mix it all together until a dough forms.

Get ready to roll that dough into perfect little balls and place them on a baking sheet – these Swedish butter cookies are about to get real!

Step 1. Preheat Oven to 350°F

preheat oven to 350 f

Before you begin preparing the dough, preheat your oven to 350°F. This crucial step ensures your oven is at the perfect temperature when it's time to bake your delectable Swedish butter cookies. The oven's even heat will help the cookies rise and achieve that irresistibly light and flaky texture.

As the oven warms up, take a moment to visualize the golden-brown beauties soon to emerge. Imagine the mouthwatering aroma of buttery goodness filling your kitchen. This is the moment when the magic begins to unfold.

Advertisement

Once your oven beeps, indicating it's reached the desired temperature, slide the cookie dough onto the middle rack. Set a timer and resist the temptation to peek – the cookies need this time to work their oven-baked magic.

In no time, you'll be rewarded with a batch of perfect Swedish butter cookies, ready to delight your senses and satisfy your sweet tooth.

Step 2. Cream Butter and Sugar Together

cream butter and sugar

Creaming the butter and sugar is a critical step in crafting these delectable Swedish butter cookies.

First, let's grab your trusty stand mixer or a large bowl and a wooden spoon. Add the softened butter and granulated sugar, then cream them together until the mixture is light and fluffy.

This process typically takes 2-3 minutes, so don't be afraid to let that mixer run! As the butter and sugar blend, you'll notice the mixture transform from a grainy texture to a smooth, creamy consistency.

This essential step helps create the cookies' signature melt-in-your-mouth texture. Remember to scrape down the sides of the bowl occasionally to ensure even mixing.

Advertisement

Once the butter and sugar are perfectly creamed, you're ready to move on to the next step in baking these irresistible Swedish treats.

Get ready to add in the other key ingredients and start shaping those delightful cookie doughs!

Step 3. Add Flour and Mix

flour incorporation and mixing

With the butter and sugar now perfectly creamed, you can move on to incorporating the flour into the mixture. Grab your trusty wooden spoon and gently fold in the all-purpose flour, a little at a time. As you stir, you'll feel the dough start to come together, forming a soft, pliable ball.

Don't be tempted to overmix – just keep folding until the flour is fully incorporated and the dough is smooth and uniform.

Next, turn the dough out onto a lightly floured surface and give it a few quick kneads to ensure everything is well combined. The dough should be soft and malleable, not sticky or dry. If it feels a bit too sticky, simply dust your hands and the surface with a bit more flour.

Now you're ready to shape the cookies! Pinch off small pieces of dough and roll them into neat little balls, placing them spaced apart on a parchment-lined baking sheet. With the flour incorporated, your Swedish butter cookies are one step closer to buttery perfection.

Advertisement

Step 4. Roll Dough Into Balls

roll dough into balls

Next, take small portions of the dough and roll them into smooth, uniform balls. Be gentle as you work, using the palms of your hands to gently roll each piece into a perfect sphere. Visualize the dough as soft, pliable clay, and let your fingers mold it with care.

As you roll, the dough should easily come together, forming neat little balls that are all the same size. This will ensure your cookies bake evenly and have a consistent, delightful appearance.

Once you've shaped the dough, place the balls onto a parchment-lined baking sheet, spacing them apart to allow for expansion during baking. Try to keep the balls uniform in size, around 1-inch in diameter, for the best results.

With each roll, you'll get a feel for the ideal shape and consistency. Take your time and enjoy the satisfying process of transforming the dough into perfectly round cookie balls, ready for the next stage of baking.

Step 5. Place on Baking Sheet

transfer to baking sheet

Once you've shaped the dough into uniform balls, carefully arrange them on a parchment-lined baking sheet, spacing them apart to allow for expansion during baking. This ensures the cookies will bake evenly and retain their perfect round shape.

Gently place each ball, making sure they don't touch, as this will prevent the edges from fusing together.

Now, take a moment to admire your handiwork. The smooth, uniform balls of dough are ready to transform into delightful Swedish butter cookies. Can you almost smell their buttery aroma already?

Advertisement

As they bake, the dough will spread slightly, creating delicate, lightly golden discs with a tender, melt-in-your-mouth texture.

Be sure to leave enough space between the cookies, about 2 inches apart, to allow air to circulate and prevent them from becoming crowded. This step is crucial for achieving the signature light and airy consistency you desire.

With the dough perfectly portioned and evenly spaced, your baking sheet is now primed for a batch of irresistible Swedish butter cookies.

Final Thoughts

reflective conclusion insights

Wrapping up, you now have a solid grasp of the art of crafting authentic Swedish butter cookies.

From selecting the finest ingredients to expertly shaping the dough and baking them to golden perfection, you've mastered the techniques that make these cookies a delight.

As you savor the final batch, take a moment to appreciate the rich, buttery flavor and the delicate, crumbly texture.

Advertisement

These cookies are a true testament to the enduring traditions of Swedish baking.

With each bite, you'll be transported to a cozy kitchen filled with the warm aroma of vanilla and the comforting nostalgia of a beloved family recipe.

Frequently Asked Questions

Can I Use Salted Butter Instead of Unsalted?

You can use salted butter instead of unsalted, but you'll need to reduce the amount of salt in the recipe. The saltiness of the butter may also affect the overall flavor, so you may need to adjust other ingredients.

Do I Need to Chill the Dough Before Baking?

Yes, you should chill the dough before baking. Chilling the dough helps the flavors develop and firms up the butter, resulting in a crisper, more defined cookie shape when baked.

How Long Do the Cookies Stay Fresh?

The cookies will stay fresh for up to a week when stored in an airtight container at room temperature. They may lose some of their crispness over time, but the flavor will remain delightful.

Advertisement

Can I Freeze the Dough or Baked Cookies?

You can definitely freeze the dough or baked cookies. The dough can be frozen for up to 3 months, while the baked cookies can be frozen for 2-3 months. This makes them convenient to have on hand whenever you crave a sweet treat.

What's the Best Way to Store Leftover Cookies?

To store leftover cookies, place them in an airtight container at room temperature. This will keep them fresh for up to a week. Avoid refrigerating or freezing, as this can dry out the cookies and affect their texture.

Continue Reading
Advertisement

Affiliate disclaimer

As an affiliate, we may earn a commission from qualifying purchases. We get commissions for purchases made through links on this website from Amazon and other third parties.

Vetted

Vetted4 months ago

Infusion Buds Butter Infuser & Decarboxylator – 2024 Review

I recently got to try out the Infusion Buds Butter Infuser & Decarboxylator Machine Combo, and I am excited to...

Vetted4 months ago

LEVO Lux – Premium Herbal Oil Infusion Machine – Review [2024]

I recently got to try out the LEVO Lux – Premium Herbal Oil Infusion Machine – Botanical Extractor – Herb...

Vetted4 months ago

STX Infuzium & Decarboxylator Bundle Review [2024]

Today, I am thrilled to share my thoughts on the PREMIUM PACK • STX Infuzium Butter-Oil-Tincture Infuser & STX Activation...

Vetted4 months ago

Review: ONGROK Small Butter Infuser [2024]

Introduction: I am thrilled to share my experience with the ONGROK Small Butter Infuser in this post. This device has...

Vetted4 months ago

Herbal Infuser Hi – Innovative Botanical Butter Maker [2024]

Today, I am thrilled to share with you my experiences with the Herbal Infuser Hi Countertop Botanical Butter Maker, Tincture...

Vetted4 months ago

Ardent FX Decarboxylator Review: Quick & Effortless! [2024]

I recently had the opportunity to try out the Ardent FX Decarboxylator 110V With Bluetooth Connectivity, and I must say,...

Vetted4 months ago

Infusion Buds Butter Infuser – Review & Accessories [2024]

Thank you for joining me as we explore a review of the Infusion Buds Butter Infuser & Decarboxylator Machine Combo....

Vetted4 months ago

Decarboxylator Machine Review: Easy & Odorless Herb Activation [2024]

I recently had the opportunity to try out the Decarboxylator Machine for Herbs, and I have to admit, it really...

Vetted4 months ago

Decarb Mini System Review: All-in-One Herbal Processing Solution [2024]

Today, I will be giving my thoughts on the Decarb Mini System. As someone who enjoys herbal infusions and tinctures,...

elevate steak with butter elevate steak with butter
Vetted4 months ago

12 Best Compound Butter Recipes for Elevating Your Steak Game

Kick your steak game up a notch with these 12 mouthwatering compound butter recipes that will take your taste buds...

mouthwatering butter cookie taste mouthwatering butter cookie taste
Vetted4 months ago

15 Best Butter Cookies That Will Melt In Your Mouth – Taste Test Results

Tantalize your taste buds with the top 15 butter cookies that promise a melt-in-your-mouth experience - a delightful journey awaits!

peanut butter ice cream peanut butter ice cream
Vetted4 months ago

15 Best Peanut Butter Ice Cream Flavors You Need to Try This Summer

Craving a creamy and decadent summer treat?

Advertisement

Trending